> ## Documentation Index
> Fetch the complete documentation index at: https://moengage.com/docs/llms.txt
> Use this file to discover all available pages before exploring further.
# Shopify 2.0
> Install and configure the MoEngage app on your Shopify 2.0 store for cross-channel engagement.
# Overview
This article covers how to install and configure the MoEngage app on your Shopify store. Complete the steps below to authenticate, initialize, and configure the integration before you begin tracking events or syncing data.
## Step 1: Install the MoEngage App
To install the MoEngage app, perform the following steps:
1. In your MoEngage UI, navigate to the **App Marketplace**.
2. Search for **Shopify 2.0**, and then click the tile.
3. Navigate to the **Integrate** tab, and then click **Install MoEngage app on your Shopify** **store**. Use the MoEngage listing in the Shopify App Marketplace to add the app to your store.
 4. Click **Open** to redirect to the Shopify admin UI and complete the installation.
## Step 2: Authenticate
After successful installation, to authenticate, perform the following steps:
1. Navigate to the **MoEngage App Integration** tab.
2. Enter the following credentials from your MoEngage account.
| Field | Description |
| ------------ | ------------------------------------------------------------------------------------------------------------------------------ |
| App ID | The Workspace ID of your MoEngage account is available at **Settings** > **Account** > **APIs** > **Workspace ID**. |
| Data API ID | Same as **Workspace ID**. |
| Data API Key | The Data API Key of the MoEngage account is available at **Settings** > **App Settings** > **APIs** > **API Keys** > **Data.** |
3. Click **Authenticate** and then click **Continue**.
**Information** Newly generated API keys can take up to 10 minutes to be activated. If authentication fails after entering new credentials, wait 10 minutes and then try again before raising a support ticket.
## Step 3: Configure Initialization Settings
**Note**
The following steps must be performed for MoEngage to track user data and events.
To configure the initialization settings, perform the following steps:
1. On the **Initialization Settings**, navigate to **Theme Settings** in your Shopify admin.
2. Turn the **MoEngage Shopify app embed** setting toggle on.
3. Click **Save**.
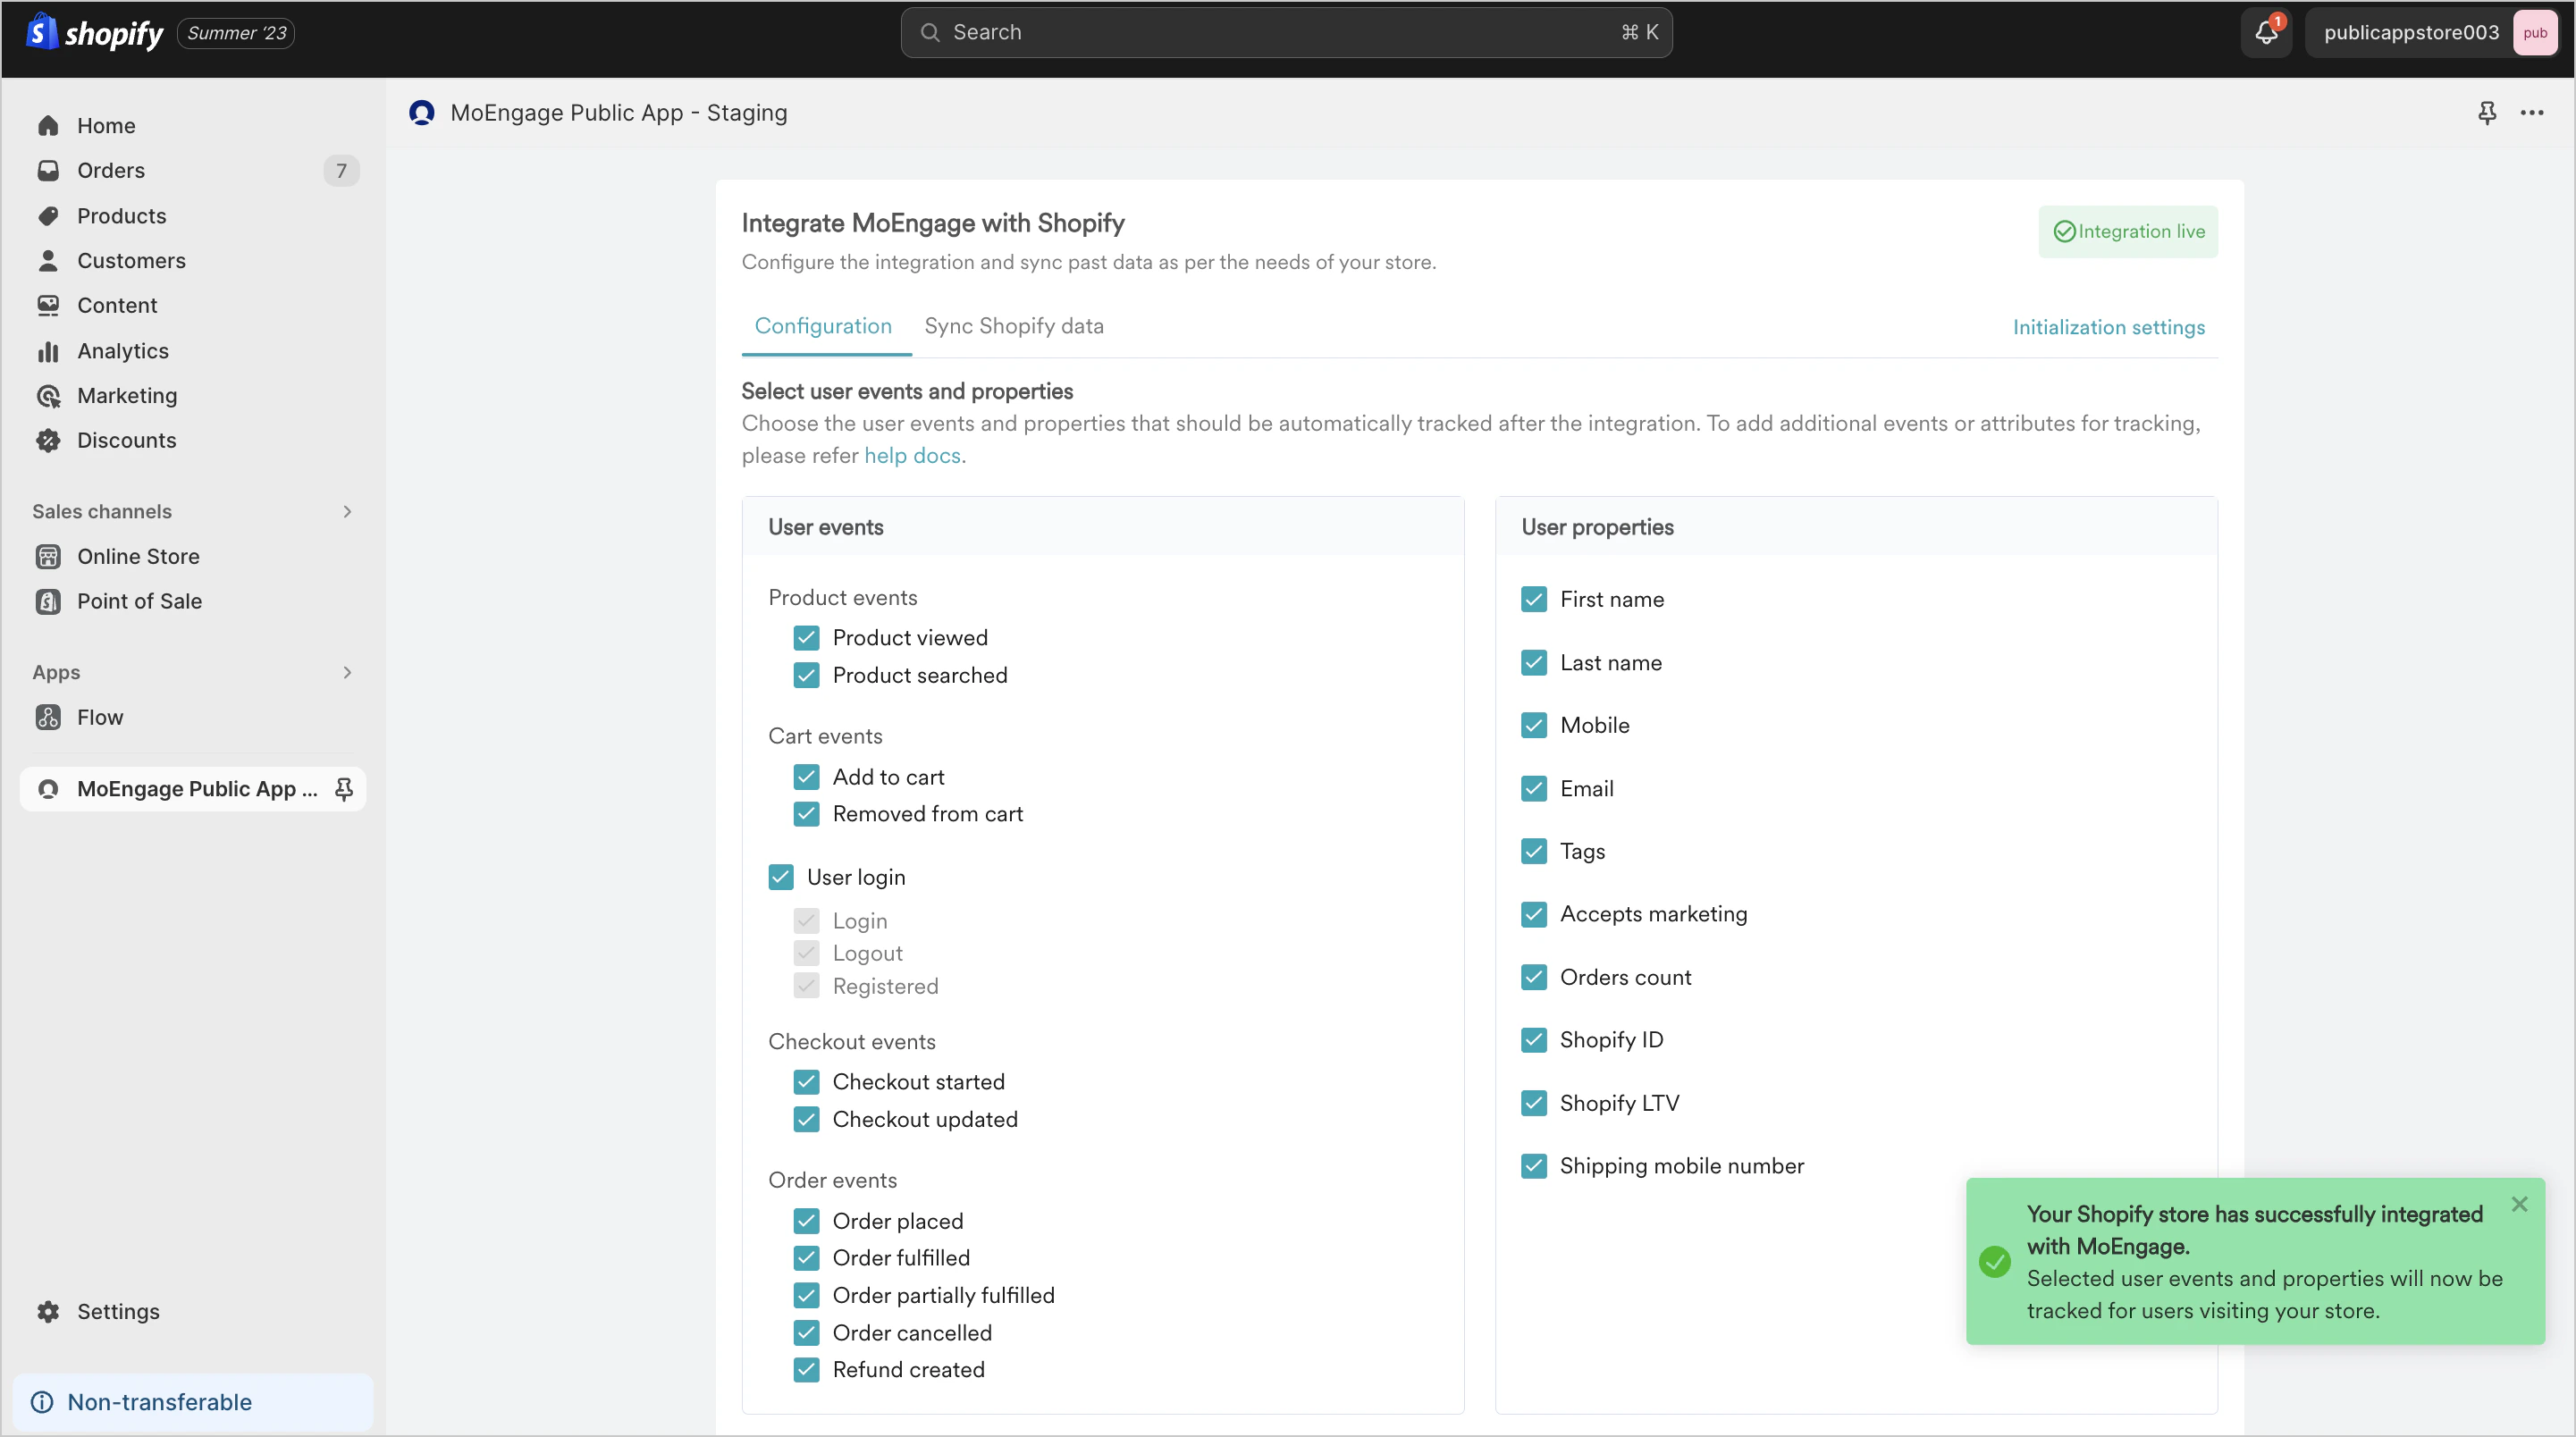
## Step 4: Configuration Settings
To configure the settings, perform the following steps:
1. Go to the **Configuration** tab.
2. Select the user events and properties you want MoEngage to track from your store. Some events are tracked by default. For more information, refer to [Events and user data tracking](/developer-guide/ecommerce-platforms/shopify/events-and-user-data-tracking) article.
3. Select your user identifier: In the **User Identifier for user synced** box, click either **Email** or **Phone Number** by using the unique identifier (UID). MoEngage uses the UID to recognize and merge user profiles across sessions and devices.
**Warning** After setup is complete, you cannot change your user identifier. For most stores, the identifier most reliably present at checkout is the email address. If your store collects phone numbers at checkout and email is optional, choose a phone number. Changing the identifier after setup requires re-integrating the app and affects all existing user profiles in your workspace.
4. Click **Save configuration**.
4. Click **Open** to redirect to the Shopify admin UI and complete the installation.
## Step 2: Authenticate
After successful installation, to authenticate, perform the following steps:
1. Navigate to the **MoEngage App Integration** tab.
2. Enter the following credentials from your MoEngage account.
| Field | Description |
| ------------ | ------------------------------------------------------------------------------------------------------------------------------ |
| App ID | The Workspace ID of your MoEngage account is available at **Settings** > **Account** > **APIs** > **Workspace ID**. |
| Data API ID | Same as **Workspace ID**. |
| Data API Key | The Data API Key of the MoEngage account is available at **Settings** > **App Settings** > **APIs** > **API Keys** > **Data.** |
3. Click **Authenticate** and then click **Continue**.
**Information** Newly generated API keys can take up to 10 minutes to be activated. If authentication fails after entering new credentials, wait 10 minutes and then try again before raising a support ticket.
## Step 3: Configure Initialization Settings
**Note**
The following steps must be performed for MoEngage to track user data and events.
To configure the initialization settings, perform the following steps:
1. On the **Initialization Settings**, navigate to **Theme Settings** in your Shopify admin.
2. Turn the **MoEngage Shopify app embed** setting toggle on.
3. Click **Save**.
## Step 4: Configuration Settings
To configure the settings, perform the following steps:
1. Go to the **Configuration** tab.
2. Select the user events and properties you want MoEngage to track from your store. Some events are tracked by default. For more information, refer to [Events and user data tracking](/developer-guide/ecommerce-platforms/shopify/events-and-user-data-tracking) article.
3. Select your user identifier: In the **User Identifier for user synced** box, click either **Email** or **Phone Number** by using the unique identifier (UID). MoEngage uses the UID to recognize and merge user profiles across sessions and devices.
**Warning** After setup is complete, you cannot change your user identifier. For most stores, the identifier most reliably present at checkout is the email address. If your store collects phone numbers at checkout and email is optional, choose a phone number. Changing the identifier after setup requires re-integrating the app and affects all existing user profiles in your workspace.
4. Click **Save configuration**.
 ## Step 5: Enable Web Personalization (Optional)
To enable web personalization, perform the following steps:
1. Confirm that Web Personalization is enabled for your MoEngage account. If it is not, contact your Customer Success Manager or the support team.
2. On the **Configuration** tab, turn the **Enable web personalization** **on your store** toggle on.
## Step 5: Enable Web Personalization (Optional)
To enable web personalization, perform the following steps:
1. Confirm that Web Personalization is enabled for your MoEngage account. If it is not, contact your Customer Success Manager or the support team.
2. On the **Configuration** tab, turn the **Enable web personalization** **on your store** toggle on.
 # Next Steps
Now that your integration is successful, you can sync data about your past orders and start tracking events.
1. [Events and User Data Tracking](/developer-guide/ecommerce-platforms/shopify/events-and-user-data-tracking)
2. [Sync User Data](/developer-guide/ecommerce-platforms/shopify/user-data-sync)
3. [Steps to Validate Integration](/developer-guide/ecommerce-platforms/shopify/validate-integration)
4. [FAQs](/developer-guide/ecommerce-platforms/shopify/faqs)
# Next Steps
Now that your integration is successful, you can sync data about your past orders and start tracking events.
1. [Events and User Data Tracking](/developer-guide/ecommerce-platforms/shopify/events-and-user-data-tracking)
2. [Sync User Data](/developer-guide/ecommerce-platforms/shopify/user-data-sync)
3. [Steps to Validate Integration](/developer-guide/ecommerce-platforms/shopify/validate-integration)
4. [FAQs](/developer-guide/ecommerce-platforms/shopify/faqs)