> ## Documentation Index
> Fetch the complete documentation index at: https://moengage.com/docs/llms.txt
> Use this file to discover all available pages before exploring further.
# Location triggered
> Set up geofence-based location-triggered push notifications in your iOS app with the MoEngage SDK.
**Important**
* Starting from **iOS 14.0**, Apple has provided user control to choose the level of precision of location to be shared in App. Now because of this **region monitoring(Geofence feature) will not work in cases where the precise location is disabled by the user**. Refer [link](https://developer.apple.com/videos/play/wwdc2020/10660/) for more info.
* Region monitoring is only supported with **Always authorization**. When-in-use authorization doesn't support this feature. Refer [link](https://developer.apple.com/documentation/corelocation/choosing_the_authorization_level_for_location_services) for more info.
* **Dwell** trigger is **not supported in iOS**, hence the SDK supports only Enter and Exit triggers.
# How to enable Location Triggered?
## Required Permissions:
**Region Monitoring(Geofences) requires Always Authorization and Precise location accuracy to be enabled to work**. Therefore make sure that the app is configured to get these permissions and also it's a good practice to let the user know the context in which these permissions are needed, this will also encourage the user to provide these permissions.
# SDK Installation
## Install using Swift Package Manager
MoEngageGeofence is supported through SPM from SDK version 4.2.0. To integrate, use the GitHub url [https://github.com/moengage/apple-sdk.git](https://github.com/moengage/apple-sdk.git) for SDK versions equal and above 9.23.0, or [https://github.com/moengage/MoEngage-iOS-SDK.git](https://github.com/moengage/MoEngage-iOS-SDK.git) for other SDK versions link and set the branch as master or required version.
## Install using CocoaPod
**Information**
CocoaPods is being deprecated. MoEngage recommends using Swift Package Manager for all new integrations. For more info on CocoaPods, refer to [CocoaPods Integration Guide](https://www.moengage.com/docs/developer-guide/ios-sdk/sdk-integration/basic/integration-through-cocoa-pods).
Integrate the MoEngageGeofence framework by adding the dependency in the podfile as show below.
```ruby Ruby wrap theme={null}
pod 'MoEngage-iOS-SDK/GeoFence',
```
Now run `pod install `to install the framework
## Manual Integration
To integrate the `MoEngageGeofence` SDK manually to your project follow this [doc](/developer-guide/ios-sdk/manual-integration/manual-integration).
**Note**
MOGeofence has been renamed to MoEngageGeofence from version 4.2.0.Do update the podfile and import statement accordingly.
## Start Geofence Monitoring:
After integrating the MoEngageGeofence module call [*startGeofenceMonitoring()*](https://moengage.github.io/ios-api-reference/Classes/MoEngageSDKGeofence.html#/c:@M@MoEngageGeofence@objc\(cs\)MoEngageSDKGeofence\(im\)startGeofenceMonitoring) method to initiate the geofence module. This will fetch the geofences around the current location of the user.
```swift Swift wrap theme={null}
MoEngageSDKGeofence.sharedInstance.startGeofenceMonitoring()
```
```objective-c Objective C wrap theme={null}
[[MoEngageSDKGeofence sharedInstance] startGeofenceMonitoring];
```
Geofence Handler also has callbacks for `didEnterRegion` and `didExitRegion`. You can get these by confirming to the as `MoEngageSDKGeofence.sharedInstance.setGeofenceDelegate(self)`
```swift Swift wrap theme={null}
extension GeofenceViewController: MoEngageGeofenceDelegate {
func geofenceEnterTriggered(withLocationManager locationManager: CLLocationManager?, andRegion region: CLRegion?, forAccountMeta accountMeta: MoEngageAccountMeta) {
print("Geofence Entered")
}
func geofenceExitTriggered(withLocationManager locationManager: CLLocationManager?, andRegion region: CLRegion?, forAccountMeta accountMeta: MoEngageAccountMeta) {
print("Geofence Exited")
}
}
```
```objective-c Objective C wrap theme={null}
@interface MyViewController ()
---
- (void)geofenceEnterTriggeredWithLocationManager:(CLLocationManager *)locationManager andRegion:(CLRegion *)region forAccountMeta:(MoEngageAccountMeta *)accountMeta {
NSLog(@"Geofence Entered");
}
- (void)geofenceExitTriggeredWithLocationManager:(CLLocationManager *)locationManager andRegion:(CLRegion *)region forAccountMeta:(MoEngageAccountMeta *)accountMeta {
NSLog(@"Geofence Exited");
}
```
# Stop Geofence Monitoring:
After version `9.3.0` we have provided support to stop the monitoring of geofences. To stop geofence monitoring call [*stopGeofenceMonitoring()*](https://moengage.github.io/ios-api-reference/Classes/MoEngageSDKGeofence.html#/c:@M@MoEngageGeofence@objc\(cs\)MoEngageSDKGeofence\(im\)stopGeofenceMonitoring) method.
```swift Swift wrap theme={null}
MoEngageSDKGeofence.sharedInstance.stopGeofenceMonitoring()
```
```objective-c Objective C wrap theme={null}
[[MoEngageSDKGeofence sharedInstance] stopGeofenceMonitoring];
```
# Testing Geofencing
First, create a geofencing campaign on your MoEngage dashboard. You can test geofencing in the following ways:
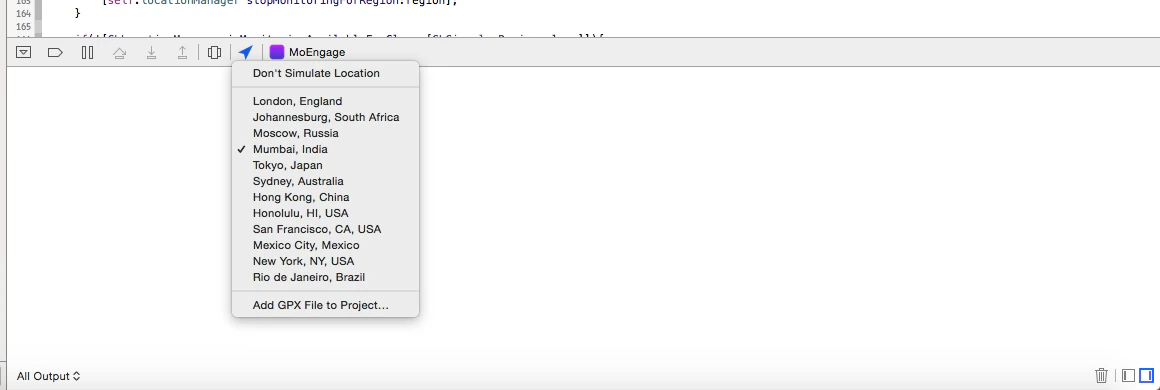
1. On the simulator:
* You can simulate location as shown below.
 * Simulate the location for which you have created the campaign on the dashboard. If you get the respective call back (the delegate methods in MoEngageGeofenceHandler), you are good to go. On simulator, you will not receive push notifications.
2. On the device:
* You can simulate location for real device from the bar above the console as shown below:
* Simulate the location for which you have created the campaign on the dashboard. If you get the respective call back (the delegate methods in MoEngageGeofenceHandler), you are good to go. On simulator, you will not receive push notifications.
2. On the device:
* You can simulate location for real device from the bar above the console as shown below:
 * You can add a gpx file with the locations configured. A sample gpx file looks like this:
```xml XML wrap theme={null}
CustomName
```
On the device, once you get the delegate callback for entering or exit in a region, a notification will be sent to the device. This happens instantly, but the notification might take up to 10 minutes.
# Geo Notifications
Once you have received the notification, to identify geo notifications, there is a custom param “cType” = “geo” in the param app\_extra, as shown below:
```json JSON wrap theme={null}
{
"app_extra" = {
cType = geo;
screenData = {
"" = "";
};
screenName = "";
};
aps = {
alert = "exit london- single fence";
badge = 1;
};
moengage = {
cid = "55a628bcf4c4073bb66a368b_GEO:55a628bcf4c4073bb66a368c_ABab1:2015-07-15_14:11:33.704706";
};
}
```
* You can add a gpx file with the locations configured. A sample gpx file looks like this:
```xml XML wrap theme={null}
CustomName
```
On the device, once you get the delegate callback for entering or exit in a region, a notification will be sent to the device. This happens instantly, but the notification might take up to 10 minutes.
# Geo Notifications
Once you have received the notification, to identify geo notifications, there is a custom param “cType” = “geo” in the param app\_extra, as shown below:
```json JSON wrap theme={null}
{
"app_extra" = {
cType = geo;
screenData = {
"" = "";
};
screenName = "";
};
aps = {
alert = "exit london- single fence";
badge = 1;
};
moengage = {
cid = "55a628bcf4c4073bb66a368b_GEO:55a628bcf4c4073bb66a368c_ABab1:2015-07-15_14:11:33.704706";
};
}
```