> ## Documentation Index
> Fetch the complete documentation index at: https://moengage.com/docs/llms.txt
> Use this file to discover all available pages before exploring further.
# Capillary
> MoEngage の Content API と Capillary を使用して、動的なクーポンコードや報酬ポイント、ロイヤルティレベルなどのロイヤルティデータをキャンペーン内に表示します。
# 概要
[Capillary](https://www.capillarytech.com/products/loyalty-program-software/) Intelligent Loyalty プラットフォームは、顧客ロイヤルティソリューションに対する包括的なアプローチを提供します。このプラットフォームは、オンライン、店舗、ソーシャルメディアを基盤とした完全なロイヤルティを提供して顧客とのエンゲージメントを図り、ブランドが効率的な顧客エンゲージメントを実現できるようにします。
# MoEngage × Capillary
MoEngage と Capillary の統合により、動的なクーポンコードや、ポイント、ロイヤルティレベル、プログラムなどの顧客ロイヤルティデータを MoEngage キャンペーン内で送信できます。
# 統合
**前提条件**
* Capillary の API を使用するには、Capillary の [API キー](https://docs.capillarytech.com/docs/api-client)が必要です。
## MoEngage キャンペーンで顧客の報酬を表示する
MoEngage の Content API を使用すると、MoEngage キャンペーン内で顧客の報酬ポイントを動的に取得し、よりパーソナライズされた体験を提供できます。
### ステップ 1: MoEngage Content API を設定する
1. **Settings** > **Advanced settings** > **Content API** に移動します。Content API 画面の右上にある **+ Add content API** をクリックします。 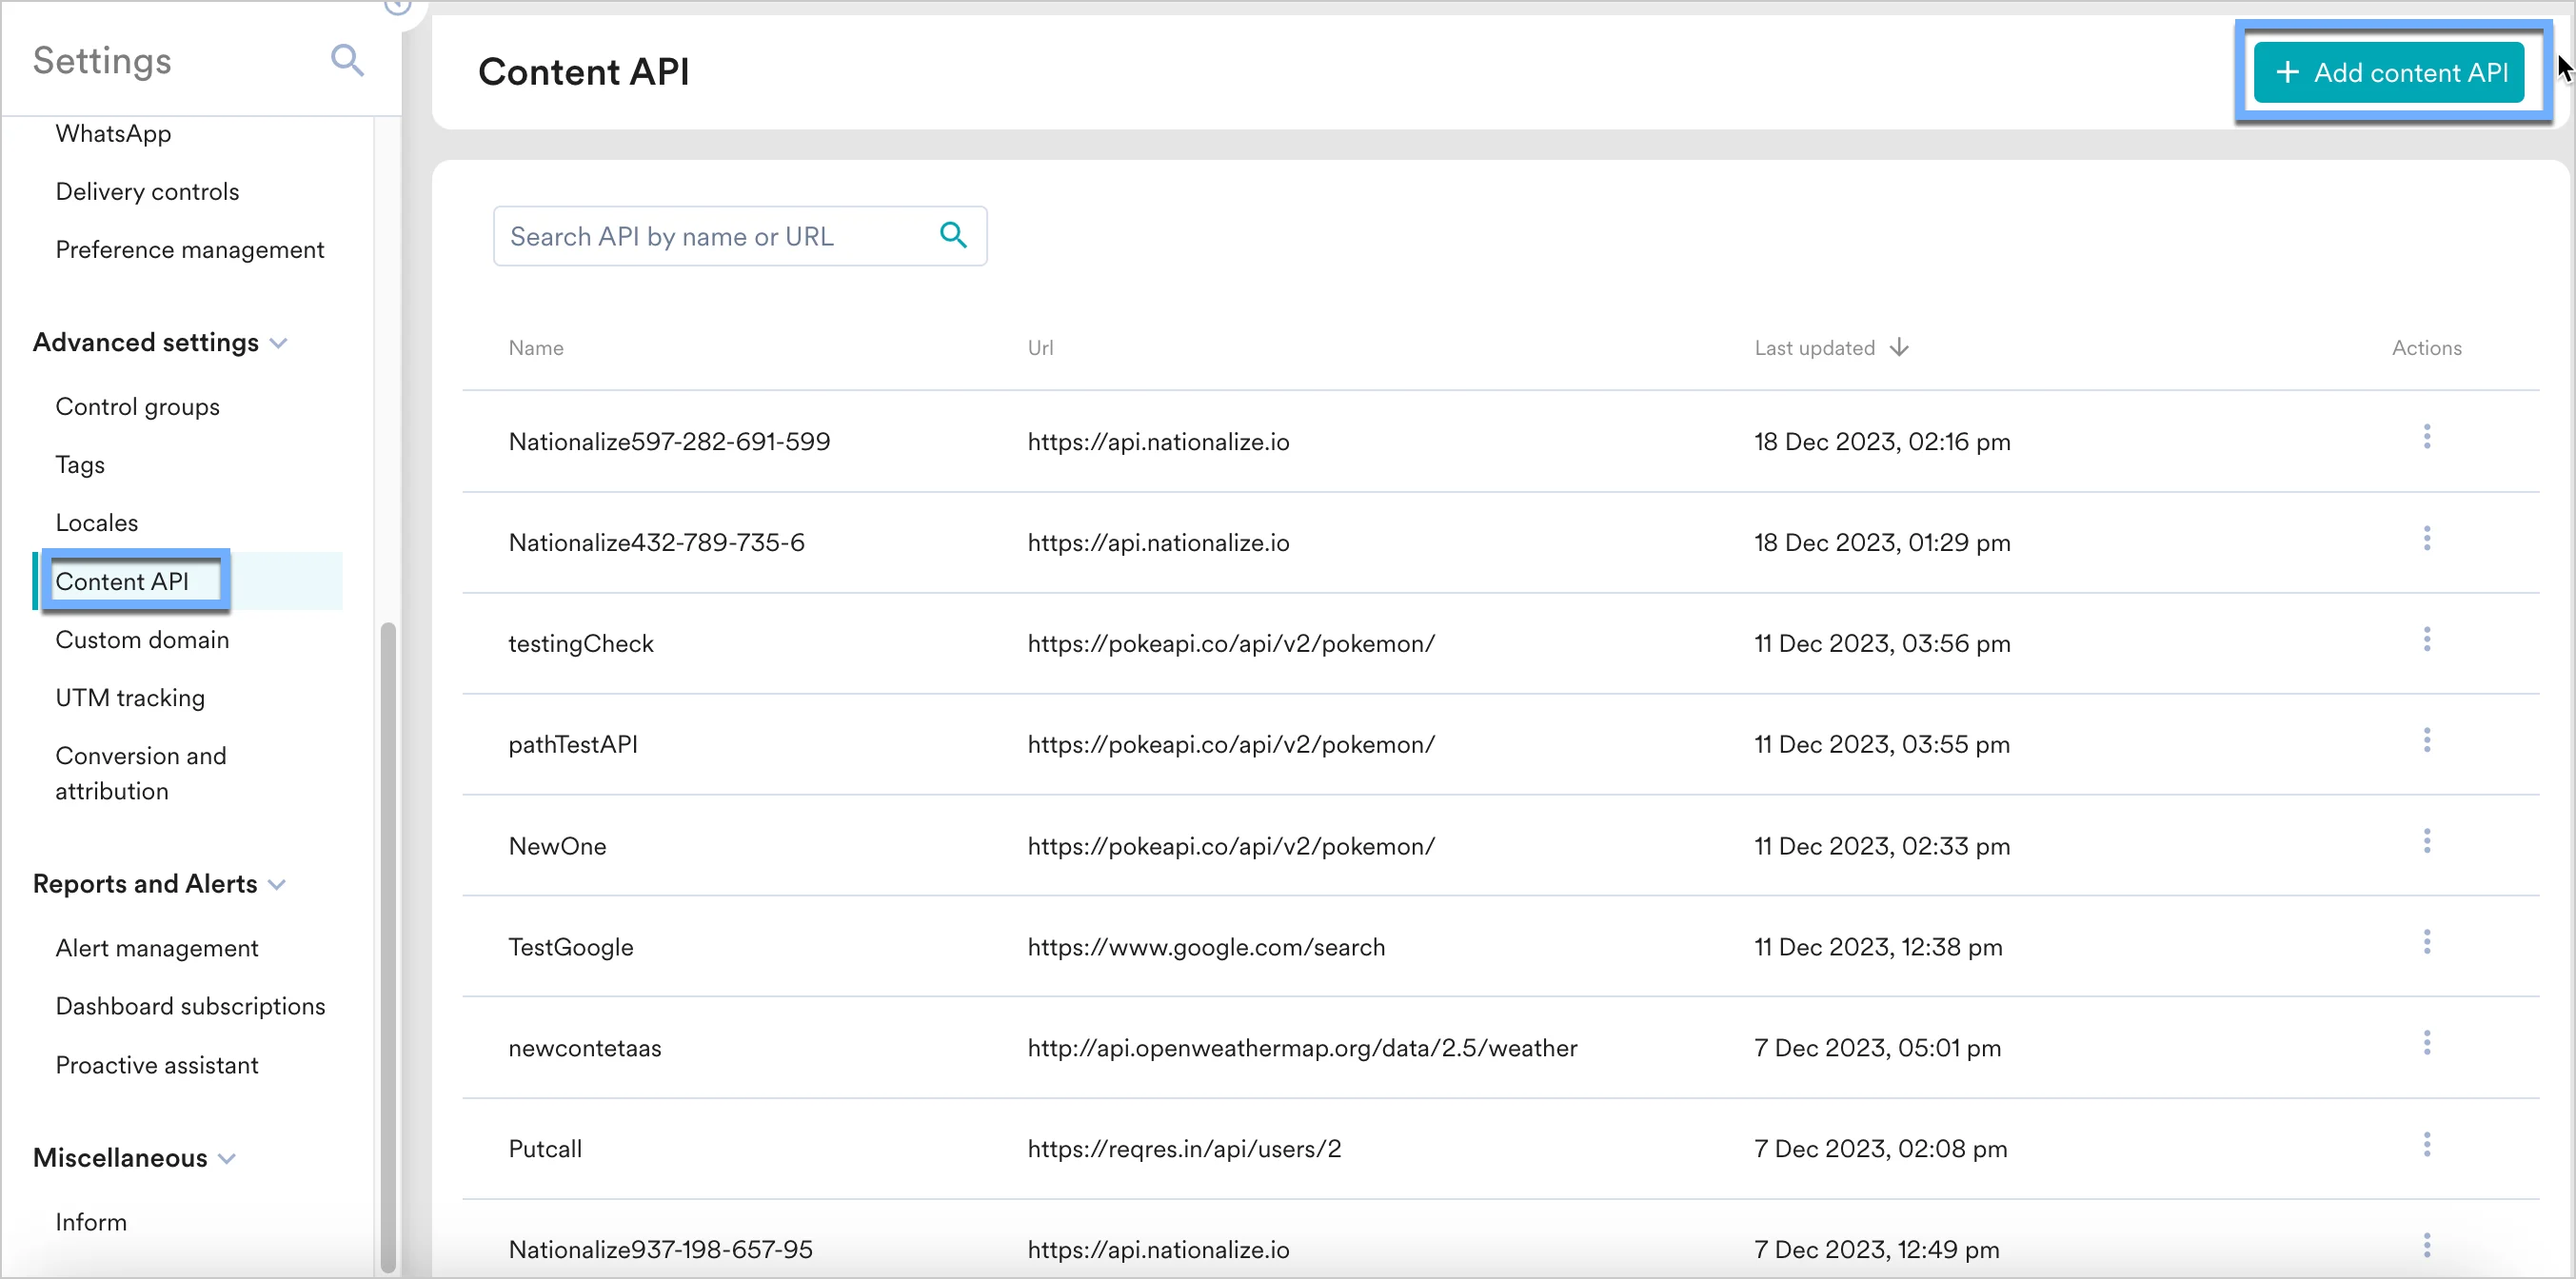 2. エンドポイント URL に Capillary API を追加します。エンドポイントはユースケースによって異なります。
  顧客の報酬を表示するには、Capillary の [Get Loyalty Details API](https://docs.capillarytech.com/reference/get-loyalty-details-1) を使用します。
Content API の設定時に、次の URL を挿入します。
`https://{host}/v2/customers/{{UserAttribute['capillary_id']}}/loyaltyDetails`
ホストは API 呼び出しを行うサーバーによって異なり、通常はクラスターの URL です。
Headers に次の内容を追加します。
* `Authorization`: オンラインツールを使用して、ユーザー名に `username`、パスワードに `password` の MD5 ハッシュを指定して Basic 認証を作成します。
顧客の報酬を表示するには、Capillary の [Get Loyalty Details API](https://docs.capillarytech.com/reference/get-loyalty-details-1) を使用します。
Content API の設定時に、次の URL を挿入します。
`https://{host}/v2/customers/{{UserAttribute['capillary_id']}}/loyaltyDetails`
ホストは API 呼び出しを行うサーバーによって異なり、通常はクラスターの URL です。
Headers に次の内容を追加します。
* `Authorization`: オンラインツールを使用して、ユーザー名に `username`、パスワードに `password` の MD5 ハッシュを指定して Basic 認証を作成します。  上の例では、このヘッダーの値は `Basic dXNlcm5hbWU6Y0dGemMzZHZjbVE9` になります。
* `Content-Type`: `application/json`
* `Accept`: `application/json`
3. **Save** をクリックし、成功のレスポンスが表示されたら **Done** をクリックします。
API をテストすることもできます。API をテストするには、Content API のアクションメニューから「Test」をクリックします。API のレスポンスをテストして検証できます。
### ステップ 2: MoEngage キャンペーン内で顧客のロイヤルティポイントを表示する
MoEngage キャンペーンでこの API を使用するには、次の手順を実行します。
1. キャンペーン作成のステップ 2 で、@ を入力します。
2. ポップアップで、ステップ 1 で設定した Capillary の Content API を選択できます。
3. [MoEngage テンプレート言語](/docs/ja/user-guide/campaigns-and-channels/getting-started/message-personalization/jinja-templating-language)を使用して API レスポンスを解析し、そのコンテンツをキャンペーンで使用できます。
上の例では、このヘッダーの値は `Basic dXNlcm5hbWU6Y0dGemMzZHZjbVE9` になります。
* `Content-Type`: `application/json`
* `Accept`: `application/json`
3. **Save** をクリックし、成功のレスポンスが表示されたら **Done** をクリックします。
API をテストすることもできます。API をテストするには、Content API のアクションメニューから「Test」をクリックします。API のレスポンスをテストして検証できます。
### ステップ 2: MoEngage キャンペーン内で顧客のロイヤルティポイントを表示する
MoEngage キャンペーンでこの API を使用するには、次の手順を実行します。
1. キャンペーン作成のステップ 2 で、@ を入力します。
2. ポップアップで、ステップ 1 で設定した Capillary の Content API を選択できます。
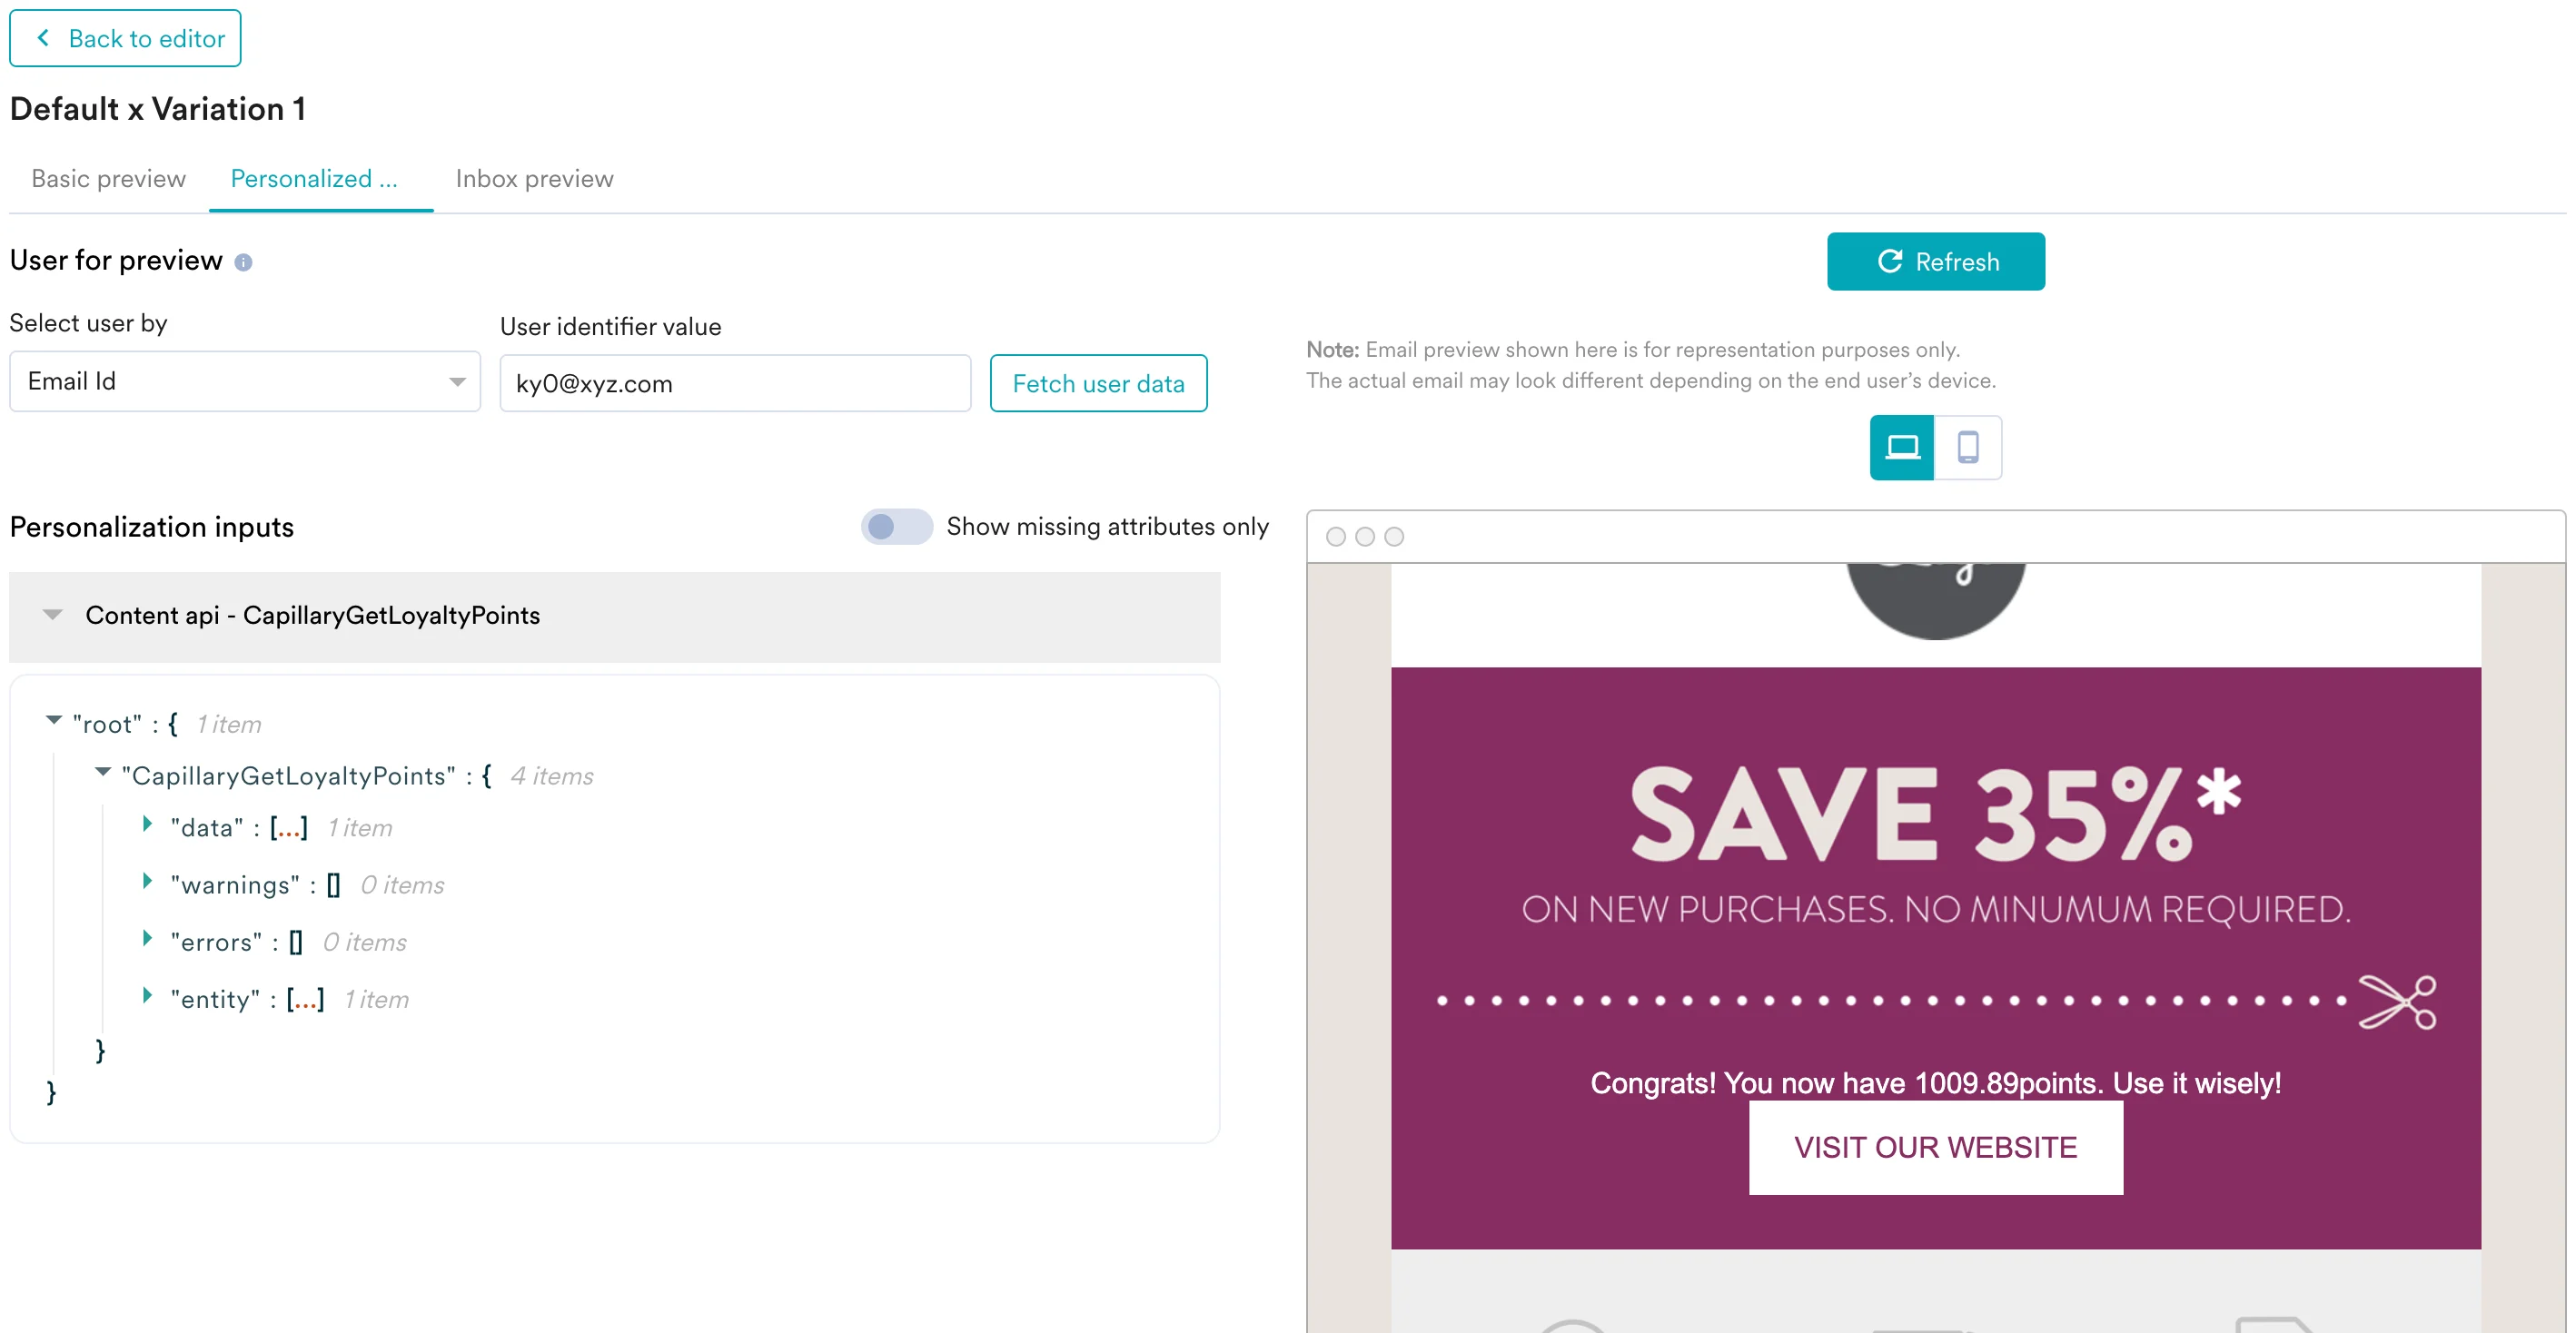
3. [MoEngage テンプレート言語](/docs/ja/user-guide/campaigns-and-channels/getting-started/message-personalization/jinja-templating-language)を使用して API レスポンスを解析し、そのコンテンツをキャンペーンで使用できます。 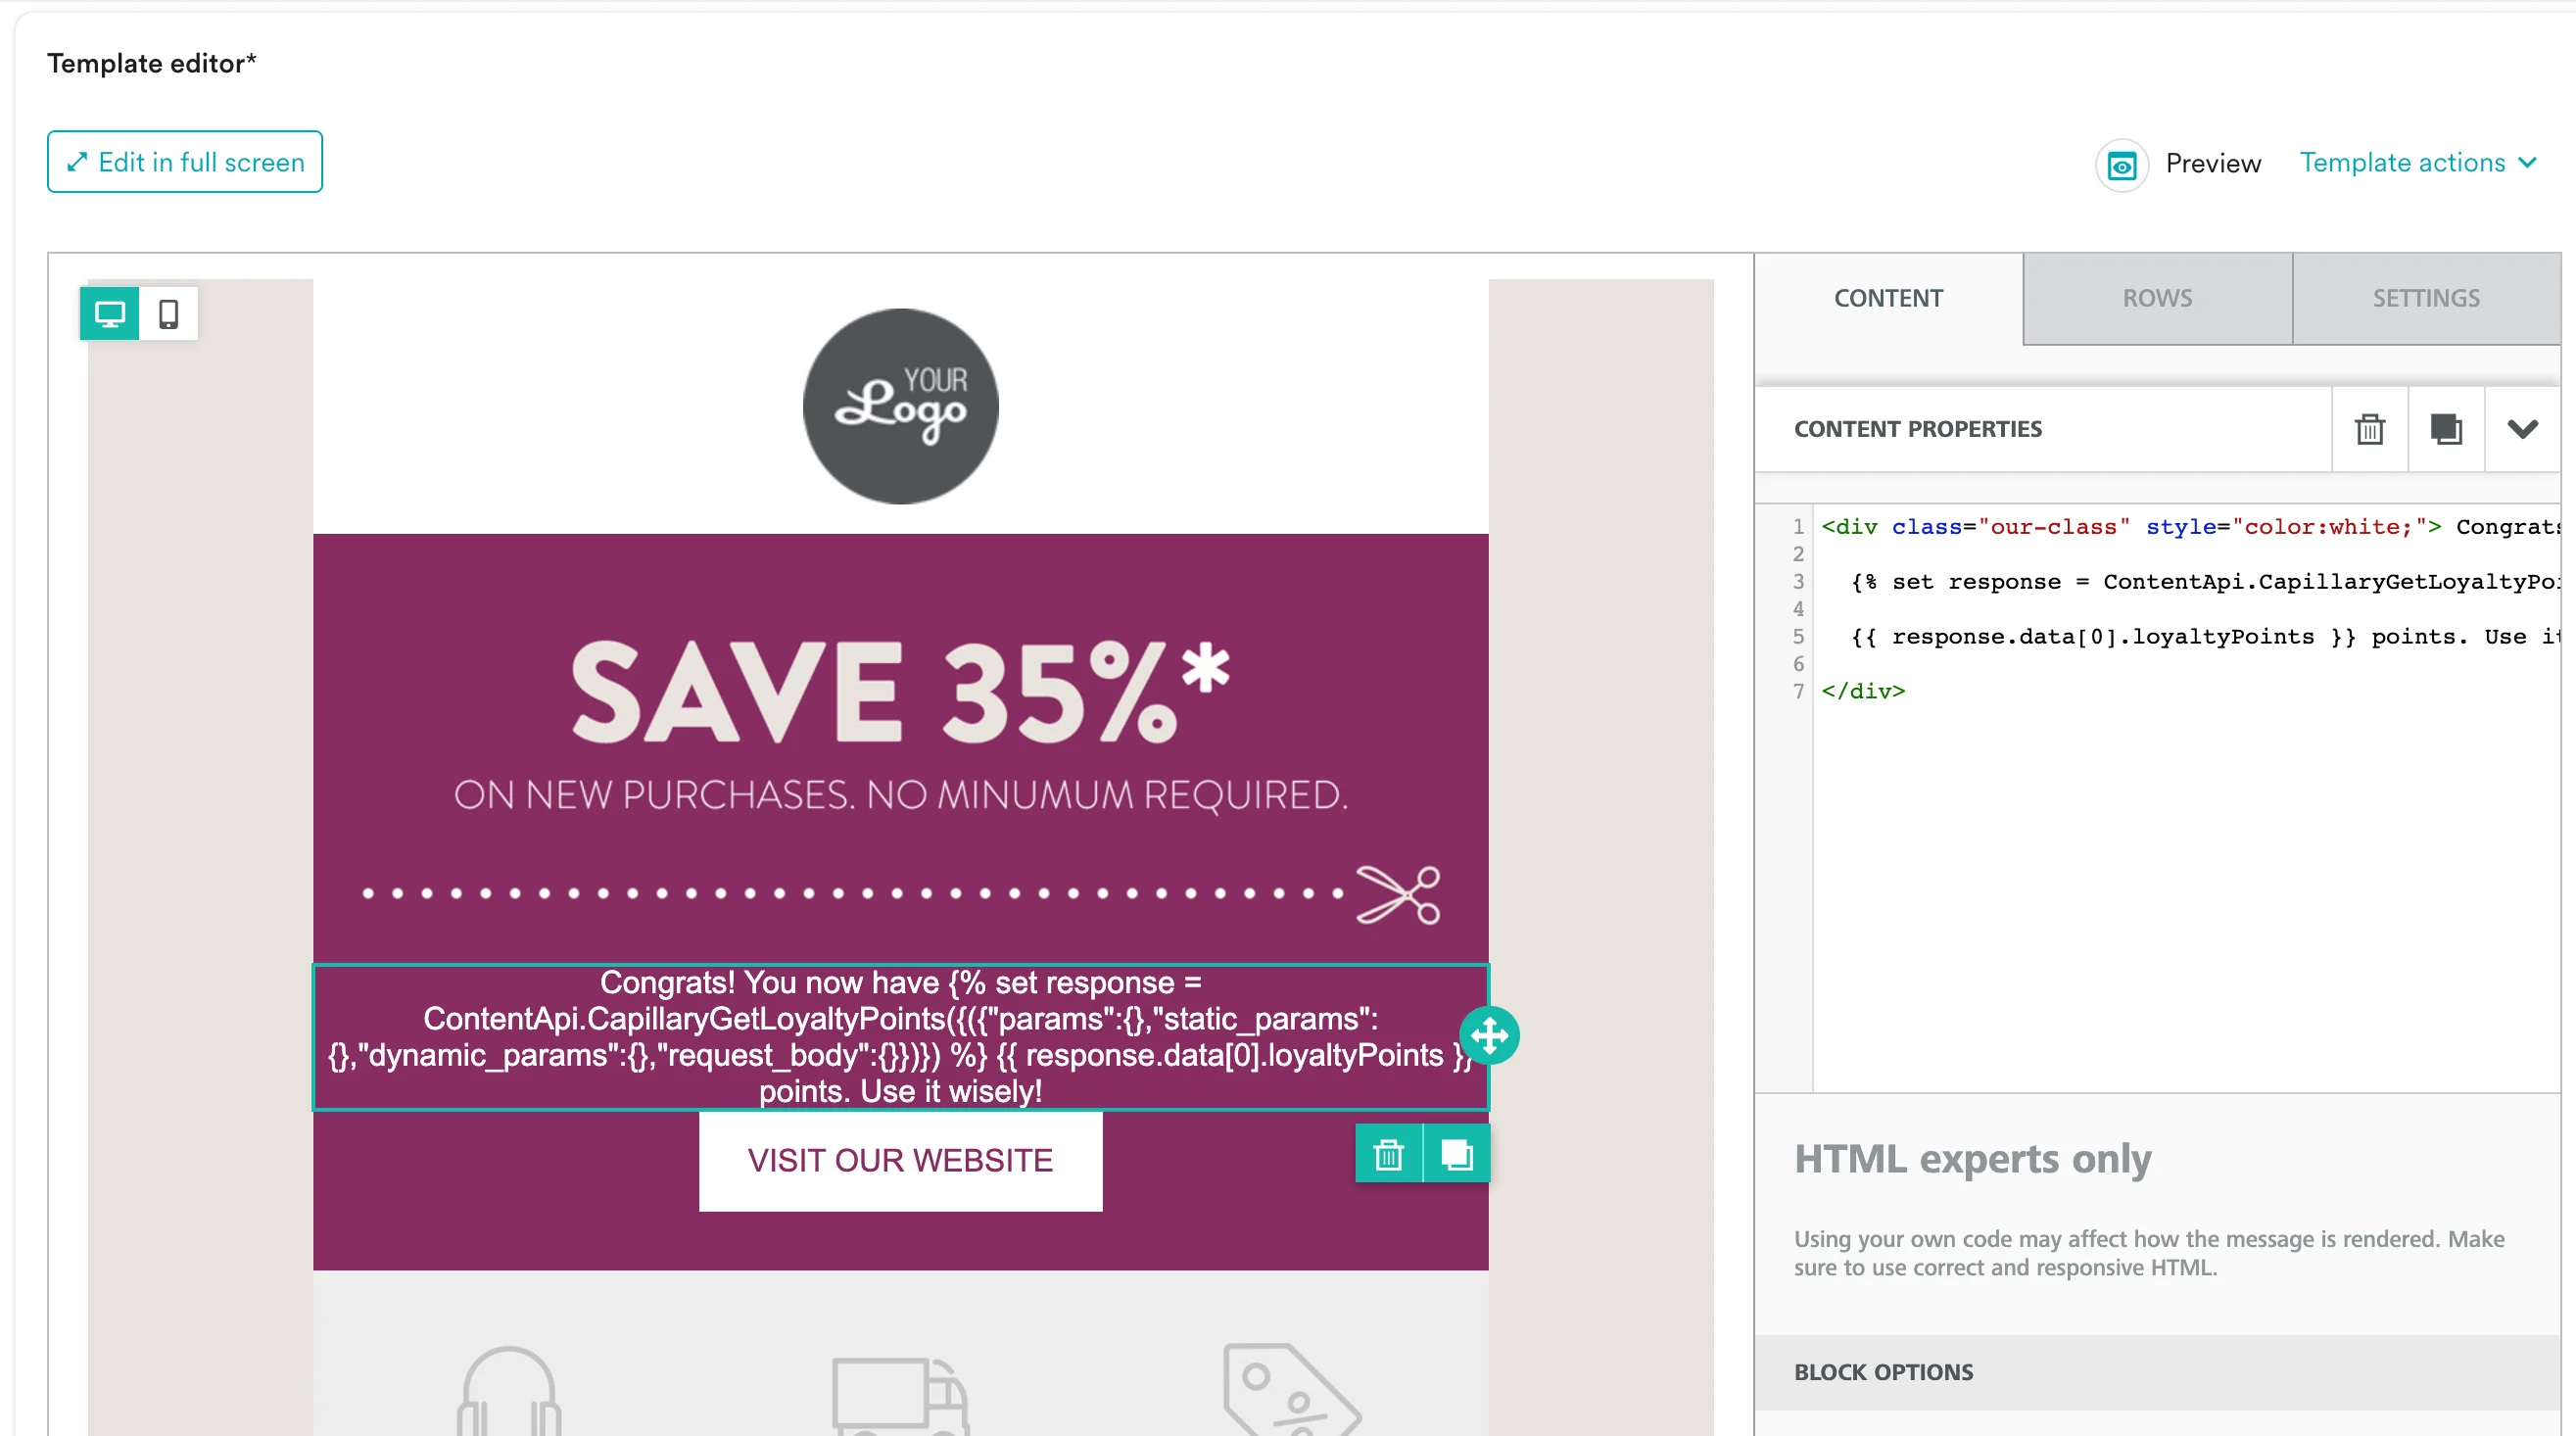 4. Preview タブをクリックすると、リアルタイムのパーソナライゼーションでキャンペーンを確認できます。
  5. 準備ができたら、**Publish** をクリックしてキャンペーンを送信します。