Introduction
Passkit enables you to extend your mobile reach by integrating Apple Wallet, and Google Pay passes into your customer’s experience. Easily create, manage, distribute, and analyze the performance of digital coupons, loyalty cards, membership cards, tickets, and much more; without your customers needing another app.MoEngage × Passkit
The MoEngage and Passkit integration can help extend your loyalty or coupon program by sending passes generated by Passkit to your audience through MoEngage campaigns. With this integration, you can -- Send Pass Interaction Events from Passkit to MoEngage.
- Create passes on the fly using Passkit’s SmartPass Links.
Integration Prerequisites
- Ensure you have access to your Passkit account.
- Ensure you have your MoEngage Data API keys.
- The Data API ID and Data API Key are available at Settings -> Account -> APIs. The Data API ID is the same as the Workspace ID. The Data API Key is available on the same screen in the API Keys -> Data section.
Send Pass Interaction Events from Passkit to MoEngage
You can enhance your customer’s mobile wallet experiences by opting to pass data to MoEngage from within your Passkit dashboard. The example of data points that can be shared:- Pass created : Will track an event when a new pass is created.
- Pass updated: Will track an event when a pass is updated.
- Pass installed : Will track an event when a user adds a pass into their digital wallet.
- Pass deleted : Will track an event when a member record is deleted.
- Pass uninstalled : Will track an event when a user removes a pass from their wallet.
- Pass invalidated : Will track an event when a pass record is invalidated.
Step 1: Retrieve MoEngage Data API credentials
From the MoEngage Dashboard, make a note of your Workspace ID and Data API Key.| Field | Description |
|---|---|
| Workspace ID | The Workspace ID of your MoEngage account is available at Settings - > Account -> APIs ->Workspace ID. The Data API ID and the Workspace ID of your MoEngage account are the same. |
| Data API Key | The Data API key of your MoEngage account is available at **Settings - > Account -> APIs -> API keys **>Data API settings. |
Step 2: Configure MoEngage Integration on Passkit
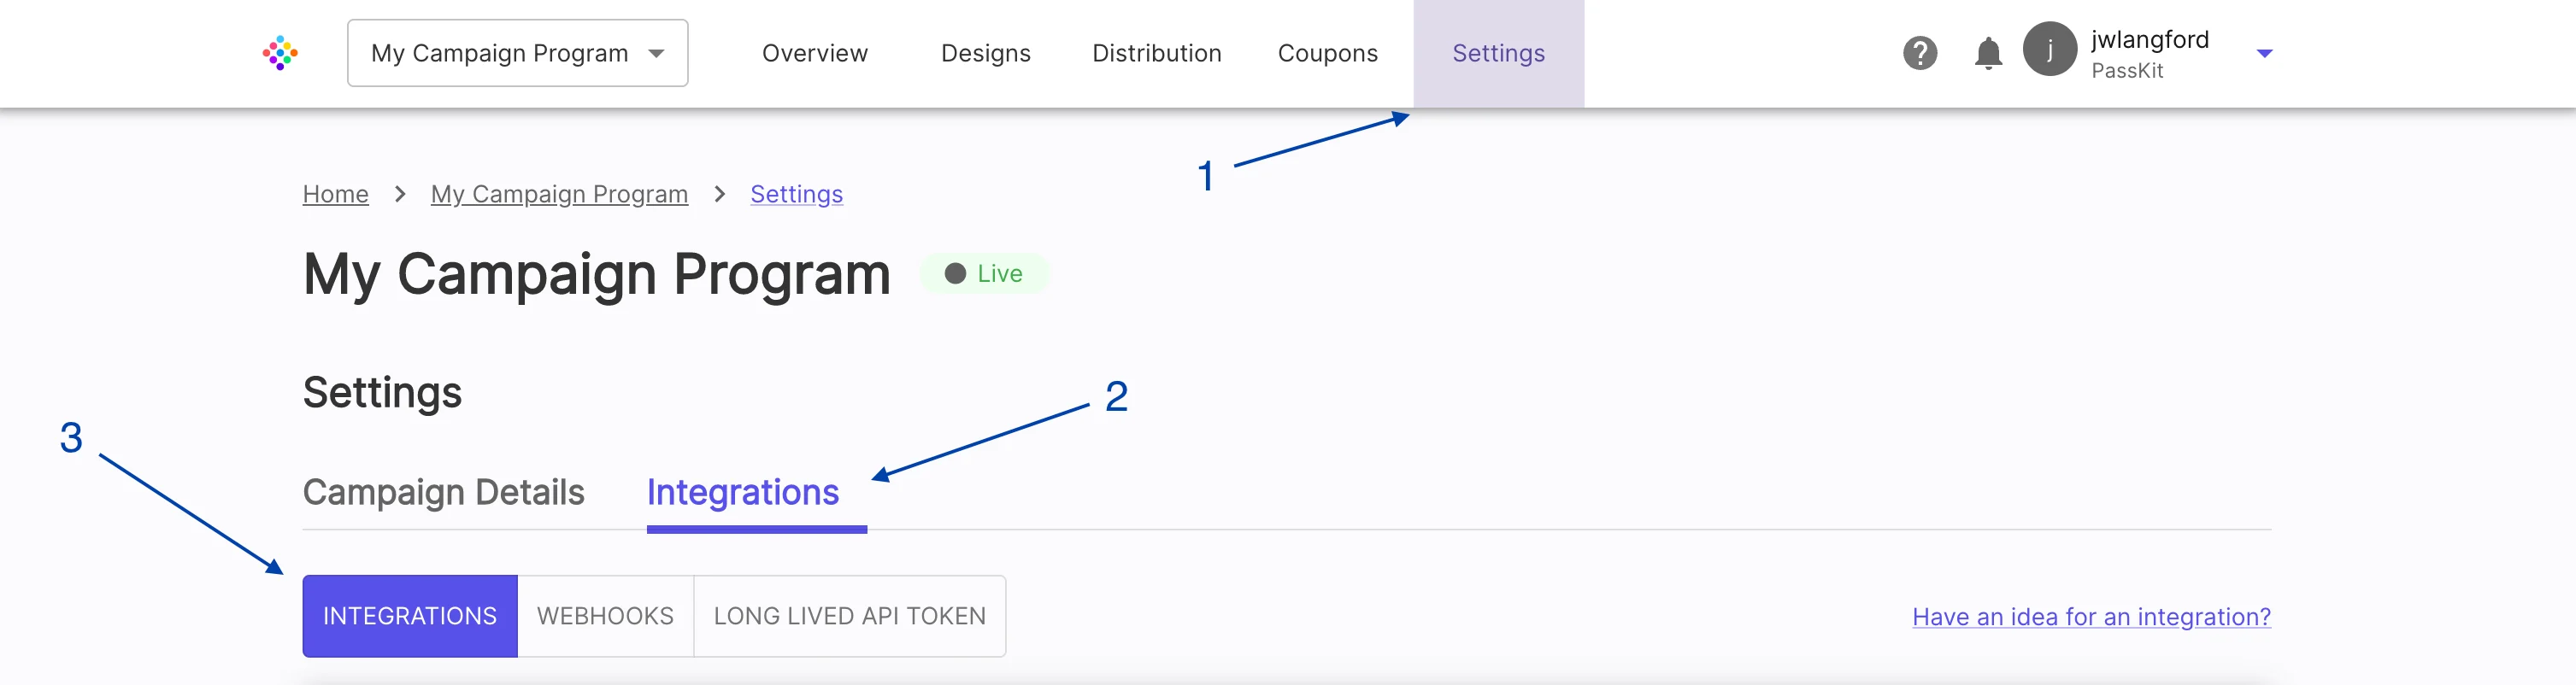
- Login to your Passkit Dashboard. Navigate to the campaign whose events you want to track.
- Inside the campaign, go to Settings >> Integrations tab (next to Campaign Details).
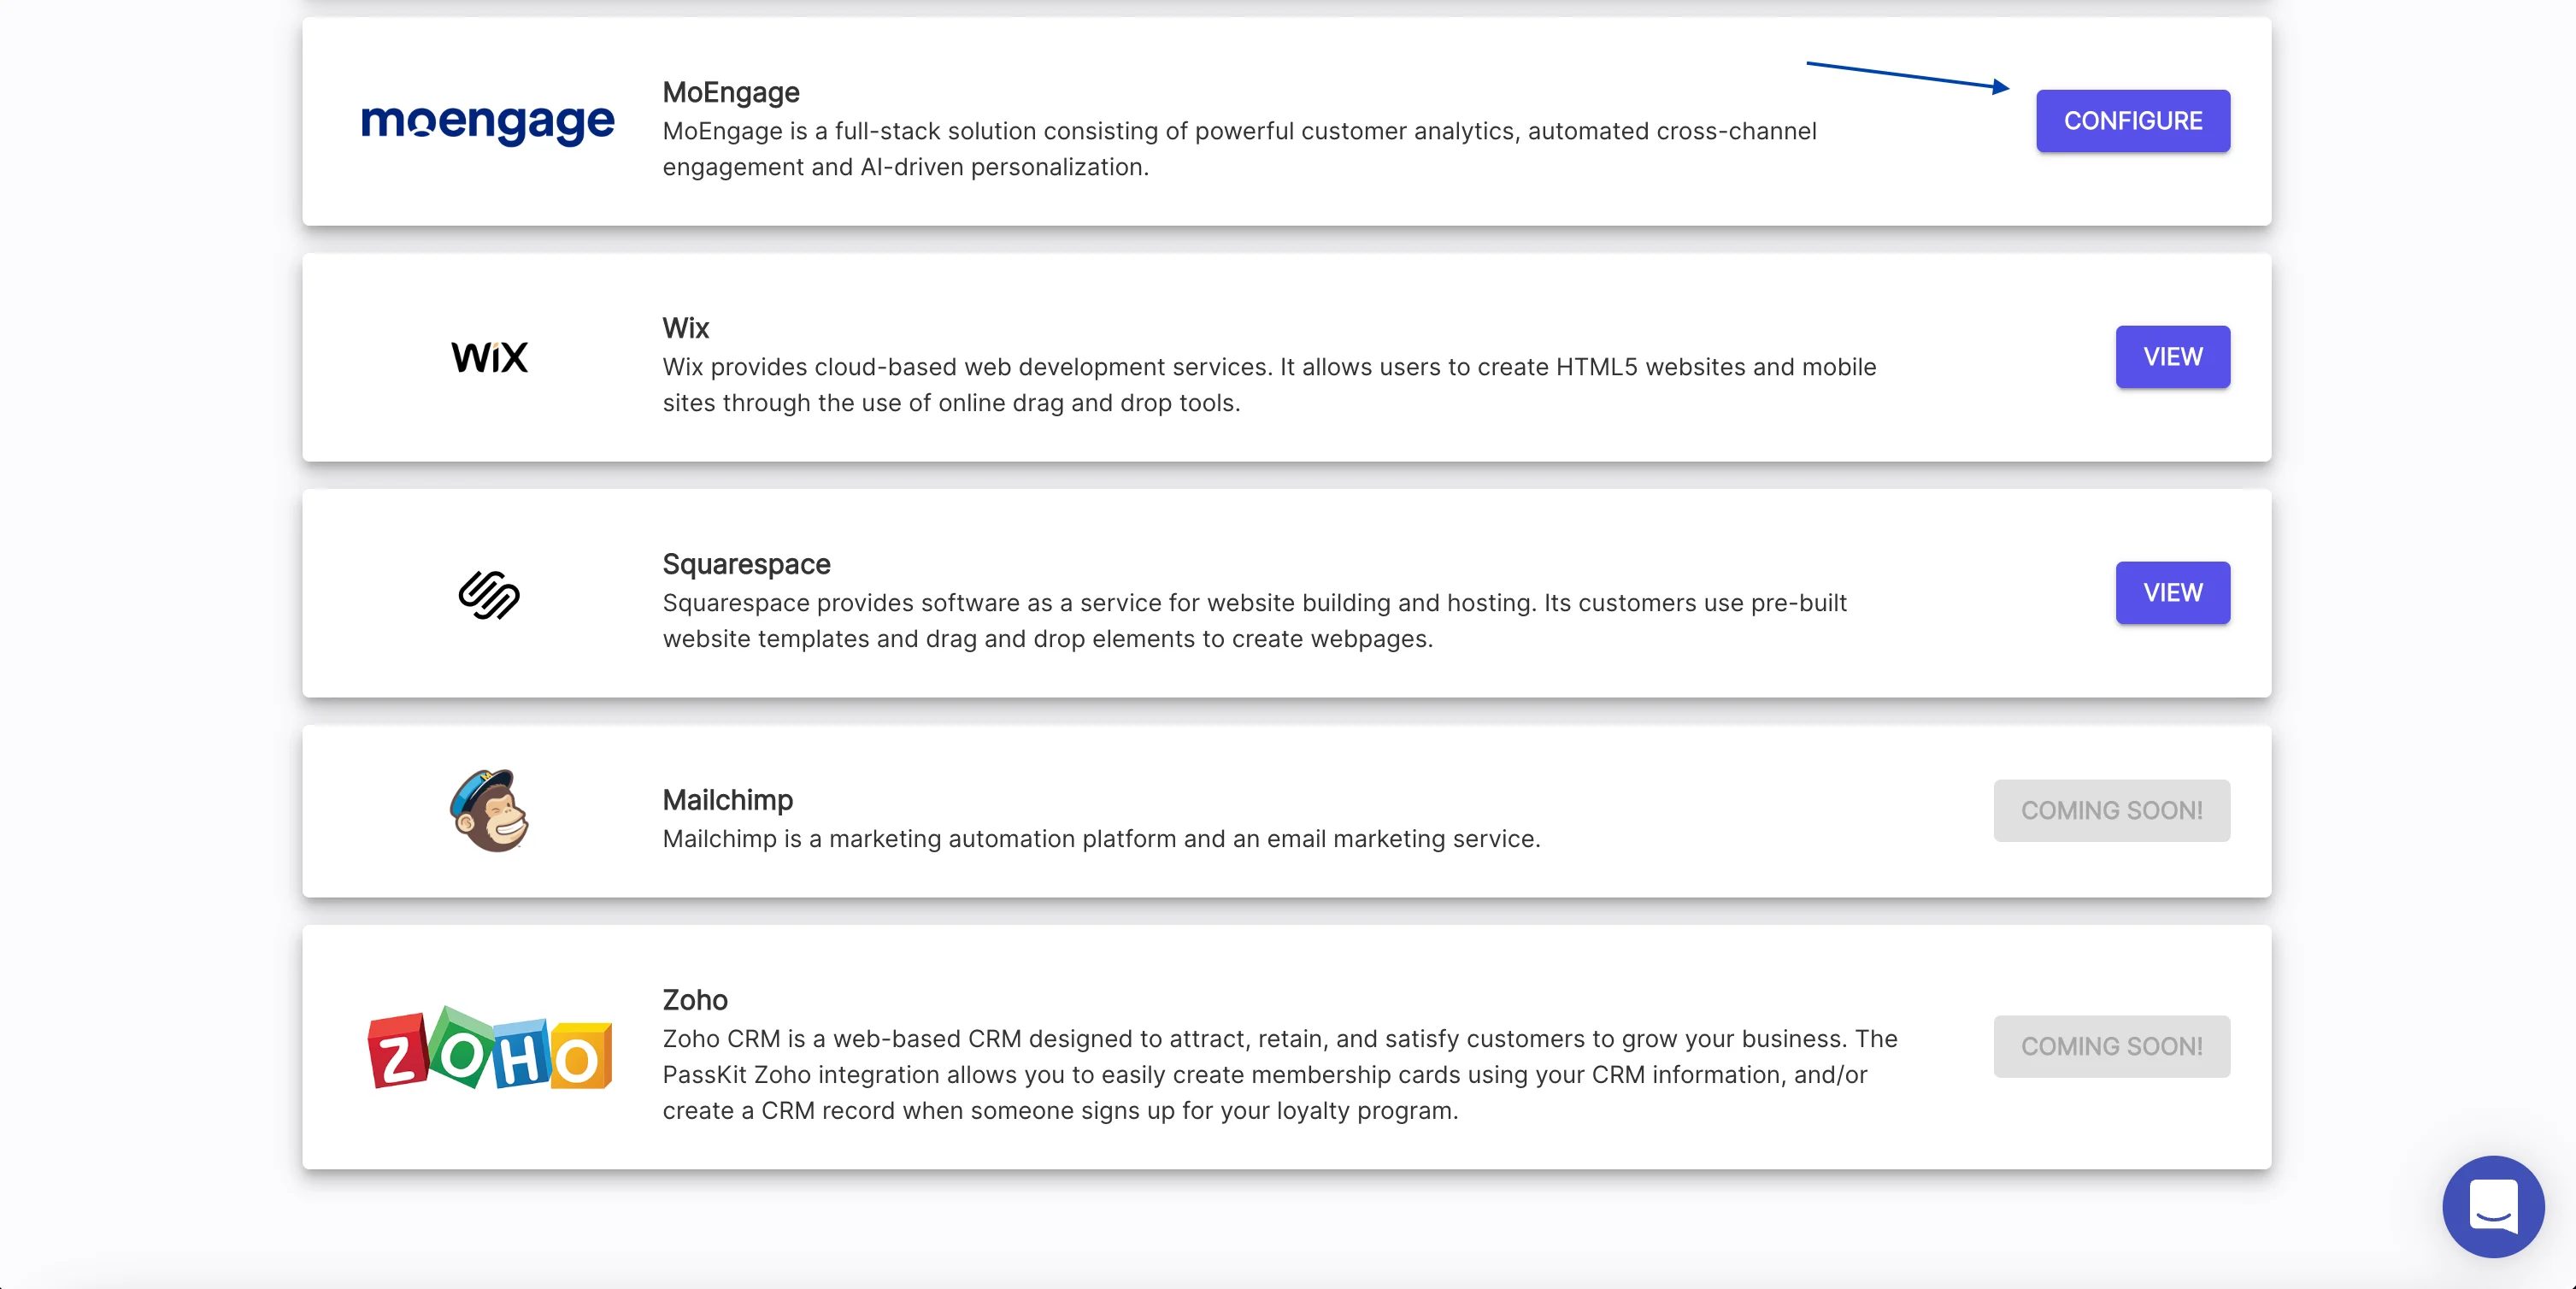
- Select MoEngage from the list. Click the Configure button.
- Fill in the form:
- Enter API key (copied from Step 1)
- Enter Workspace ID (copied from Step 1)
- Provide a name to identify your MoEngage account
- Select data center- Read more about MoEngage data centers
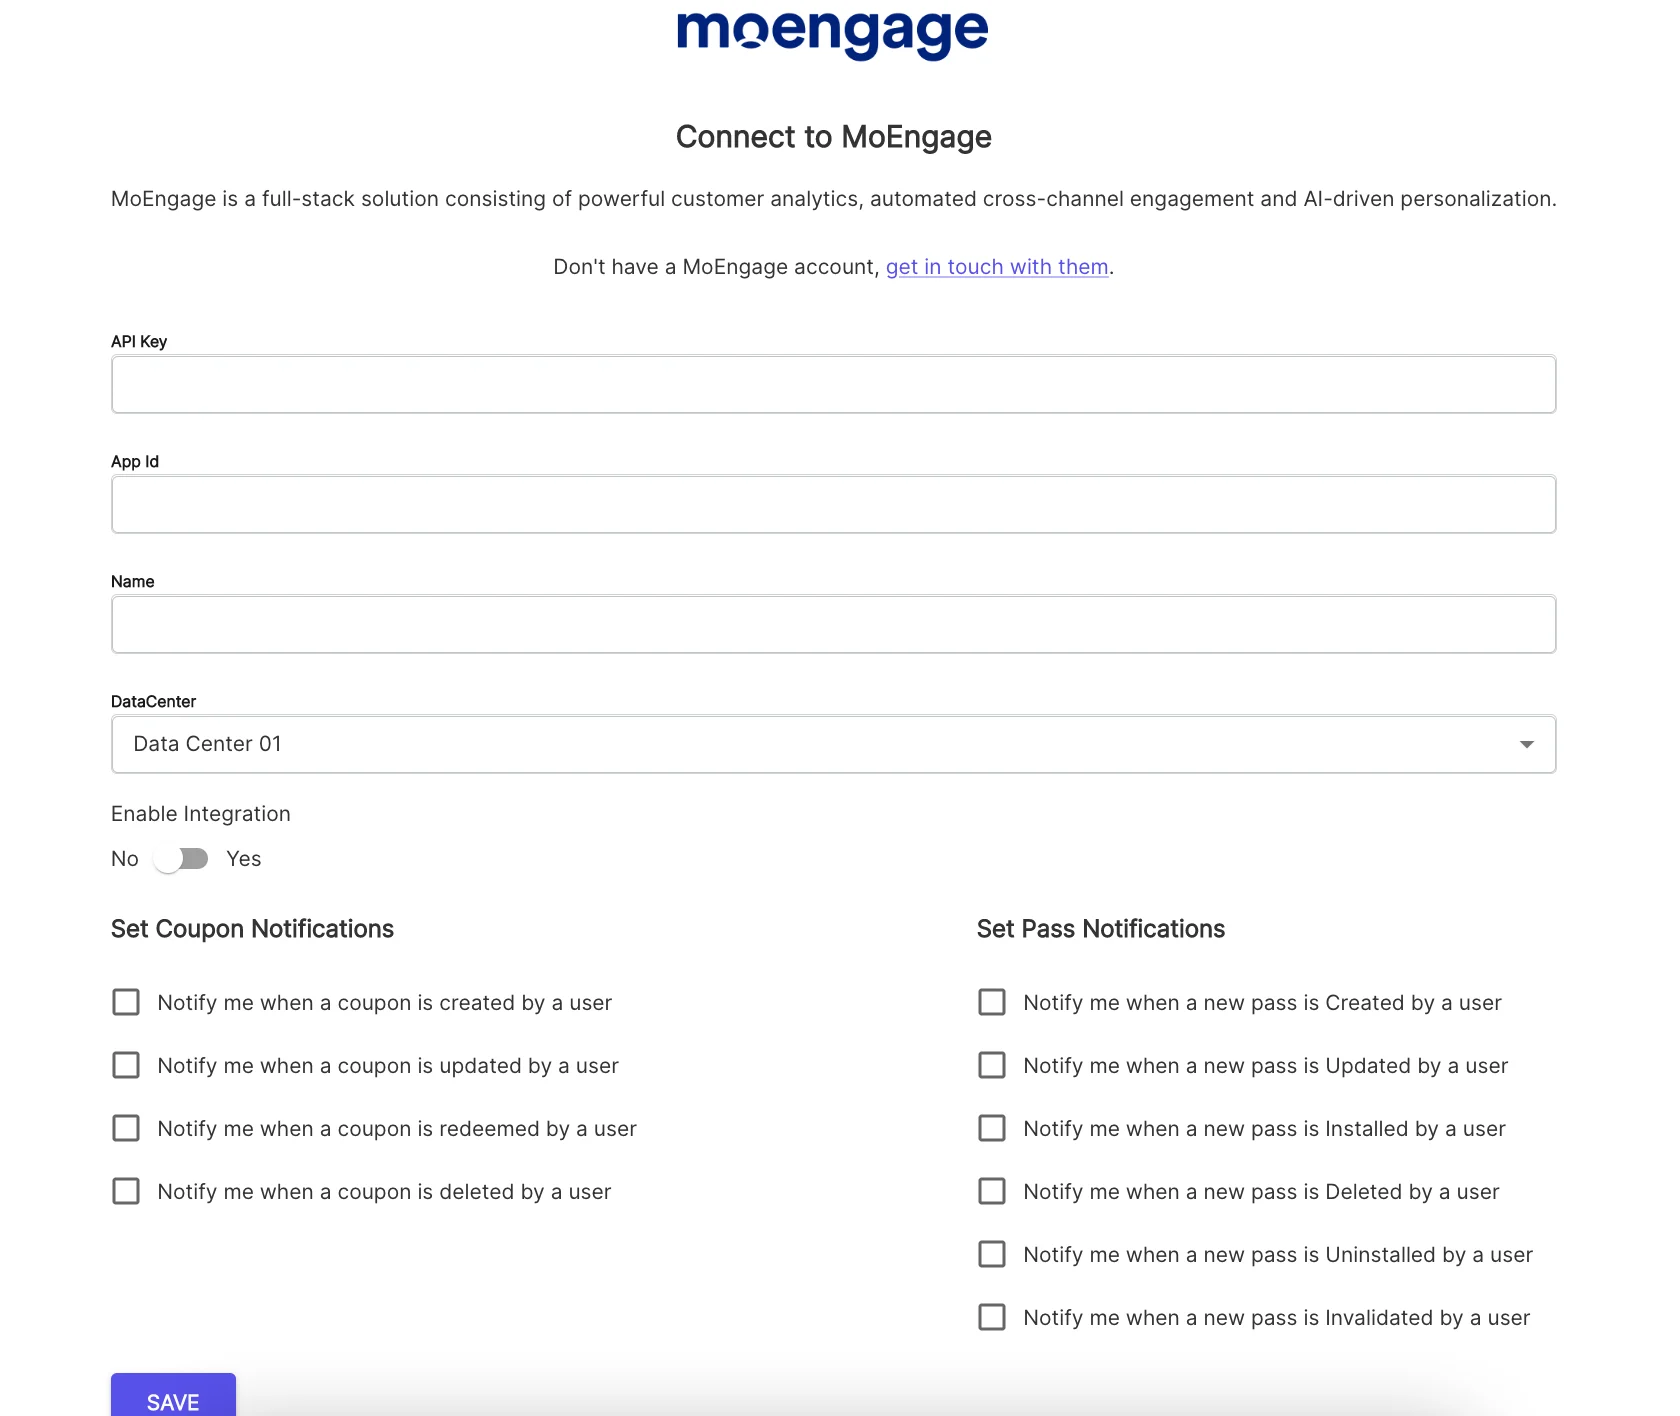
- Enable Integration toggle
- Select the Pass events what you can to use in MoEngage to trigger or personalize your campaigns with.
- Click “Save”.
Step 3: Tracking Events in MoEngage
Now you can create custom segments based on Passkit events or use them in MoEngage campaigns.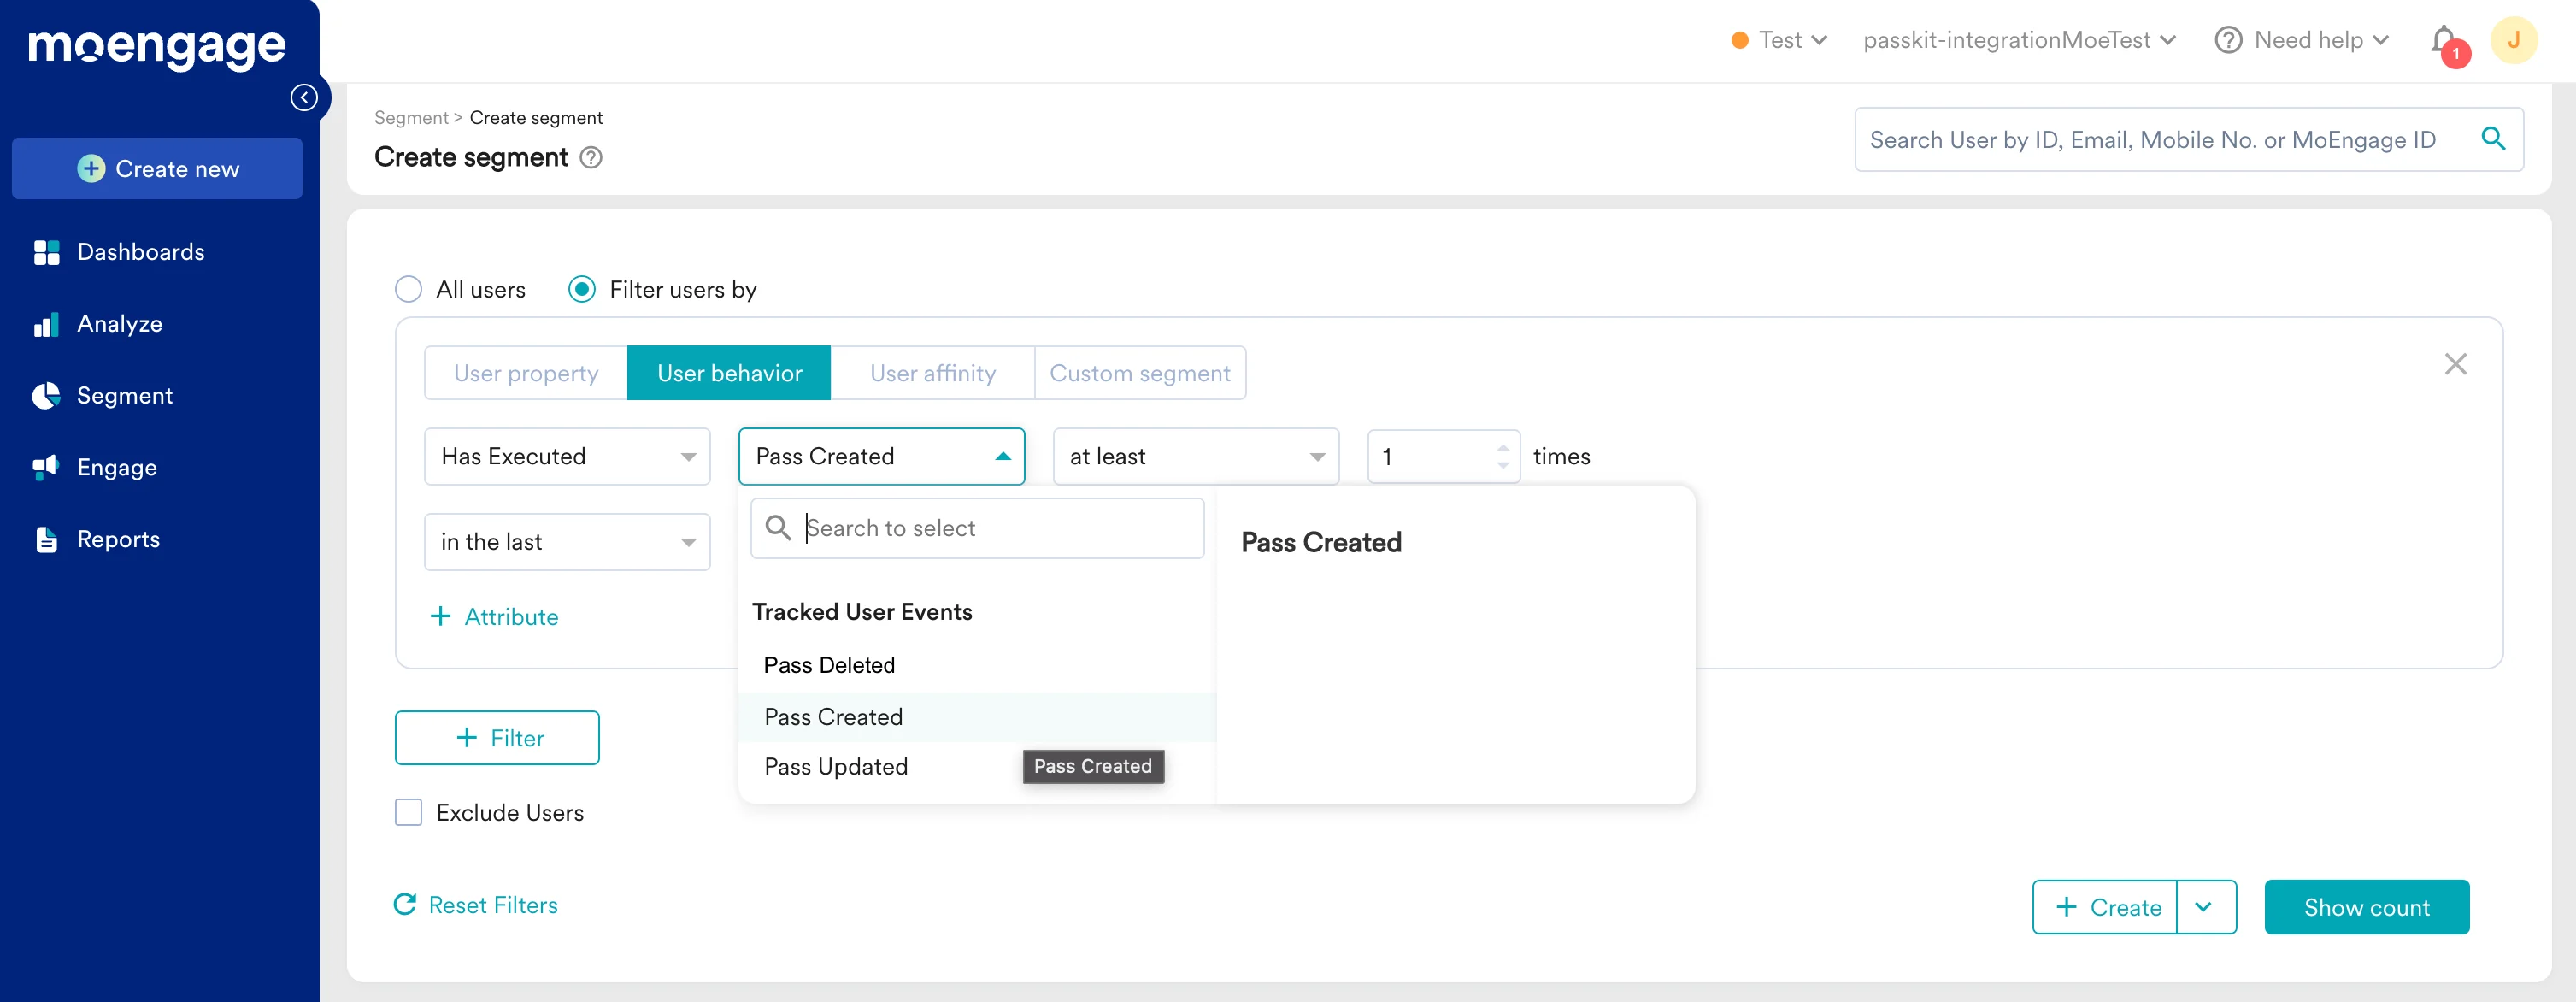
Create passes on the fly using Passkit’s SmartPass Links
You can create passes for your users dynamically using MoEngage’s Templating Language and calling the SmartPass Links provided by Passkit which is then used to create on-the-fly passes using specially hashed URLs. To read more about how these links work, visit Passkit’s Generating hashed SmartPass links.Prerequisites
In order to build your SmartPass Links, you will need the following:- Passkit URL - You can get this from Distribution >> SmartPass Settings in PassKit Dashboard.
- PassKit Secret - Each PassKit project has a unique secret that is used for creating a signature HMAC hash of the link. You can find this under the Distribution tab >> Generate Pass Links >> Commmand Line Tool inside your Passkit Dashboard.
- Program (or project) ID - Your PassKit Program ID will be under the Settings tab of your project or program.
Step 1: Get your Passkit Program/Project URL
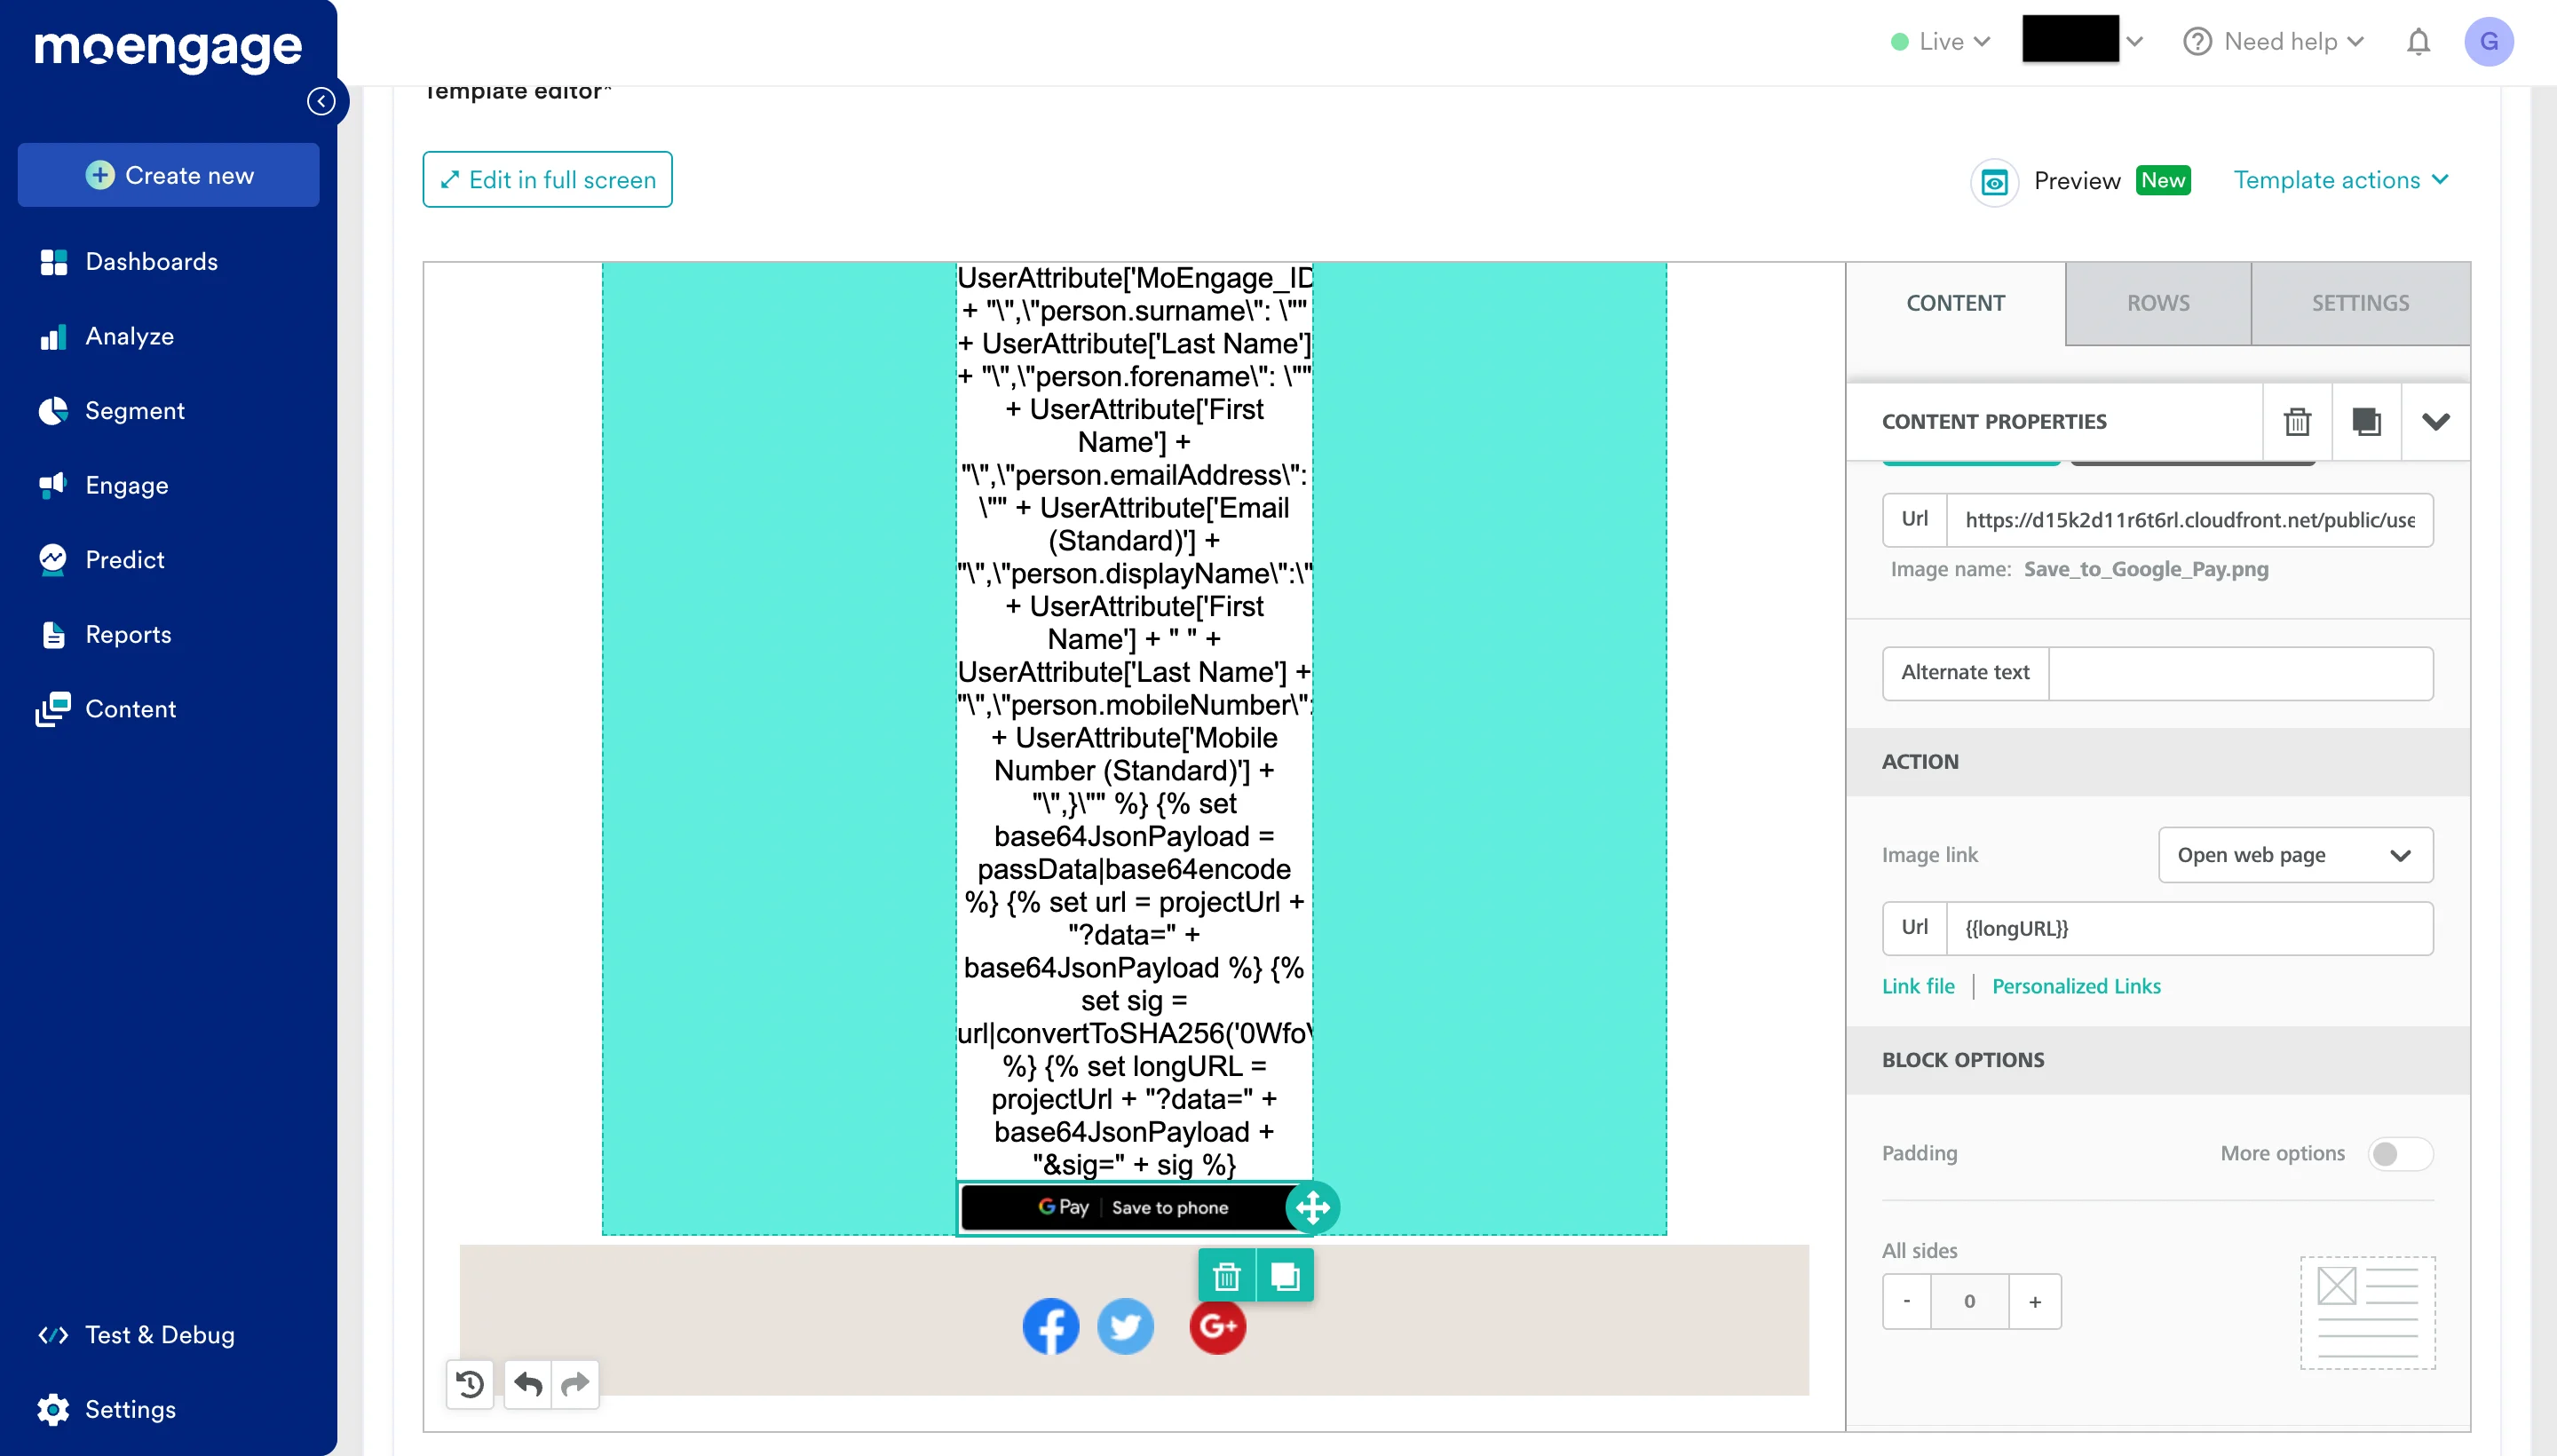
Your Passkit Program/Project URL will be on the distribution tab of your Passkit project. Make a new variable with the value being this URL:{% set projectUrl = "https://pub1.pskt.io/c/a4hrop" %}
Step 2: Generate your payload
The payload can contain the coupon / member, PII & meta data that needs to go into the pass record:Step 3: Encode your payload
The next step is to encode your payload into a base64 format:Step 4: Create your URL string
Once you have the encoded payload, your final URL string should be in this format:Step 5: Generate a hash for the entire URL
Each PassKit project has a unique secret that is used for creating a signature HMAC hash of the link. You can find this under the Distribution tab in your Passkit Dashboard.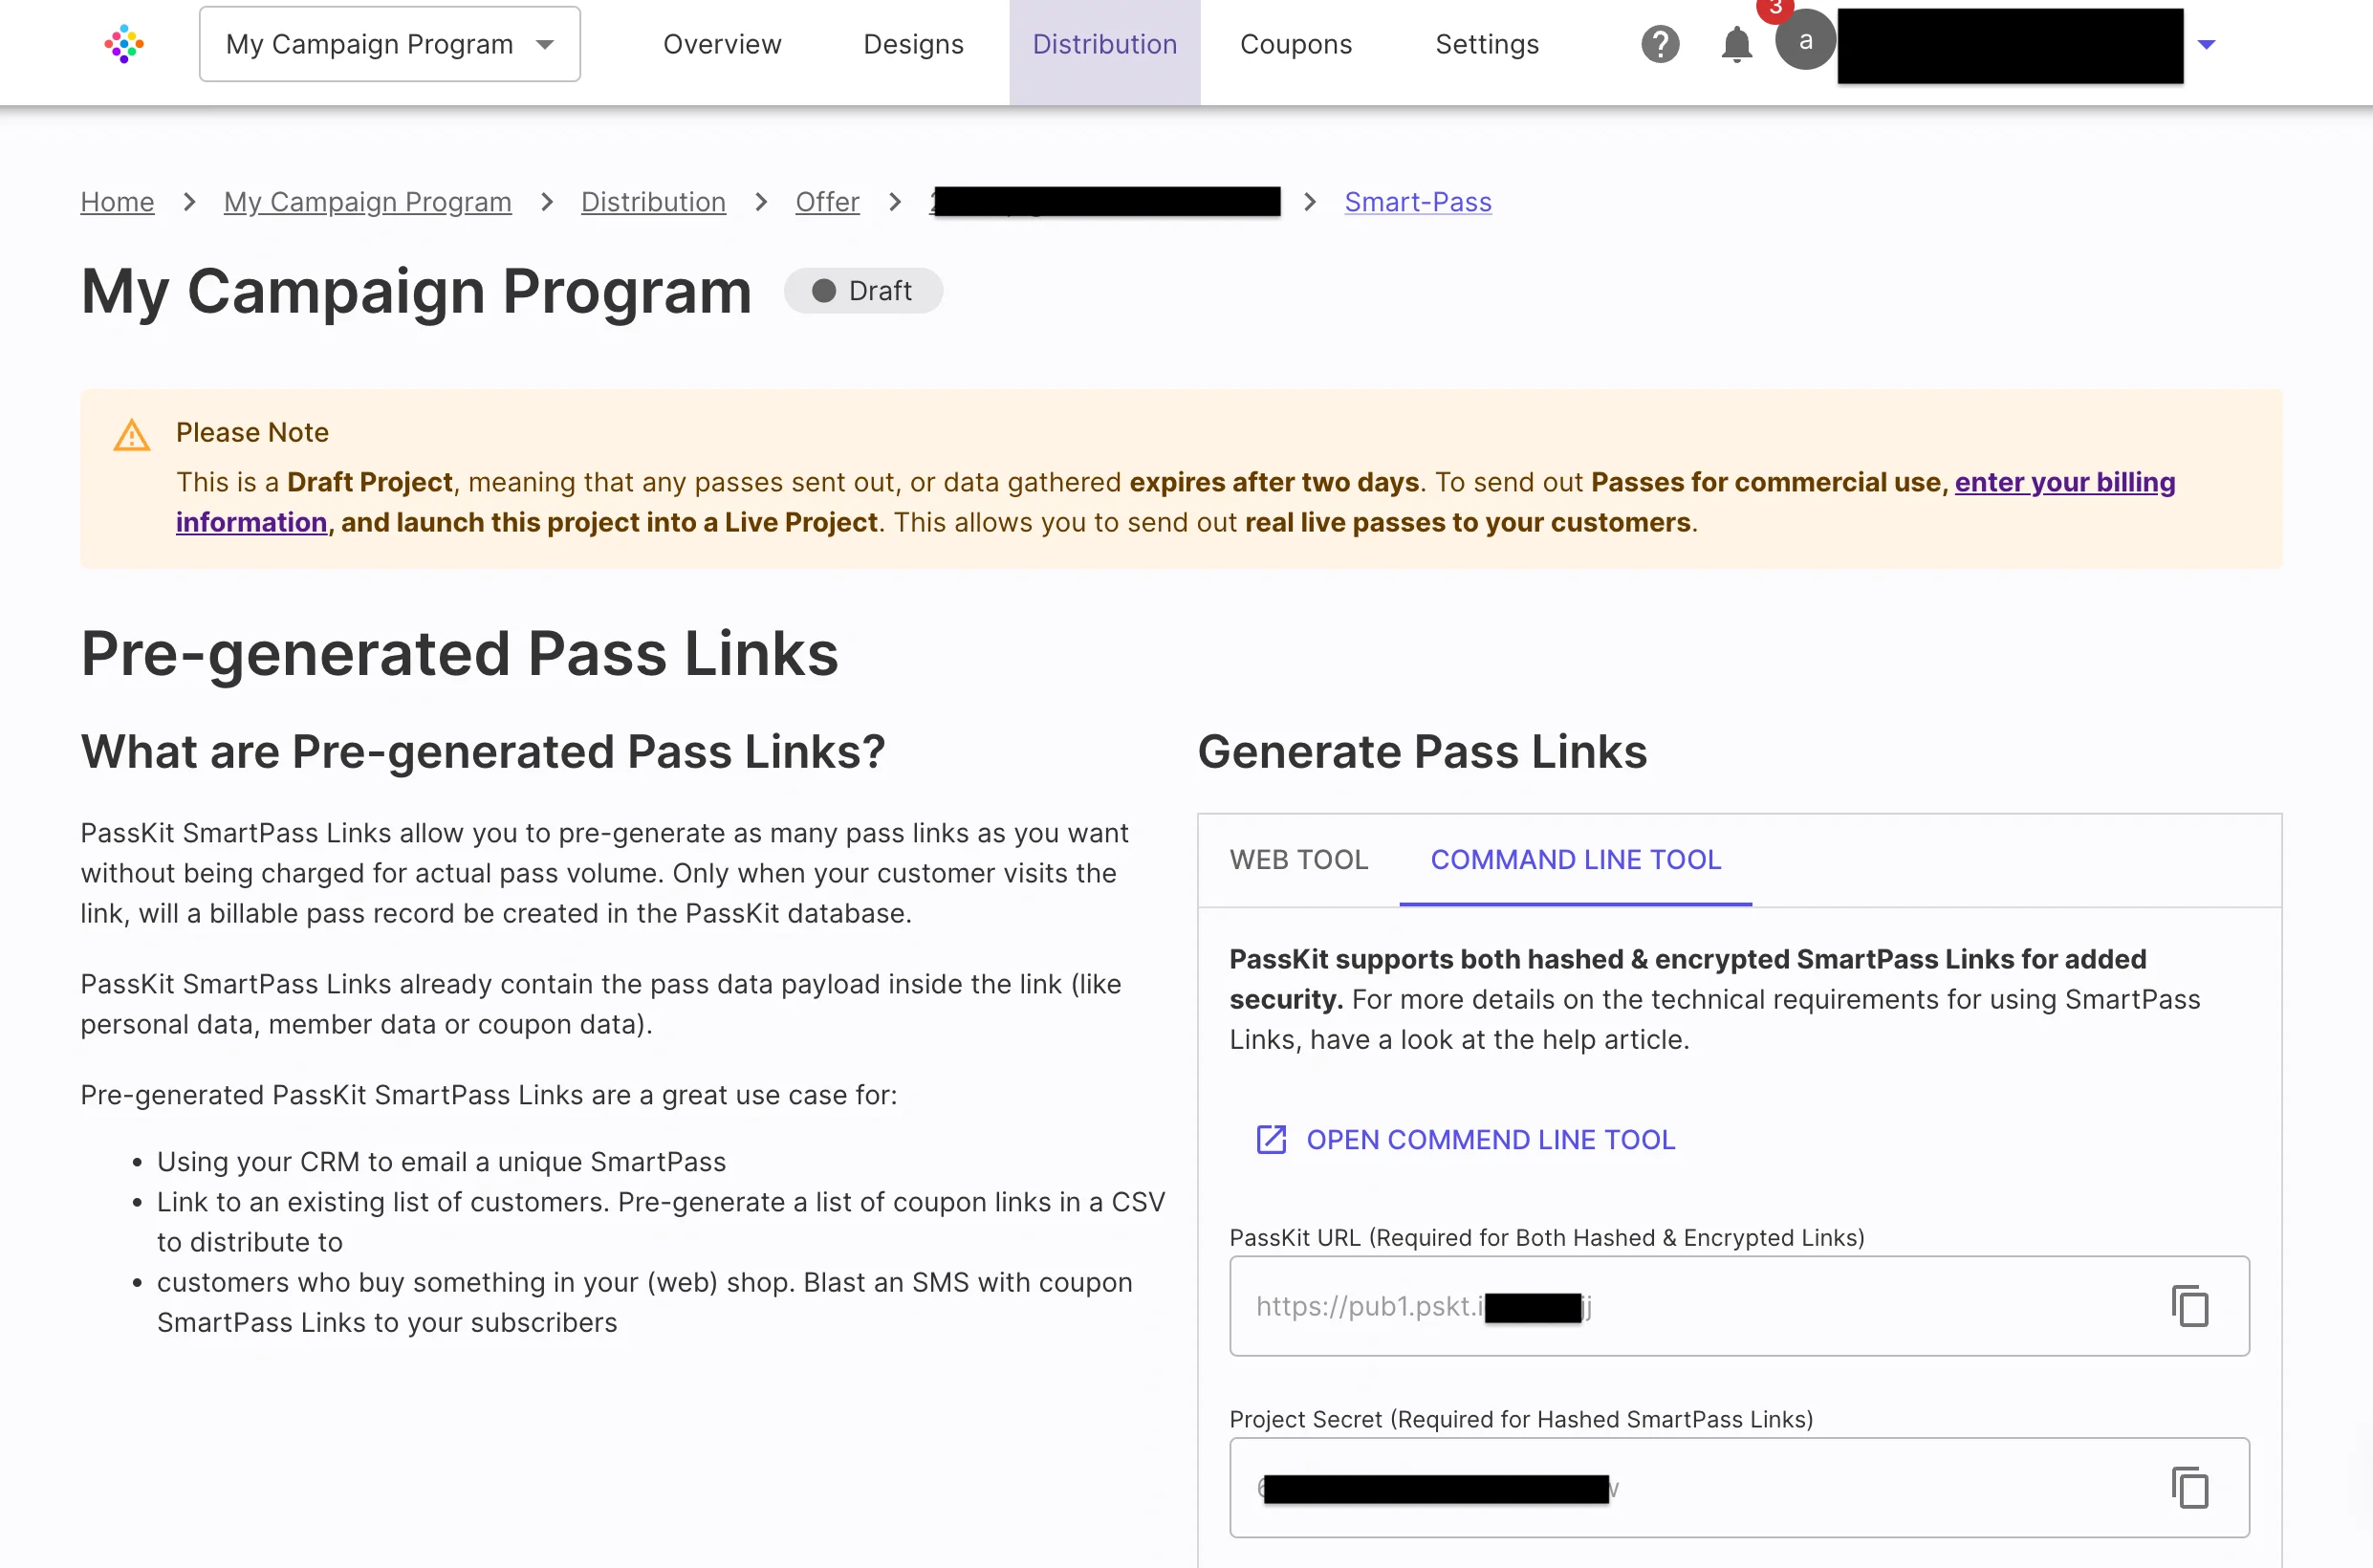
Step 6: Create the final SmartPass URL
Now all you need to do is stitch all the above variables together to form the SmartPass URL:Step 7: Use this link in your campaigns
Your final code will look something like this:- Insert a new image inside your template.
- In our File Manager, click on “Import” and then select URL.
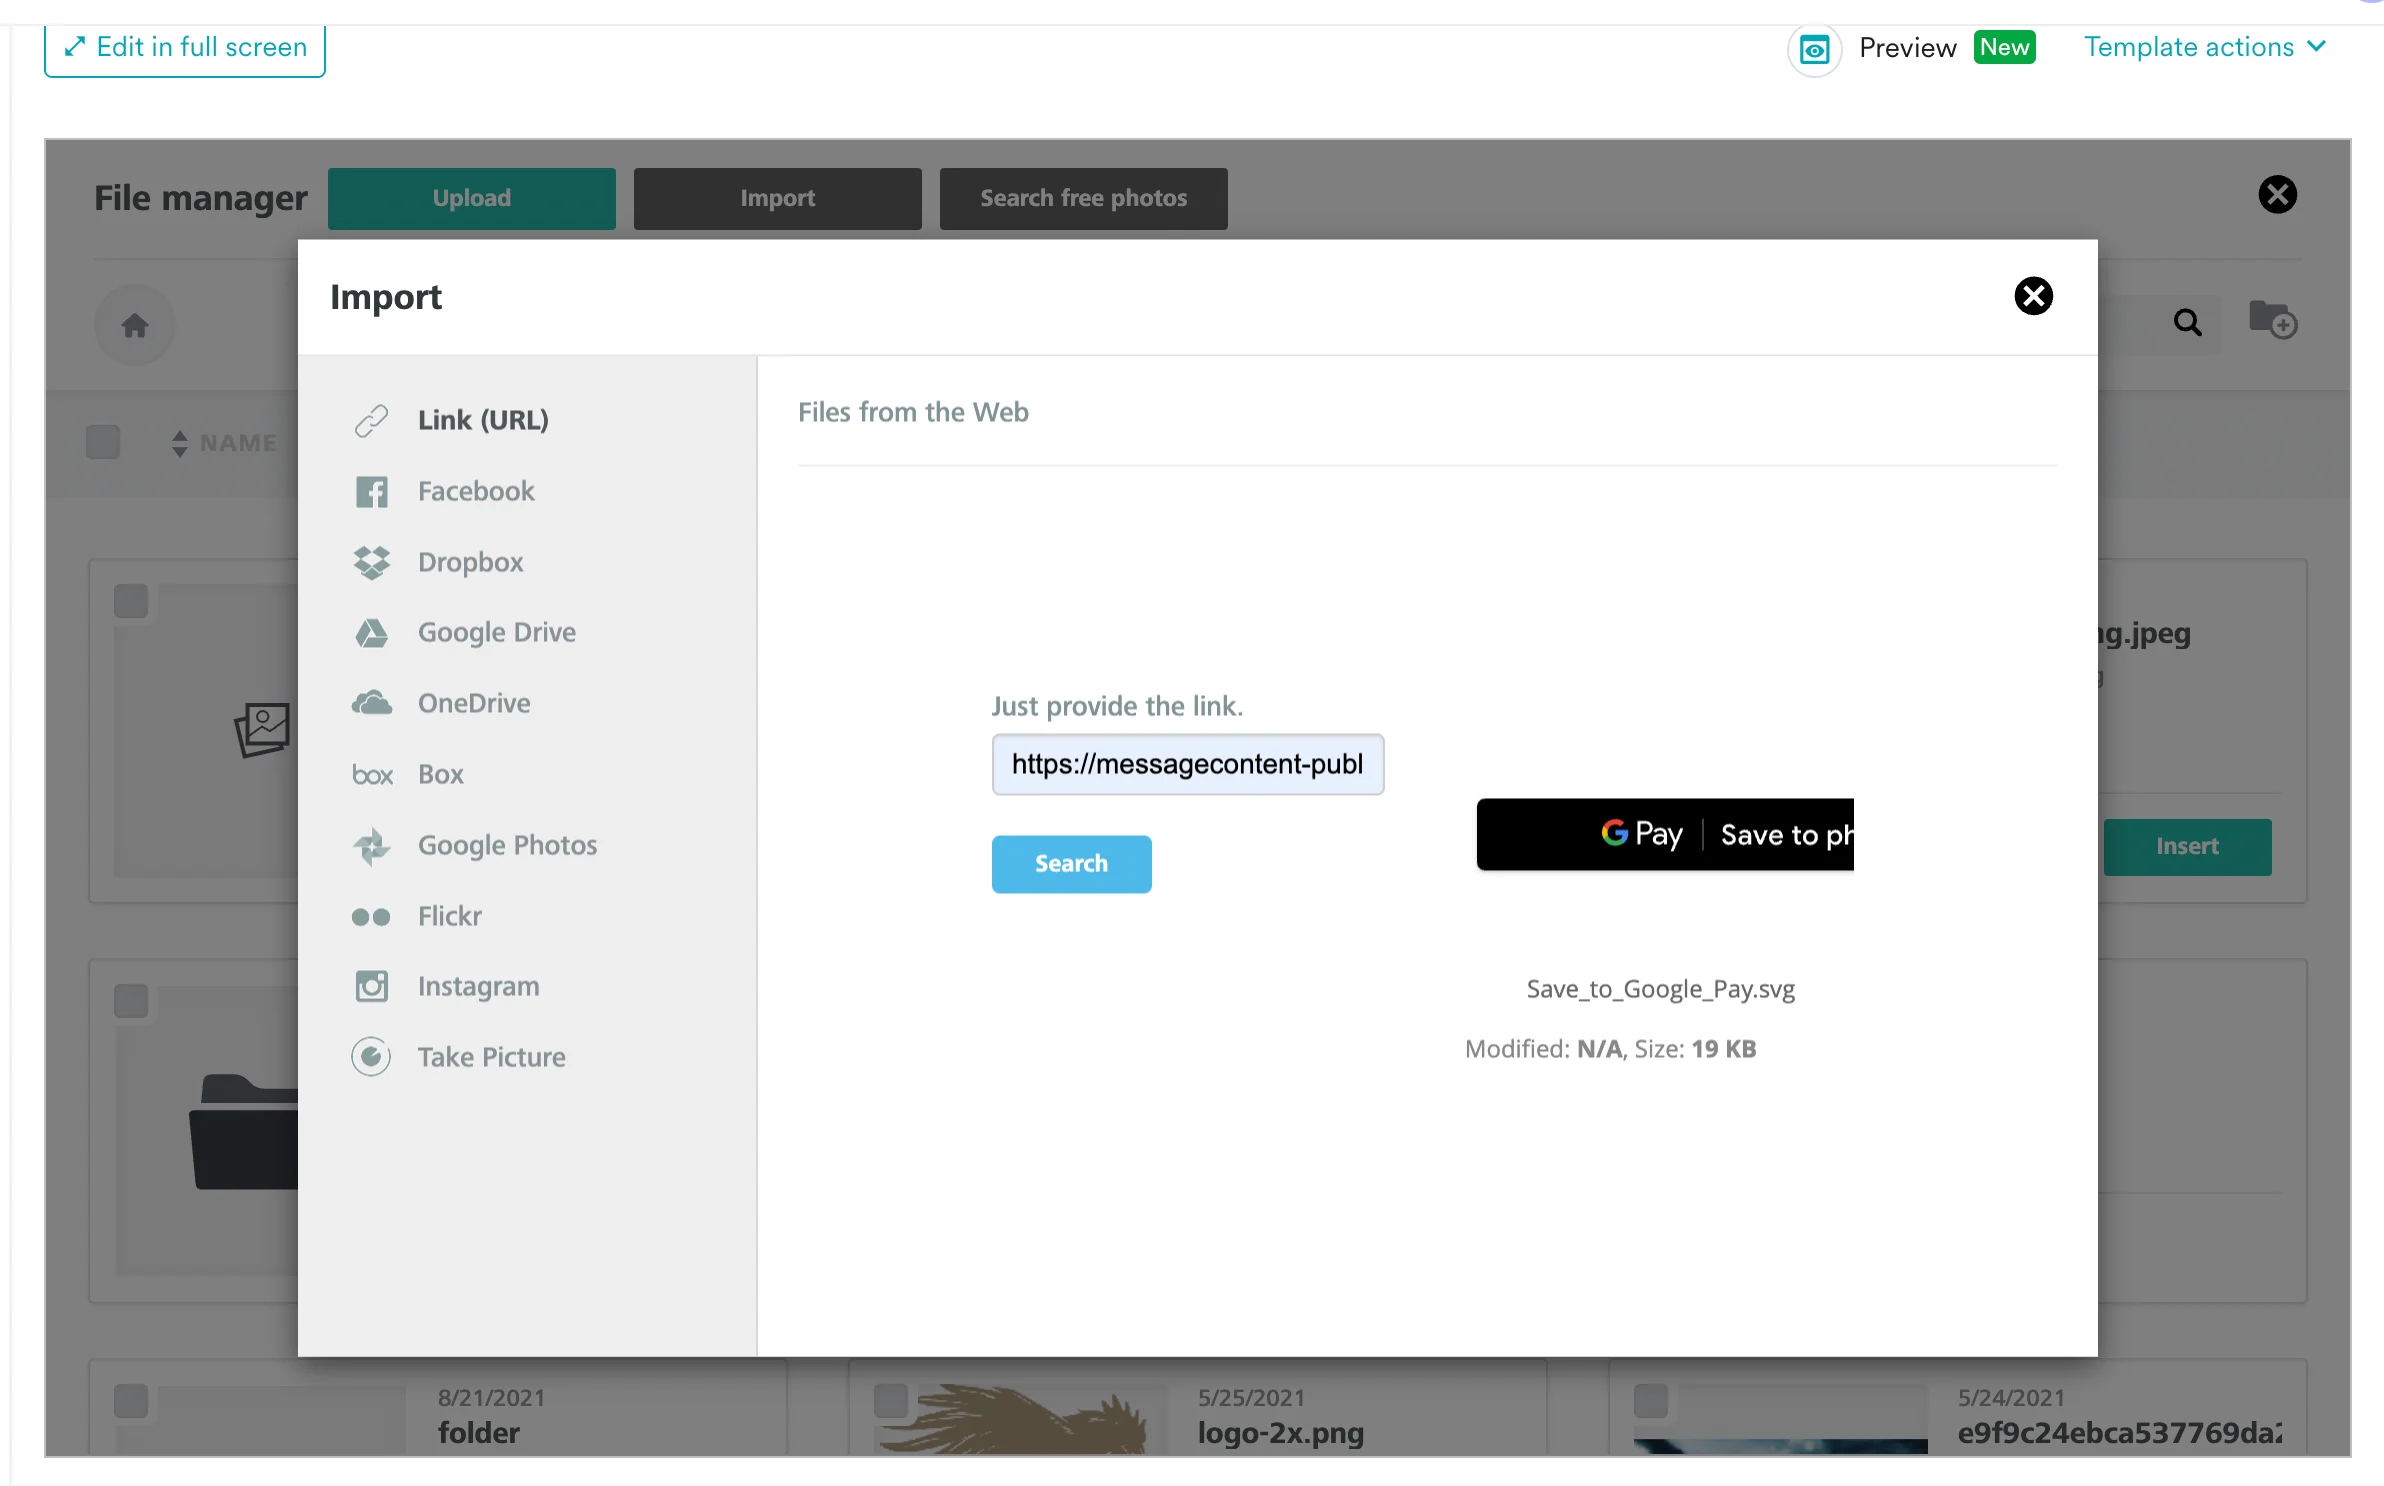
- Select the appropriate image to show.
- In the URL section, type:
{{longURL}}