> ## Documentation Index
> Fetch the complete documentation index at: https://moengage.com/docs/llms.txt
> Use this file to discover all available pages before exploring further.
# Treasure Data
## Introduction
[Treasure Data](https://www.treasuredata.com/) is a customer data platform (CDP) that collects and routes information from multiple sources to a variety of other locations in your marketing stack.
## MoEngage × Treasure Data
MoEngage and Treasure Data bi-directional integration allows you to write job results from Treasure Data directly to MoEngage. You can
* Forward user actions and events from Treasure Data to MoEngage
* Create or update users in MoEngage
* Send MoEngage campaign interaction data back to Treasure Data
## Integration
**Prerequisites**
* Ensure you have permission to create a HTTP webhook on Treasure Data
* Ensure you have access to the MoEngage Dashboard.
### Use cases
1. You can synchronize your consolidated customer profiles from Treasure Data into MoEngage to build-out target segments. Treasure Data supports first-party cookie data, Mobile IDs, third-party systems like your CRM, and many more.
2. You can also send back MoEngage campaign interaction data back to Treasure Data
Please note that the integration is not available directly. Please reach out to your Customer Success Managers to get it enabled!
### Step 1: Get your MoEngage endpoint
Speak to your MoEngage Customer Success Manager to help you get a dedicated endpoint for TreasureData. You will be getting two separate endpoints for importing Users and Events.
### Step 2: Configure MoEngage connection on Treasure Data
Repeat the following steps for each of the two URLs given to you:
1. On your Treasure Data dashboard, navigate to **Catalog**.
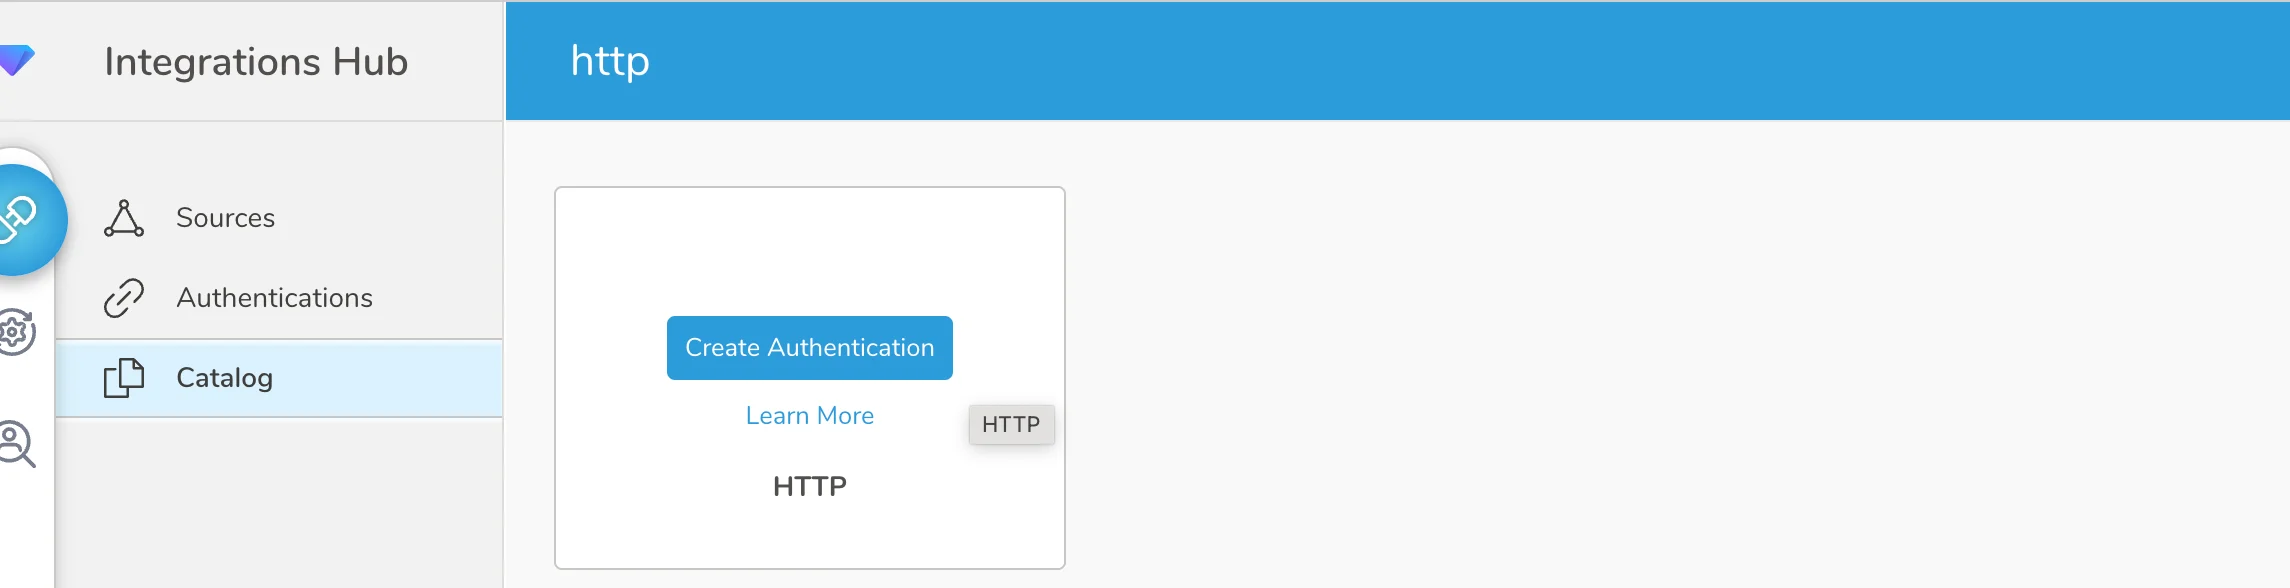 2. Search for **HTTP** and click on **Create Authentication** and enter the MoEngage endpoints.
#### Set up MoEngage destination
1. Enter MoEngage user API endpoints
2. Search for **HTTP** and click on **Create Authentication** and enter the MoEngage endpoints.
#### Set up MoEngage destination
1. Enter MoEngage user API endpoints
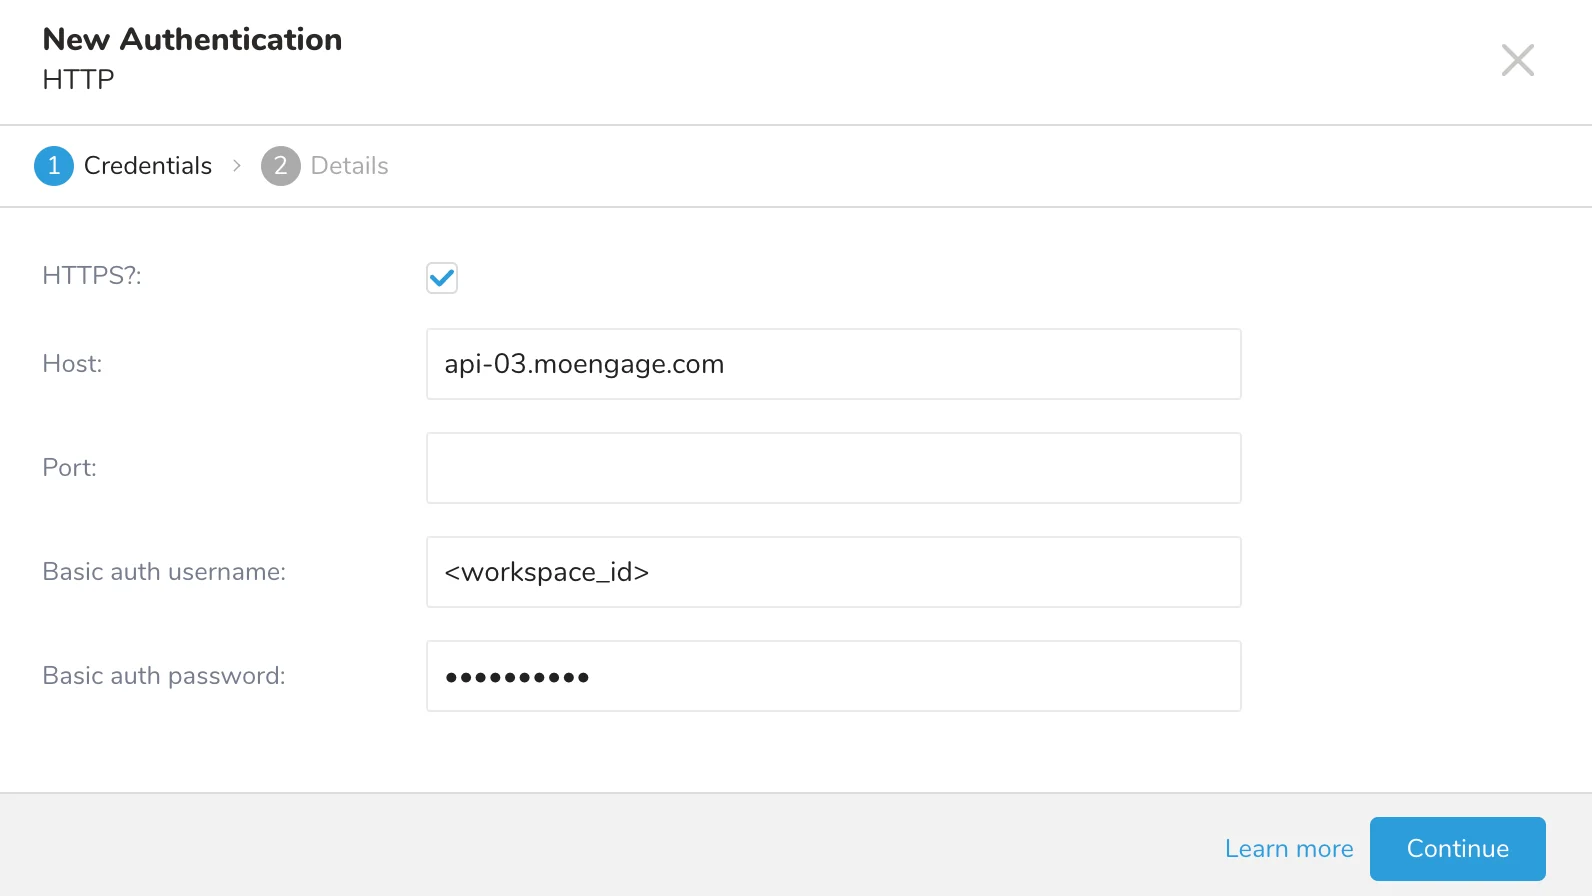 2. Select **HTTPS** and enter the following details:
| Field | Description |
| ----------------------- | ----------------------------------------------------------------------------------------------------------------------------------------------------------------------------------------------- |
| **HTTPS** | Check this box. |
| **Host** | Enter the URL part before "/v1/partner/treasuredata/events/?configName=" excluding *https\://*. |
| **Port** | Leave this as blank. |
| **Basic auth username** | The Workspace ID of your MoEngage account is available at **Settings** > **Account** > **APIs** > **Workspace ID**. The Data API ID and the Workspace ID of your MoEngage account are the same. |
| **Basic auth password** | The secret key is the Data API Key. The Data API key of your MoEngage account is available at **Settings** > **Account** > **APIs** > **API Keys** > **Data**. |
3. Click **Continue** and save it as *moengage\_event\_sync* or *moengage\_user\_sync.*
### Step 3: Define your query
On your Treasure Data dashboard,
1. Navigate to **Data Workbench** > **Queries** and select a query you would like to export data.
2. Select **HTTPS** and enter the following details:
| Field | Description |
| ----------------------- | ----------------------------------------------------------------------------------------------------------------------------------------------------------------------------------------------- |
| **HTTPS** | Check this box. |
| **Host** | Enter the URL part before "/v1/partner/treasuredata/events/?configName=" excluding *https\://*. |
| **Port** | Leave this as blank. |
| **Basic auth username** | The Workspace ID of your MoEngage account is available at **Settings** > **Account** > **APIs** > **Workspace ID**. The Data API ID and the Workspace ID of your MoEngage account are the same. |
| **Basic auth password** | The secret key is the Data API Key. The Data API key of your MoEngage account is available at **Settings** > **Account** > **APIs** > **API Keys** > **Data**. |
3. Click **Continue** and save it as *moengage\_event\_sync* or *moengage\_user\_sync.*
### Step 3: Define your query
On your Treasure Data dashboard,
1. Navigate to **Data Workbench** > **Queries** and select a query you would like to export data.
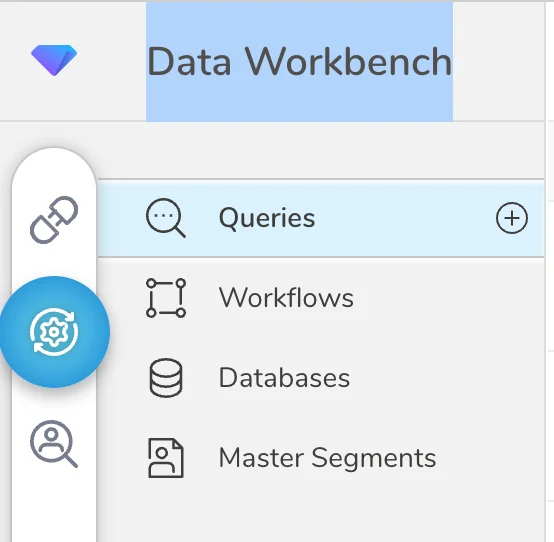 2. Run this query to validate the result set. Ensure that the query has a `customer_id` column. This will be used to identify users in MoEngage.
Note: For users using HIVE to build queries, HIVE requires that any columns or tables that begin with an underscore be wrapped by backquotes, such as *merge\_objects.*
3. Select **Export Results** and select an existing integration authentication.
2. Run this query to validate the result set. Ensure that the query has a `customer_id` column. This will be used to identify users in MoEngage.
Note: For users using HIVE to build queries, HIVE requires that any columns or tables that begin with an underscore be wrapped by backquotes, such as *merge\_objects.*
3. Select **Export Results** and select an existing integration authentication.
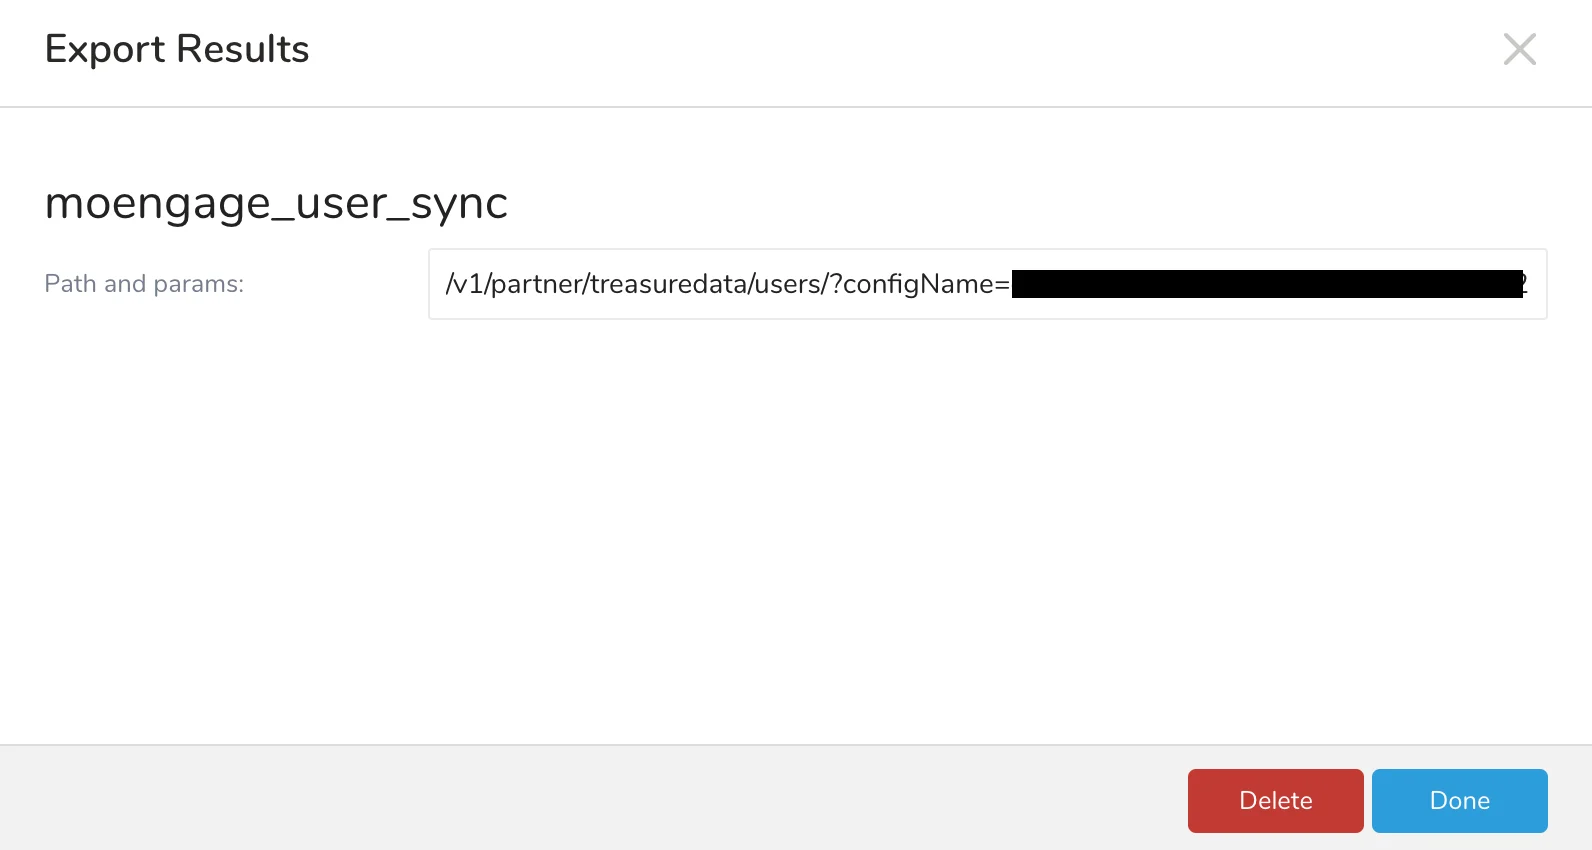
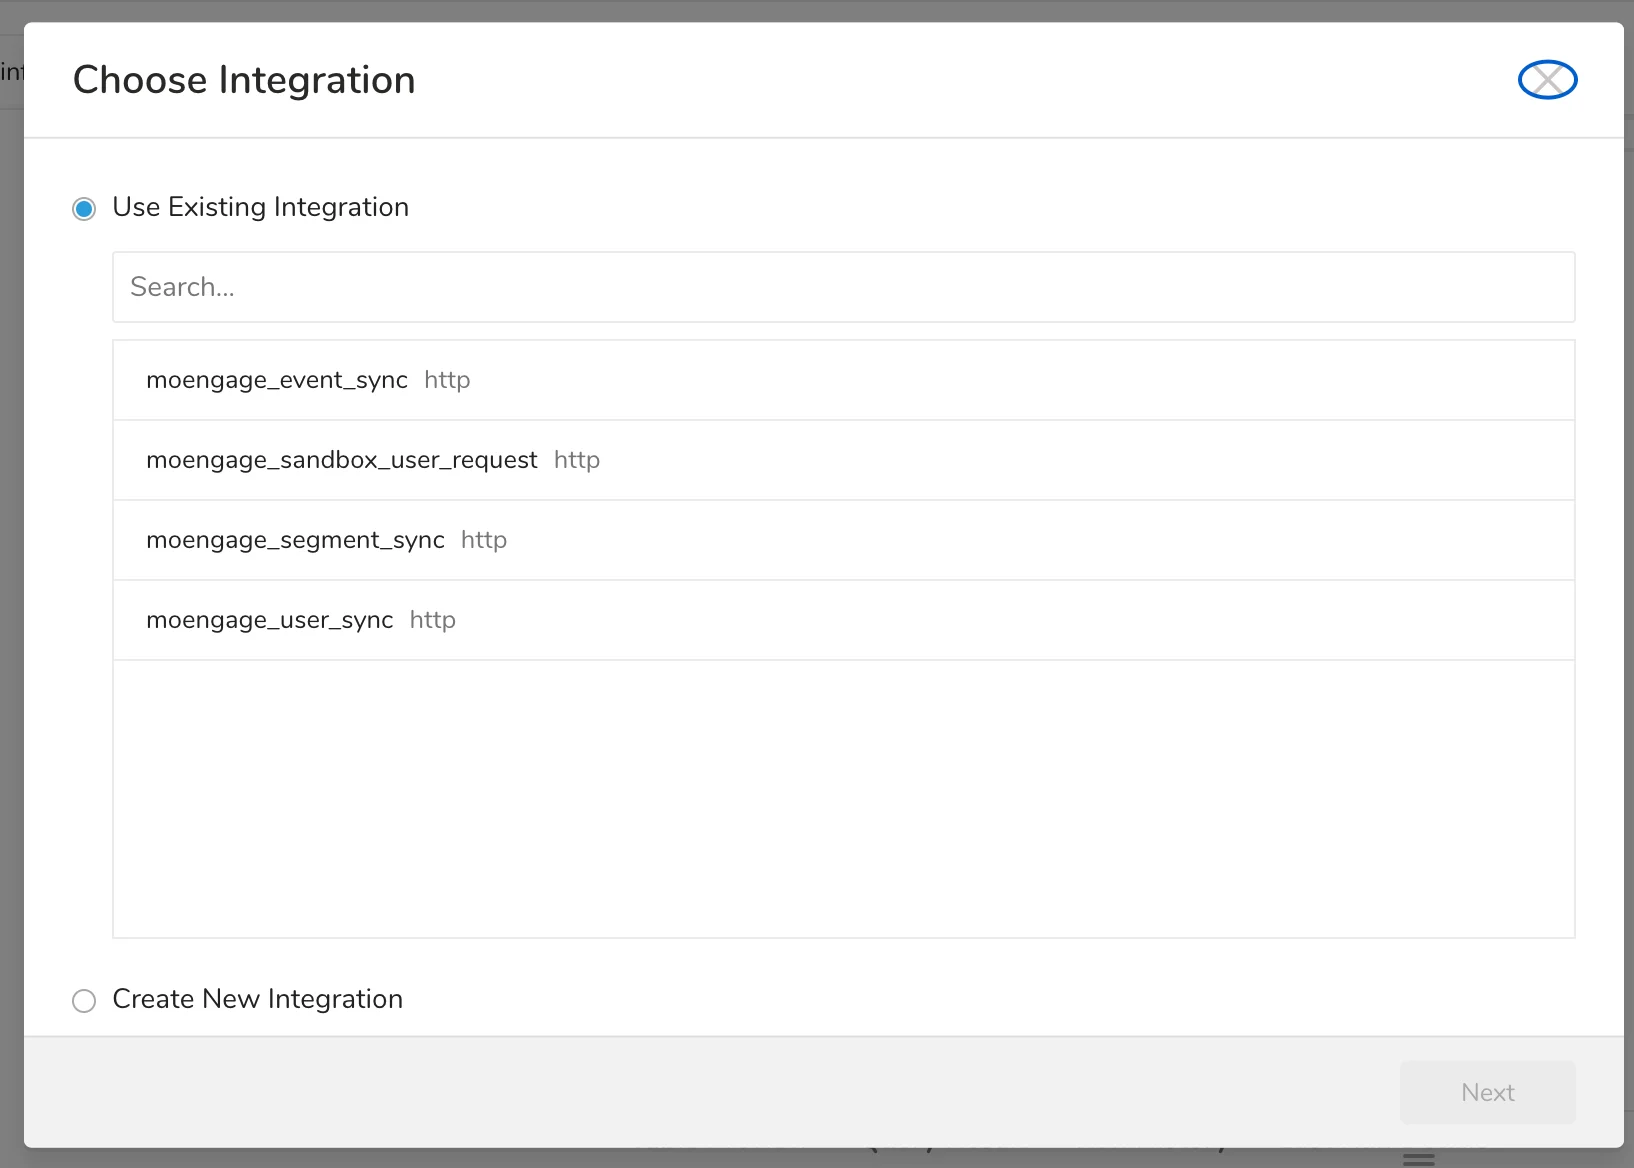 4. Enter the remaining part of your MoEngage URL after "moengage.com":
 Read more on pre-formatted fields, example queries, parameter details, and query export job scheduling on Treasure Data [here](https://docs.treasure.ai/int/web-server-and-http-put-endpoint-export-integration).
### Step 4: Validate data on MoEngage
You can search for the new users and see users and events getting created.
## Send campaign interaction data back to Treasure Data
Treasure Data users can ingest data through its [Postback APIs](https://docs.treasure.ai/products/customer-data-platform/integration-hub/streaming/postback-api) via Connector Campaigns. To create a connector campaign on MoEngage,
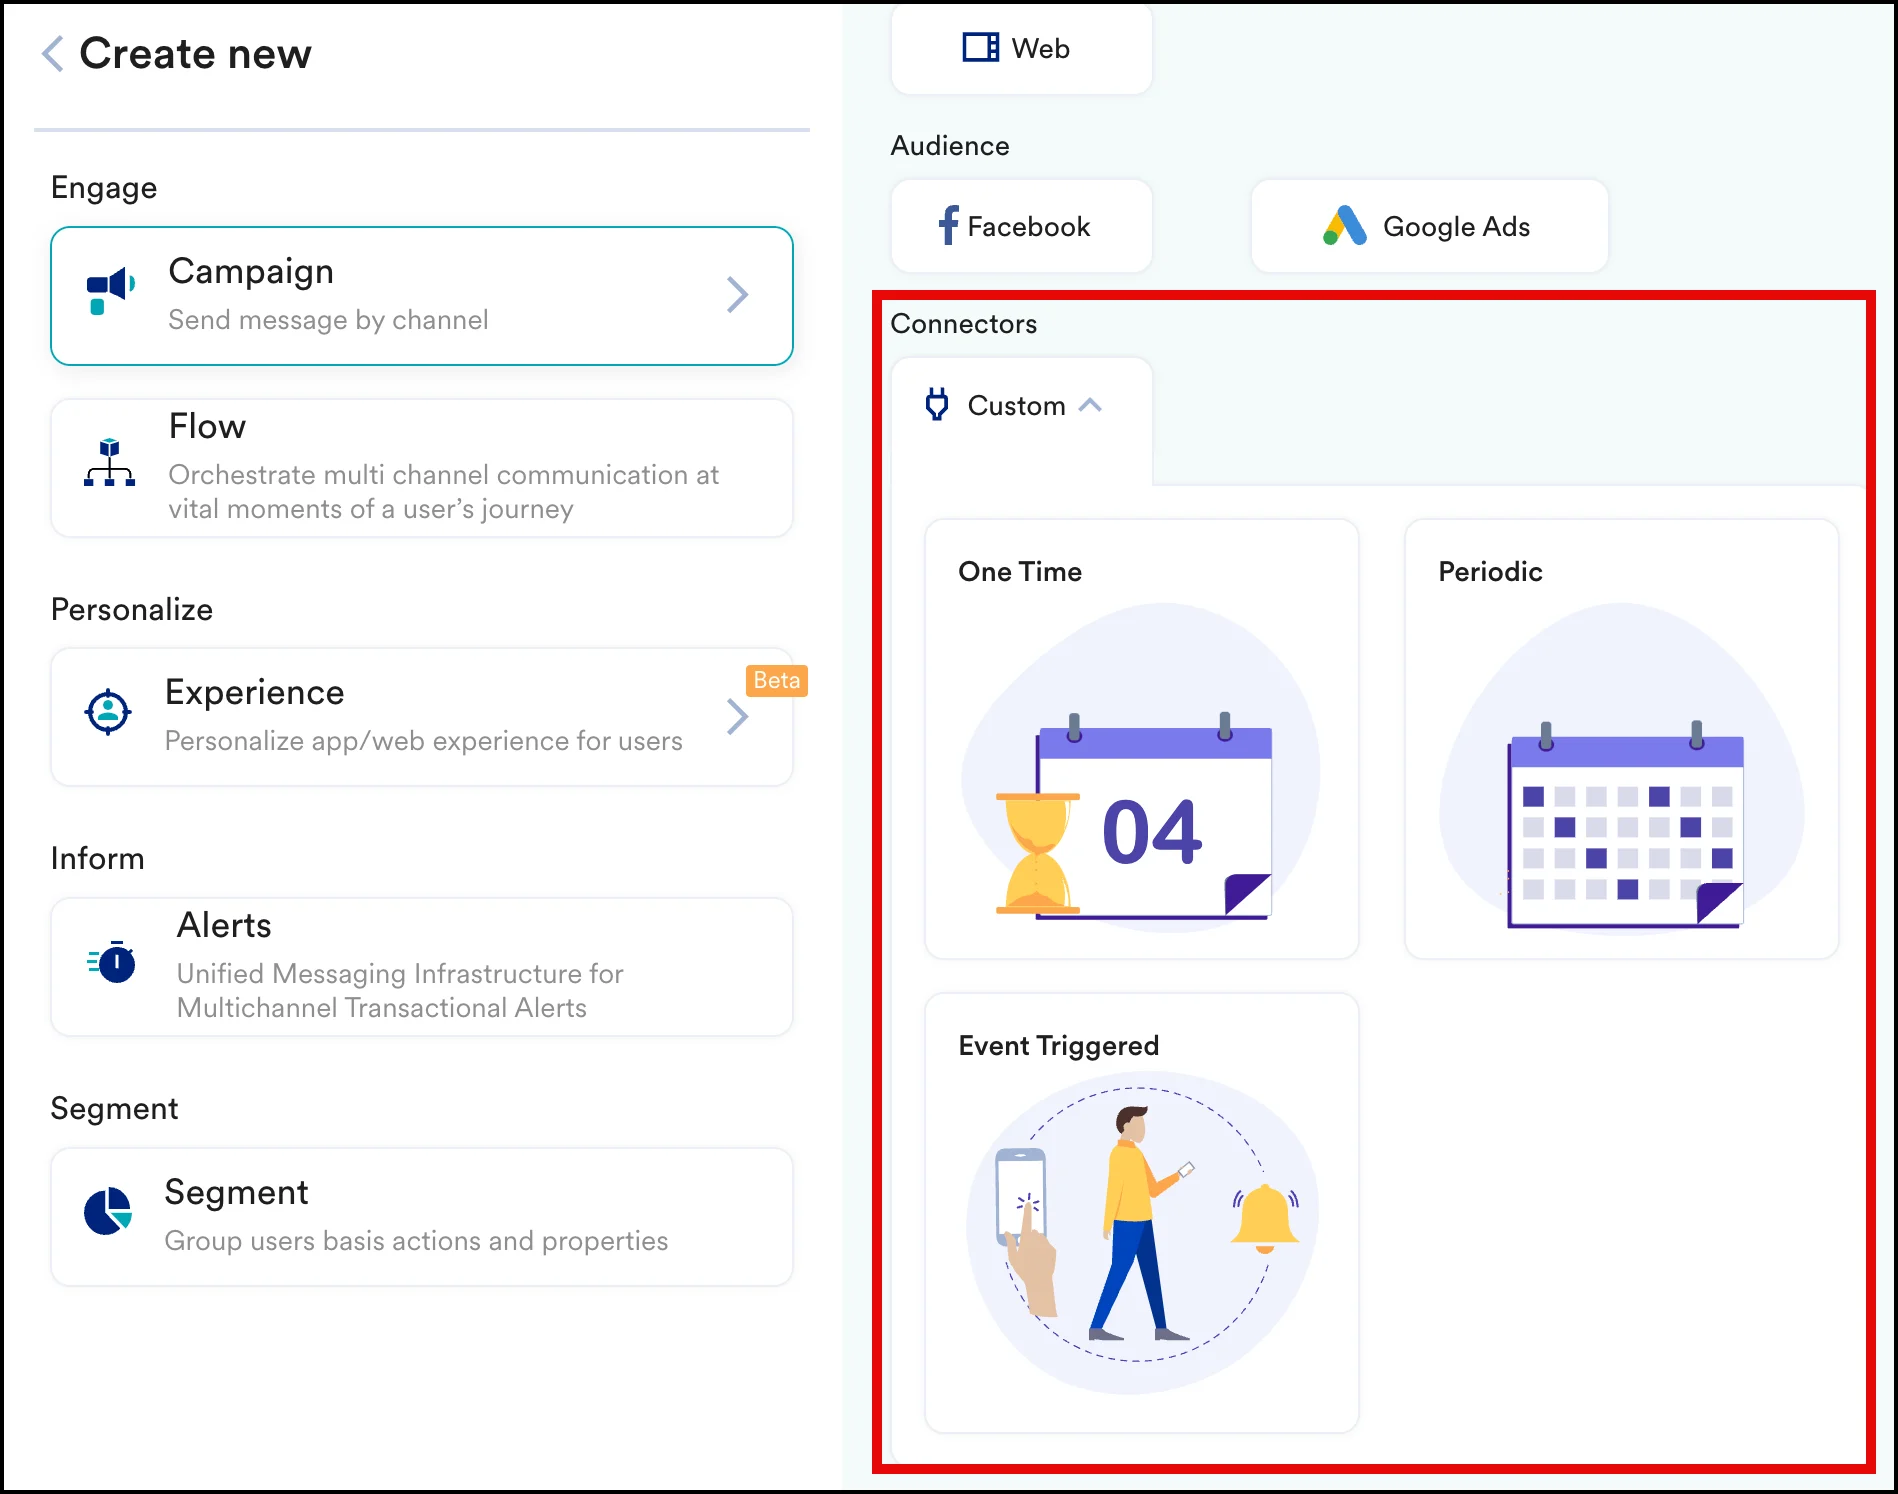
1. Navigate to **Create Campaign** > **Connectors** > **Custom** and choose the delivery type most suitable to your needs
Read more on pre-formatted fields, example queries, parameter details, and query export job scheduling on Treasure Data [here](https://docs.treasure.ai/int/web-server-and-http-put-endpoint-export-integration).
### Step 4: Validate data on MoEngage
You can search for the new users and see users and events getting created.
## Send campaign interaction data back to Treasure Data
Treasure Data users can ingest data through its [Postback APIs](https://docs.treasure.ai/products/customer-data-platform/integration-hub/streaming/postback-api) via Connector Campaigns. To create a connector campaign on MoEngage,
1. Navigate to **Create Campaign** > **Connectors** > **Custom** and choose the delivery type most suitable to your needs
 2. In step 2 of the campaign, connect to the [Postback APIs](https://docs.treasure.ai/products/customer-data-platform/integration-hub/streaming/postback-api). First, go to your Treasure Data dashboard to [generate](https://docs.treasure.ai/products/my-settings/getting-your-api-keys) your Write-Only Keys.
* **Method**: POST
* **URL**: `/postback/v3/event/{database}/{table}` You can get your Treasure Data's Base URL from [here](https://api-docs.treasuredata.com/en/overview/aboutendpoints/#treasure-data-api-baseurls). Look for the Postback service URLs for your region.
* **Headers**:
| Key | Description |
| ------------------ | ------------------------------------------------------------------------------------------------------------- |
| **Content-Type** | Set this header to `application/json`. |
| **X-TD-Write-Key** | Your Treasure Data [Write-Only API Key](https://docs.treasure.ai/products/my-settings/getting-your-api-keys). |
* **Body**:
```json theme={null}
{
"col1": "val1",
"col2": "val2",
...
}
```
Note that
* You need to pass `"key": "value"` pairs for each of your columns. The key is the column name in your table.
* Treasure Data does not support bulk operations at the moment.
### Preview your request
At this point, your campaign should be ready to test and send. You can also test your connector configuration using the **Test** functionality available in Step 2 of Create Connector Campaign.
2. In step 2 of the campaign, connect to the [Postback APIs](https://docs.treasure.ai/products/customer-data-platform/integration-hub/streaming/postback-api). First, go to your Treasure Data dashboard to [generate](https://docs.treasure.ai/products/my-settings/getting-your-api-keys) your Write-Only Keys.
* **Method**: POST
* **URL**: `/postback/v3/event/{database}/{table}` You can get your Treasure Data's Base URL from [here](https://api-docs.treasuredata.com/en/overview/aboutendpoints/#treasure-data-api-baseurls). Look for the Postback service URLs for your region.
* **Headers**:
| Key | Description |
| ------------------ | ------------------------------------------------------------------------------------------------------------- |
| **Content-Type** | Set this header to `application/json`. |
| **X-TD-Write-Key** | Your Treasure Data [Write-Only API Key](https://docs.treasure.ai/products/my-settings/getting-your-api-keys). |
* **Body**:
```json theme={null}
{
"col1": "val1",
"col2": "val2",
...
}
```
Note that
* You need to pass `"key": "value"` pairs for each of your columns. The key is the column name in your table.
* Treasure Data does not support bulk operations at the moment.
### Preview your request
At this point, your campaign should be ready to test and send. You can also test your connector configuration using the **Test** functionality available in Step 2 of Create Connector Campaign.
 You can go ahead and Publish the campaign.