> ## Documentation Index
> Fetch the complete documentation index at: https://moengage.com/docs/llms.txt
> Use this file to discover all available pages before exploring further.
# PostHog
## Introduction
[PostHog](https://posthog.com/) offers a suite of product analysis tools, including funnels, heat maps, session recording, and more, all in a single platform.
## MoEngage × PostHog
With the MoEngage and PostHog integration, you can forward events being tracked in MoEngage to your PostHog dashboard to perform holistic analytics on your users' behaviors. You can also forward users to PostHog using MoEngage's Connector Campaigns.
## Integration
**Prerequisites**
* You would need to know your PostHog [project API key](https://posthog.com/docs/api).
### Forward events on MoEngage to PostHog
With MoEngage's Connector Campaigns, you can forward your events to PostHog when they perform any action on your app or website.
To create a connector campaign on MoEngage:
1. Navigate to **Create Campaign** > **Connectors** > **Custom** and choose the delivery type most suitable to your needs. For this example, we will select **Event Triggered** and select the event as **Purchased**. 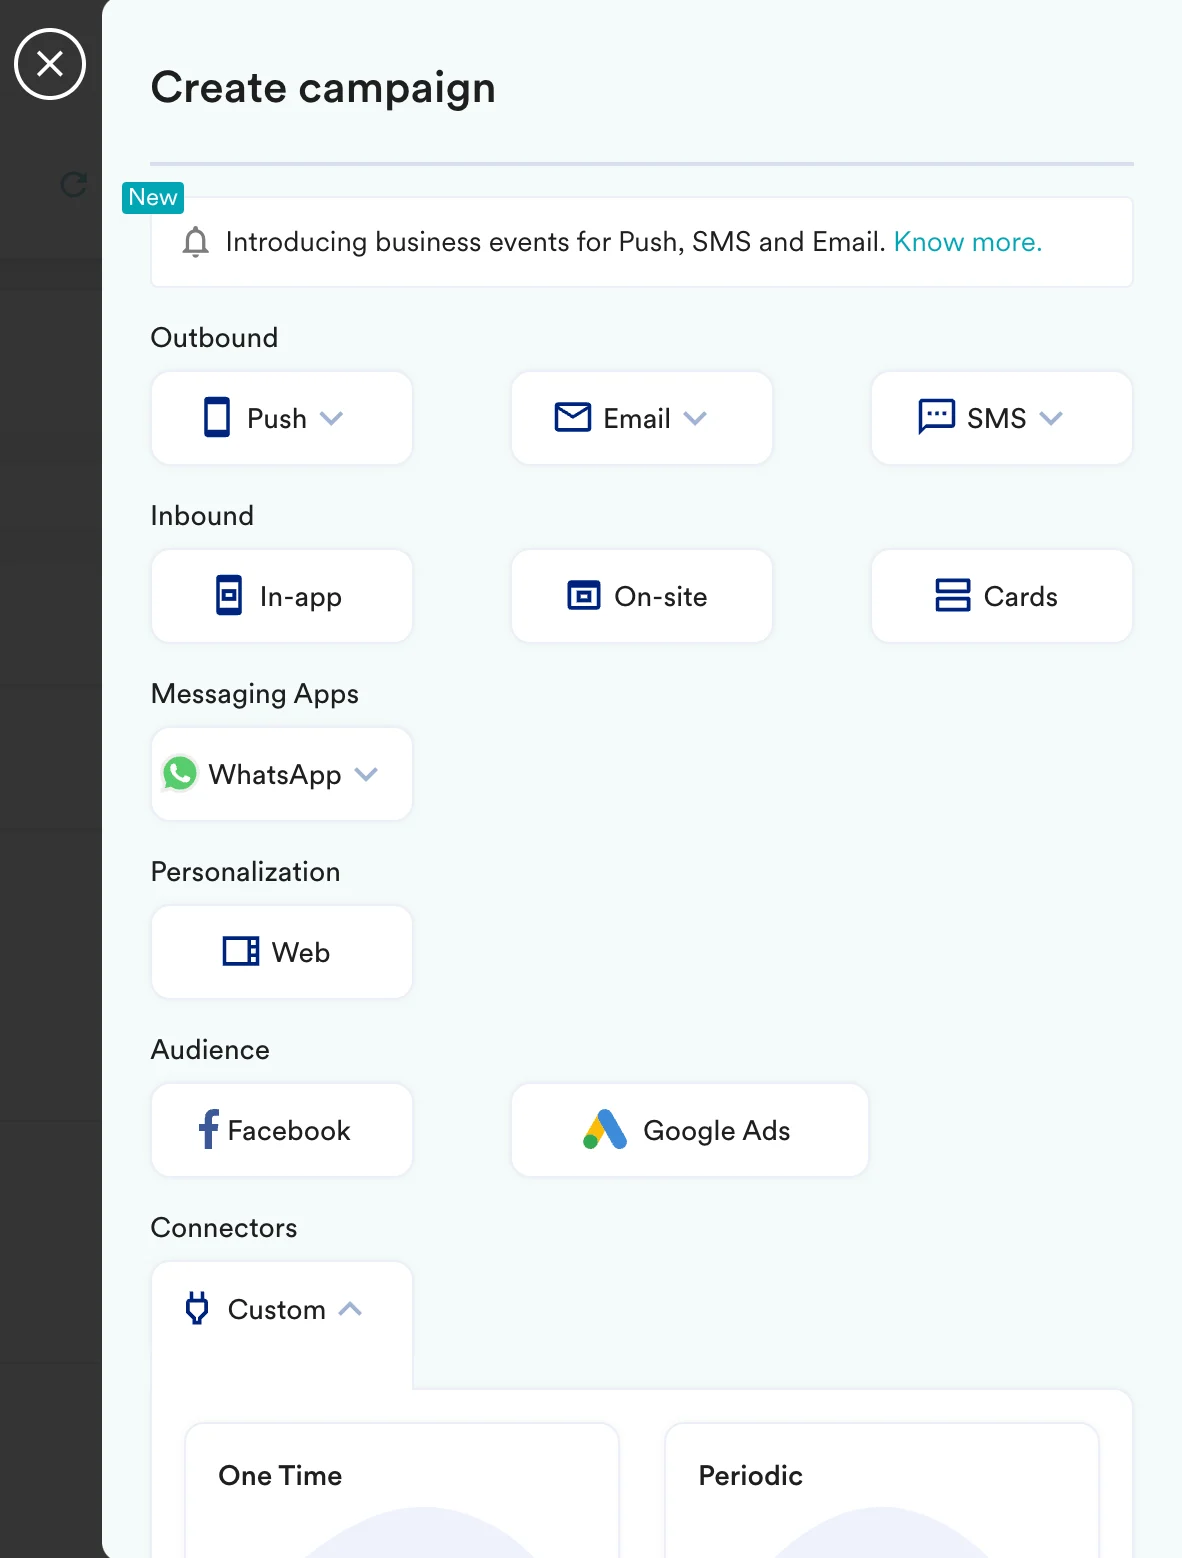 2. On step 2 of the campaign:
#### Call the PostHog API
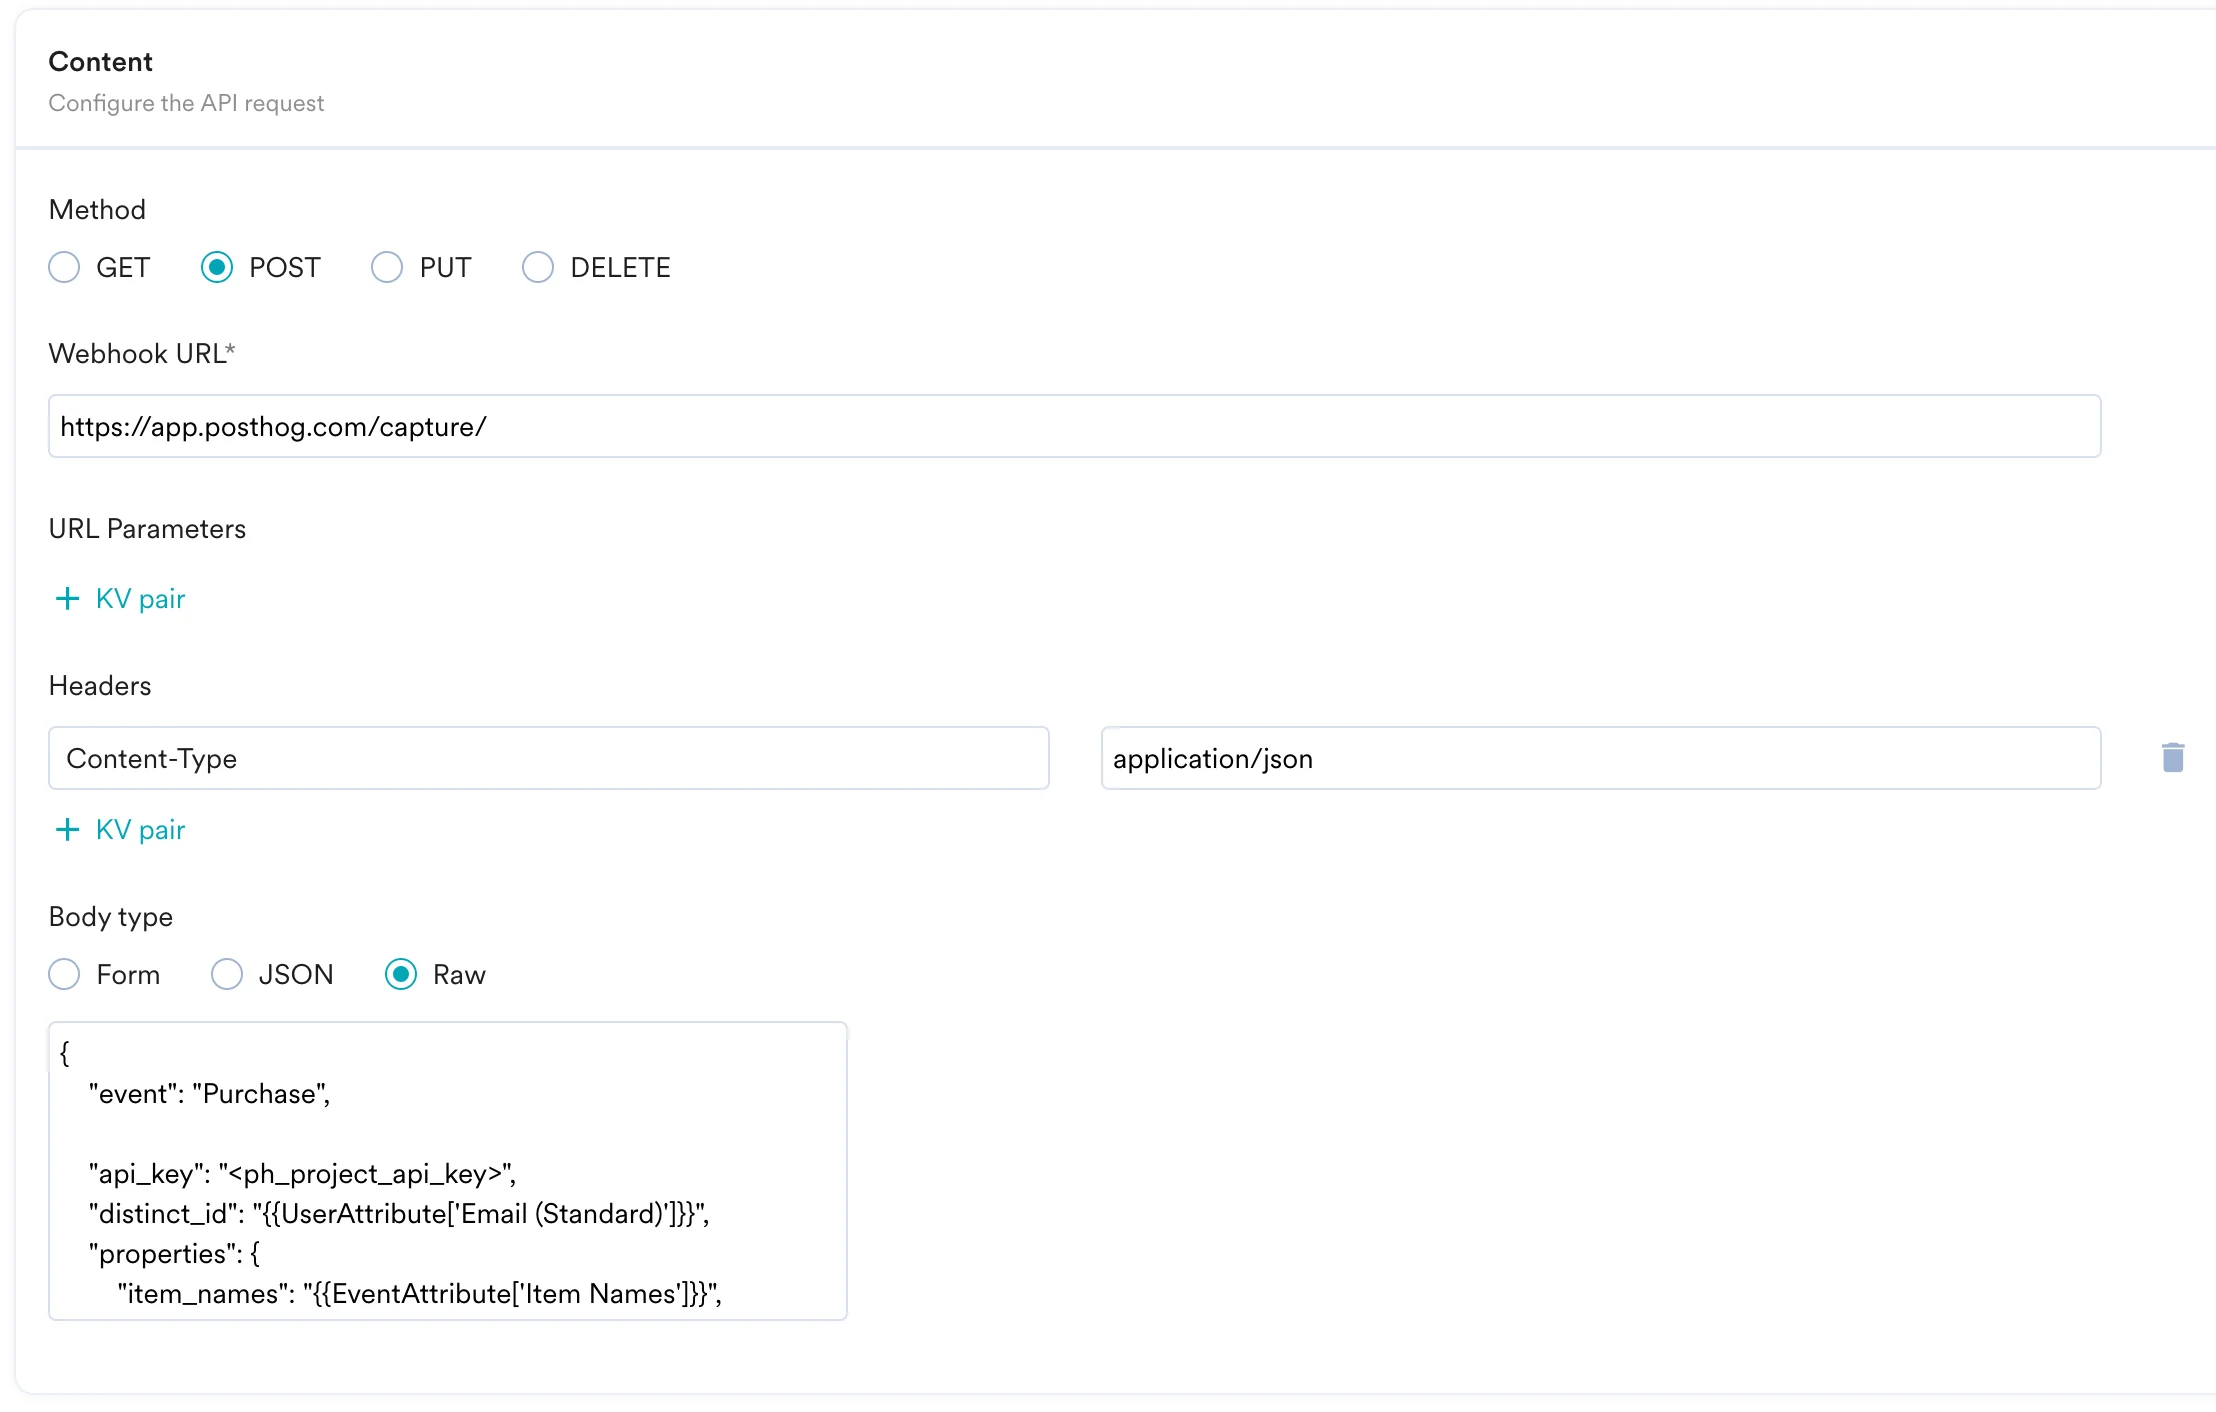
To send your event to Heap, use the `POST` method and configure the payload.
* Select the method as **POST**.
* Headers:
* `Content-Type`: `application/json`
* Add the endpoint as Webhook URL: `https://app.posthog.com/capture/` (for US Cloud) or `https://eu.posthog.com/capture/` (for EU Cloud).
* Body: Type **@** to personalize your payload.
```json JSON theme={null}
{
"event": "Purchase",
"api_key": "",
"distinct_id": "{{UserAttribute['Email (Standard)']}}",
"properties": {
"item_names": "{{EventAttribute['Item Names']}}",
"value": "{{EventAttribute['Value']}}"
}
}
```
2. On step 2 of the campaign:
#### Call the PostHog API
To send your event to Heap, use the `POST` method and configure the payload.
* Select the method as **POST**.
* Headers:
* `Content-Type`: `application/json`
* Add the endpoint as Webhook URL: `https://app.posthog.com/capture/` (for US Cloud) or `https://eu.posthog.com/capture/` (for EU Cloud).
* Body: Type **@** to personalize your payload.
```json JSON theme={null}
{
"event": "Purchase",
"api_key": "",
"distinct_id": "{{UserAttribute['Email (Standard)']}}",
"properties": {
"item_names": "{{EventAttribute['Item Names']}}",
"value": "{{EventAttribute['Value']}}"
}
}
```
 * Refer to the [PostHog API documentation](https://posthog.com/docs/api/post-only-endpoints) for more information.
#### Preview your request
At this point, your campaign should be ready to test and send. You can also test your connector configuration using the **Test** functionality available in Step 2 of Create Connector Campaign.
* Refer to the [PostHog API documentation](https://posthog.com/docs/api/post-only-endpoints) for more information.
#### Preview your request
At this point, your campaign should be ready to test and send. You can also test your connector configuration using the **Test** functionality available in Step 2 of Create Connector Campaign.
 You can go ahead and Publish the campaign.
### Forward users on MoEngage to PostHog
To forward MoEngage users to PostHog, or update their properties on PostHog, set up a MoEngage Connector Campaign as shown above and use the [PostHog Identify API](https://posthog.com/docs/api/post-only-endpoints#identify) to create or update users inside PostHog.
You can go ahead and Publish the campaign.
### Forward users on MoEngage to PostHog
To forward MoEngage users to PostHog, or update their properties on PostHog, set up a MoEngage Connector Campaign as shown above and use the [PostHog Identify API](https://posthog.com/docs/api/post-only-endpoints#identify) to create or update users inside PostHog.