> ## Documentation Index
> Fetch the complete documentation index at: https://moengage.com/docs/llms.txt
> Use this file to discover all available pages before exploring further.
# Outbound: User and Event Forwarding
# Introduction
With the MoEngage and Zeotap integration, you can sync your valuable user and event data directly from Zeotap's platform to MoEngage. This integration enables you to enrich user profiles for enhanced segmentation and personalized campaigns.
The Zeotap integration does not currently support [Unified Identity (Identity Resolution)](/user-guide/data/user-data/unified-identity-identity-resolution) and [Portfolio](/user-guide/settings/account/portfolio/portfolio).
## Supported Data Types
| Type | Details |
| --------------- | ----------------------------------------------------------------------------------------------------------------------------------------------------------------------------- |
| User Identities | Users are matched between platforms using a unique identifier. Currently, MoEngage supports only the `customer_id`. |
| User Attributes | You can sync any standard or custom user attributes from Zeotap to corresponding attributes in MoEngage. This includes data such as Name, First Name, or other custom fields. |
# Integration
Ensure you have the following:
* An active Zeotap account.
* Access to your MoEngage dashboard settings.
## Step 1: Get Your MoEngage Endpoint
To get your MoEngage API credentials, perform the following steps:
1. On the left navigation menu in the MoEngage UI, go to **Settings** > **Account** > **APIs**.
2. On the **API** page, copy the following credentials:
1. Copy the ID under **Workspace ID** (**earlier app id**).
2. Copy the **Data** under **API keys**.
3. **Data Center** : Find your data center code from your dashboard's URL. The following table describes the data center name and URL:
| Data Center Name | Dashboard URL |
| ---------------- | ---------------------------------------------------------------------- |
| DC-01 | [https://dashboard-01.moengage.com](https://dashboard-01.moengage.com) |
| DC-02 | [https://dashboard-02.moengage.com](https://dashboard-02.moengage.com) |
| DC-03 | [https://dashboard-03.moengage.com](https://dashboard-03.moengage.com) |
| DC-04 | [https://dashboard-04.moengage.com](https://dashboard-04.moengage.com) |
| DC-05 | [https://dashboard-05.moengage.com](https://dashboard-05.moengage.com) |
| DC-06 | [https://dashboard-06.moengage.com](https://dashboard-06.moengage.com) |
For more information, refer [here](/user-guide/data/key-concepts/data-centers-in-moengage#01G5DQVXGT2KZMXTJPF77QPJ25).
## Step 2: Create a MoEngage Destination in Zeotap
To create a MoEngage destination in Zeotap, perform the following steps:
1. Log in to your Zeotap dashboard, navigate to **Integrate** > **Destinations**.
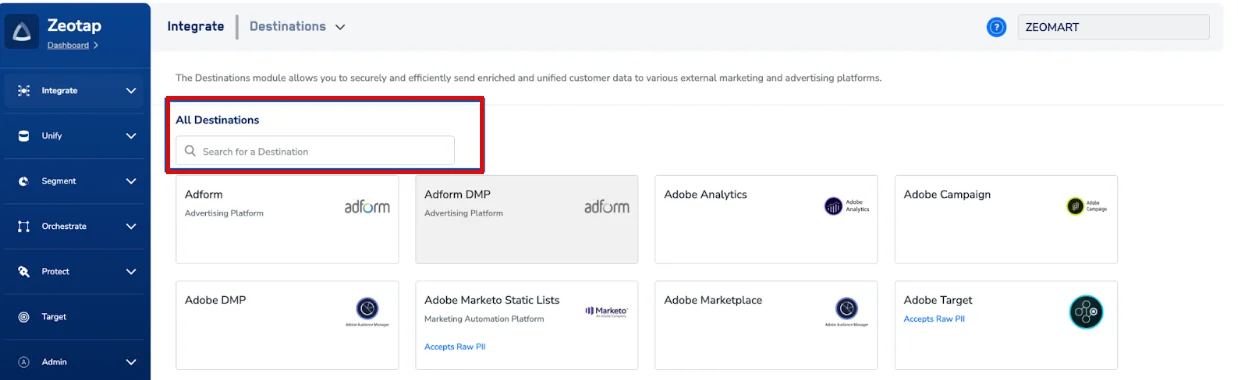
2. On the **Destinations** page, click **+ Create Destination** in the upper-right corner.\ 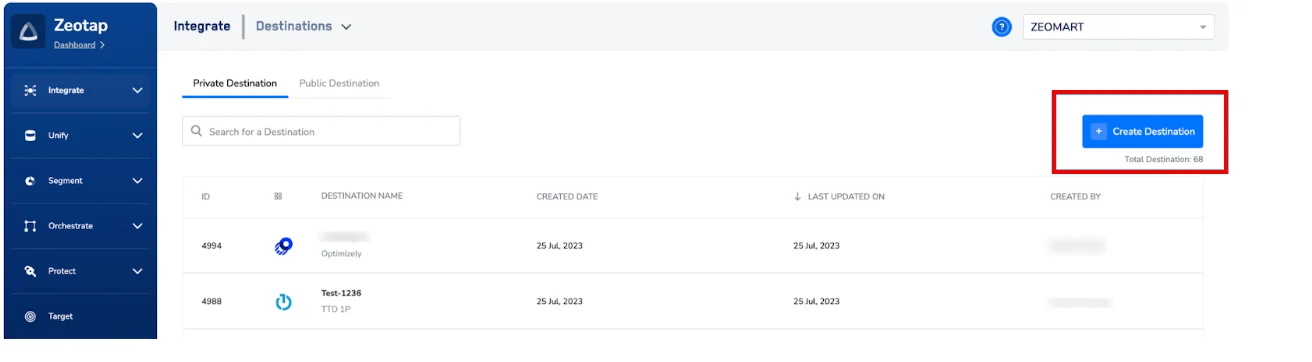 3. Under **All Destinations** , in the **Search for a** **Destination** box, type MoEngage.
  4. Click the **MoEngage** tile.\
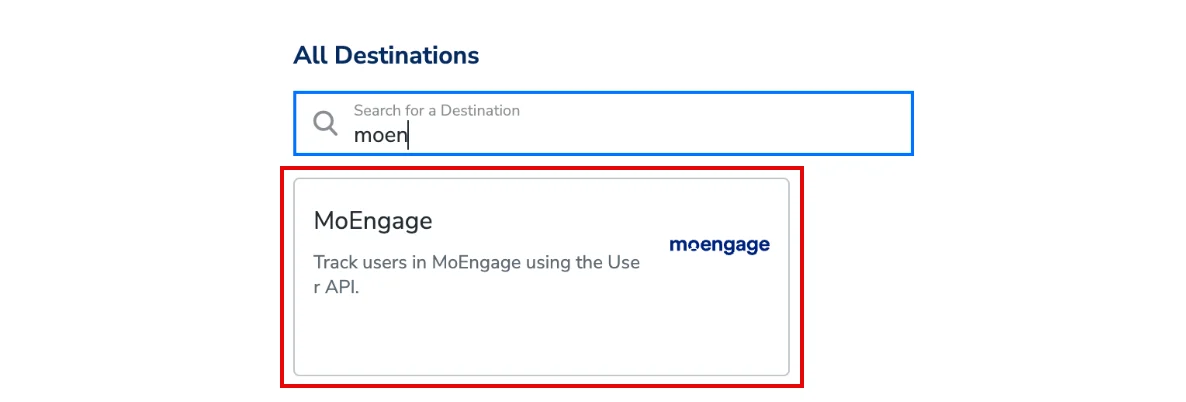 \
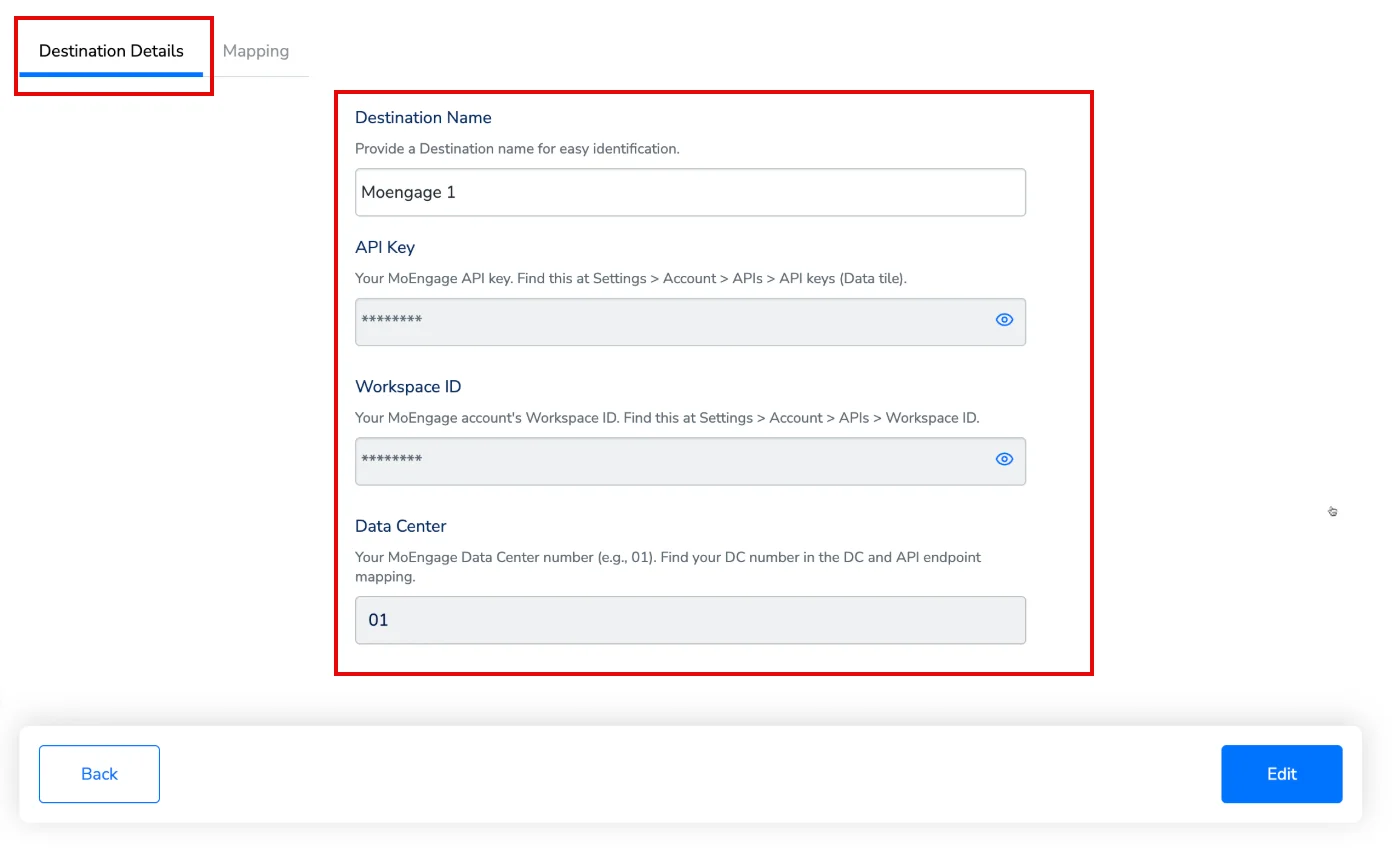
The Destination Details configuration page appears.
5. On the **Destination** **Details** tab, provide the following details:
1. In the **Destination Name** box, type a name for the destination.
2. In the **API Key box** , type your MoEngage API key.
3. In the **Workspace ID** box, type your MoEngage account's Workspace ID.
4. In the **Data Center** box, type your MoEngage Data Center number.
5. Click **Next**. The MoEngage destination is now active in your journey.
\
The Destination Details configuration page appears.
5. On the **Destination** **Details** tab, provide the following details:
1. In the **Destination Name** box, type a name for the destination.
2. In the **API Key box** , type your MoEngage API key.
3. In the **Workspace ID** box, type your MoEngage account's Workspace ID.
4. In the **Data Center** box, type your MoEngage Data Center number.
5. Click **Next**. The MoEngage destination is now active in your journey.
 The **Mapping** configuration page appears.
6. Select the action (**Add Audience to segment** , **Send events to moengage** , and **Sync User**) you want to perform in MoEngage based on your specific use case. For example, in this use case, the action is **Create User** , which instructs MoEngage to either create a new user profile or update an existing one with the data from Zeotap.
7. Under **Choose your Action** , in the drop-down list, select **Create User**.
8. Under **Map the Fields** , map the **Catalogue Field** from Zeotap to the corresponding **Destination Field** in MoEngage:
* **Identifiers** : Map the **Email Raw** field to the **Email/Customer ID**\* field. This is a mandatory field.
* **Attributes** : Map the necessary Zeotap fields to their corresponding MoEngage fields, such as **Name** and **First Name**.
9. Click **Create Destination** to save the configuration.\
**Note** : To sync multiple user identifiers, click **+Add Mapping**. This allows you to create new rows for mapping standard attributes (such as Name) and any custom fields you require.
The **Mapping** configuration page appears.
6. Select the action (**Add Audience to segment** , **Send events to moengage** , and **Sync User**) you want to perform in MoEngage based on your specific use case. For example, in this use case, the action is **Create User** , which instructs MoEngage to either create a new user profile or update an existing one with the data from Zeotap.
7. Under **Choose your Action** , in the drop-down list, select **Create User**.
8. Under **Map the Fields** , map the **Catalogue Field** from Zeotap to the corresponding **Destination Field** in MoEngage:
* **Identifiers** : Map the **Email Raw** field to the **Email/Customer ID**\* field. This is a mandatory field.
* **Attributes** : Map the necessary Zeotap fields to their corresponding MoEngage fields, such as **Name** and **First Name**.
9. Click **Create Destination** to save the configuration.\
**Note** : To sync multiple user identifiers, click **+Add Mapping**. This allows you to create new rows for mapping standard attributes (such as Name) and any custom fields you require. 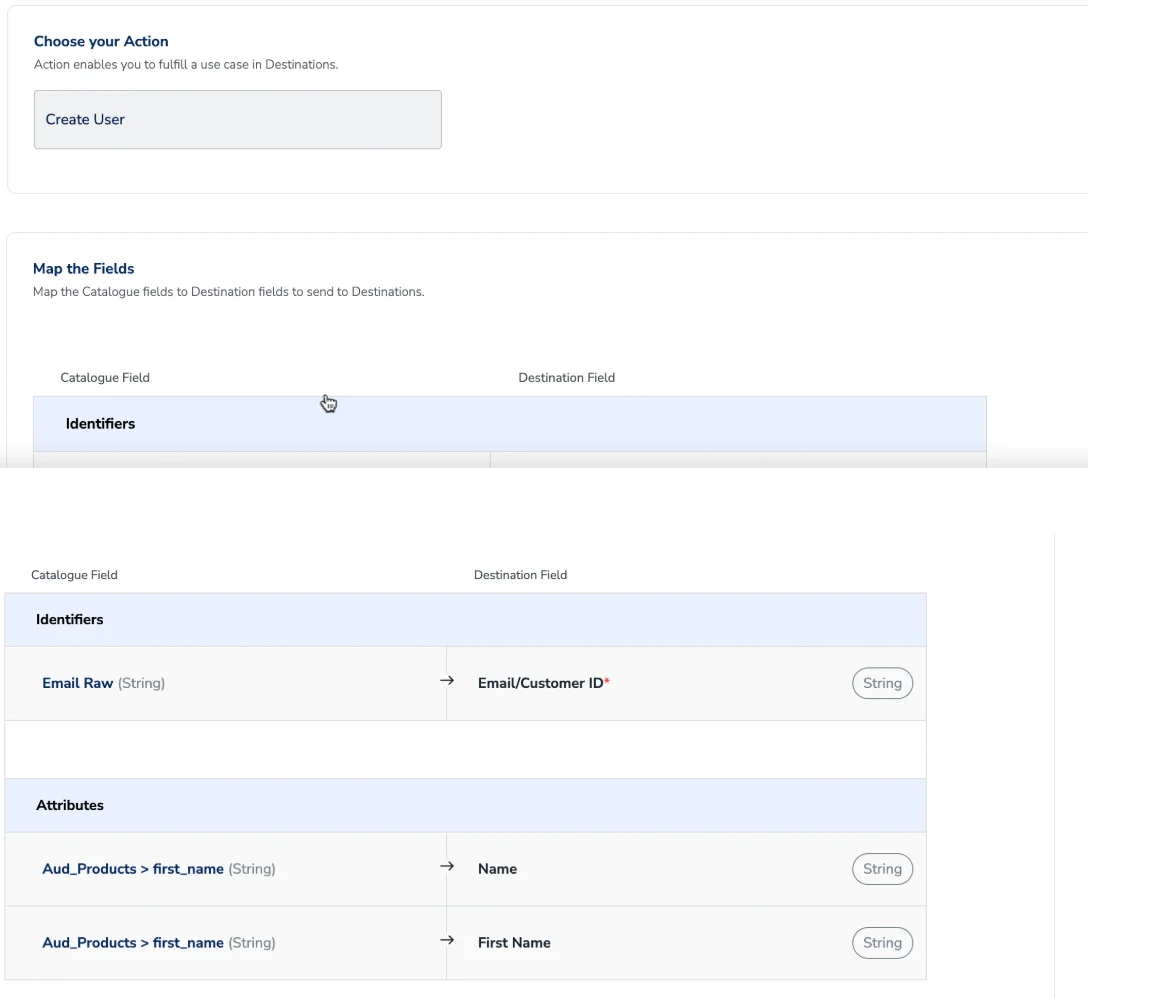 10. Click **Save Mapping**.
After creating the destination, you can link your new destination in the Zeotap Journey app to send user data to MoEngage.
## Step 3: Activate the Destination in a Zeotap Journey
To activate the destination in a Zeotap Journey, perform the following steps:
1. Navigate to the **Orchestrate** section in Zeotap and open the Journey (workflow) where you want to add the destination.
2. In the workflow canvas, click the **+** icon to add a new action.
3. On the **Choose an action** menu, click **Send to Destinations**.
10. Click **Save Mapping**.
After creating the destination, you can link your new destination in the Zeotap Journey app to send user data to MoEngage.
## Step 3: Activate the Destination in a Zeotap Journey
To activate the destination in a Zeotap Journey, perform the following steps:
1. Navigate to the **Orchestrate** section in Zeotap and open the Journey (workflow) where you want to add the destination.
2. In the workflow canvas, click the **+** icon to add a new action.
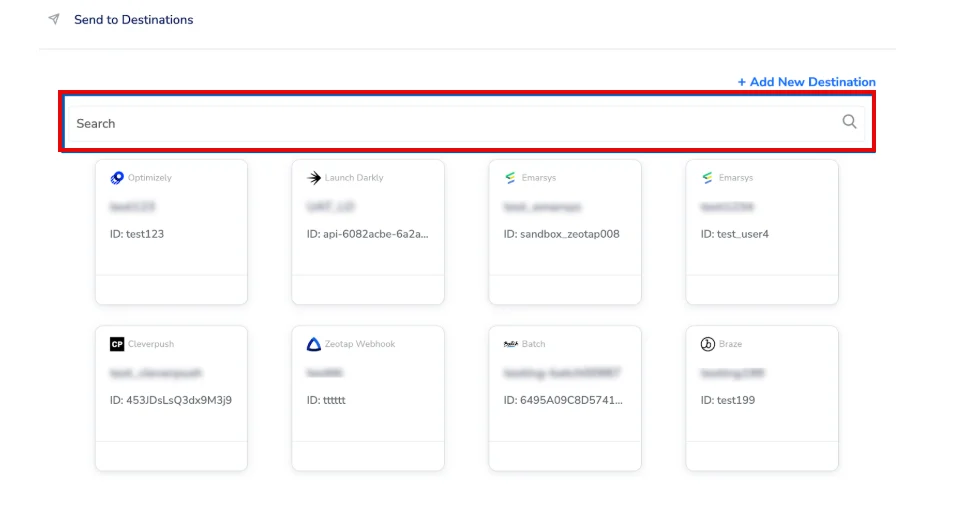
3. On the **Choose an action** menu, click **Send to Destinations**. 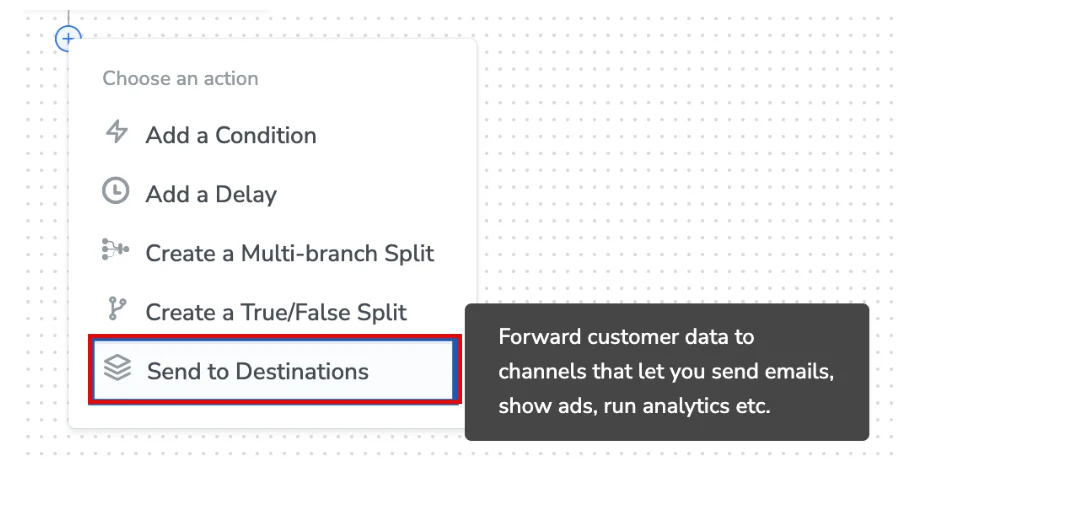 4. In the **Search** box, type the MoEngage destination you created earlier.\
  5. On the **Destination Details** tab, verify the **API Key** and **Data Center** fields, which are automatically populated with the details from your destination's configuration.
6. Click **Save Destination**.
5. On the **Destination Details** tab, verify the **API Key** and **Data Center** fields, which are automatically populated with the details from your destination's configuration.
6. Click **Save Destination**. 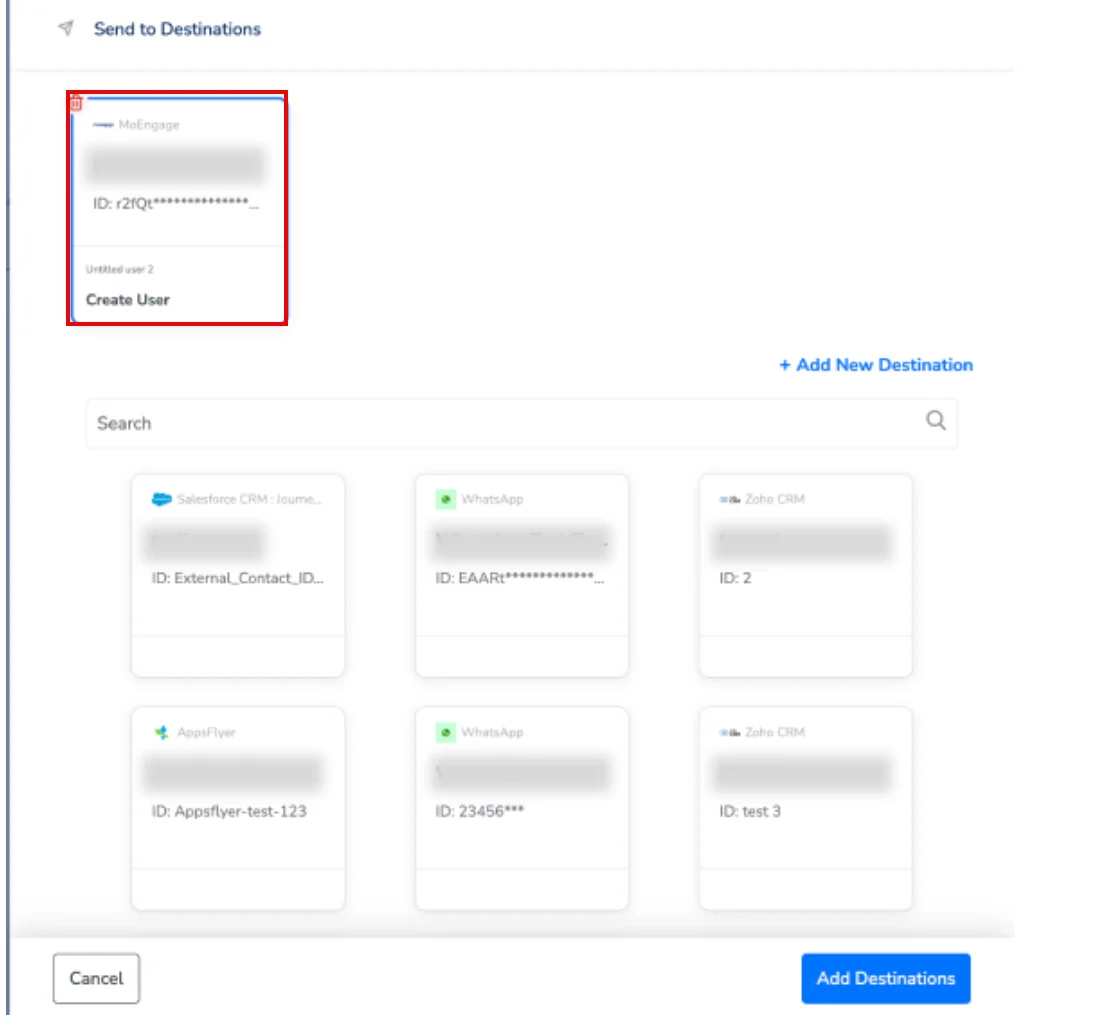 # Rate Limits
To maintain platform stability, MoEngage limits ingestion of Zeotap data to a maximum of 500 requests per second (RPS) per workspace. If your workspace exceeds this limit, MoEngage returns an HTTP `429 (Too Many Requests)` status code. Refer to Zeotap's documentation on default retry policy to understand how rate limiting affects your data flow.
**Retry Exhaustion**: If Zeotap exhausts all retry attempts for a batch of data, you must contact the Zeotap Support Team to replay the failed requests.
# Rate Limits
To maintain platform stability, MoEngage limits ingestion of Zeotap data to a maximum of 500 requests per second (RPS) per workspace. If your workspace exceeds this limit, MoEngage returns an HTTP `429 (Too Many Requests)` status code. Refer to Zeotap's documentation on default retry policy to understand how rate limiting affects your data flow.
**Retry Exhaustion**: If Zeotap exhausts all retry attempts for a batch of data, you must contact the Zeotap Support Team to replay the failed requests.