> ## Documentation Index
> Fetch the complete documentation index at: https://moengage.com/docs/llms.txt
> Use this file to discover all available pages before exploring further.
# Airtable
# Introduction
[Airtable](https://airtable.com/) is an easy-to-use online platform for creating and sharing relational databases.
# MoEngage × Airtable
The MoEngage and Airtable integration allows you to forward user and event data from MoEngage to your Airtables, allowing you to store all your data in one place for further processing and analytics. With this integration, you can -
1. Forward data to Airtable using MoEngage Connector Campaigns
# Integration Prerequisites
* Ensure you have access to your Airtable account.
* Ensure you have access to Data API keys in the MoEngage Dashboard. The Data API ID and Data API Key are available at **Settings** -> **Account** -> **APIs**. The Data API ID is the same as the **Workspace ID.** The Data API Key is available on the same screen in the **API Keys** -> **Data** section.
## Send data from MoEngage to Airtable
### Step 1: Get your Airtable API Access Token
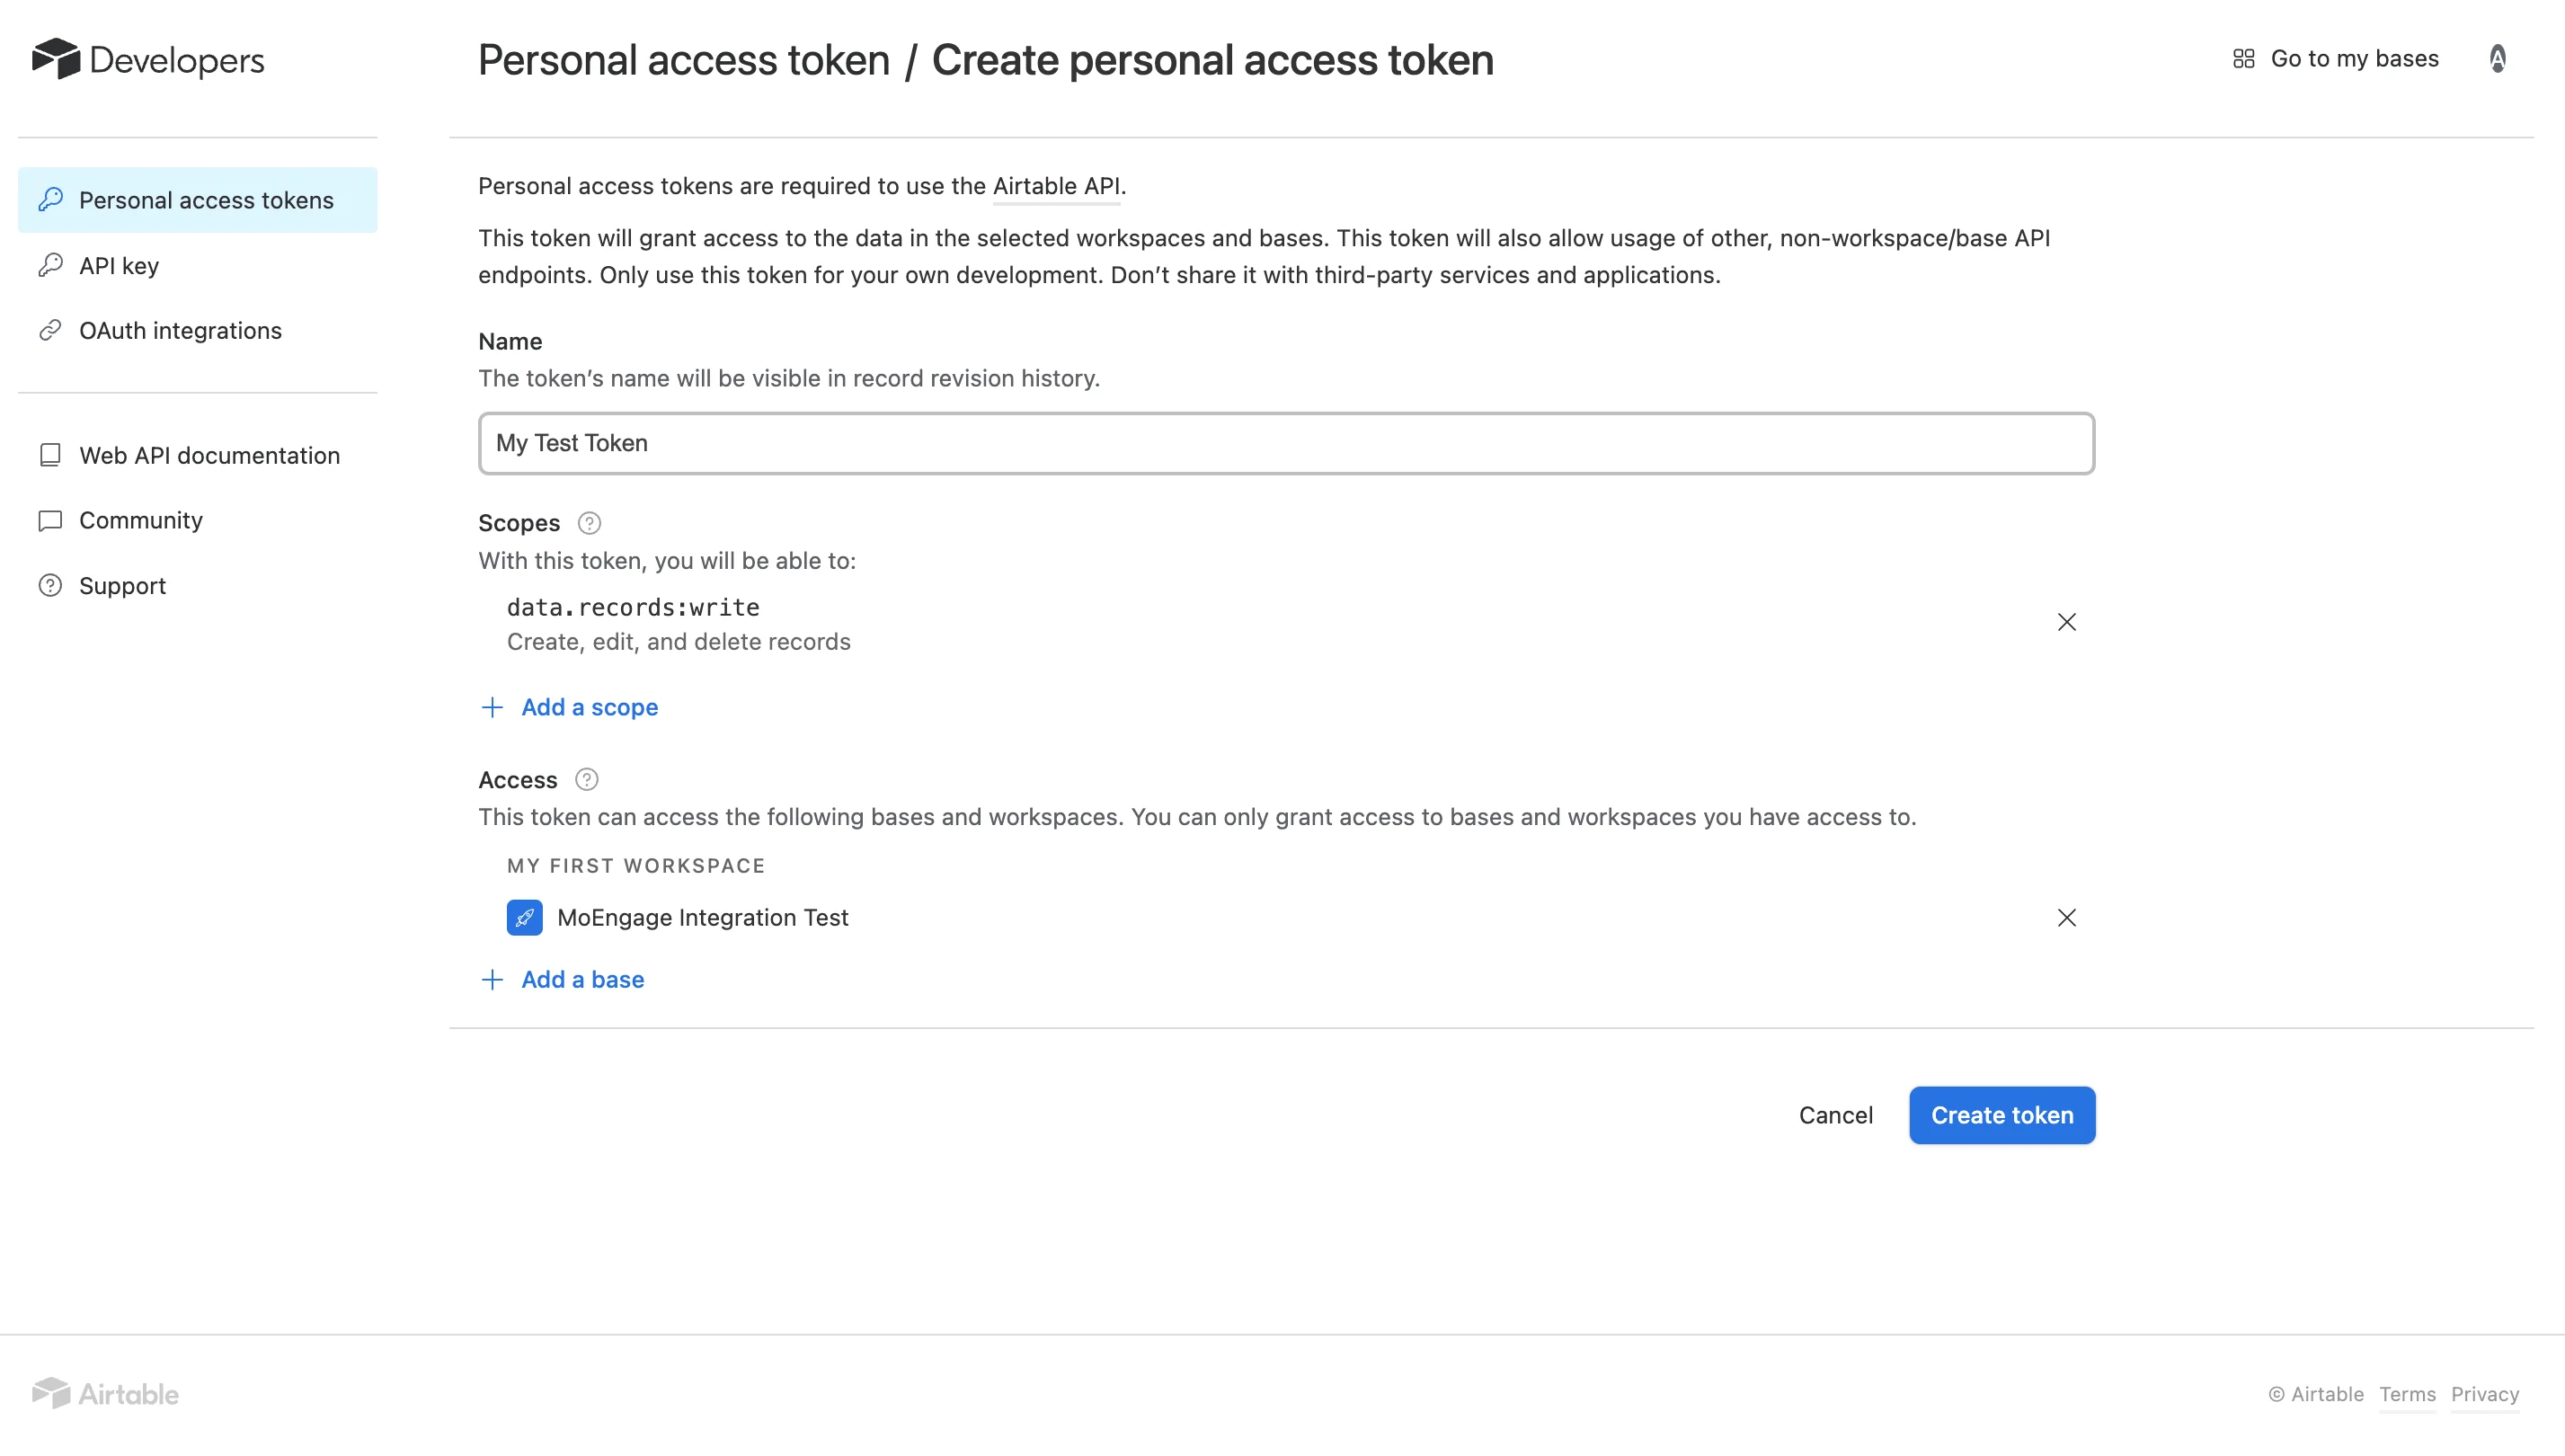 1. On your Airtable Dashboard, click on your Profile Icon on the top right >> Developer hub. Or, go to [/create/token](https://airtable.com/create/tokens).
2. If you have no existing tokens, click on "Create token".
3. Give your token a name, and grant the following scopes:
1. `data.records:write` - Create, edit, or delete records using API
4. Define the "Access" of your token as per your requirements.
5. Click on "Create token" to generate your token. Make a not of this token somewhere safe as Airtable will not show it to you again. You will need to pass this token along with every API call you make from MoEngage.
[Read more](https://airtable.com/developers/web/api/authentication) about the various Authentication methods supported in Airtable APis.
### Step 2: Setup the Connector Campaign in MoEngage Dashboard
1. Navigate to MoEngage Dashboard.
2. Use any one of the following options:
1. On the **All Campaigns** page, click **Create Campaign**.\
The Create Campaign page is displayed.\\
1. On your Airtable Dashboard, click on your Profile Icon on the top right >> Developer hub. Or, go to [/create/token](https://airtable.com/create/tokens).
2. If you have no existing tokens, click on "Create token".
3. Give your token a name, and grant the following scopes:
1. `data.records:write` - Create, edit, or delete records using API
4. Define the "Access" of your token as per your requirements.
5. Click on "Create token" to generate your token. Make a not of this token somewhere safe as Airtable will not show it to you again. You will need to pass this token along with every API call you make from MoEngage.
[Read more](https://airtable.com/developers/web/api/authentication) about the various Authentication methods supported in Airtable APis.
### Step 2: Setup the Connector Campaign in MoEngage Dashboard
1. Navigate to MoEngage Dashboard.
2. Use any one of the following options:
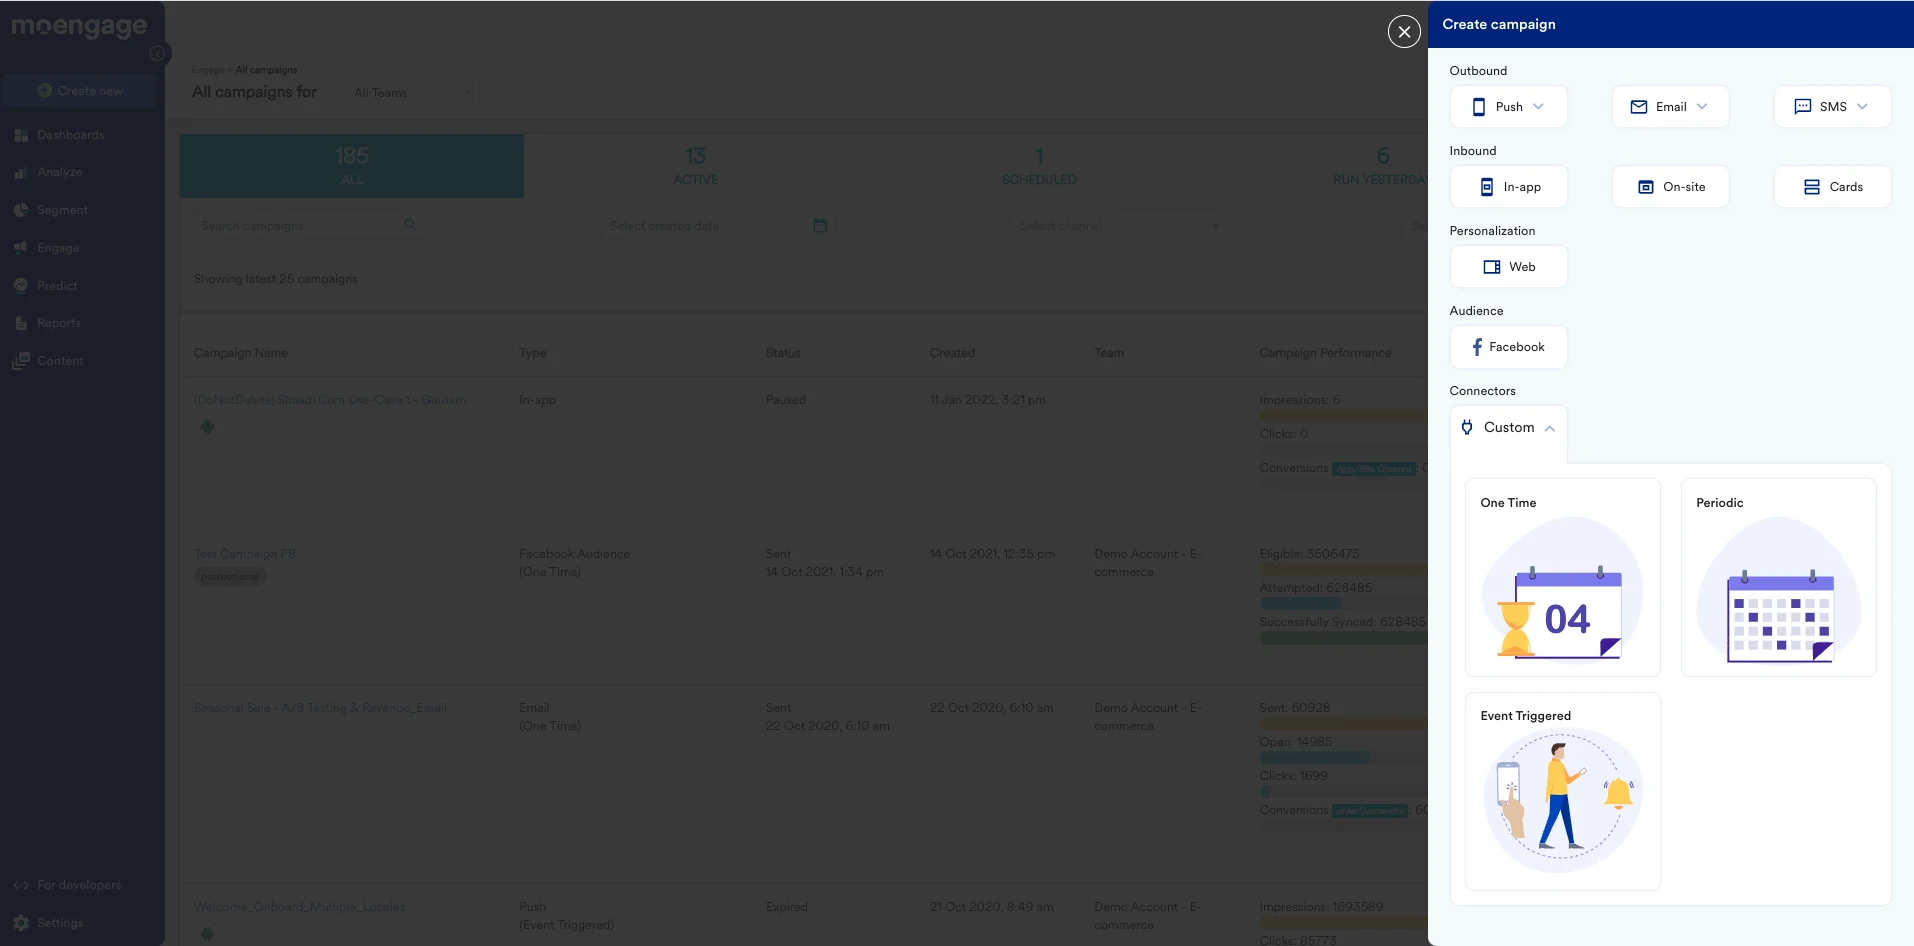
1. On the **All Campaigns** page, click **Create Campaign**.\
The Create Campaign page is displayed.\\
 2. Click **Create New** > **Campaign**.\
The Create Campaign page is displayed.\\
2. Click **Create New** > **Campaign**.\
The Create Campaign page is displayed.\\
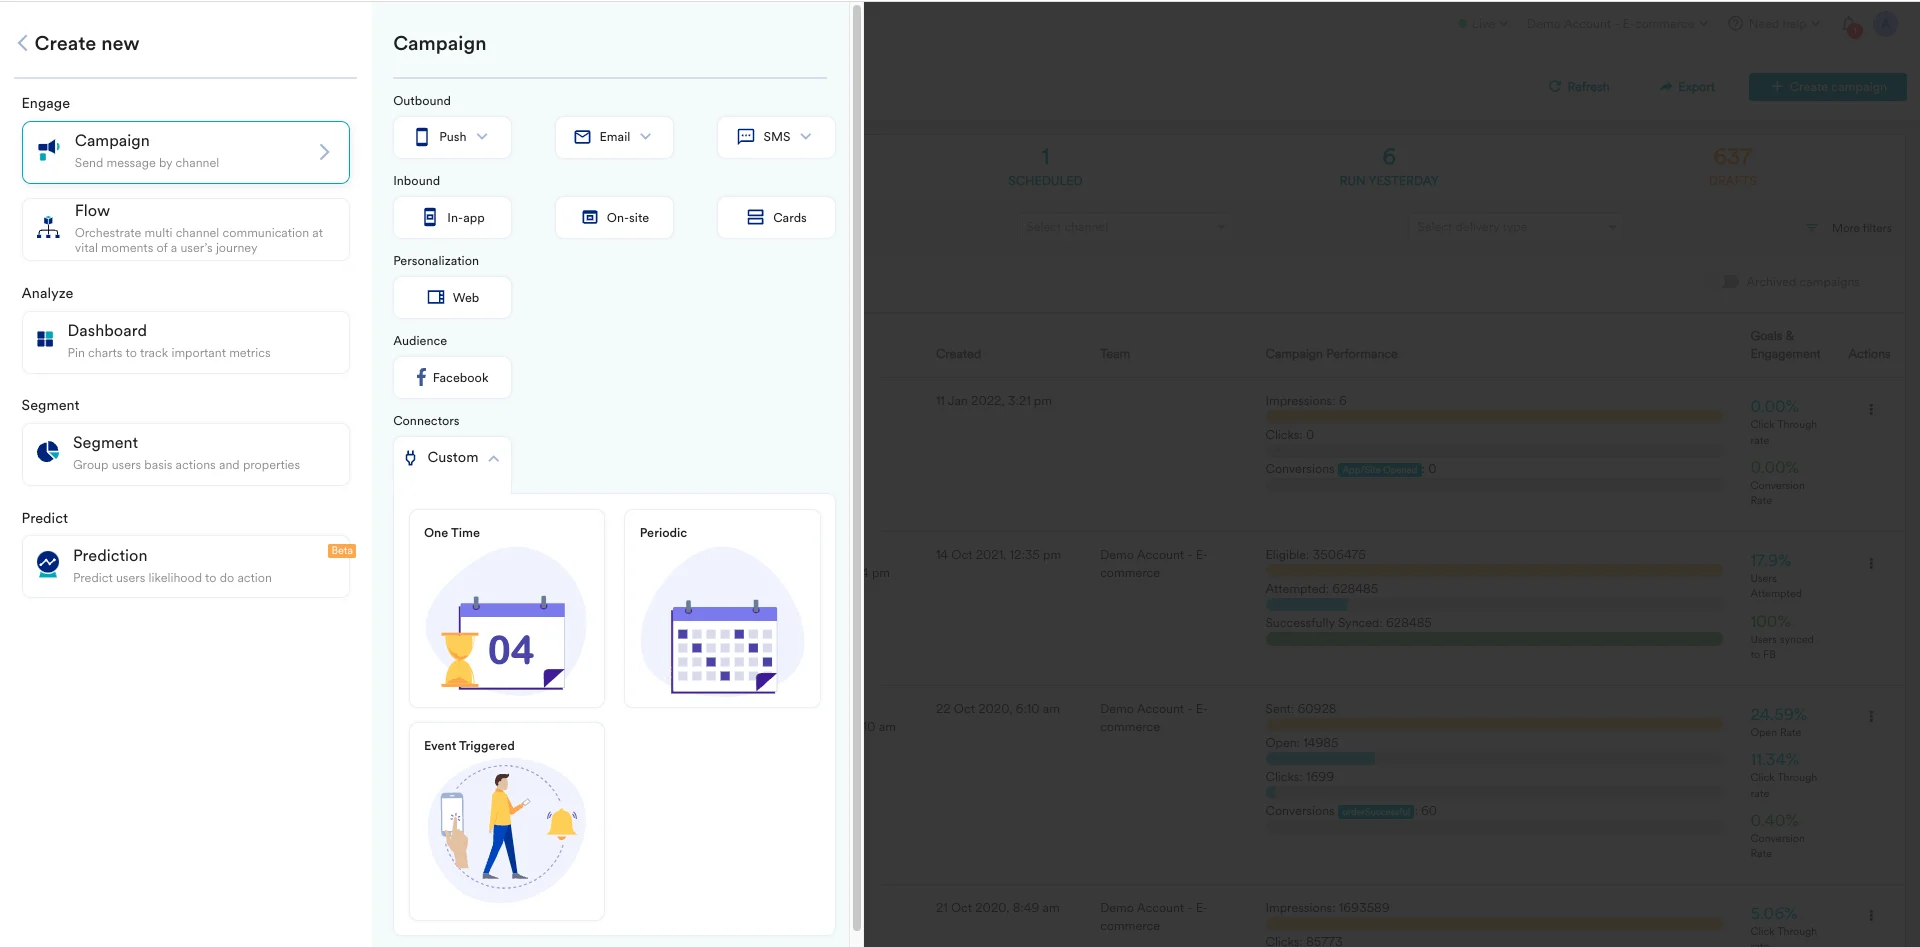 3. Click **Custom** under Connectors.
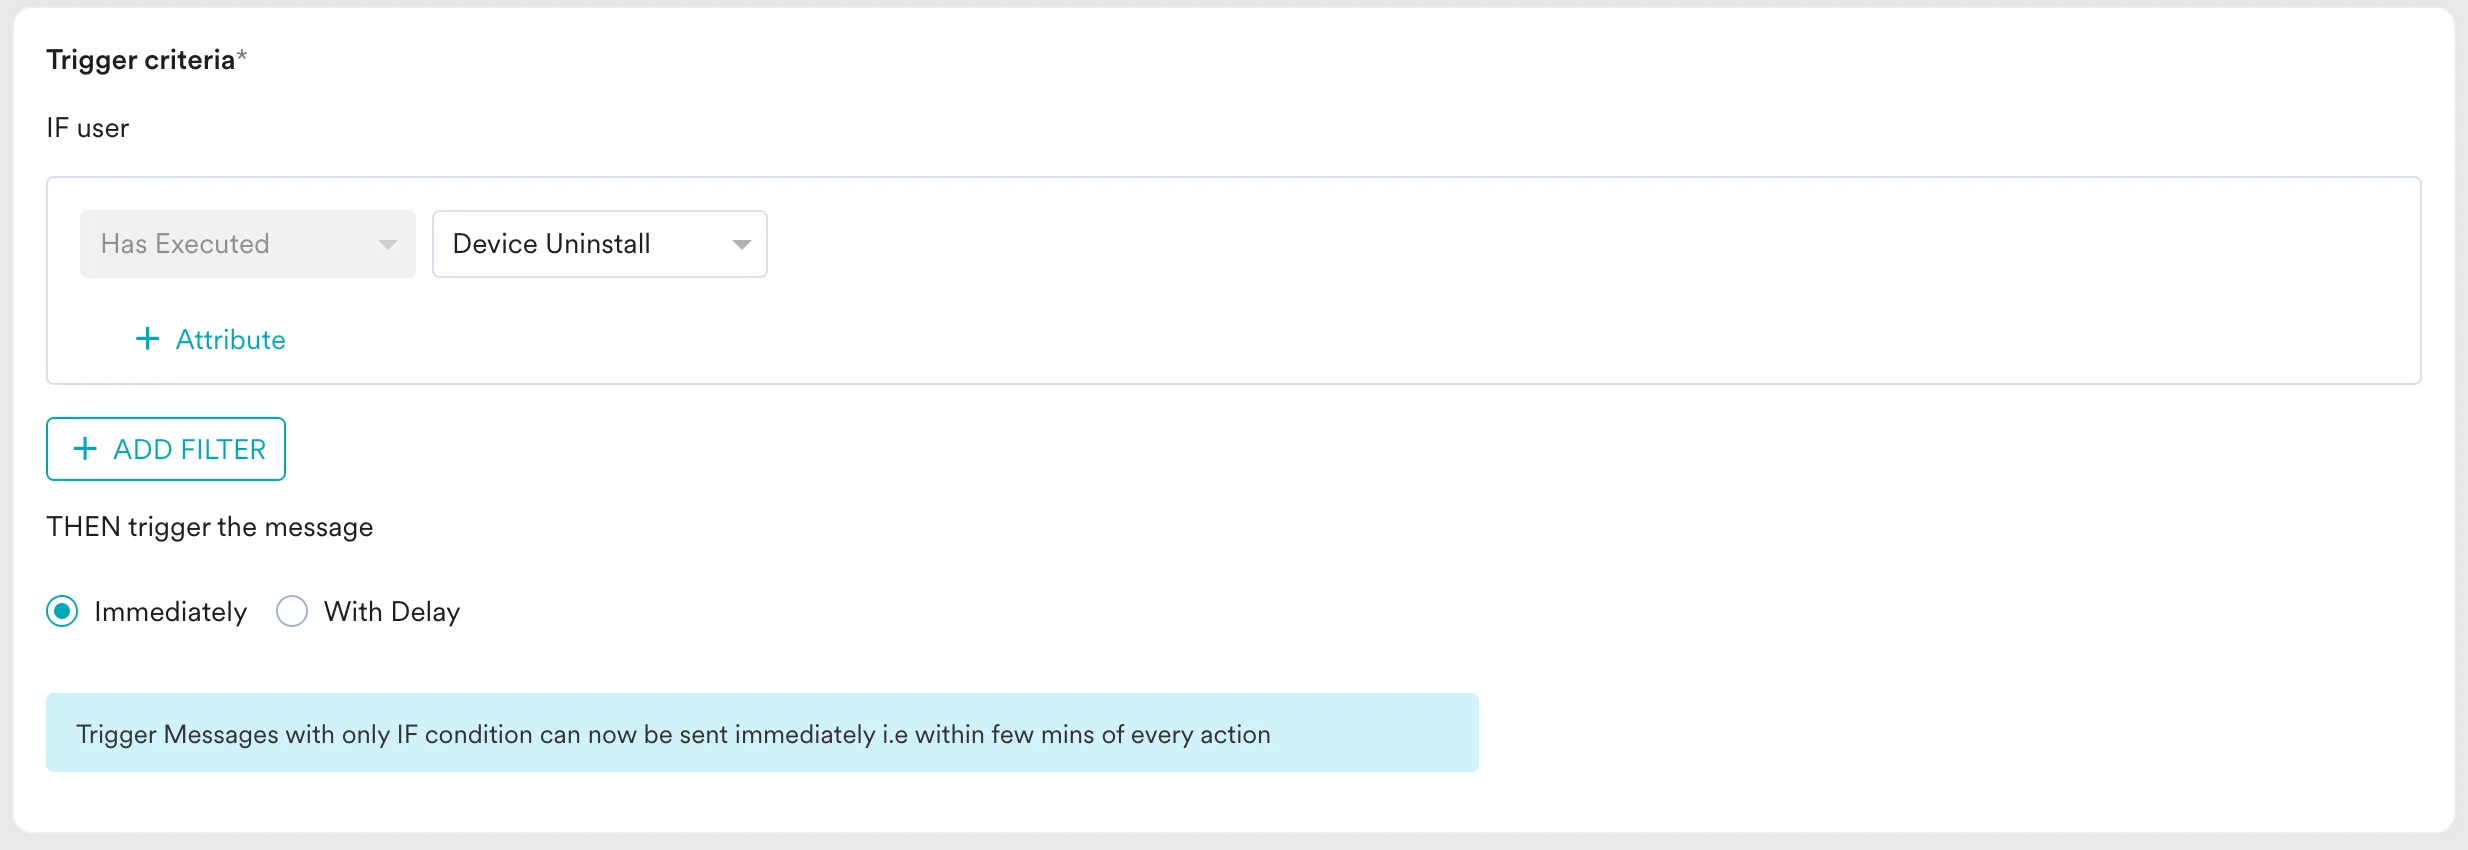
4. For the campaign delivery types, choose "Event-Triggered".
* For more information about delivery types, refer to [Delivery Types](https://www.moengage.com/docs/user-guide/campaigns-and-channels/getting-started/introduction/delivery-types-moengage-channels).
5. On the next screen, give your Campaign a name, and select the Criteria as "Device Uninstall".
6. For the trigger, choose "immediately".
3. Click **Custom** under Connectors.
4. For the campaign delivery types, choose "Event-Triggered".
* For more information about delivery types, refer to [Delivery Types](https://www.moengage.com/docs/user-guide/campaigns-and-channels/getting-started/introduction/delivery-types-moengage-channels).
5. On the next screen, give your Campaign a name, and select the Criteria as "Device Uninstall".
6. For the trigger, choose "immediately".
 7. For the audience, let us choose "All users" for this use case. Click "Next" when satisfied.
8. On the content screen, we will define our payload and webhook URL.
9. Choose the method as "POST" (know more about [Create Records API](https://airtable.com/developers/web/api/create-records) on Airtable).
10. For Webhook URL, enter `https://api.airtable.com/v0/{baseId}/{tableIdOrName}`
When you have a base open in a compatible web browser, you should see a URL in the address bar that looks similar to this (Google Chrome):

In between each backslash, you will find a string that identifies the Base, Table, and View IDs.
* Base IDs begin with "`app`"
* Table IDs begin with "`tbl`"
* View IDs begin with "`viw`"
7. For the audience, let us choose "All users" for this use case. Click "Next" when satisfied.
8. On the content screen, we will define our payload and webhook URL.
9. Choose the method as "POST" (know more about [Create Records API](https://airtable.com/developers/web/api/create-records) on Airtable).
10. For Webhook URL, enter `https://api.airtable.com/v0/{baseId}/{tableIdOrName}`
When you have a base open in a compatible web browser, you should see a URL in the address bar that looks similar to this (Google Chrome):

In between each backslash, you will find a string that identifies the Base, Table, and View IDs.
* Base IDs begin with "`app`"
* Table IDs begin with "`tbl`"
* View IDs begin with "`viw`" 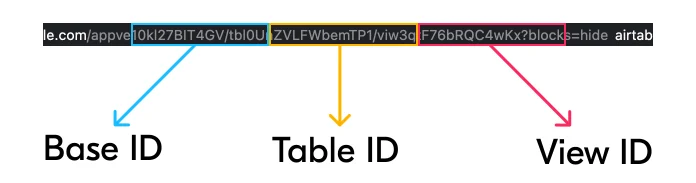 11. Define the following headers:
12. `Authorization`: `Bearer `
13. `Content-Type`: `application/json`
14. Choose the "Body Type" as raw and paste the following:
```json theme={null}
{
"records": [
{
"fields": {
"Name": "{{UserAttribute['First Name']}} {{UserAttribute['Last Name']}}",
"Email": "{{UserAttribute['Email (Standard)']}}"
}
}
]
}
```
The exact payload needs to be adjusted for the columns in your table. [Read more](https://airtable.com/developers/web/api/create-records#request-fields). (you can type @ to insert personalized values as well)
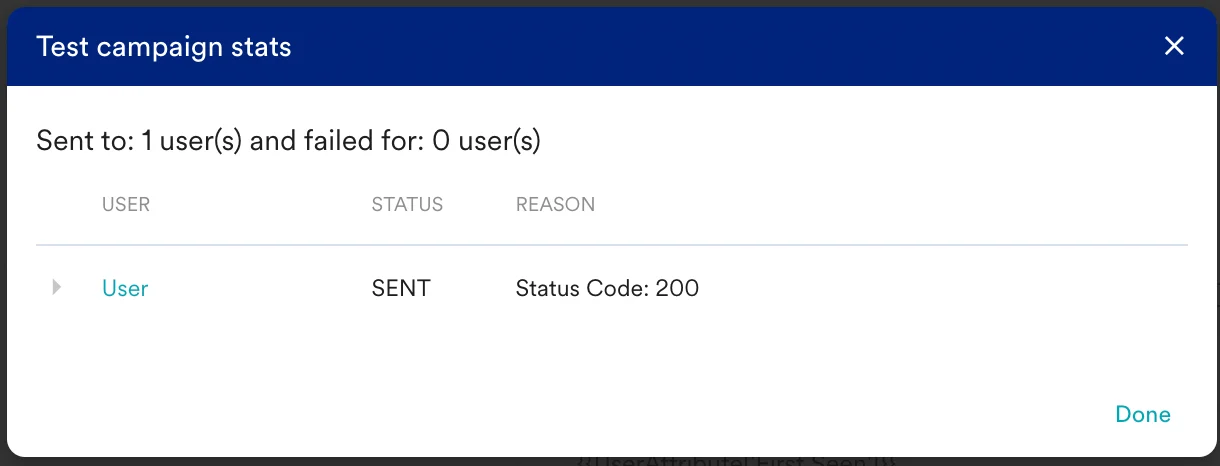
13. Now you need to test this webhook, scroll down and enter a test user's data and click on "test".
14. You should see a new modal saying the test was successful:
11. Define the following headers:
12. `Authorization`: `Bearer `
13. `Content-Type`: `application/json`
14. Choose the "Body Type" as raw and paste the following:
```json theme={null}
{
"records": [
{
"fields": {
"Name": "{{UserAttribute['First Name']}} {{UserAttribute['Last Name']}}",
"Email": "{{UserAttribute['Email (Standard)']}}"
}
}
]
}
```
The exact payload needs to be adjusted for the columns in your table. [Read more](https://airtable.com/developers/web/api/create-records#request-fields). (you can type @ to insert personalized values as well)
13. Now you need to test this webhook, scroll down and enter a test user's data and click on "test".
14. You should see a new modal saying the test was successful:
 15. Now go back to the Airtable Base view.
### Step 3: Verify if your table has been updated
15. Now go back to the Airtable Base view.
### Step 3: Verify if your table has been updated
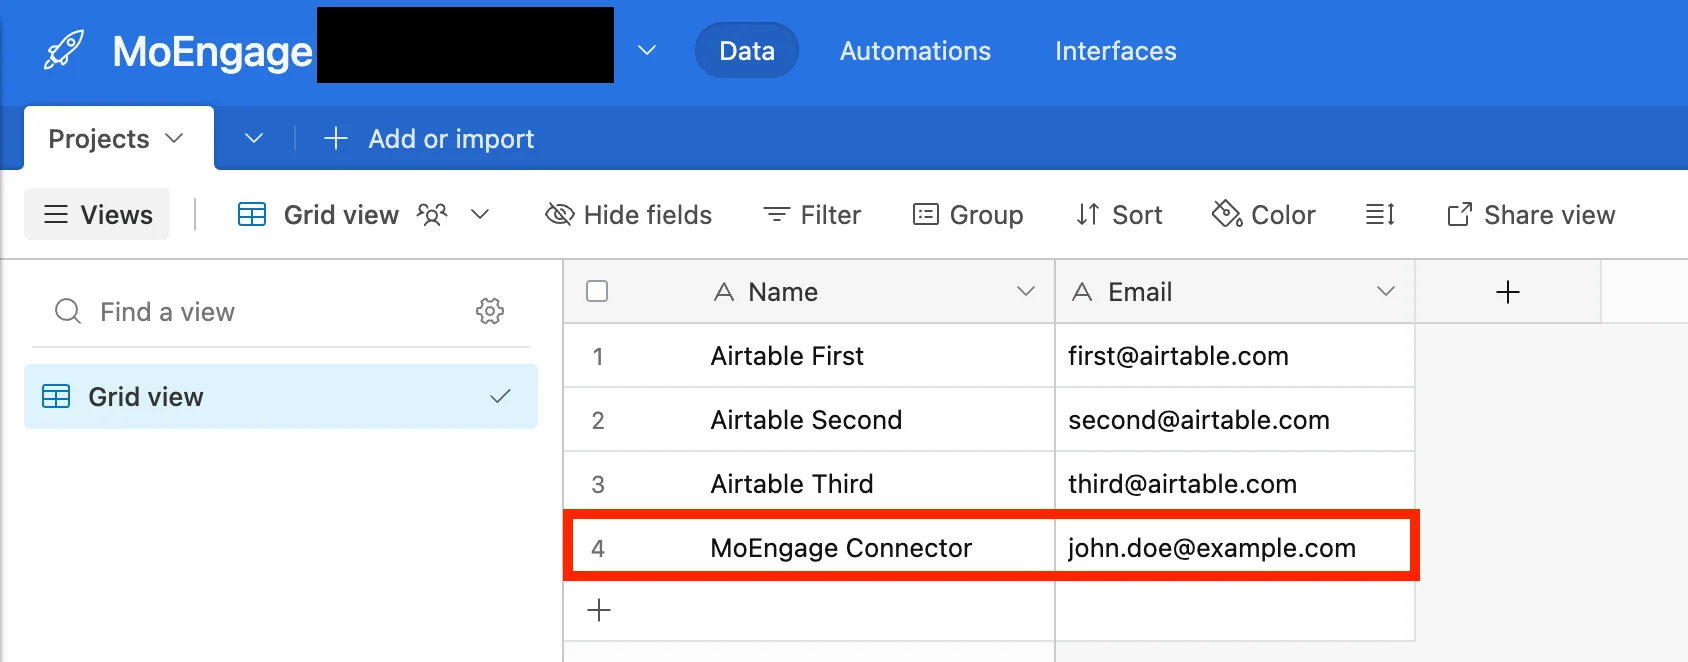 You should now see a new row in your table. This confirms that your data was successfully sent to Airtable.
### Step 4: Publish the campaign
When you're ready with the setup, just publish the campaign and MoEngage will call your API when your trigger conditions are met.
You should now see a new row in your table. This confirms that your data was successfully sent to Airtable.
### Step 4: Publish the campaign
When you're ready with the setup, just publish the campaign and MoEngage will call your API when your trigger conditions are met.