> ## Documentation Index
> Fetch the complete documentation index at: https://moengage.com/docs/llms.txt
> Use this file to discover all available pages before exploring further.
# Rehook
# Introduction
[Rehook](https://rehook.ai/) is a powerful and dedicated user-incentivization solution that enables businesses to reward and engage users without dependency on tech.
# MoEngage × Rehook
With the MoEngage and Rehook integration, you can forward users and events from MoEngage to Rehook. You can use this to trigger custom rule-based promotions on Rehook when an event is captured from MoEngage or add new users to your Rehook dashboard when MoEngage identifies a new user in your app or website. You can also display your customer's reward progress in MoEngage Campaigns using our Content APIs.
# Integration
**Prerequisites**
* You would need to know your Rehook [API Key and Secret Key](https://docs.rehook.ai/reference/getting-started-copy).
## Forward events on MoEngage to Rehook
With MoEngage's Connector Campaigns, you can forward your events to Rehook when they perform any action on your app or website.
To create a connector campaign on MoEngage,
1. Navigate to Create Campaign >> Connectors >> Custom and choose the delivery type most suitable to your needs. For this example, we will select "Event Triggered" and select the event as "Purchased". 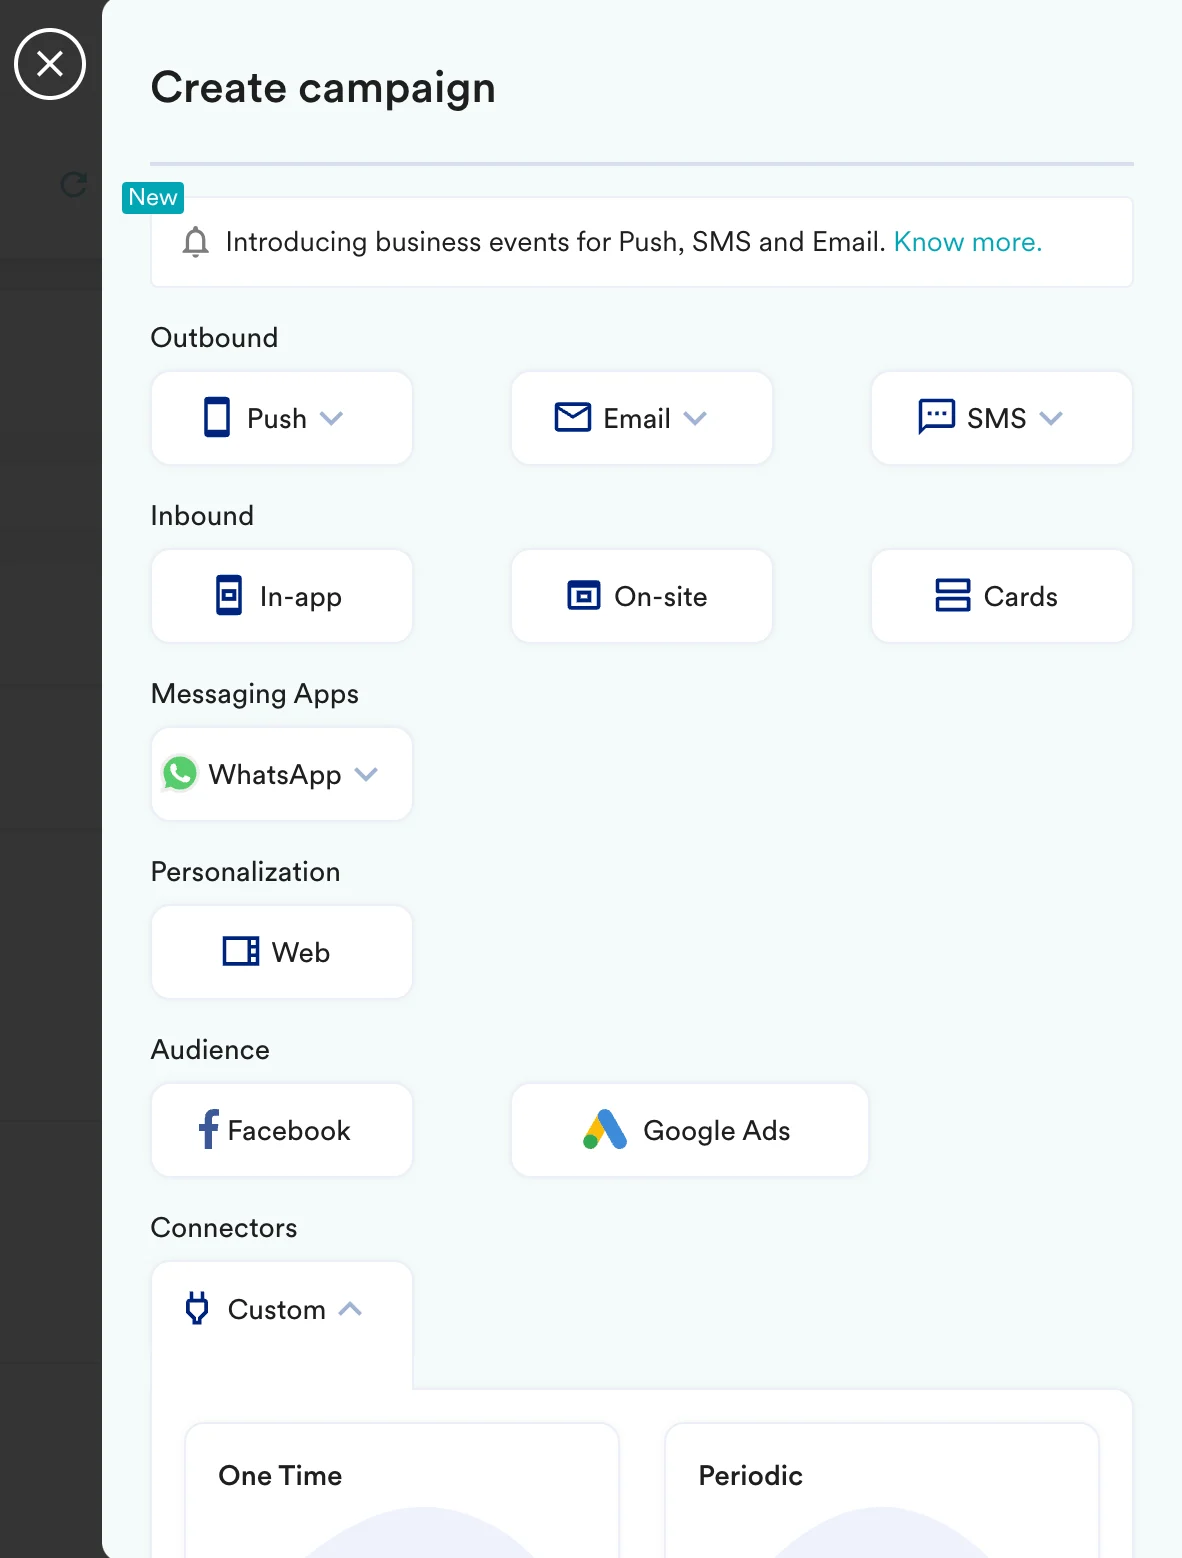 2. On step 2 of the campaign:
### Call the Rehook API
To send your event to Heap, use the `POST` method and configure the payload.
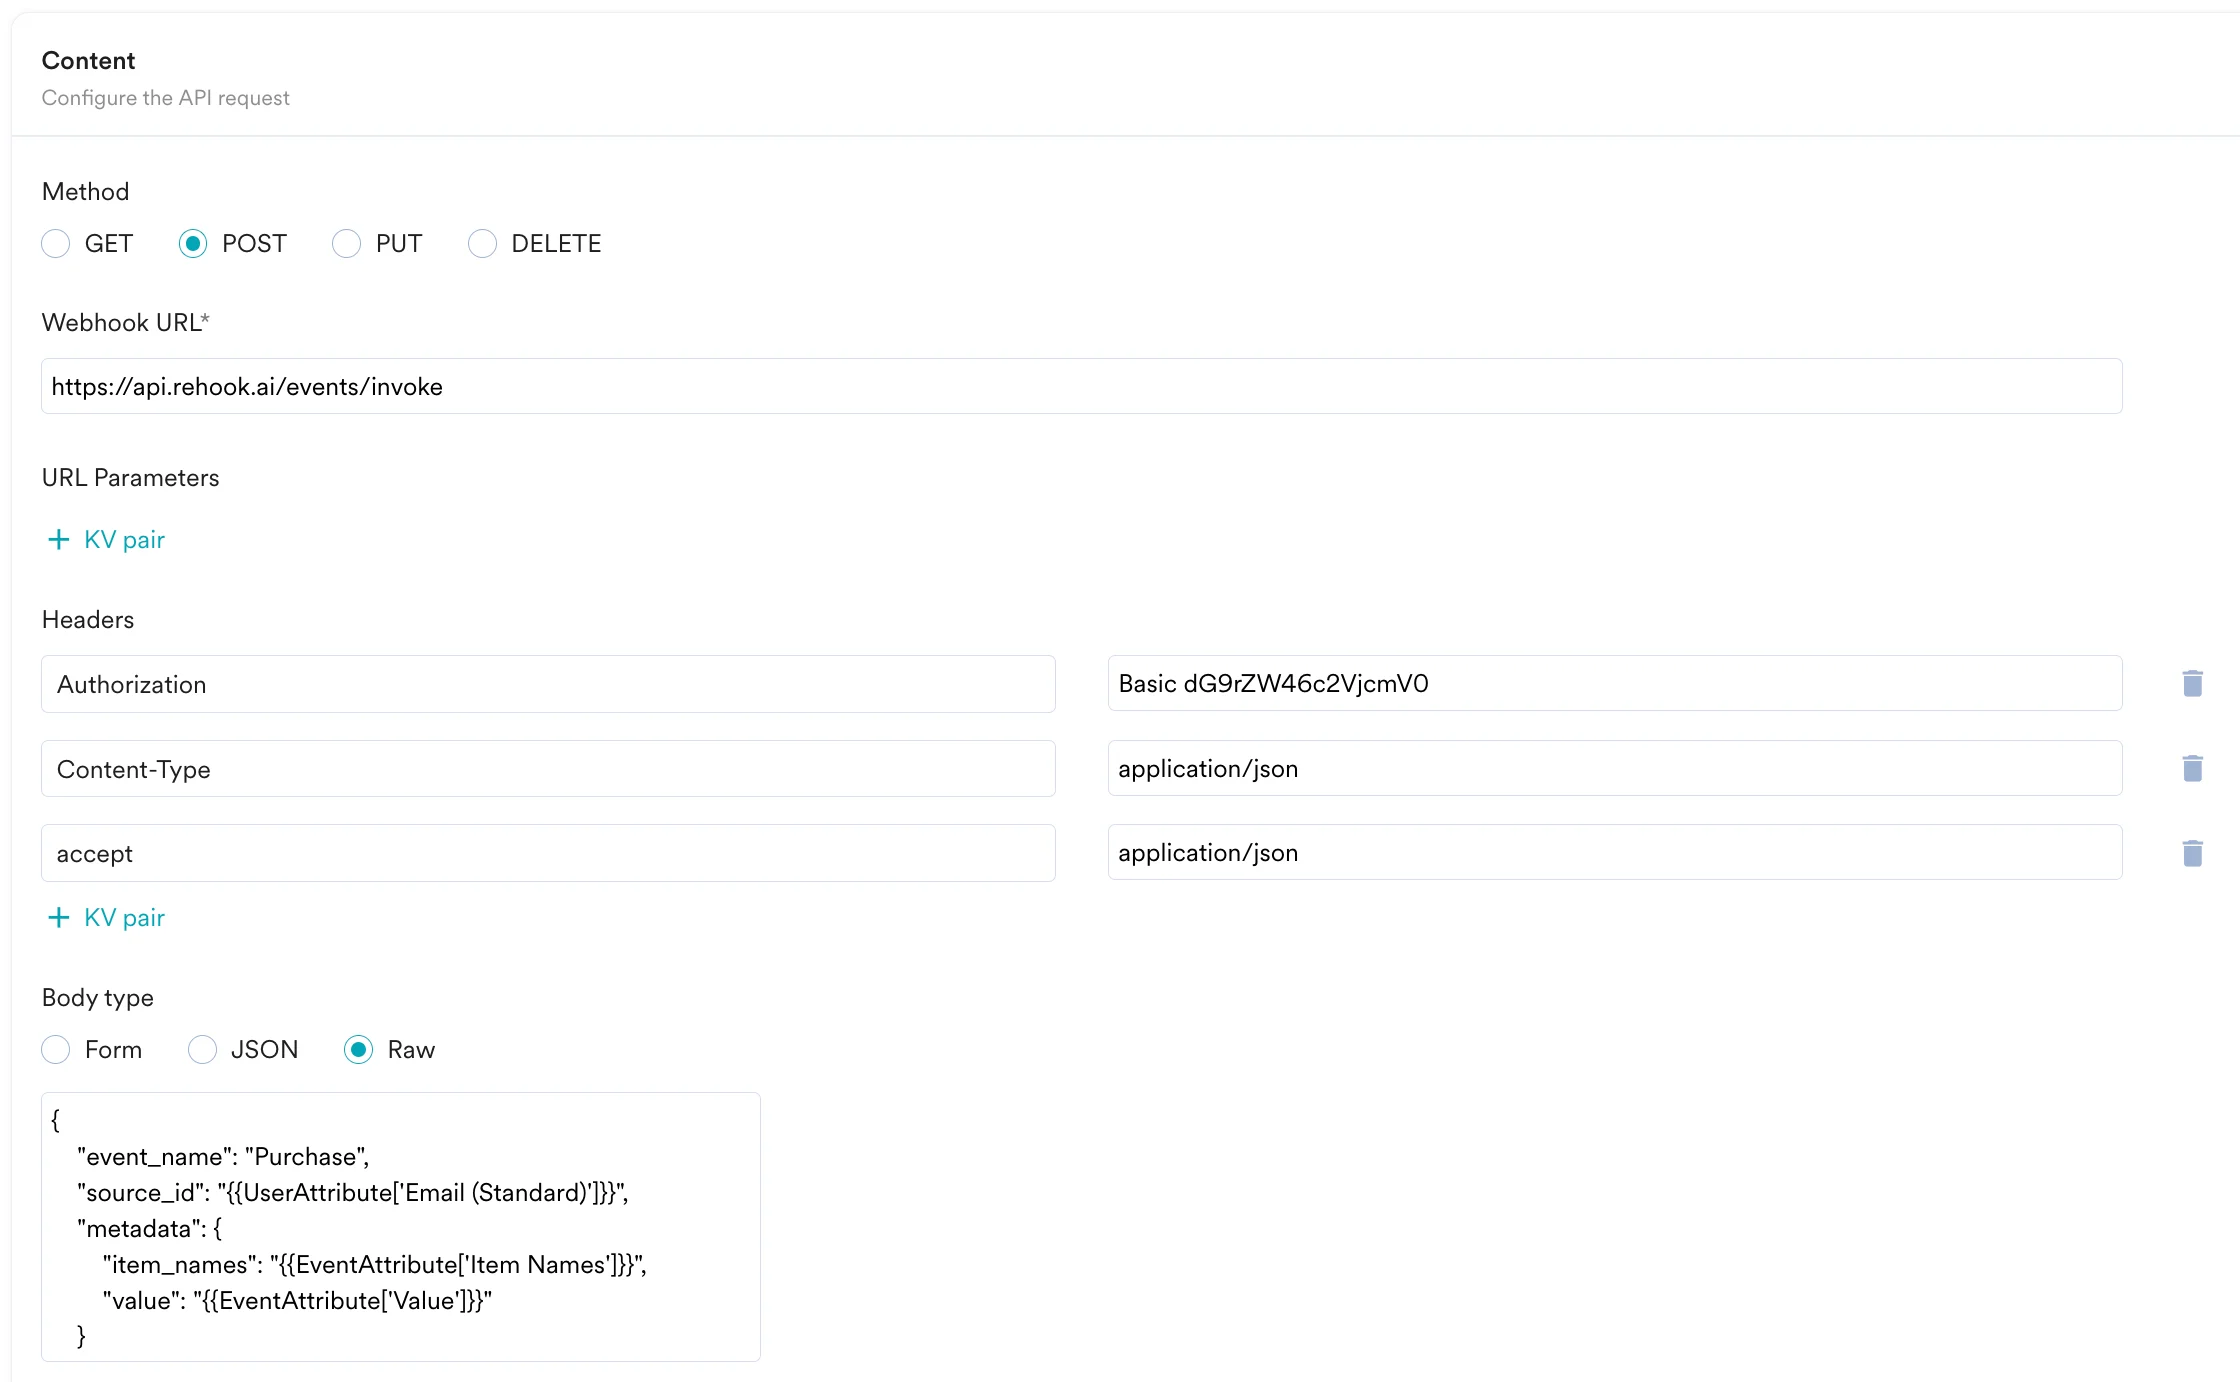
* Select the method as POST
* Headers
* `Authorization`: Use an online tool to create your basic auth with your `API Key` as a username and your `Secret Key` as a password:
2. On step 2 of the campaign:
### Call the Rehook API
To send your event to Heap, use the `POST` method and configure the payload.
* Select the method as POST
* Headers
* `Authorization`: Use an online tool to create your basic auth with your `API Key` as a username and your `Secret Key` as a password: 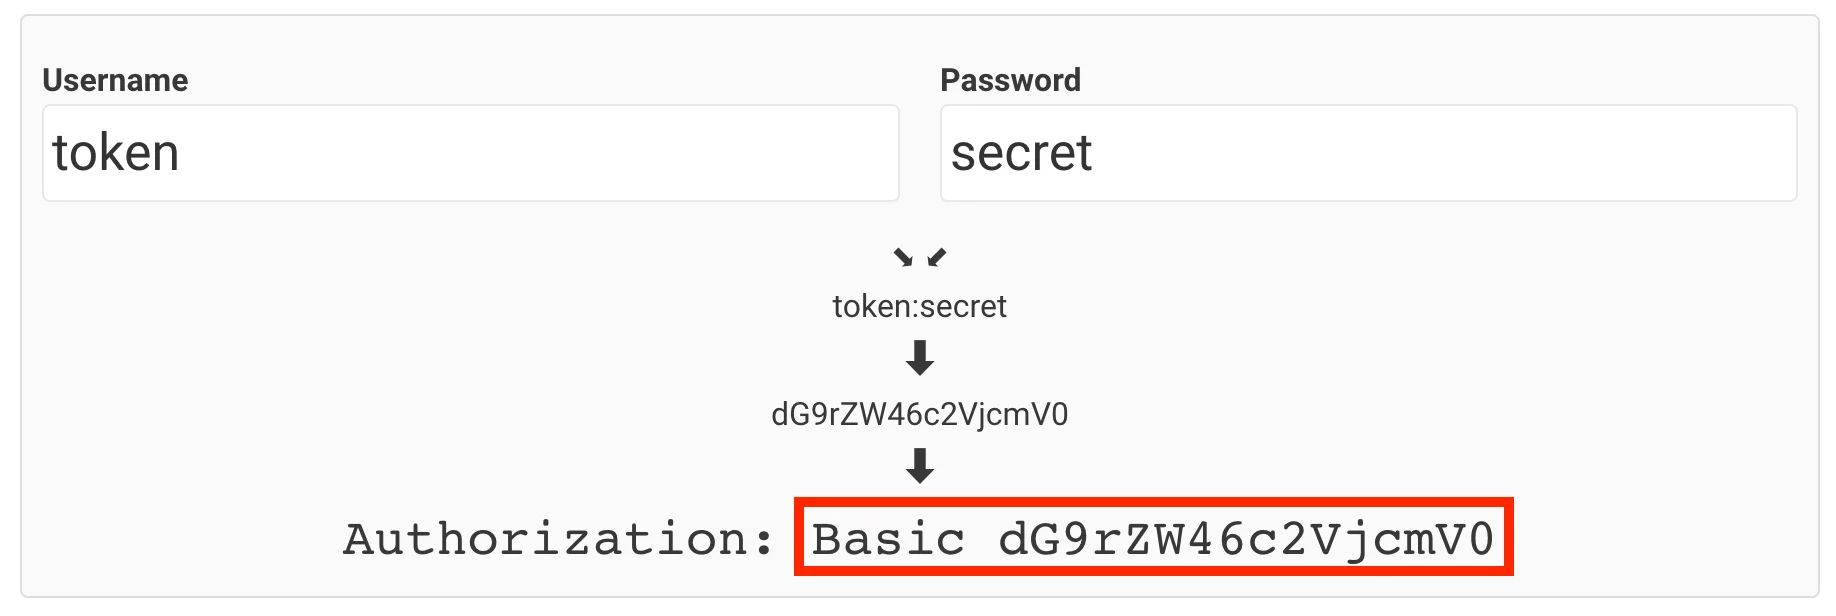 \
In the above example, the value of this header would be `Basic dG9rZW46c2VjcmV0`
* `Content-Type`: `application/json`
* `accept`: `application/json`
* Add the endpoint as Webhook URL: `https://api.rehook.ai/events/invoke`
* Body:\
Type @ to personalize your payload.
```json JSON theme={null}
{
"event_name": "Purchase",
"source_id": "{{UserAttribute['Email (Standard)']}}",
"metadata": {
"item_names": "{{EventAttribute['Item Names']}}",
"value": "{{EventAttribute['Value']}}"
}
}
```
\
In the above example, the value of this header would be `Basic dG9rZW46c2VjcmV0`
* `Content-Type`: `application/json`
* `accept`: `application/json`
* Add the endpoint as Webhook URL: `https://api.rehook.ai/events/invoke`
* Body:\
Type @ to personalize your payload.
```json JSON theme={null}
{
"event_name": "Purchase",
"source_id": "{{UserAttribute['Email (Standard)']}}",
"metadata": {
"item_names": "{{EventAttribute['Item Names']}}",
"value": "{{EventAttribute['Value']}}"
}
}
```
 * Refer to the [Rehook API documentation](https://docs.rehook.ai/reference/getting-started-copy) for more information.
### Preview your request
At this point, your campaign should be ready to test and send. You can also test your connector configuration using the Test functionality available in Step 2 of Create Connector Campaign.
* Refer to the [Rehook API documentation](https://docs.rehook.ai/reference/getting-started-copy) for more information.
### Preview your request
At this point, your campaign should be ready to test and send. You can also test your connector configuration using the Test functionality available in Step 2 of Create Connector Campaign. You can go ahead and Publish the campaign.
## Forward users on MoEngage to Rehook
To forward MoEngage users to Rehook, or update their properties on Rehook, set up a MoEngage Connector Campaign as shown above and use the [Rehook's Create or Update API](https://docs.rehook.ai/reference/create-customer) to create or update users inside Rehook.
## Display customer reward progress in MoEngage Campaigns
Using MoEngage's Content APIs, you can dynamically pull customers' reward progress inside MoEngage campaigns for a more personalized experience.
### Step 1: Set up a MoEngage Content API
1. Navigate to **Settings** > **Advanced settings** > **Content API**. Click **+ Add content API** at the top right corner of the Content API screen.
You can go ahead and Publish the campaign.
## Forward users on MoEngage to Rehook
To forward MoEngage users to Rehook, or update their properties on Rehook, set up a MoEngage Connector Campaign as shown above and use the [Rehook's Create or Update API](https://docs.rehook.ai/reference/create-customer) to create or update users inside Rehook.
## Display customer reward progress in MoEngage Campaigns
Using MoEngage's Content APIs, you can dynamically pull customers' reward progress inside MoEngage campaigns for a more personalized experience.
### Step 1: Set up a MoEngage Content API
1. Navigate to **Settings** > **Advanced settings** > **Content API**. Click **+ Add content API** at the top right corner of the Content API screen.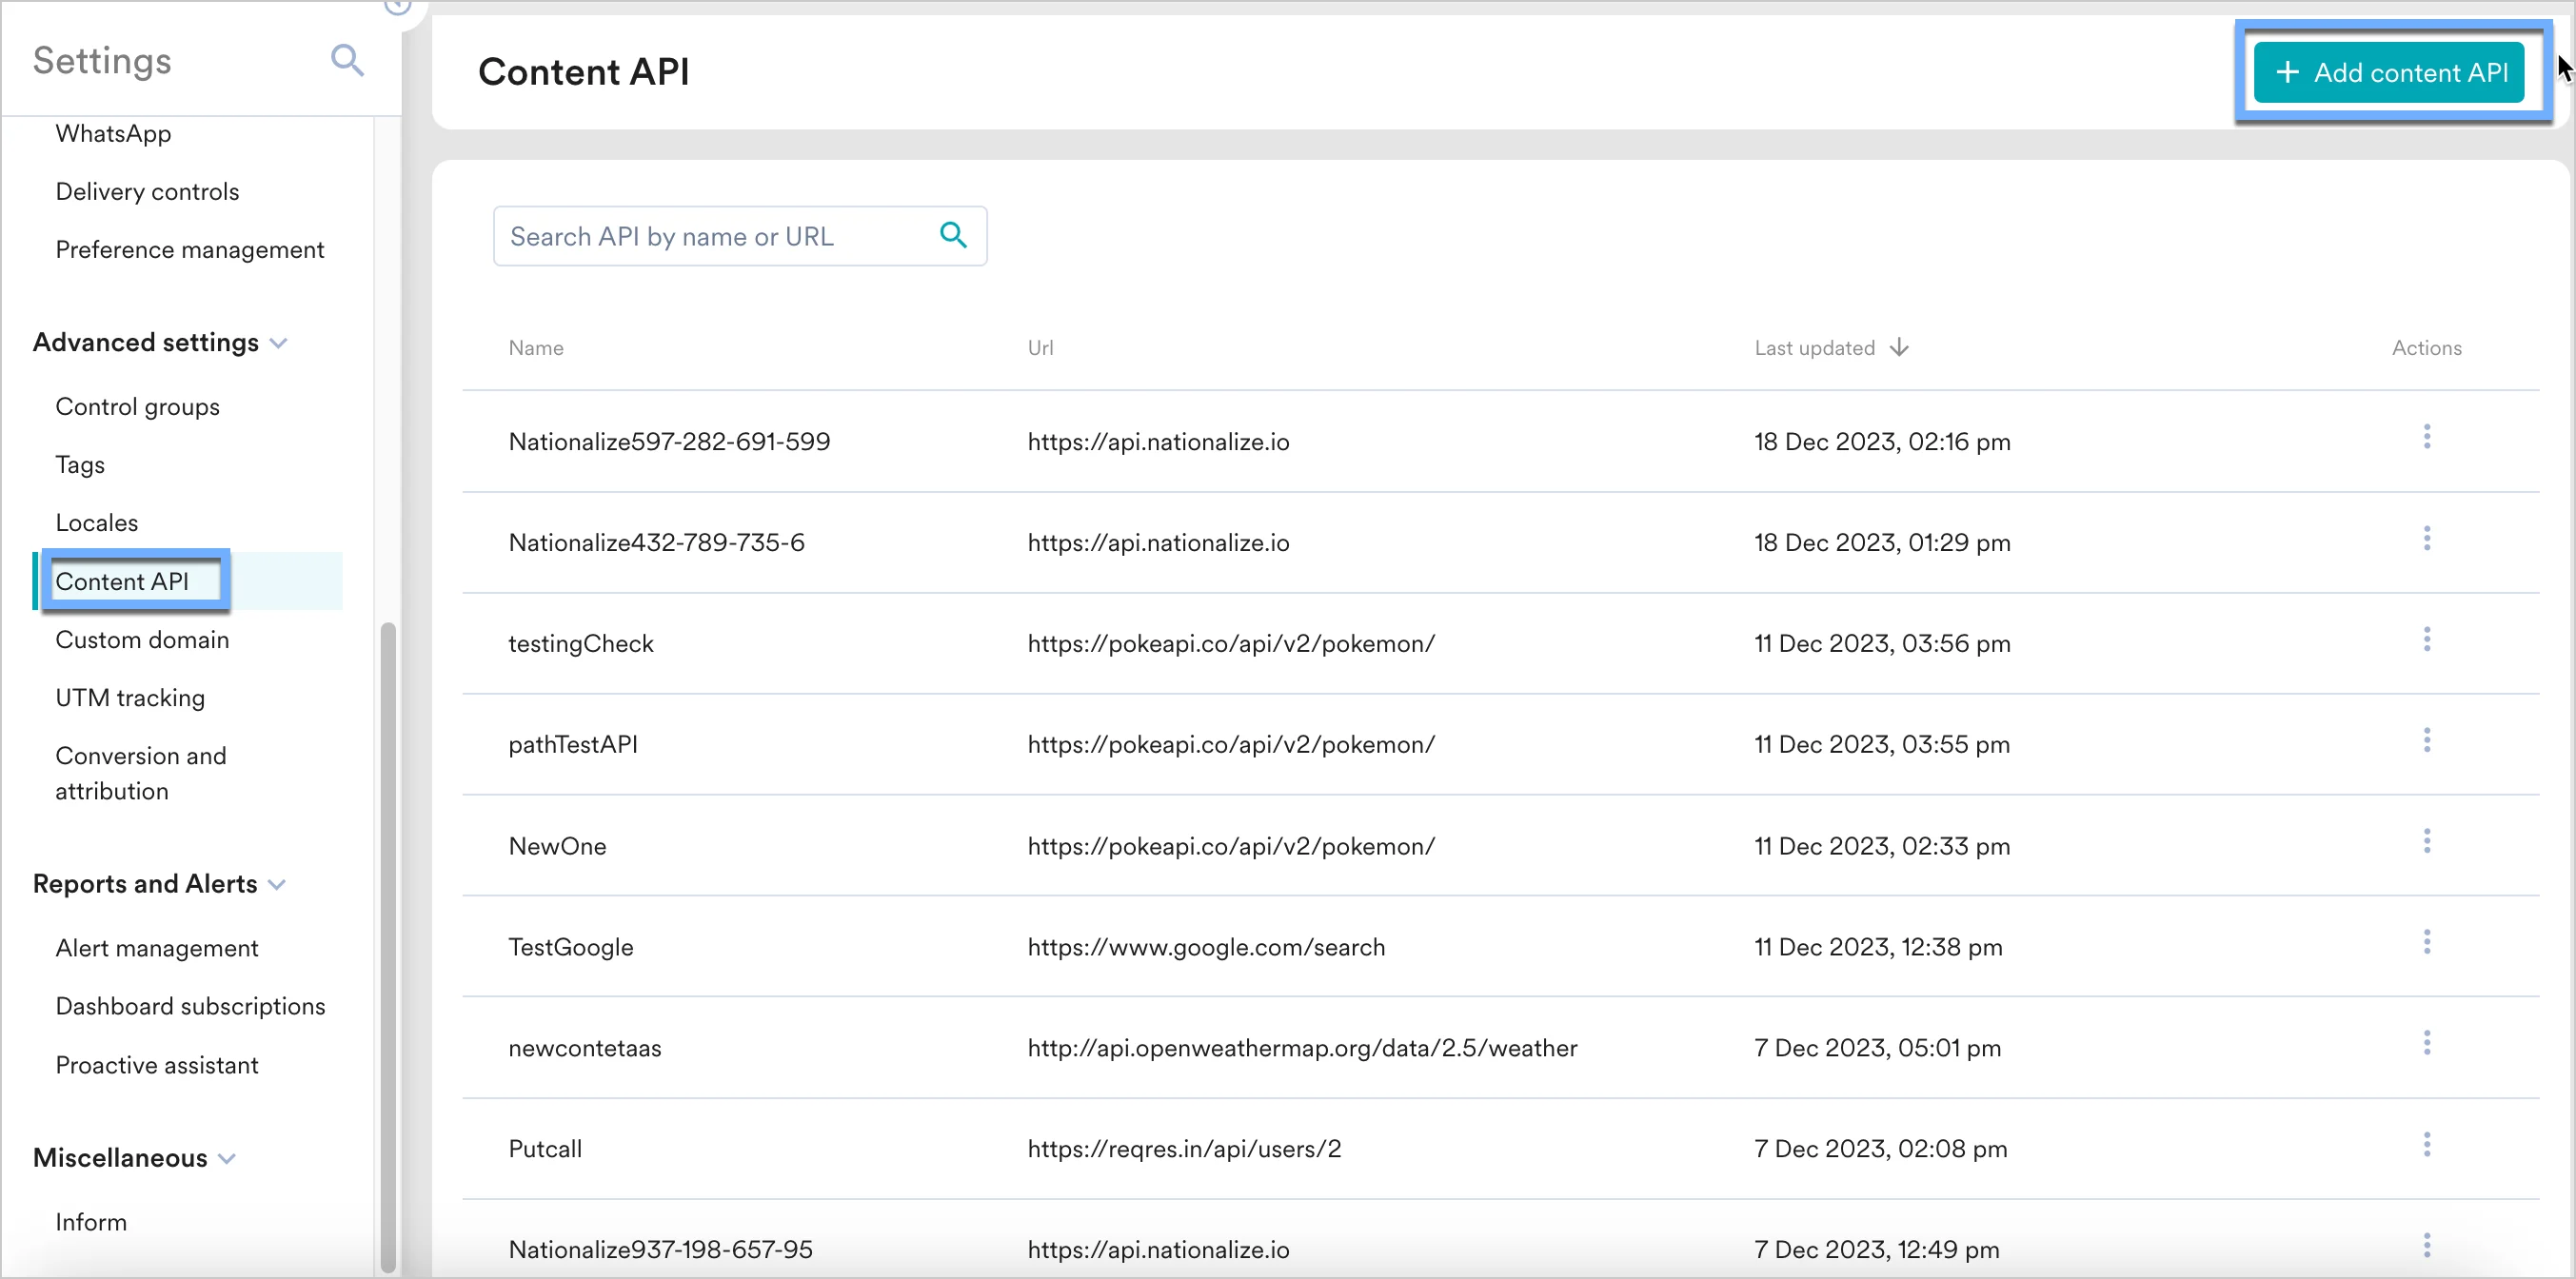 2. Add your Rehook API to the endpoint URL. Depending on your use case, the endpoint will change.
 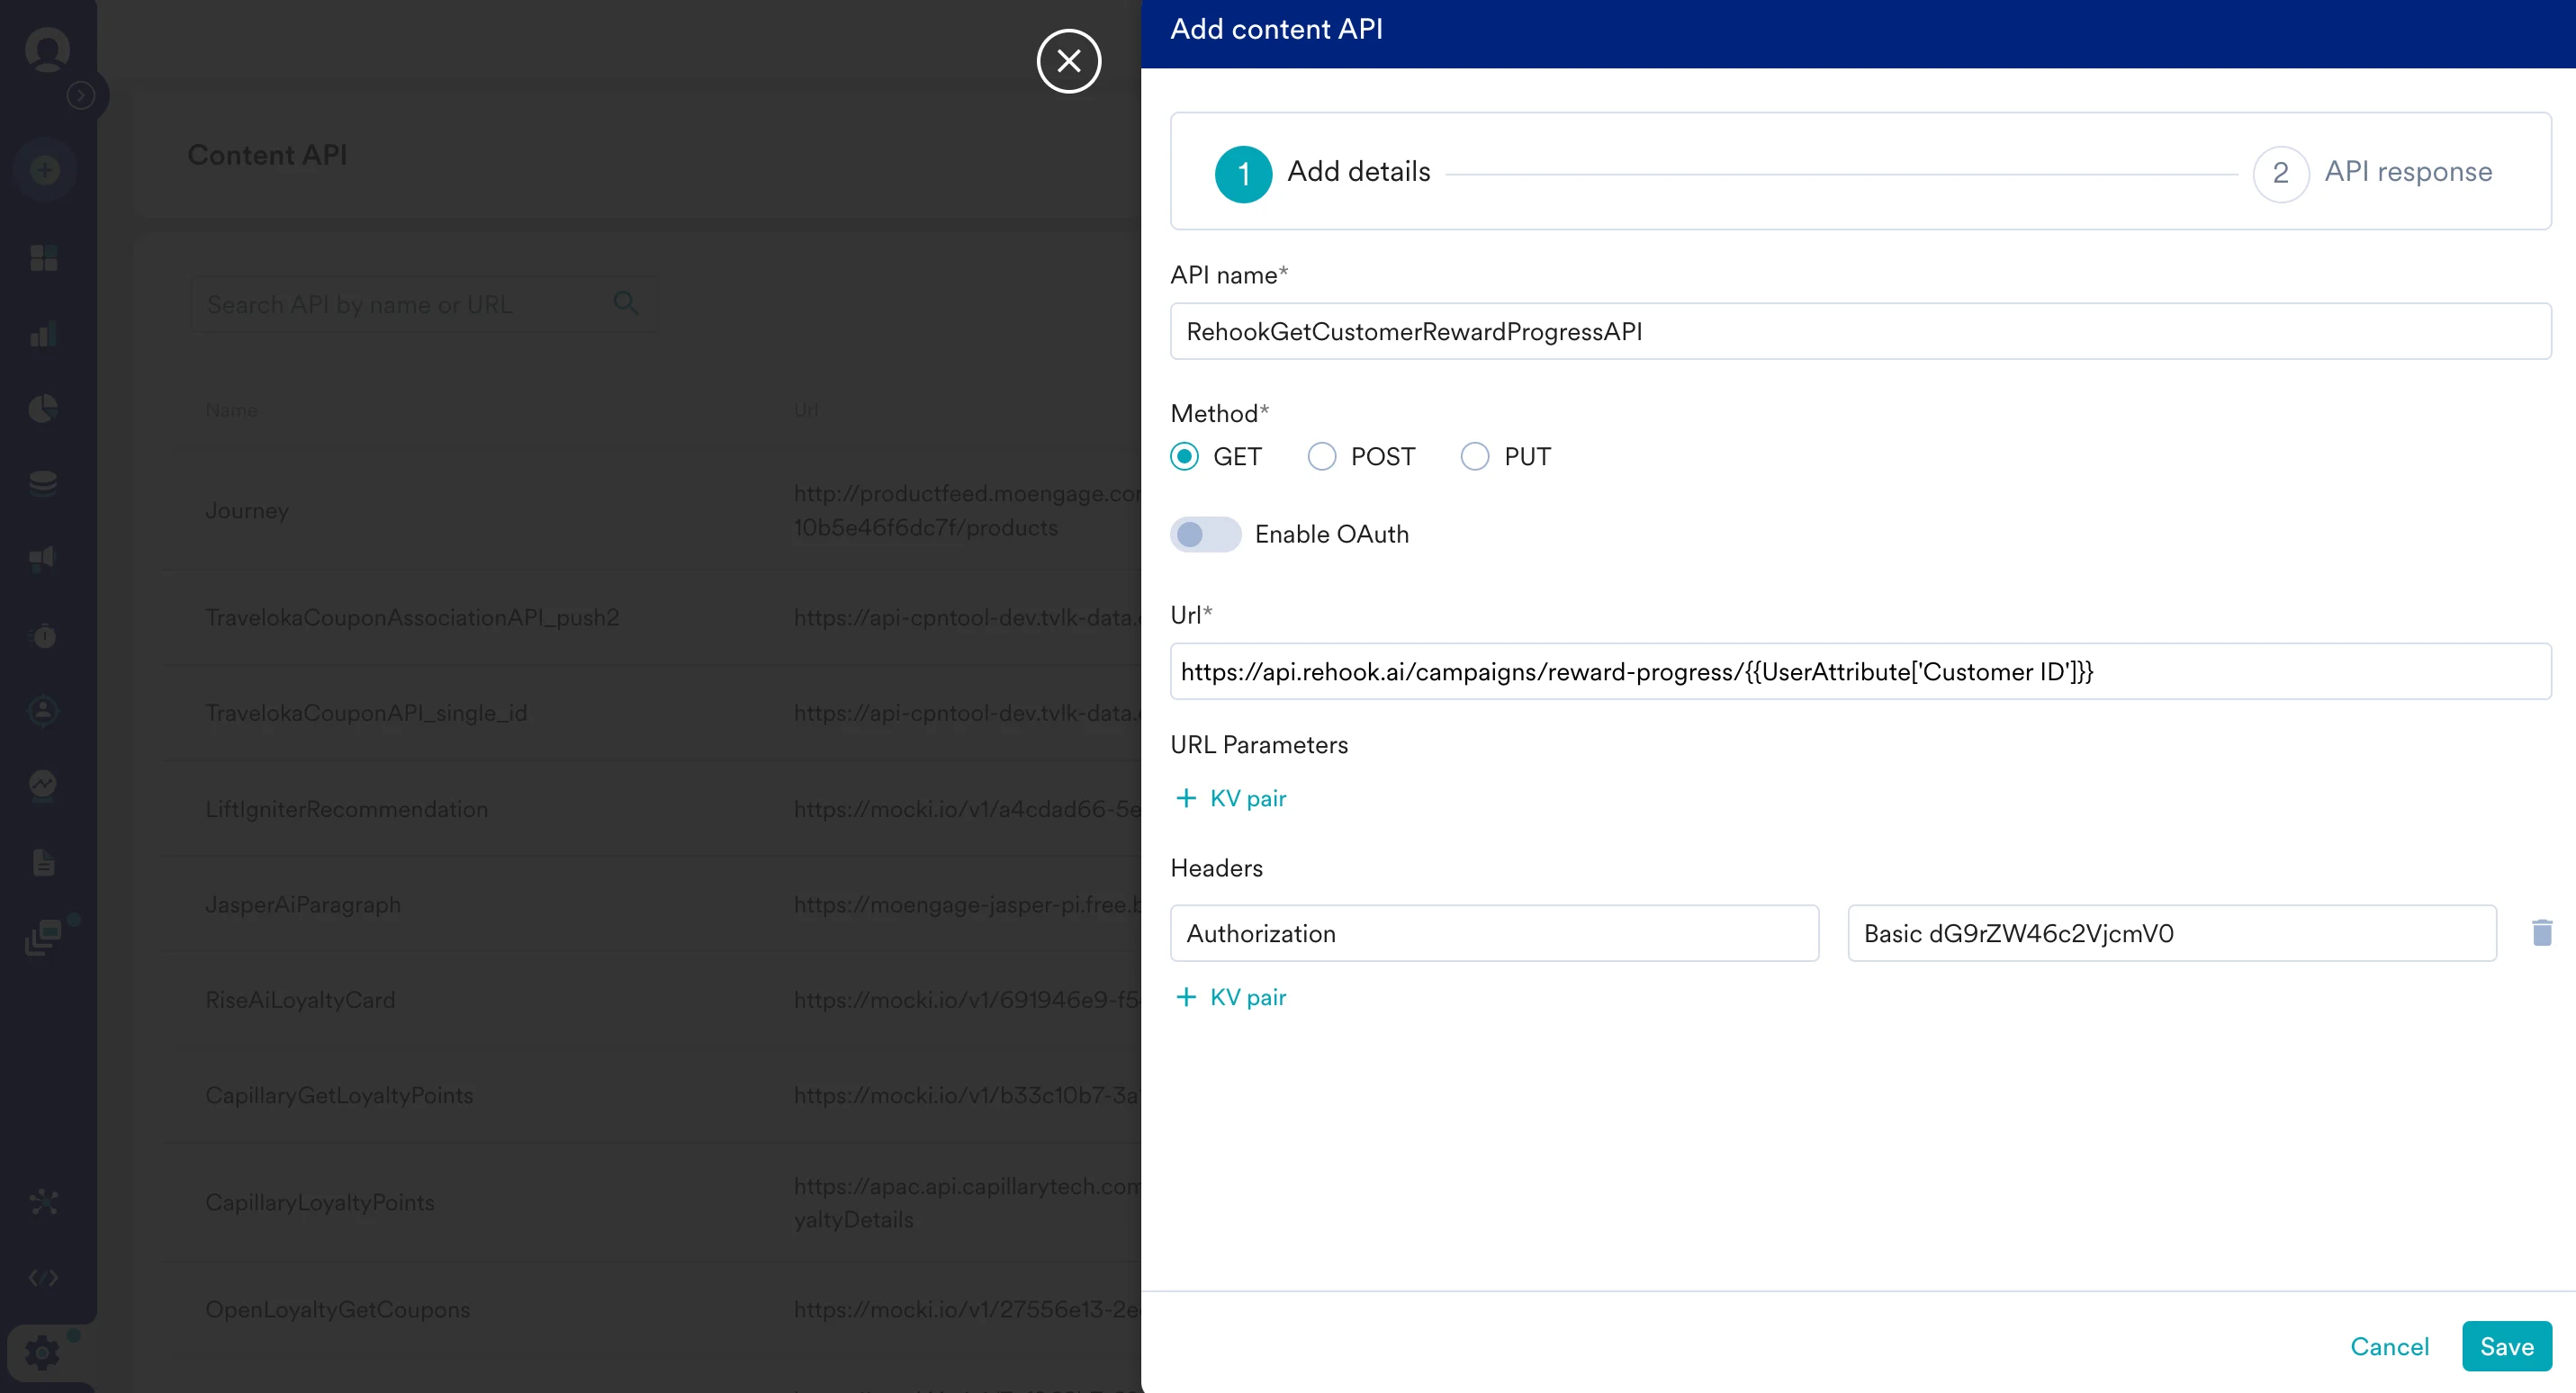 To display your customers' reward progress, use Rehook's [Get Reward Progress API](https://docs.rehook.ai/reference/get-reward-progress).
While setting up your content API, insert the following URL: `https://api.rehook.ai/campaigns/reward-progress/{{UserAttribute['Customer ID']}}`
Under Headers, add the following:
* `Authorization`: Use an online tool to create your basic auth with your `API Key` as a username and your `Secret Key` as a password. In the above example, the value of this header would be `Basic dG9rZW46c2VjcmV0`
* `Content-Type`: `application/json`
3. Click on **Save** and then **Done** once you see a successful response.
You can also test your APIs. To test your APIs, from the Content API's action menu, click on "Test". You can validate your API response.
### Step 2: Display your customers' reward progress inside MoEngage campaigns
To use this API in your MoEngage campaigns,
1. On step 2 on your campaign creation, enter @.
2. In the pop up, you can select the Rehook Content API configured in Step 1.
3. You can use [MoEngage Templating Language](/user-guide/campaigns-and-channels/getting-started/message-personalization/jinja-templating-language) to parse through the API response and use the content in your campaigns.
To display your customers' reward progress, use Rehook's [Get Reward Progress API](https://docs.rehook.ai/reference/get-reward-progress).
While setting up your content API, insert the following URL: `https://api.rehook.ai/campaigns/reward-progress/{{UserAttribute['Customer ID']}}`
Under Headers, add the following:
* `Authorization`: Use an online tool to create your basic auth with your `API Key` as a username and your `Secret Key` as a password. In the above example, the value of this header would be `Basic dG9rZW46c2VjcmV0`
* `Content-Type`: `application/json`
3. Click on **Save** and then **Done** once you see a successful response.
You can also test your APIs. To test your APIs, from the Content API's action menu, click on "Test". You can validate your API response.
### Step 2: Display your customers' reward progress inside MoEngage campaigns
To use this API in your MoEngage campaigns,
1. On step 2 on your campaign creation, enter @.
2. In the pop up, you can select the Rehook Content API configured in Step 1.
3. You can use [MoEngage Templating Language](/user-guide/campaigns-and-channels/getting-started/message-personalization/jinja-templating-language) to parse through the API response and use the content in your campaigns. 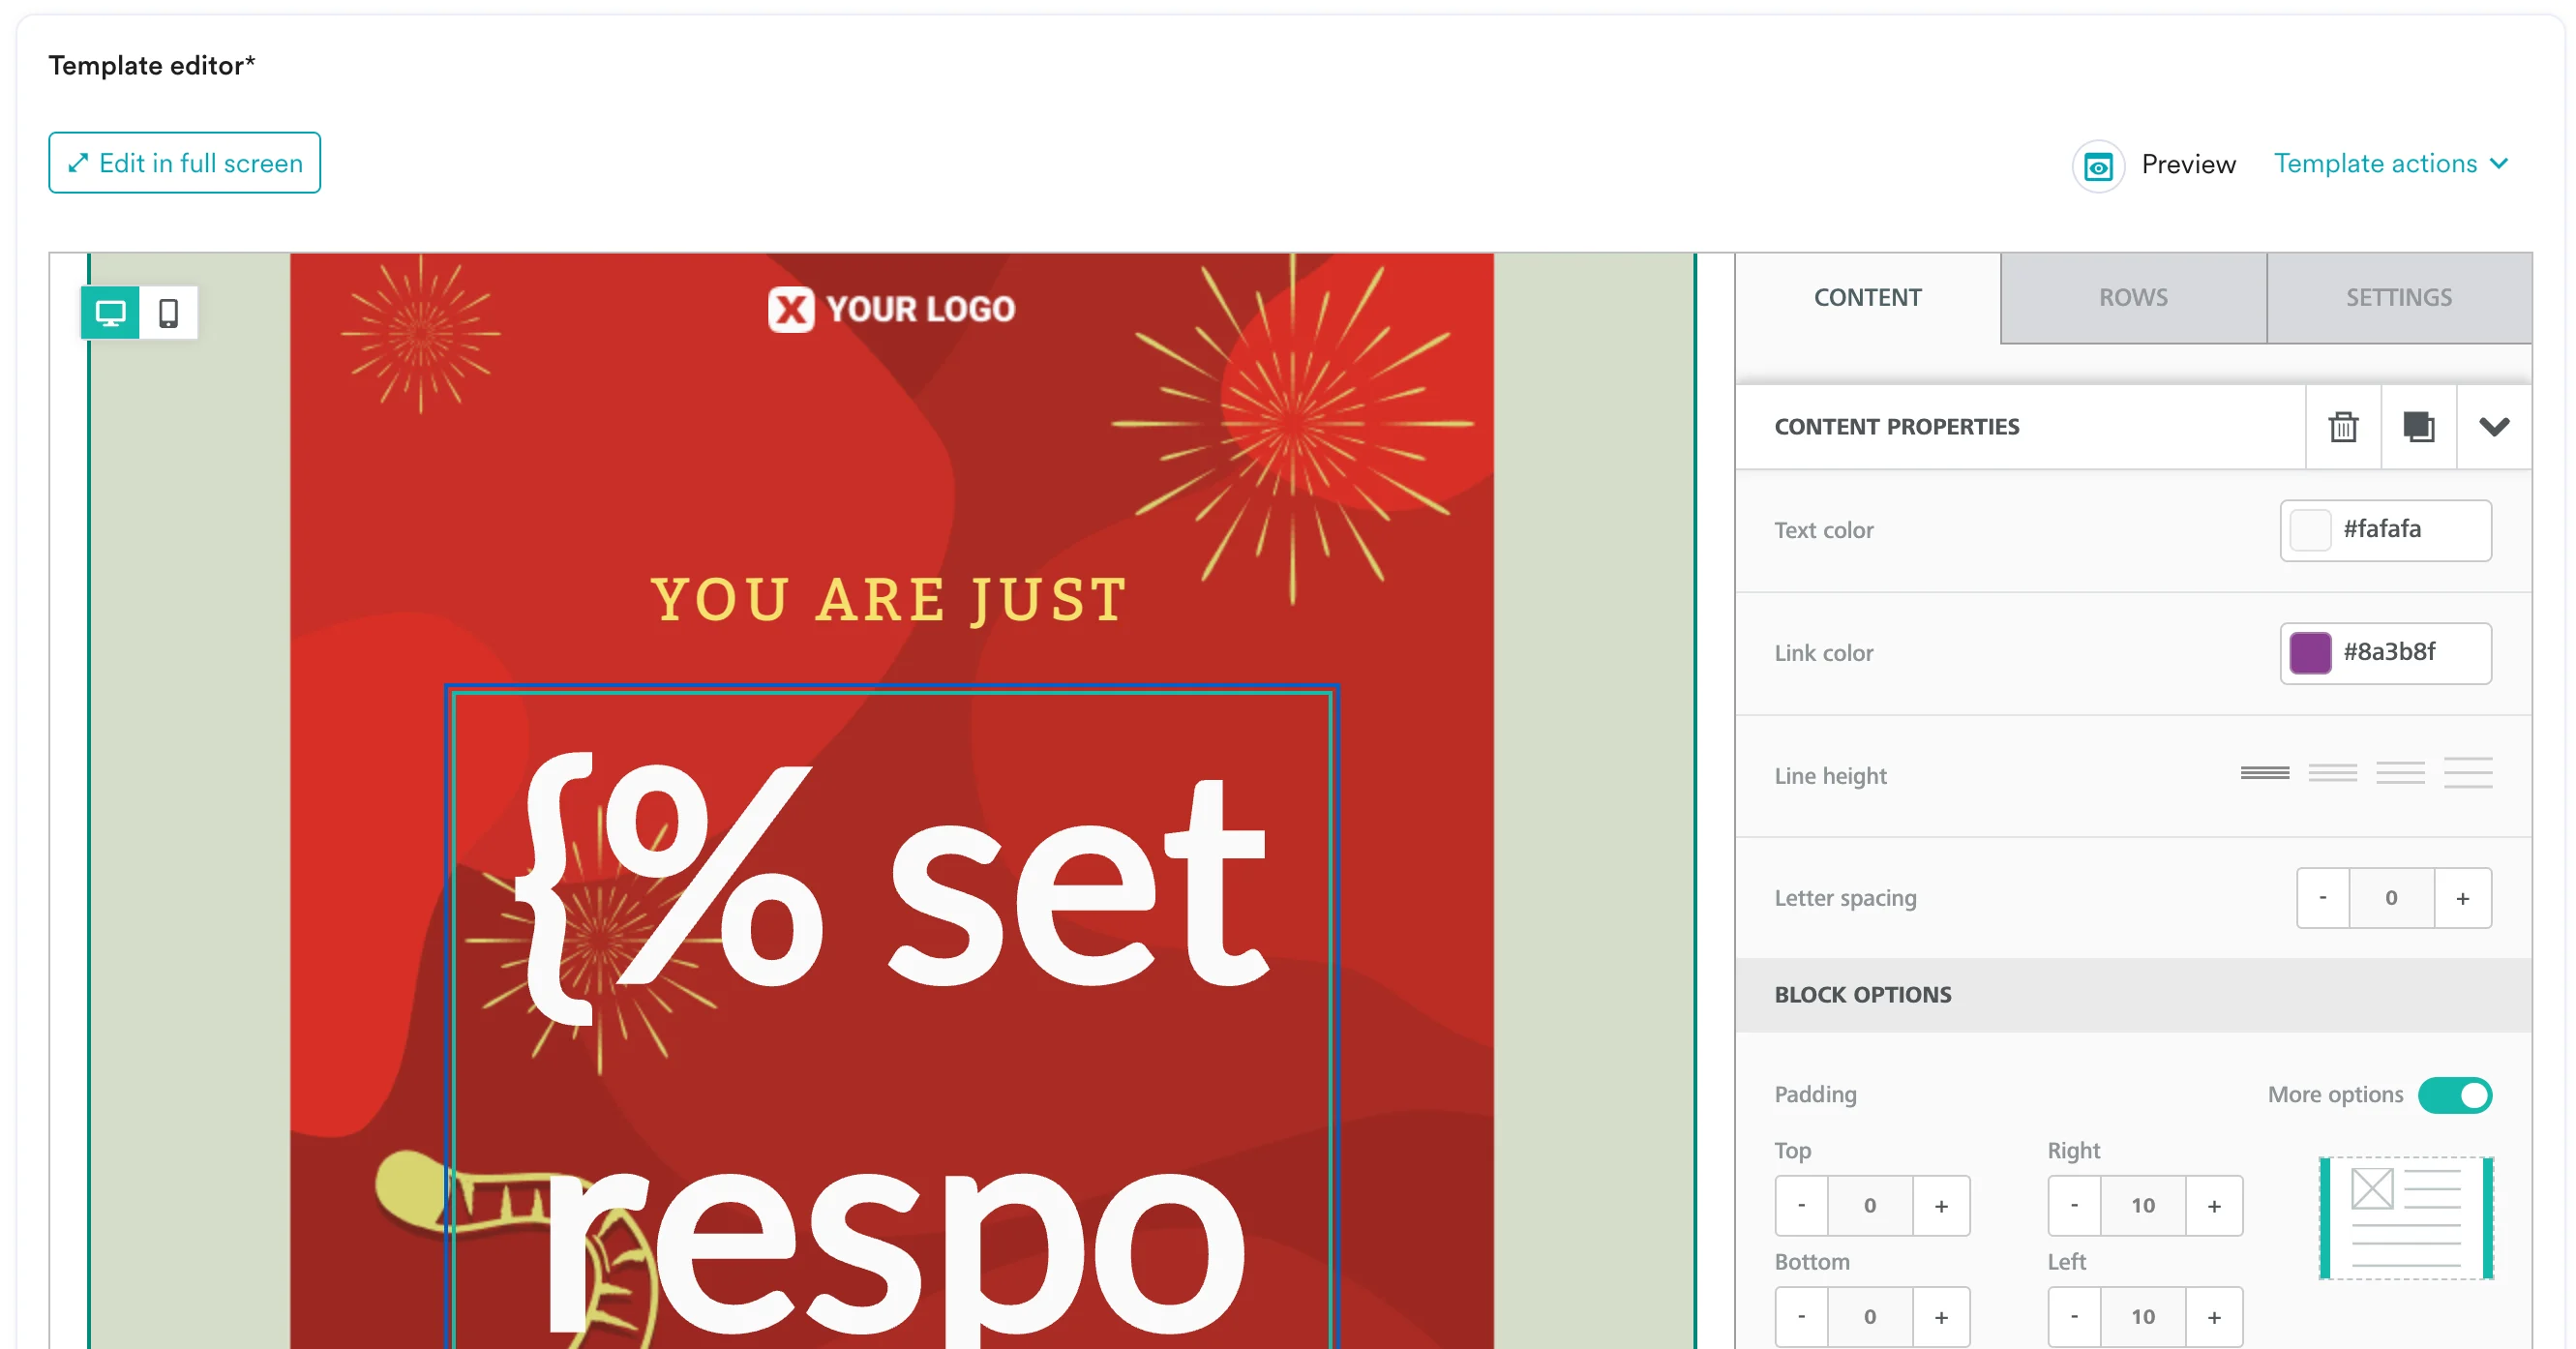 4. You can click on the Preview tab to view your campaign in real-time personalization:
 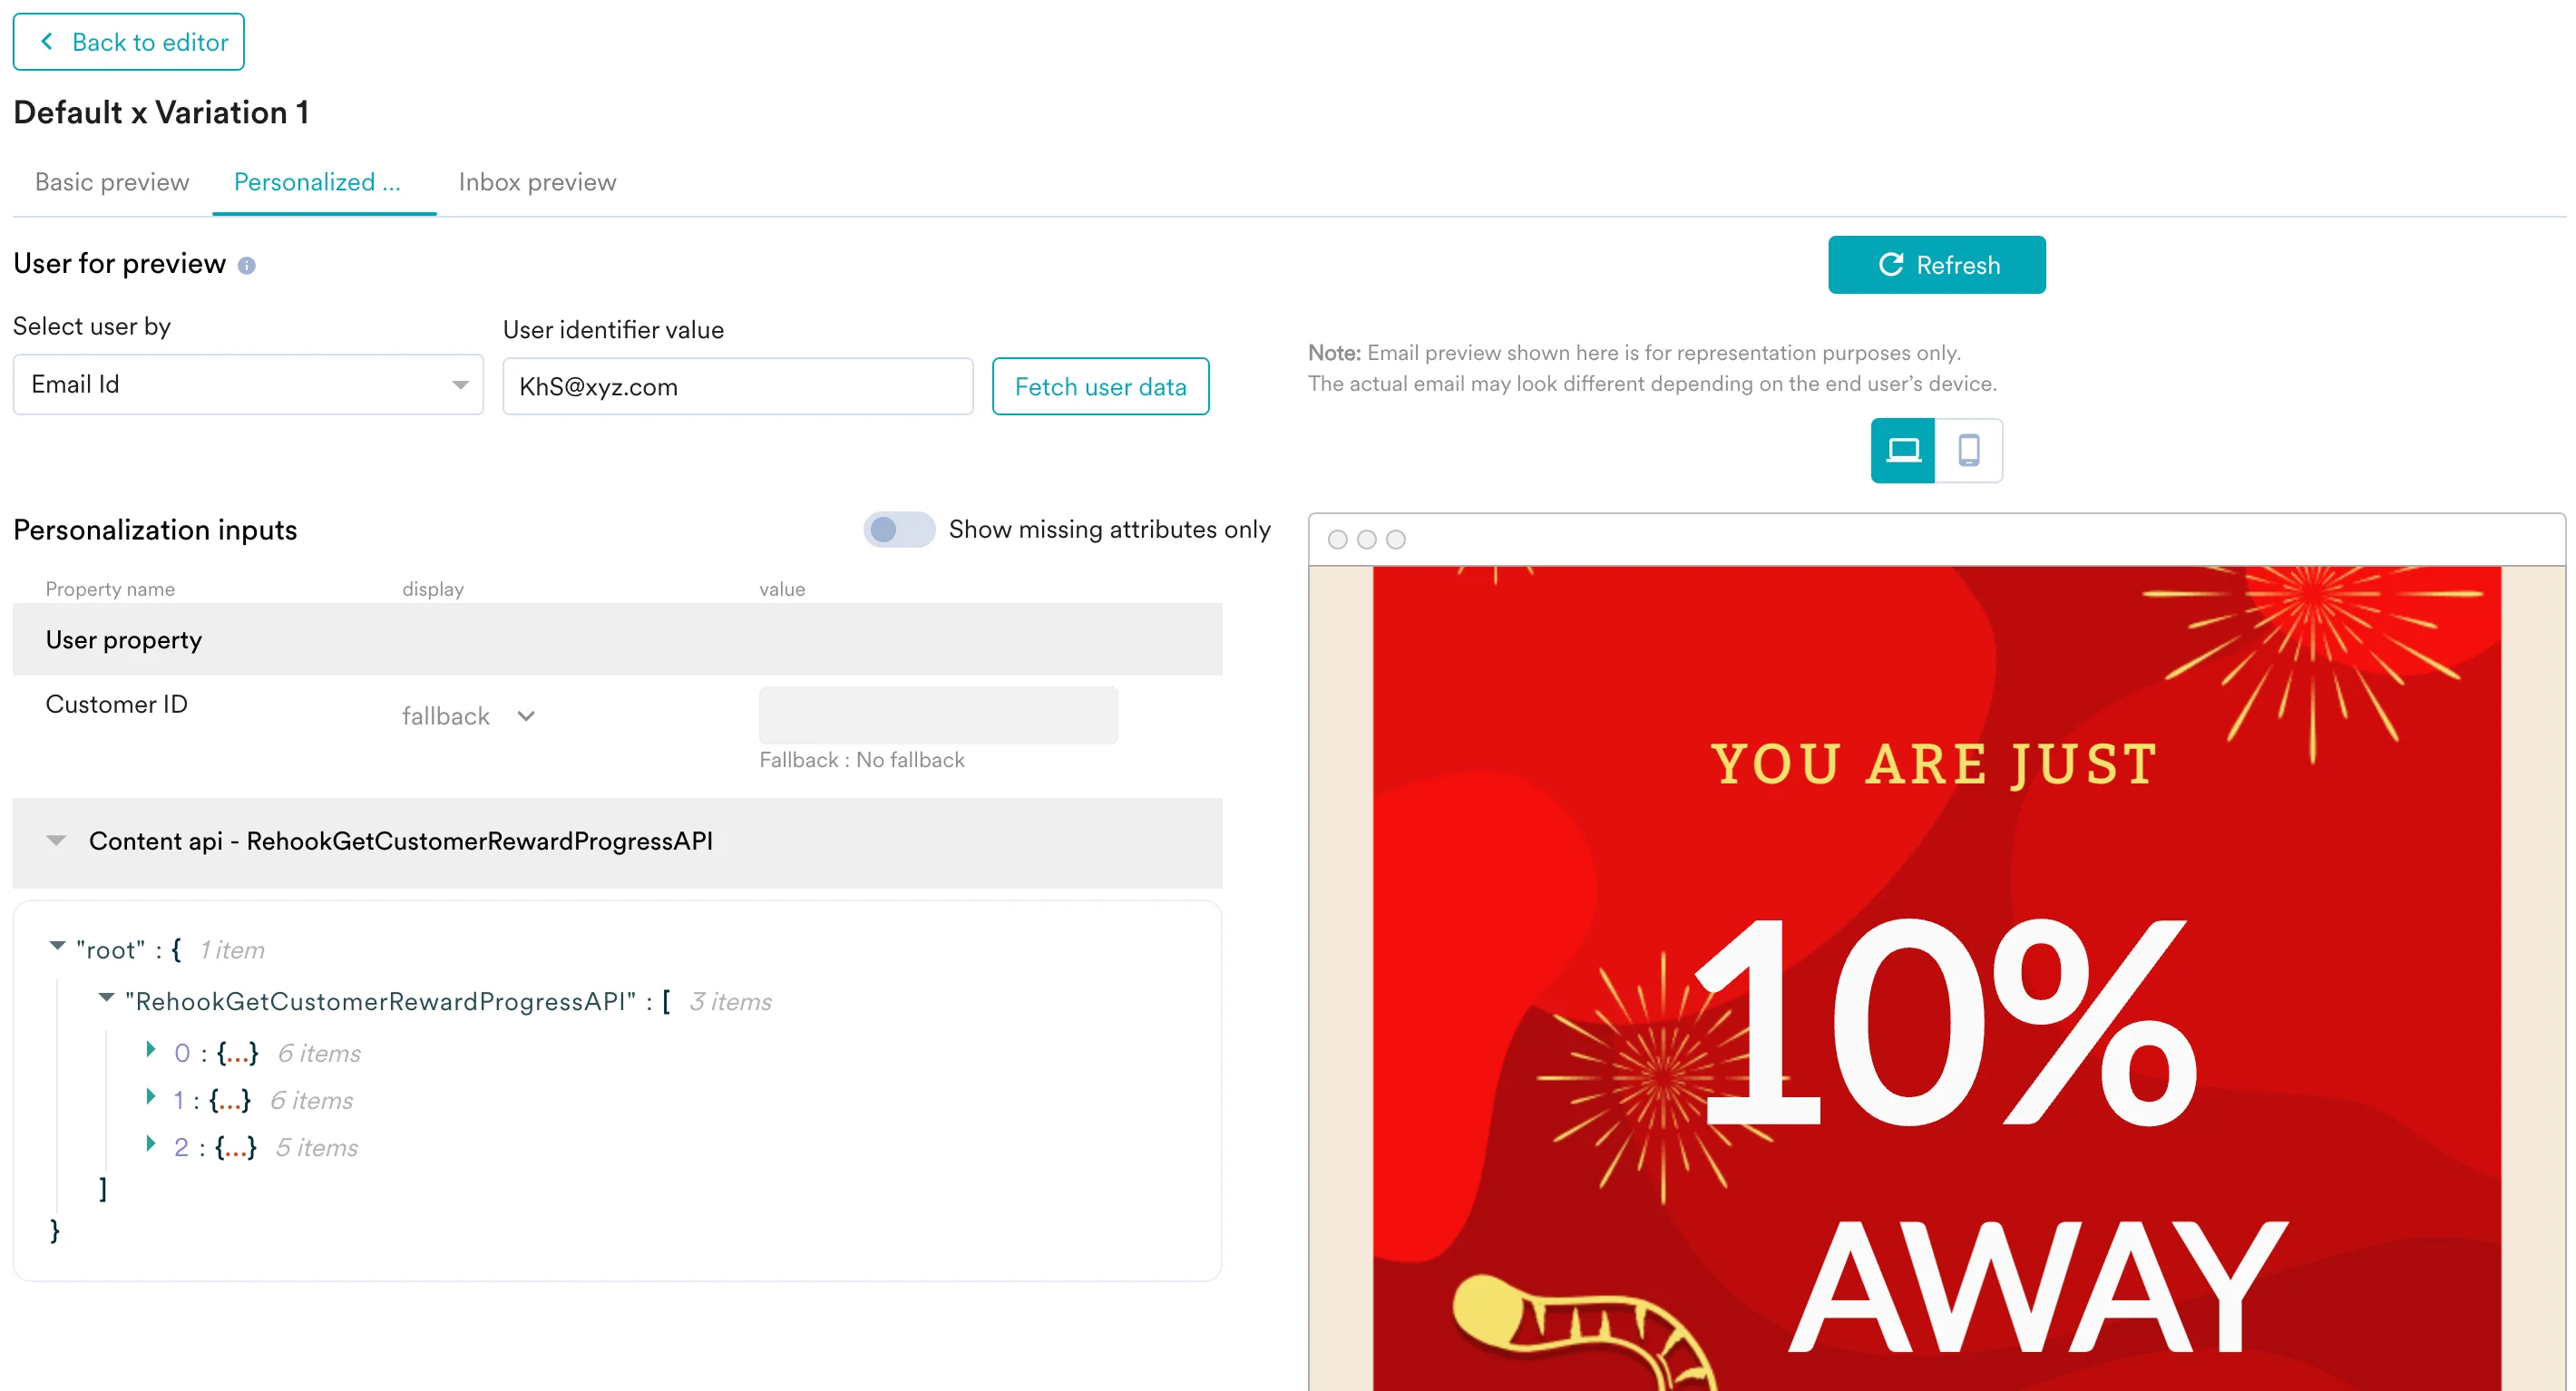 5. Once you are satisfied with the results, you can publish your campaign.