> ## Documentation Index
> Fetch the complete documentation index at: https://moengage.com/docs/llms.txt
> Use this file to discover all available pages before exploring further.
# Sync users from SFMC to MoEngage
> Use Salesforce Marketing Cloud Automation Studio to sync users from Data Extensions to MoEngage in scheduled or on-demand runs for personalized cross-channel campaigns.
## Introduction
This document helps to sync your users from Salesforce Marketing Cloud (SFMC) to MoEngage. By following these steps, you can ensure that your user data is consistently updated in MoEngage, enabling effective and personalized marketing campaigns.
**Prerequisites**
* MoEngage Credentials Data Extension: Included in the package, this data extension stores your MoEngage workspace credentials.
* Sync Users to MoEngage Data Extension: Included in the package, this data extension contains all users to be synced to MoEngage. Required fields include `customer_id`, MoEngage Workspace Name, and `synced` (indicates sync status).
* User Sync Automation: Included in the package, this automation includes the necessary Server-Side JavaScript (SSJS) activity to perform the sync.
## Integration
SFMC Audience Sync involves transferring audience data from Salesforce Marketing Cloud to MoEngage using Automation Studio. The process leverages an SSJS script to extract user data and MoEngage credentials from designated Data Extensions, syncs the users to the specified MoEngage workspace, and updates the sync status accordingly. This automation runs daily or on demand (from the UI).
## Steps
### Step 1: Configure Data Extension
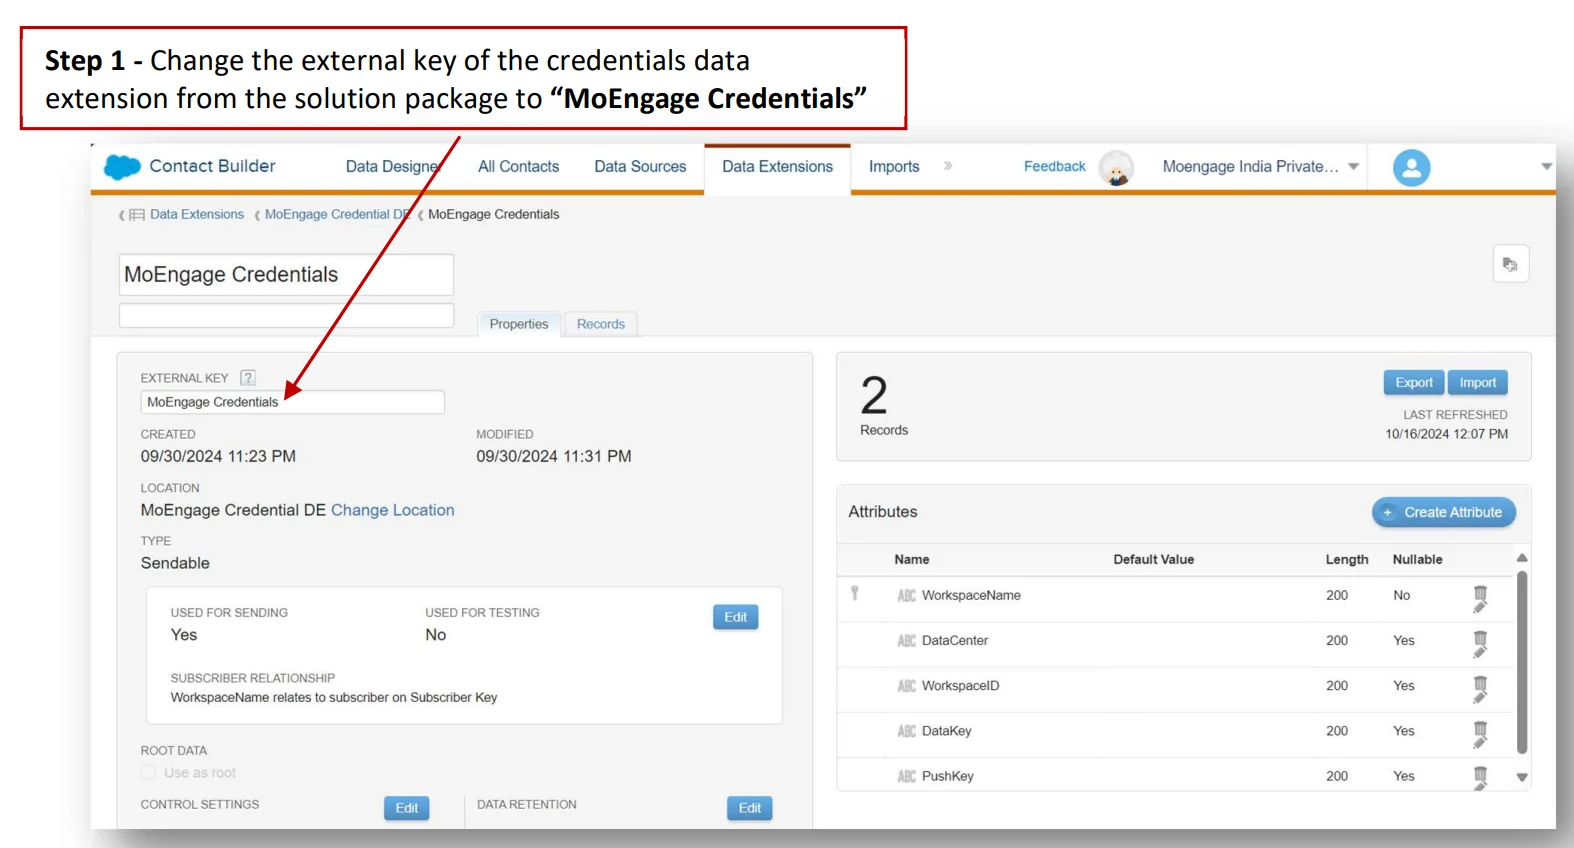
1. Change the external key of the credentials data extension from the solution package to "MoEngage Credentials".
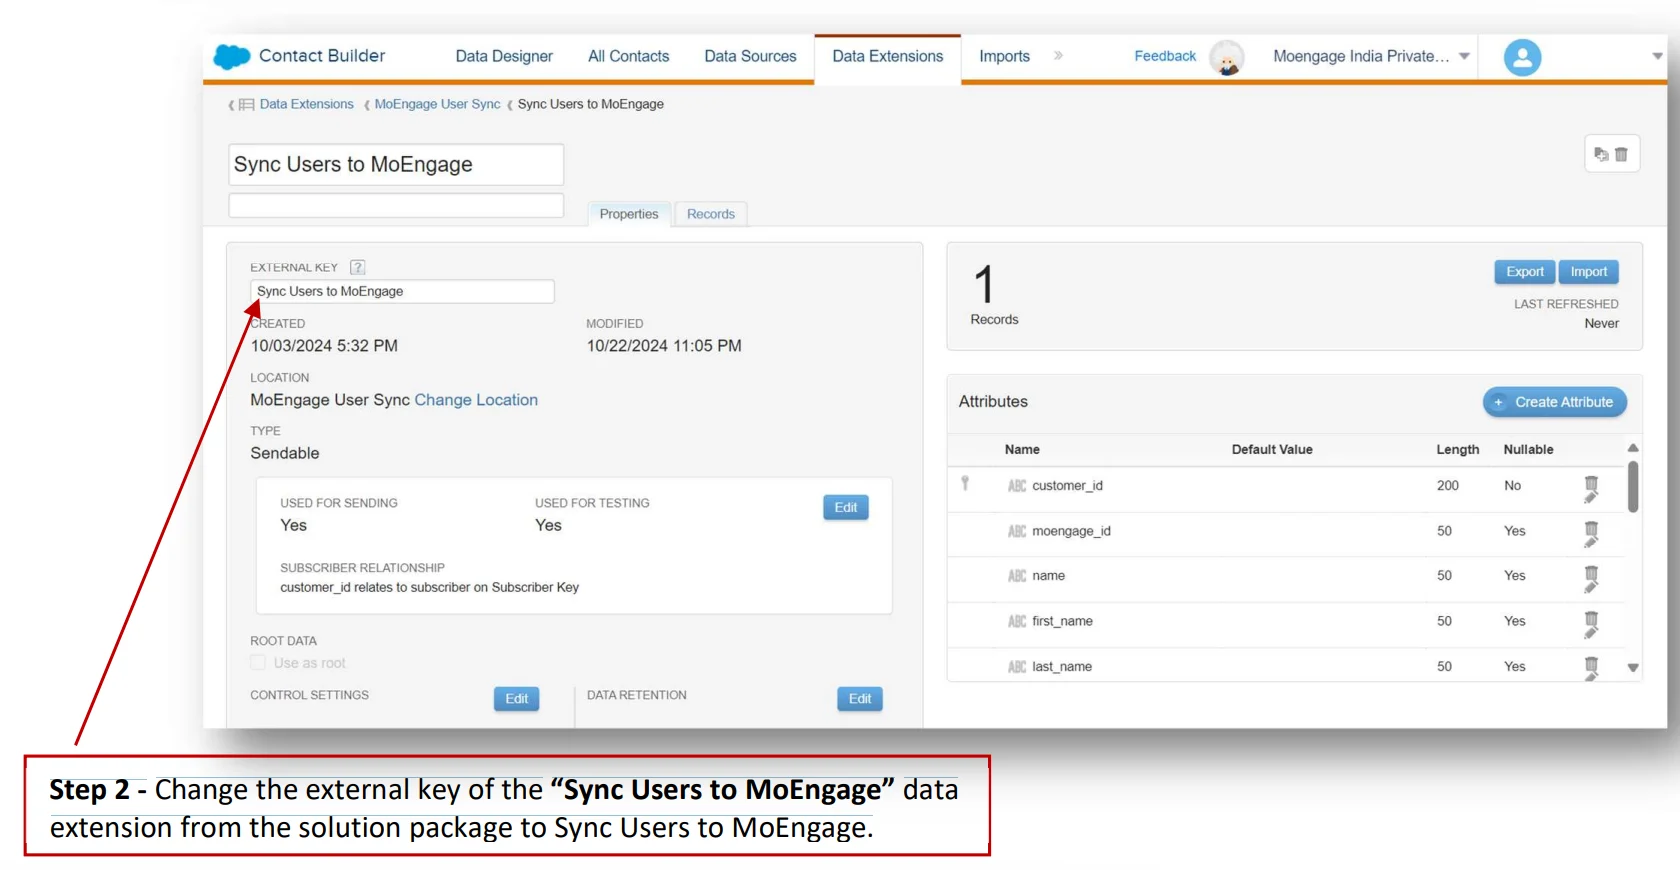
 2. Change the external key of the "Sync Users to MoEngage" data extension from the solution package to "Sync Users to MoEngage".
 ### Step 2: Populate user data
1. Open the "Sync Users to MoEngage" Data Extension from the installed solution package.
### Step 2: Populate user data
1. Open the "Sync Users to MoEngage" Data Extension from the installed solution package.
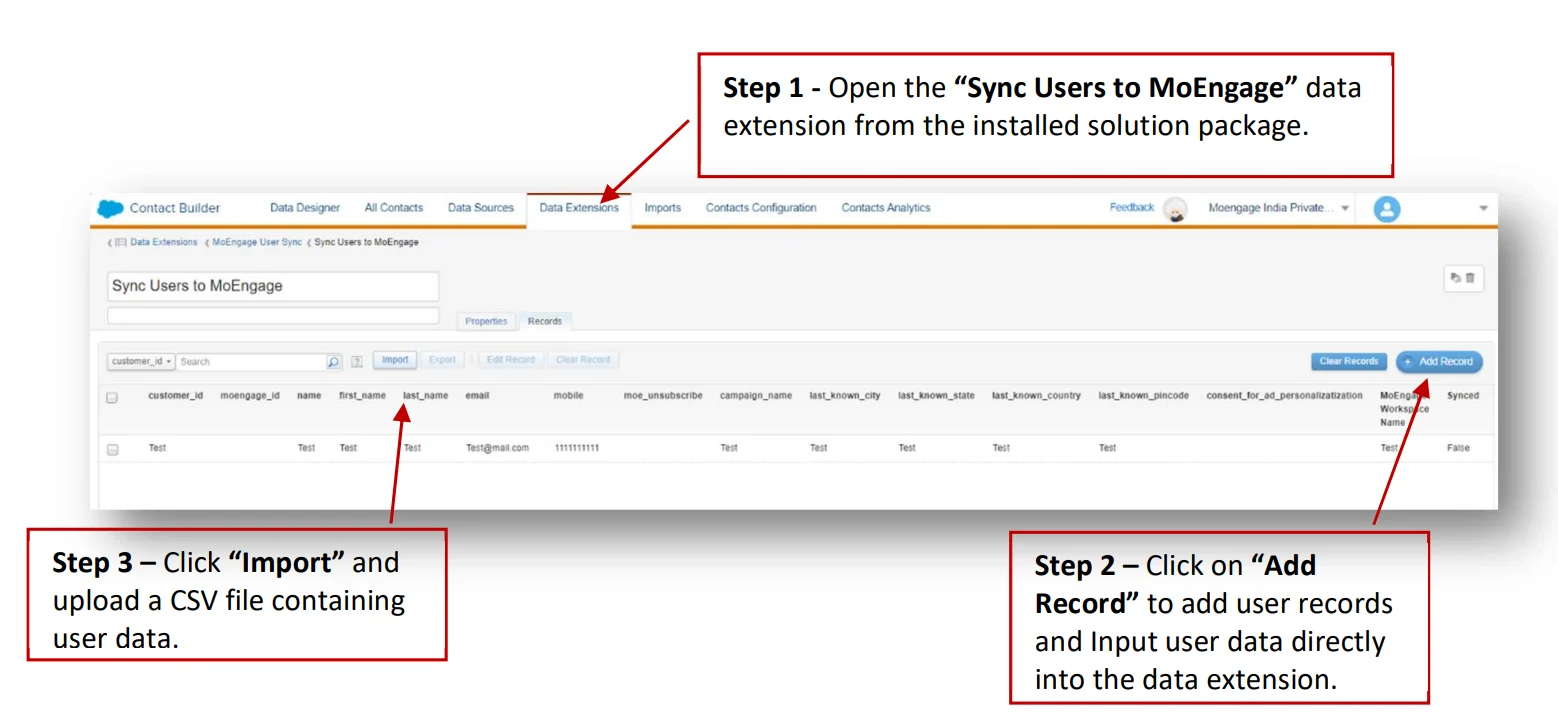 2. Click on "Add Record" to add user records and input user data directly into the Data Extension.
3. Click "Import" and upload a CSV file containing user data.
4. Required Fields:
* `customer_id`
* MoEngage Workspace Name
* `synced` (set to `false` for unsynced records)
5. Additional Fields: Include any other necessary fields for the sync process. Fields can be added or removed based on requirements.
Setting the `synced` field to `false` ensures that only these records are picked up by the automation for syncing. After a successful sync, this field will be updated to `true`.
### Step 3: Execute User Sync Automation
#### Automation configuration
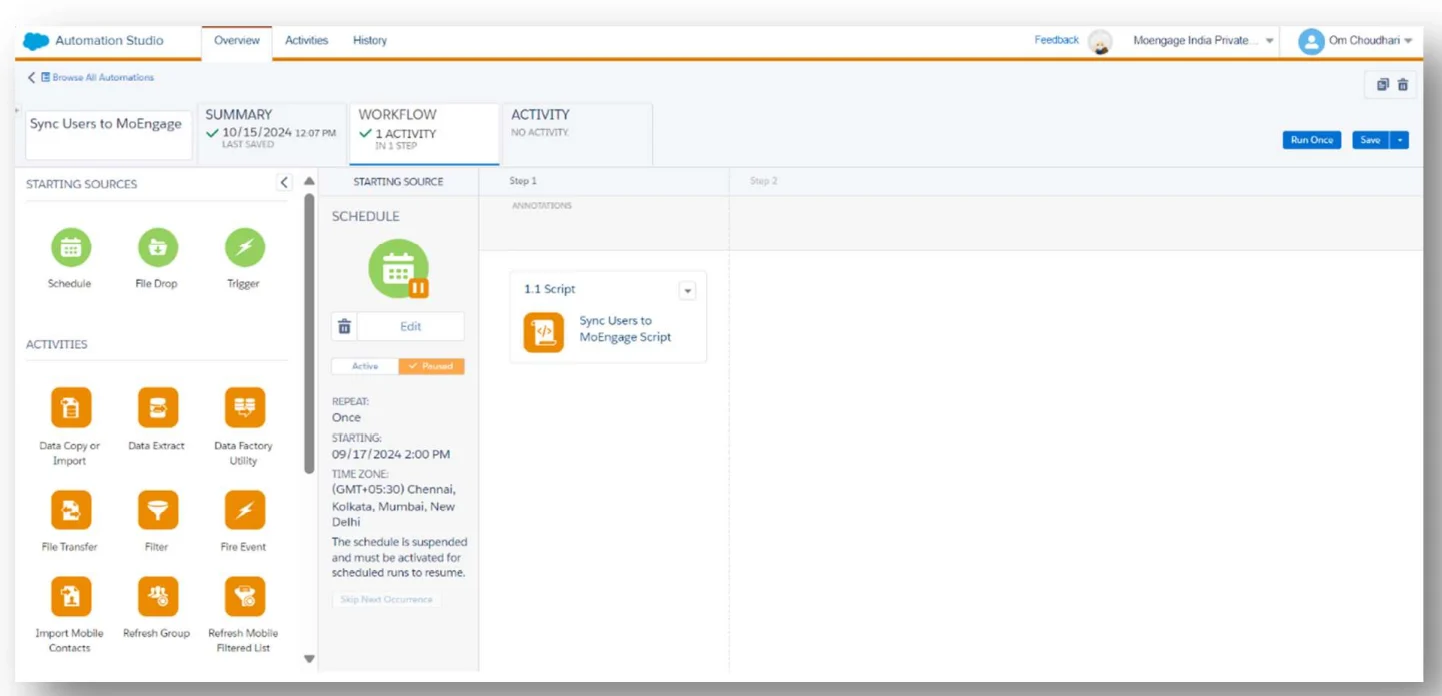
The automation, pre-configured in the solution package, uses an SSJS script to process the sync. Activate the automation to run every 24 hours. Or click "run once" to execute the automation once for testing purposes.
2. Click on "Add Record" to add user records and input user data directly into the Data Extension.
3. Click "Import" and upload a CSV file containing user data.
4. Required Fields:
* `customer_id`
* MoEngage Workspace Name
* `synced` (set to `false` for unsynced records)
5. Additional Fields: Include any other necessary fields for the sync process. Fields can be added or removed based on requirements.
Setting the `synced` field to `false` ensures that only these records are picked up by the automation for syncing. After a successful sync, this field will be updated to `true`.
### Step 3: Execute User Sync Automation
#### Automation configuration
The automation, pre-configured in the solution package, uses an SSJS script to process the sync. Activate the automation to run every 24 hours. Or click "run once" to execute the automation once for testing purposes.
 #### Sync process
The automation retrieves user data from the Sync Users to MoEngage Data Extension and MoEngage credentials from the MoEngage Credentials Data Extension. It syncs users with `synced` set to `false` to the active MoEngage workspace.
* New Users: Created in MoEngage.
* Existing Users: Attributes are updated in MoEngage.
Upon successful sync, the `synced` field in SFMC DE is updated to `true`.
#### Scheduling
The automation runs automatically every 24 hours.
### Troubleshooting: Monitor automation logs
* Navigate to the Activity Section within Automation Studio to view logs related to the sync process.
#### Sync process
The automation retrieves user data from the Sync Users to MoEngage Data Extension and MoEngage credentials from the MoEngage Credentials Data Extension. It syncs users with `synced` set to `false` to the active MoEngage workspace.
* New Users: Created in MoEngage.
* Existing Users: Attributes are updated in MoEngage.
Upon successful sync, the `synced` field in SFMC DE is updated to `true`.
#### Scheduling
The automation runs automatically every 24 hours.
### Troubleshooting: Monitor automation logs
* Navigate to the Activity Section within Automation Studio to view logs related to the sync process.
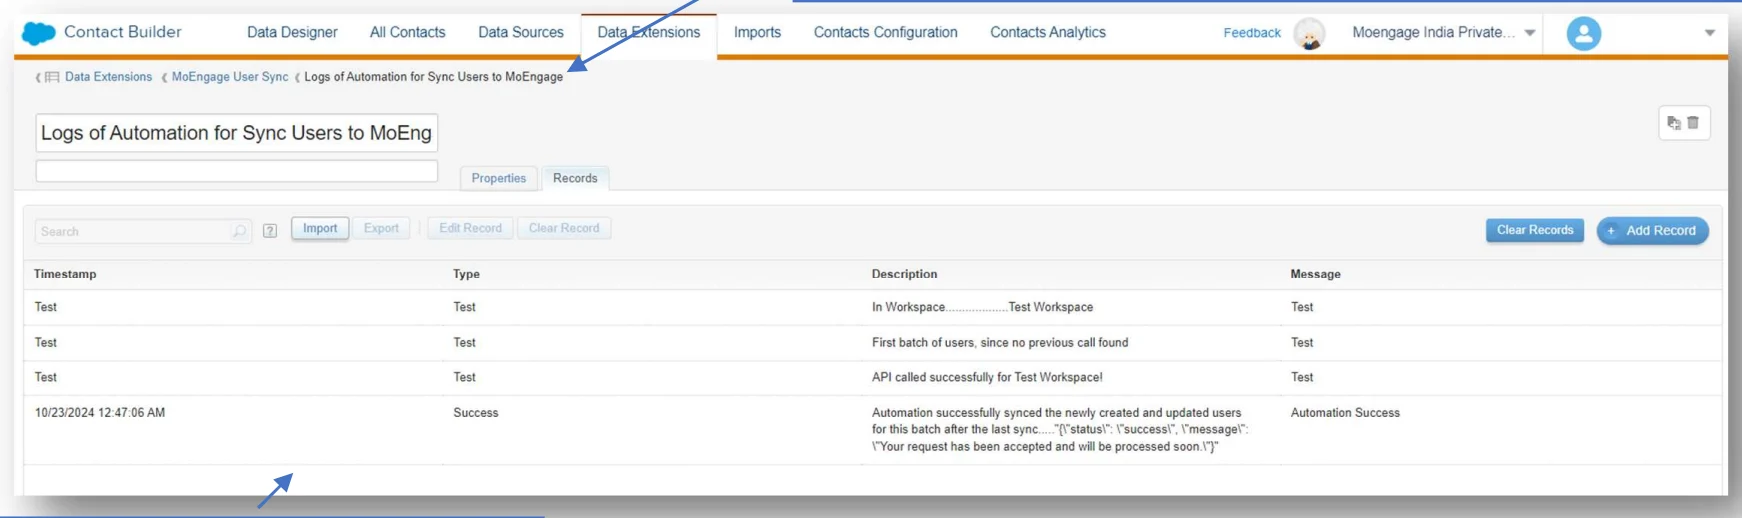
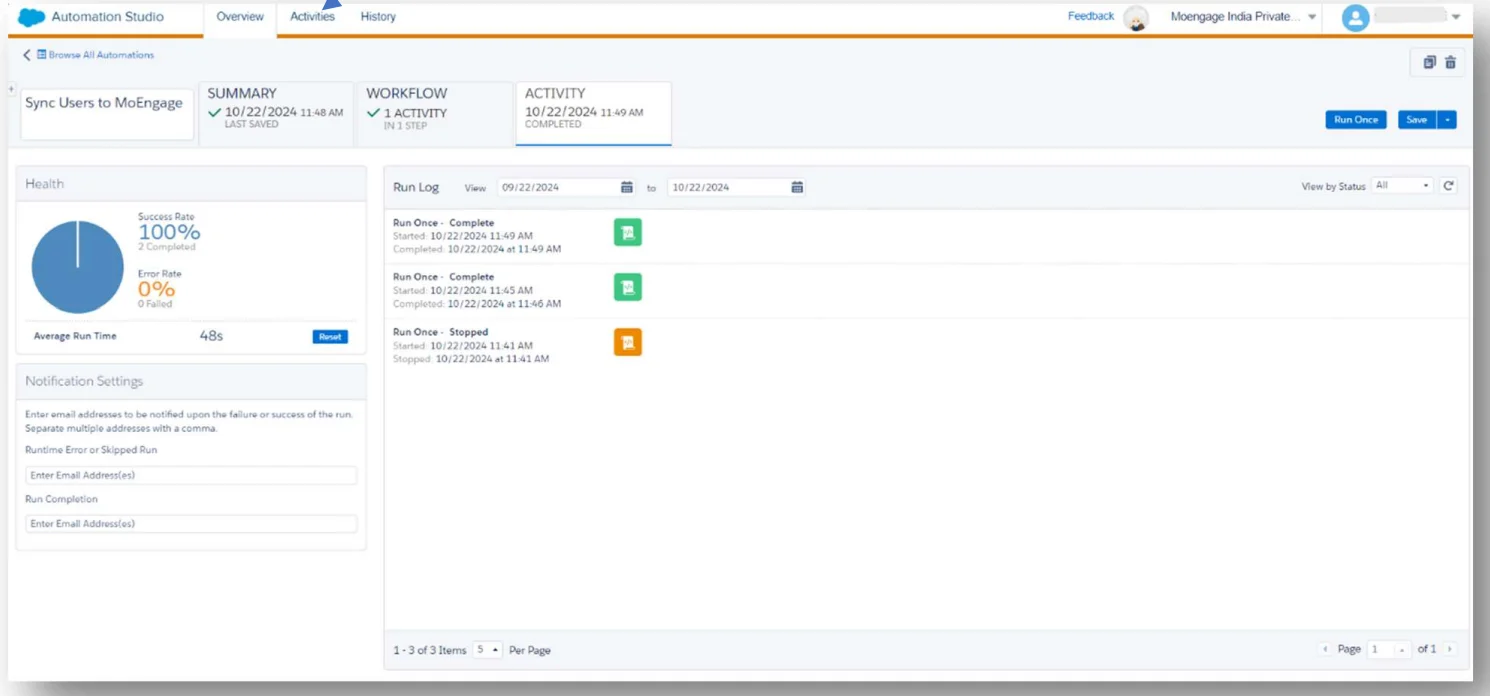 * Additional details are logged in the "Logs of Automation for Sync Users to MoEngage" Data Extension, available in the solution package. Use these logs to troubleshoot any issues or verify successful sync operations.