> ## Documentation Index
> Fetch the complete documentation index at: https://moengage.com/docs/llms.txt
> Use this file to discover all available pages before exploring further.
# Whilter AI
[Whilter AI](https://konne.whilter.ai/login) is an advanced platform for creating dynamic and hyper-personalized video and image content. It uses user data to generate real-time media at scale.
## MoEngage x Whilter AI
The integration of Whilter AI and MoEngage enables businesses to generate and deliver personalized media in real-time. You can use MoEngage's connector campaigns to trigger content creation in Whilter AI, which then uses a secure callback to update the MoEngage user profile with the generated media URL.
With this integration, you can:
* Trigger real-time personalized content generation (video or image) based on user actions in MoEngage.
* Update MoEngage user profiles instantly with the public URL of the generated media.
* Use the personalized URL in subsequent MoEngage delivery campaigns (Email, WhatsApp, and others).
## Use Cases
Integrating MoEngage with Whilter AI supports the following use cases:
* **Personalized onboarding**: Automatically generate a personalized welcome video when a new user signs up and send it via email instantly.
* **Abandoned cart recovery**: Create a personalized image or video showing a user's abandoned item(s) and use it in a recovery campaign.
* **Milestone rewards**: Generate a personalized "Thank You" video when a user reaches a loyalty tier or purchase milestone.
# Integration
**Prerequisites**
Before you begin the configuration, ensure you have the following:
* An active Whilter AI account with access to template creation.
* Your Whilter AI **Client ID** and **Client Secret** (required for token generation).
* An active MoEngage UI account.
## Step 1: Set up the Whilter AI Campaign
To set up the campaign in Whilter, perform the following steps:
1. Sign in to the Whilter AI platform.  2. Navigate to the **Campaign Creation** page:
1. On the left navigation, click **Campaign**.
2. Click **+ Create** or select an existing campaign (for example, axis-genz).
2. Navigate to the **Campaign Creation** page:
1. On the left navigation, click **Campaign**.
2. Click **+ Create** or select an existing campaign (for example, axis-genz). 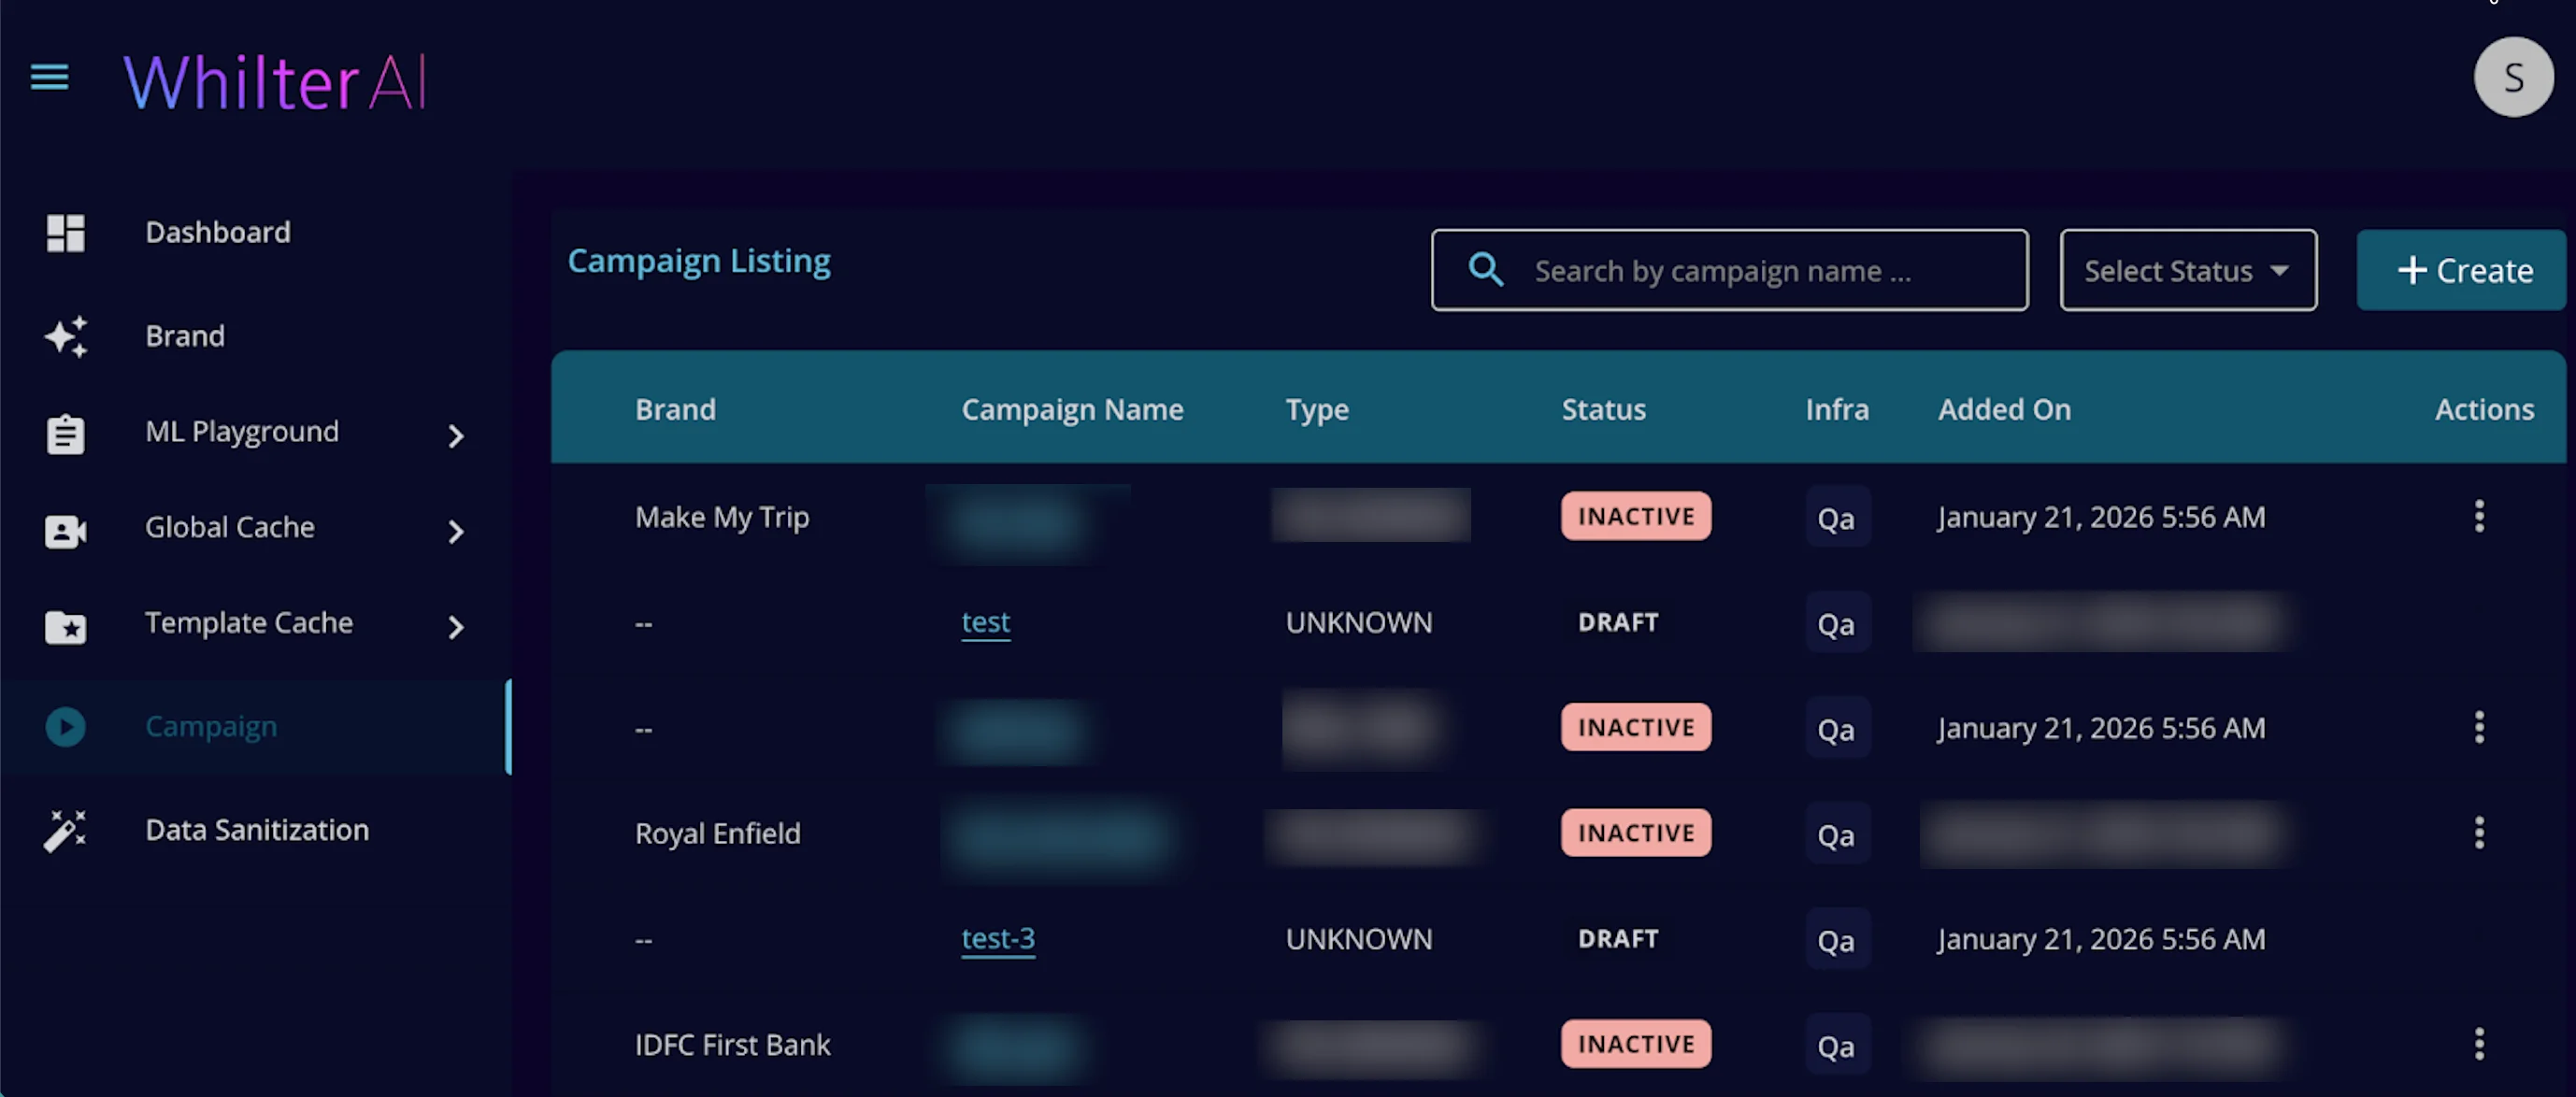 3. Configure Media Parts:
1. On the **Campaign** dashboard, click **Campaign Config**.
2. In the **Video Config** section, your template is divided into sequential parts. Click each header below to expand the section and upload your base templates:
* **ML with MLT**: AI-driven features like LipSync, Transliteration, or TTS.
* **MLT**: Standard dynamic layer mapping.
* **STATIC**: Assets that remain unchanged.
3. Click **Browse Media** to upload your asset.
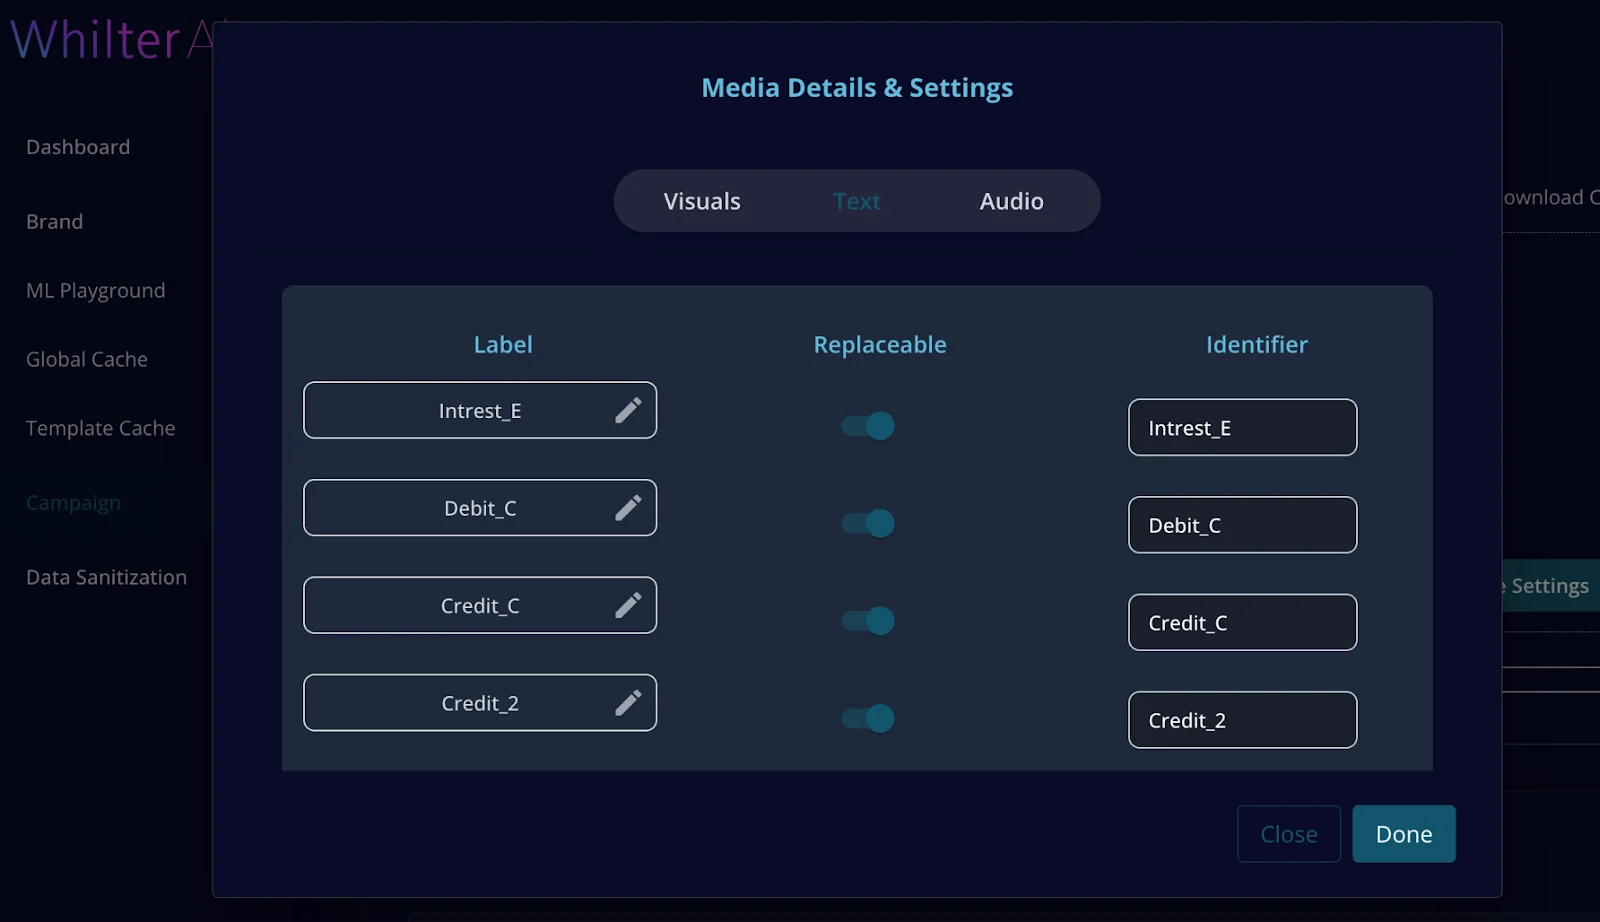
4. Map the dynamic fields:
1. Identify the layers (text or image) in your template.
2. Map the user attributes you want to send from MoEngage.
3. Click the Eye
3. Configure Media Parts:
1. On the **Campaign** dashboard, click **Campaign Config**.
2. In the **Video Config** section, your template is divided into sequential parts. Click each header below to expand the section and upload your base templates:
* **ML with MLT**: AI-driven features like LipSync, Transliteration, or TTS.
* **MLT**: Standard dynamic layer mapping.
* **STATIC**: Assets that remain unchanged.
3. Click **Browse Media** to upload your asset.
4. Map the dynamic fields:
1. Identify the layers (text or image) in your template.
2. Map the user attributes you want to send from MoEngage.
3. Click the Eye  icon (optional) to preview the asset.
  4. Connection Configuration:
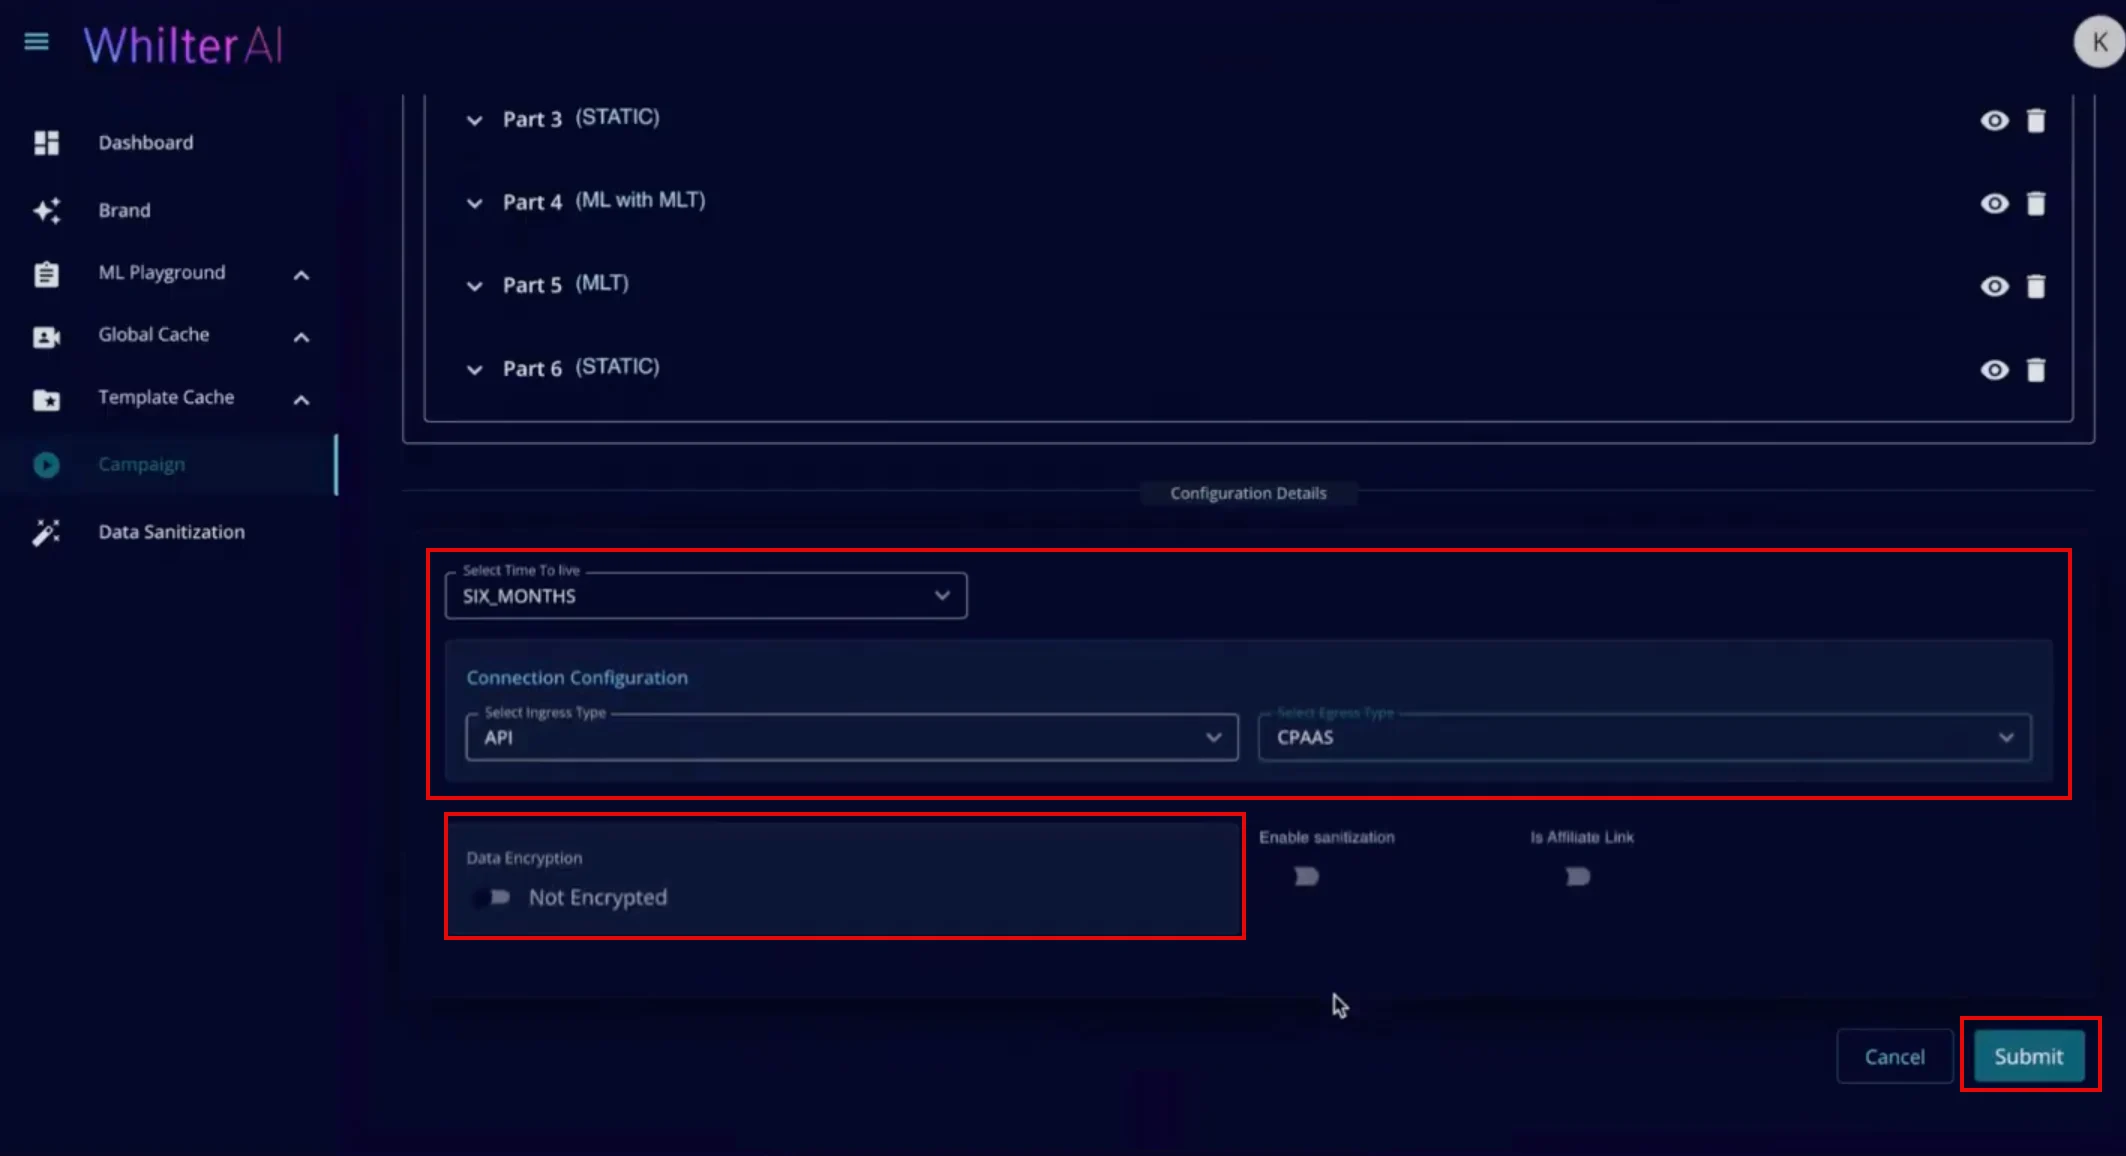
1. Scroll down to the **Connection Details** section.
2. In the **Select Ingress Type** list, click **API**.
3. In the **Select Egress Type** list, click **CPAAS**.
4. In the **Select Time To Live** list, click **SIX\_MONTHS** (or as required by the campaign).
5. **Data Encryption**: Turn the **Not Encrypted** toggle on based on your data privacy requirements.
5. Submit and Obtain ID:
1. Click **Submit**.
2. Copy the unique use-case-id assigned to the template (for example, `67be6947-44c2-4fcc-bf34-3d82ce767081`). This ID is required for [Step 2](#step-2-set-up-moengage-authorization).
4. Connection Configuration:
1. Scroll down to the **Connection Details** section.
2. In the **Select Ingress Type** list, click **API**.
3. In the **Select Egress Type** list, click **CPAAS**.
4. In the **Select Time To Live** list, click **SIX\_MONTHS** (or as required by the campaign).
5. **Data Encryption**: Turn the **Not Encrypted** toggle on based on your data privacy requirements.
5. Submit and Obtain ID:
1. Click **Submit**.
2. Copy the unique use-case-id assigned to the template (for example, `67be6947-44c2-4fcc-bf34-3d82ce767081`). This ID is required for [Step 2](#step-2-set-up-moengage-authorization).
 ## Step 2: Set up MoEngage Authorization
Follow the steps below to integrate MoEngage with Whilter AI and set up the connector campaign.
### Step 2.1: Access Authorization Settings
1. Log in to the MoEngage UI.
2. Navigate to **Settings** > **Advanced settings** > **Authorization configuration**.
3. Click **+ Add OAuth config**.
### Step 2.2: Configure OAuth Details
1. In the **OAuth details** step, enter the following:
* **OAuth name**: Enter a name for the OAuth configuration (for example, WhilterAI).
* **Grant type**: Currently, the **Client Credential** grant type is supported. If you use other grant types, contact your MoEngage Customer Success Manager (CSM) or the Support team.
* **Token type**: Click **Opaque** (Whilter AI uses opaque tokens where the response contains the expiry time alongside the token).
* **API URL**: Enter `https://api.whilter.ai/getToken/token`.
* **Method**: Click **POST**.
* **Headers**: Click **+ KV pair** and add **Content-Type**: `application/json`.
* **Body type**: Click **Raw** and in the body section, configure the body for your requests.
## Step 2: Set up MoEngage Authorization
Follow the steps below to integrate MoEngage with Whilter AI and set up the connector campaign.
### Step 2.1: Access Authorization Settings
1. Log in to the MoEngage UI.
2. Navigate to **Settings** > **Advanced settings** > **Authorization configuration**.
3. Click **+ Add OAuth config**.
### Step 2.2: Configure OAuth Details
1. In the **OAuth details** step, enter the following:
* **OAuth name**: Enter a name for the OAuth configuration (for example, WhilterAI).
* **Grant type**: Currently, the **Client Credential** grant type is supported. If you use other grant types, contact your MoEngage Customer Success Manager (CSM) or the Support team.
* **Token type**: Click **Opaque** (Whilter AI uses opaque tokens where the response contains the expiry time alongside the token).
* **API URL**: Enter `https://api.whilter.ai/getToken/token`.
* **Method**: Click **POST**.
* **Headers**: Click **+ KV pair** and add **Content-Type**: `application/json`.
* **Body type**: Click **Raw** and in the body section, configure the body for your requests. 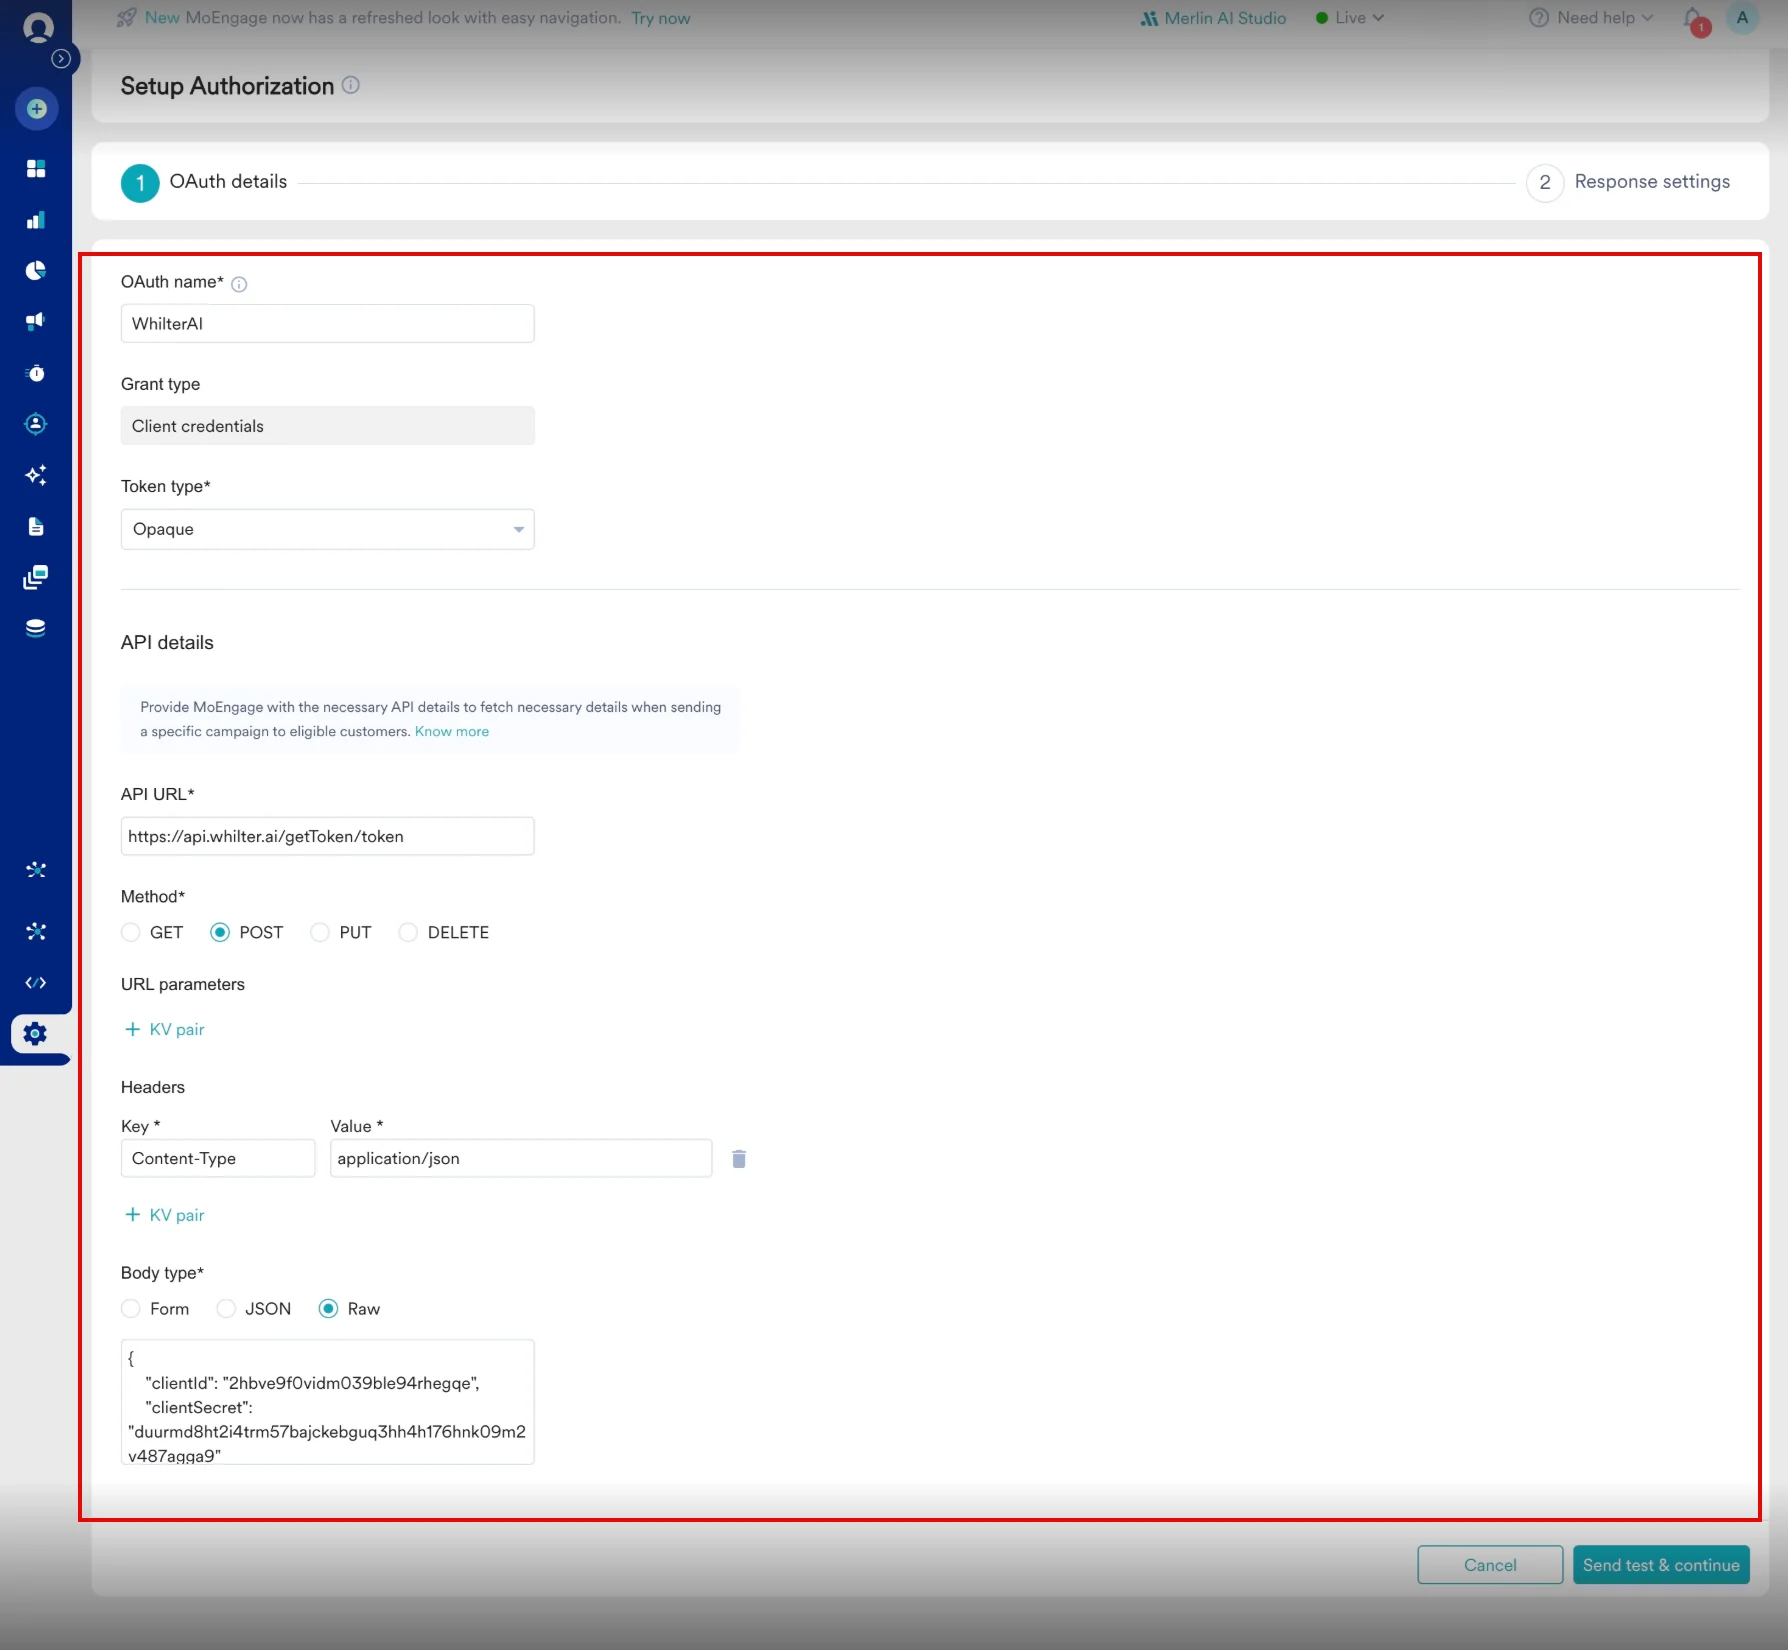 2. Click **Send test & continue**.
### Step 2.3: Configure Response Settings
In the **Response settings** step, finalize how MoEngage handles the Whilter AI token:
1. **OAuth delivery response**: Verify the JSON response received from the test.
2. **Access token**: Click the key that contains the token (for example, `access_token`).
3. **Expiry**: Click **expires\_in** and set the unit to **Seconds**.
4. **Preferred prefix:** Click **Bearer**.
5. **Preferred error codes**: Enter the error code (for example, `401` or `403`) to trigger a token refresh if an authorization failure occurs.
6. Click **Save**.
2. Click **Send test & continue**.
### Step 2.3: Configure Response Settings
In the **Response settings** step, finalize how MoEngage handles the Whilter AI token:
1. **OAuth delivery response**: Verify the JSON response received from the test.
2. **Access token**: Click the key that contains the token (for example, `access_token`).
3. **Expiry**: Click **expires\_in** and set the unit to **Seconds**.
4. **Preferred prefix:** Click **Bearer**.
5. **Preferred error codes**: Enter the error code (for example, `401` or `403`) to trigger a token refresh if an authorization failure occurs.
6. Click **Save**.  The setting status is shown as **Active**. For more information, refer to [Authorization Configuration with OAuth 2.0](/user-guide/settings/advanced-settings/authorization-configuration-with-oauth-20#h_01HR16WG2MHMC9BFDAVCTPDTX3).
## Step 3: Create a MoEngage Connector Campaign
To create the MoEngage connector campaign, perform the following steps:
1. Navigate to the MoEngage UI.
2. On the left navigation menu, click **Engage** and then click **Campaigns**.
3. On the All campaigns page, in the upper-right corner, click **+ Create campaign**.
The setting status is shown as **Active**. For more information, refer to [Authorization Configuration with OAuth 2.0](/user-guide/settings/advanced-settings/authorization-configuration-with-oauth-20#h_01HR16WG2MHMC9BFDAVCTPDTX3).
## Step 3: Create a MoEngage Connector Campaign
To create the MoEngage connector campaign, perform the following steps:
1. Navigate to the MoEngage UI.
2. On the left navigation menu, click **Engage** and then click **Campaigns**.
3. On the All campaigns page, in the upper-right corner, click **+ Create campaign**.  Alternatively, click Create **New** > **Campaign**. The Campaign page is displayed.
 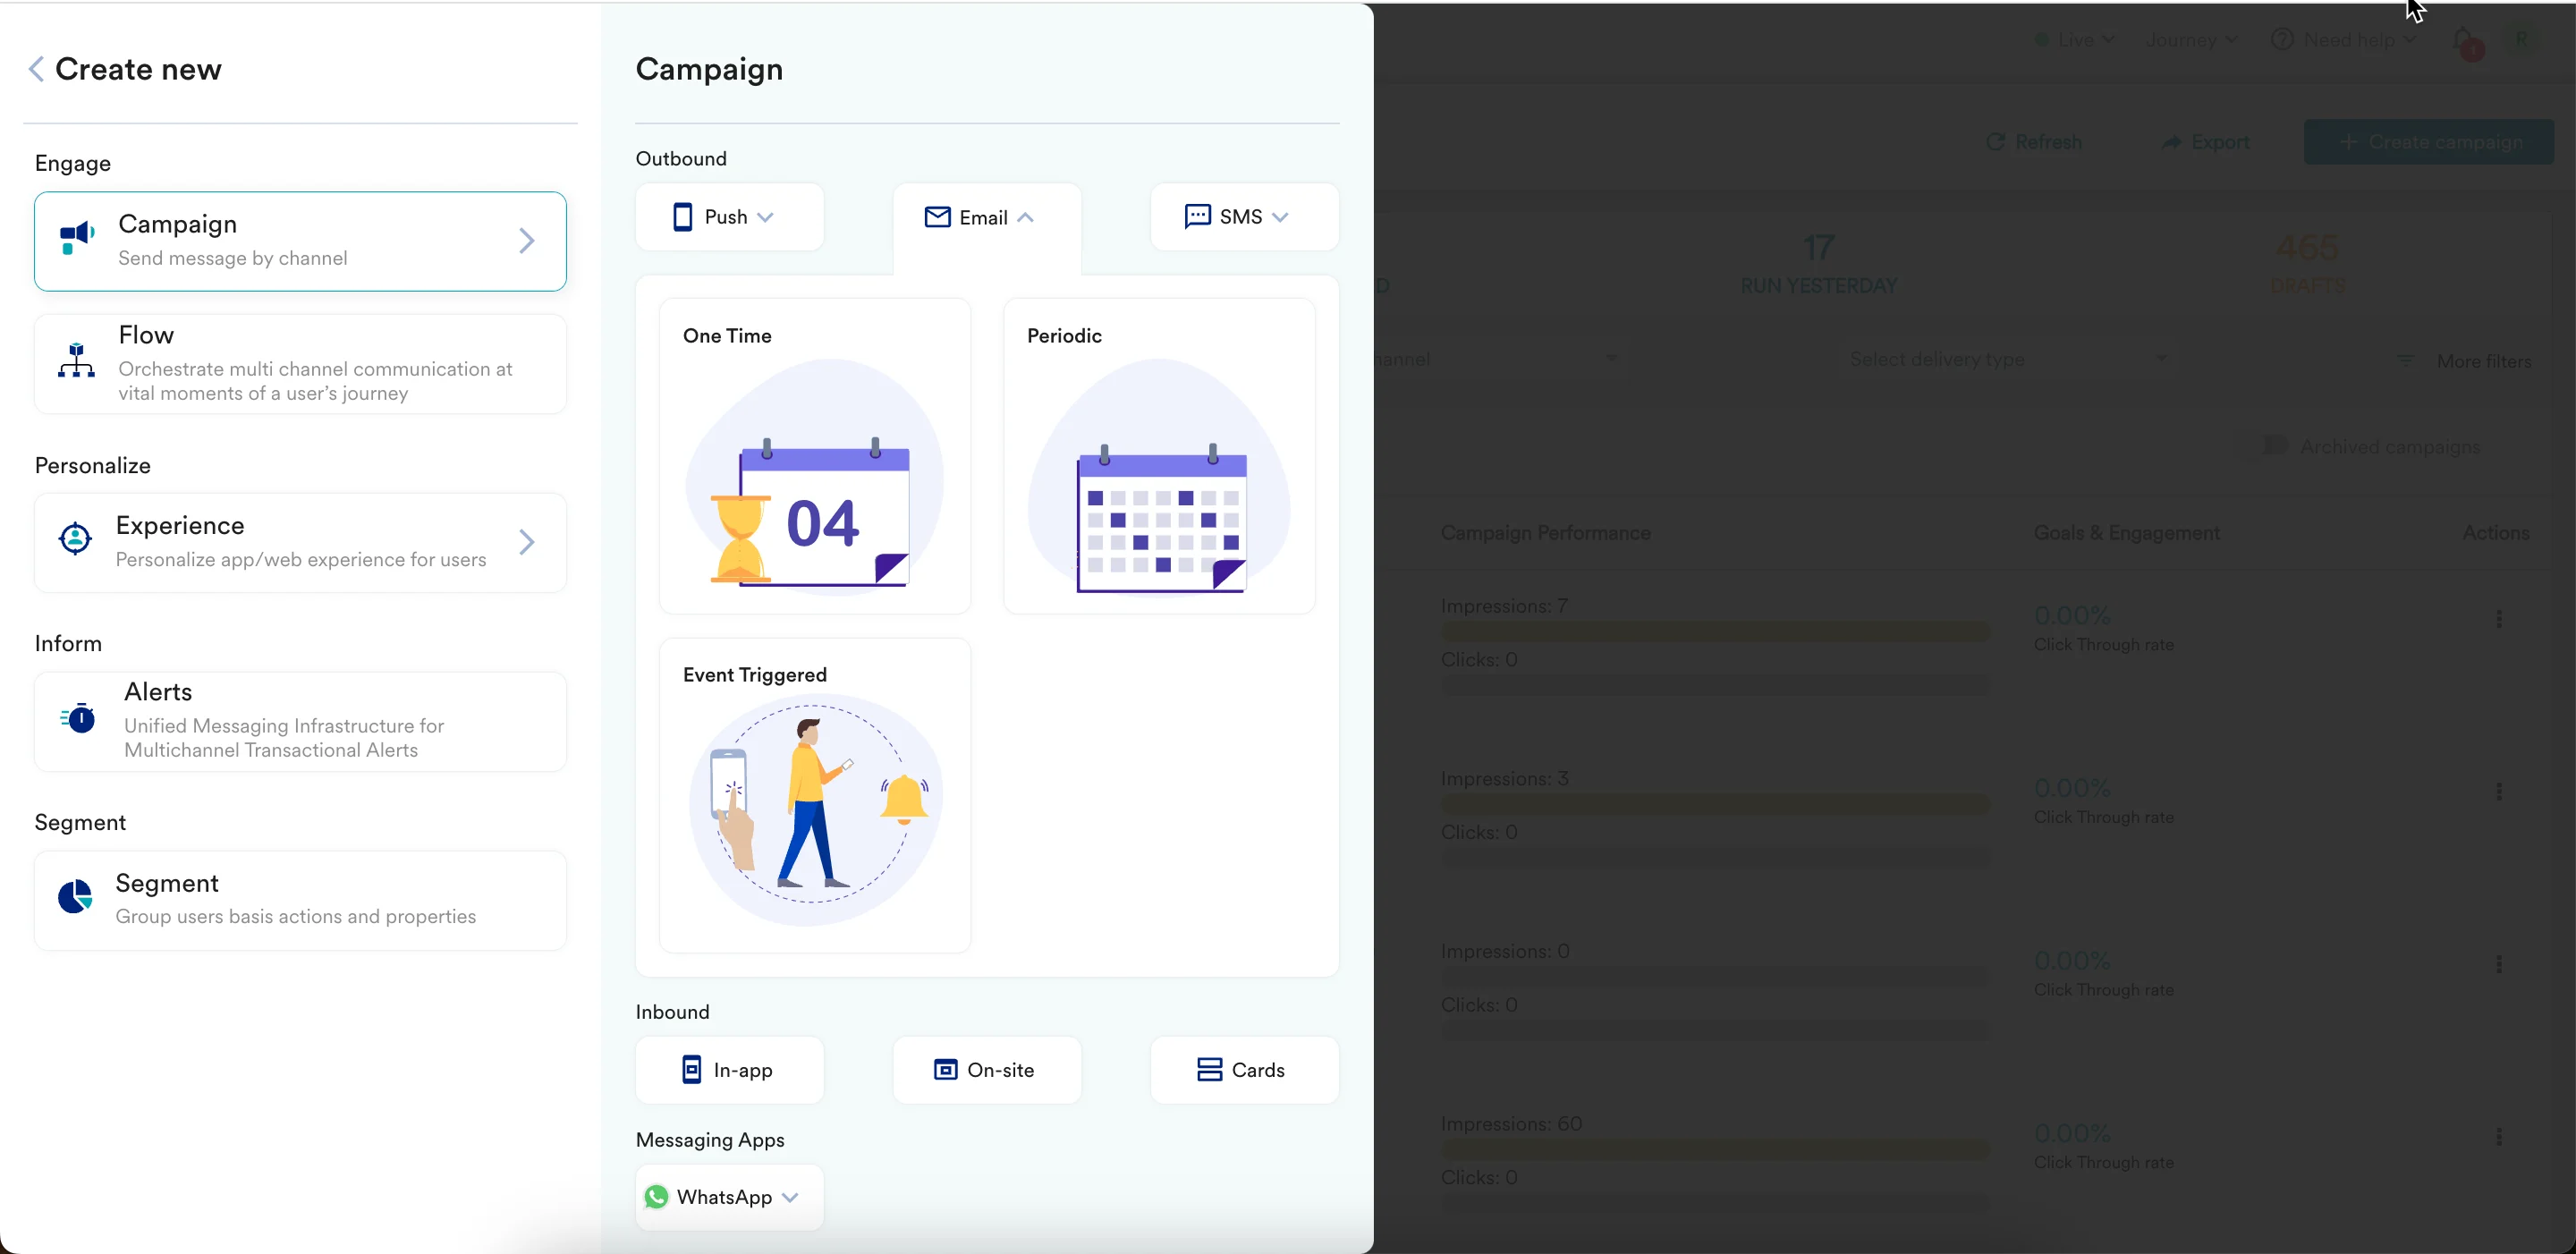 4. Under **Connectors**, click **Custom** and select one of the following campaign delivery types:
1. One Time
2. Periodic
3. Event Triggered
4. Business Event Triggered
For more information, refer to [Delivery Types](/user-guide/campaigns-and-channels/getting-started/introduction/moengage-channels). The Connector creation page is displayed.
4. Under **Connectors**, click **Custom** and select one of the following campaign delivery types:
1. One Time
2. Periodic
3. Event Triggered
4. Business Event Triggered
For more information, refer to [Delivery Types](/user-guide/campaigns-and-channels/getting-started/introduction/moengage-channels). The Connector creation page is displayed.  5. In step 2 of the campaign, provide the following information:
| Field | Value |
| ------------------ | ---------------------------------------------------------------------------------------------------------------------------------------------------------------- |
| **Method** | **POST** |
| **URL** | `https://api.whilter.ai/video/request` |
| **Custom Headers** | **Content-Type**: `application/json`
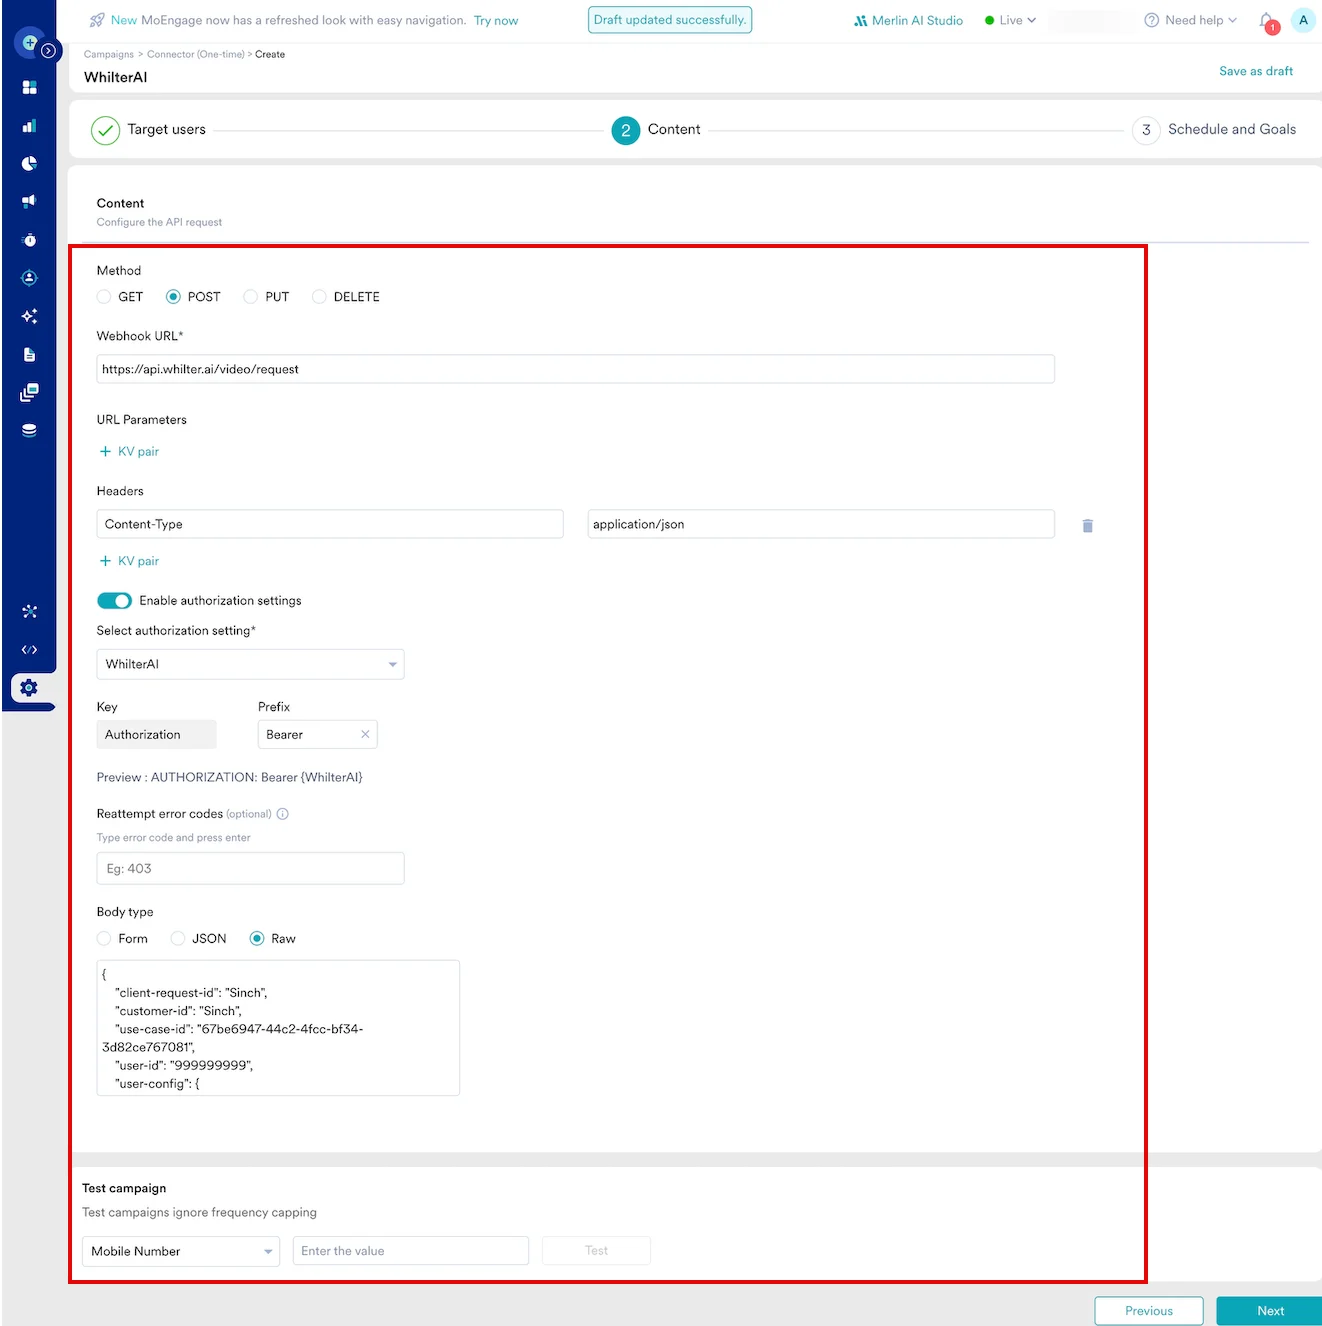
5. In step 2 of the campaign, provide the following information:
| Field | Value |
| ------------------ | ---------------------------------------------------------------------------------------------------------------------------------------------------------------- |
| **Method** | **POST** |
| **URL** | `https://api.whilter.ai/video/request` |
| **Custom Headers** | **Content-Type**: `application/json`
**Authorization**: Select the OAuth configuration that you created in [Step 2](#step-2-set-up-moengage-authorization). |
5. In the body section, define the parameters required by the Whilter AI template using the following payload structure:
```json wrap theme={null}
{
"client-request-id": "MoEngage_{{UserAttribute['MoEngage ID']}}",
"customer-id": "{{UserAttribute['MoEngage ID']}}",
"use-case-id": "YOUR_USE_CASE_ID_FROM_STEP_1",
"user-id": "{{UserAttribute['Phone Number']}}",
"user-config": {
"name": "{{UserAttribute['First Name']}}",
"product_name": "{{EventAttribute['product_name']}}"
},
"reference-record-id": "{{Campaign.ID}}"
}
```
 6. Now, preview your request. The campaign is now ready to be tested and sent. You can test the connector configuration using the Test functionality available in the second step of campaign creation.
  ## Step 4: Deliver the Personalized Content
After your Connector Campaign is live, MoEngage requests Whilter AI to create your templates. The media URLs generated by Whilter AI are stored as a custom attribute on the user's profile, making them available to any MoEngage delivery campaign.
1. Create a new delivery campaign (for example, Email, WhatsApp, Push notification) in MoEngage.
2. Ensure your target audience is filtered to include users who have the personalized URL set (for example, `whilter_video_url` is set).
3. In the campaign editor, use MoEngage personalization syntax (`@` or `{{UserAttribute}}`) to insert the attribute you mapped in [Step 2](#step-2-set-up-moengage-authorization).
```html wrap theme={null}
## Step 4: Deliver the Personalized Content
After your Connector Campaign is live, MoEngage requests Whilter AI to create your templates. The media URLs generated by Whilter AI are stored as a custom attribute on the user's profile, making them available to any MoEngage delivery campaign.
1. Create a new delivery campaign (for example, Email, WhatsApp, Push notification) in MoEngage.
2. Ensure your target audience is filtered to include users who have the personalized URL set (for example, `whilter_video_url` is set).
3. In the campaign editor, use MoEngage personalization syntax (`@` or `{{UserAttribute}}`) to insert the attribute you mapped in [Step 2](#step-2-set-up-moengage-authorization).
```html wrap theme={null}
 ```
**Information**
You can use the Whilter URL as the **src** attribute value in an `img` tag or embed it as a link for playback in a web browser.
4. Launch the campaign to deliver the personalized media.
```
**Information**
You can use the Whilter URL as the **src** attribute value in an `img` tag or embed it as a link for playback in a web browser.
4. Launch the campaign to deliver the personalized media.