> ## Documentation Index
> Fetch the complete documentation index at: https://moengage.com/docs/llms.txt
> Use this file to discover all available pages before exploring further.
# Seen
> Integrate MoEngage with SEEN to automate personalized video generation and distribute unique landing pages and thumbnails to your users.
# Introduction
[SEEN](https://seen.io/) is a personalization video platform that allows companies to create and build videos around their customers to deliver a more engaging experience. With SEEN, you can design a video around your data, personalize it at scale in the cloud, then distribute it where it works best.
# Use cases
SEEN offers automated video personalization across the entire customer journey. Common uses include onboarding, loyalty, sign-ups and conversion, and win-back and anti-churn.
# Integration
**Prerequisites**
* Ensure you have access to a Seen Campaign.
* Ensure MoEngage Connected sources is available for your account
In the following example, we'll send users' data to SEEN for video generation, and receive a unique landing page link and a unique, personalized thumbnail back to MoEngage for distribution.
This example uses a Connector Campaign to send data to SEEN, and Connected Sources to receive the data back to MoEngage.
If you have multiple video campaigns with SEEN, repeat the process to connect MoEngage with all video campaigns.
## Step 1: Create a connector campaign on MoEngage
To create a connector campaign on MoEngage,
1. Navigate to Create Campaign >> Connectors >> Custom
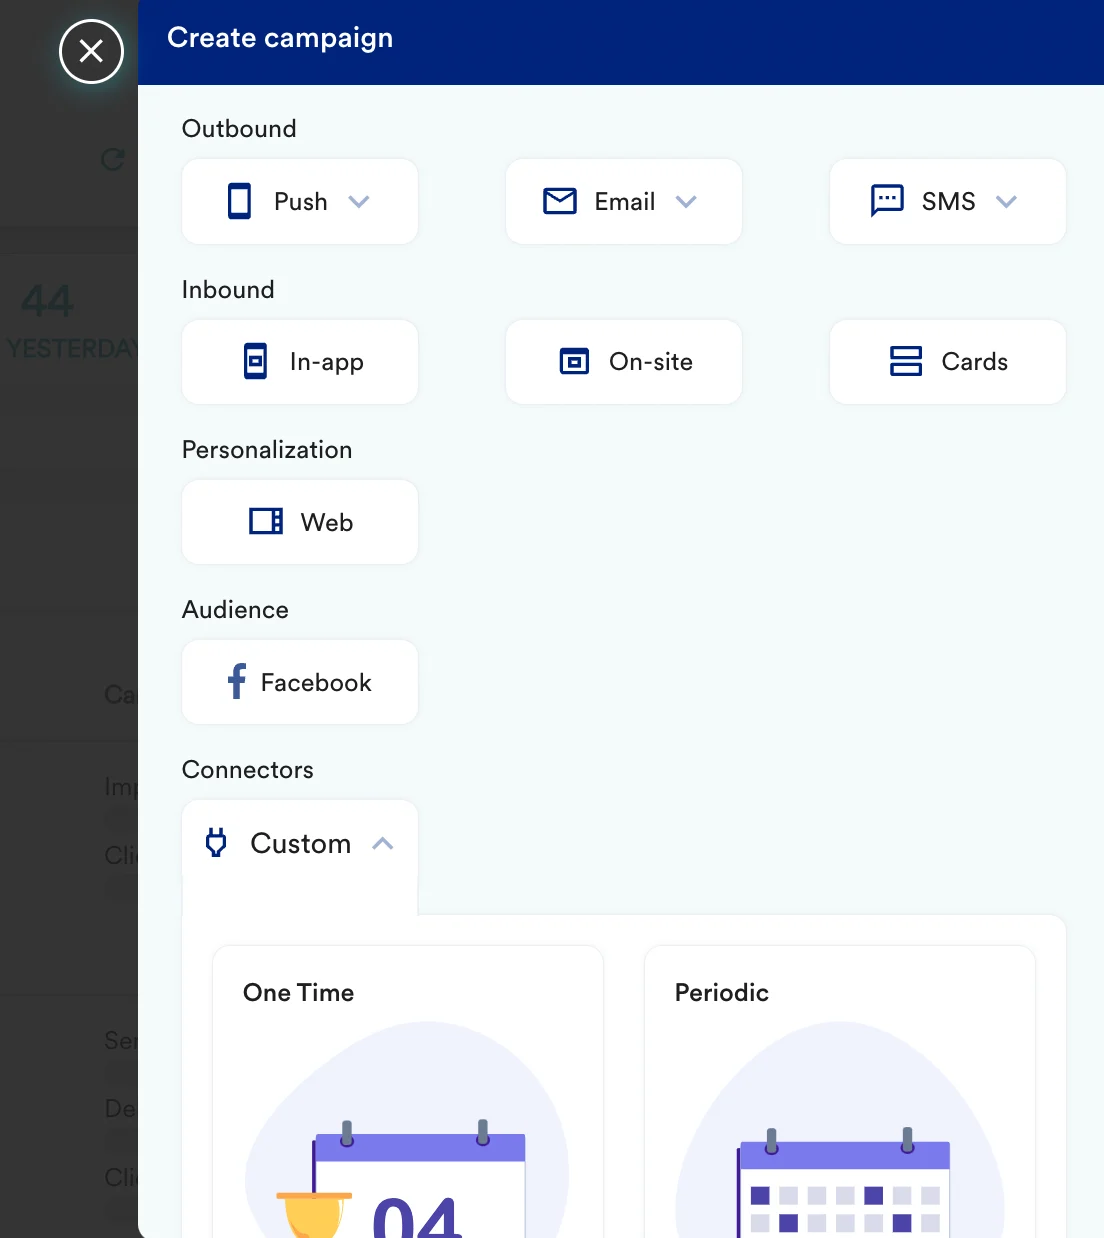 2. On step 2 of the campaign, add -
| Key | Value |
| ----------- | ------------------------------------------------------------------------------------------------------------------------------------------------------------------------------------------------------------------------------------------------------------------------------------------------------------------------------------------------------------------------------------------------------------------------------------------------------------------------------------------------------------------------------------------------------------------------------------------------------------------------------------------------------------------------------------------------------------------------------------------------------------------------------------------------------------------------------------------------------------------------------------------------------------------------------------------------------------------------------------------------------------------------------------------------------------------------------------------------------------------------------------------------------------------------------------------------------------------------------------------------------------------------------------------------------------------------------------------------------------------------------------------------------------------------------------------------------------------------------------------------------------------------------------------------------------------------------------------------------------------------------------------------------------------------------------------- |
| Method | POST |
| Webhook URL | `https://api.seen.io/v1/campaigns//receivers/` Get your campaign\_slug from SEEN to call the correct endpoint. |
| Headers | Authorization: Token `{token}`
2. On step 2 of the campaign, add -
| Key | Value |
| ----------- | ------------------------------------------------------------------------------------------------------------------------------------------------------------------------------------------------------------------------------------------------------------------------------------------------------------------------------------------------------------------------------------------------------------------------------------------------------------------------------------------------------------------------------------------------------------------------------------------------------------------------------------------------------------------------------------------------------------------------------------------------------------------------------------------------------------------------------------------------------------------------------------------------------------------------------------------------------------------------------------------------------------------------------------------------------------------------------------------------------------------------------------------------------------------------------------------------------------------------------------------------------------------------------------------------------------------------------------------------------------------------------------------------------------------------------------------------------------------------------------------------------------------------------------------------------------------------------------------------------------------------------------------------------------------------------------------- |
| Method | POST |
| Webhook URL | `https://api.seen.io/v1/campaigns//receivers/` Get your campaign\_slug from SEEN to call the correct endpoint. |
| Headers | Authorization: Token `{token}`
Content-Type: application/json
You will receive your Authentication Token from SEEN. |
| Body | Follow the [SEEN API documentation](https://docs.seen.io/api-documentation/ntRoJJ3rXoHzFXhA94JiHB/overview/tvy2F5tS3JRM7DfcHwz5fK#request-content) for the exact request body. You can select raw and copy paste the request. 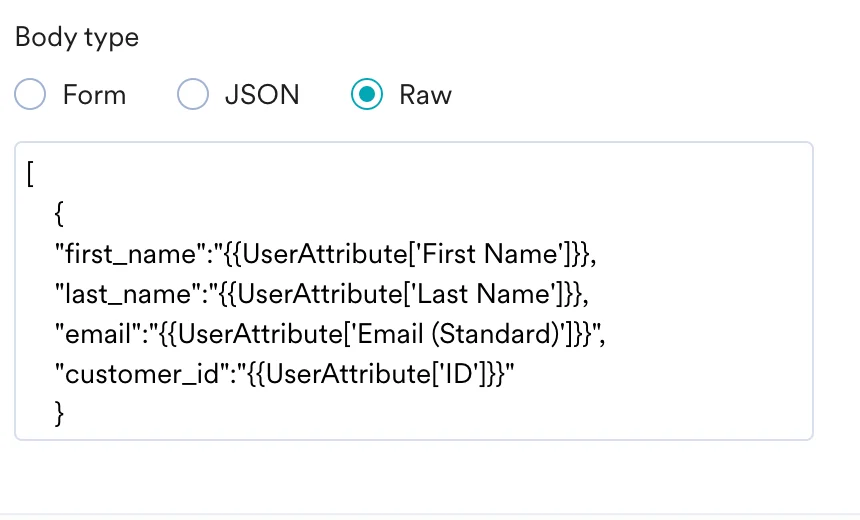 |
3. At this point, your campaign should be ready to test and send. You can also test your connector configuration using the Test functionality available on Step 2 of Create Connector Campaign
|
3. At this point, your campaign should be ready to test and send. You can also test your connector configuration using the Test functionality available on Step 2 of Create Connector Campaign
 ### Rate limit
The SEEN API currently accepts 1,000 calls per hour.
## Step 2: Create a connected source on MoEngage
On your SEEN dashboard,
1. Create new custom attribute fields for `landing_page_url` and `email_thumbnail_url`. These are the two attributes we will be using in this example.
2. Create a connected source on MoEngage. Reach out to your CSM or support team to create connected source - provide your config and get a valid endpoint.
3. Paste the endpoint on your Seen CallBacks. Follow the [Seen documentation](https://docs.seen.io/api-documentation/ntRoJJ3rXoHzFXhA94JiHB/callbacks/k9DEbcgkq3Vr2pxbHyPQbp) for more details.
### Rate limit
The SEEN API currently accepts 1,000 calls per hour.
## Step 2: Create a connected source on MoEngage
On your SEEN dashboard,
1. Create new custom attribute fields for `landing_page_url` and `email_thumbnail_url`. These are the two attributes we will be using in this example.
2. Create a connected source on MoEngage. Reach out to your CSM or support team to create connected source - provide your config and get a valid endpoint.
3. Paste the endpoint on your Seen CallBacks. Follow the [Seen documentation](https://docs.seen.io/api-documentation/ntRoJJ3rXoHzFXhA94JiHB/callbacks/k9DEbcgkq3Vr2pxbHyPQbp) for more details.