> ## Documentation Index
> Fetch the complete documentation index at: https://moengage.com/docs/llms.txt
> Use this file to discover all available pages before exploring further.
# Unbounce
## Introduction
[Unbounce](https://unbounce.com/) is an AI-powered landing page builder with drag-and-drop functionality that lets you create landing pages for your marketing campaigns.
## MoEngage and Unbounce
With the MoEngage and Unbounce integration, you can capture leads from your Unbounce landing pages and send personalized, targeted campaigns through MoEngage to drive conversions. With this integration, you can:
* Create or update users in MoEngage when a form is submitted.
* Create events with the details submitted from the form.
## Integration
**Prerequisites**
* Ensure you have access to your Unbounce form.
### Step 1: Get your MoEngage endpoint
To get a dedicated endpoint for your integration, contact the MoEngage Support team. In your request, specify the common identifier used to link user profiles between MoEngage and the partner platform.
### Step 2: Set up the webhook in Unbounce
To create users and events in MoEngage when your users submit a form, set up a webhook inside Unbounce.
1. On your Unbounce dashboard, go to **Pages** and open your desired landing page, popup, or sticky bar.
2. Go to the **Integrations** tab > **Webhooks** > **+ Add Webhook**.  3. Fill in the webhook details described in the [Webhook configuration](#webhook-configuration) section.
4. Click **Save changes** to add the webhook.
#### Webhook configuration
Provide the following details when configuring the Unbounce webhook:
| Field | Description |
| ------------------------------------- | ------------------------------------------------------------------------------------------------------------------------------ |
| **Choose a URL to POST form data to** | Enter the MoEngage endpoint provided by your Customer Success Manager. |
| **Body Type** | By default, **Default** is selected. **Change this to JSON.** |
| **Custom Headers** | Add the headers described in the [Custom headers](#custom-headers) section below. |
| **Unbounce Form Data** | Map your Unbounce form fields to MoEngage standard fields as described in the [Form data mapping](#form-data-mapping) section. |
| **Unbounce Page Data** | You can leave this mapping as-is. |
| **Custom fields** | Enter the event name that should appear on the MoEngage dashboard. See [Custom fields](#custom-fields). |
#### Custom headers
| Header | Value |
| --------------- | ------------------- |
| `Content-Type` | `application/json` |
| `Authorization` | `Basic ` |
To generate your **Authorization** token:
1. Use a [Basic Auth Header Generator tool](https://www.debugbear.com/basic-auth-header-generator).
2. Enter your **Workspace ID** as the username and your **Data API Key** as the password.
To find your credentials, on the MoEngage dashboard, navigate to **Settings** > **Account** > **APIs**.
Your final token looks similar to this:
```text wrap theme={null}
Basic Qk5CR1NNNUR4eHh4eHhWQ1hSRFJEWTdSOlFsWHVoTHVaeHh4eHh4QWQrQnBYUEotNw==
```
Paste this as the value for the `Authorization` header.
#### Form data mapping
Map the Unbounce field IDs to MoEngage standard fields:
| Unbounce field ID | MoEngage standard field |
| ----------------- | ---------------------------------- |
| `name` | `full_name` |
| `mobile_number` | `mobile_number` (or `customer_id`) |
| `email` | `email` (or `customer_id`) |
| `first_name` | `first_name` |
| `last_name` | `last_name` |
* If you collect any additional fields, map them to their corresponding attribute names in MoEngage.
* If you use `mobile_number` or `email` as your **Customer ID**, enter the value `customer_id` against that Unbounce field ID.
#### Custom fields
Define the event name that appears on the MoEngage dashboard:
| Unbounce field ID | Field to map to |
| -------------------------------------------------------- | --------------- |
| Your event name (for example, `Unbounce Form Submitted`) | `event_name` |
### Step 3: Send targeted campaigns on MoEngage
Your users and events should start showing up in MoEngage:
3. Fill in the webhook details described in the [Webhook configuration](#webhook-configuration) section.
4. Click **Save changes** to add the webhook.
#### Webhook configuration
Provide the following details when configuring the Unbounce webhook:
| Field | Description |
| ------------------------------------- | ------------------------------------------------------------------------------------------------------------------------------ |
| **Choose a URL to POST form data to** | Enter the MoEngage endpoint provided by your Customer Success Manager. |
| **Body Type** | By default, **Default** is selected. **Change this to JSON.** |
| **Custom Headers** | Add the headers described in the [Custom headers](#custom-headers) section below. |
| **Unbounce Form Data** | Map your Unbounce form fields to MoEngage standard fields as described in the [Form data mapping](#form-data-mapping) section. |
| **Unbounce Page Data** | You can leave this mapping as-is. |
| **Custom fields** | Enter the event name that should appear on the MoEngage dashboard. See [Custom fields](#custom-fields). |
#### Custom headers
| Header | Value |
| --------------- | ------------------- |
| `Content-Type` | `application/json` |
| `Authorization` | `Basic ` |
To generate your **Authorization** token:
1. Use a [Basic Auth Header Generator tool](https://www.debugbear.com/basic-auth-header-generator).
2. Enter your **Workspace ID** as the username and your **Data API Key** as the password.
To find your credentials, on the MoEngage dashboard, navigate to **Settings** > **Account** > **APIs**.
Your final token looks similar to this:
```text wrap theme={null}
Basic Qk5CR1NNNUR4eHh4eHhWQ1hSRFJEWTdSOlFsWHVoTHVaeHh4eHh4QWQrQnBYUEotNw==
```
Paste this as the value for the `Authorization` header.
#### Form data mapping
Map the Unbounce field IDs to MoEngage standard fields:
| Unbounce field ID | MoEngage standard field |
| ----------------- | ---------------------------------- |
| `name` | `full_name` |
| `mobile_number` | `mobile_number` (or `customer_id`) |
| `email` | `email` (or `customer_id`) |
| `first_name` | `first_name` |
| `last_name` | `last_name` |
* If you collect any additional fields, map them to their corresponding attribute names in MoEngage.
* If you use `mobile_number` or `email` as your **Customer ID**, enter the value `customer_id` against that Unbounce field ID.
#### Custom fields
Define the event name that appears on the MoEngage dashboard:
| Unbounce field ID | Field to map to |
| -------------------------------------------------------- | --------------- |
| Your event name (for example, `Unbounce Form Submitted`) | `event_name` |
### Step 3: Send targeted campaigns on MoEngage
Your users and events should start showing up in MoEngage:
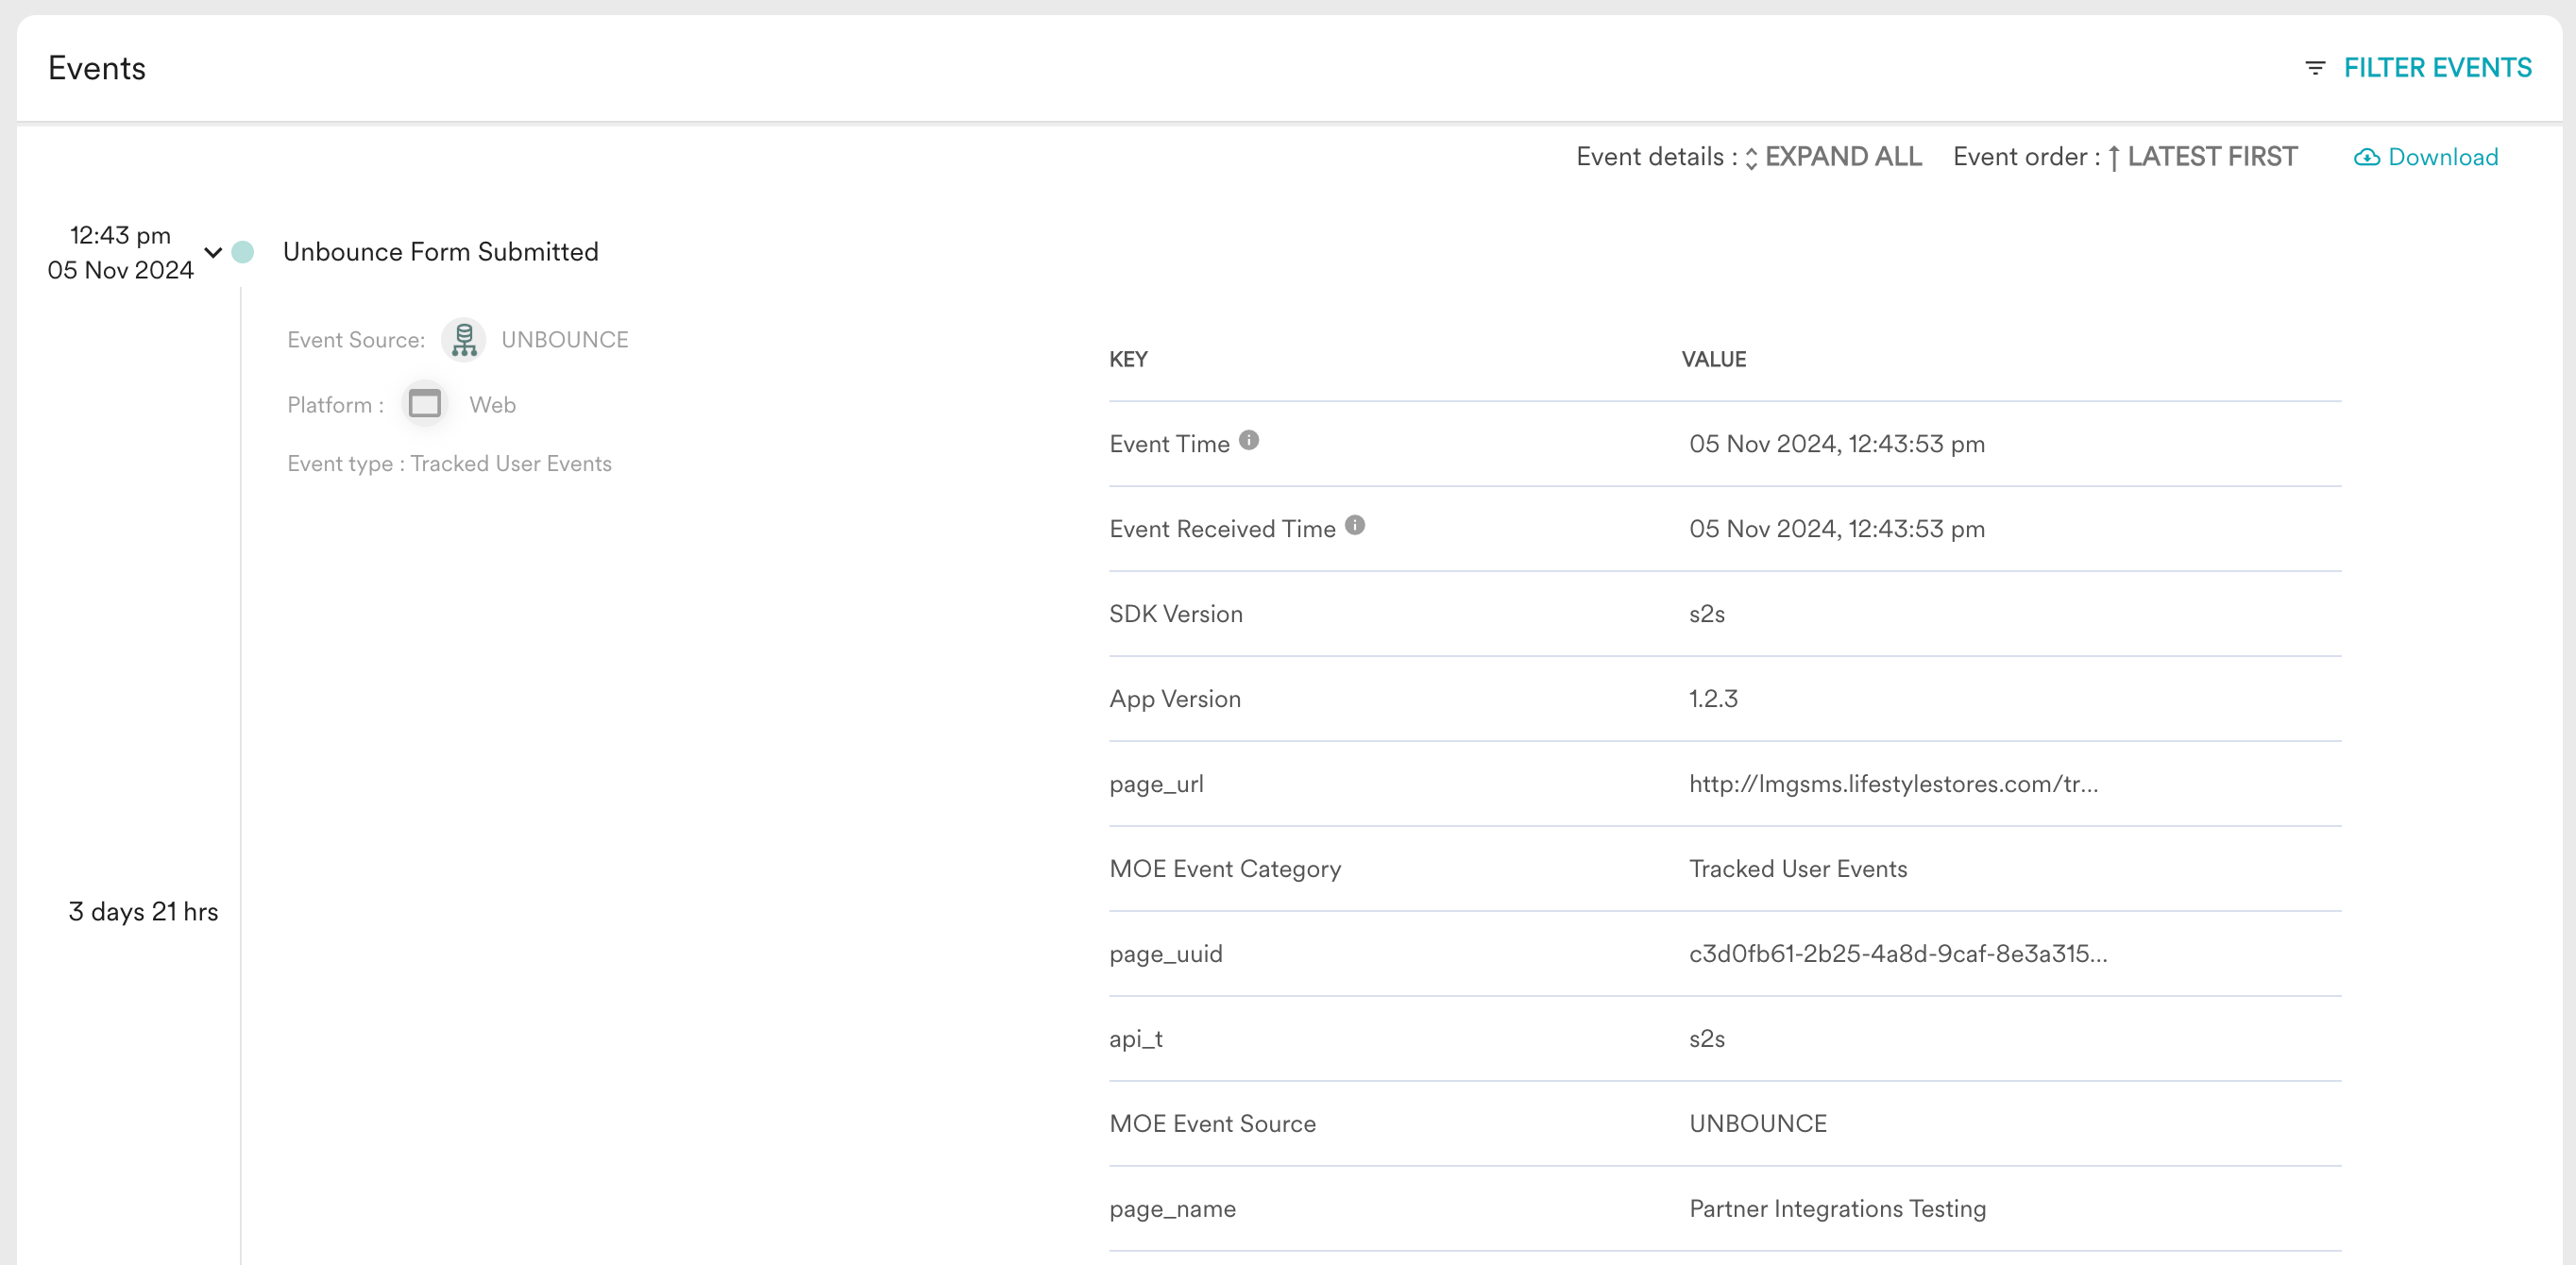 You can now run event-triggered campaigns to your users.
The test submission appears as a user in MoEngage with the configured event name tracked.
You can now run event-triggered campaigns to your users.
The test submission appears as a user in MoEngage with the configured event name tracked.