> ## Documentation Index
> Fetch the complete documentation index at: https://moengage.com/docs/llms.txt
> Use this file to discover all available pages before exploring further.
# Delighted
# Introduction
Delighted is a turnkey customer experience platform that helps brands drive business growth with actionable feedback.
# MoEngage × Delighted
Delighted is a tool for gathering real-time, actionable customer feedback via email, web, or SMS. With the MoEngage and Delighted Integration, you can:
* Send your Delighted surveys to your users when MoEngage captures an event.
* Add users to Autopilot when they perform a particular event on your app or website.
# Integration
**Prerequisites**
* You would need to know your [Private API Key](https://app.delighted.com/docs/api#authentication) linked to your Delighted account.
## Trigger Delighted survey deliveries via MoEngage
With MoEngage's Connector Campaigns, you can send a Delighted survey to your users when they perform any action on your app or website.
To create a connector campaign on MoEngage:
1. Navigate to Create Campaign >> Connectors >> Custom and choose the delivery type most suitable to your needs. For this example, we will select "Event Triggered" and select the event as "Purchased". 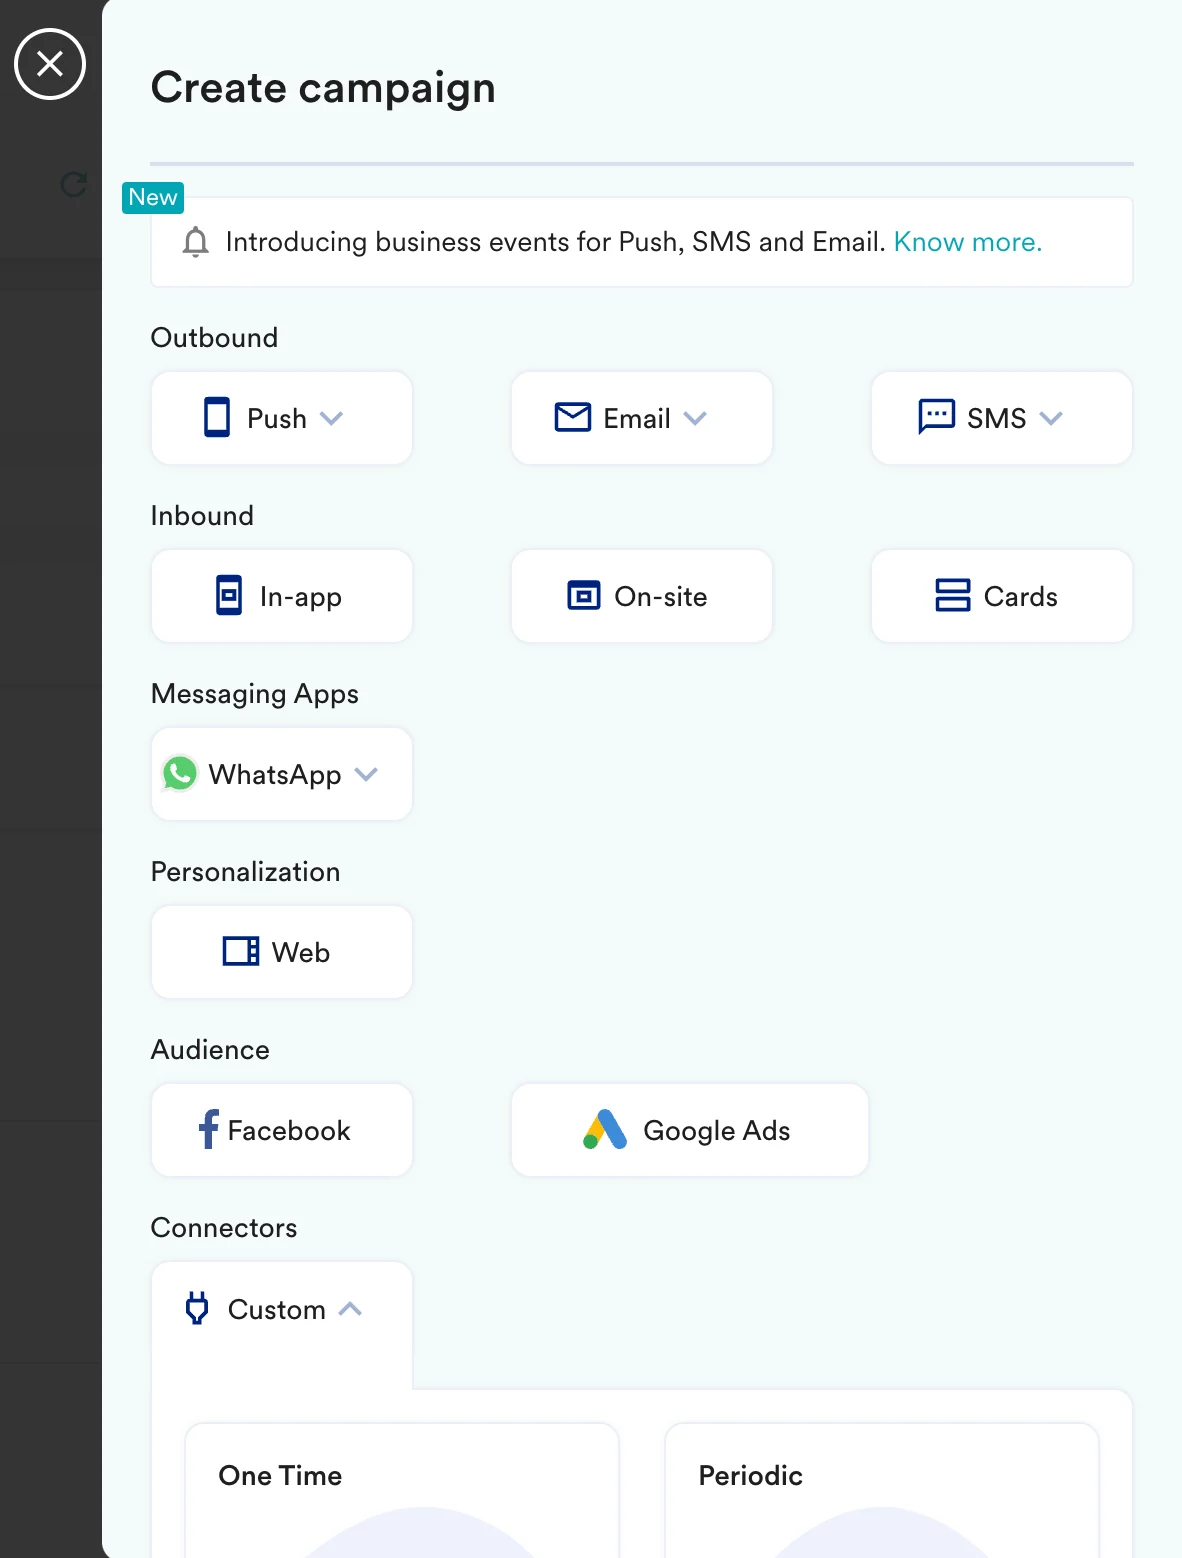 2. On step 2 of the campaign:
### Call the Delighted API
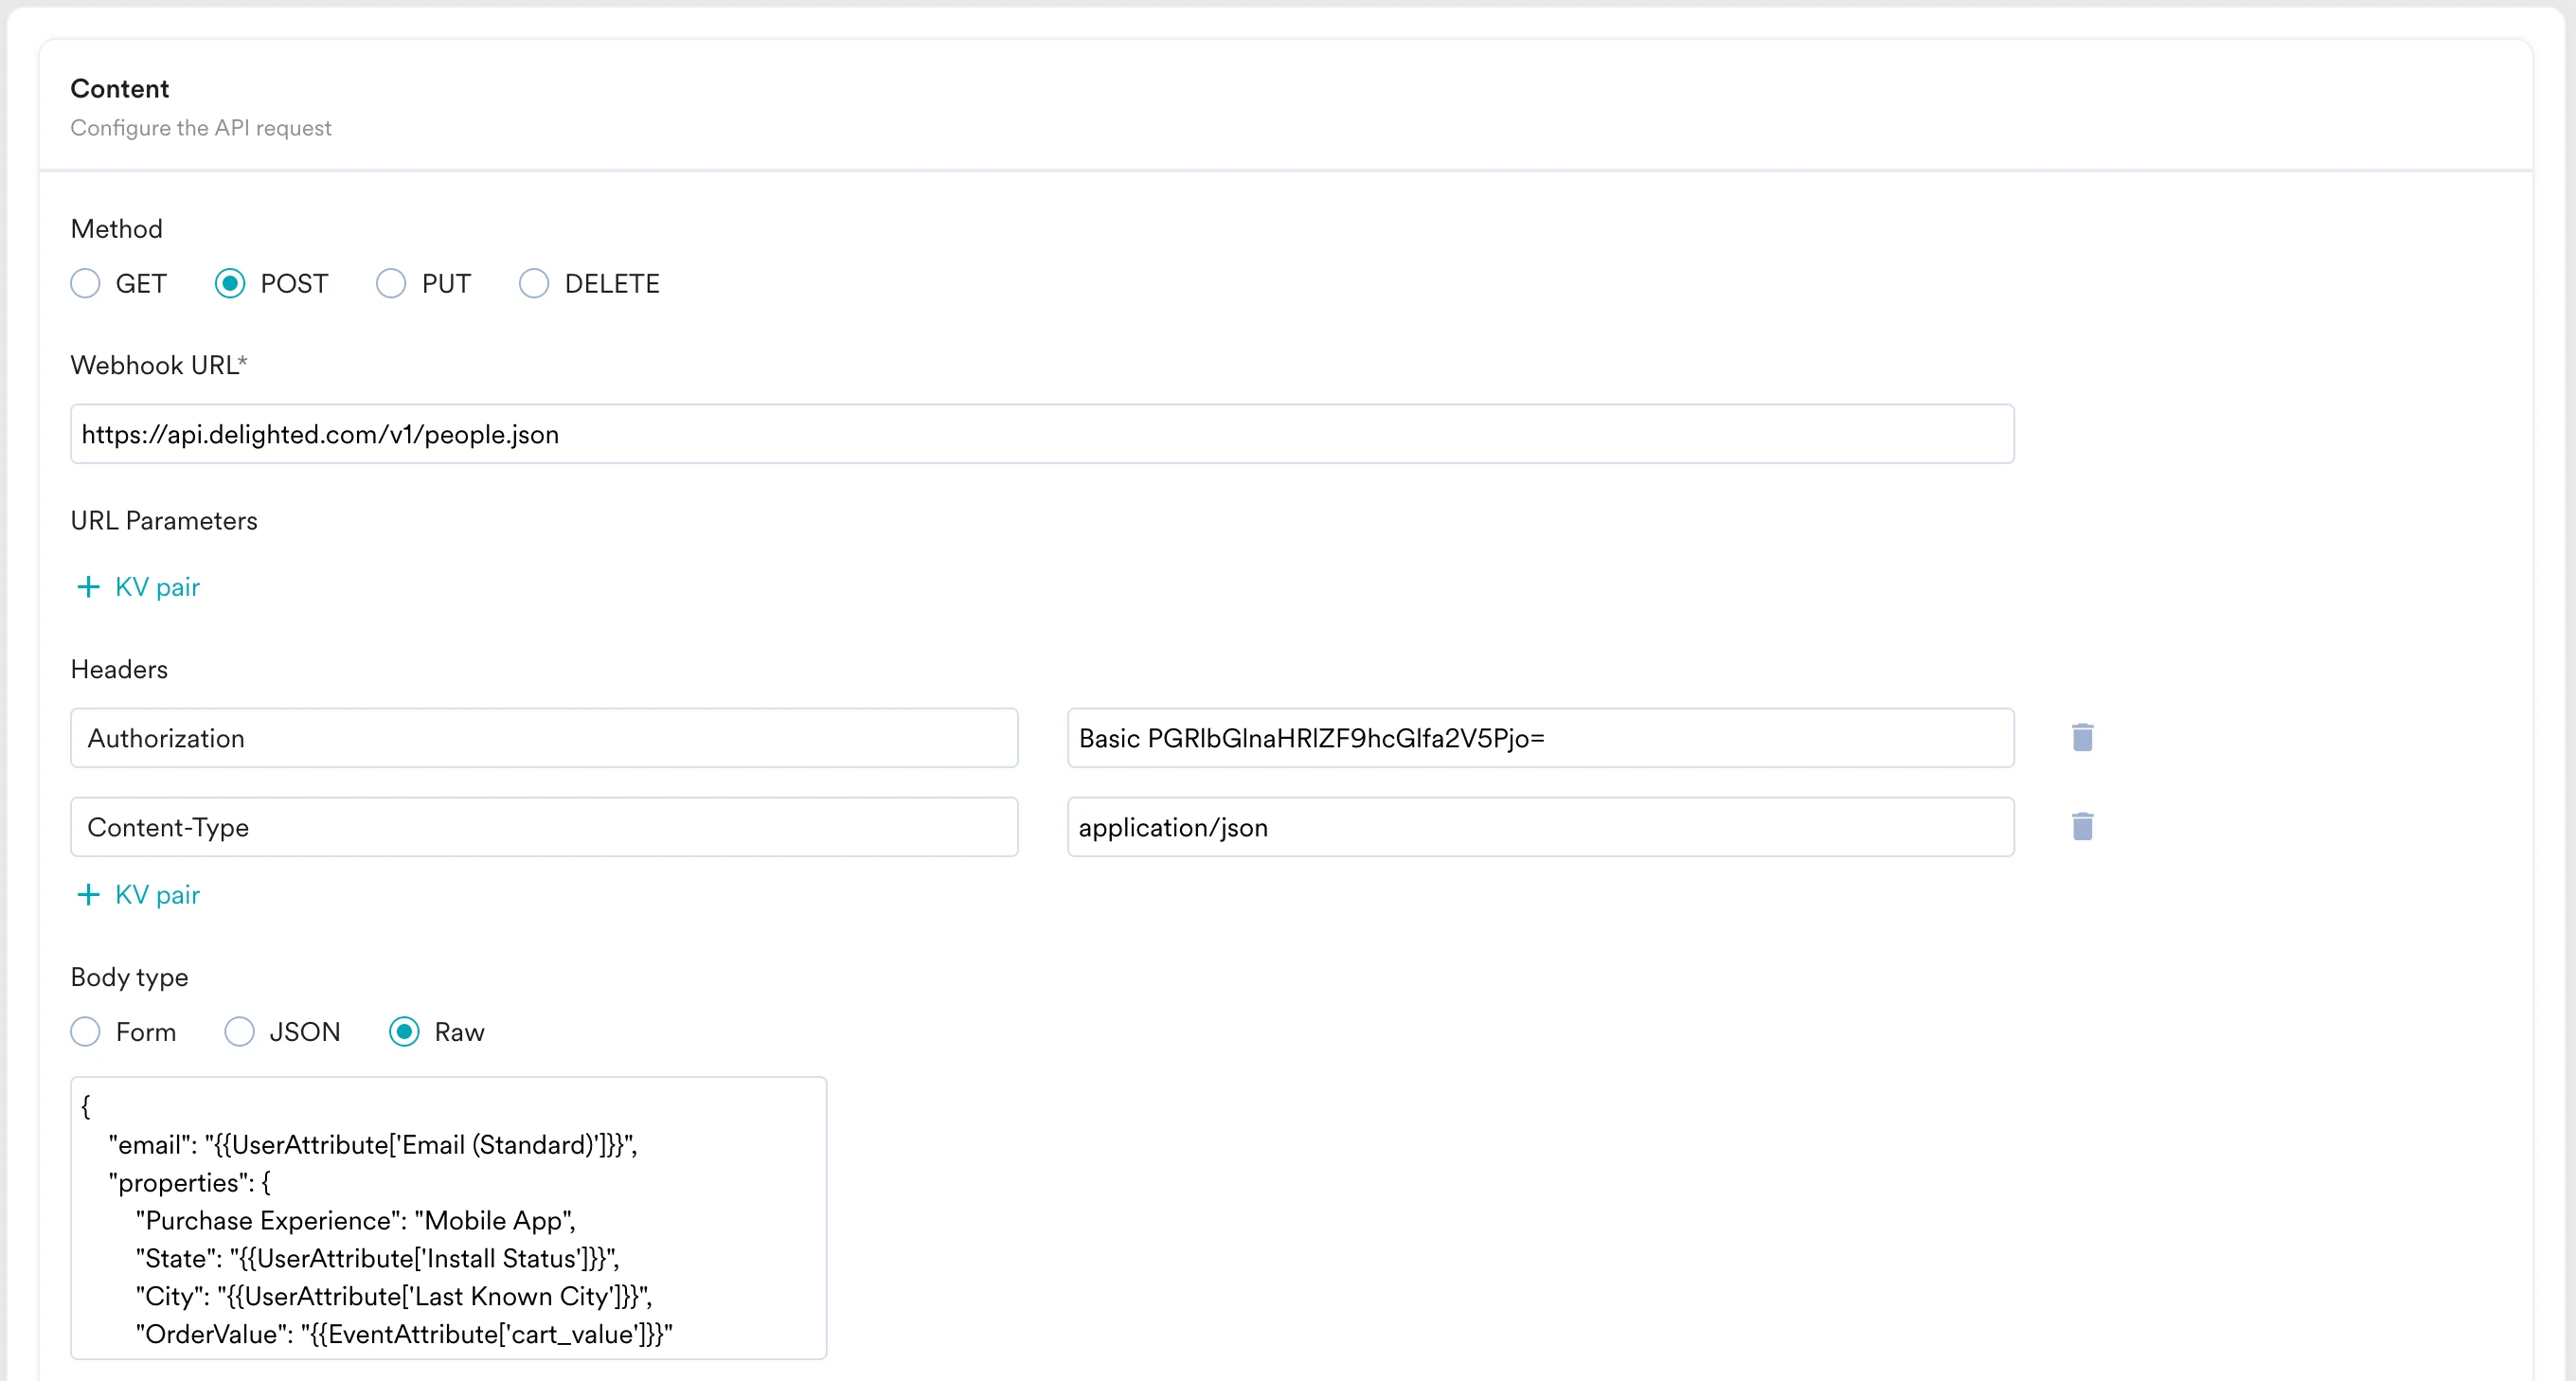
To send your survey, use the `POST` method and configure the payload.
* Select the method as POST
* Headers
* `Authorization`: Use an online tool to create your basic auth with your `Delighted API Key` as a username and keeping your password as blank:
2. On step 2 of the campaign:
### Call the Delighted API
To send your survey, use the `POST` method and configure the payload.
* Select the method as POST
* Headers
* `Authorization`: Use an online tool to create your basic auth with your `Delighted API Key` as a username and keeping your password as blank:  In the above example, the value of this header would be `Basic PGRlbGlnaHRlZF9hcGlfa2V5Pjo=`
* `Content-Type`: `application/json`
* Add the endpoint as Webhook URL: `https://api.delighted.com/v1/people.json`
* Body: Type @ to personalize your payload.
```json JSON theme={null}
{
"email": "{{UserAttribute['Email (Standard)']}}",
"properties": {
"Purchase Experience": "Mobile App",
"State": "{{UserAttribute['Install Status']}}",
"City": "{{UserAttribute['Last Known City']}}",
"OrderValue": "{{EventAttribute['cart_value']}}"
}
}
```
In the above example, the value of this header would be `Basic PGRlbGlnaHRlZF9hcGlfa2V5Pjo=`
* `Content-Type`: `application/json`
* Add the endpoint as Webhook URL: `https://api.delighted.com/v1/people.json`
* Body: Type @ to personalize your payload.
```json JSON theme={null}
{
"email": "{{UserAttribute['Email (Standard)']}}",
"properties": {
"Purchase Experience": "Mobile App",
"State": "{{UserAttribute['Install Status']}}",
"City": "{{UserAttribute['Last Known City']}}",
"OrderValue": "{{EventAttribute['cart_value']}}"
}
}
```
 * Refer to the [Delighted API documentation](https://app.delighted.com/docs/api/sending-to-people) for more information.
* You can test your campaign on this step.
* Once ready, you can go ahead and publish this campaign.
## Add users to Delighted Autopilot
When your users perform a specific event, you can trigger a MoEngage Connector Campaign as shown above, and call [Delighted's Autopilot APIs](https://app.delighted.com/docs/api/adding-people-to-autopilot). Delighted will automatically schedule a survey for them and continue sending surveys at the frequency configured in your Autopilot settings.
* Refer to the [Delighted API documentation](https://app.delighted.com/docs/api/sending-to-people) for more information.
* You can test your campaign on this step.
* Once ready, you can go ahead and publish this campaign.
## Add users to Delighted Autopilot
When your users perform a specific event, you can trigger a MoEngage Connector Campaign as shown above, and call [Delighted's Autopilot APIs](https://app.delighted.com/docs/api/adding-people-to-autopilot). Delighted will automatically schedule a survey for them and continue sending surveys at the frequency configured in your Autopilot settings.