> ## Documentation Index
> Fetch the complete documentation index at: https://moengage.com/docs/llms.txt
> Use this file to discover all available pages before exploring further.
# Regal
# Introduction
[Regal](https://www.regal.io/) has built an event-driven customer engagement platform that enables brands’ sales teams to communicate with their customers through branded calls and SMS.
# MoEngage × Regal
The MoEngage and Regal integration offers a powerful combination of insights-led customer engagement and outbound phone & SMS sales platform. This integration is designed to fulfill the following use cases:
* Create contacts in Regal when an event is captured in MoEngage
* Update user properties like opt-in information on Regal when MoEngage capturs this information
* Forward events captured in MoEngage to Regal as custom events
# Integration
**Prerequisites**
* You would need your Regal [API Key](https://developer.regal.io/reference/overview#authentication) to get started.
The Regal Voice API is designed as a single Custom Events endpoint that lets you creates a contact, update a contact or add a custom event to a contact’s profile.
## Step 1: Setup Connector Campaign on MoEngage
To create a connector campaign on MoEngage,
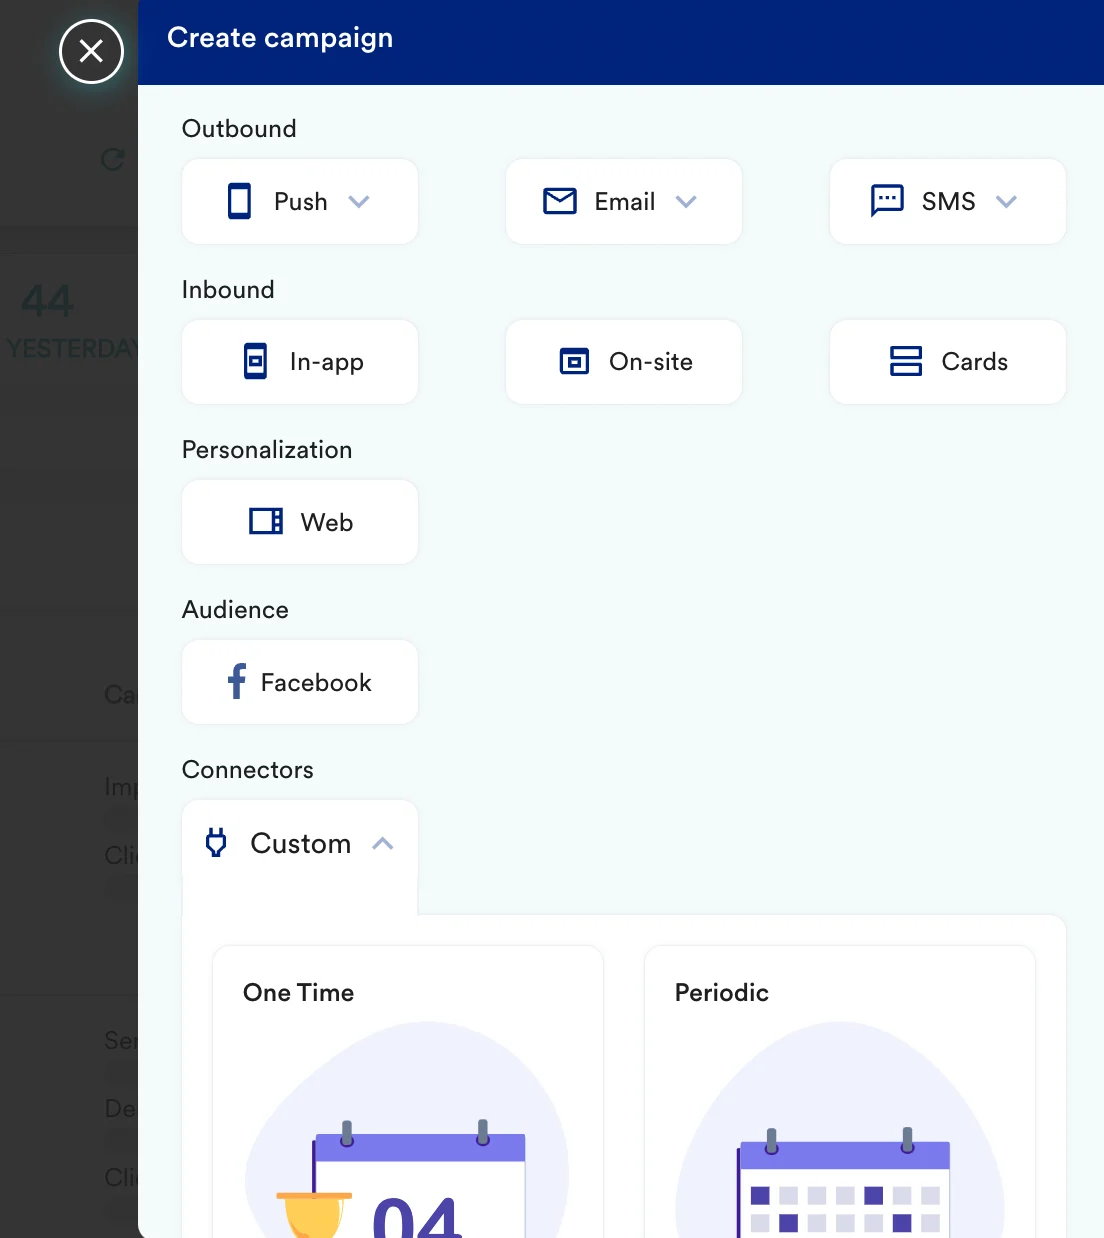
1. Navigate to Create Campaign >> Connectors >> Custom and choose the delivery type most suitable to your needs
 2. On step 2 of the campaign
### Call the Regal Custom Events API
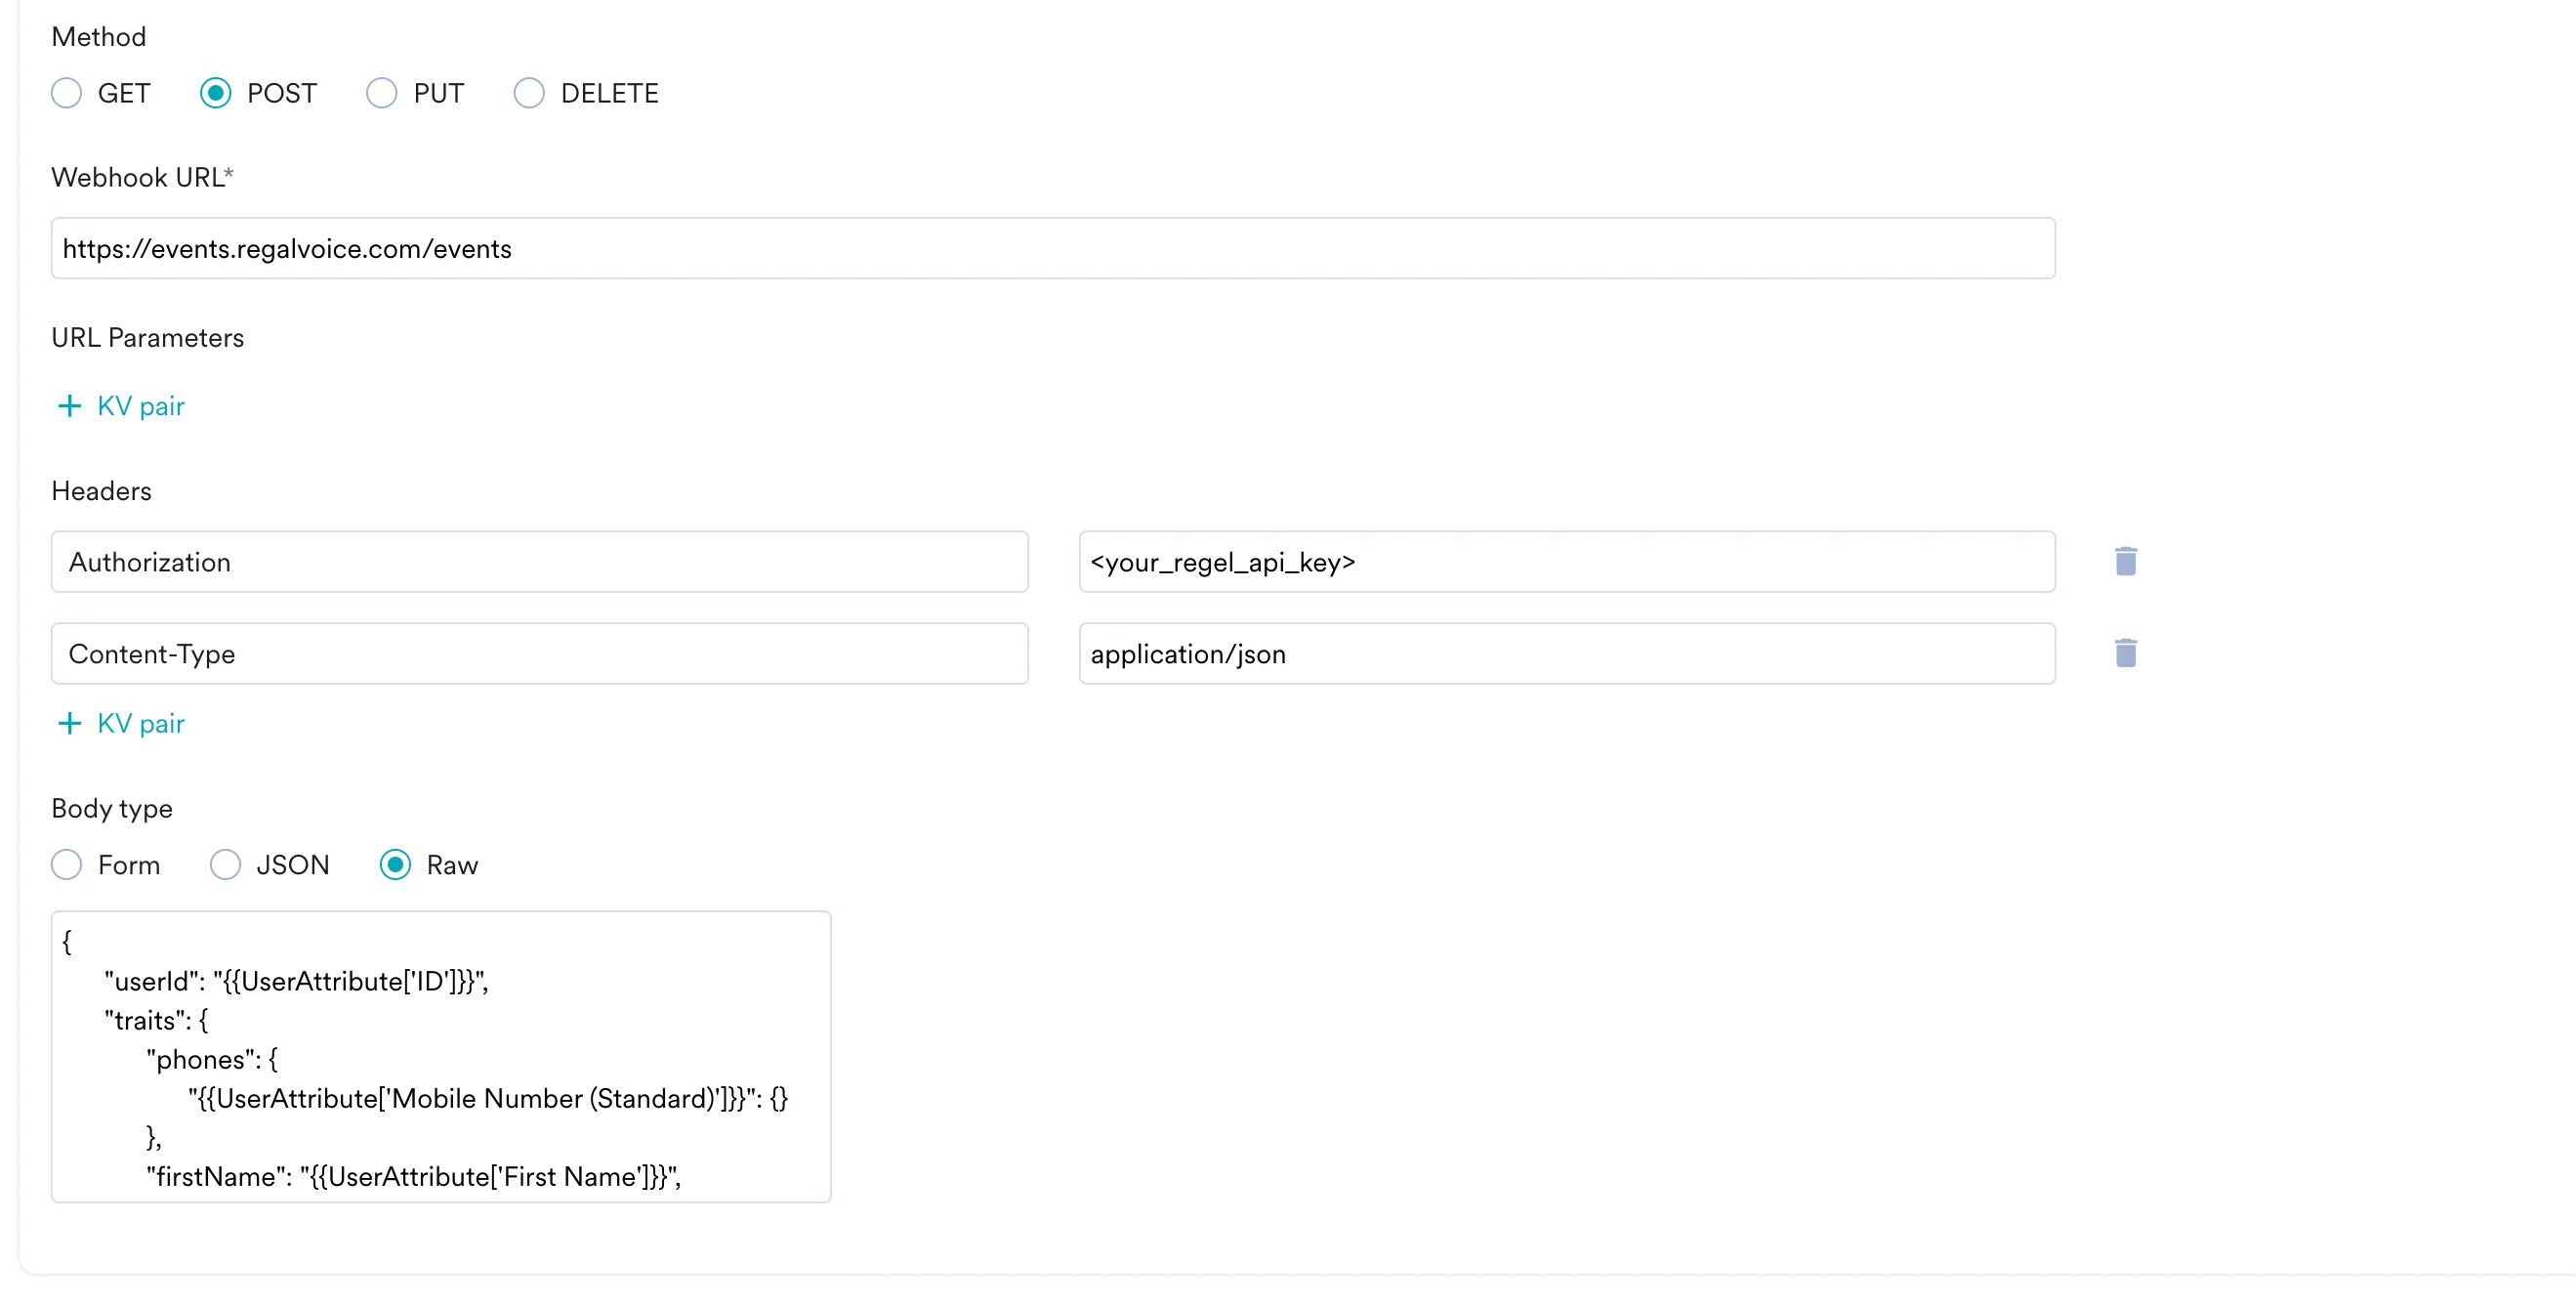
To create a new contacts on Regal, use the `POST` method and configure the payload.
* Select the method as POST
* Headers:
* `Authorization`: ``
* `Content-Type`: `application/json`
* Add the endpoint as Webhook URL: `https://events.regalvoice.com/events`
* Body:
```json theme={null}
{
"userId": "{{UserAttribute['ID']}}",
"traits": {
"phones": {
"{{UserAttribute['Mobile Number (Standard)']}}": {}
},
"firstName": "{{UserAttribute['First Name']}}",
"lastName": "{{UserAttribute['Last Name']}}"
},
"eventSource": "MoEngage"
}
```
```json theme={null}
{
"userId": "{{UserAttribute['ID']}}",
"traits": {
"phones": {
"{{UserAttribute['Mobile Number (Standard)']}}": {
"isPrimary": true,
"voiceOptIn": {
"subscribed": true
},
"smsOptIn": {
"subscribed": true
}
}
}
}
}
```
```json theme={null}
{
"userId": "{{UserAttribute['ID']}}",
"name": "Course Purchased",
"properties": {
"course_title": "{{EventAttribute['Title']}}",
"course_amount": "{{EventAttribute['Amount']}}",
"course_start": "{{EventAttribute['Start date']}}"
},
"eventSource": "MoEngage"
}
```
2. On step 2 of the campaign
### Call the Regal Custom Events API
To create a new contacts on Regal, use the `POST` method and configure the payload.
* Select the method as POST
* Headers:
* `Authorization`: ``
* `Content-Type`: `application/json`
* Add the endpoint as Webhook URL: `https://events.regalvoice.com/events`
* Body:
```json theme={null}
{
"userId": "{{UserAttribute['ID']}}",
"traits": {
"phones": {
"{{UserAttribute['Mobile Number (Standard)']}}": {}
},
"firstName": "{{UserAttribute['First Name']}}",
"lastName": "{{UserAttribute['Last Name']}}"
},
"eventSource": "MoEngage"
}
```
```json theme={null}
{
"userId": "{{UserAttribute['ID']}}",
"traits": {
"phones": {
"{{UserAttribute['Mobile Number (Standard)']}}": {
"isPrimary": true,
"voiceOptIn": {
"subscribed": true
},
"smsOptIn": {
"subscribed": true
}
}
}
}
}
```
```json theme={null}
{
"userId": "{{UserAttribute['ID']}}",
"name": "Course Purchased",
"properties": {
"course_title": "{{EventAttribute['Title']}}",
"course_amount": "{{EventAttribute['Amount']}}",
"course_start": "{{EventAttribute['Start date']}}"
},
"eventSource": "MoEngage"
}
```
 * Refer to the [Regal documentation](https://developer.regal.io/reference/overview) for more information.
## Preview your request
At this point, your campaign should be ready to test and send. You can also test your connector configuration using the Test functionality available in Step 2 of Create Connector Campaign.
* Refer to the [Regal documentation](https://developer.regal.io/reference/overview) for more information.
## Preview your request
At this point, your campaign should be ready to test and send. You can also test your connector configuration using the Test functionality available in Step 2 of Create Connector Campaign. You can go ahead and Publish the campaign.