> ## Documentation Index
> Fetch the complete documentation index at: https://moengage.com/docs/llms.txt
> Use this file to discover all available pages before exploring further.
# How to Activate Dormant Users with Memories
# Introduction
The efforts to acquire new customers should not be nullified by losing customers. The trend goes from customers coming on the website or app to becoming dormant and getting lost. Retaining dormant customers thus plays a crucial role.
The users should be engaged by multiple campaigns or offers that help them realize the value of the brand they had intended to be associated with. One of the most effective ways of capturing the attention of the customer is by showcasing the memories they have spent with the brand. These can be either the last video the user watched or the last purchase the user made.
In this article, we will create a Catalog, a Recommendation, and a Push campaign to target users based on their past experience, such as users who have made purchases in the last 30 days.
The time range can differ depending on your retention period. If you need a longer retention period of more than 30 days, contact your account manager.
# Expected Result
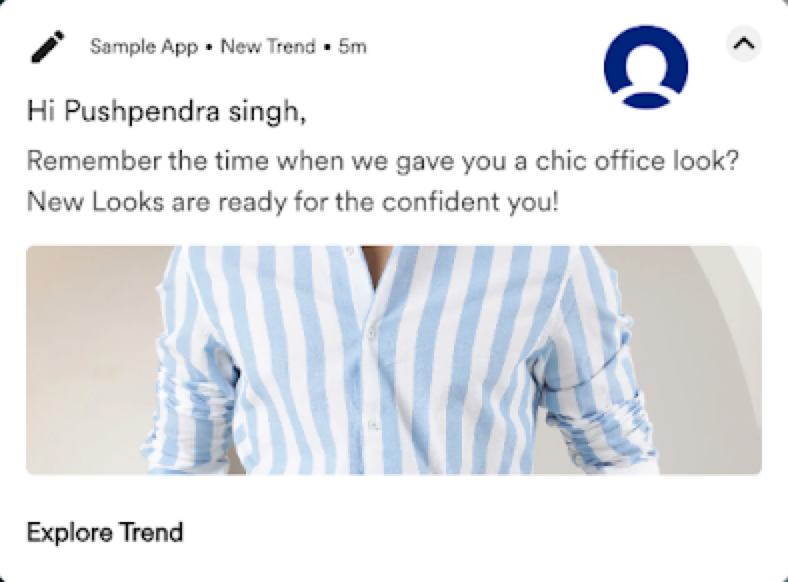
Dormant users receive a Push Notification on their phones:
 * Recommendations must be enabled and a Catalog must be present.
* Events such as item purchased, video played, or book read, and so on, and the respective attributes must be present.
# Create a Catalog
In this section, let us create a Catalog:
1. Go to **Content** > **Catalogs** from the left navigation. The Catalogs page is displayed.
2. Click **+ Create Catalog**. The Create catalog pop-up window is displayed.
3. In the **Enter catalog name** field, enter a name. For example, "skuwise\_post\_purchase\_journey".
4. Click **Submit**. The newly-created catalog is listed on the Catalogs page.
* Recommendations must be enabled and a Catalog must be present.
* Events such as item purchased, video played, or book read, and so on, and the respective attributes must be present.
# Create a Catalog
In this section, let us create a Catalog:
1. Go to **Content** > **Catalogs** from the left navigation. The Catalogs page is displayed.
2. Click **+ Create Catalog**. The Create catalog pop-up window is displayed.
3. In the **Enter catalog name** field, enter a name. For example, "skuwise\_post\_purchase\_journey".
4. Click **Submit**. The newly-created catalog is listed on the Catalogs page.
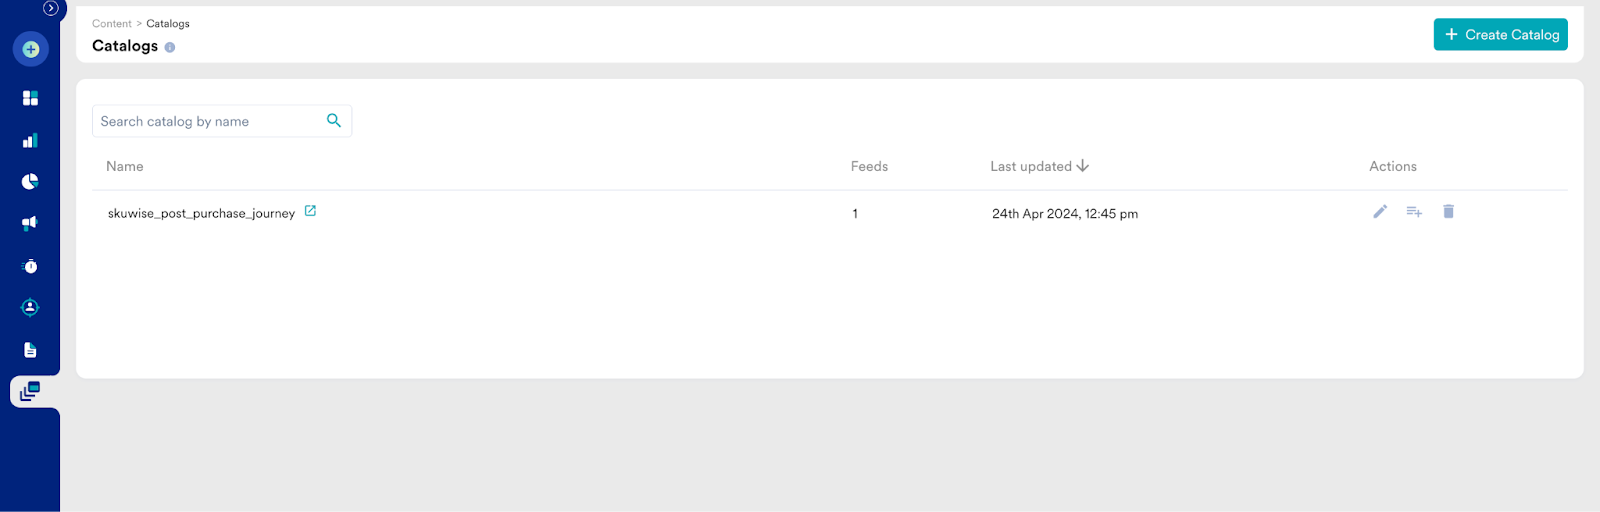 5. Click the catalog name link or the icon next to it. The Create feed pop-up window is displayed
6. Upload a catalog with fields such as ID, product image, price, product name, and description. For more information, refer to [Catalogs](/user-guide/content/recommendations/prerequisites/catalogs).
# Create a Recommendation
In this section, let us map the user action and set the recommendation criteria.
## Map the User Action
1. Go to **Content** > **Recommendations** from the left navigation. The Recommendations page is displayed.
2. Click **Map user actions**.
3. Click the event drop-down list under a User Action bucket and choose the relevant action from the drop-down menu.
5. Click the catalog name link or the icon next to it. The Create feed pop-up window is displayed
6. Upload a catalog with fields such as ID, product image, price, product name, and description. For more information, refer to [Catalogs](/user-guide/content/recommendations/prerequisites/catalogs).
# Create a Recommendation
In this section, let us map the user action and set the recommendation criteria.
## Map the User Action
1. Go to **Content** > **Recommendations** from the left navigation. The Recommendations page is displayed.
2. Click **Map user actions**.
3. Click the event drop-down list under a User Action bucket and choose the relevant action from the drop-down menu.
 ## Set the Recommendation Criteria
1. Go to **Content** > **Recommendations** from the left navigation. The Recommendations page is displayed.
2. Click **+ Create recommendation**. The Create recommendation page is displayed.
3. Under **Filter by user action and item attributes**, click the **User Actions** model.
4. Click **Next**. It takes you to the second step "Create recommendation". Enter the following details:
* **Recommendation name**: Enter a name for the recommendation. For example, "product purchased". This will be the name through which you will refer the output of this recommendation model.
* **Recommendation description**: Enter a description for the recommendation. This description will help you understand what the model is aimed at.
* **Catalog**: Select the "skuwise\_post\_purchase\_journey" catalog.
## Set the Recommendation Criteria
1. Go to **Content** > **Recommendations** from the left navigation. The Recommendations page is displayed.
2. Click **+ Create recommendation**. The Create recommendation page is displayed.
3. Under **Filter by user action and item attributes**, click the **User Actions** model.
4. Click **Next**. It takes you to the second step "Create recommendation". Enter the following details:
* **Recommendation name**: Enter a name for the recommendation. For example, "product purchased". This will be the name through which you will refer the output of this recommendation model.
* **Recommendation description**: Enter a description for the recommendation. This description will help you understand what the model is aimed at.
* **Catalog**: Select the "skuwise\_post\_purchase\_journey" catalog.
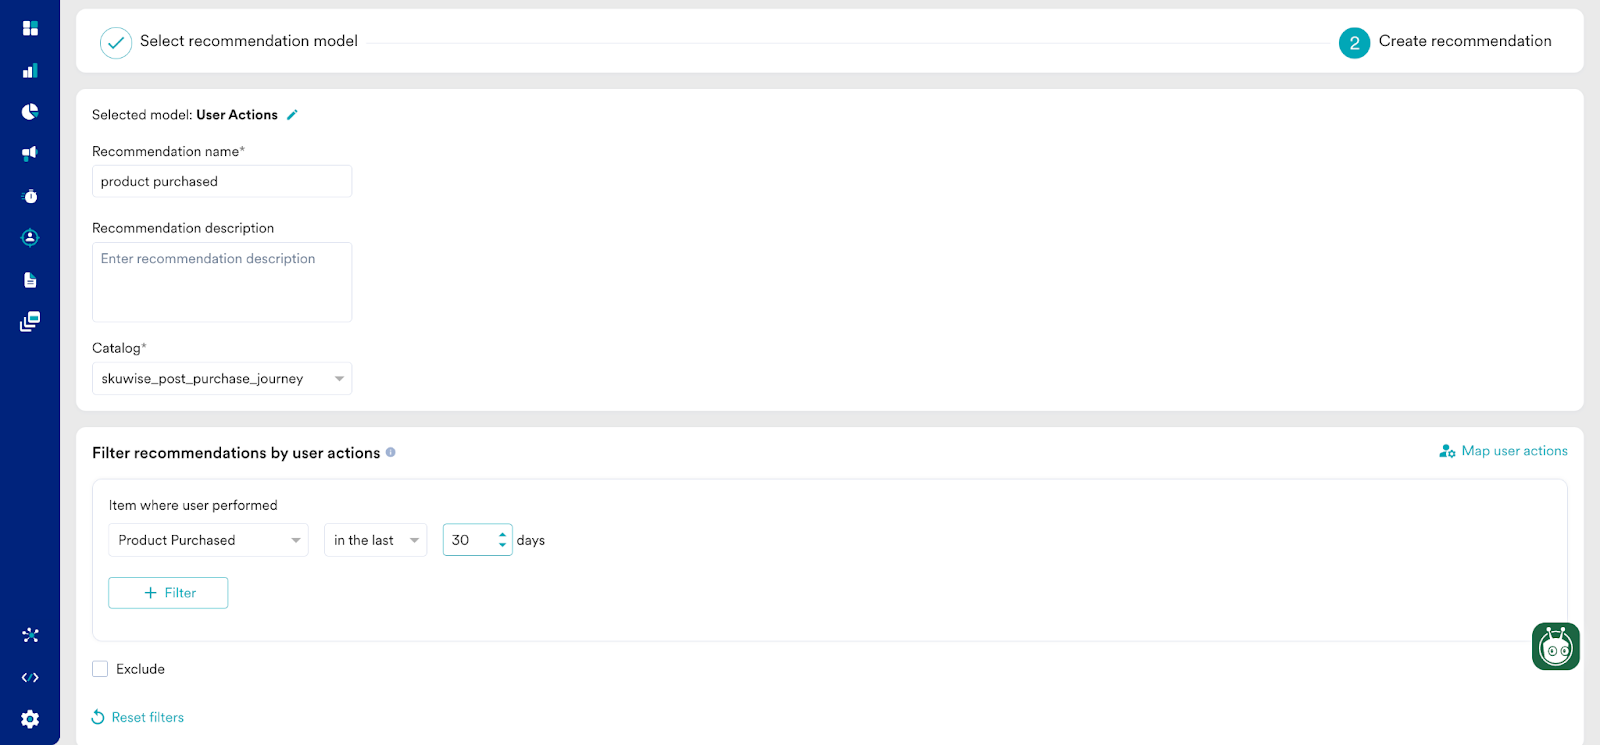 5. Click **Create** to save the changes and run the model.
# Create a Push Campaign
In this section, let us create a Push notification for our use case.
## Step 1: Target Users
1. Navigate to the sidebar on the left and click **Engage** > **Campaigns** and click **+ Create campaign** or click **+ Create new** > **Campaign**.
2. Under **Outbound**, select **Push** and then select the delivery type.
5. Click **Create** to save the changes and run the model.
# Create a Push Campaign
In this section, let us create a Push notification for our use case.
## Step 1: Target Users
1. Navigate to the sidebar on the left and click **Engage** > **Campaigns** and click **+ Create campaign** or click **+ Create new** > **Campaign**.
2. Under **Outbound**, select **Push** and then select the delivery type.
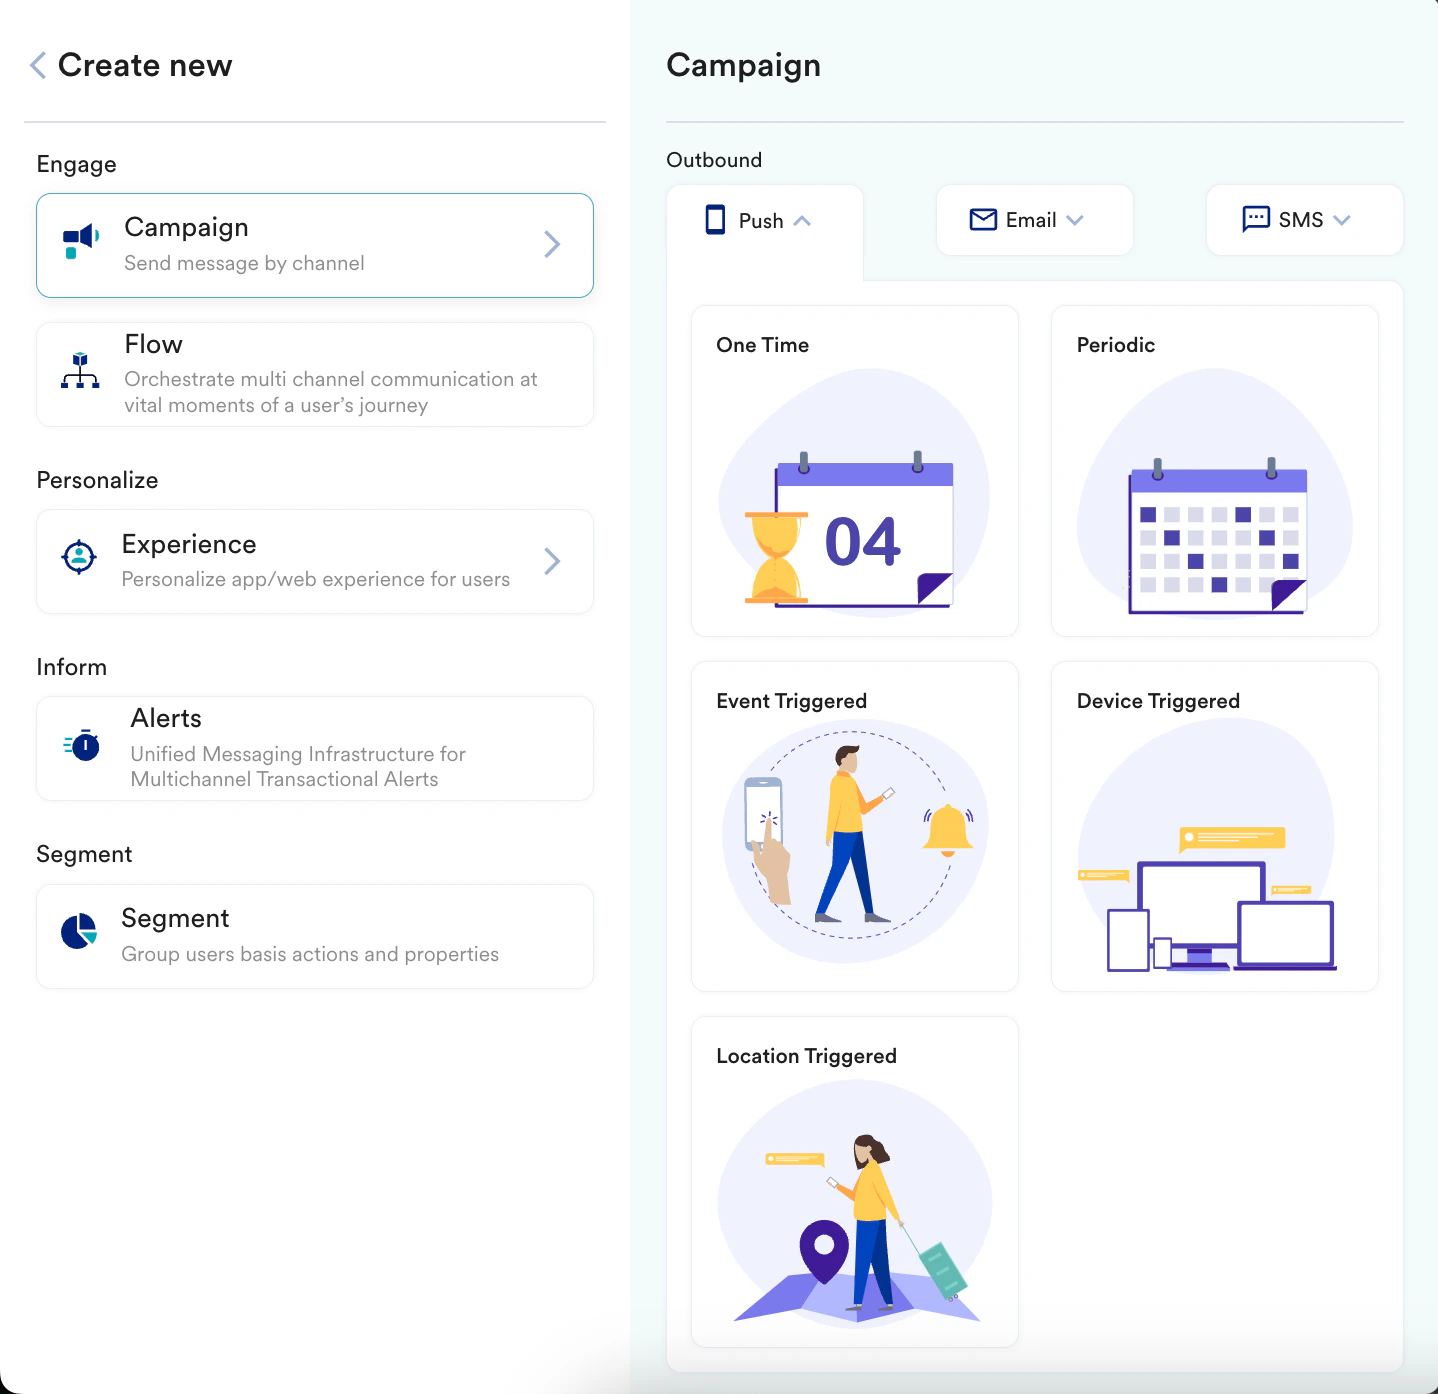 You are taken to the first step "Target users" of defining your campaign.
3. Enter the following details:
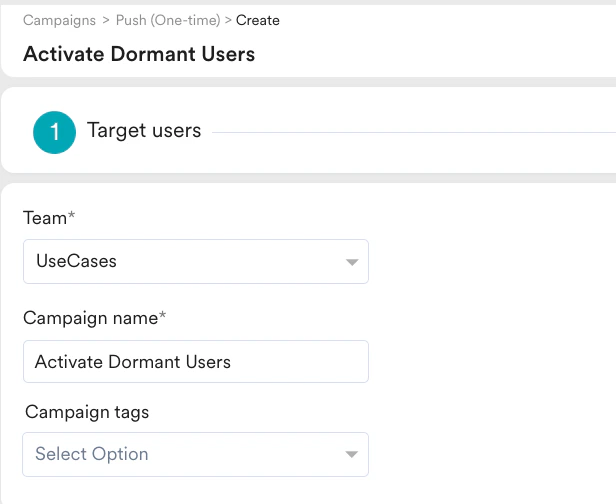
1. **Team**: Select a team if your organization has teams enabled for your account. For example, "UseCases". For more information, refer to [Teams in MoEngage](/user-guide/settings/account/team-management/teams-in-moengage).
2. **Campaign name**: Enter a name for the campaign. For example, "Activate Dormant Users".
3. **Campaign tags**: Select the required campaign tags.
You are taken to the first step "Target users" of defining your campaign.
3. Enter the following details:
1. **Team**: Select a team if your organization has teams enabled for your account. For example, "UseCases". For more information, refer to [Teams in MoEngage](/user-guide/settings/account/team-management/teams-in-moengage).
2. **Campaign name**: Enter a name for the campaign. For example, "Activate Dormant Users".
3. **Campaign tags**: Select the required campaign tags.
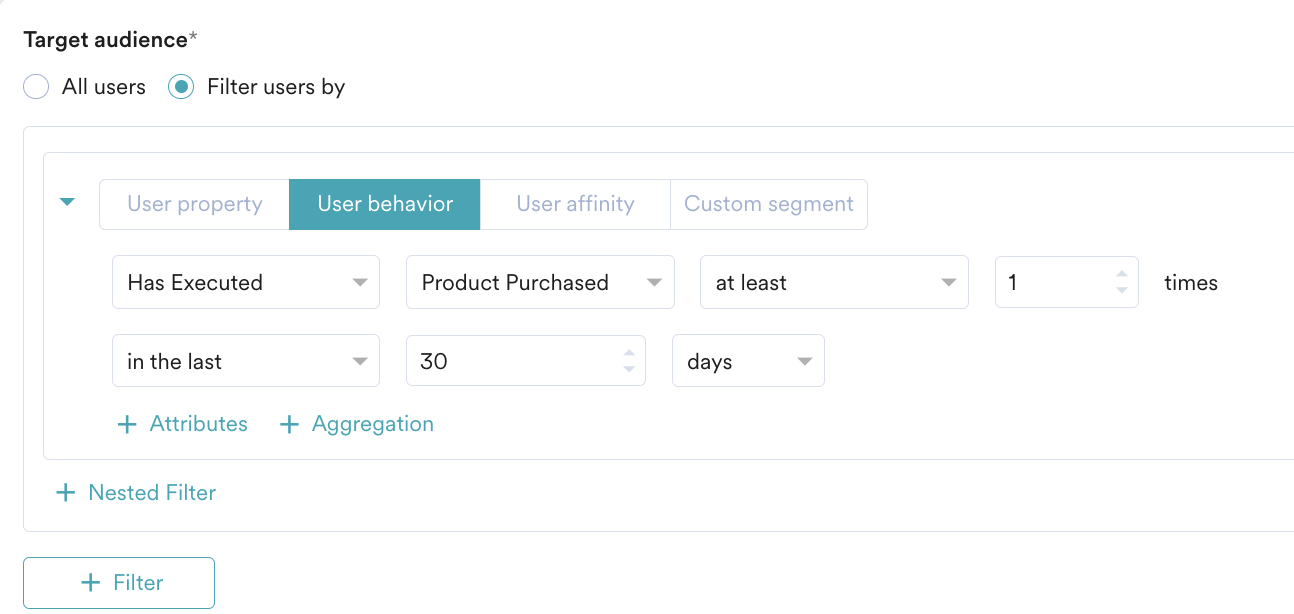
 4. In the **Target Audience** section, select the target audience as shown in the image below:
 5. In the **Target Platforms** section, select **Android**.
6. Click **Next** to move to the second step "Content" where you can define the content that will go into your Push campaign.
## Step 2: Content
1. Select the template that you like to go with. For our example, select **Basic notification**.
5. In the **Target Platforms** section, select **Android**.
6. Click **Next** to move to the second step "Content" where you can define the content that will go into your Push campaign.
## Step 2: Content
1. Select the template that you like to go with. For our example, select **Basic notification**. 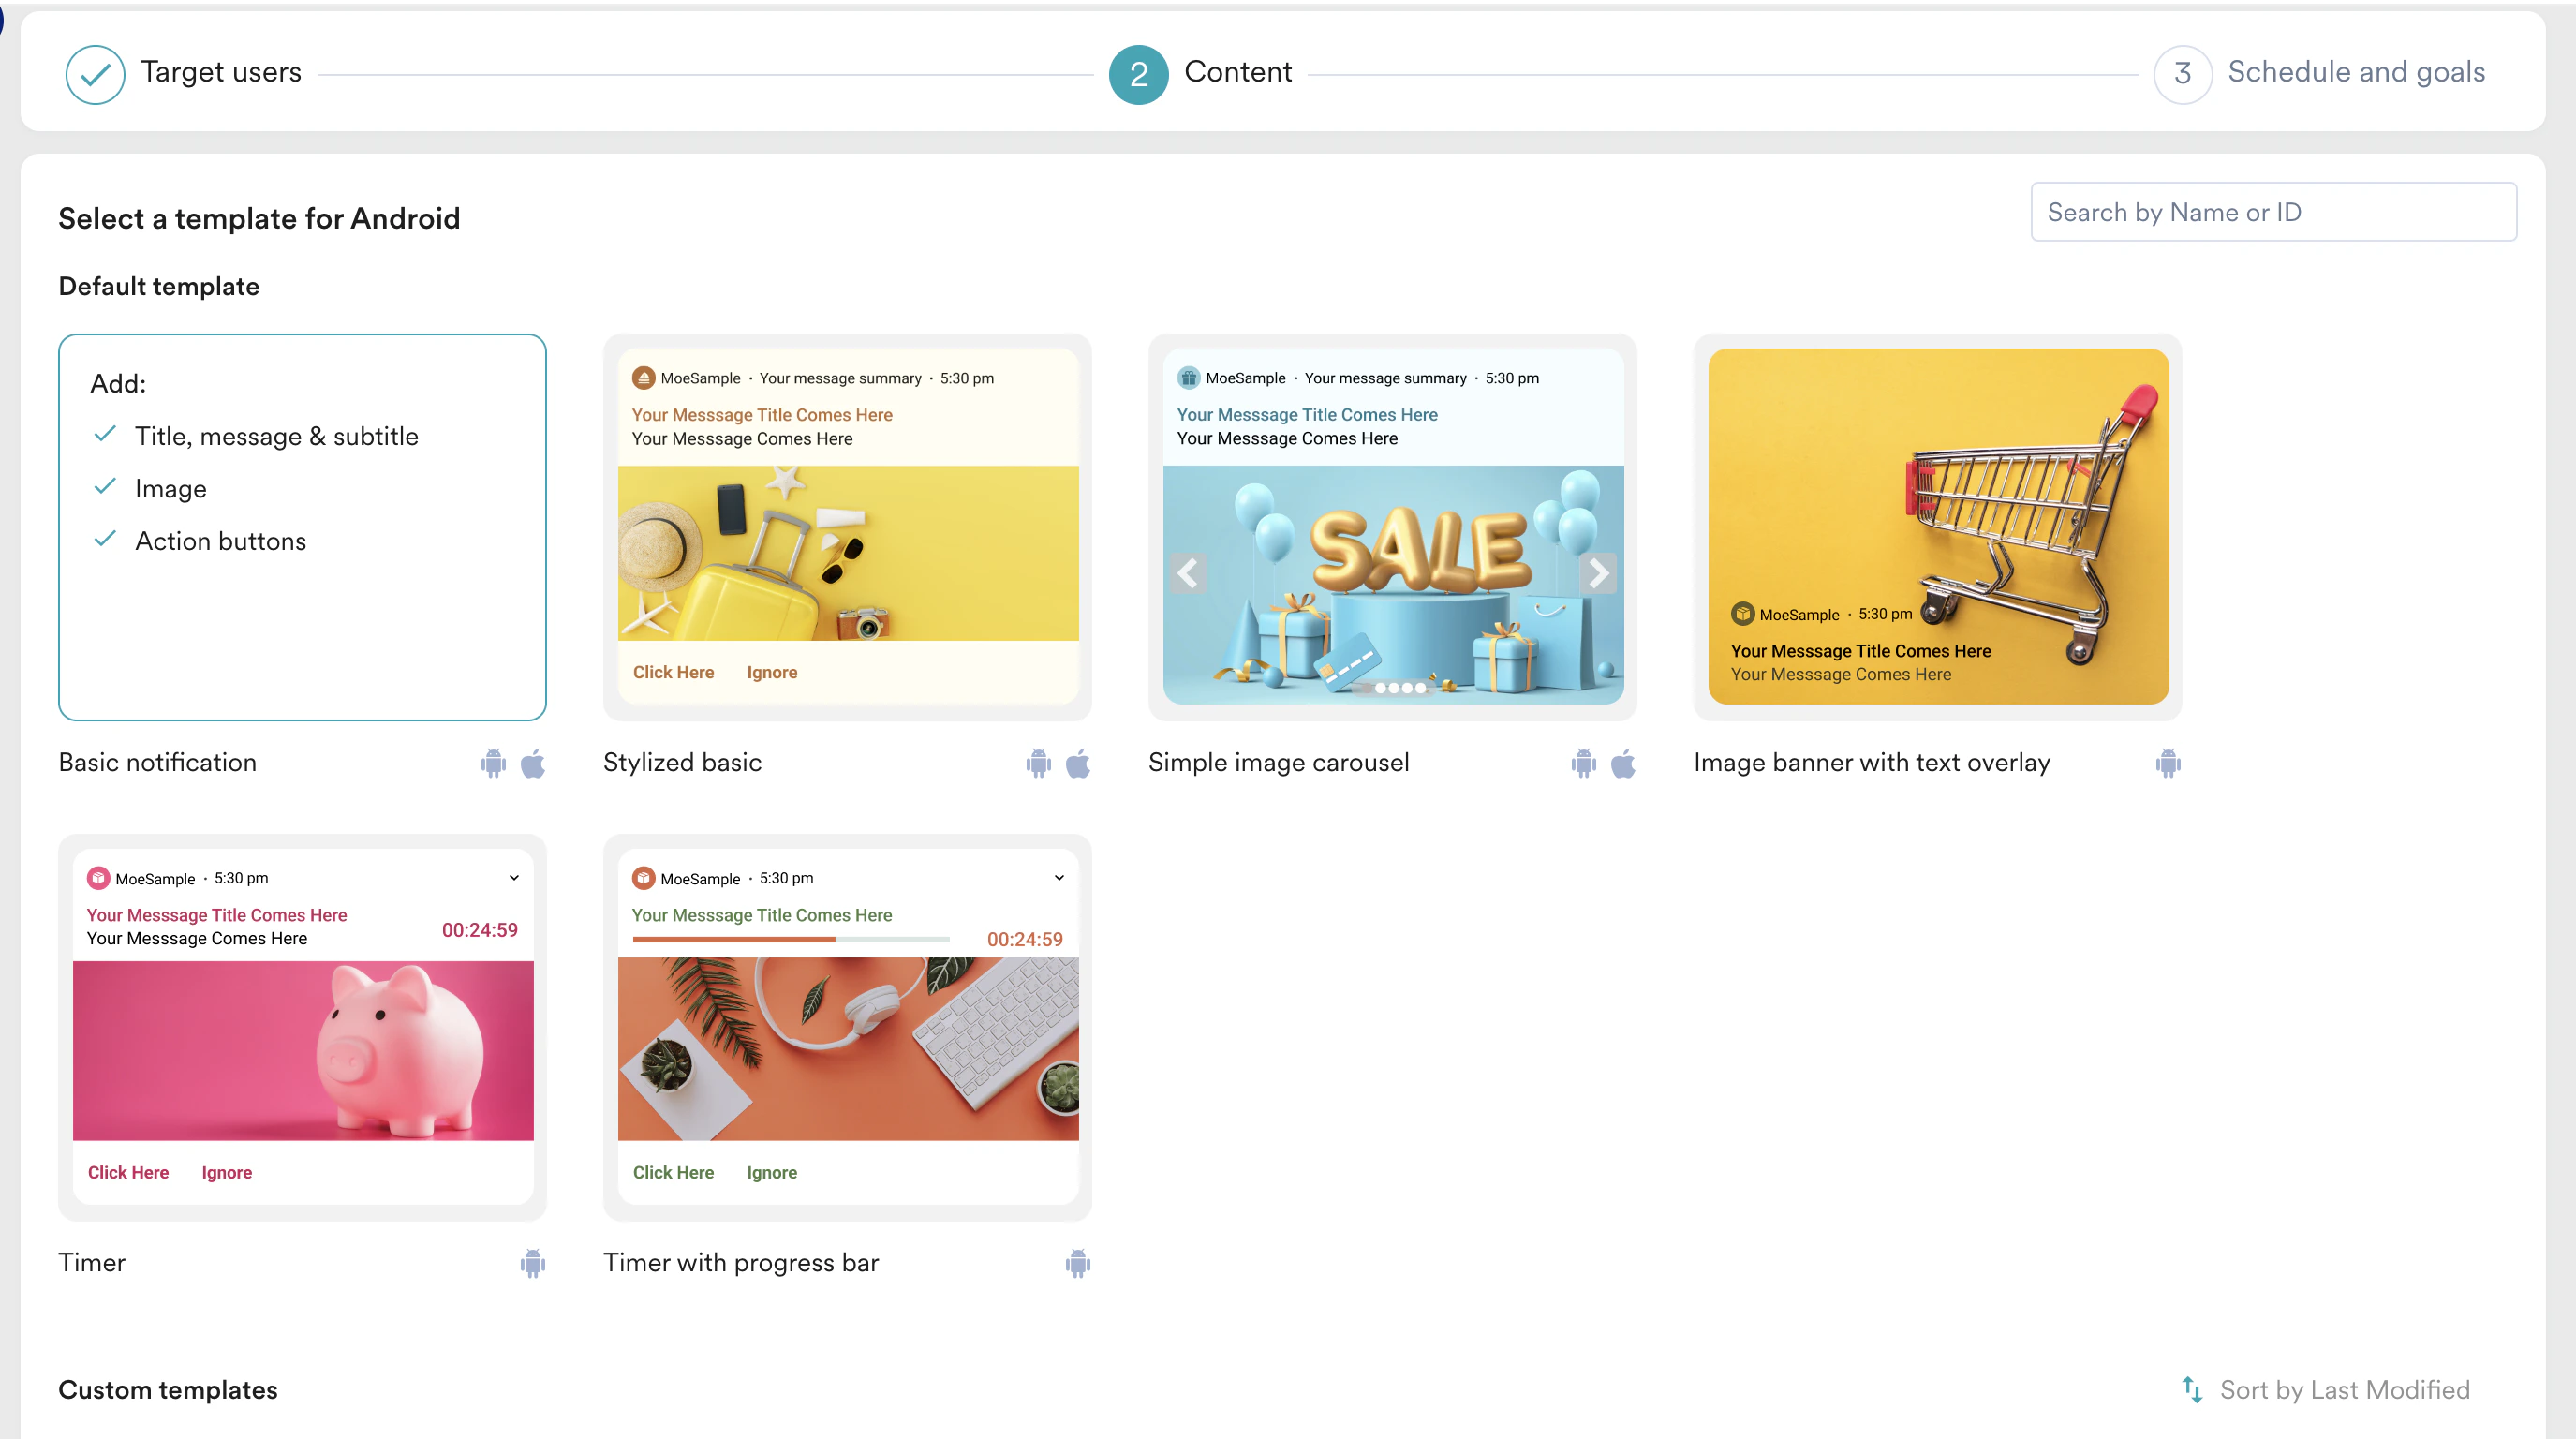 2. Enter the required content for the campaign. For example:
* Message title
* Message
* Message summary
3. Make use of the Catalog to display the memory images.
2. Enter the required content for the campaign. For example:
* Message title
* Message
* Message summary
3. Make use of the Catalog to display the memory images.
 Carousels work best when there are multiple memories in hand. To set them up, you can use the data to be fetched from the product Catalog and displayed to the user.
4. Click **Next** to move to the third step "Schedule and goals" where you can define the schedule and goal of your campaign.
## Step 3: Schedule and Goals
1. In the **Send campaign** section, define when you want to start and end your campaign.
2. In the **Conversion goals** section, add conversion goals that you like to track.
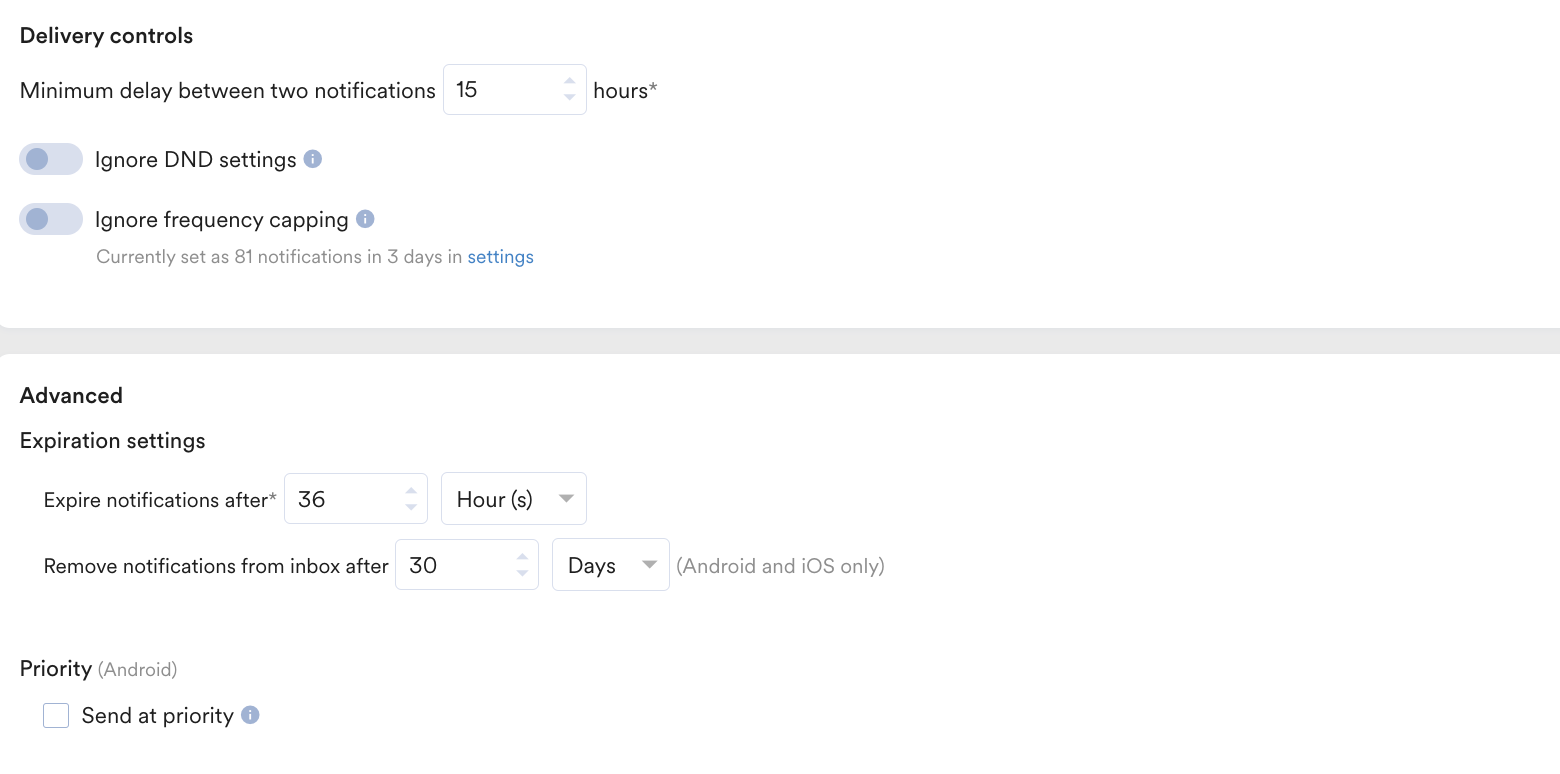
3. Define **Delivery controls** and **Advanced** settings based on your requirements. For more information, refer to [Create Push Campaigns](/user-guide/campaigns-and-channels/mobile-push/create/create-push-campaigns).
Carousels work best when there are multiple memories in hand. To set them up, you can use the data to be fetched from the product Catalog and displayed to the user.
4. Click **Next** to move to the third step "Schedule and goals" where you can define the schedule and goal of your campaign.
## Step 3: Schedule and Goals
1. In the **Send campaign** section, define when you want to start and end your campaign.
2. In the **Conversion goals** section, add conversion goals that you like to track.
3. Define **Delivery controls** and **Advanced** settings based on your requirements. For more information, refer to [Create Push Campaigns](/user-guide/campaigns-and-channels/mobile-push/create/create-push-campaigns).
 4. Click **Publish**.
# Conclusion
In this use case, we created a Catalog, a Recommendation, and a Push campaign to target users using their past experience such as users who have made purchases before 30 days.
4. Click **Publish**.
# Conclusion
In this use case, we created a Catalog, a Recommendation, and a Push campaign to target users using their past experience such as users who have made purchases before 30 days.