> ## Documentation Index
> Fetch the complete documentation index at: https://moengage.com/docs/llms.txt
> Use this file to discover all available pages before exploring further.
# How to Configure Different Pop-Up Messages Based on Location
# Introduction
Localized In-app pop-up messages effectively deliver targeted content and offers to users based on their geographical location. By leveraging the *localized In-app pop-up* feature, you can enhance user engagement and user experience by showing relevant information that resonates with their specific locale. This use case details how to create these pop-ups to provide a more personalized experience for your users.
In this article, we will create an in-app campaign that promotes special offers to users in different regions, such as the USA, Germany, and India, right after they add an item to their cart. Each region will have customized content and offers that are automatically displayed to the respective users.
# Expected results
Users will see pop-up messages customized to their location, providing them with relevant information, offers, or promotions tailored to their specific locale. This increases the relevance of the messages and enhances user engagement.
Integration of the MoEngage Android SDK or iOS SDK with your app. For more information, refer to the [Developer Guide](/docs/developer-guide/introduction).
# Create an In-App Campaign
In this section, let us create an In-app campaign to promote targeted content and offers to users based on their geographical location.
## Step 1: Target users
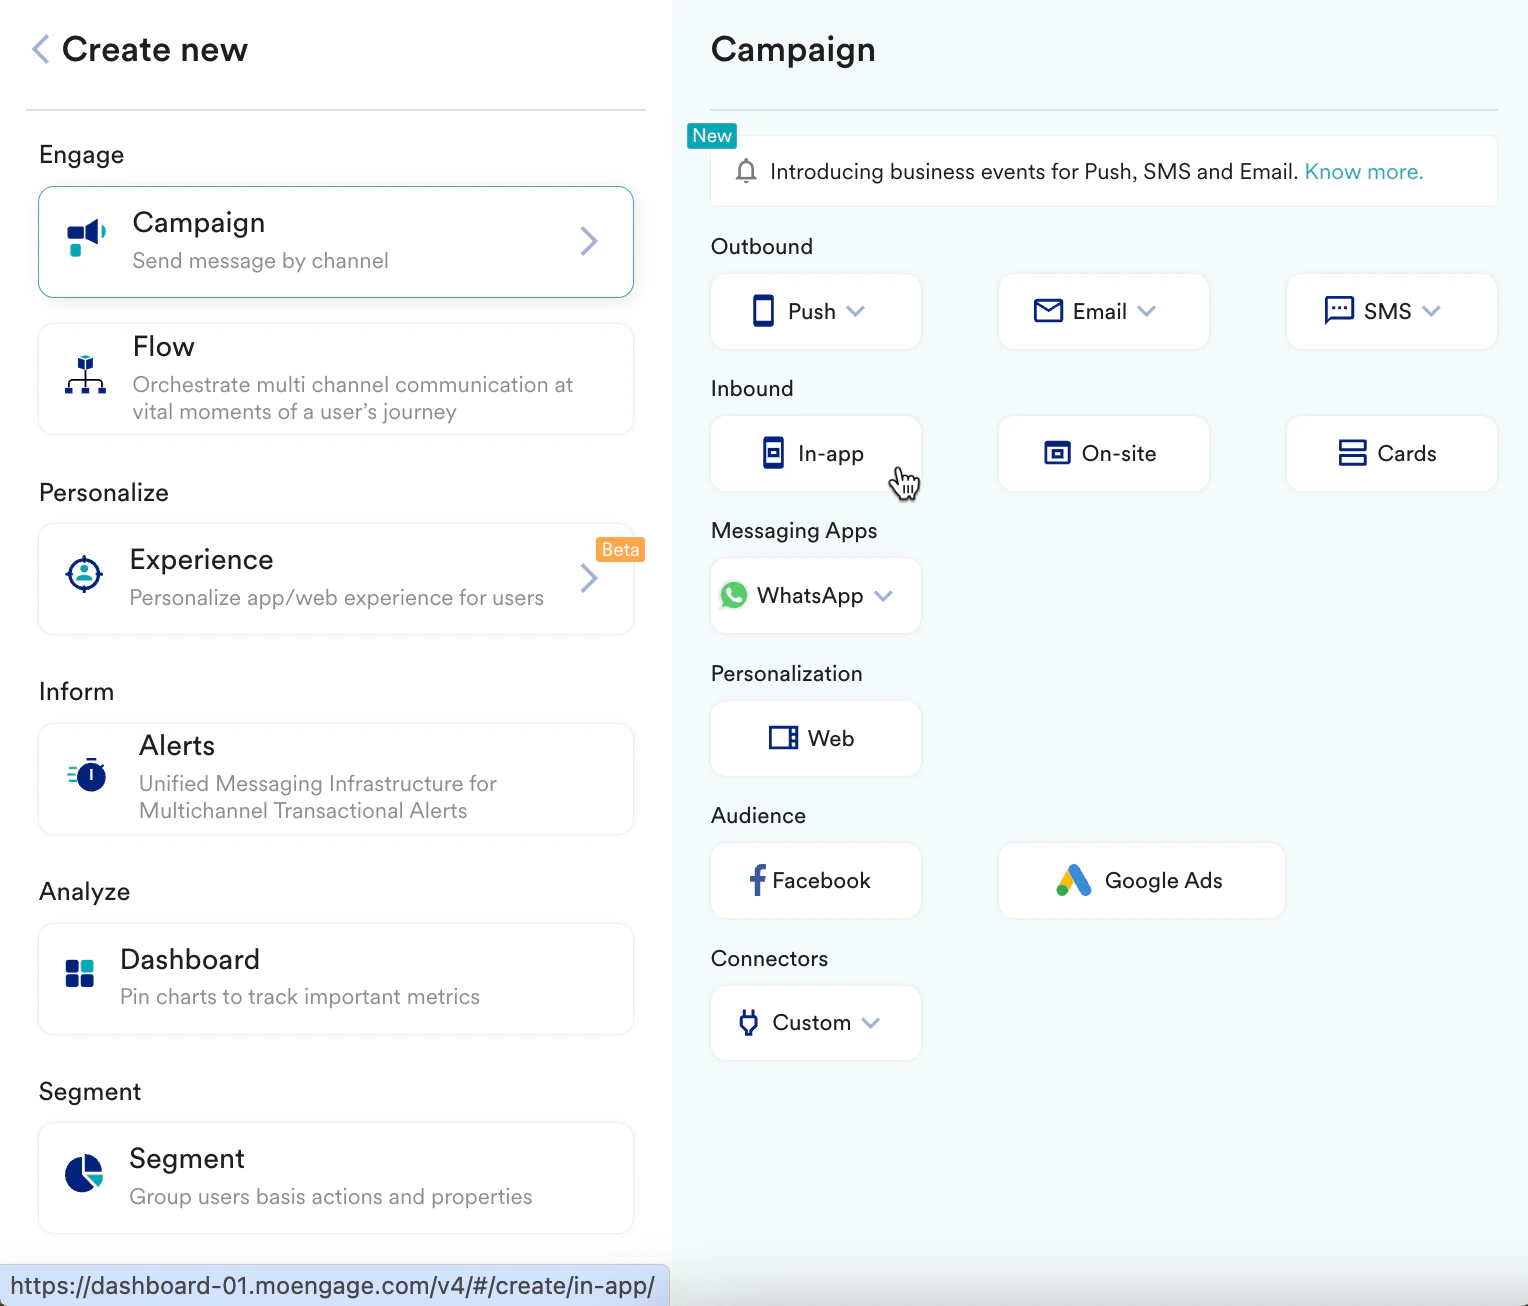
1. Navigate to the sidebar on the left and click **Engage** > **Campaigns** and click **+ Create campaign**, or click **+ Create new**> **Campaign**.
2. Under **Inbound**, click **In-app**. \
You are taken to the first step "Target users" of defining your campaign.
3. Enter the following details:
* **Campaign name**: Enter a name for the campaign. For example, "Location based In-app pop-up messages".
* **Campaign tags**: Select the relevant campaign tags.
4. In the **Trigger Criteria** section, select **On app open**.
5. In the **Select trigger time** section, select **Immediately** to send the message immediately.
6. In the **Target Audience** section, create segments based on user locations. You can use user attributes or location-based targeting provided by MoEngage.
* Example segments:
* Users in the USA
* Users in Germany
* Users in India
* Exclude users who have recently dismissed similar pop-up messages.
7. Click **Next** to move to the second step, "Content," where you can define the content for your campaign.
## Step 2: Content
MoEngage In-app campaign offers a variety of templates for all your use cases. It also provides the option to start from scratch.
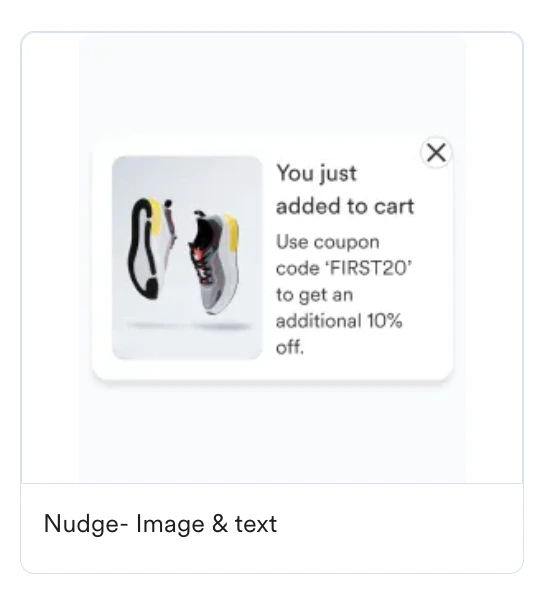
1. Select the template you want to show the user. You can select any in-app message template to design the pop-up. We will select the **Nudge- Image & text** template for this use case. You can customize it using the **Template Settings** page.
2. Click **+ Locale**, and then click **+ New locale** to add new locales.
3. Create three different locales for USA, Germany, and India.
* For these locales, the last known country will be USA, Germany, and India.
4. Design the pop-up messages for each locale by performing the following steps:
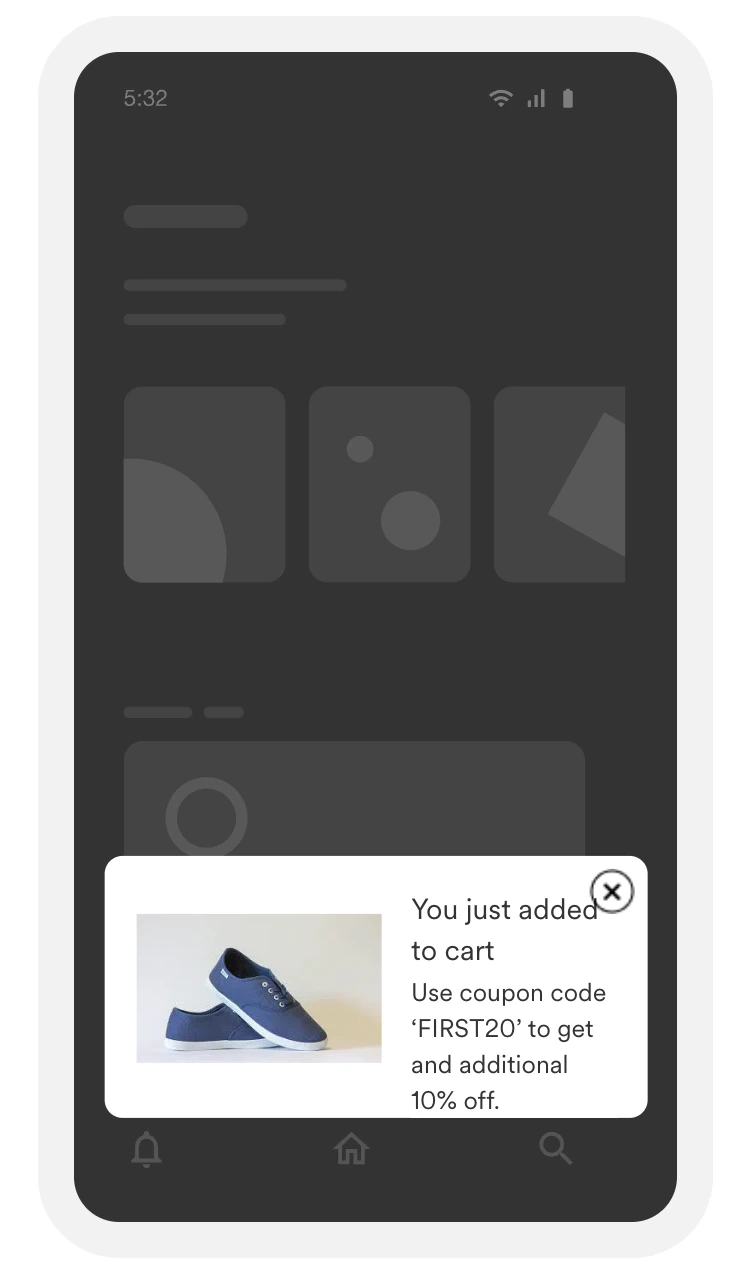
* **USA locale:**
* **Title**: "You Just Added to Cart!"
* **Description**: "Complete your purchase now and enjoy a 20% discount on all products. This is a limited-time offer!"
* **Visual Elements:** Include images relevant to the US market, such as popular products or festive themes.
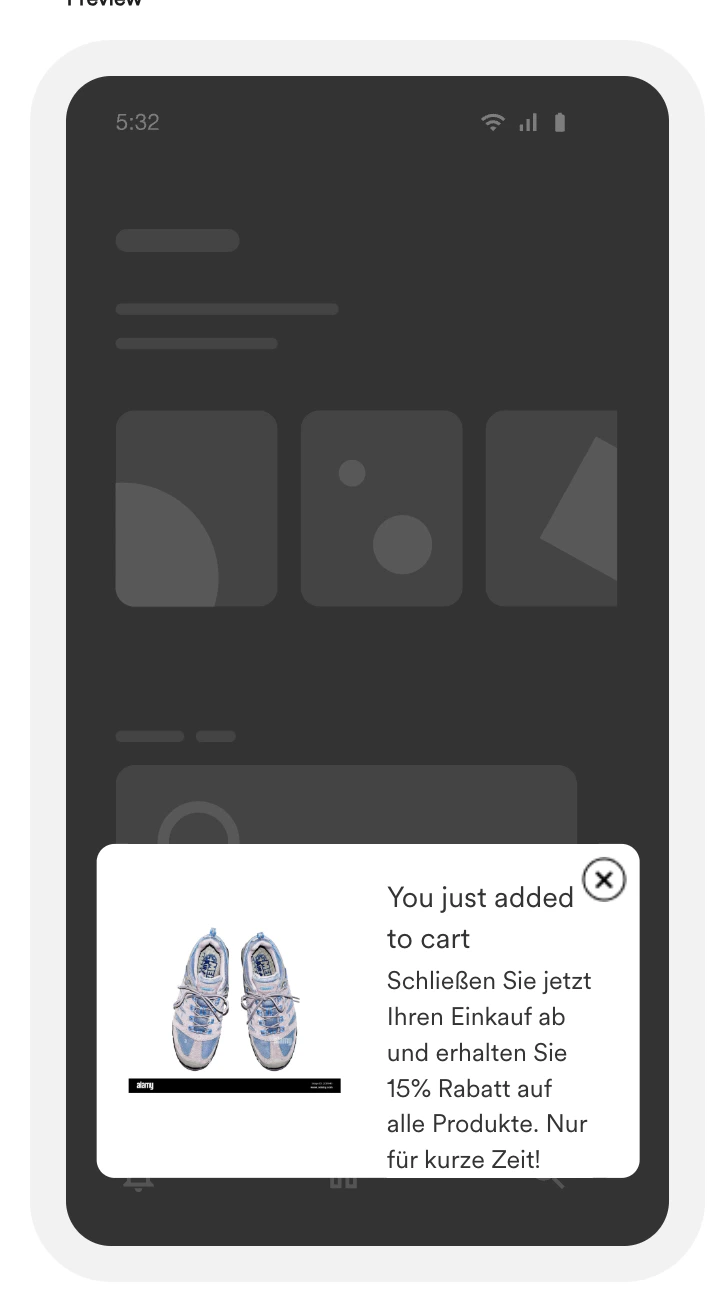
* **Germany locale:**
* **Title**: "You Just Added to Cart!"
* **Description**: "Schließen Sie jetzt Ihren Einkauf ab und erhalten Sie 15% Rabatt auf alle Produkte. Nur für kurze Zeit!"
* **Visual Elements:** Include images relevant to the German market, such as popular products or local festive themes.
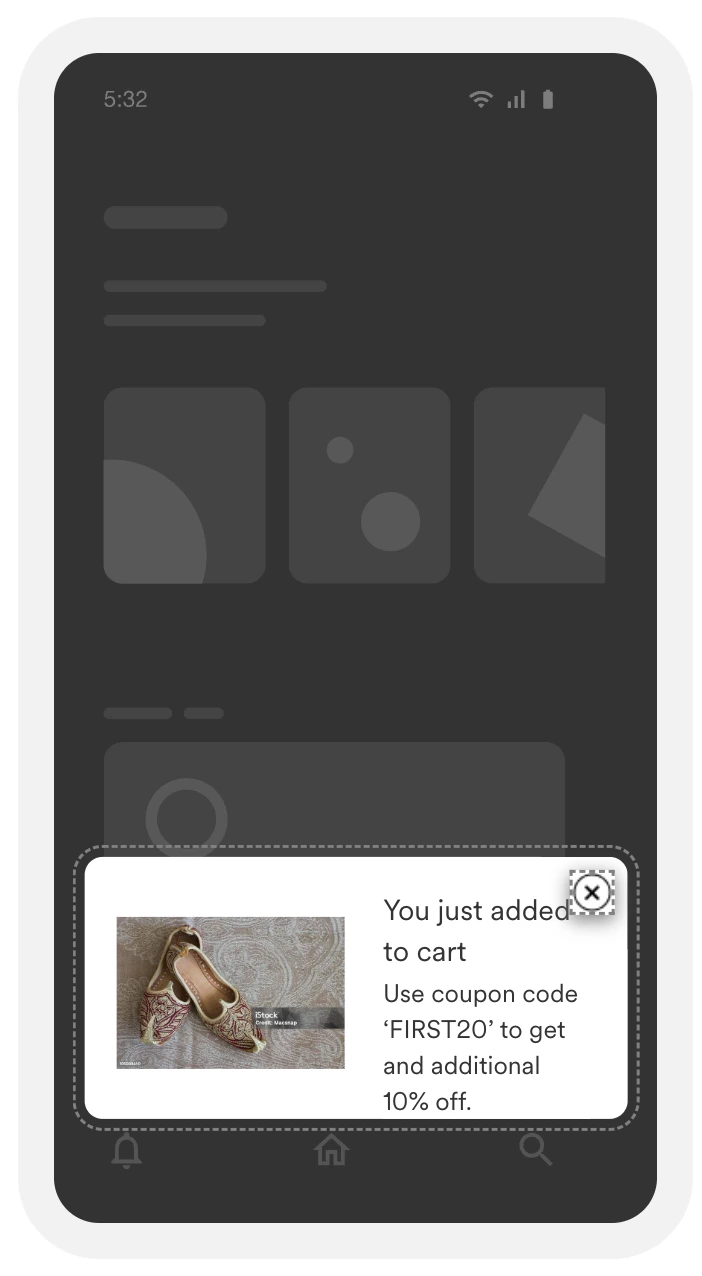
* **India locale:**
1. **Title**: "You Just Added to Cart!"
2. **Description**: "Complete your purchase now and get a 10% discount on select items. This offer is valid for a limited period!"
3. **Visual Elements:** Include images relevant to the Indian market, such as popular products or local festive themes.
5. Click **Next** to move to the third step, "Schedule and goals," where you can define your campaign's schedule and goals.
## Step 3: Schedule and goals
Here, you can select the campaign schedule, add the conversion goal, choose the campaign's priority, and define custom delivery controls.
1. In the **Send campaign** section, define when you want to start and end your In-app campaign with the frequency and limits.
2. In the **Conversion Goals** section, add conversion goals that you would like to track.
3. In the **Campaign priority** section, assign a priority to this campaign. Assigning a priority helps you decide which In-app message to be shown to a user when they are eligible for more than one message at a specific time. For example, selecting **Critical** makes sure that the users will always see this even when there are other campaigns that they are eligible for.
4. In the **Delivery controls** section, define the controls based on your requirements. For more information, refer to [Create In-app Campaign](/docs/user-guide/campaigns-and-channels/in-app-message/create/create-in-app-campaign).
5. Click **Publish**.
# Conclusion
In this use case, we created an In-app campaign to deliver targeted content and offers to users based on their geographical location.
This automated campaign will help you promote tailored information or promotional content to your users based on their geographical location. This approach helps to improve user engagement and enhance the overall user experience by providing customized services to the users.
Now that we have published the campaign, we can track our CTR and conversions (if defined) to understand how well the campaign is performing. For more information, refer to [In-app Campaign Analytics](/docs/user-guide/campaigns-and-channels/in-app-message/analyze/analyze-in-app-campaigns).
 \
You are taken to the first step "Target users" of defining your campaign.
3. Enter the following details:
* **Campaign name**: Enter a name for the campaign. For example, "Location based In-app pop-up messages".
* **Campaign tags**: Select the relevant campaign tags.
4. In the **Trigger Criteria** section, select **On app open**.
\
You are taken to the first step "Target users" of defining your campaign.
3. Enter the following details:
* **Campaign name**: Enter a name for the campaign. For example, "Location based In-app pop-up messages".
* **Campaign tags**: Select the relevant campaign tags.
4. In the **Trigger Criteria** section, select **On app open**. 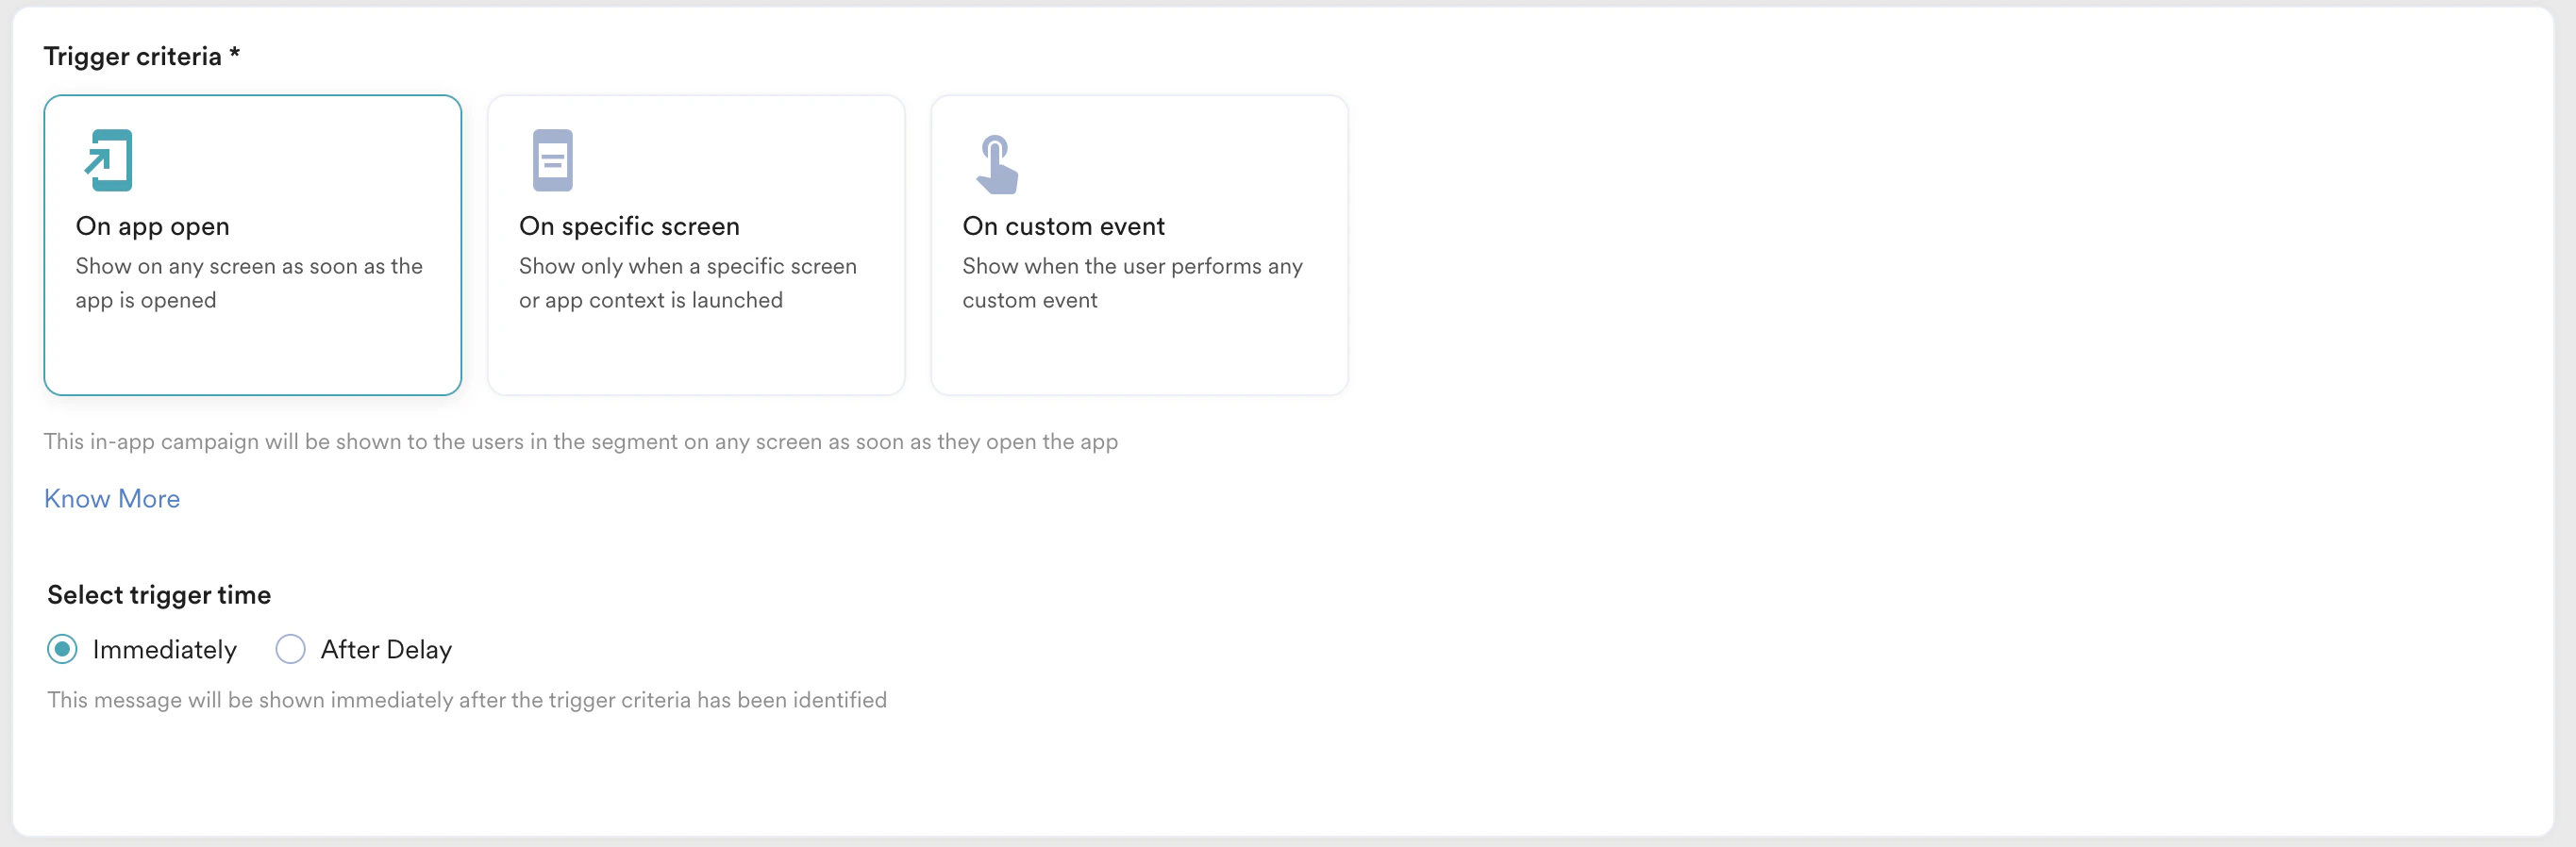 5. In the **Select trigger time** section, select **Immediately** to send the message immediately.
6. In the **Target Audience** section, create segments based on user locations. You can use user attributes or location-based targeting provided by MoEngage.
* Example segments:
* Users in the USA
* Users in Germany
* Users in India
5. In the **Select trigger time** section, select **Immediately** to send the message immediately.
6. In the **Target Audience** section, create segments based on user locations. You can use user attributes or location-based targeting provided by MoEngage.
* Example segments:
* Users in the USA
* Users in Germany
* Users in India 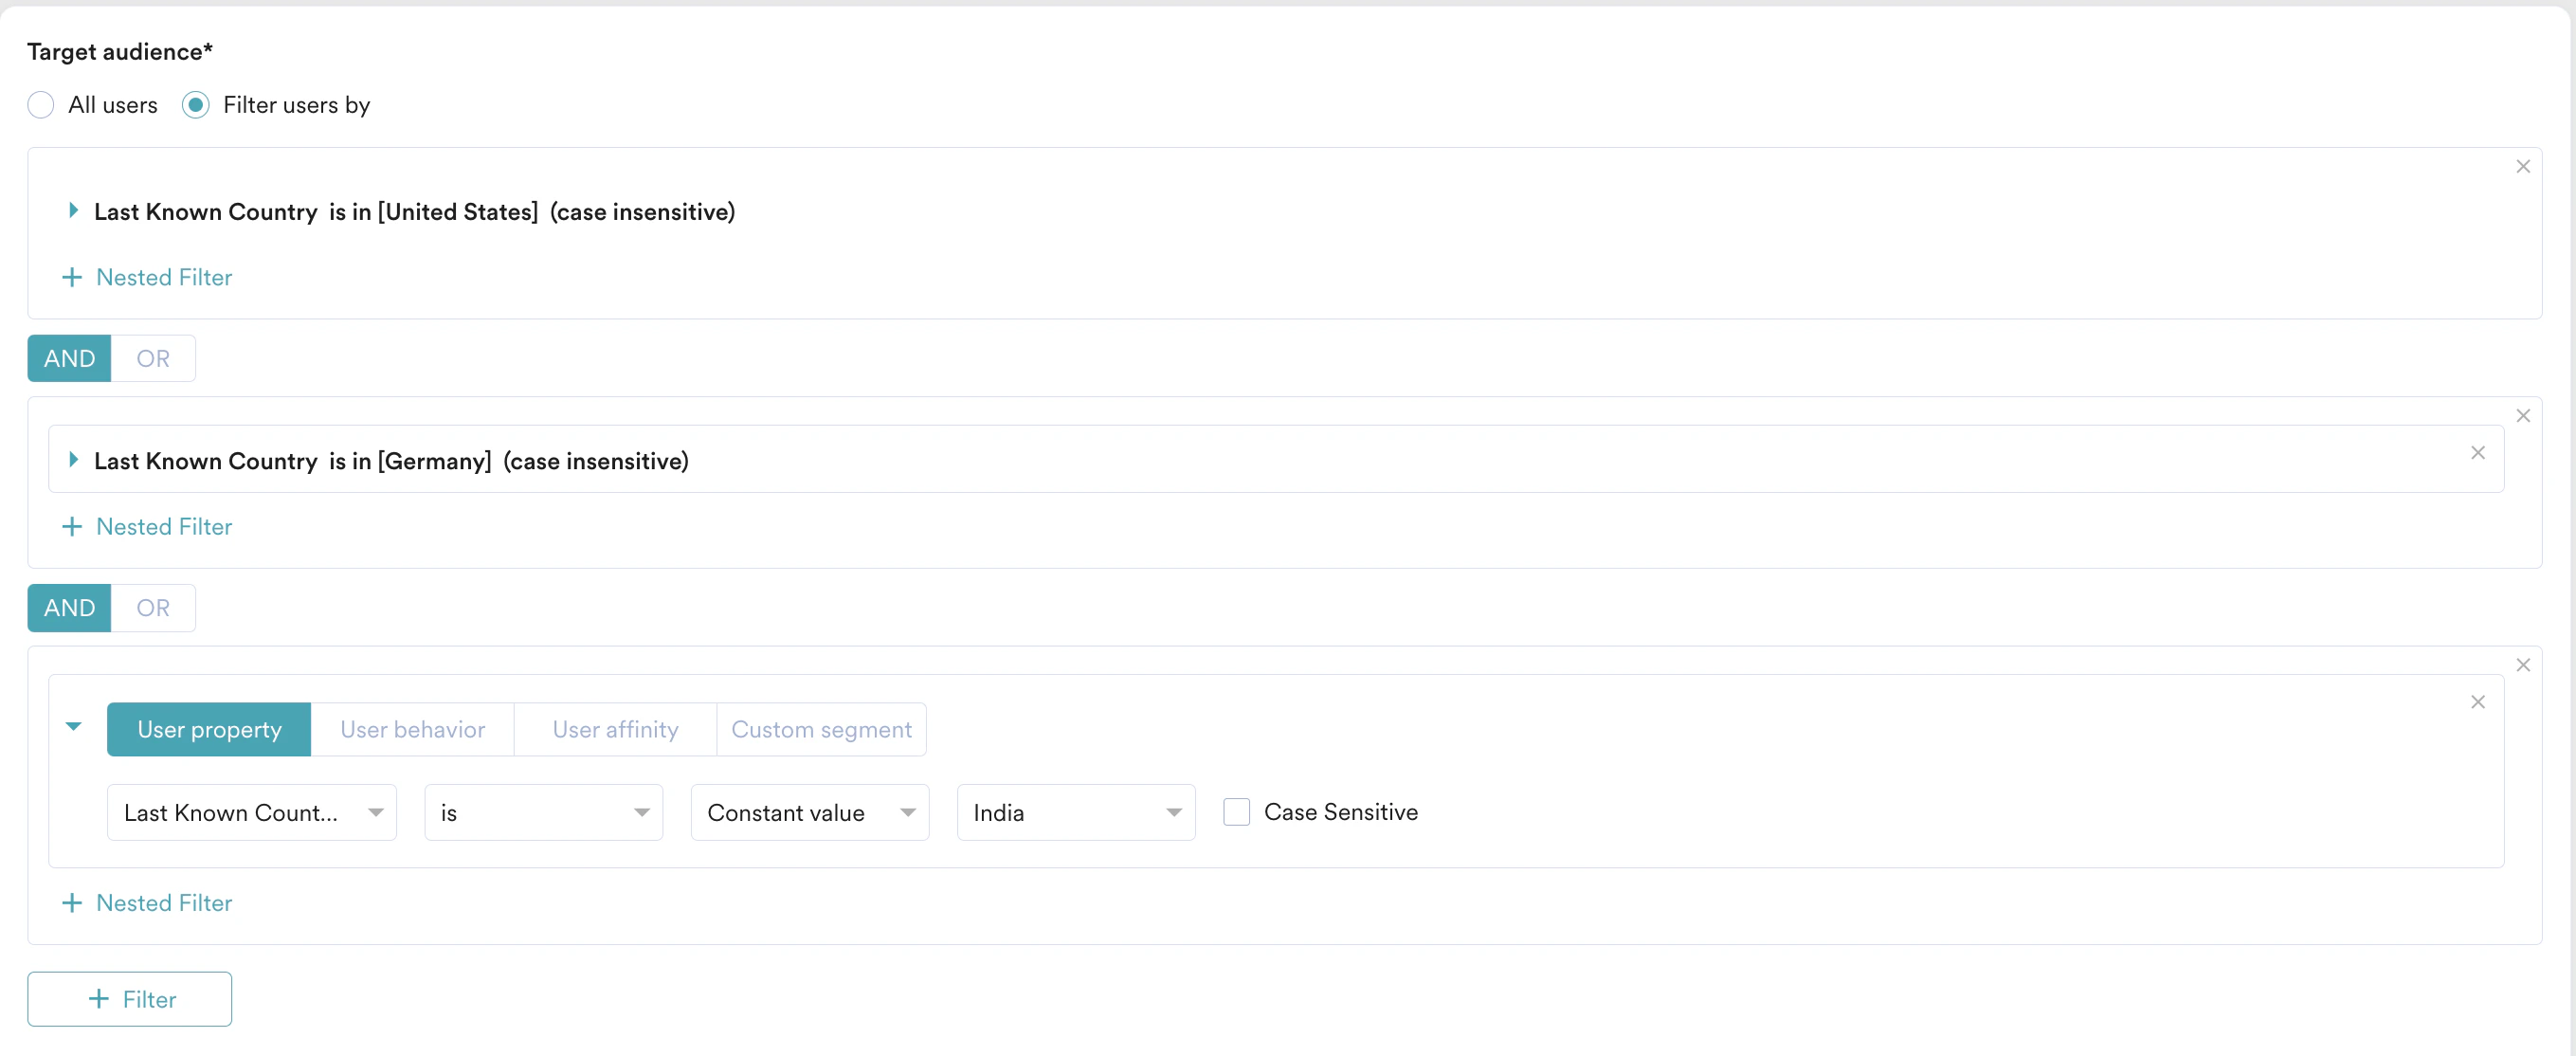 * Exclude users who have recently dismissed similar pop-up messages.
7. Click **Next** to move to the second step, "Content," where you can define the content for your campaign.
## Step 2: Content
MoEngage In-app campaign offers a variety of templates for all your use cases. It also provides the option to start from scratch.
1. Select the template you want to show the user. You can select any in-app message template to design the pop-up. We will select the **Nudge- Image & text** template for this use case. You can customize it using the **Template Settings** page.
* Exclude users who have recently dismissed similar pop-up messages.
7. Click **Next** to move to the second step, "Content," where you can define the content for your campaign.
## Step 2: Content
MoEngage In-app campaign offers a variety of templates for all your use cases. It also provides the option to start from scratch.
1. Select the template you want to show the user. You can select any in-app message template to design the pop-up. We will select the **Nudge- Image & text** template for this use case. You can customize it using the **Template Settings** page.
 2. Click **+ Locale**, and then click **+ New locale** to add new locales.
3. Create three different locales for USA, Germany, and India.
* For these locales, the last known country will be USA, Germany, and India.
2. Click **+ Locale**, and then click **+ New locale** to add new locales.
3. Create three different locales for USA, Germany, and India.
* For these locales, the last known country will be USA, Germany, and India. 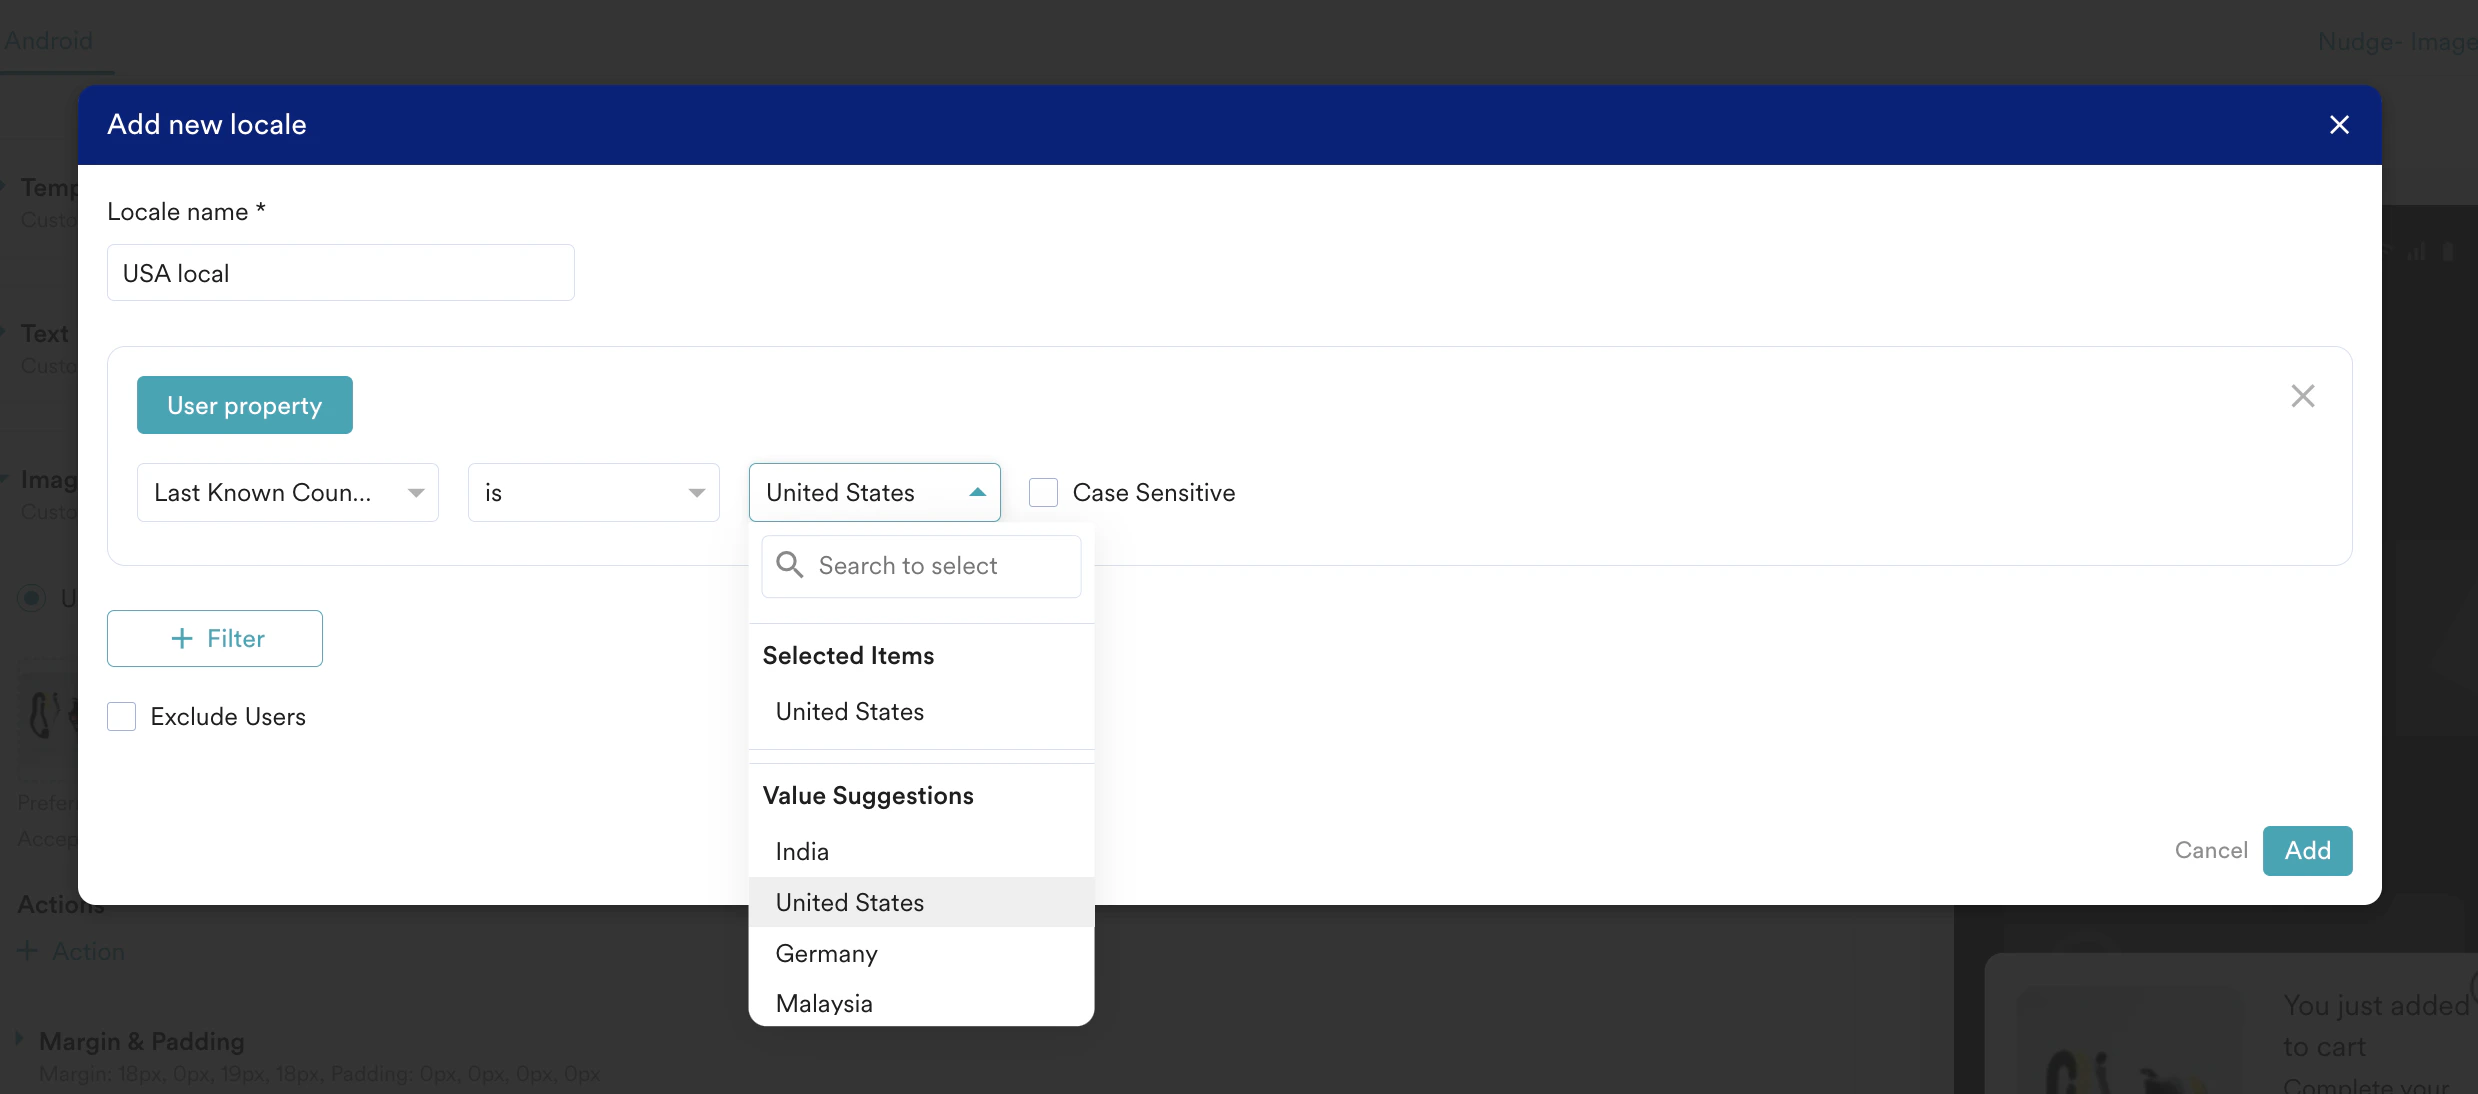 4. Design the pop-up messages for each locale by performing the following steps:
* **USA locale:**
* **Title**: "You Just Added to Cart!"
* **Description**: "Complete your purchase now and enjoy a 20% discount on all products. This is a limited-time offer!"
* **Visual Elements:** Include images relevant to the US market, such as popular products or festive themes.
* **Germany locale:**
* **Title**: "You Just Added to Cart!"
* **Description**: "Schließen Sie jetzt Ihren Einkauf ab und erhalten Sie 15% Rabatt auf alle Produkte. Nur für kurze Zeit!"
* **Visual Elements:** Include images relevant to the German market, such as popular products or local festive themes.
* **India locale:**
1. **Title**: "You Just Added to Cart!"
2. **Description**: "Complete your purchase now and get a 10% discount on select items. This offer is valid for a limited period!"
3. **Visual Elements:** Include images relevant to the Indian market, such as popular products or local festive themes.
5. Click **Next** to move to the third step, "Schedule and goals," where you can define your campaign's schedule and goals.
## Step 3: Schedule and goals
Here, you can select the campaign schedule, add the conversion goal, choose the campaign's priority, and define custom delivery controls.
1. In the **Send campaign** section, define when you want to start and end your In-app campaign with the frequency and limits.
4. Design the pop-up messages for each locale by performing the following steps:
* **USA locale:**
* **Title**: "You Just Added to Cart!"
* **Description**: "Complete your purchase now and enjoy a 20% discount on all products. This is a limited-time offer!"
* **Visual Elements:** Include images relevant to the US market, such as popular products or festive themes.
* **Germany locale:**
* **Title**: "You Just Added to Cart!"
* **Description**: "Schließen Sie jetzt Ihren Einkauf ab und erhalten Sie 15% Rabatt auf alle Produkte. Nur für kurze Zeit!"
* **Visual Elements:** Include images relevant to the German market, such as popular products or local festive themes.
* **India locale:**
1. **Title**: "You Just Added to Cart!"
2. **Description**: "Complete your purchase now and get a 10% discount on select items. This offer is valid for a limited period!"
3. **Visual Elements:** Include images relevant to the Indian market, such as popular products or local festive themes.
5. Click **Next** to move to the third step, "Schedule and goals," where you can define your campaign's schedule and goals.
## Step 3: Schedule and goals
Here, you can select the campaign schedule, add the conversion goal, choose the campaign's priority, and define custom delivery controls.
1. In the **Send campaign** section, define when you want to start and end your In-app campaign with the frequency and limits. 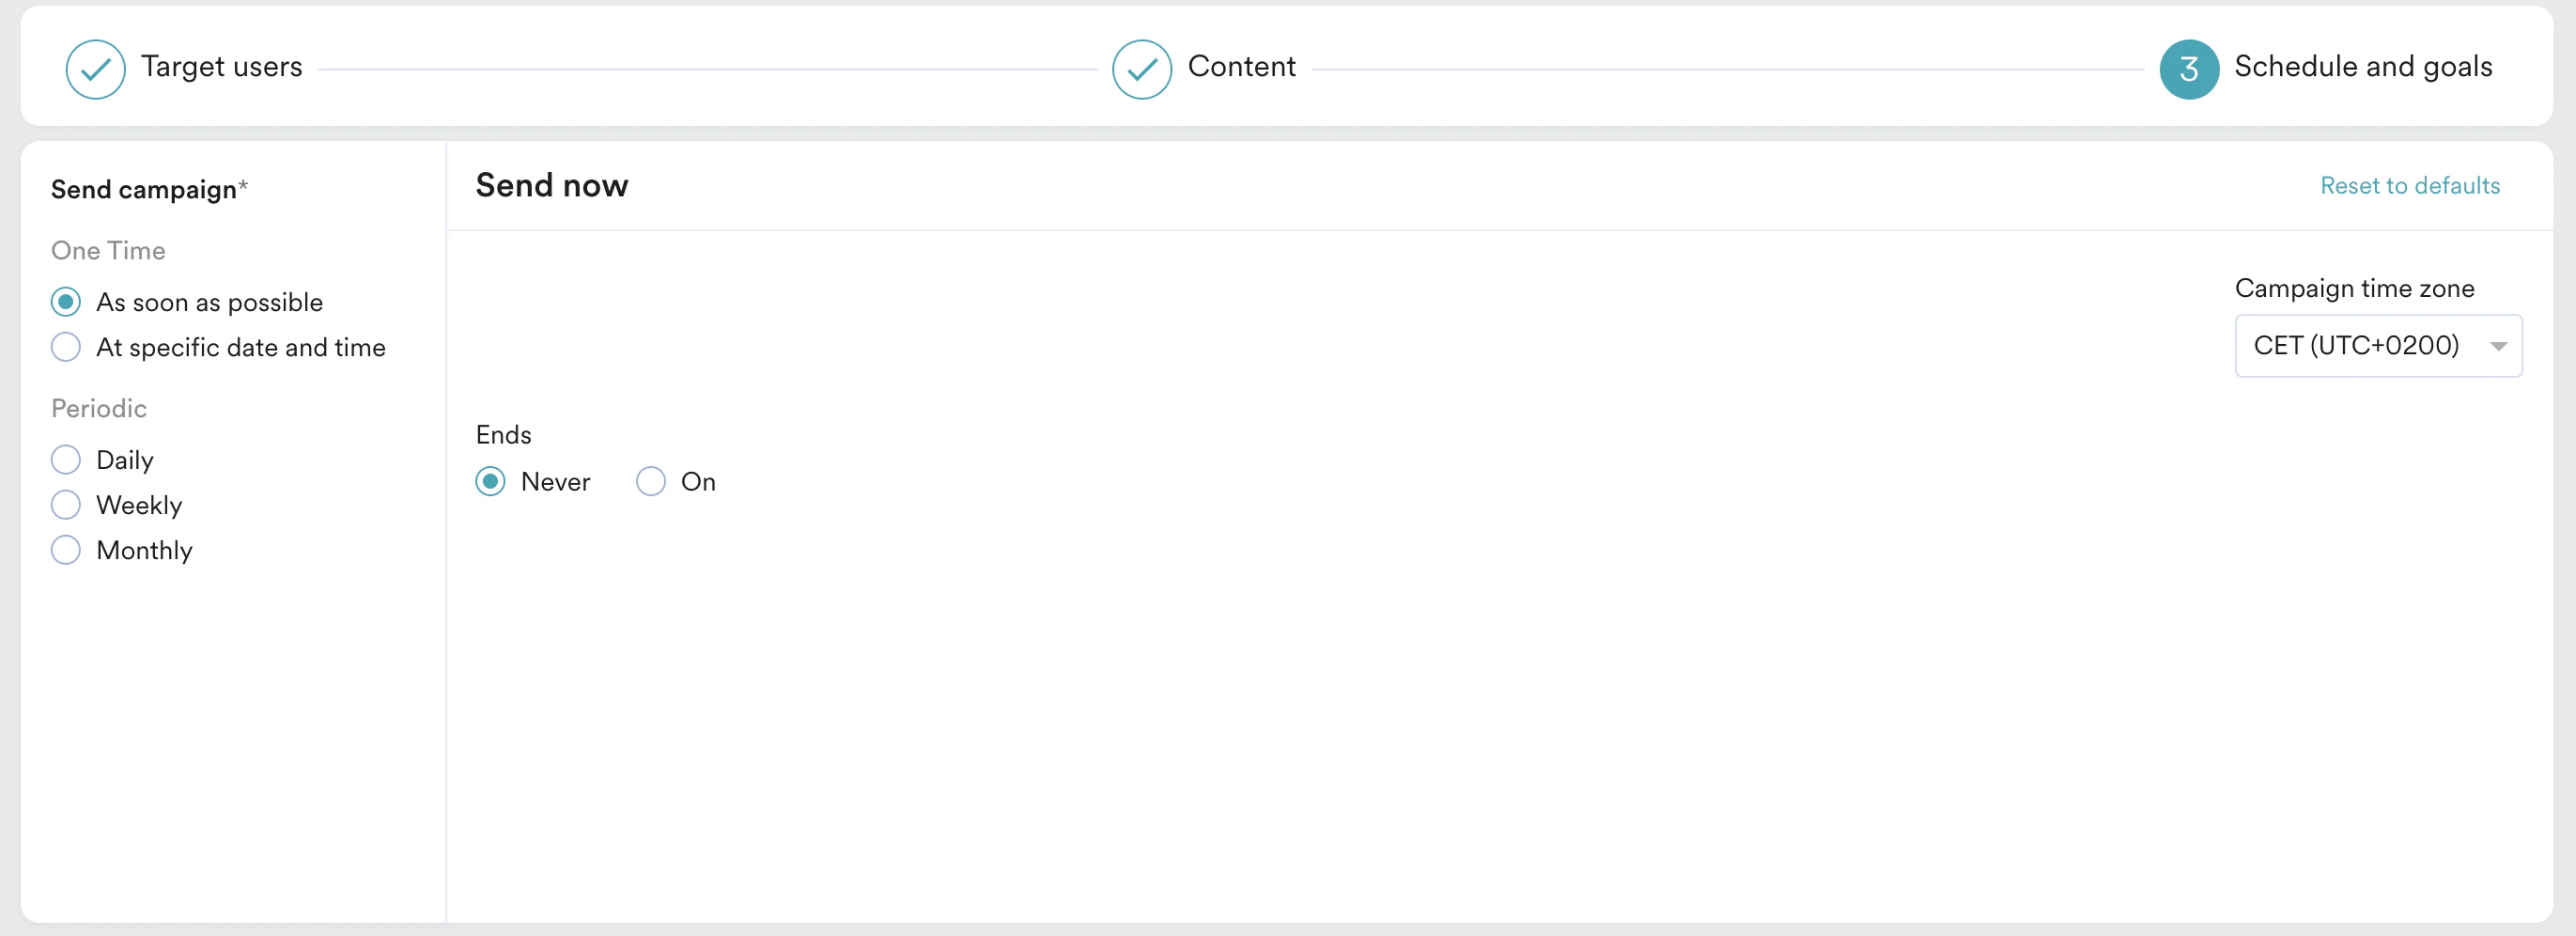 2. In the **Conversion Goals** section, add conversion goals that you would like to track.
3. In the **Campaign priority** section, assign a priority to this campaign. Assigning a priority helps you decide which In-app message to be shown to a user when they are eligible for more than one message at a specific time. For example, selecting **Critical** makes sure that the users will always see this even when there are other campaigns that they are eligible for.
4. In the **Delivery controls** section, define the controls based on your requirements. For more information, refer to [Create In-app Campaign](/docs/user-guide/campaigns-and-channels/in-app-message/create/create-in-app-campaign).
2. In the **Conversion Goals** section, add conversion goals that you would like to track.
3. In the **Campaign priority** section, assign a priority to this campaign. Assigning a priority helps you decide which In-app message to be shown to a user when they are eligible for more than one message at a specific time. For example, selecting **Critical** makes sure that the users will always see this even when there are other campaigns that they are eligible for.
4. In the **Delivery controls** section, define the controls based on your requirements. For more information, refer to [Create In-app Campaign](/docs/user-guide/campaigns-and-channels/in-app-message/create/create-in-app-campaign). 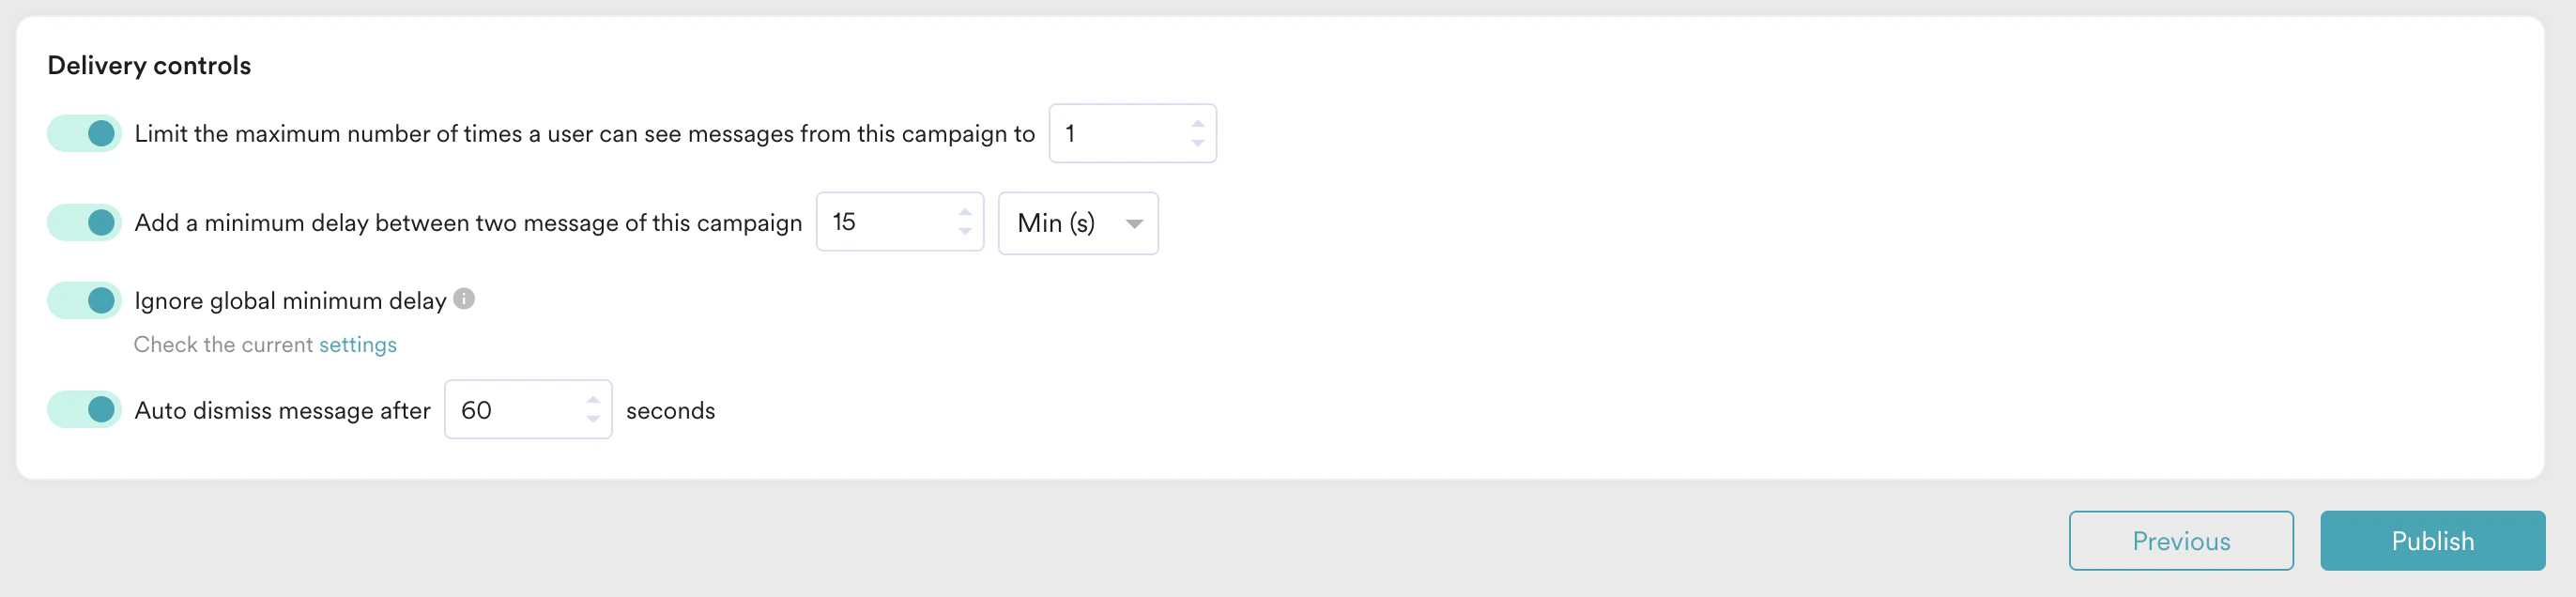 5. Click **Publish**.
# Conclusion
In this use case, we created an In-app campaign to deliver targeted content and offers to users based on their geographical location.
This automated campaign will help you promote tailored information or promotional content to your users based on their geographical location. This approach helps to improve user engagement and enhance the overall user experience by providing customized services to the users.
Now that we have published the campaign, we can track our CTR and conversions (if defined) to understand how well the campaign is performing. For more information, refer to [In-app Campaign Analytics](/docs/user-guide/campaigns-and-channels/in-app-message/analyze/analyze-in-app-campaigns).
5. Click **Publish**.
# Conclusion
In this use case, we created an In-app campaign to deliver targeted content and offers to users based on their geographical location.
This automated campaign will help you promote tailored information or promotional content to your users based on their geographical location. This approach helps to improve user engagement and enhance the overall user experience by providing customized services to the users.
Now that we have published the campaign, we can track our CTR and conversions (if defined) to understand how well the campaign is performing. For more information, refer to [In-app Campaign Analytics](/docs/user-guide/campaigns-and-channels/in-app-message/analyze/analyze-in-app-campaigns).