> ## Documentation Index
> Fetch the complete documentation index at: https://moengage.com/docs/llms.txt
> Use this file to discover all available pages before exploring further.
# How to Create a Survey Using the Drag & Drop Editor to Understand Customer Preferences
# Introduction
Understanding customer preferences is crucial in customizing product offerings and boosting user engagement.
In this article, we will create a single-question survey using the drag-and-drop editor of MoEngage to collect customer preferences quickly. This survey will be easy to deploy and analyze, offering valuable insights to guide better decision-making.
For this use case, we will gather feedback on food preferences by asking customers to choose between Asian and Continental cuisine.
# Expected Result
The goal is to quickly design and deploy a single-question survey to understand customer food preferences. The collected data will help refine menu strategies and improve customer engagement.
Integration of the MoEngage Android SDK or iOS SDK with your app. For more information, refer to the [Developer Guide](/developer-guide/introduction).
# Create an In-App Campaign
In this section, let us create a single-question survey using the drag-and-drop editor of MoEngage to collect customer preferences quickly.
## Step 1: Target Users
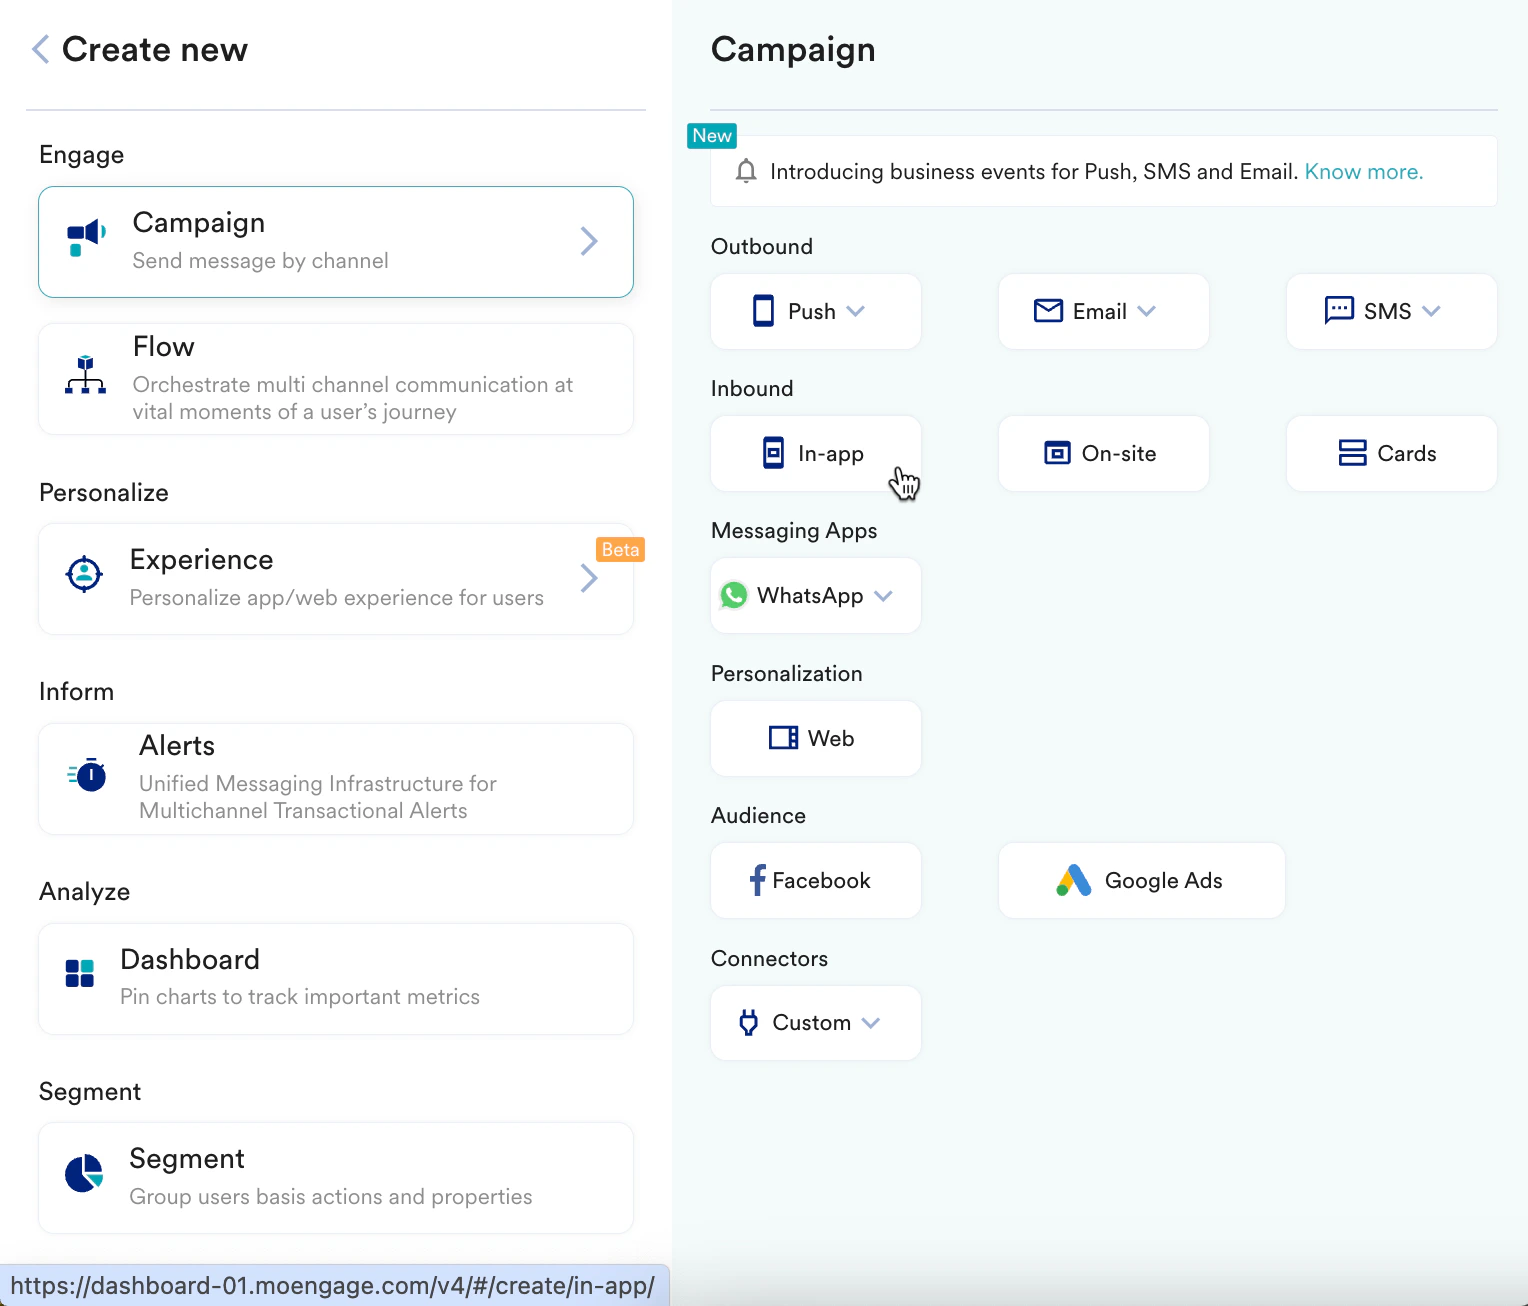
1. Navigate to the sidebar on the left and click **Engage** > **Campaigns** and click **+ Create campaign**, or click **+ Create new**> **Campaign**.
2. Under **Inbound**, click **In-app**. You are taken to the first step, "Target users," of defining your campaign.
3. Enter the following details:
* **Campaign name**: Enter a name for the campaign. For example, "Single question survey campaign."
* **Campaign tags**: Select the relevant campaign tags.
4. In the **Target Platforms** section, select **iOS**.
5. In the **Trigger Criteria** section, select **On app open**.
6. In the **Select trigger time** section, select **Immediately** to send the message.
7. In the **Target audience** section, select **All users**.
8. Click **Next** to move to the second step, "Content," where you can define the content that will go into your campaign.
## Step 2: Content
MoEngage In-app campaign offers a variety of templates for all your use cases. It also provides the option to start from scratch.
1. Access the drag-and-drop editor and click **Explore pre-built templates** from the banner.
2. Design the survey:
* Let’s select the **Drag and Drop - E-commerce 2** template for our use case.
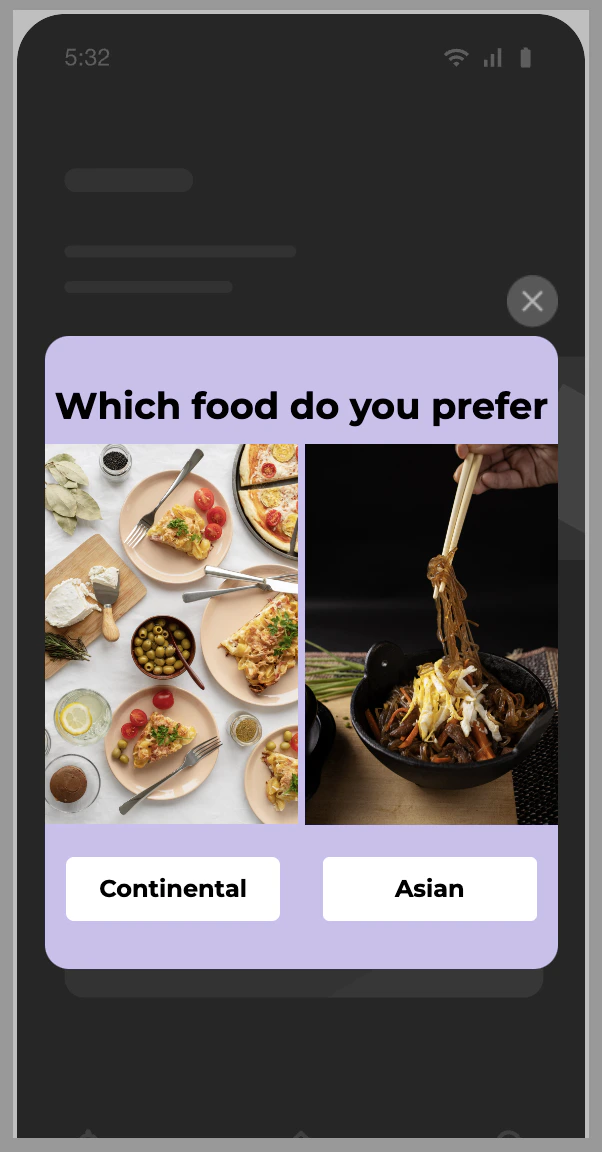
* Change the Title text to “Which food do you prefer?”
* Change the images to depict Asian and Continental food.
* Change the button names to Continental and Asian.
* Your template should look something like this:
3. Track results:
* To track the number of times Continental or Asian buttons were clicked, you need to track a custom event whenever any of the buttons are clicked.
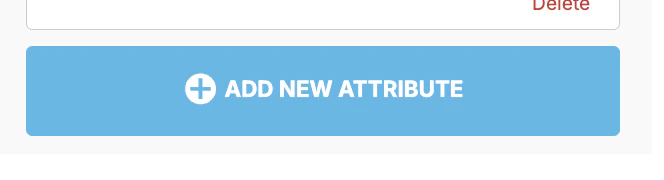
* To track the click, select the button and click **+ Add new attribute** on the right panel.
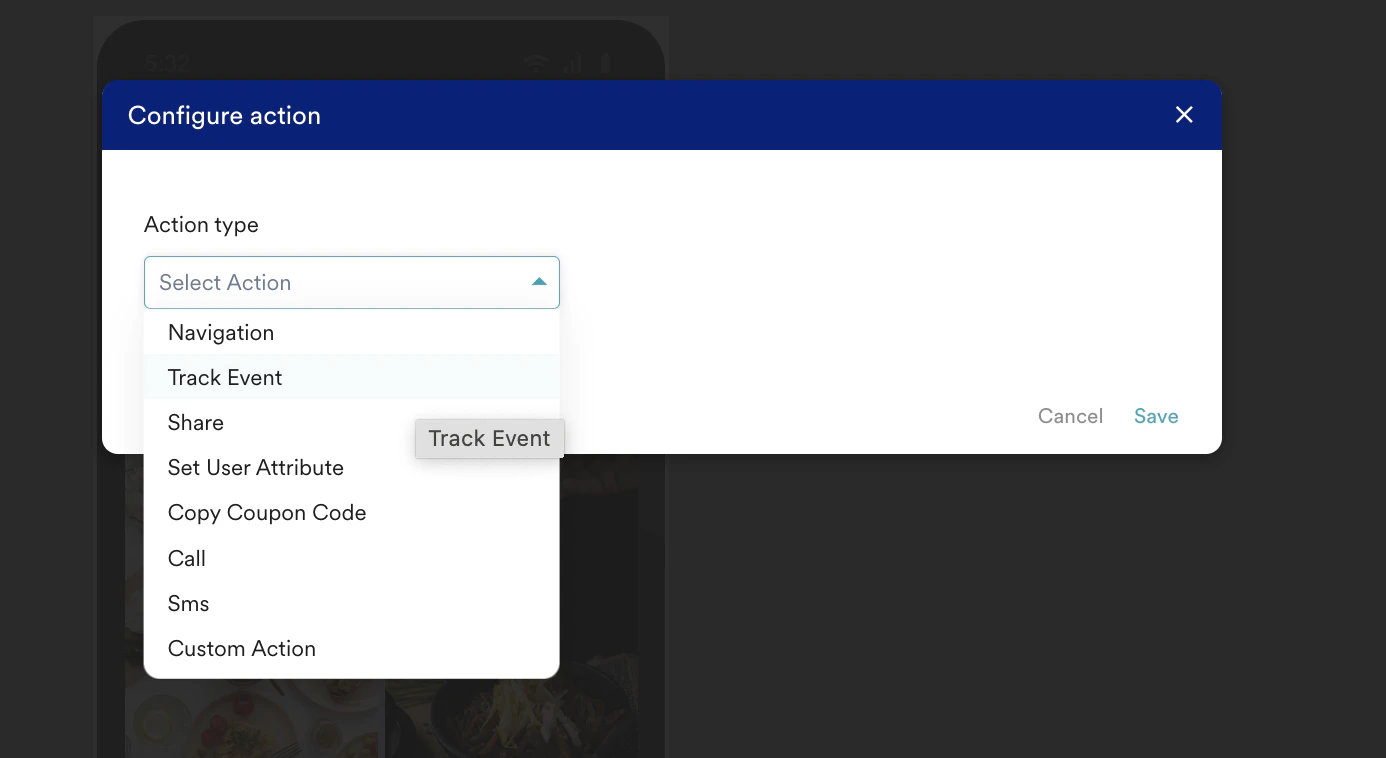
* Then click **Search Attributes** and select **Track event** from the **Action type** drop-down list.
* In the **Track Event** field:
* For the Continental button, set the event as Continental\_clicked.
* For the Asian button, set the event as Asian\_clicked.
4. Click **Next** to move to the third step, "Schedule and goals," where you can define your campaign's schedule and goals.
## Step 3: Schedule and goals
Here, you can select the campaign schedule, add the conversion goal, choose the campaign's priority, and define custom delivery controls.
1. In the **Send campaign** section, define the frequency and limits and when you want to start and end your In-app campaign.
2. In the **Conversion Goals** section, add conversion goals that you would like to track.
3. In the **Campaign priority** section, assign a priority to this campaign. Assigning a priority helps you decide which In-app message to show to a user when they are eligible for more than one message at a specific time. For example, selecting **Critical** ensures that the users will always see this even when there are other campaigns for which they are eligible.
4. In the **Delivery Controls** section, define the controls based on your requirements. For more information, refer to [Create In-App Campaign](/user-guide/campaigns-and-channels/in-app-message/create/create-in-app-campaign).
5. Click **Publish**.
## Analyze Results
1. After the campaign is published, you can go to **Segment** > **Create Segment**.
2. Add user behavior as *Has executed* and then select Continental\_clicked or Asian\_clicked.
3. After the segmentation is done, you can download the results for the users who clicked them.
## Generate Insights and Take Action
1. Generate reports based on the survey data.
2. Identify which type of food is preferred by the majority of customers.
3. Use these insights to refine menu offerings, improve marketing strategies, and enhance the dining experience.
# Conclusion
In this use case, we created a single-question survey using the drag-and-drop editor of MoEngage to collect customer preferences quickly. By implementing this feature, you can gather and analyze customer preferences efficiently.
This automated campaign allows businesses to quickly collect valuable feedback and leverage the insights to make informed decisions that improve product offerings and user engagement.
Now that we have published the campaign, we can track our CTR and conversions (if defined) to understand how well it is performing. For more information, refer to [In-App Campaign Analytics](/user-guide/campaigns-and-channels/in-app-message/analyze/analyze-in-app-campaigns).
 You are taken to the first step, "Target users," of defining your campaign.
3. Enter the following details:
* **Campaign name**: Enter a name for the campaign. For example, "Single question survey campaign."
* **Campaign tags**: Select the relevant campaign tags.
4. In the **Target Platforms** section, select **iOS**.
5. In the **Trigger Criteria** section, select **On app open**.
You are taken to the first step, "Target users," of defining your campaign.
3. Enter the following details:
* **Campaign name**: Enter a name for the campaign. For example, "Single question survey campaign."
* **Campaign tags**: Select the relevant campaign tags.
4. In the **Target Platforms** section, select **iOS**.
5. In the **Trigger Criteria** section, select **On app open**. 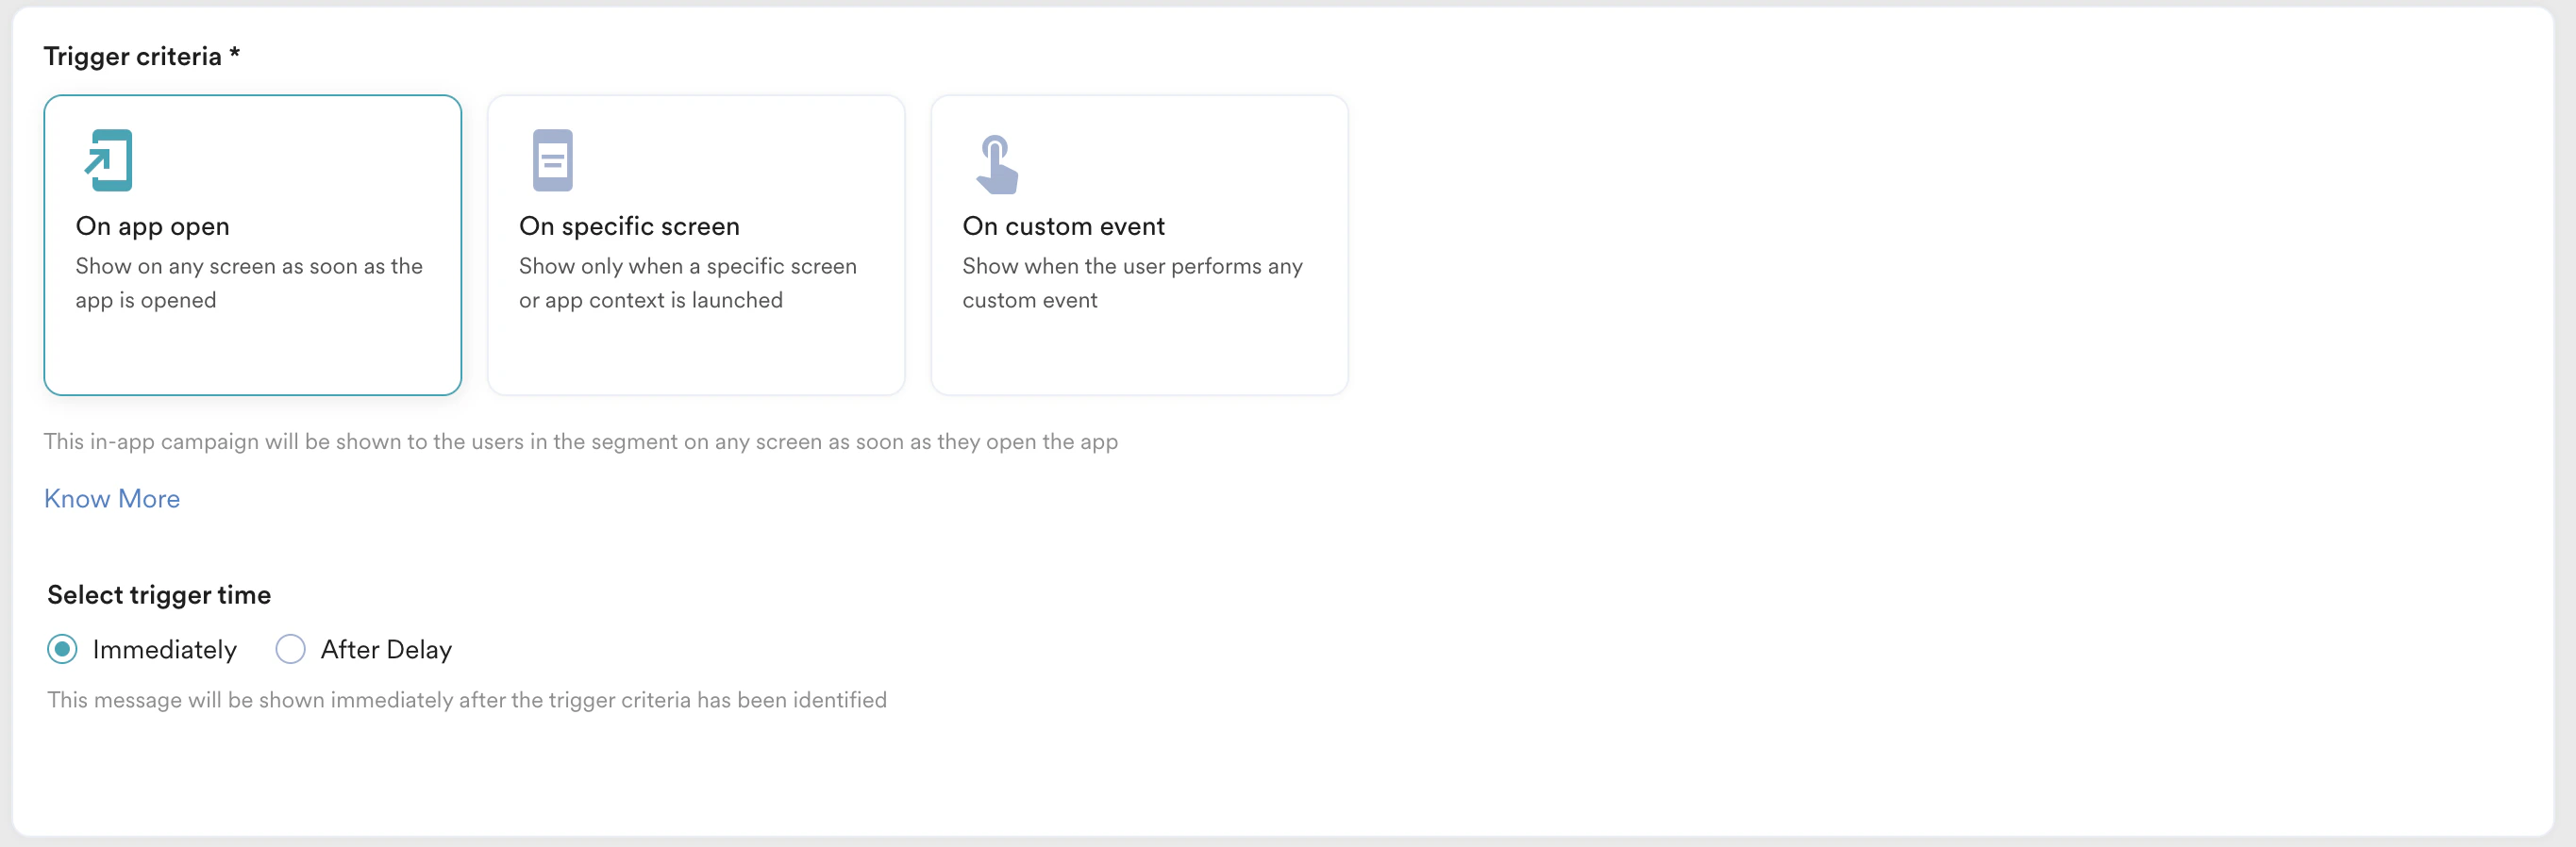 6. In the **Select trigger time** section, select **Immediately** to send the message.
7. In the **Target audience** section, select **All users**.
8. Click **Next** to move to the second step, "Content," where you can define the content that will go into your campaign.
## Step 2: Content
MoEngage In-app campaign offers a variety of templates for all your use cases. It also provides the option to start from scratch.
1. Access the drag-and-drop editor and click **Explore pre-built templates** from the banner.
6. In the **Select trigger time** section, select **Immediately** to send the message.
7. In the **Target audience** section, select **All users**.
8. Click **Next** to move to the second step, "Content," where you can define the content that will go into your campaign.
## Step 2: Content
MoEngage In-app campaign offers a variety of templates for all your use cases. It also provides the option to start from scratch.
1. Access the drag-and-drop editor and click **Explore pre-built templates** from the banner. 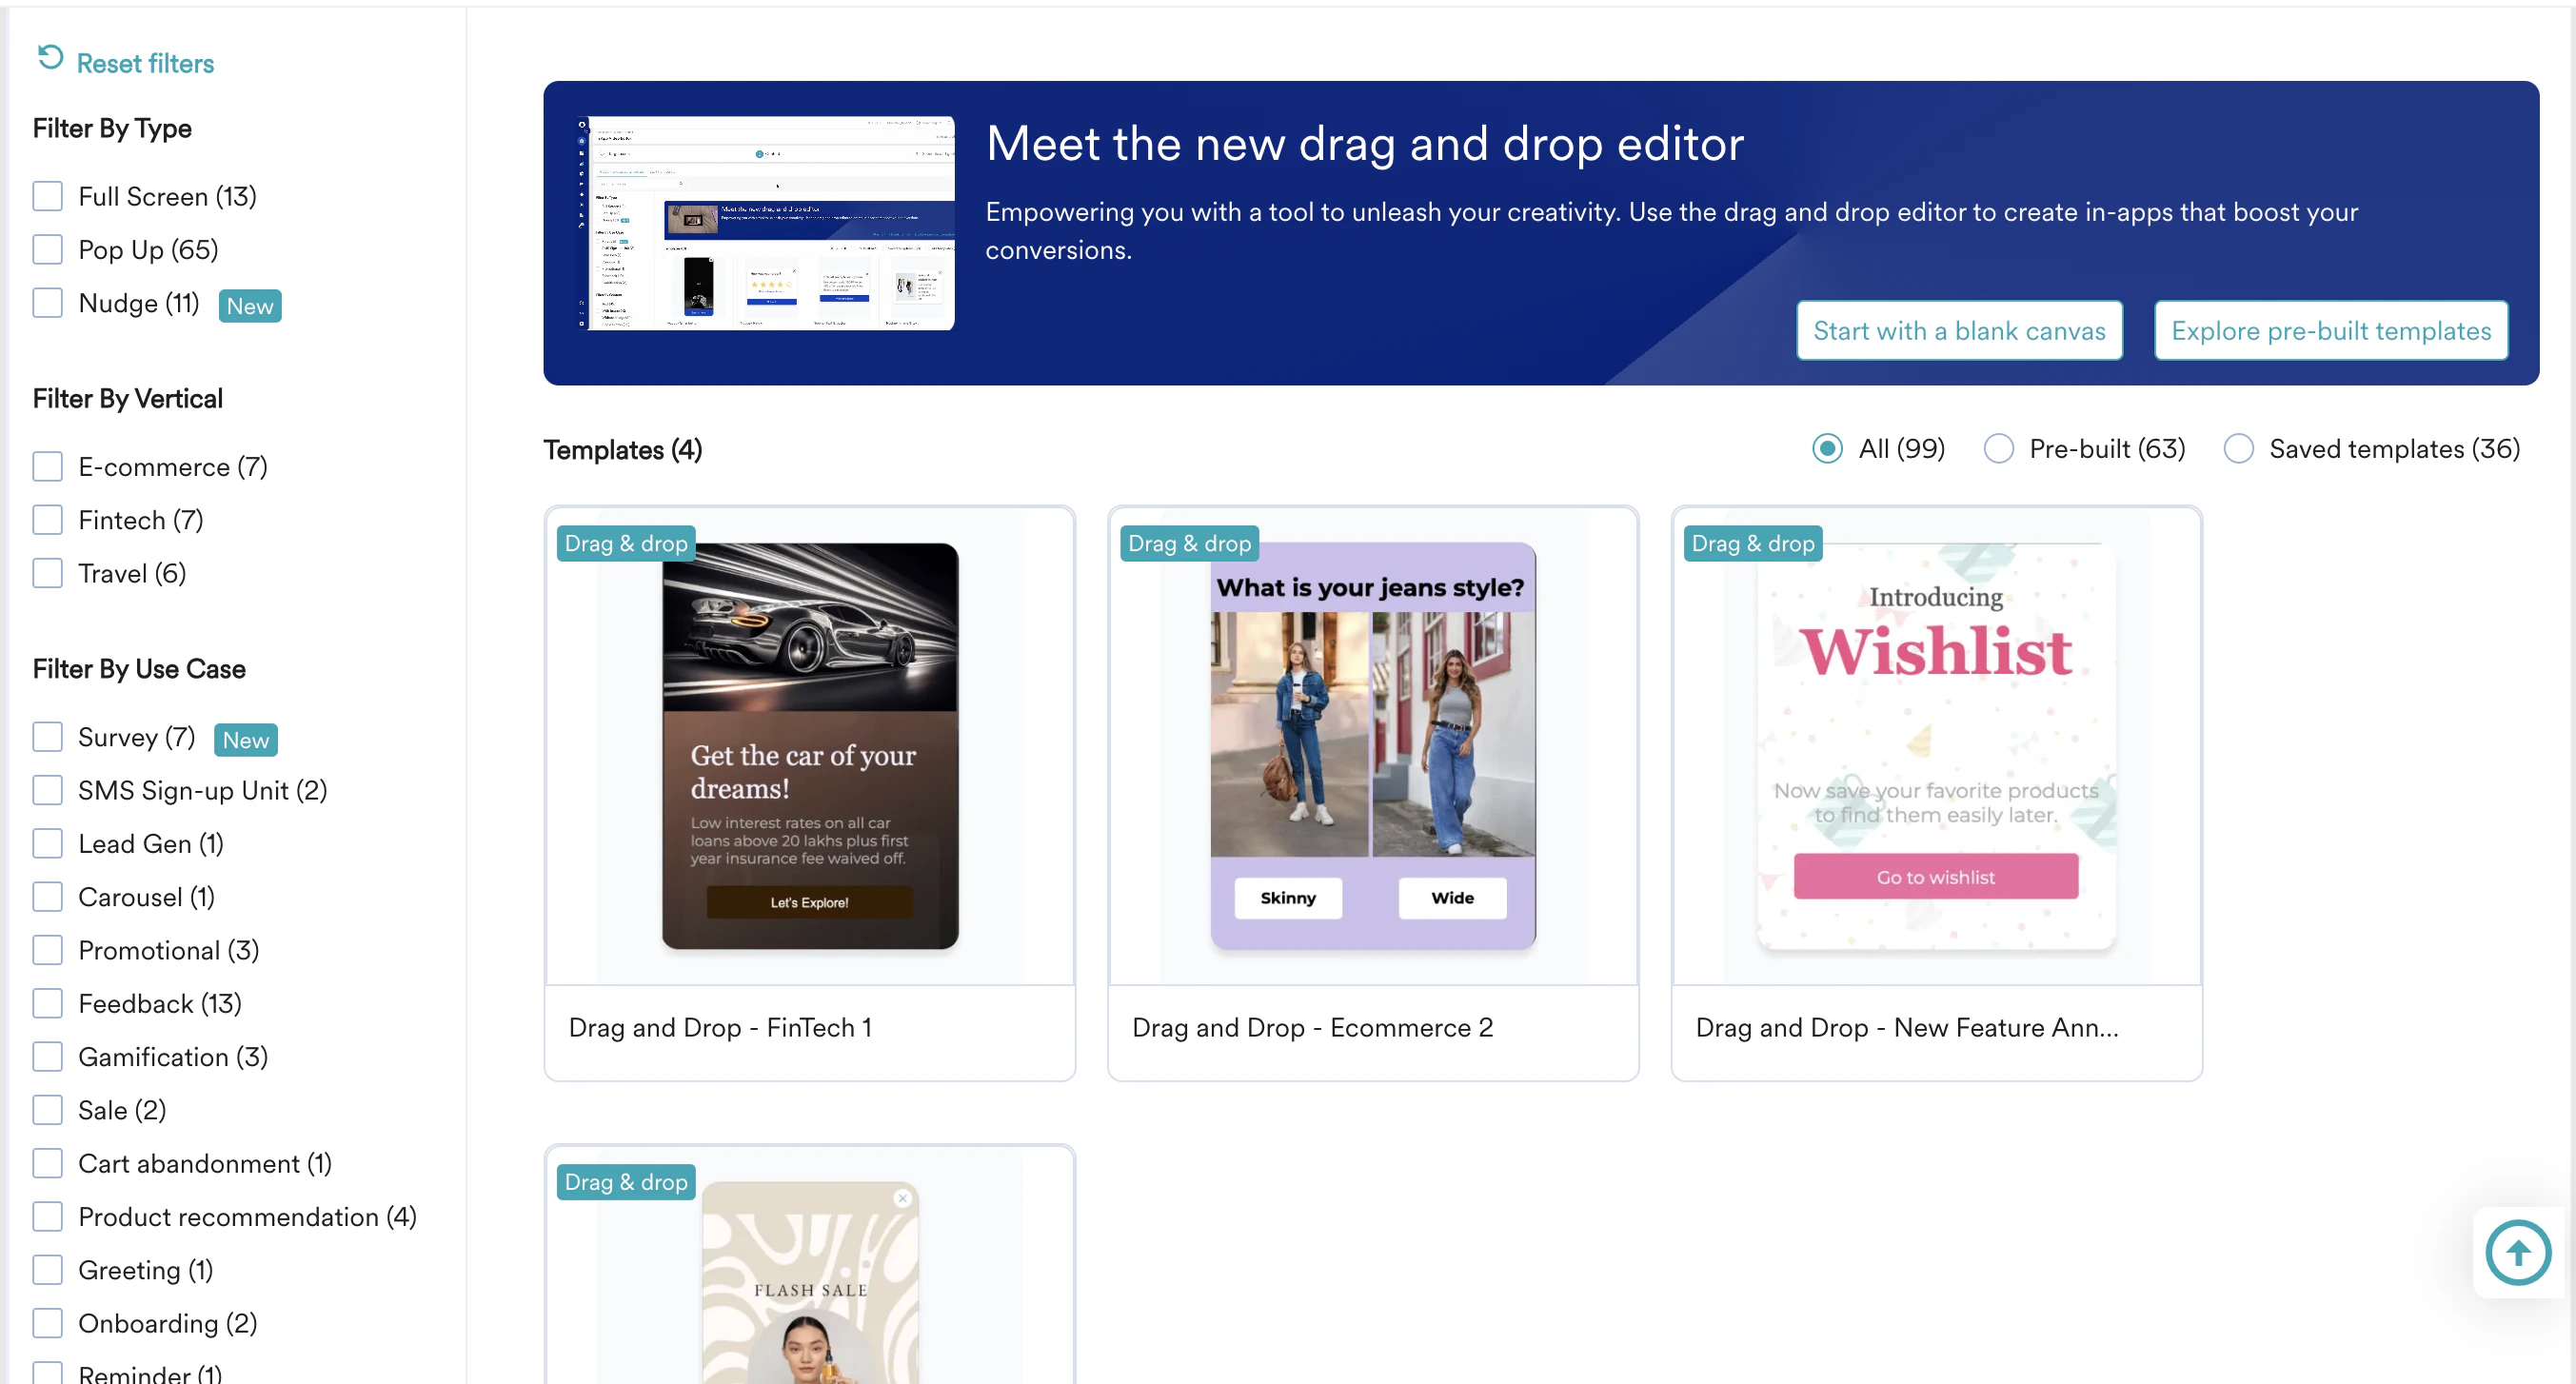 2. Design the survey:
* Let’s select the **Drag and Drop - E-commerce 2** template for our use case.
2. Design the survey:
* Let’s select the **Drag and Drop - E-commerce 2** template for our use case. 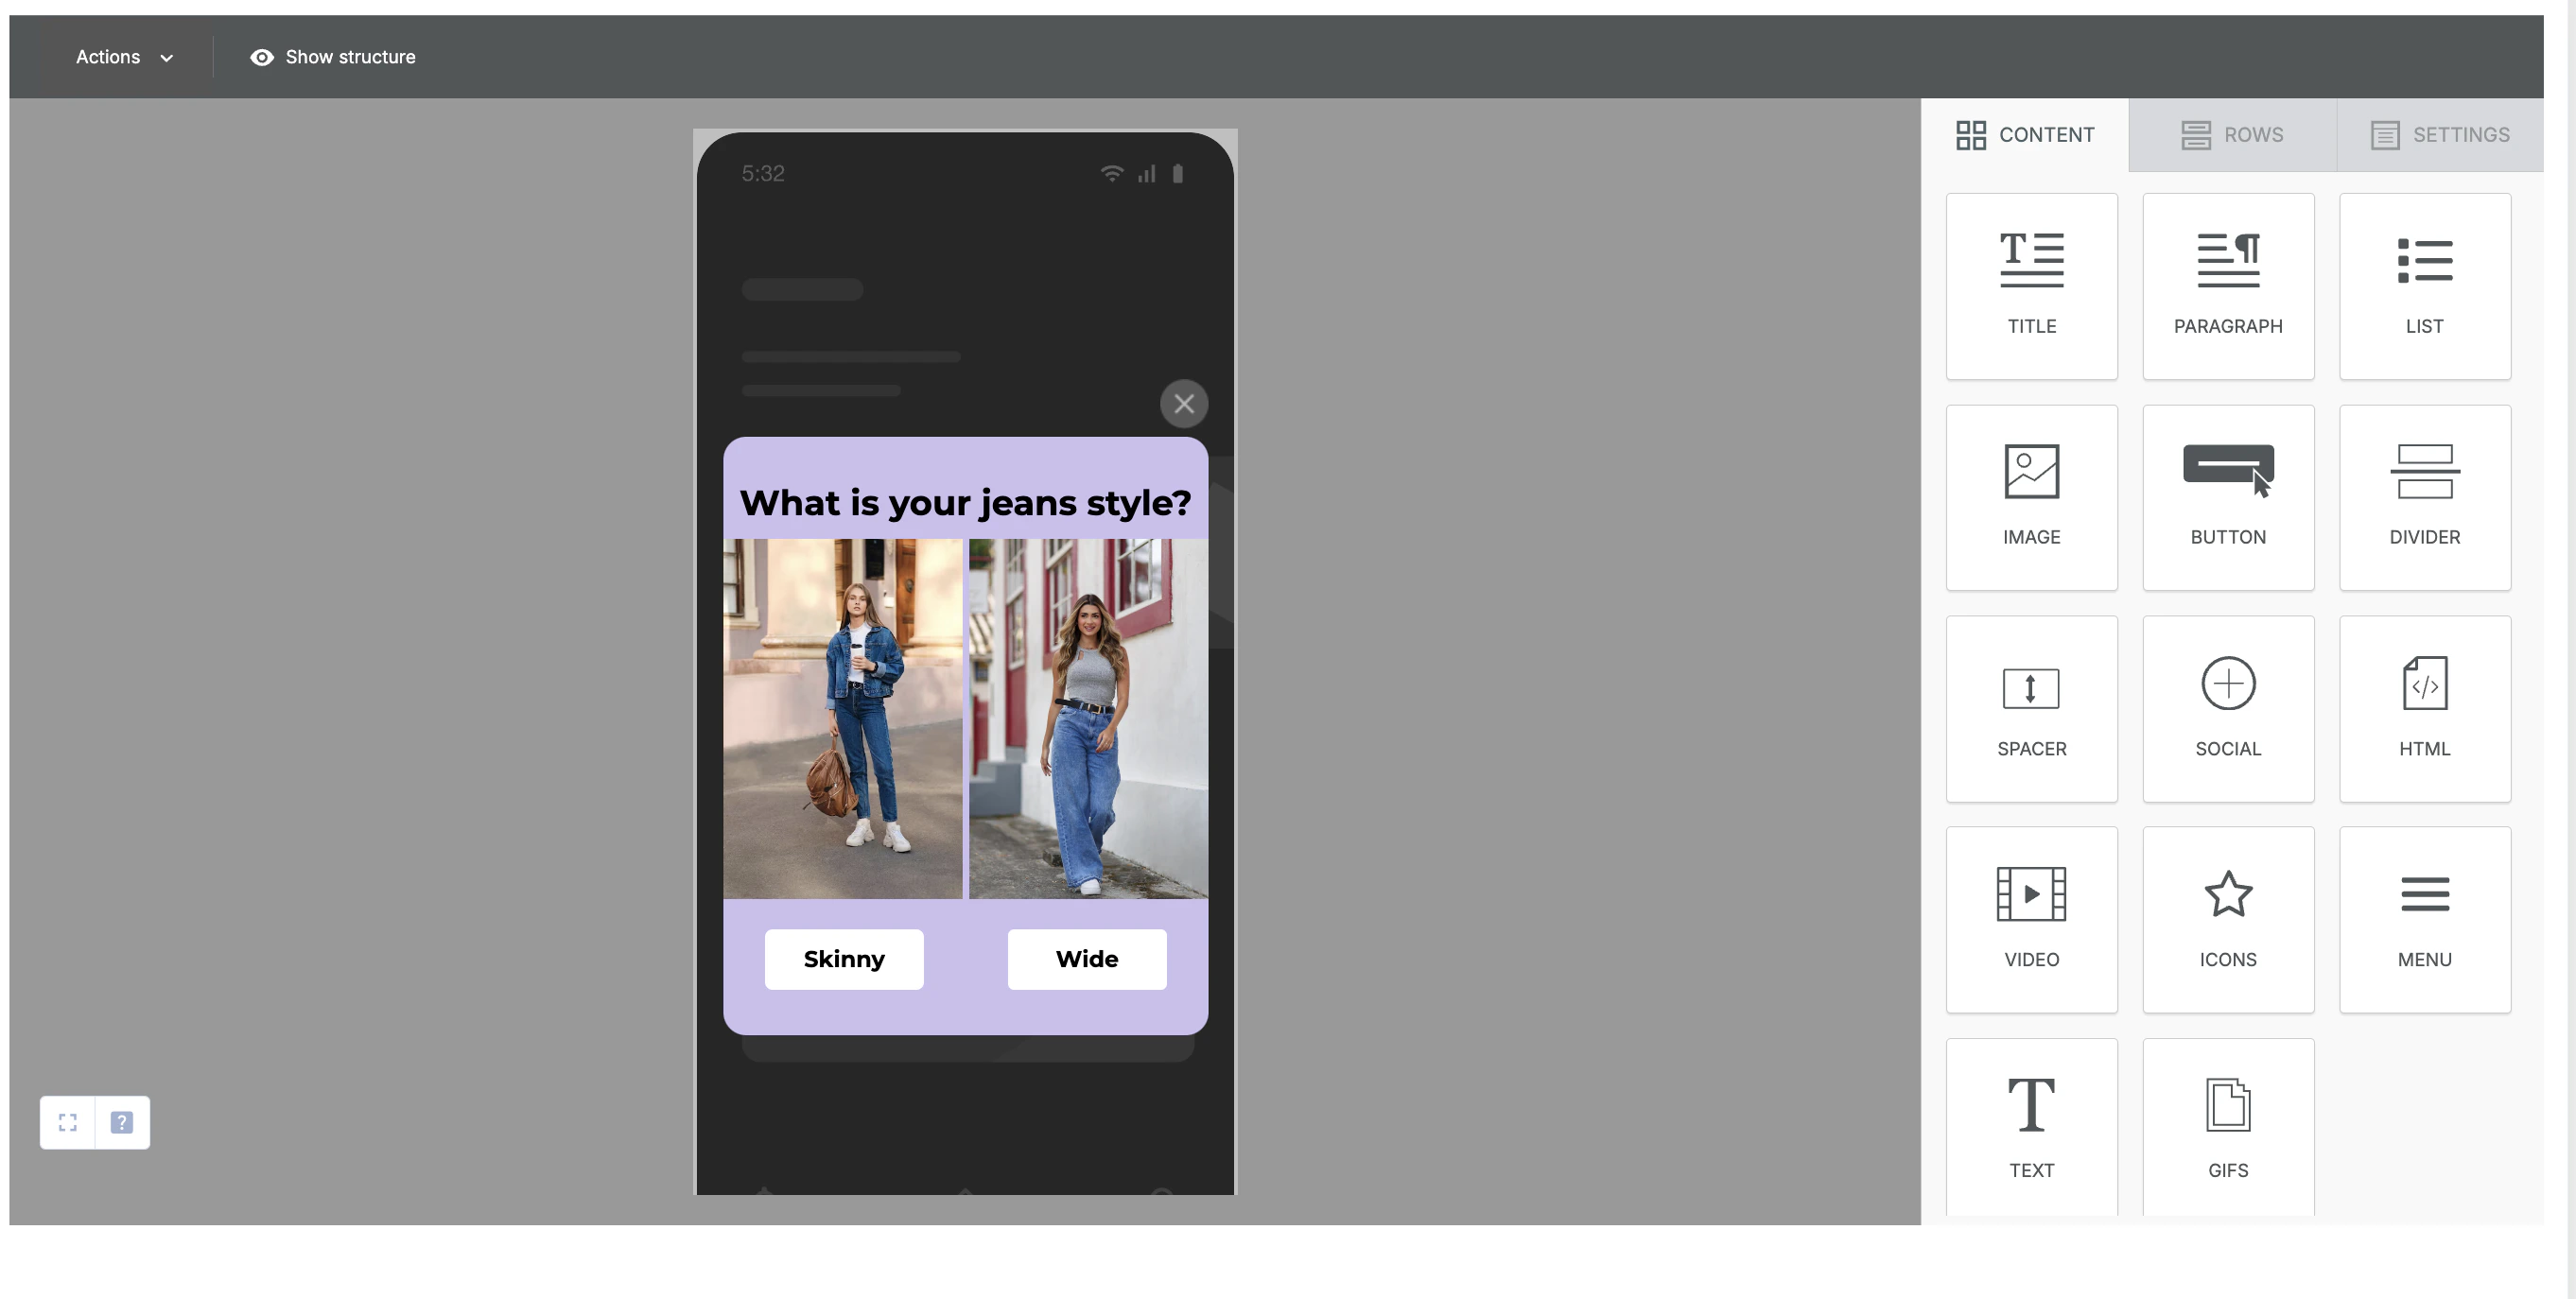 * Change the Title text to “Which food do you prefer?”
* Change the images to depict Asian and Continental food.
* Change the button names to Continental and Asian.
* Your template should look something like this:
* Change the Title text to “Which food do you prefer?”
* Change the images to depict Asian and Continental food.
* Change the button names to Continental and Asian.
* Your template should look something like this:
 * Then click **Search Attributes** and select **Track event** from the **Action type** drop-down list.
  * In the **Track Event** field:
* For the Continental button, set the event as Continental\_clicked.
* For the Asian button, set the event as Asian\_clicked.
* In the **Track Event** field:
* For the Continental button, set the event as Continental\_clicked.
* For the Asian button, set the event as Asian\_clicked. 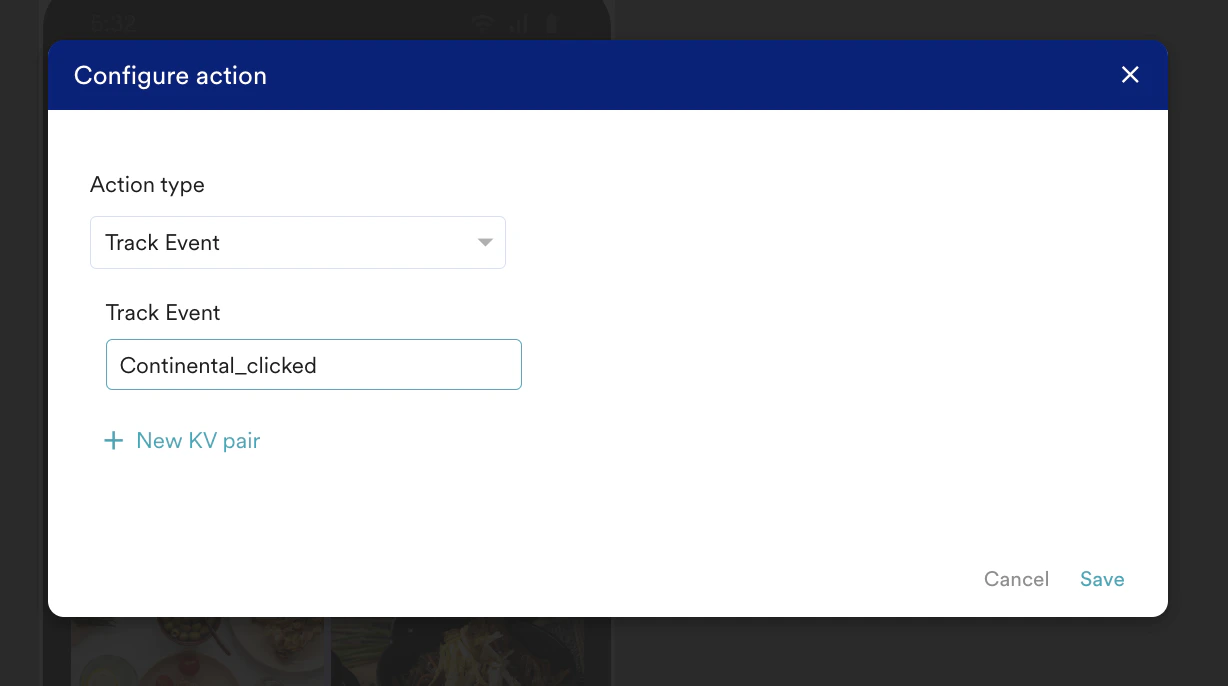 4. Click **Next** to move to the third step, "Schedule and goals," where you can define your campaign's schedule and goals.
## Step 3: Schedule and goals
Here, you can select the campaign schedule, add the conversion goal, choose the campaign's priority, and define custom delivery controls.
1. In the **Send campaign** section, define the frequency and limits and when you want to start and end your In-app campaign.
2. In the **Conversion Goals** section, add conversion goals that you would like to track.
3. In the **Campaign priority** section, assign a priority to this campaign. Assigning a priority helps you decide which In-app message to show to a user when they are eligible for more than one message at a specific time. For example, selecting **Critical** ensures that the users will always see this even when there are other campaigns for which they are eligible.
4. In the **Delivery Controls** section, define the controls based on your requirements. For more information, refer to [Create In-App Campaign](/user-guide/campaigns-and-channels/in-app-message/create/create-in-app-campaign).
4. Click **Next** to move to the third step, "Schedule and goals," where you can define your campaign's schedule and goals.
## Step 3: Schedule and goals
Here, you can select the campaign schedule, add the conversion goal, choose the campaign's priority, and define custom delivery controls.
1. In the **Send campaign** section, define the frequency and limits and when you want to start and end your In-app campaign.
2. In the **Conversion Goals** section, add conversion goals that you would like to track.
3. In the **Campaign priority** section, assign a priority to this campaign. Assigning a priority helps you decide which In-app message to show to a user when they are eligible for more than one message at a specific time. For example, selecting **Critical** ensures that the users will always see this even when there are other campaigns for which they are eligible.
4. In the **Delivery Controls** section, define the controls based on your requirements. For more information, refer to [Create In-App Campaign](/user-guide/campaigns-and-channels/in-app-message/create/create-in-app-campaign). 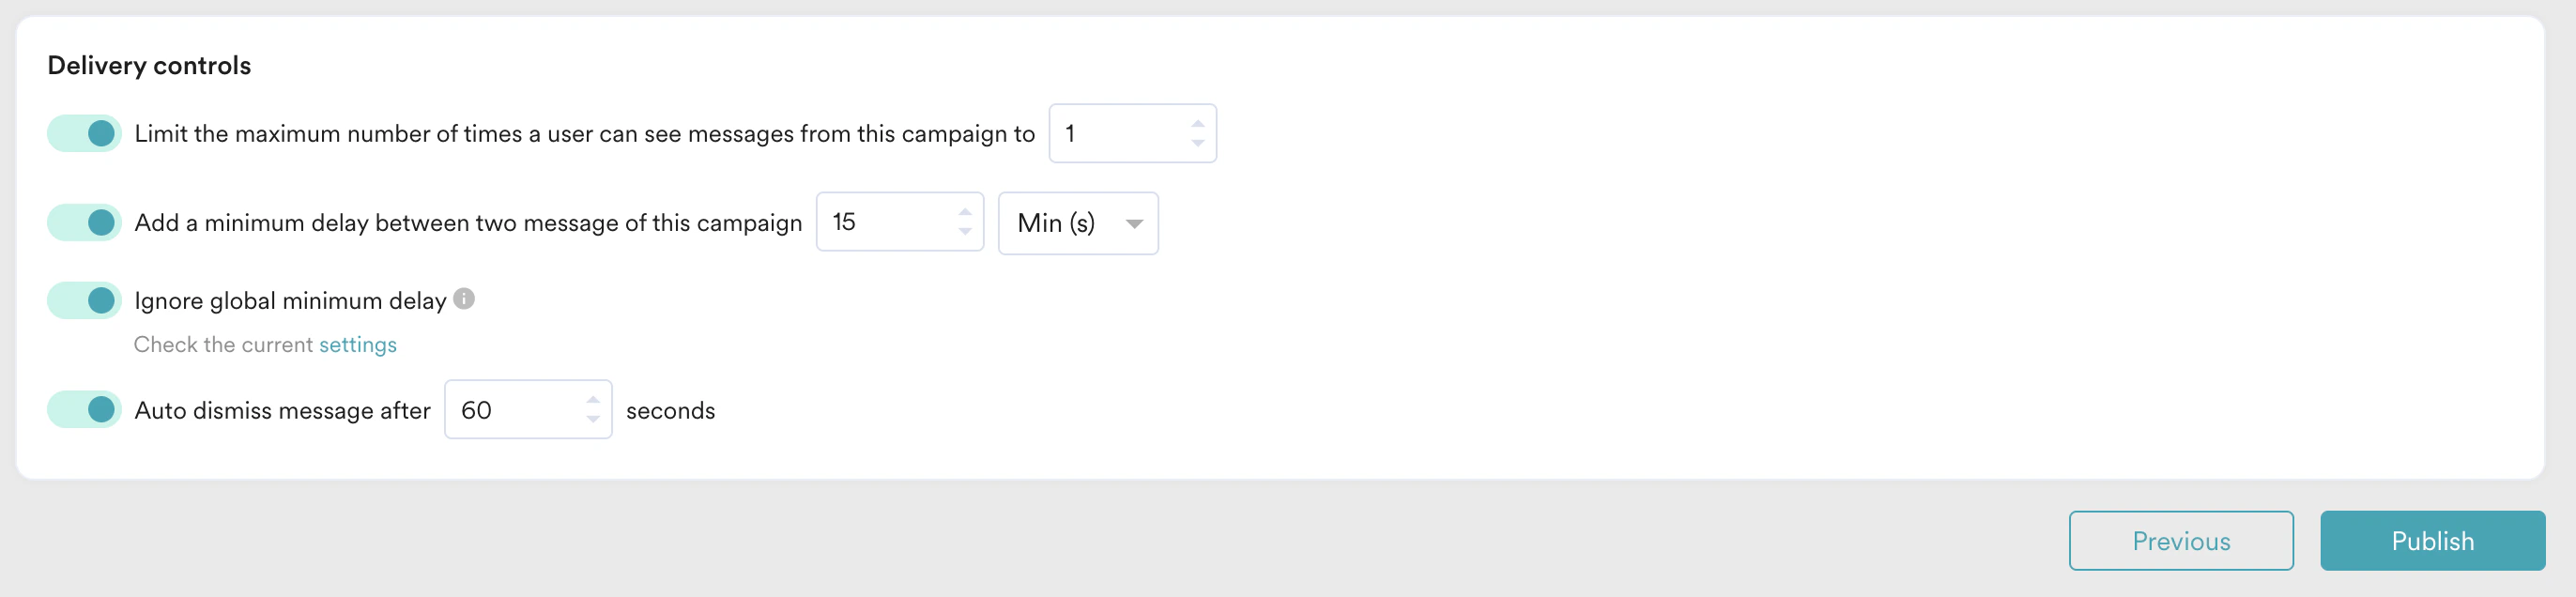 5. Click **Publish**.
## Analyze Results
1. After the campaign is published, you can go to **Segment** > **Create Segment**.
2. Add user behavior as *Has executed* and then select Continental\_clicked or Asian\_clicked.
3. After the segmentation is done, you can download the results for the users who clicked them.
## Generate Insights and Take Action
1. Generate reports based on the survey data.
2. Identify which type of food is preferred by the majority of customers.
3. Use these insights to refine menu offerings, improve marketing strategies, and enhance the dining experience.
# Conclusion
In this use case, we created a single-question survey using the drag-and-drop editor of MoEngage to collect customer preferences quickly. By implementing this feature, you can gather and analyze customer preferences efficiently.
This automated campaign allows businesses to quickly collect valuable feedback and leverage the insights to make informed decisions that improve product offerings and user engagement.
Now that we have published the campaign, we can track our CTR and conversions (if defined) to understand how well it is performing. For more information, refer to [In-App Campaign Analytics](/user-guide/campaigns-and-channels/in-app-message/analyze/analyze-in-app-campaigns).
5. Click **Publish**.
## Analyze Results
1. After the campaign is published, you can go to **Segment** > **Create Segment**.
2. Add user behavior as *Has executed* and then select Continental\_clicked or Asian\_clicked.
3. After the segmentation is done, you can download the results for the users who clicked them.
## Generate Insights and Take Action
1. Generate reports based on the survey data.
2. Identify which type of food is preferred by the majority of customers.
3. Use these insights to refine menu offerings, improve marketing strategies, and enhance the dining experience.
# Conclusion
In this use case, we created a single-question survey using the drag-and-drop editor of MoEngage to collect customer preferences quickly. By implementing this feature, you can gather and analyze customer preferences efficiently.
This automated campaign allows businesses to quickly collect valuable feedback and leverage the insights to make informed decisions that improve product offerings and user engagement.
Now that we have published the campaign, we can track our CTR and conversions (if defined) to understand how well it is performing. For more information, refer to [In-App Campaign Analytics](/user-guide/campaigns-and-channels/in-app-message/analyze/analyze-in-app-campaigns).