> ## Documentation Index
> Fetch the complete documentation index at: https://moengage.com/docs/llms.txt
> Use this file to discover all available pages before exploring further.
# Collect First-Party Data Using Typeform
# Introduction
In today's digital landscape, where many web browsers block third-party cookies, collecting first-party data is more important than ever. First-party data is more accurate and relevant than other types of data because it's collected directly from your customers, prospects, and others who interact with your brand.
#### Advantages of collecting first-party data
* **Data accuracy and reliability**: First-party data is accurate and reliable, unlike third-party data, which can be subject to inaccuracies or biases. It helps you build direct relationships with your customers.
* **Enhanced personalization**: First-party data provides a rich understanding of individual customer profiles. This allows for highly targeted marketing messages, product recommendations, and personalized experiences.
* **Improved customer engagement**: By understanding customer preferences and behaviors, you can tailor their marketing efforts to resonate with specific audiences, increasing engagement and loyalty.
* **Better marketing ROI**: Accurate and relevant data can help you optimize campaigns, reduce wasted expenses, and improve conversion rates.
* **Stronger customer relationships**: Personalization and relevant interactions foster stronger relationships between businesses and their customers.
We will achieve this use case by [creating an On-site Messaging (OSM) campaign](/user-guide/use-cases/on-site-messaging-\(osm\)/collect-first-party-data-using-typeform#create-an-osm-campaign) and embedding the [Typeform](https://www.typeform.com/) survey in it to gather first-party data on your website. Typeform enables you to create user-friendly surveys, while MoEngage ensures that the right audience sees your survey at the optimal time. We will survey the purchasing experience after the user buys a product from your online store.
# Expected Result
When users visit the website, they will see a pop-up message:
 * Typeform must be integrated with MoEngage. For more information, refer [here](https://partners.moengage.com/hc/en-us/articles/4410030363284-Typeform#h_01HM95JTPHSJA6DBZWM2Q13EGE).
* URL to the published Typeform survey you want to display to your users must be available.
* Your website must be integrated with the MoEngage Web SDK. For more information, refer to the [Web SDK](/developer-guide/web-sdk/web-sdk-overview/web-sdk-overview) documentation.
* Events to track the action of a user purchasing the product and related information such as the platform, product's ID, name, and price must be available in MoEngage. In this example, we will use the event *Product Purchased*. To understand how to track events, refer to the [Developer Guide](/developer-guide/introduction).
# Create an OSM Campaign
In this section, we will create an OSM campaign to send a Typeform survey:
## Step 1: Target Users
1. On the left navigation menu in the MoEngage dashboard, click **Engage**, and then click **Campaigns**.
2. On the All campaigns page, click **+ Create campaign**.
3. Under **Inbound**, click **On-site**.
* Typeform must be integrated with MoEngage. For more information, refer [here](https://partners.moengage.com/hc/en-us/articles/4410030363284-Typeform#h_01HM95JTPHSJA6DBZWM2Q13EGE).
* URL to the published Typeform survey you want to display to your users must be available.
* Your website must be integrated with the MoEngage Web SDK. For more information, refer to the [Web SDK](/developer-guide/web-sdk/web-sdk-overview/web-sdk-overview) documentation.
* Events to track the action of a user purchasing the product and related information such as the platform, product's ID, name, and price must be available in MoEngage. In this example, we will use the event *Product Purchased*. To understand how to track events, refer to the [Developer Guide](/developer-guide/introduction).
# Create an OSM Campaign
In this section, we will create an OSM campaign to send a Typeform survey:
## Step 1: Target Users
1. On the left navigation menu in the MoEngage dashboard, click **Engage**, and then click **Campaigns**.
2. On the All campaigns page, click **+ Create campaign**.
3. Under **Inbound**, click **On-site**.
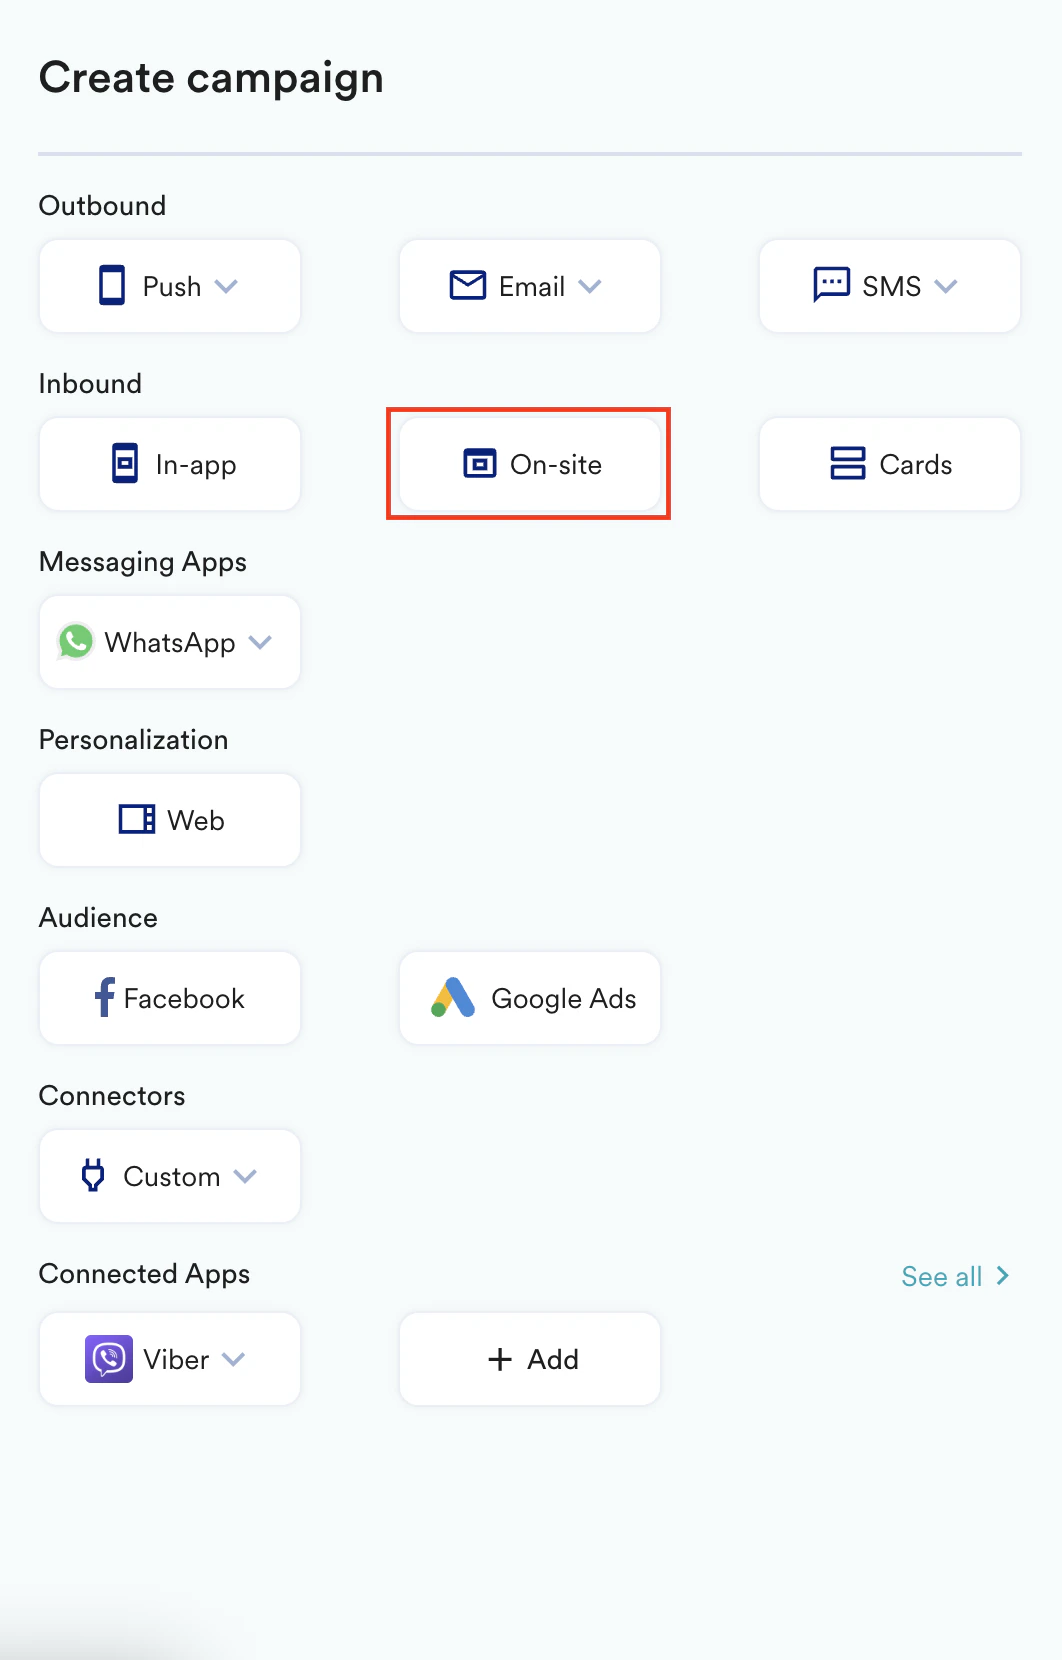 You are taken to the first step, **Target users**.
4. Define your campaign with a name and tags.
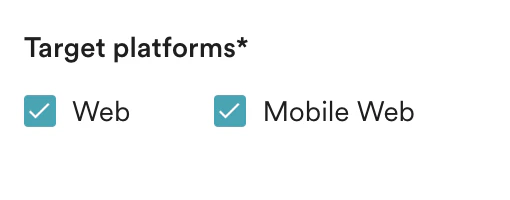
5. In the **Target Platforms** section, select both the **Web** and **Mobile Web** options.
You are taken to the first step, **Target users**.
4. Define your campaign with a name and tags.
5. In the **Target Platforms** section, select both the **Web** and **Mobile Web** options.
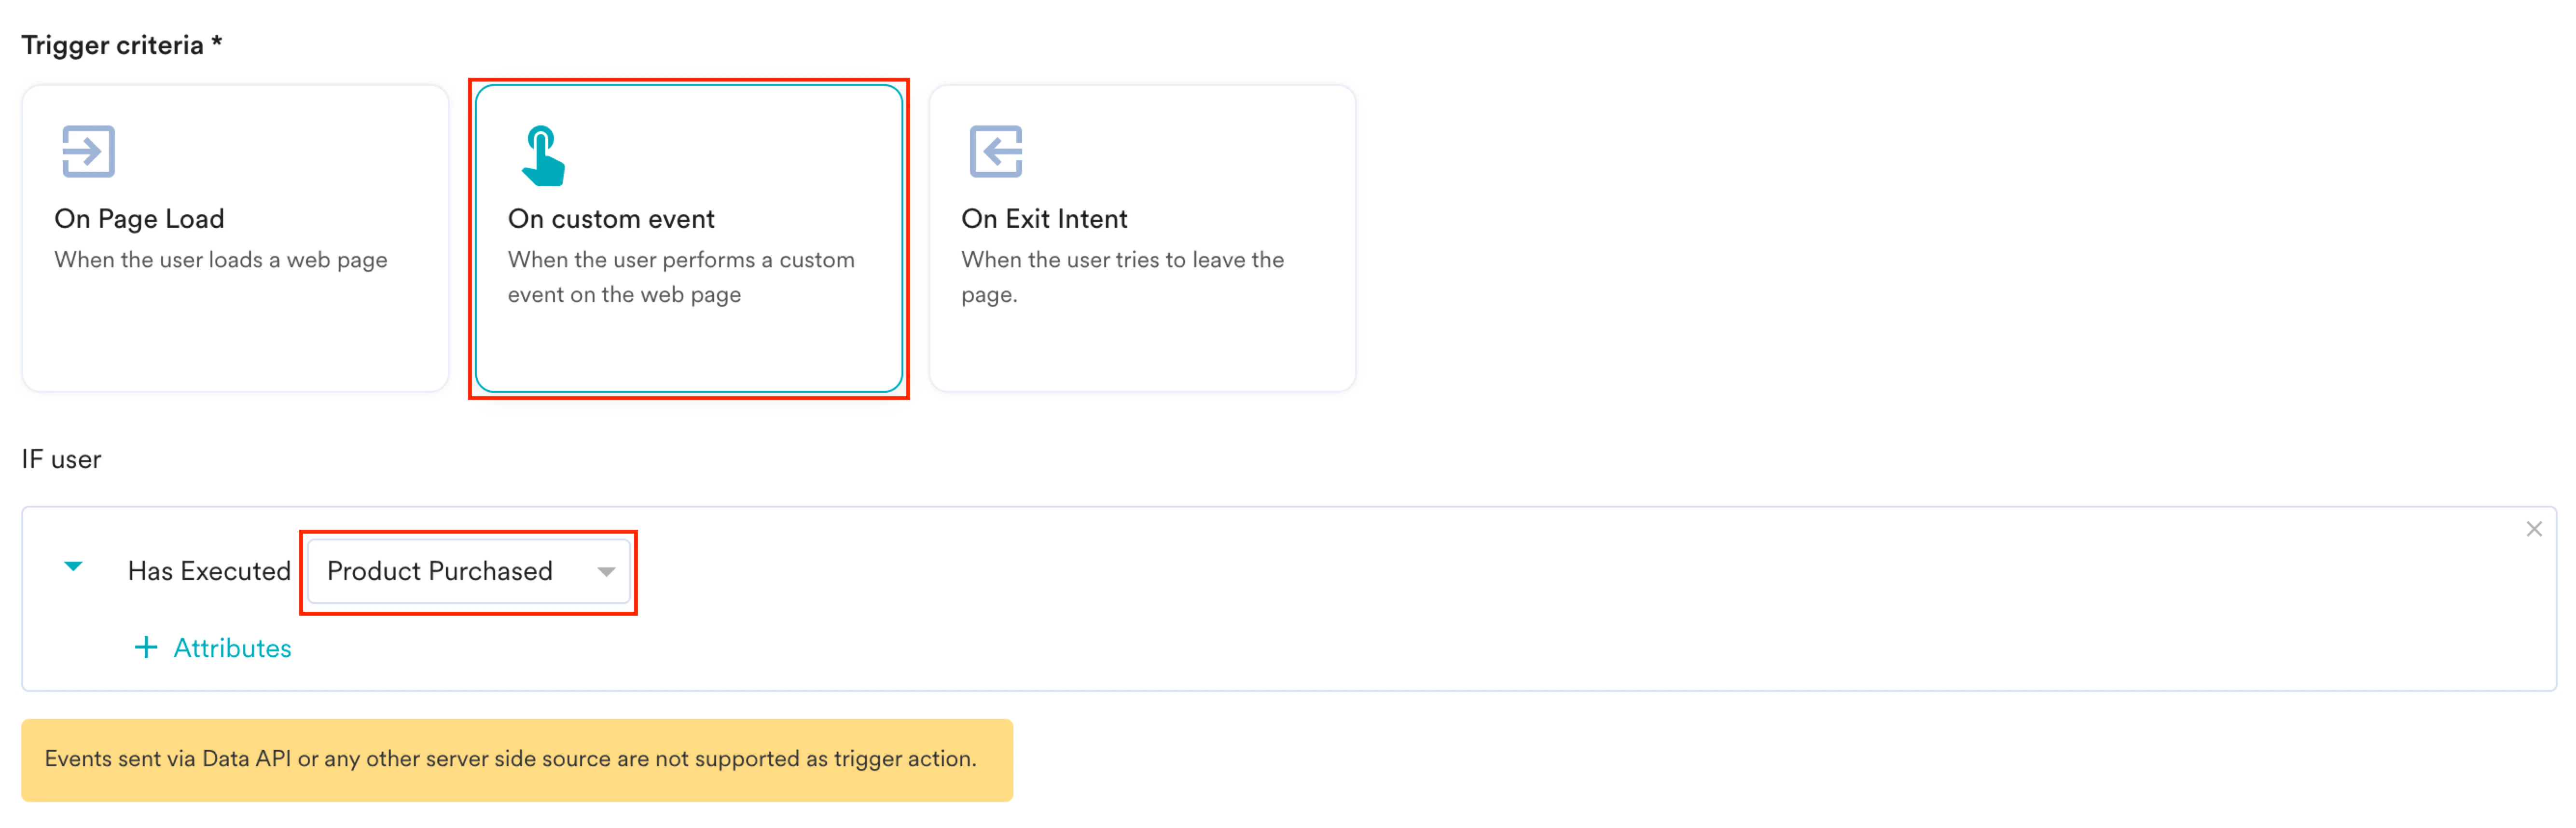
 6. In the **Trigger criteria** section, select when you want to display the survey to your users. In this use case, we want to get feedback about the product purchasing experience. Therefore, click **On custom event** and define the condition as *Has Executed Product Purchase* to display the survey right after the user purchases the product. For more information, refer to [Create OSM Campaign](/user-guide/campaigns-and-channels/on-site-message/create/create-osm-campaign).
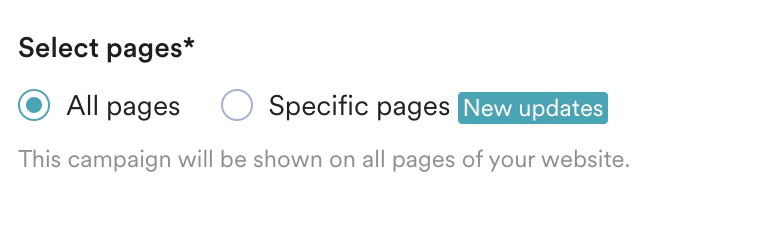
 7. In the **Select pages** section, click **All pages**.
 8. In the **Target audience** section, click **All users**. The success of your survey depends on the questionnaire and your target audience, so define them as specifically as possible.
9. Click **Next** to move to the second step, **Content**, where you can define the content for your campaign.
## Step 2: Content
In this step, we will define the content for your campaign.
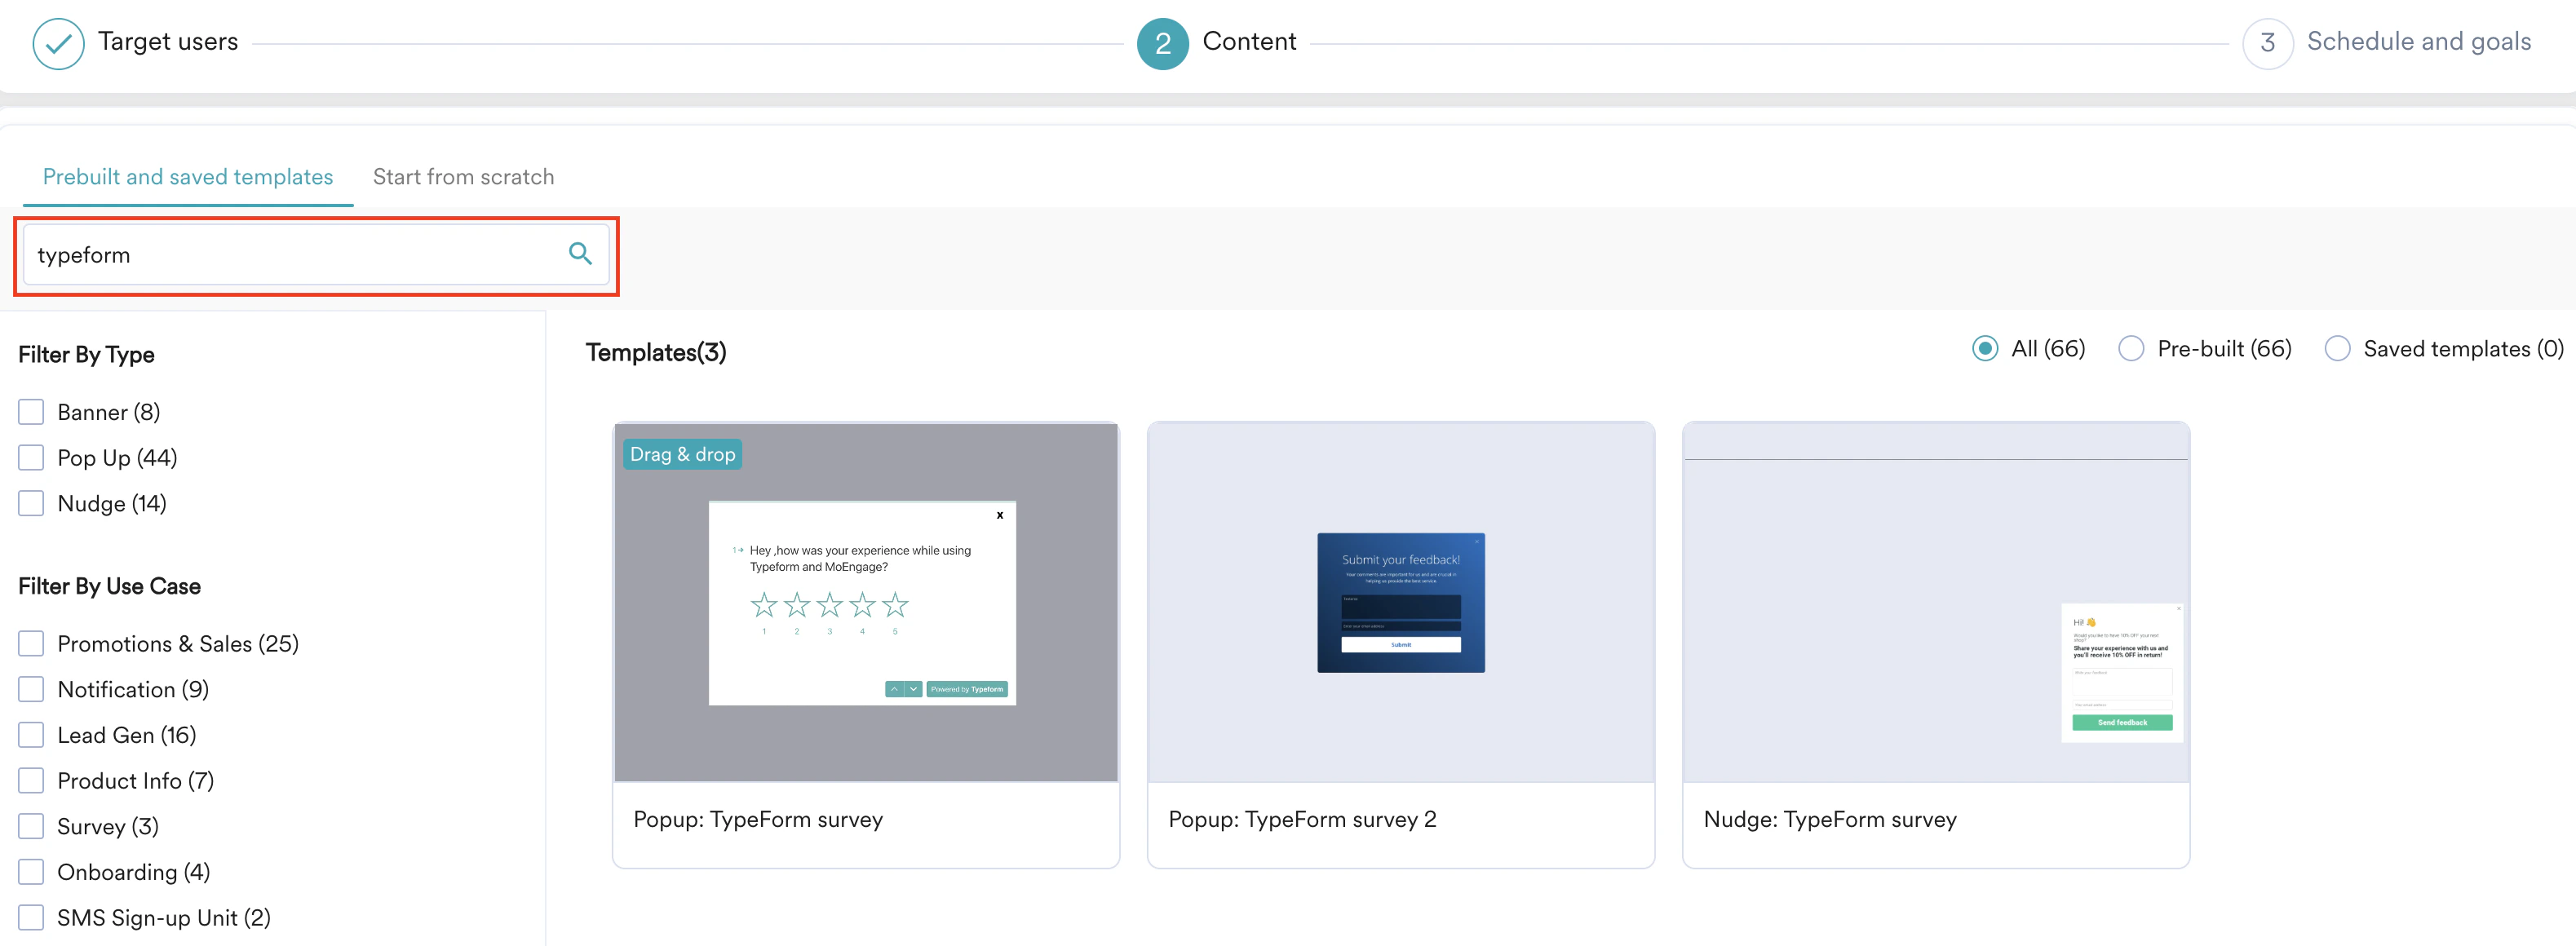
1. In the **Search templates** field, search with the keyword "Typeform" and select the desired template.
8. In the **Target audience** section, click **All users**. The success of your survey depends on the questionnaire and your target audience, so define them as specifically as possible.
9. Click **Next** to move to the second step, **Content**, where you can define the content for your campaign.
## Step 2: Content
In this step, we will define the content for your campaign.
1. In the **Search templates** field, search with the keyword "Typeform" and select the desired template.
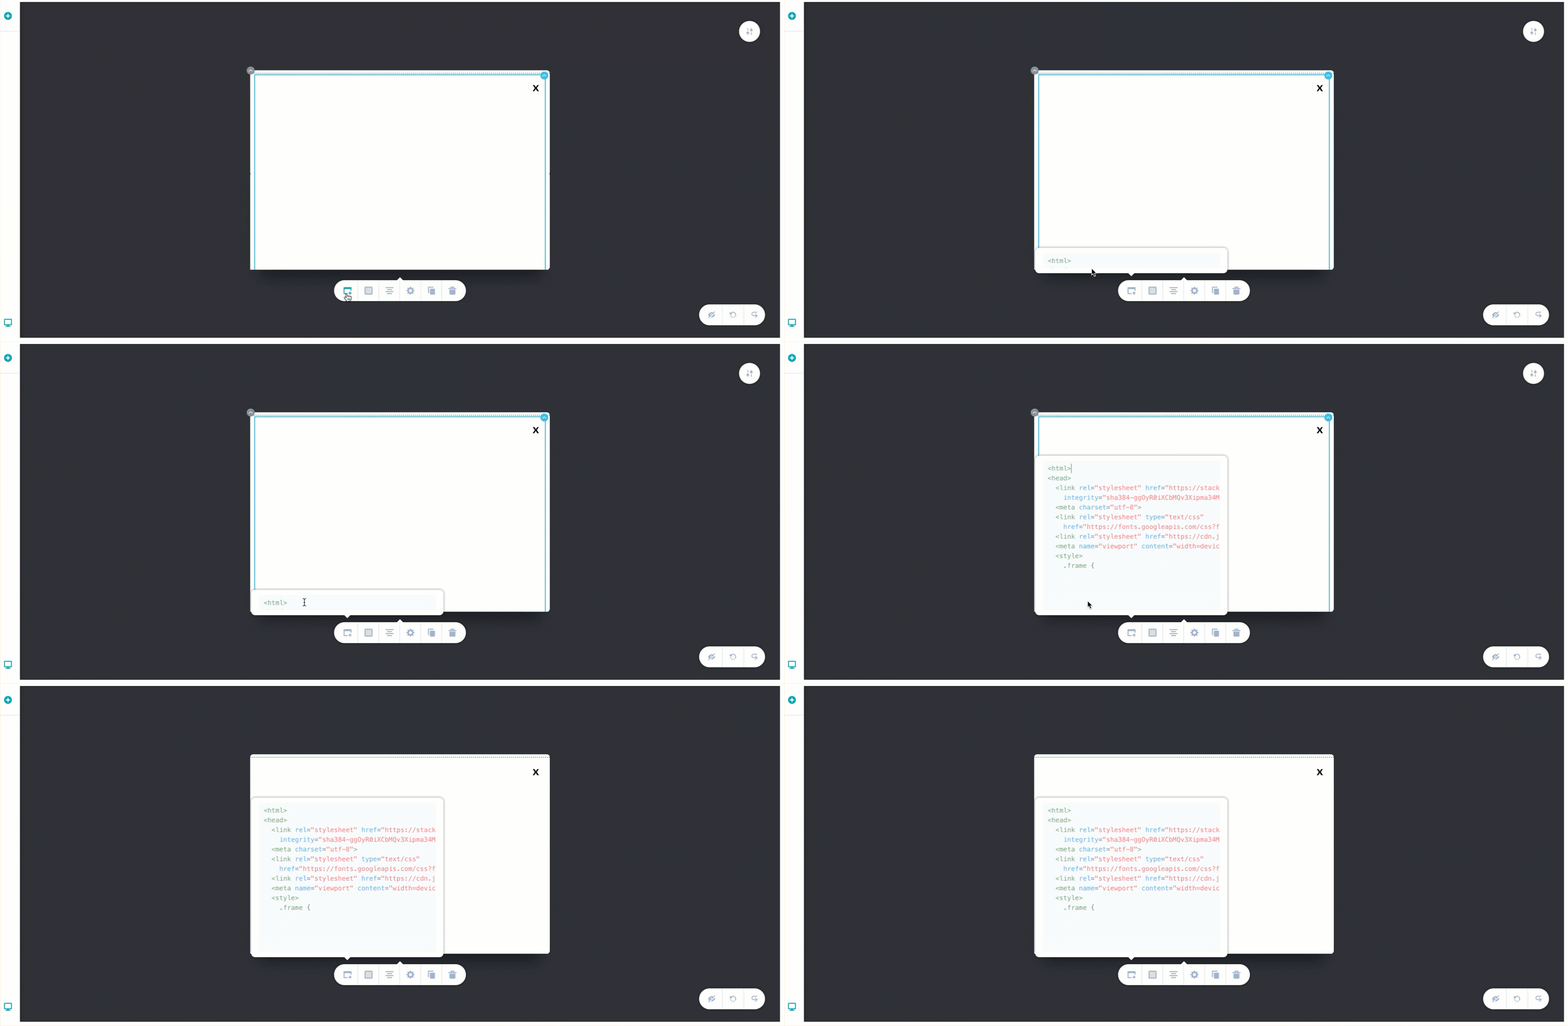
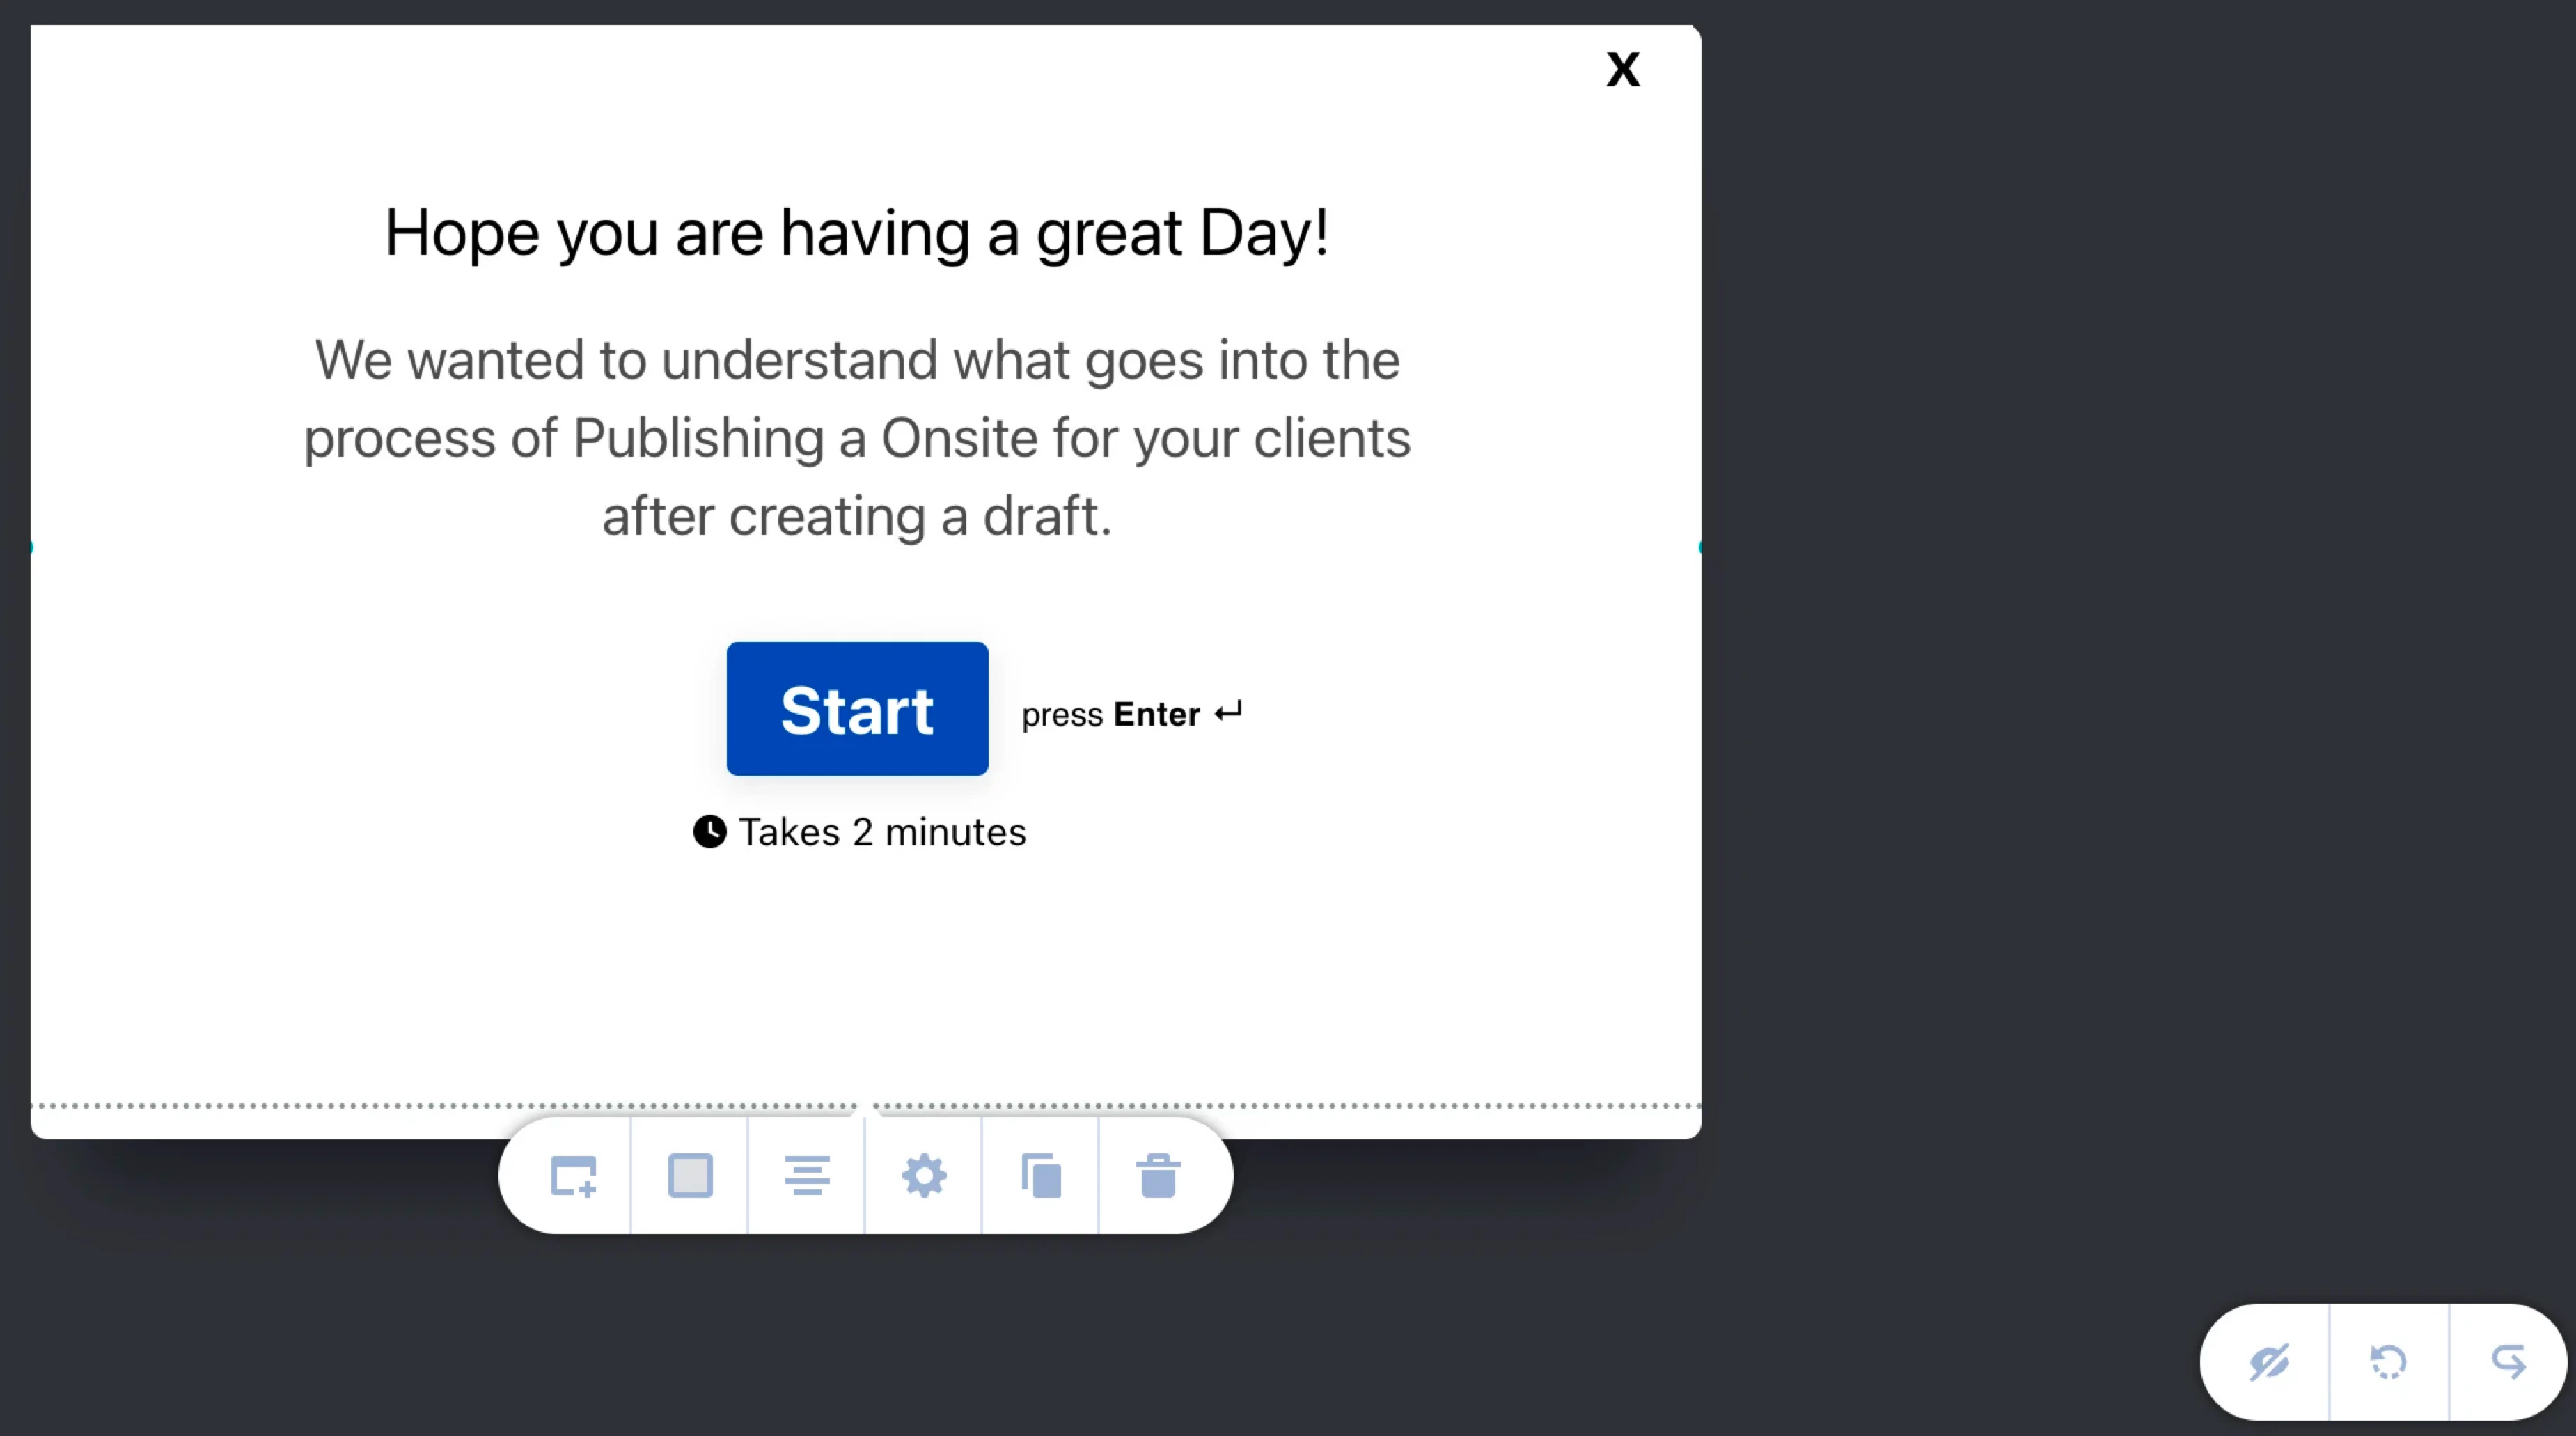
 2. After the screen loads, click the empty Typeform element. A set of icons is displayed.
3. Click the first icon to edit the HTML code elements to connect your survey here.
2. After the screen loads, click the empty Typeform element. A set of icons is displayed.
3. Click the first icon to edit the HTML code elements to connect your survey here.
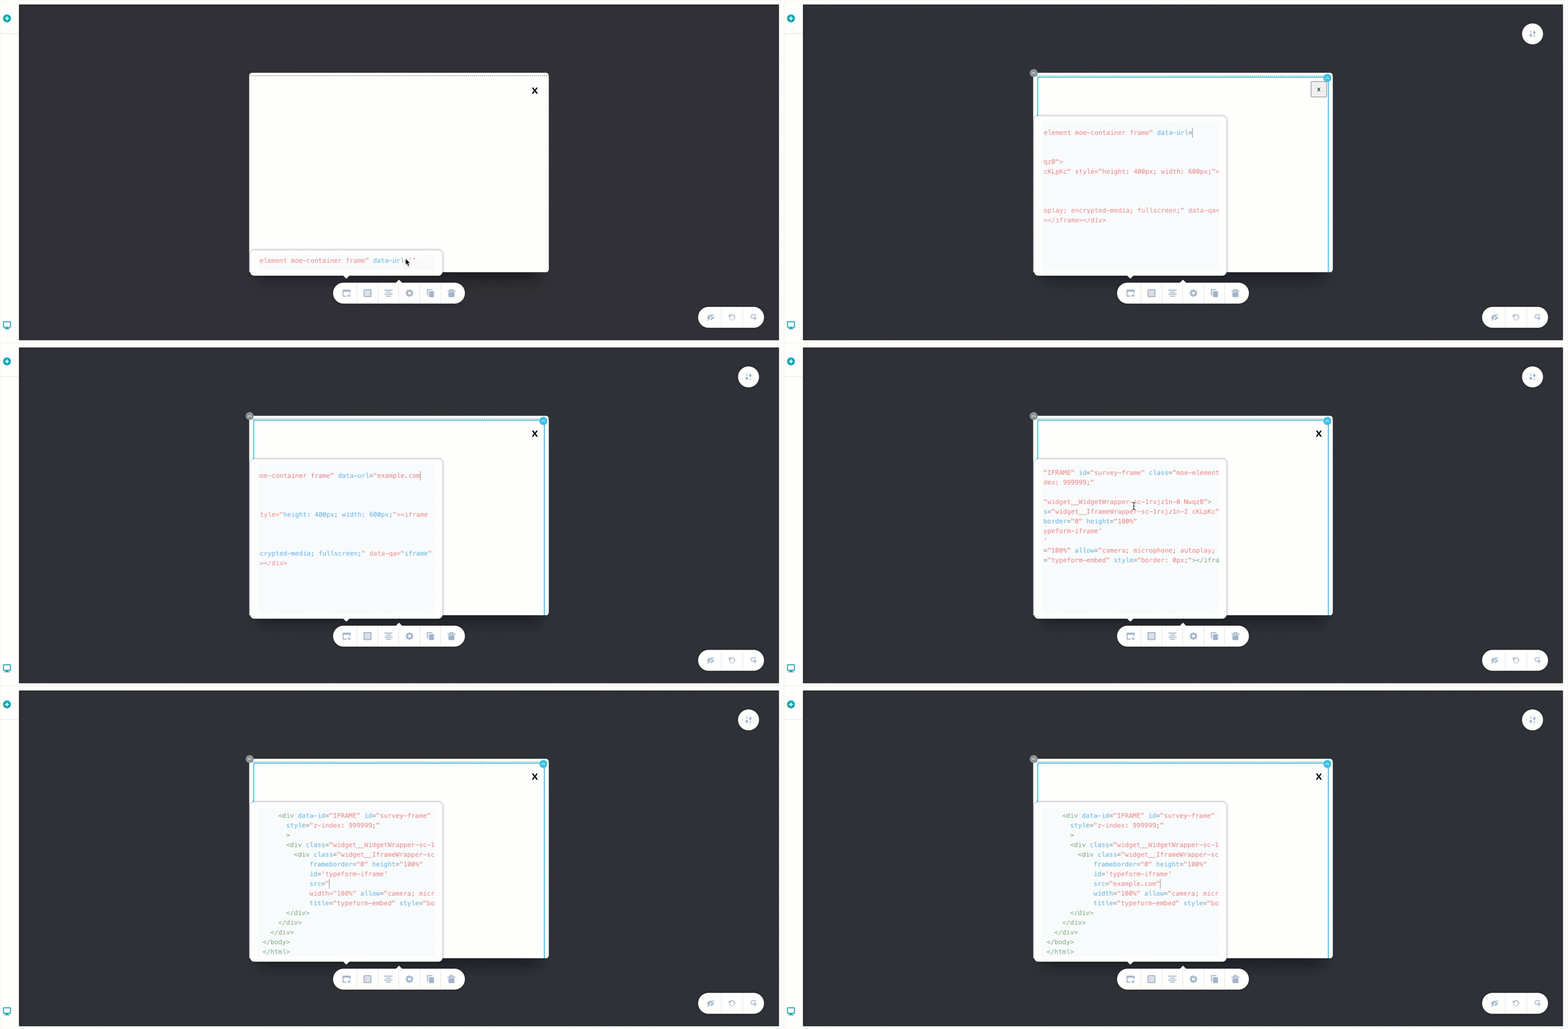
 4. Look for the *data-url* and *src* variables. Add your Typeform URL with query parameters against these variables. Make sure you use double quotation marks ("") instead of single quotation marks ('').
 5. Click **Next** to move to the third step, **Schedule and goals**.
## Step 3: Schedule and Goals
In this step, we will define the schedule and goal of your campaign.
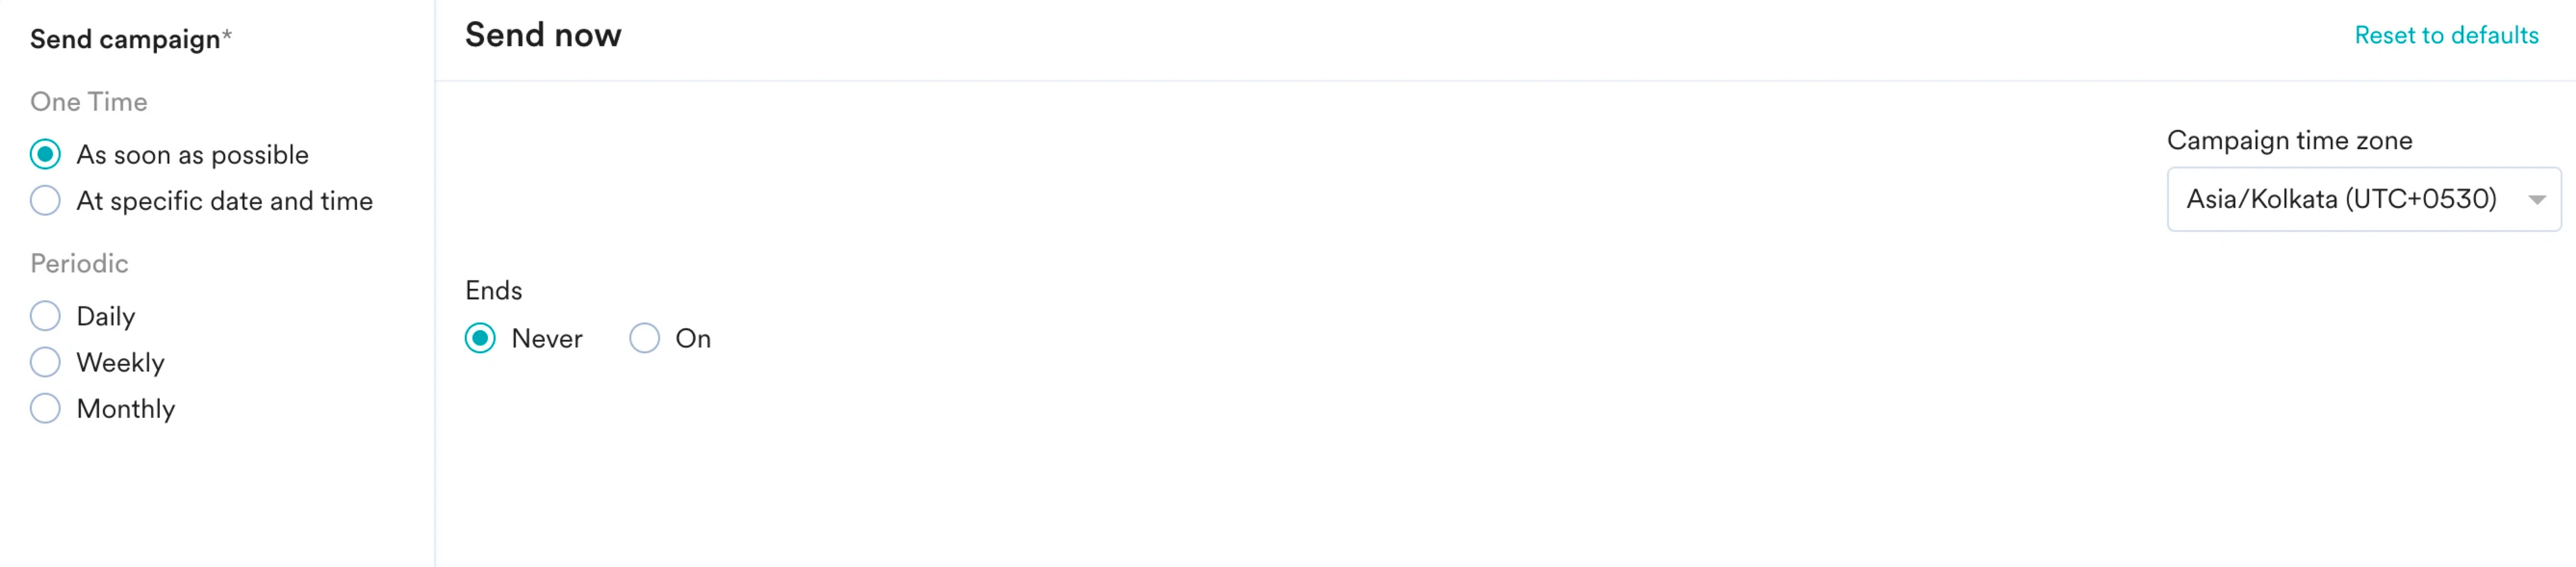
1. In the **Send campaign** section, define when you want to start and end your OSM campaign.
5. Click **Next** to move to the third step, **Schedule and goals**.
## Step 3: Schedule and Goals
In this step, we will define the schedule and goal of your campaign.
1. In the **Send campaign** section, define when you want to start and end your OSM campaign.
 2. In the **Conversion goals** section, add conversion goals that you would like to track.
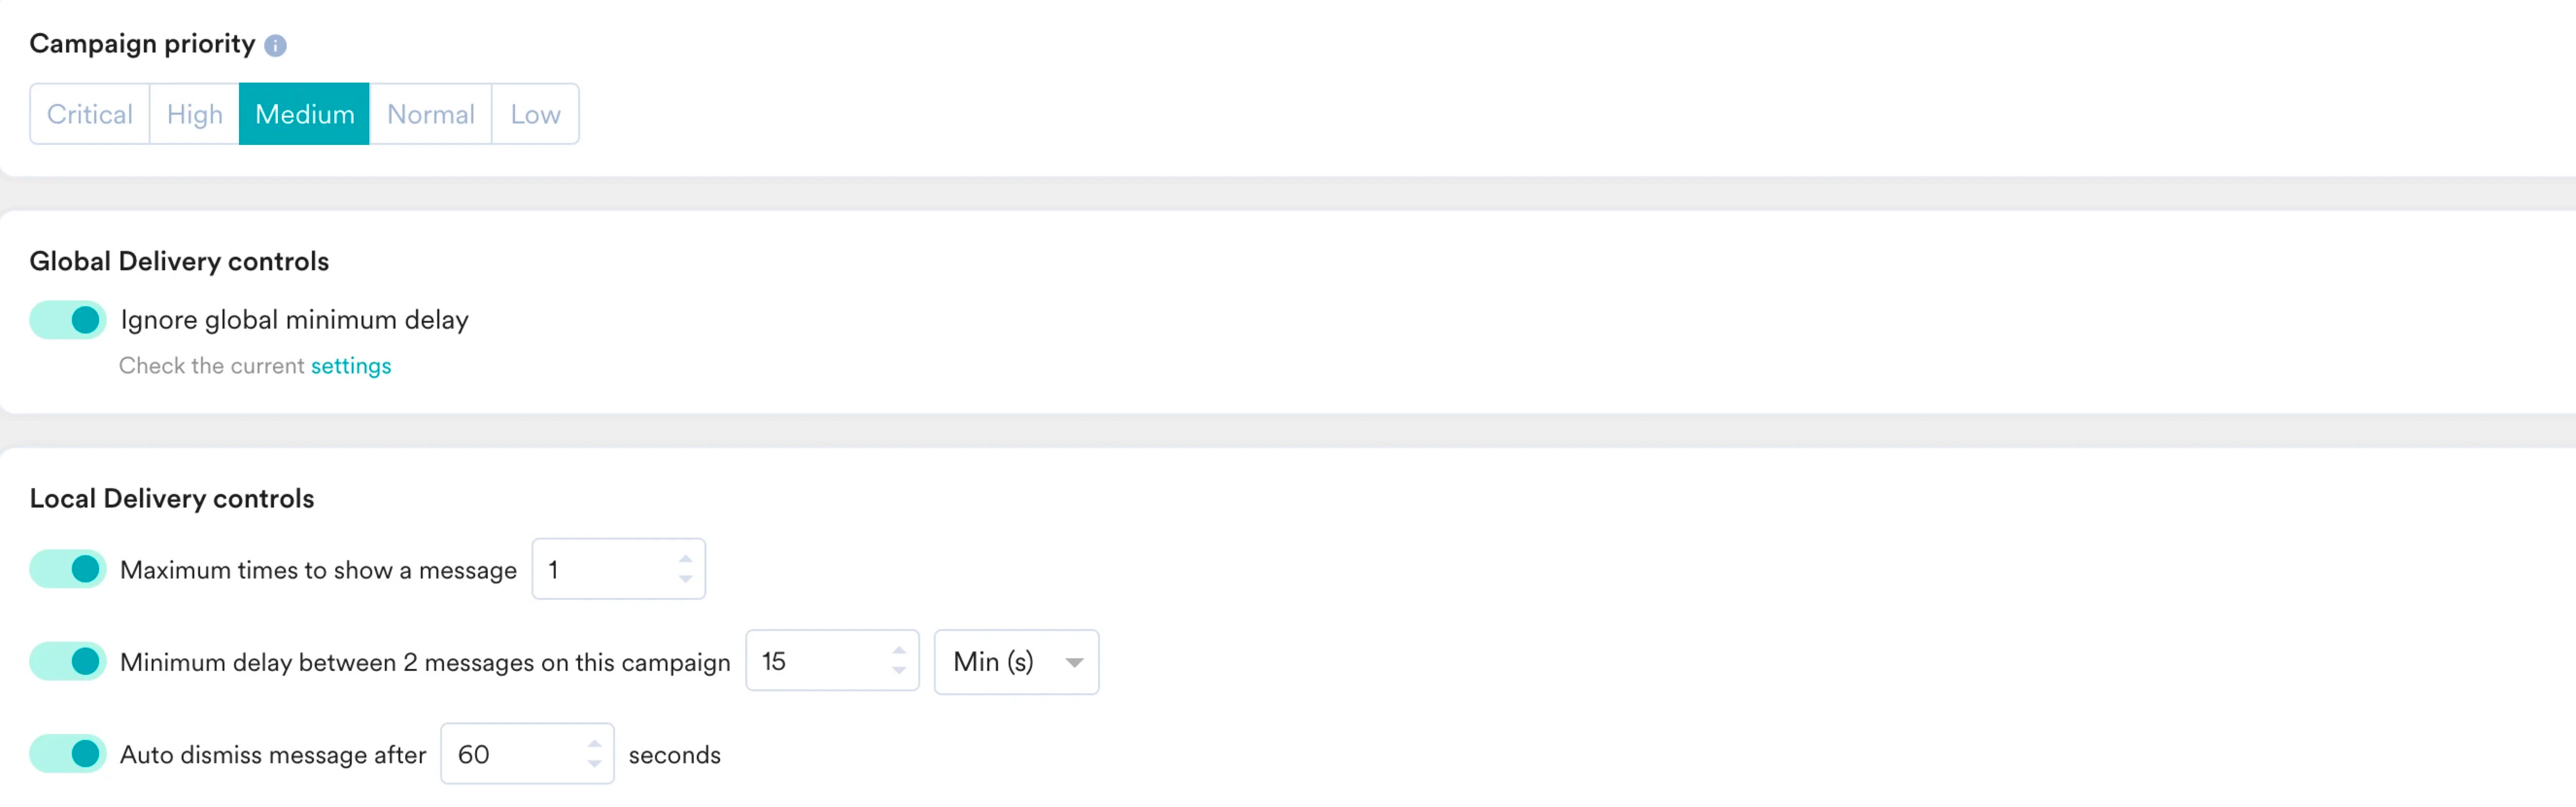
3. In the **Campaign priority** section, assign a priority to this OSM campaign. For example, selecting **Critical** ensures that the users will see the campaign, even when there are other campaigns to be shown. For more information, refer to [Create OSM Campaign](/user-guide/campaigns-and-channels/on-site-message/create/create-osm-campaign).
4. In the **Global Delivery controls** section, turn the **Ignore global minimum delay** toggle on to override the defined minimum delay between any two campaigns defined in settings.
5. In the **Local Delivery controls** section, define the controls based on your requirements. For more information, refer to [Create OSM Campaign](/user-guide/campaigns-and-channels/on-site-message/create/create-osm-campaign).
2. In the **Conversion goals** section, add conversion goals that you would like to track.
3. In the **Campaign priority** section, assign a priority to this OSM campaign. For example, selecting **Critical** ensures that the users will see the campaign, even when there are other campaigns to be shown. For more information, refer to [Create OSM Campaign](/user-guide/campaigns-and-channels/on-site-message/create/create-osm-campaign).
4. In the **Global Delivery controls** section, turn the **Ignore global minimum delay** toggle on to override the defined minimum delay between any two campaigns defined in settings.
5. In the **Local Delivery controls** section, define the controls based on your requirements. For more information, refer to [Create OSM Campaign](/user-guide/campaigns-and-channels/on-site-message/create/create-osm-campaign).
 6. Click **Publish**.
# Conclusion
In this use case, we created an OSM campaign and embedded the Typeform survey. Now that we have published the campaign, we can analyze its performance. For more information, refer to [Analyze On-site Messaging Campaigns](/user-guide/campaigns-and-channels/on-site-message/analyze/analyze-on-site-messaging-campaigns).
6. Click **Publish**.
# Conclusion
In this use case, we created an OSM campaign and embedded the Typeform survey. Now that we have published the campaign, we can analyze its performance. For more information, refer to [Analyze On-site Messaging Campaigns](/user-guide/campaigns-and-channels/on-site-message/analyze/analyze-on-site-messaging-campaigns).