> ## Documentation Index
> Fetch the complete documentation index at: https://moengage.com/docs/llms.txt
> Use this file to discover all available pages before exploring further.
# How to Retarget Customers in Real Time
# Introduction
To collect more information about the anonymous users who visit the website without disrupting their flow, we can show them an on-site pop-up window with a "lead gen" template with an initial offer or discount.
In this article, we will create an On-site Messaging (OSM) Campaign in MoEngage to generate website lead and retarget customers in real time. We will:
* Show a "lead gen" form using OSM
* Create a custom segment based on users who filled the "lead gen" form
* Create a campaign from the custom segment
Integration of the MoEngage Web SDK with your website. For more information, refer to the [Developer Guide](/developer-guide/introduction).
# Create an OSM Campaign
In this section, let us create an OSM campaign to collect contact details from your first time users.
## Step 1: Target Users
1. Navigate to the sidebar on the left and click **Engage** > **Campaigns** and click **+ Create campaign**, or click **+ Create new**> **Campaign**.
2. Under **Inbound**, click **On-site**.
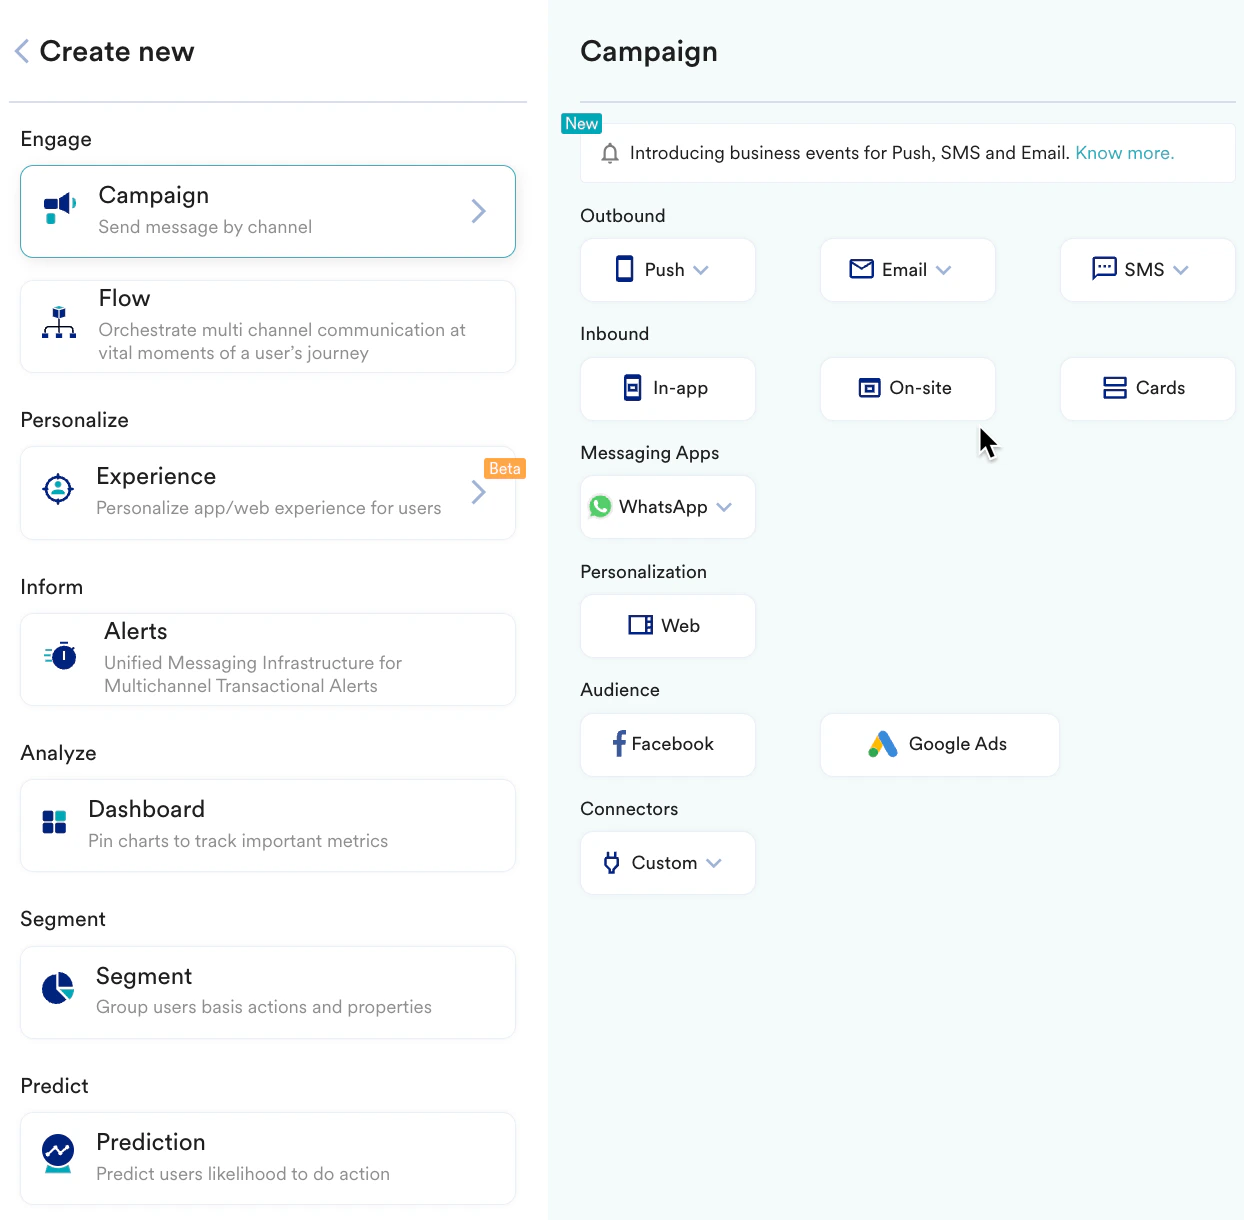 You are taken to the first step "Target users" of defining your campaign.
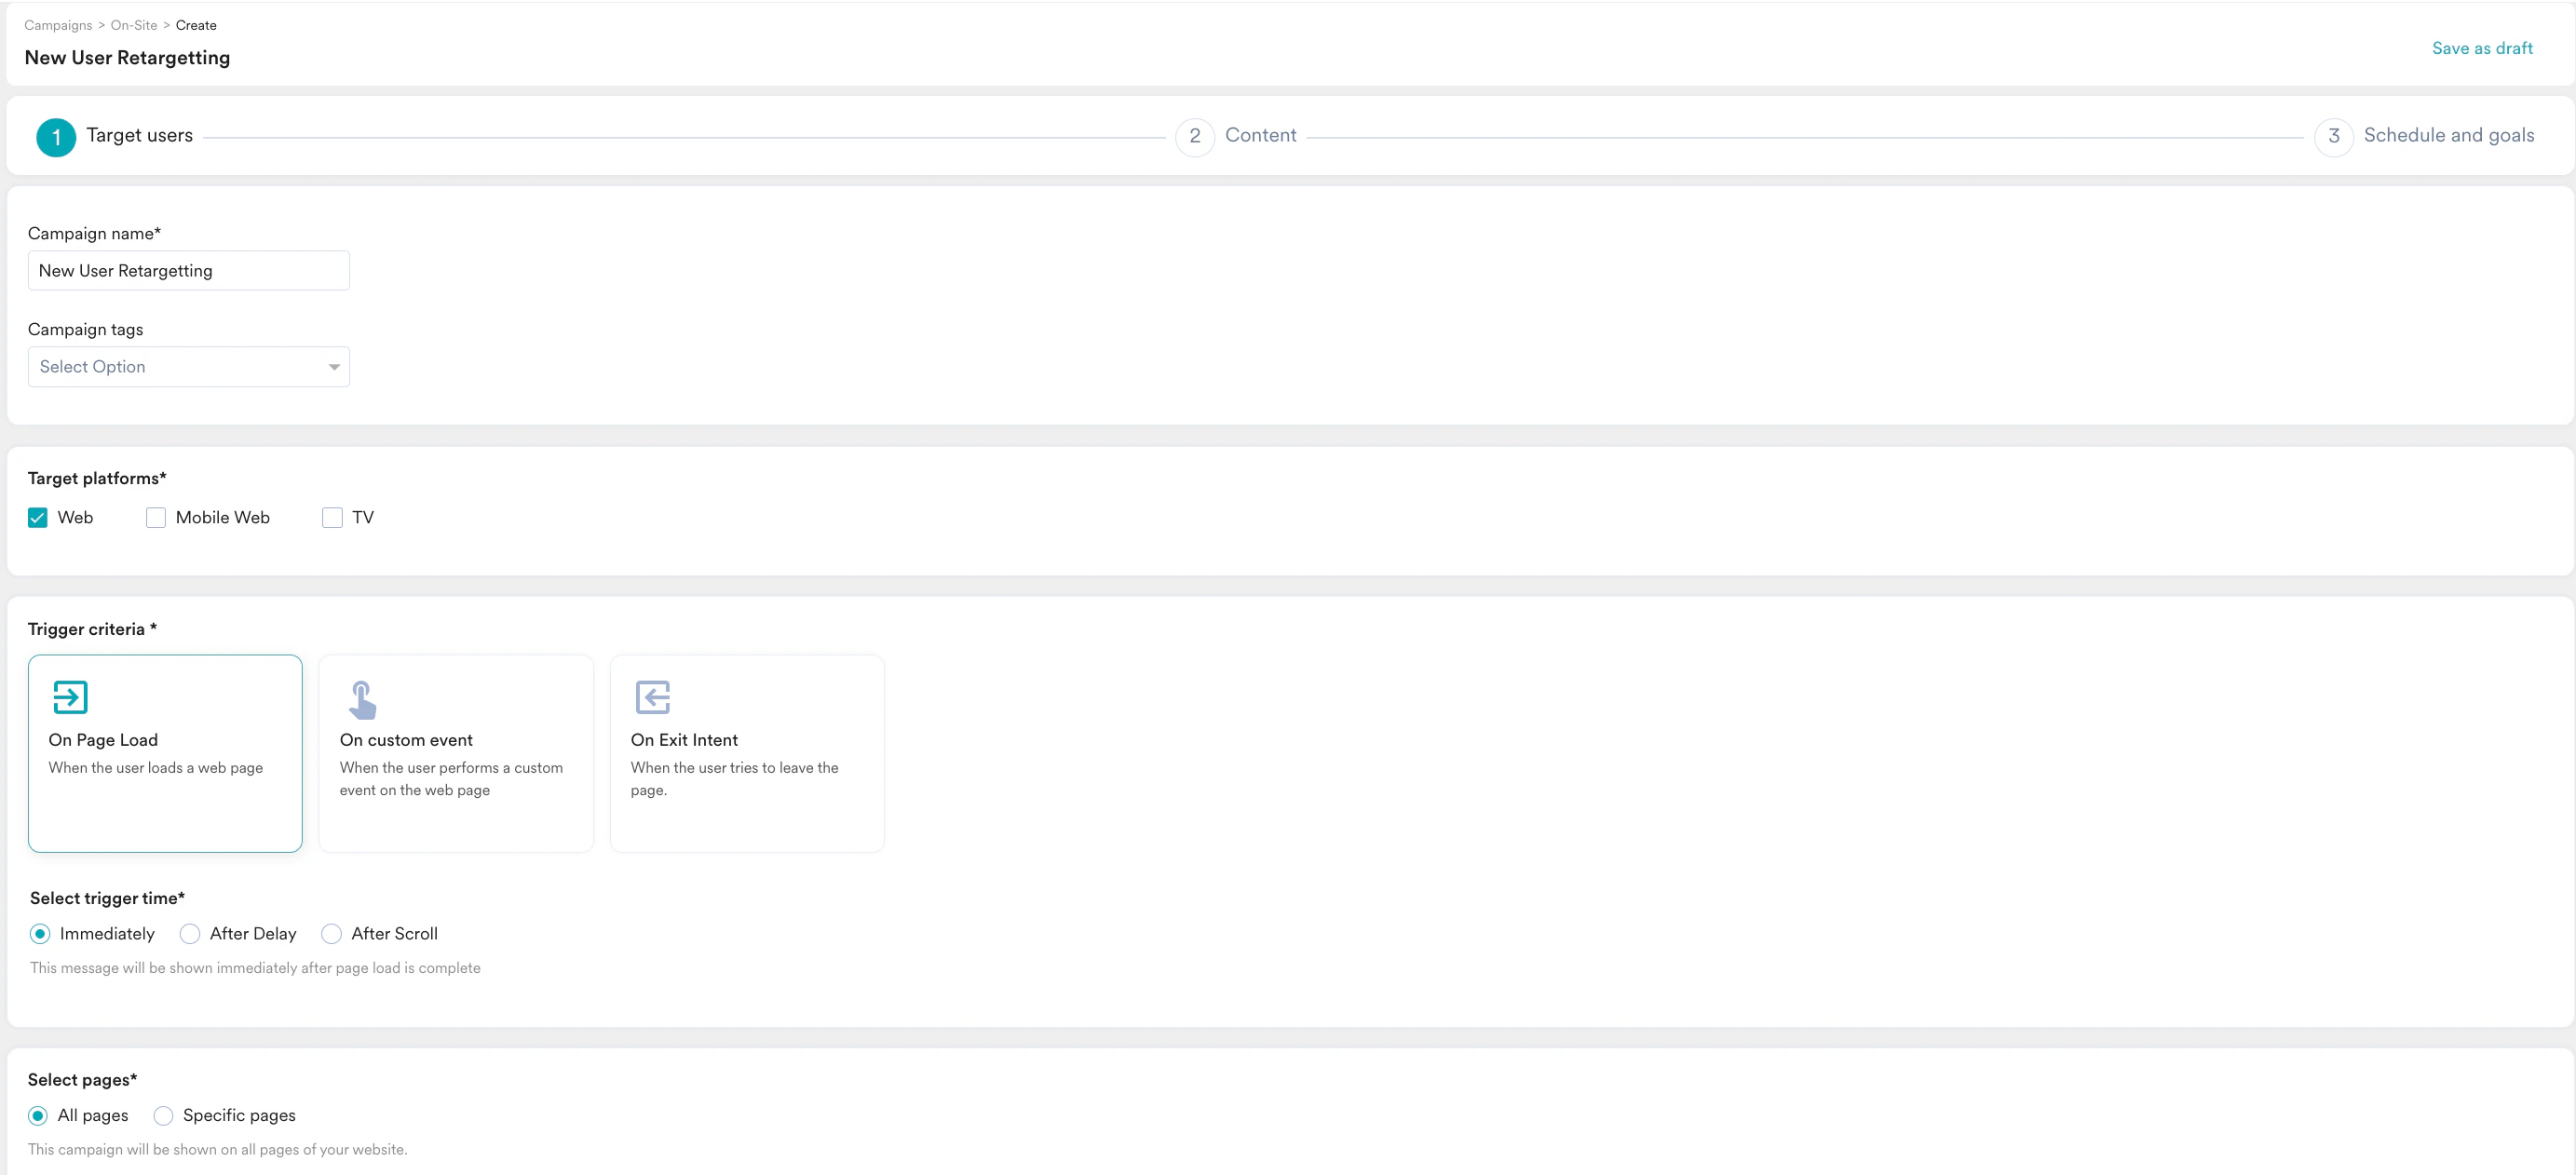
3. Enter the following details:
* **Campaign name**: Enter a name for the campaign. For example, "New User Retargetting".
* **Campaign tags**: Select the relevant campaign tags.
4. In the **Target platforms** section, select **Web**.
5. In the **Trigger criteria** section, select **On Page Load** because the aim is to show a pop-up when the user visits the website.
6. In the **Select trigger time** section, select **Immediately** because we want to show the pop-up as soon as the user visits the website.
7. In the **Select pages** section, select the **All pages** option.
You are taken to the first step "Target users" of defining your campaign.
3. Enter the following details:
* **Campaign name**: Enter a name for the campaign. For example, "New User Retargetting".
* **Campaign tags**: Select the relevant campaign tags.
4. In the **Target platforms** section, select **Web**.
5. In the **Trigger criteria** section, select **On Page Load** because the aim is to show a pop-up when the user visits the website.
6. In the **Select trigger time** section, select **Immediately** because we want to show the pop-up as soon as the user visits the website.
7. In the **Select pages** section, select the **All pages** option.
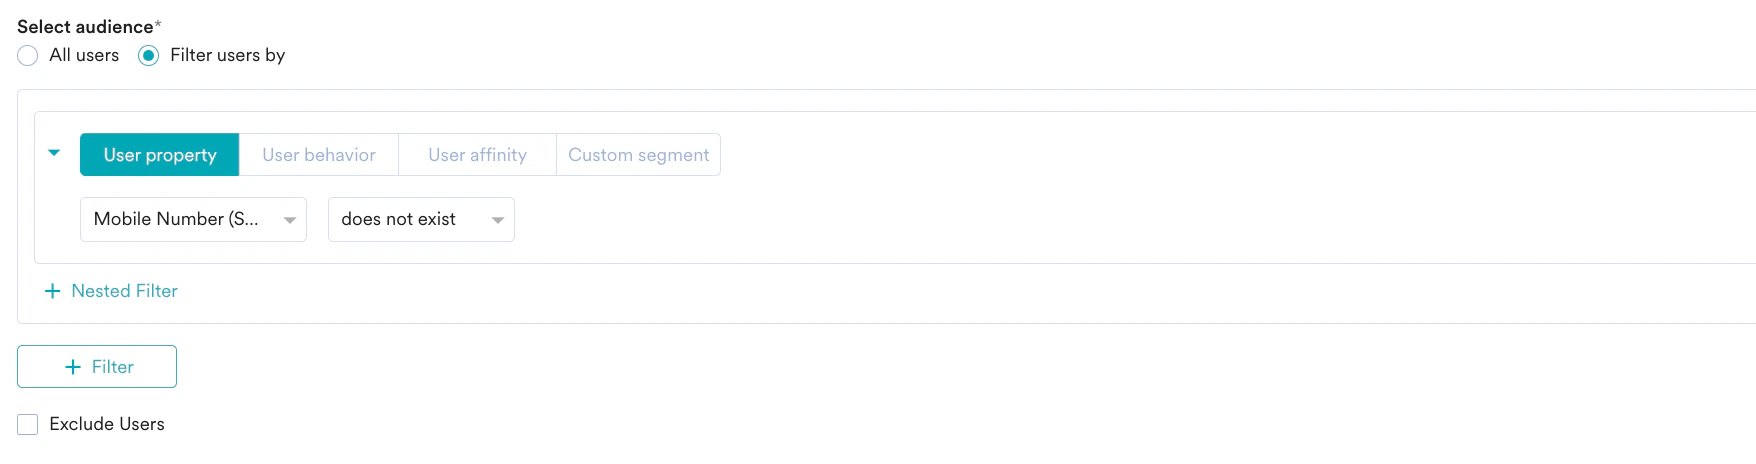
 8. In the **Target Audience** section, filter the users by **User Property** and define the attribute as "Mobile Number (Standard) does not exist".
 9. Click **Next** to move to the second step "Content" where you can define the content that will go into your campaign.
## Step 2: Content
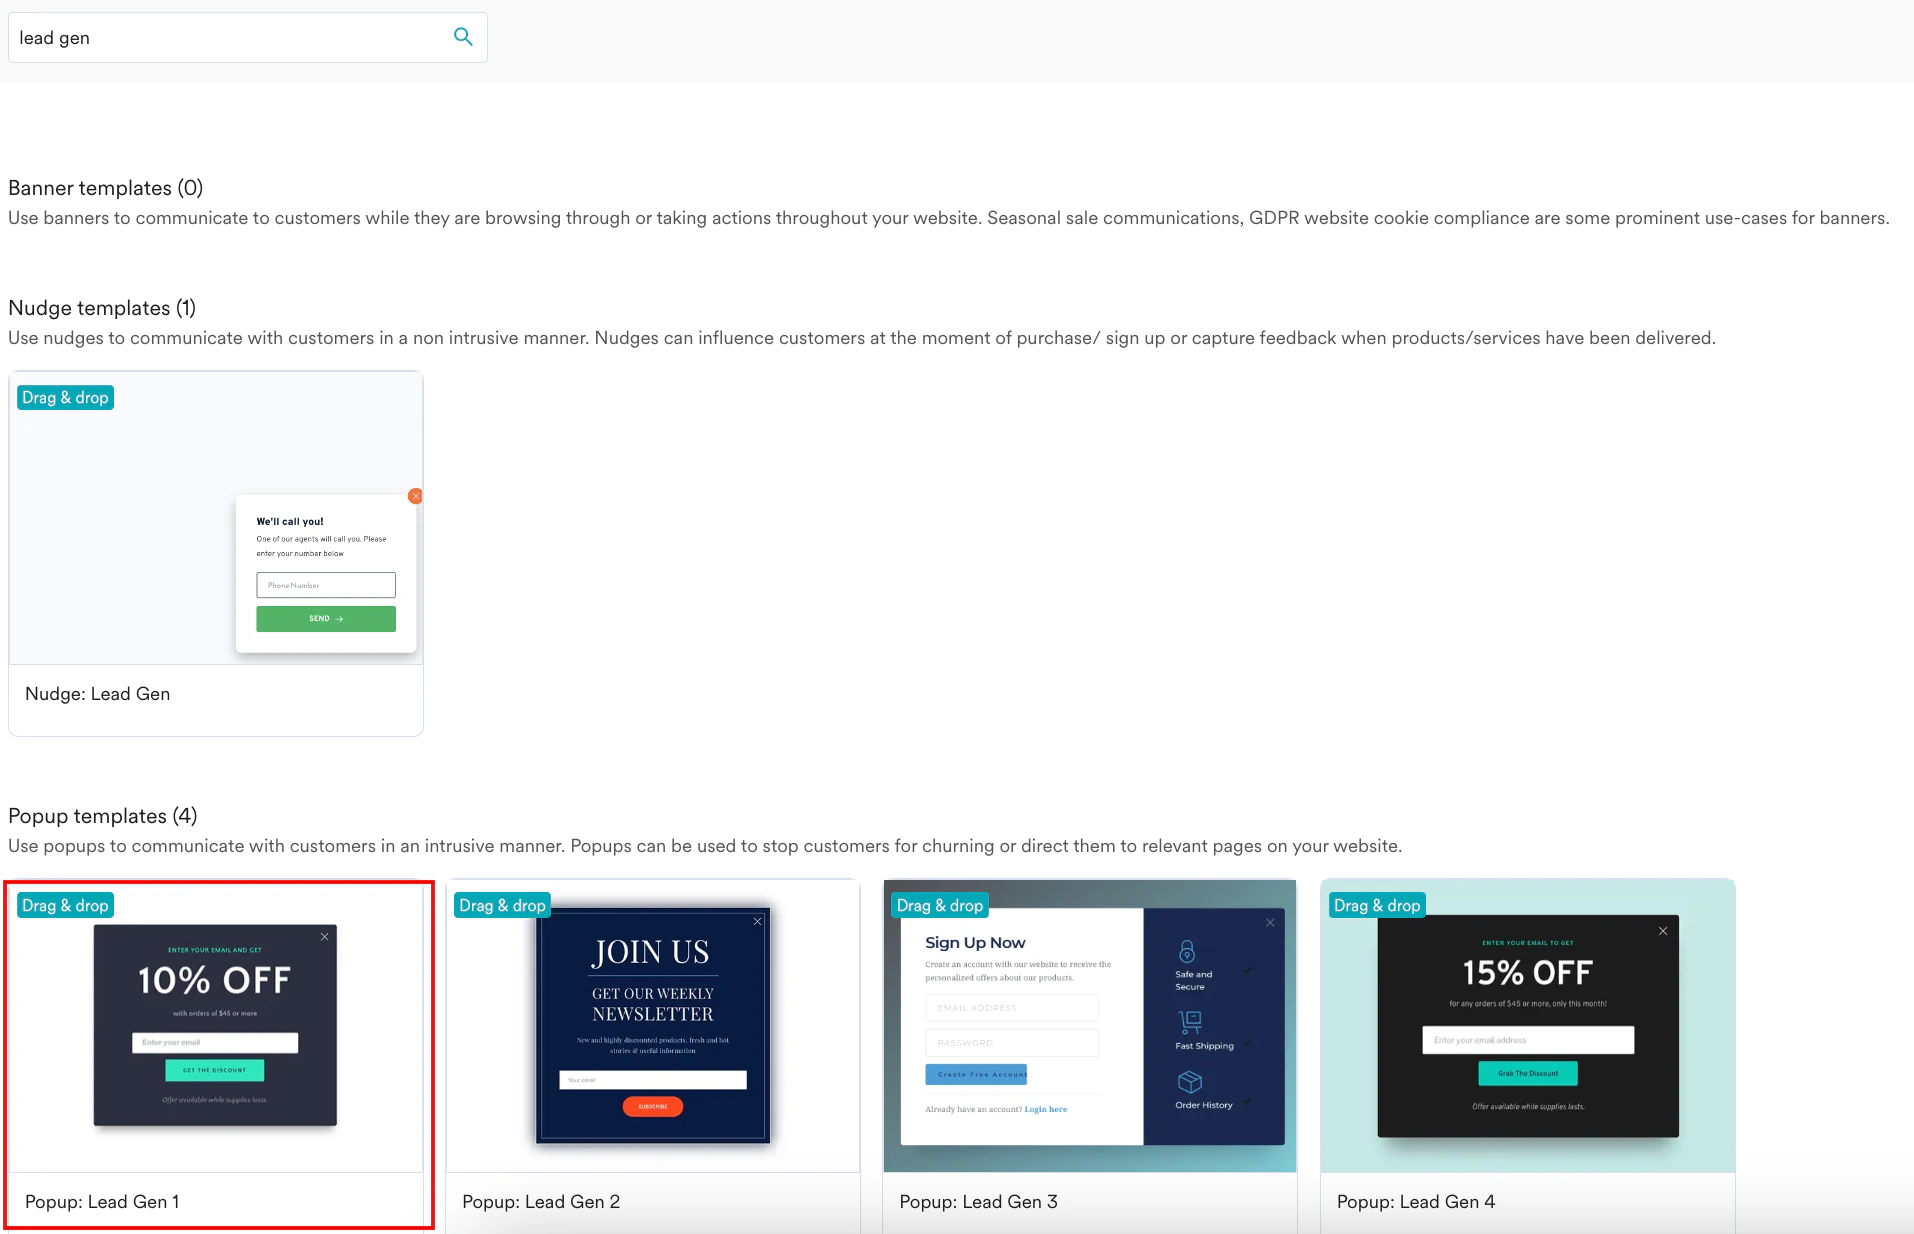
1. In the **Search templates** field, search with the keyword “lead gen” to find a list of pop-up windows.
2. In the **Popup templates** section, hover your mouse on the **Popup: Lead Gen 1** template and click **Select Template**.
9. Click **Next** to move to the second step "Content" where you can define the content that will go into your campaign.
## Step 2: Content
1. In the **Search templates** field, search with the keyword “lead gen” to find a list of pop-up windows.
2. In the **Popup templates** section, hover your mouse on the **Popup: Lead Gen 1** template and click **Select Template**.
 3. After the screen loads, edit the template based on your requirement and define your campaign.
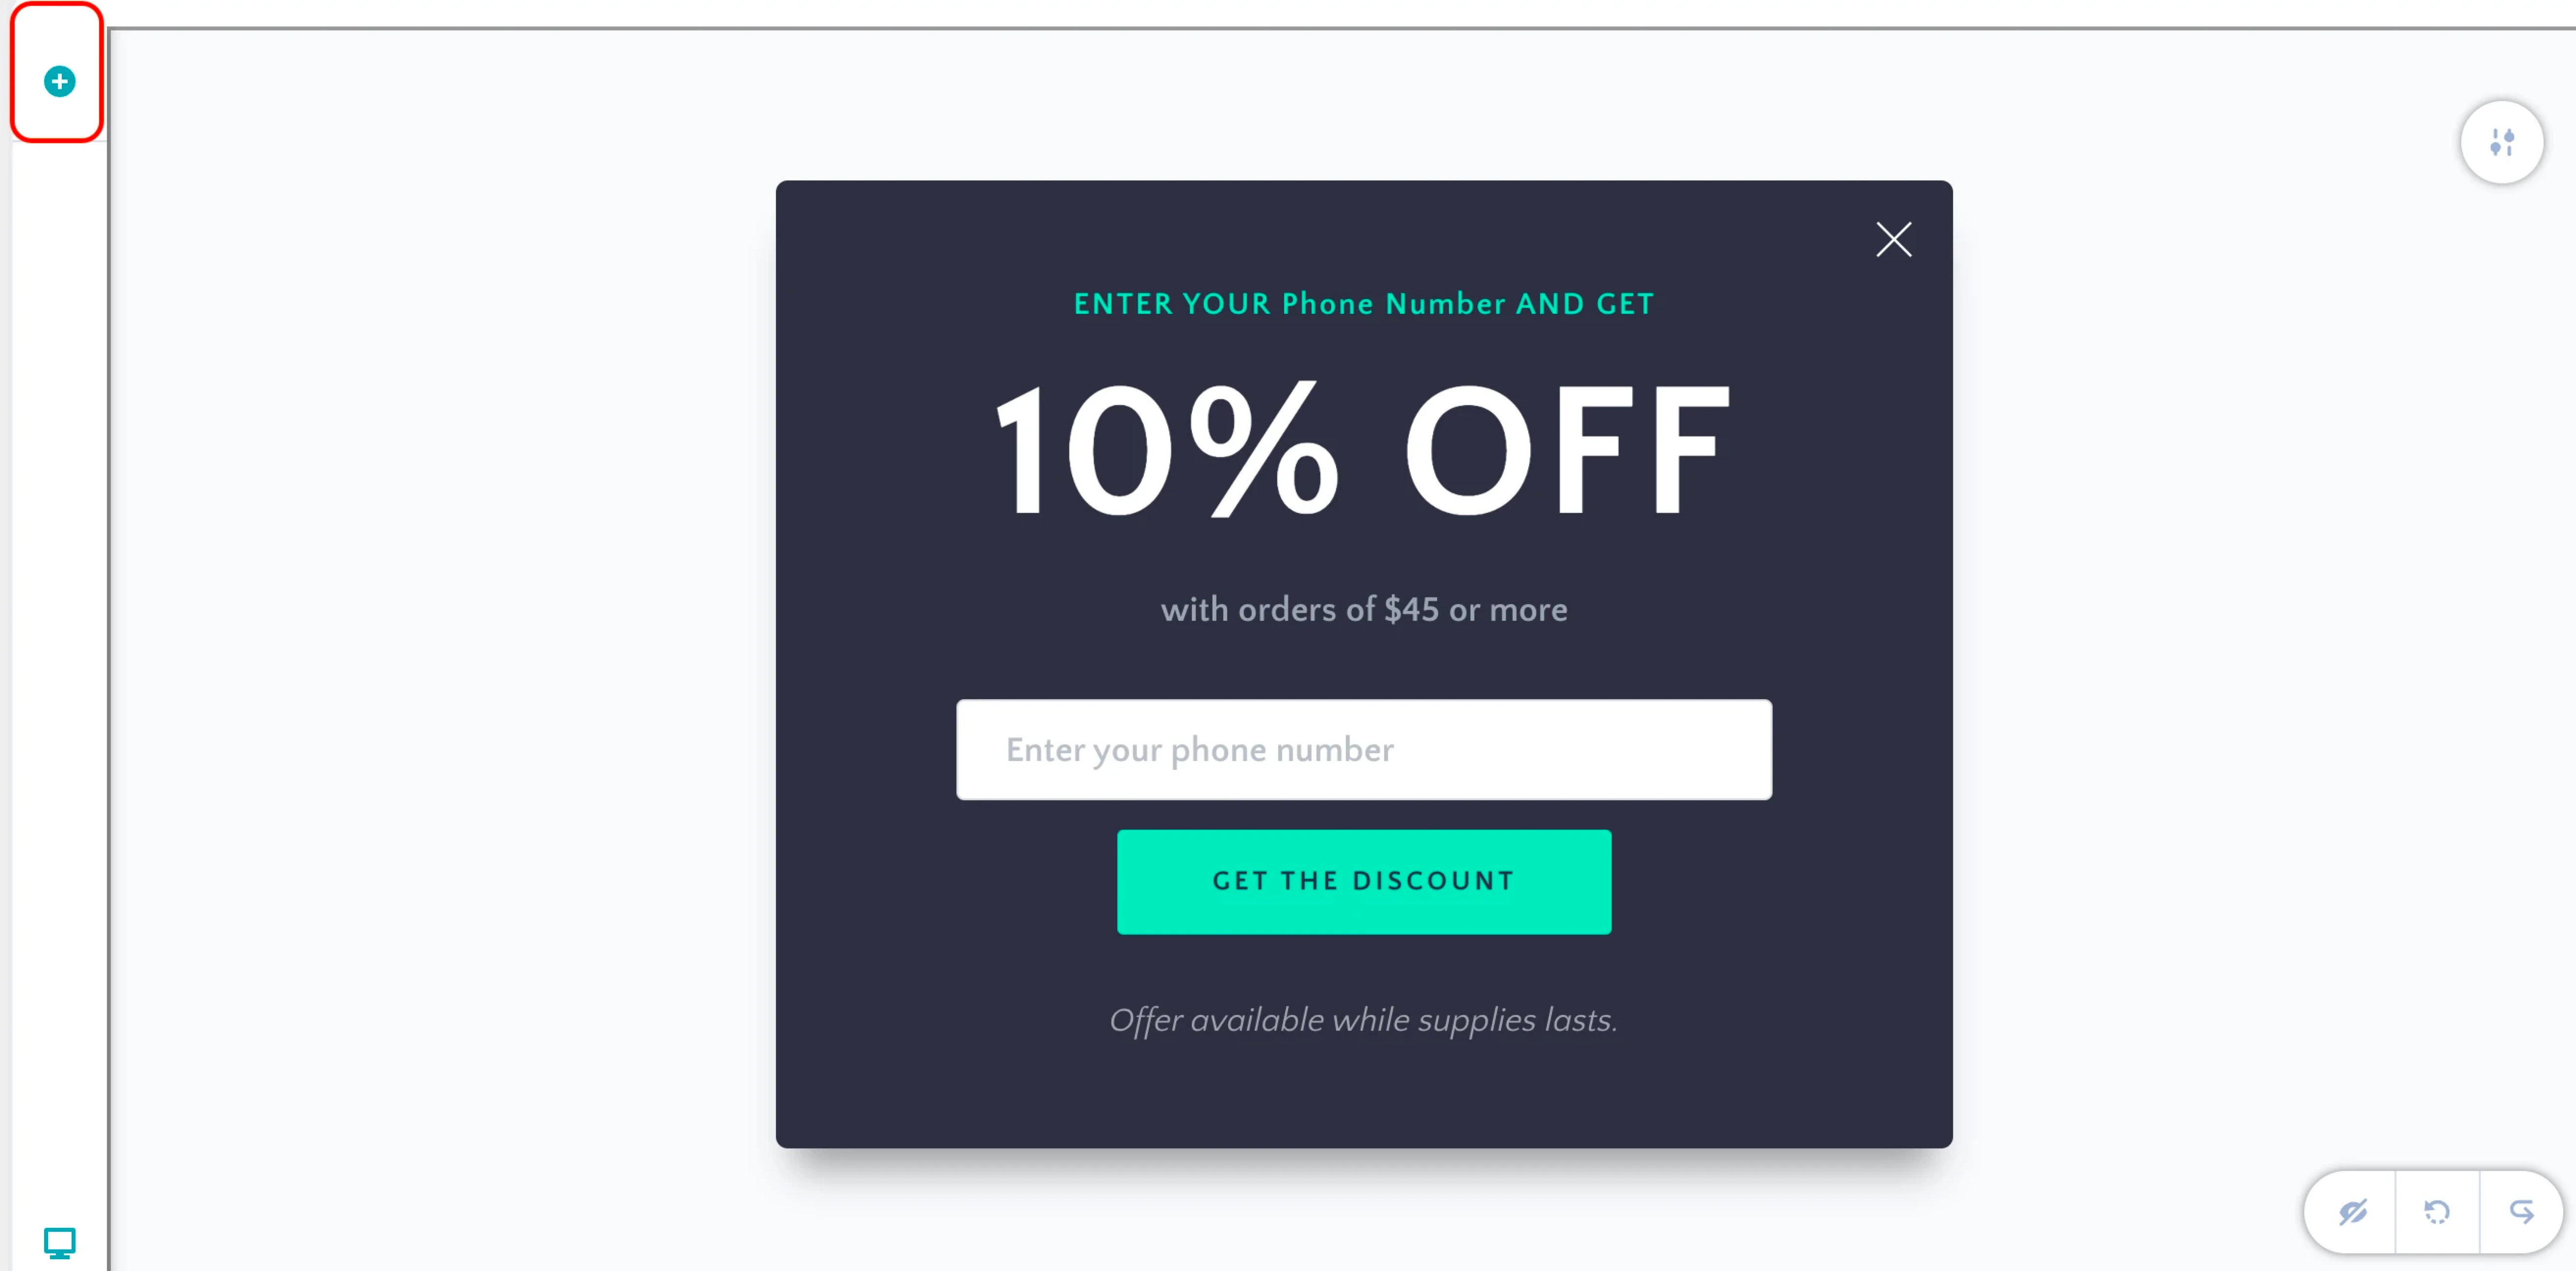
4. Click the **+** icon on the left to add new elements to your campaign.
3. After the screen loads, edit the template based on your requirement and define your campaign.
4. Click the **+** icon on the left to add new elements to your campaign.
 5. As a part of your defining OSM, you can click the input box and click the first icon to get the following settings:
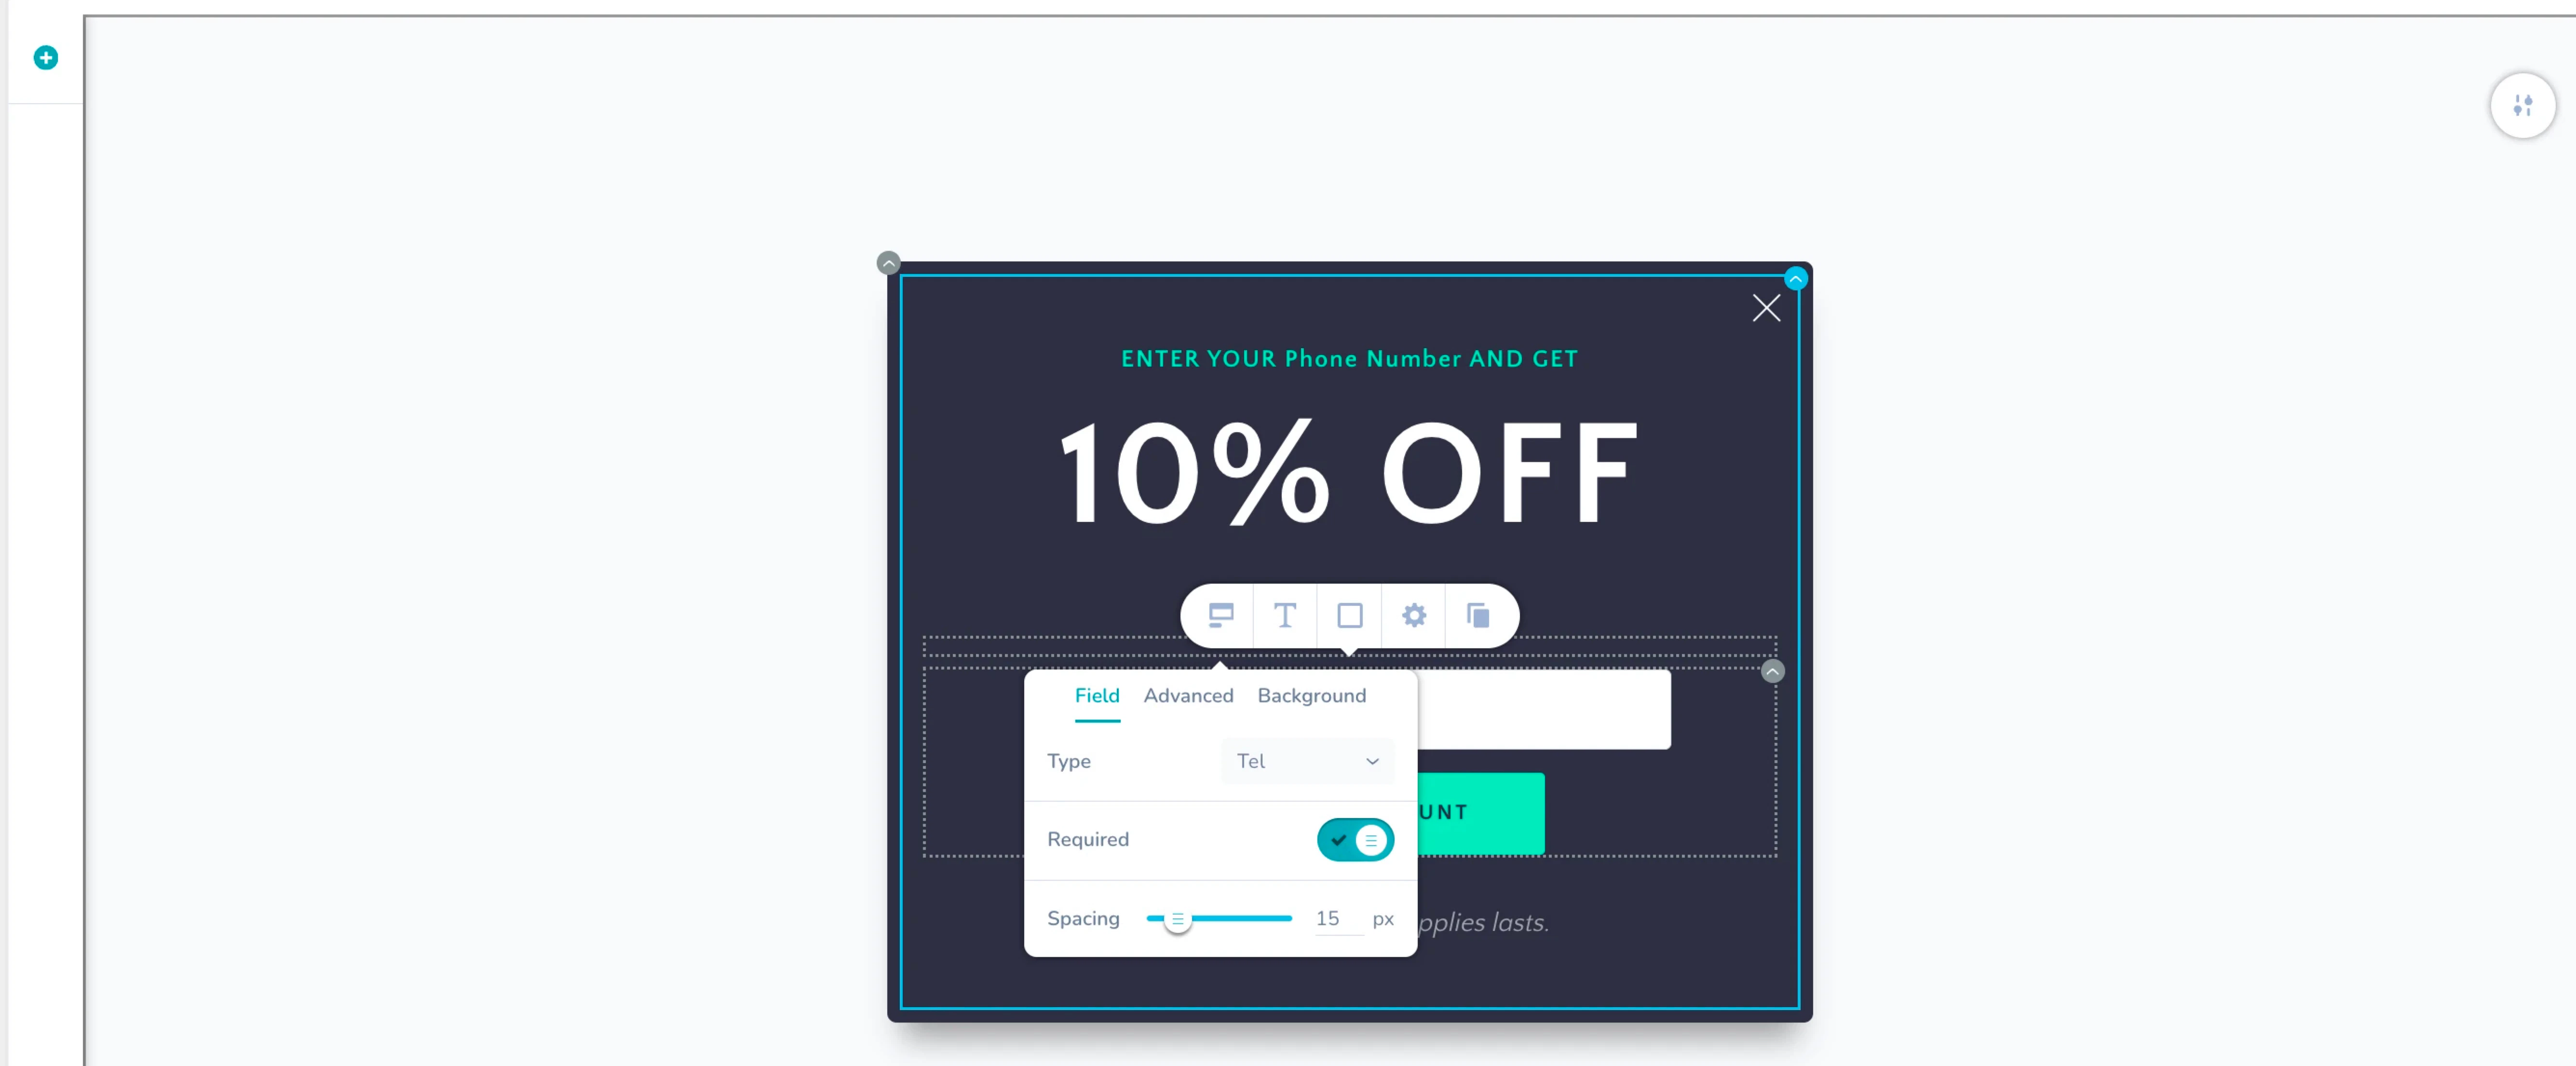 6. From here, you can implement basic level of checks. For example, selecting the “Tel” option from the first drop-down list helps MoEngage validate if users are entering only the numbers.
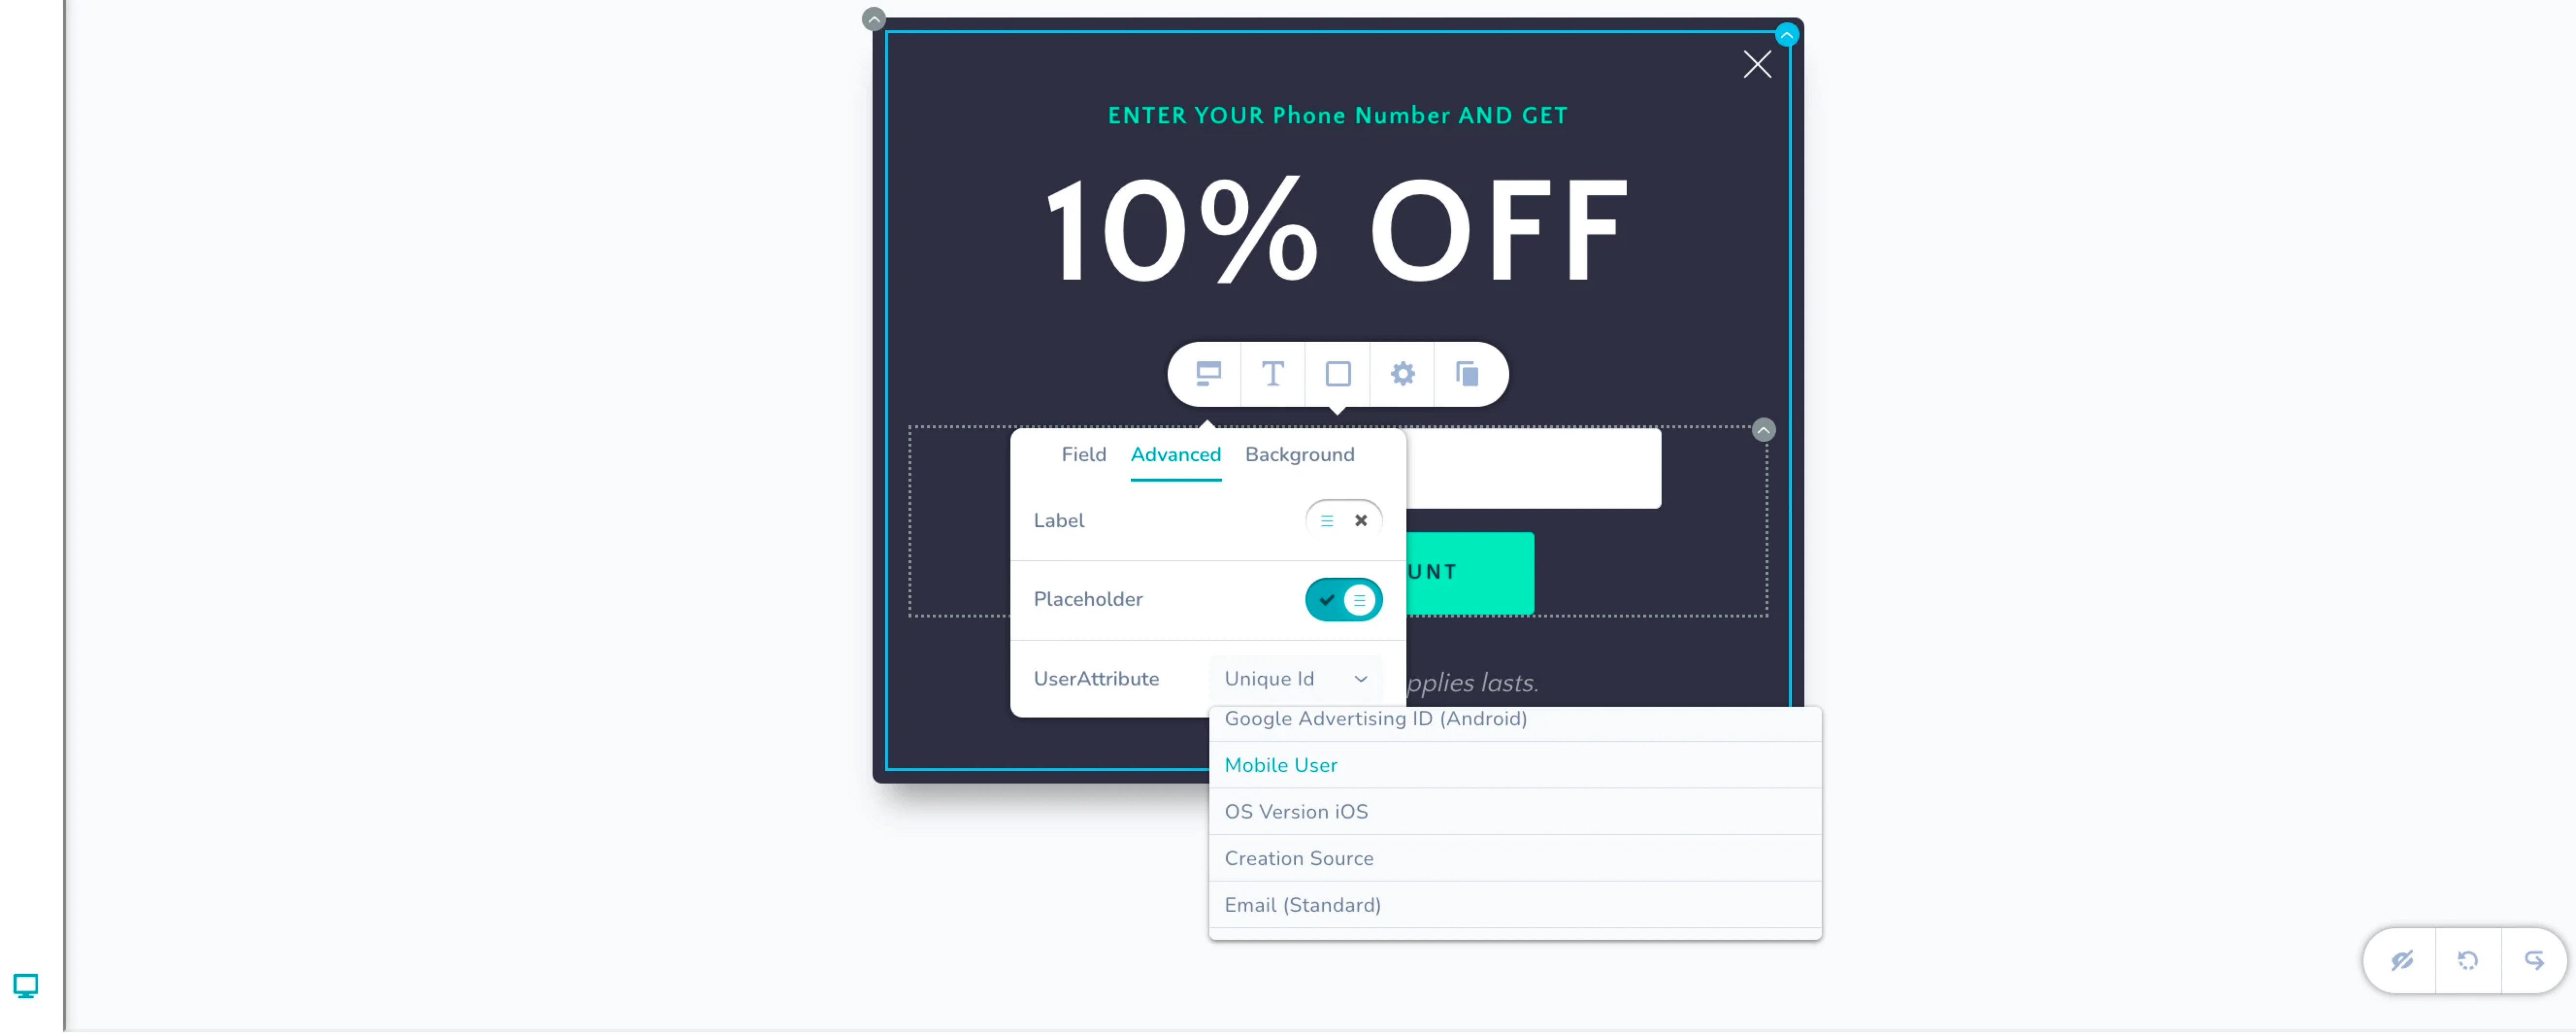
7. On the **Advanced** tab, you can make sure to save the input value to the profile that gets created at MoEngage by selecting the “Attribute” where you would like to store the input value. This will help you engage with them in the future.
6. From here, you can implement basic level of checks. For example, selecting the “Tel” option from the first drop-down list helps MoEngage validate if users are entering only the numbers.
7. On the **Advanced** tab, you can make sure to save the input value to the profile that gets created at MoEngage by selecting the “Attribute” where you would like to store the input value. This will help you engage with them in the future.
 8. To handle cases where the User Attribute Sync with segmentation is delayed, add the following Jinja to check whether the mobile number is populated.
```text wrap theme={null}
{% if UserAttribute['Mobile Number (Standard)']|length != 0 %} MOE_NOT_SEND {% endif %}
```
9. Click **Next** to move to the third step "Schedule and goals" where you can define the schedule and goal of your campaign.
## Step 3: Schedule and Goals
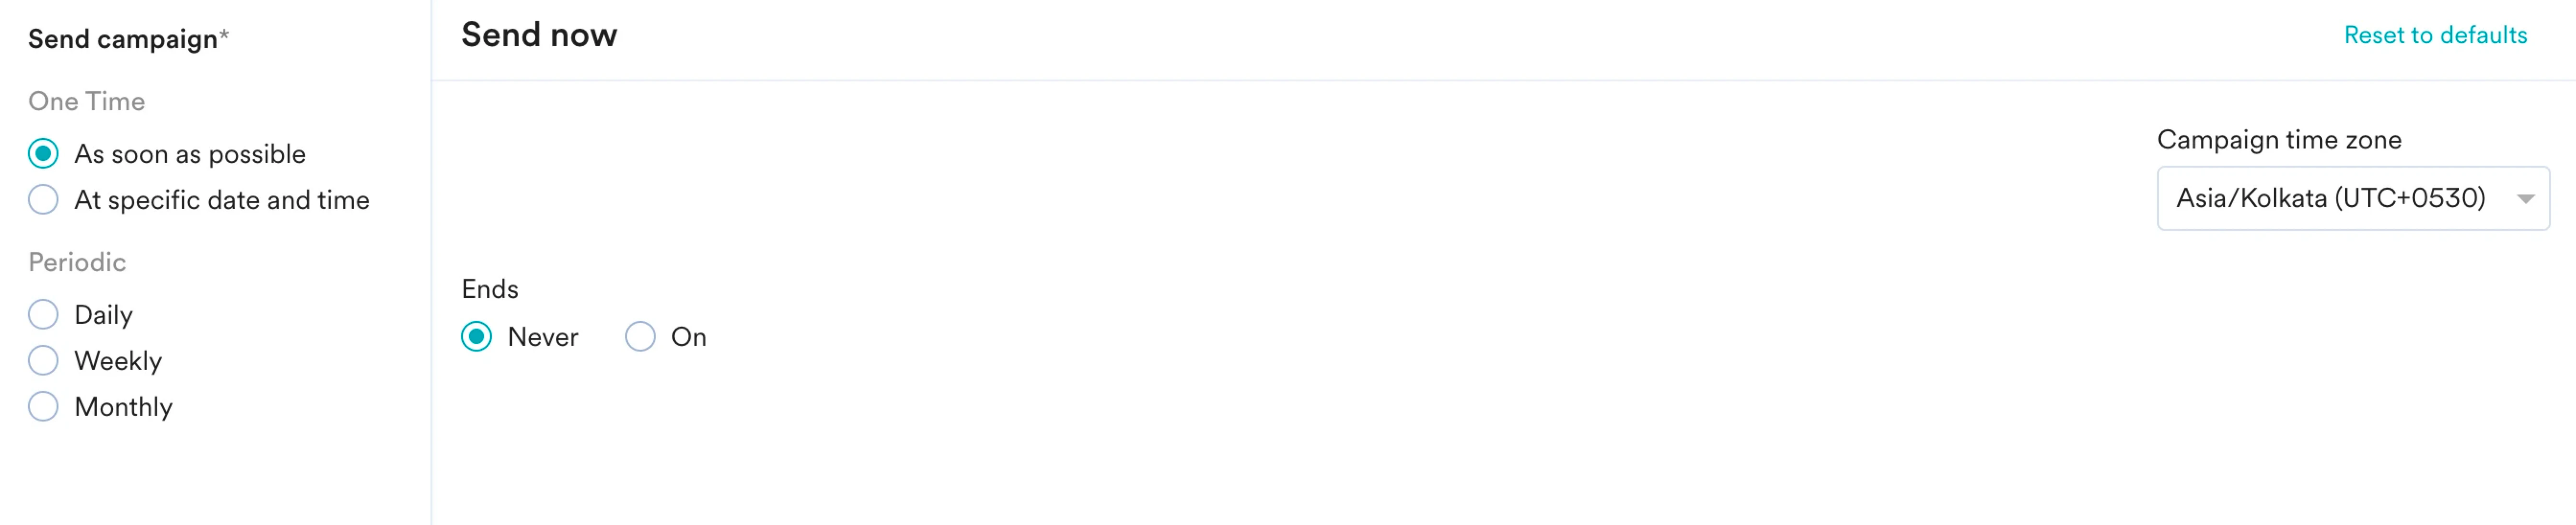
1. In the **Send campaign** section, define when you want to start and end your OSM campaign.
8. To handle cases where the User Attribute Sync with segmentation is delayed, add the following Jinja to check whether the mobile number is populated.
```text wrap theme={null}
{% if UserAttribute['Mobile Number (Standard)']|length != 0 %} MOE_NOT_SEND {% endif %}
```
9. Click **Next** to move to the third step "Schedule and goals" where you can define the schedule and goal of your campaign.
## Step 3: Schedule and Goals
1. In the **Send campaign** section, define when you want to start and end your OSM campaign.
 2. In the **Conversion goals** section, add conversion goals that you like to track.
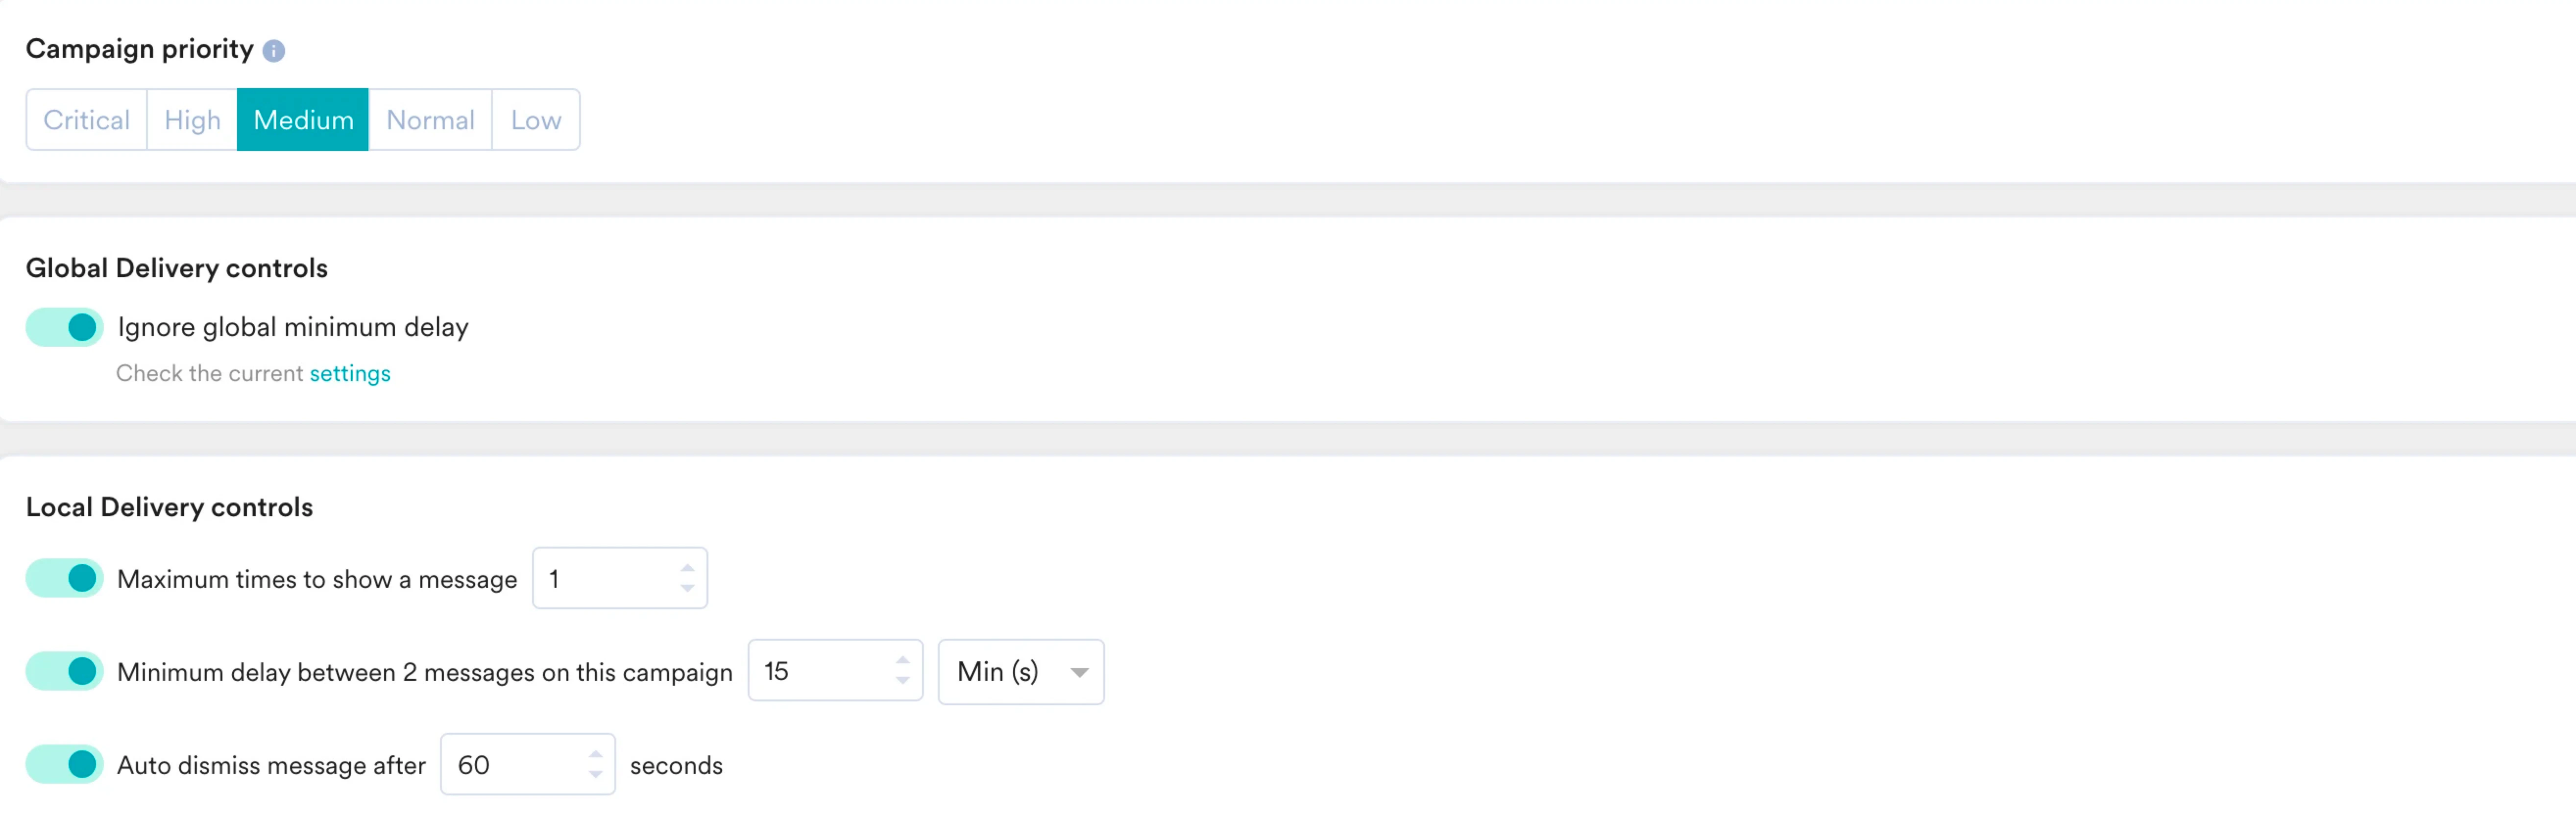
3. In the **Campaign priority** section, assign a priority to this OSM campaign. Assigning a priority helps you decide which OSM to be shown to a user when they are eligible for more than one OSMs at a specific time. For example, selecting **Critical** makes sure that the users will always see this even when there are other campaigns that they are eligible for. For more information, refer to [Create OSM Pro Campaign](/user-guide/campaigns-and-channels/on-site-message/create/create-osm-campaign).
4. In the **Global Delivery controls** section, turn the **Ignore global minimum delay** toggle on to override the defined minimum delay between any two campaigns defined in settings.
5. In the **Local Delivery controls** section, define the controls based on your requirements. For more information, refer to [Create OSM Pro Campaign](/user-guide/campaigns-and-channels/on-site-message/create/create-osm-campaign).
2. In the **Conversion goals** section, add conversion goals that you like to track.
3. In the **Campaign priority** section, assign a priority to this OSM campaign. Assigning a priority helps you decide which OSM to be shown to a user when they are eligible for more than one OSMs at a specific time. For example, selecting **Critical** makes sure that the users will always see this even when there are other campaigns that they are eligible for. For more information, refer to [Create OSM Pro Campaign](/user-guide/campaigns-and-channels/on-site-message/create/create-osm-campaign).
4. In the **Global Delivery controls** section, turn the **Ignore global minimum delay** toggle on to override the defined minimum delay between any two campaigns defined in settings.
5. In the **Local Delivery controls** section, define the controls based on your requirements. For more information, refer to [Create OSM Pro Campaign](/user-guide/campaigns-and-channels/on-site-message/create/create-osm-campaign).
 6. Click **Publish**.
# Identify Users Who Submitted a Response
The user's inputs are stored in the user attribute mapped in the template. For example. if a user enters an mobile number and clicks **Subscribe**, the mobile number gets stored in the mobile number user attribute and is available in the MOE\_RESPONSE\_SUBMITTED event in the user profile of the user, as shown in the image below.
You can identify users who have performed the MOE\_RESPONSE\_SUBMITTED event and filter them based on their responses to create segments and analyze the data in them by performing the following steps:
1. Navigate to the MoEngage Dashboard -> **Segment** -> **Create Segment**.
2. In the **Filter Users by** tab, select **User Property** and add the **Has executed** event as MOE\_RESPONSE\_SUBMITTED.
3. Specify the time range for the event and add the campaign ID of your OSM campaign to see the number of users who have submitted a response to the campaign, as shown below:
6. Click **Publish**.
# Identify Users Who Submitted a Response
The user's inputs are stored in the user attribute mapped in the template. For example. if a user enters an mobile number and clicks **Subscribe**, the mobile number gets stored in the mobile number user attribute and is available in the MOE\_RESPONSE\_SUBMITTED event in the user profile of the user, as shown in the image below.
You can identify users who have performed the MOE\_RESPONSE\_SUBMITTED event and filter them based on their responses to create segments and analyze the data in them by performing the following steps:
1. Navigate to the MoEngage Dashboard -> **Segment** -> **Create Segment**.
2. In the **Filter Users by** tab, select **User Property** and add the **Has executed** event as MOE\_RESPONSE\_SUBMITTED.
3. Specify the time range for the event and add the campaign ID of your OSM campaign to see the number of users who have submitted a response to the campaign, as shown below:
 4. You can create a campaign targeting this segment, analyze it or export its details, and run your own analysis on the segment data.
# What Happens When the Customer Opens the Page?
* The On-Site trigger will be called, from where the user’s mobile number attribute is checked by segmentation.
* When the content is generated and sent to the SDK for rendering, the Jinja snippet verifies the user attribute again, and if the attribute does not exist, the content is sent to the SDK.
* If the user attribute check fails in the Content section, the On-Site message will be dropped for the specific user.\
To learn more, see [OSM Pro Templates](/user-guide/campaigns-and-channels/on-site-message/create/osm-templates).
# Conclusion
In this use case, we created an Onsite Campaign in MoEngage to generate website lead and retarget customers in real time.
You can also add other user attribute checks using Jinja or in the segmentation section and collect mobile numbers, emails, birthdays, or any other details that you would like to collect from the user.
4. You can create a campaign targeting this segment, analyze it or export its details, and run your own analysis on the segment data.
# What Happens When the Customer Opens the Page?
* The On-Site trigger will be called, from where the user’s mobile number attribute is checked by segmentation.
* When the content is generated and sent to the SDK for rendering, the Jinja snippet verifies the user attribute again, and if the attribute does not exist, the content is sent to the SDK.
* If the user attribute check fails in the Content section, the On-Site message will be dropped for the specific user.\
To learn more, see [OSM Pro Templates](/user-guide/campaigns-and-channels/on-site-message/create/osm-templates).
# Conclusion
In this use case, we created an Onsite Campaign in MoEngage to generate website lead and retarget customers in real time.
You can also add other user attribute checks using Jinja or in the segmentation section and collect mobile numbers, emails, birthdays, or any other details that you would like to collect from the user.