> ## Documentation Index
> Fetch the complete documentation index at: https://moengage.com/docs/llms.txt
> Use this file to discover all available pages before exploring further.
# How to Increase Retention with Personalized Shipping Confirmation Emails
# Introduction
As time progresses, personalization is becoming the key to all communications. Marketers want to leave a hook for the user’s next purchase.
For example, when an order is placed and confirmed, a marketer would want to send order confirmation emails and a list of trending items/recommended items so customers can browse the products.
In this article, we will create a recommendation and a personalized shipping campaign to nudge or entice users to watch or browse more products in the App.
# Expected Result
These campaigns essentially have two outcomes:
* Order confirmation
* Personalised recommendations to browse products further
# Create an S2S Event
This event should ideally be triggered by shipping partners such as Shiprocket, Delhivery indicating the product has been shipped. They would use Event API, where the payload attributes can contain:
* Order ID
* Order Value
# Create a Recommendation
In this section, let us create a recommendation based on the user's actions. Here, we would need a product catalog and two product sets.
1. Navigate to the MoEngage Dashboard and select **Content** > **Recommendations** from the left navigation. The Recommendations page is displayed. For more information, refer to [Creating User Action Recommendations](/user-guide/content/recommendations/basic-recommendations/user-actions-model).
2. At the top right corner, click **+ Create recommendation**. This will take you to the first step, "Select recommendation model."
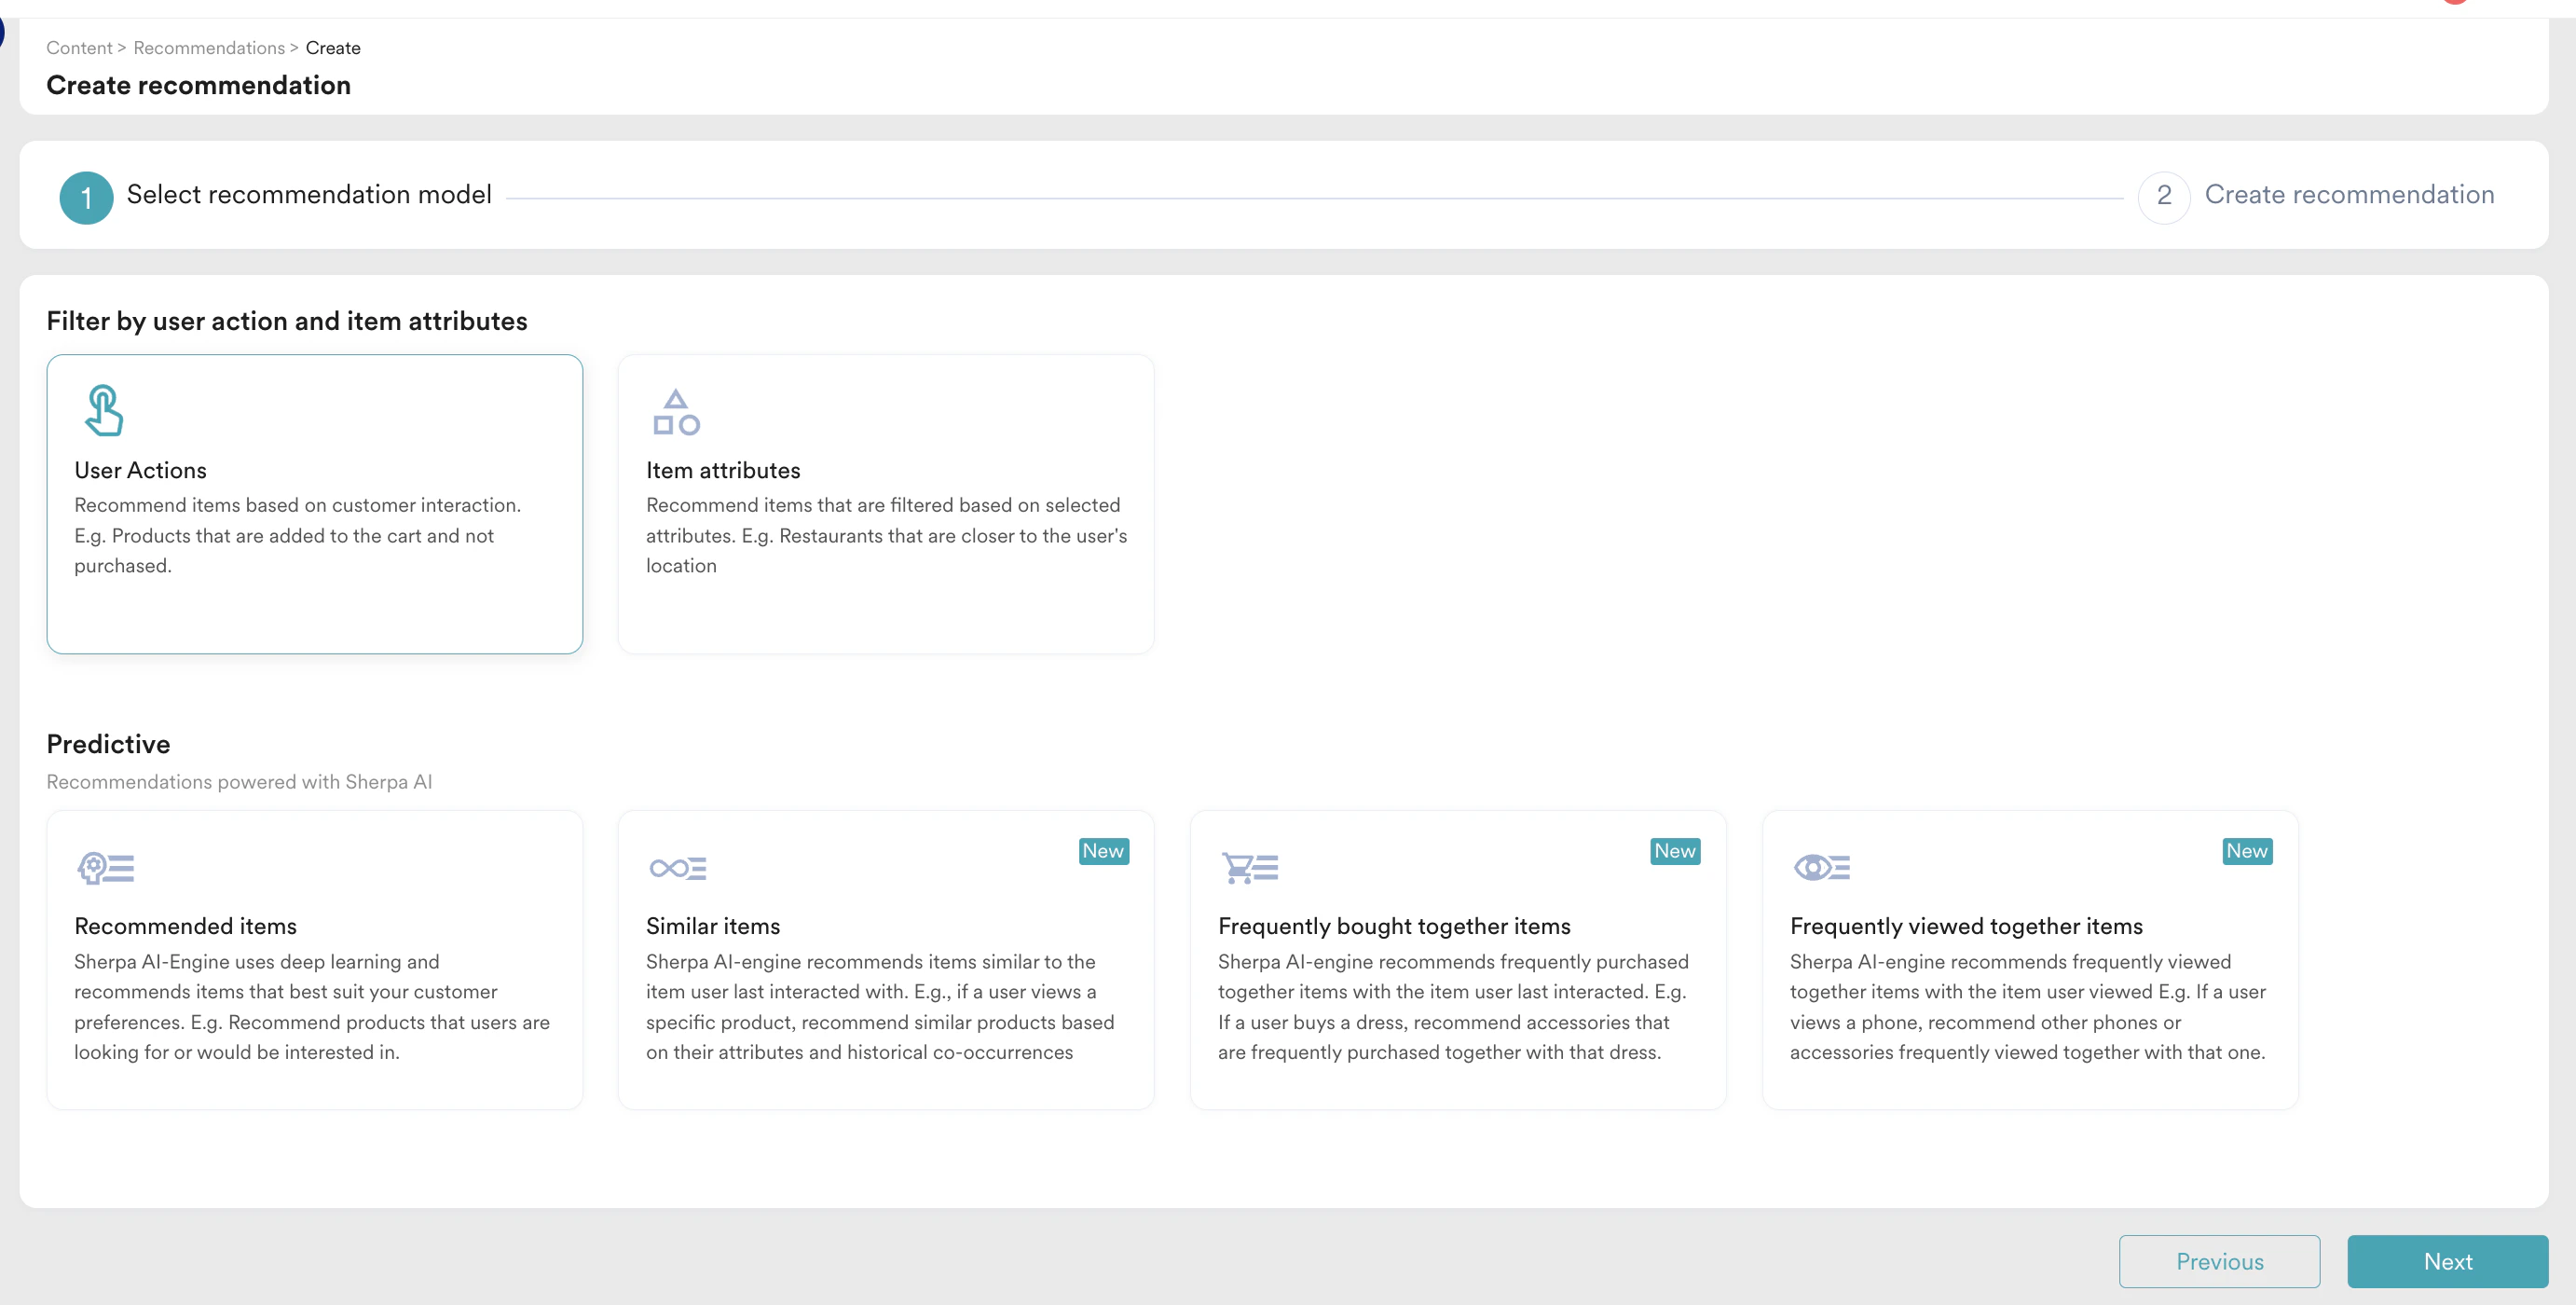 3. Select the **Recommended items** model and click **Next**. It takes you to the second step "Create recommendation". Enter the following details:
1. **Recommendation name**: Enter a name for the recommendation.
2. **Recommendation description**: Enter a description for the recommendation. This description will help you understand the model's aim.
3. **Catalog**: Select the catalog on which the recommendation will be worked.
3. Select the **Recommended items** model and click **Next**. It takes you to the second step "Create recommendation". Enter the following details:
1. **Recommendation name**: Enter a name for the recommendation.
2. **Recommendation description**: Enter a description for the recommendation. This description will help you understand the model's aim.
3. **Catalog**: Select the catalog on which the recommendation will be worked.
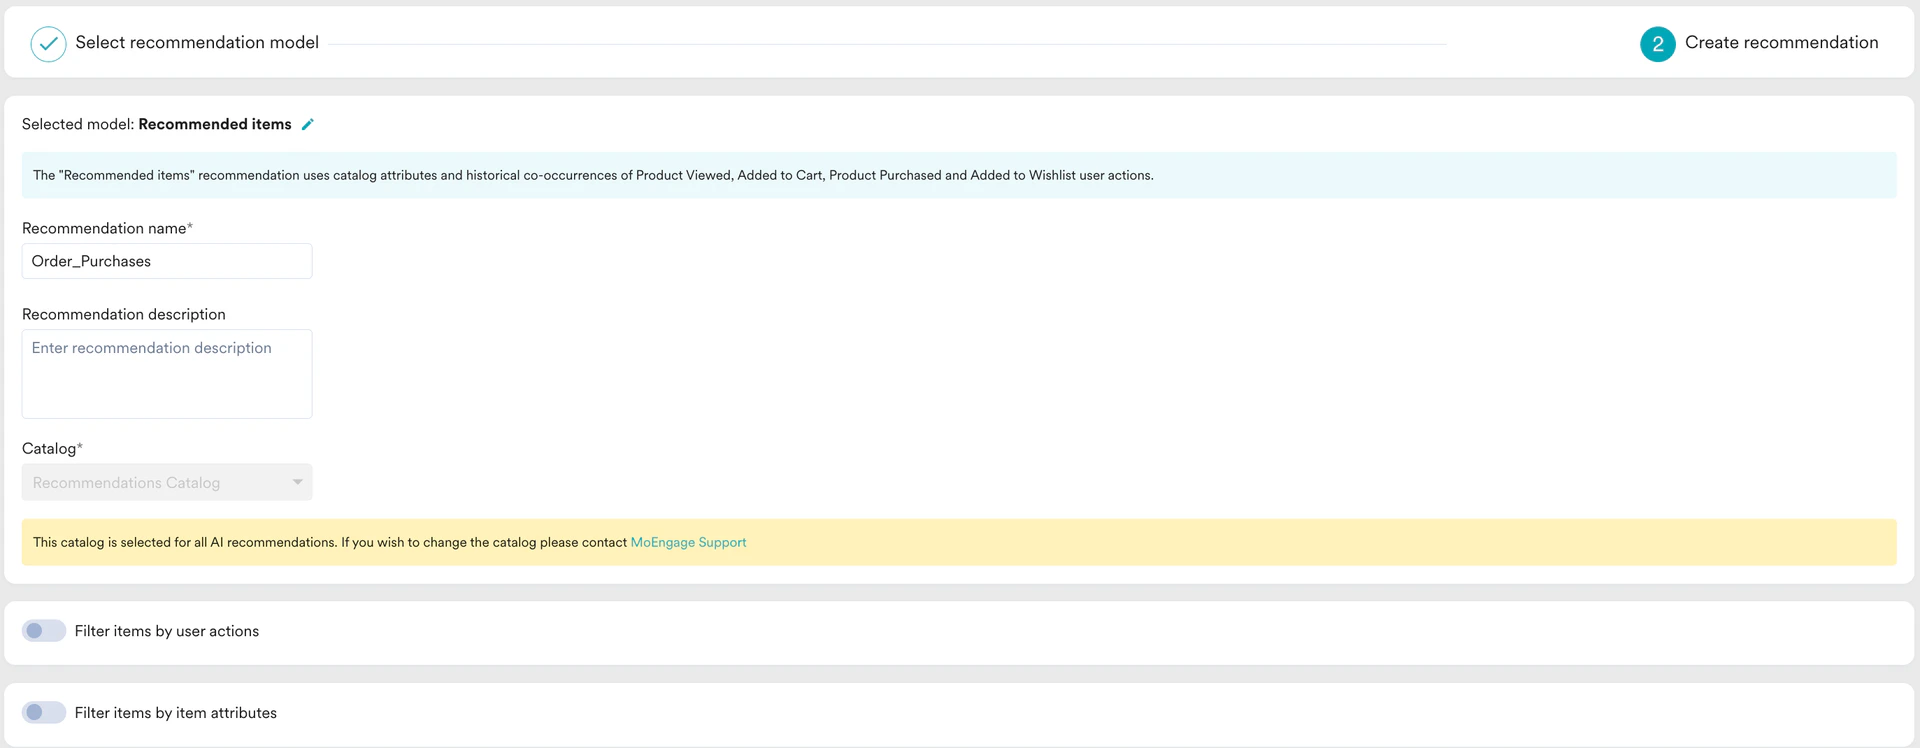 4. Click **Create** to save the changes and run the model. Its status will be Active on the Recommendations home page.
Now that we have created the recommendation, let us create and personalize a Push campaign.
# Create an Email Campaign
In this section, let us create an Email campaign.
## Step 1: Target Users
1. Navigate to the sidebar on the left and click **Engage** > **Campaigns** and click **+ Create campaign** or click **+ Create new** > **Campaign**.
2. Under **Outbound**, select **Email** > **Event Triggered**.
4. Click **Create** to save the changes and run the model. Its status will be Active on the Recommendations home page.
Now that we have created the recommendation, let us create and personalize a Push campaign.
# Create an Email Campaign
In this section, let us create an Email campaign.
## Step 1: Target Users
1. Navigate to the sidebar on the left and click **Engage** > **Campaigns** and click **+ Create campaign** or click **+ Create new** > **Campaign**.
2. Under **Outbound**, select **Email** > **Event Triggered**.
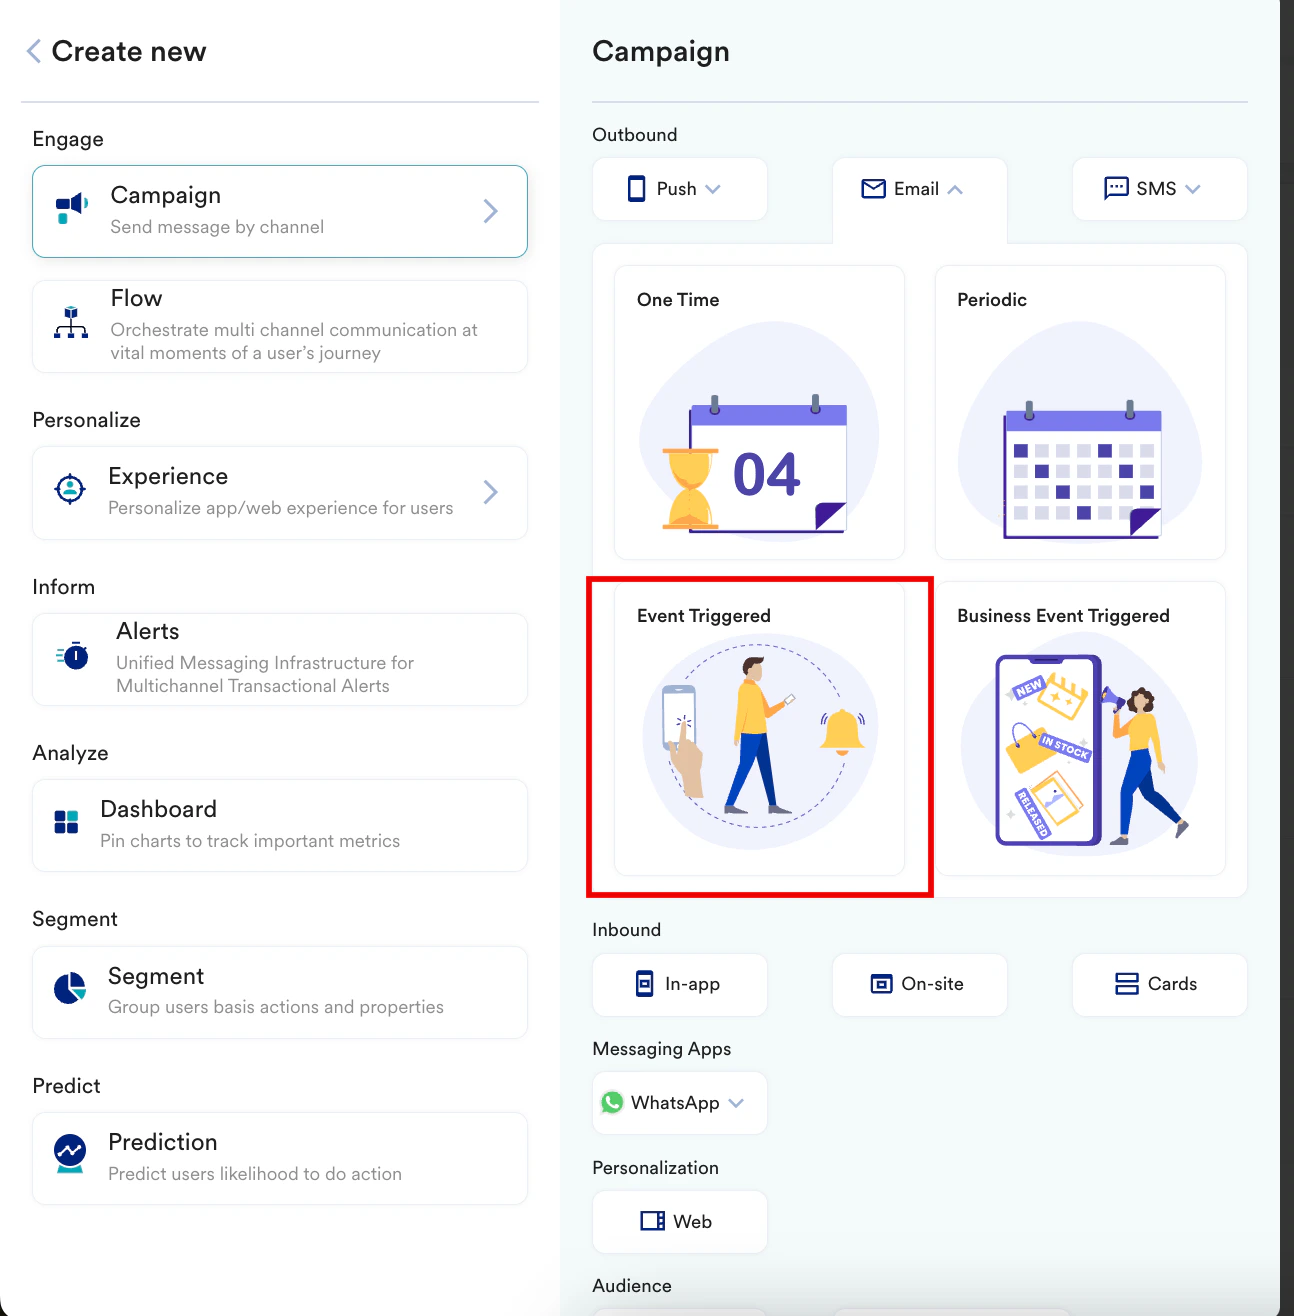 You are taken to the first step, "Target users" of defining your campaign.
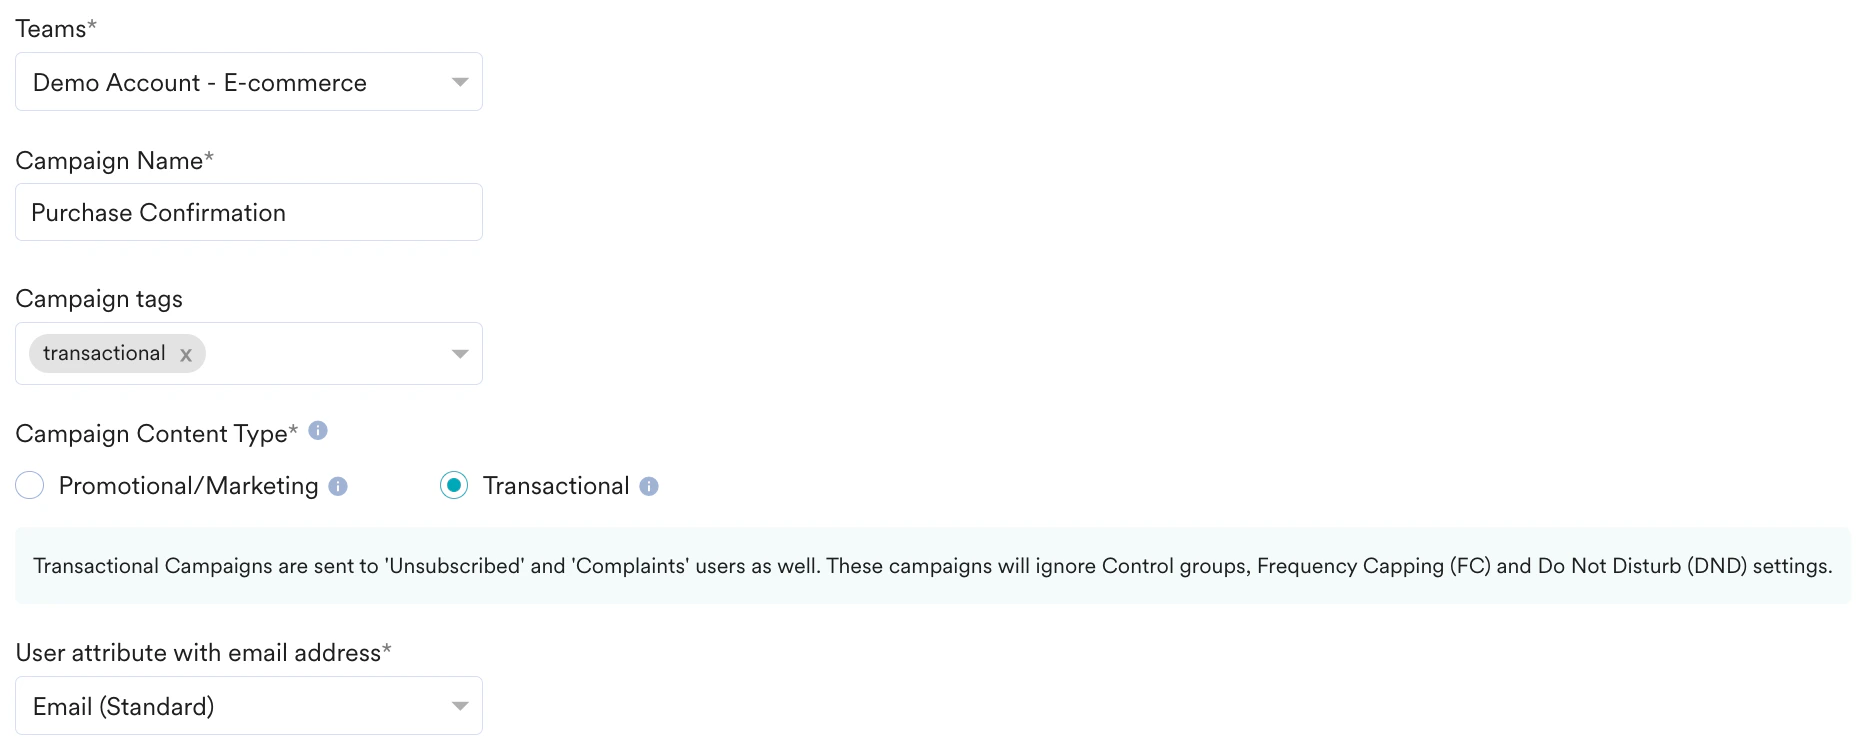
3. Enter the following details:
* **Team**: Select a team if your organization has teams enabled for your account. For more information, refer to [Teams in MoEngage](/user-guide/settings/account/team-management/teams-in-moengage).
* **Campaign Name**: Enter a name for the campaign.
* **Campaign Content Type**: Select **Transactional**.
* **User attribute with email address**: Select "Email (Standard)."
You are taken to the first step, "Target users" of defining your campaign.
3. Enter the following details:
* **Team**: Select a team if your organization has teams enabled for your account. For more information, refer to [Teams in MoEngage](/user-guide/settings/account/team-management/teams-in-moengage).
* **Campaign Name**: Enter a name for the campaign.
* **Campaign Content Type**: Select **Transactional**.
* **User attribute with email address**: Select "Email (Standard)."
 4. In the **Select condition** section, select the event that contains the purchase details as the trigger.
5. In the **Target Audience** section, select **All users**.
6. Click **Next** to move to the second step, "Content," where you can define the content for your Email campaign.
## Step 2: Content
1. Select the template that you would like to use. For our example, let us select the **Blank Template** on the **Drag and drop editor** tab.
2. In the **Subject** field, you can add personalization as **First Name** or any other user attribute. **
4. In the **Select condition** section, select the event that contains the purchase details as the trigger.
5. In the **Target Audience** section, select **All users**.
6. Click **Next** to move to the second step, "Content," where you can define the content for your Email campaign.
## Step 2: Content
1. Select the template that you would like to use. For our example, let us select the **Blank Template** on the **Drag and drop editor** tab.
2. In the **Subject** field, you can add personalization as **First Name** or any other user attribute. **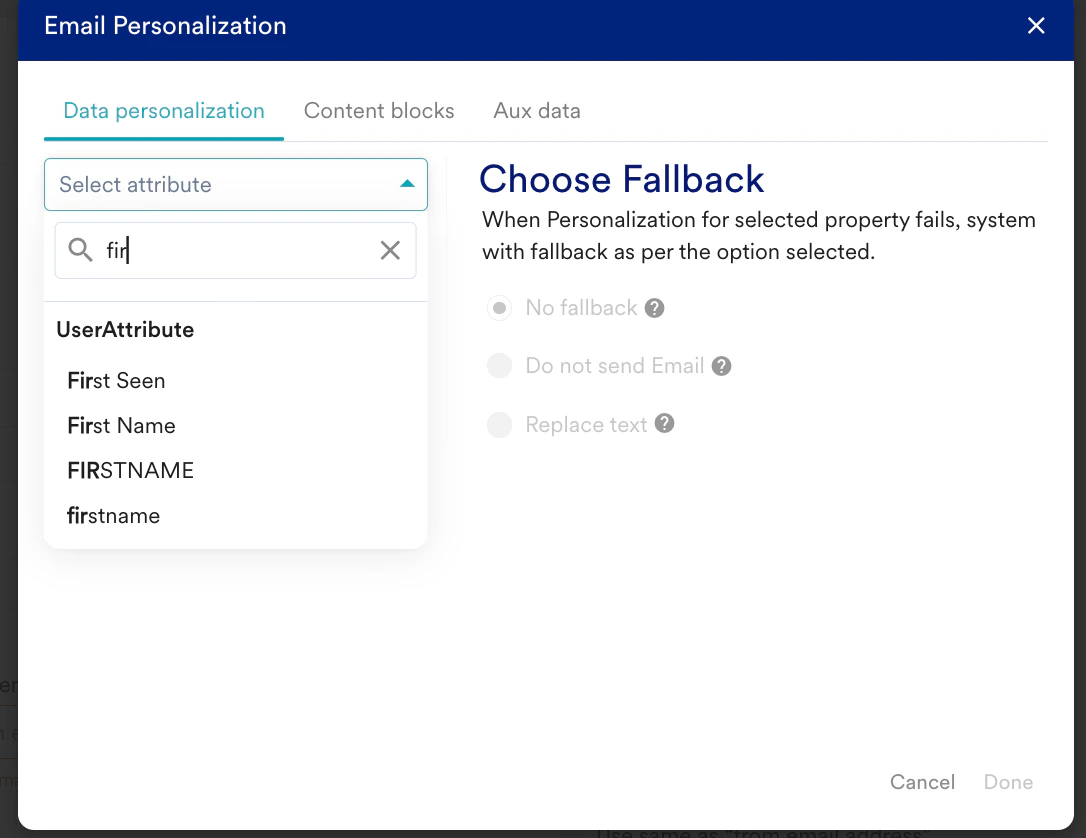 **
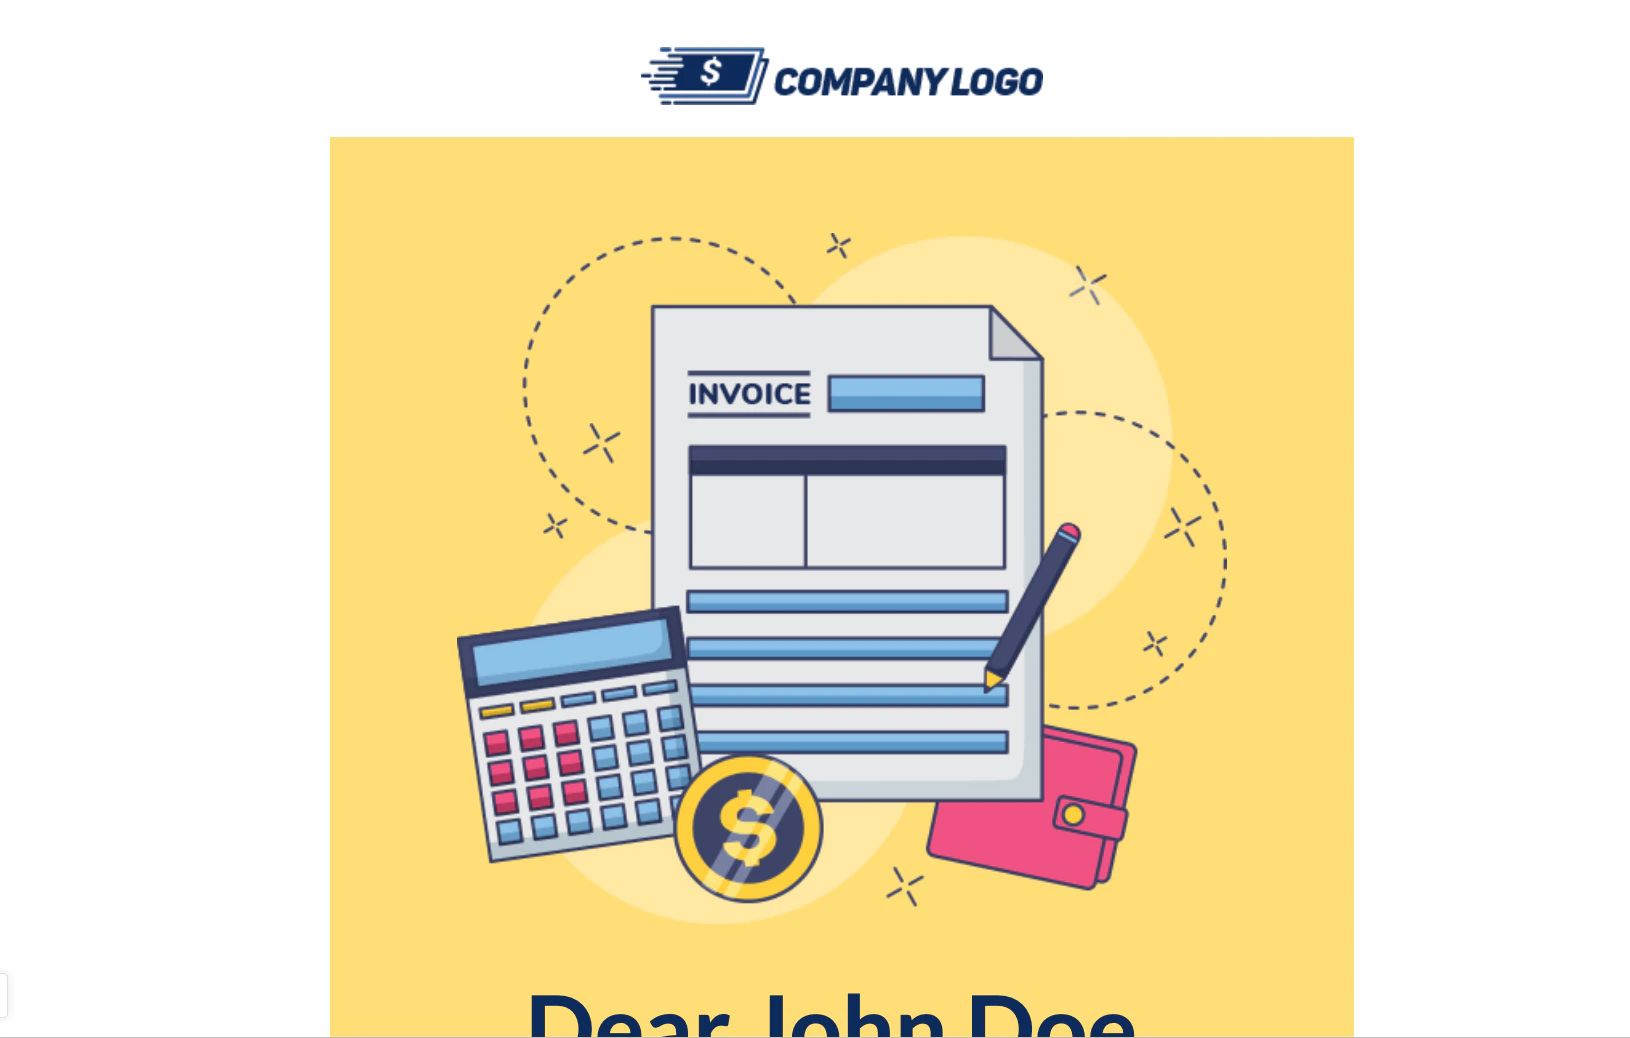
3. You can add a text box highlighting the Order ID and Order Value for further personalization.
**
3. You can add a text box highlighting the Order ID and Order Value for further personalization.
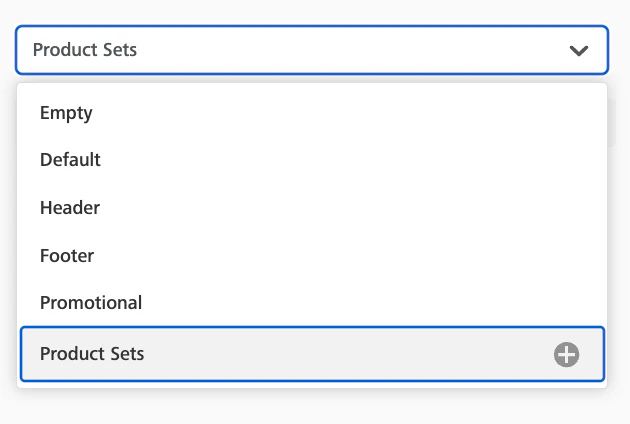
 4. For adding personalization, you can go to rows and select product sets
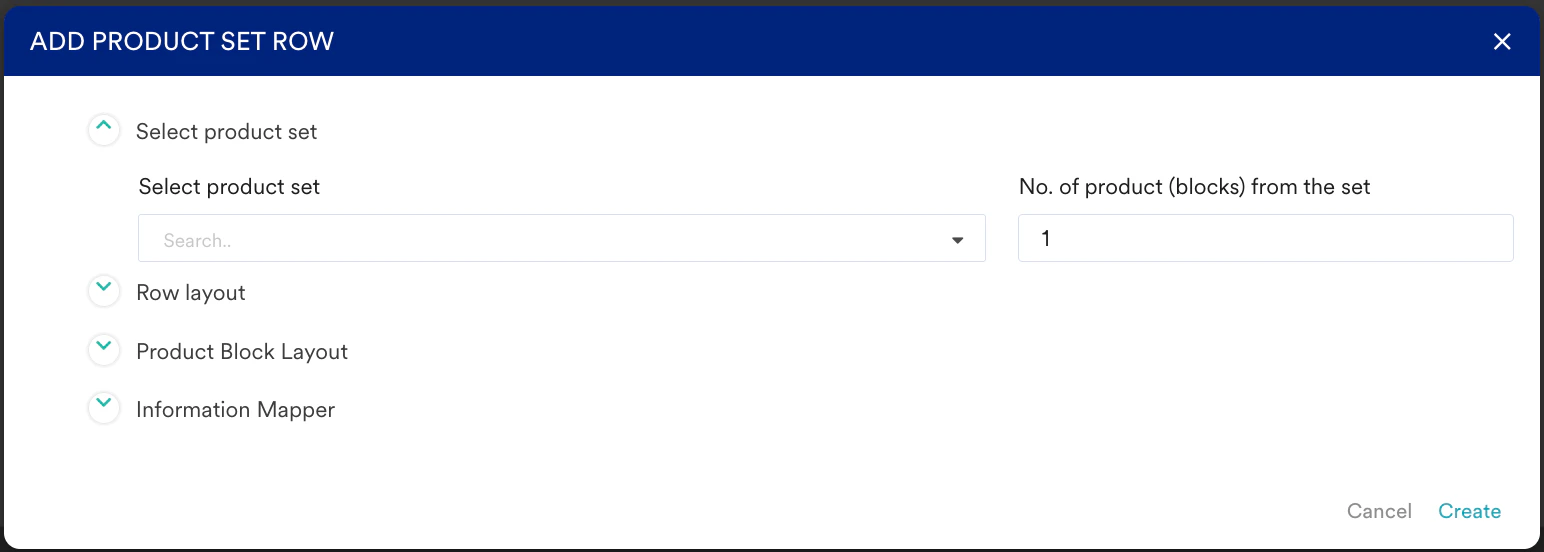
 5. You can choose the layout in which the product needs to be shown. You can pick and choose from the options below:
 6. Once this is created, drag and drop the personalized product set anywhere in the Email campaign as below:
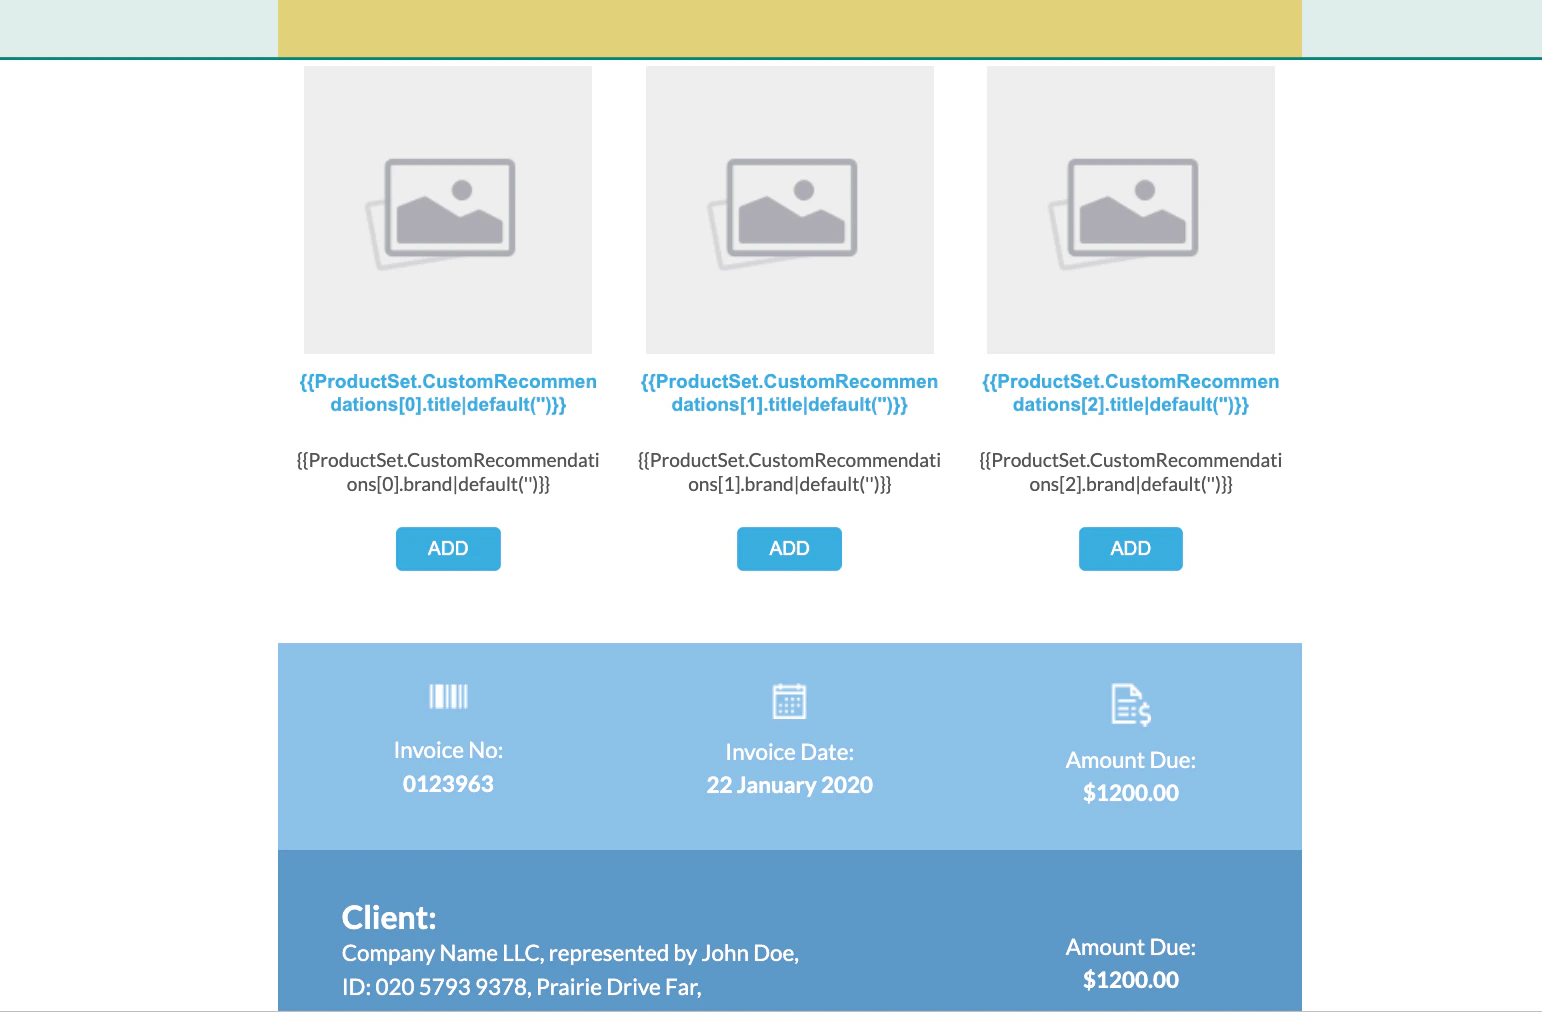 7. Click **Next** to move to the third step, "Schedule and goals," where you can define your campaign's schedule and goals.
## Step 3: Schedule and Goals
1. Define when to start and end this campaign and the conversion goal based on your requirements.
2. Change the deliverability settings based on your requirements. For more information, refer to [Create Email Campaigns](/user-guide/campaigns-and-channels/email/create/create-an-email-campaign).
3. Click **Publish**.
# Conclusion
In this use case, we created a recommendation and a personalized shipping campaign to nudge or entice users to watch or browse more products in the App.
7. Click **Next** to move to the third step, "Schedule and goals," where you can define your campaign's schedule and goals.
## Step 3: Schedule and Goals
1. Define when to start and end this campaign and the conversion goal based on your requirements.
2. Change the deliverability settings based on your requirements. For more information, refer to [Create Email Campaigns](/user-guide/campaigns-and-channels/email/create/create-an-email-campaign).
3. Click **Publish**.
# Conclusion
In this use case, we created a recommendation and a personalized shipping campaign to nudge or entice users to watch or browse more products in the App.