> ## Documentation Index
> Fetch the complete documentation index at: https://moengage.com/docs/llms.txt
> Use this file to discover all available pages before exploring further.
# Preview Settings
> Customize the device preview icons, app name, and text shown during push campaign creation to see how notifications will look on actual user devices.
With Preview Settings in Push, you can modify the icons and text that appear on the device preview in the second step of the campaign creation process.
This device preview lets you envision how the push notification will look on real devices and whether you need to format something or not.
To use this feature, navigate to **Settings > Channels > Push > Preview Settings**.
**Prerequisites**
For your [*Portfolio*](/user-guide/settings/account/portfolio/portfolio)*-enabled* workspace, before configuring Preview settings, you must add at least one project to your MoEngage [Portfolio](/user-guide/settings/account/portfolio/portfolio). For more information on how to add a project, refer [here](/user-guide/settings/account/portfolio/portfolio).
## Project selection
If your portfolio has multiple projects, a dropdown appears under the **Preview settings** tab. Select the project you want to configure from the dropdown menu. The related settings (such as the App name, App icon) load automatically. For portfolios with a single project, all settings are applied to that project.
Preview Settings do not affect real device output. The icons that you add here will only be shown to you on the device preview for push campaigns.
### Android
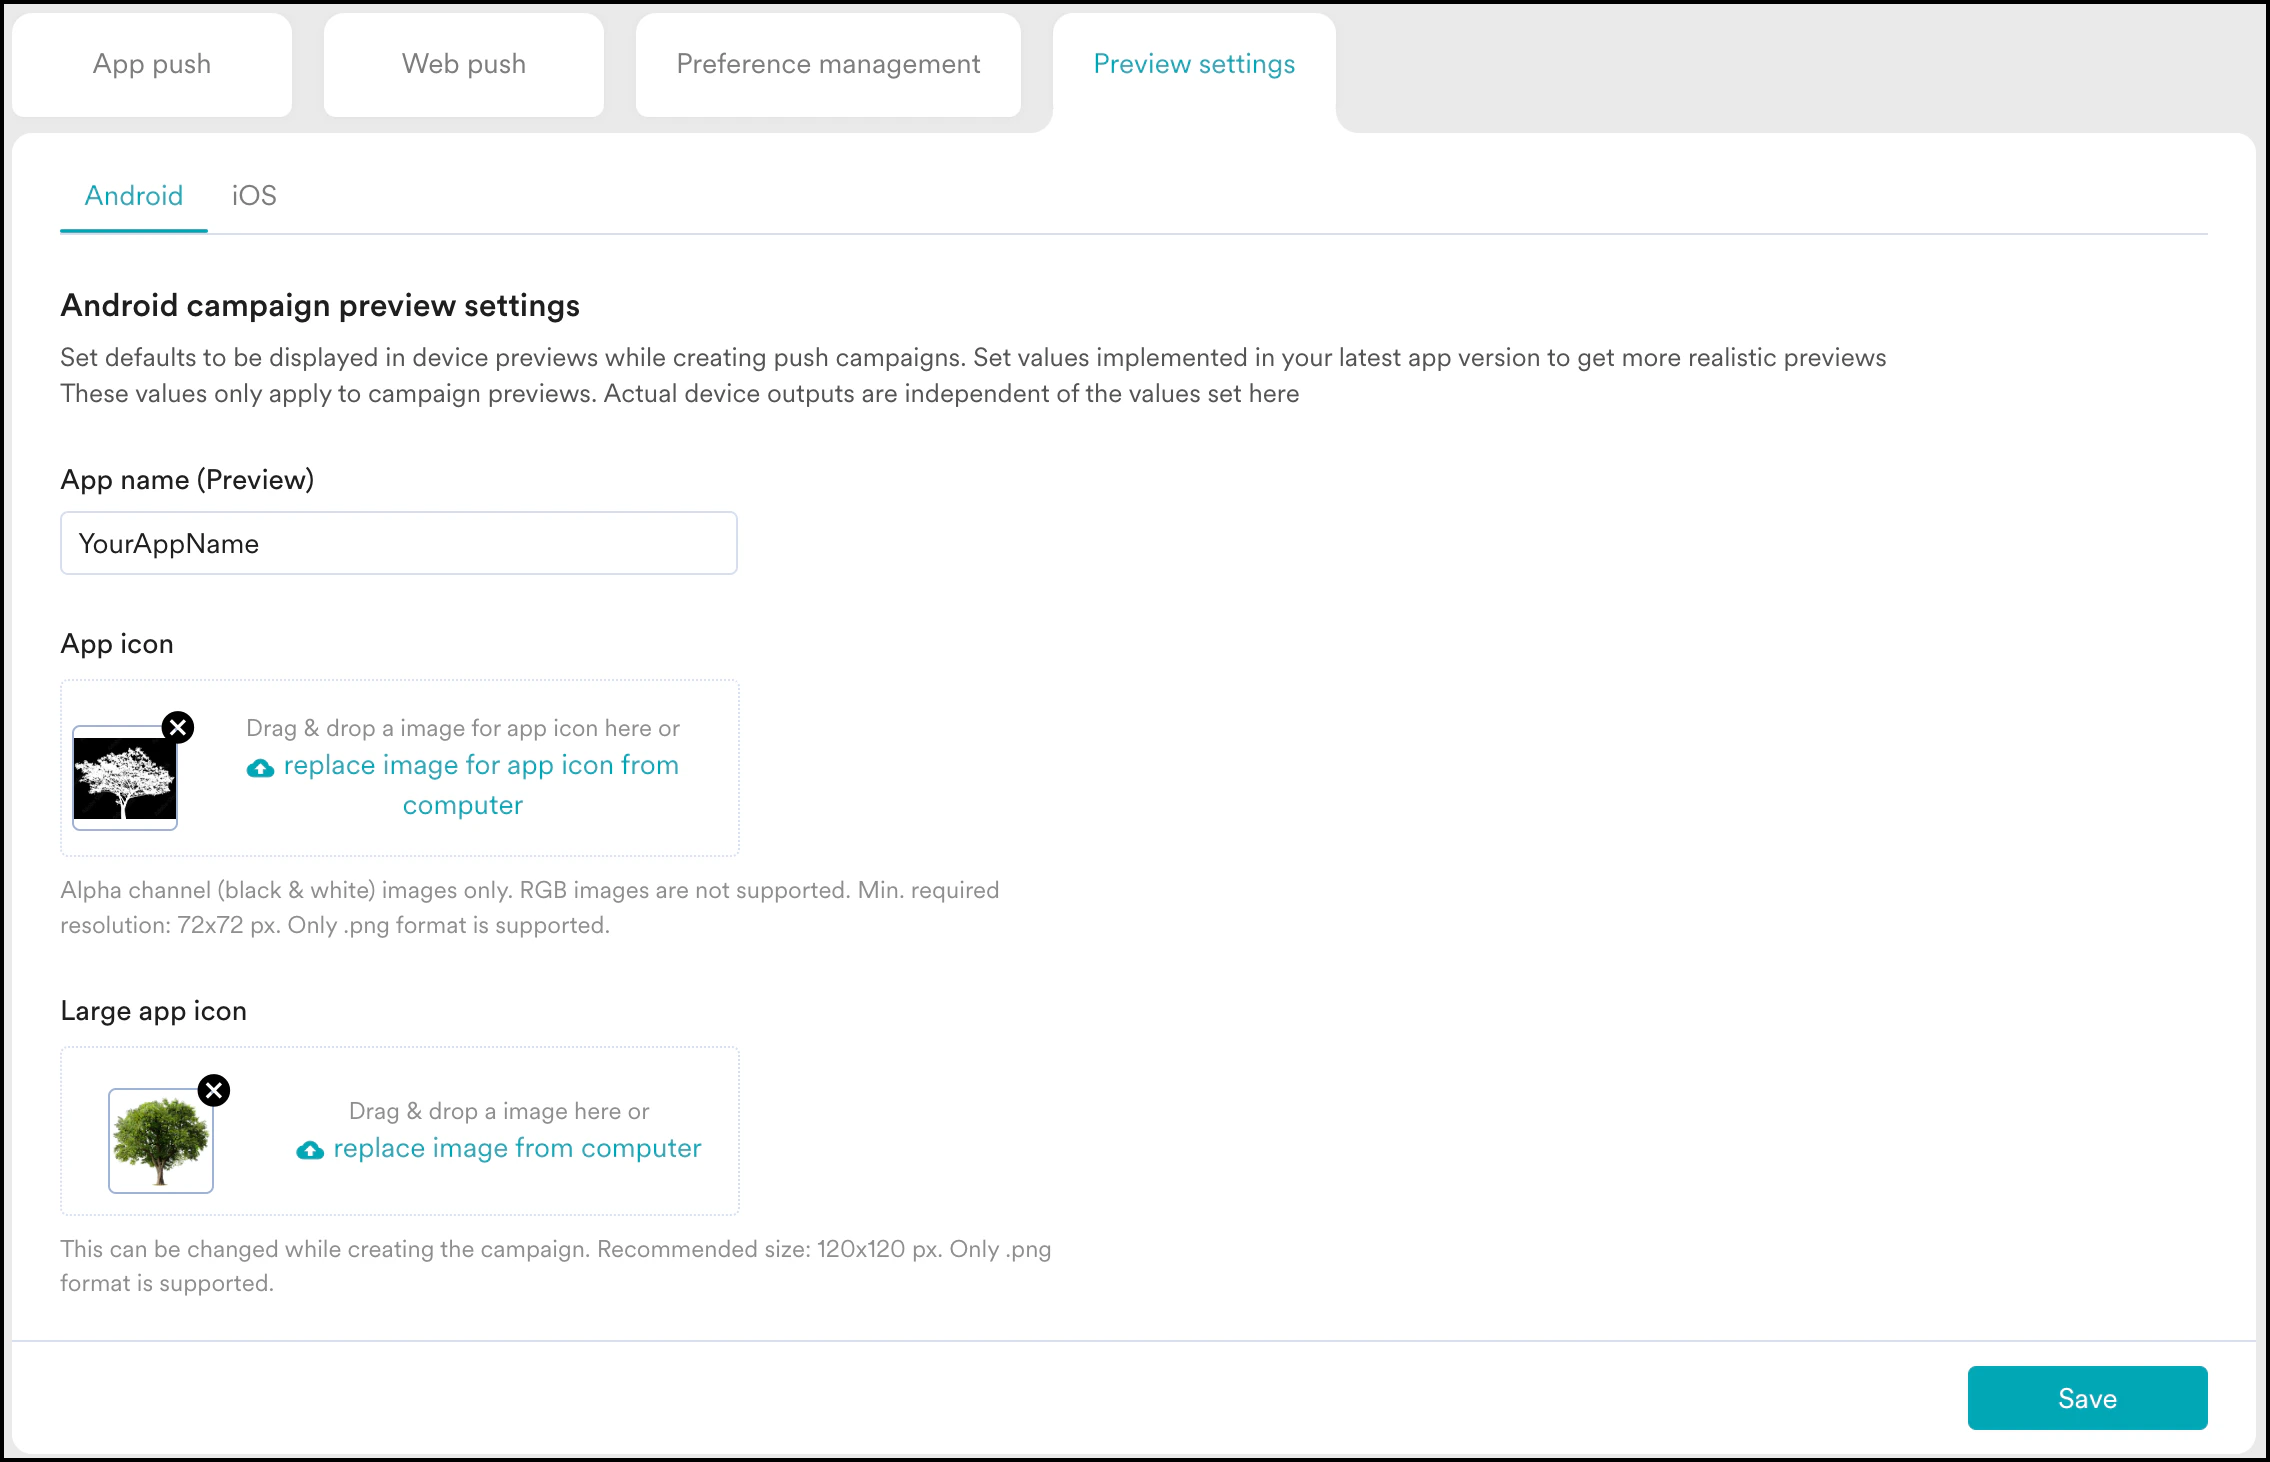 1. **App Name (preview)**: Enter the name of your app as seen on the device. The real app name is the one that appears on the Google Play console.
2. **App icon**: You can upload your app icon by clicking on the upload box. The real app icon is set when you integrate your app with MoEngage Push. To know more, refer to [Push Configuration](/developer-guide/android-sdk/push/basic/push-configuration).
* Only Alpha Channel images are supported.
* RGB images are not supported.
* Minimum required resolution: *72 x 72 px*
* Only images with the format *.png* are supported.
3. **Large app icon**: You can upload a large app icon by clicking on the upload box. The real Large app icon can be set while creating push campaigns.
* Recommended resolution: *120 x 120 px*
* Only images with the format *.png* are supported.
#### Campaign Preview
1. **App Name (preview)**: Enter the name of your app as seen on the device. The real app name is the one that appears on the Google Play console.
2. **App icon**: You can upload your app icon by clicking on the upload box. The real app icon is set when you integrate your app with MoEngage Push. To know more, refer to [Push Configuration](/developer-guide/android-sdk/push/basic/push-configuration).
* Only Alpha Channel images are supported.
* RGB images are not supported.
* Minimum required resolution: *72 x 72 px*
* Only images with the format *.png* are supported.
3. **Large app icon**: You can upload a large app icon by clicking on the upload box. The real Large app icon can be set while creating push campaigns.
* Recommended resolution: *120 x 120 px*
* Only images with the format *.png* are supported.
#### Campaign Preview
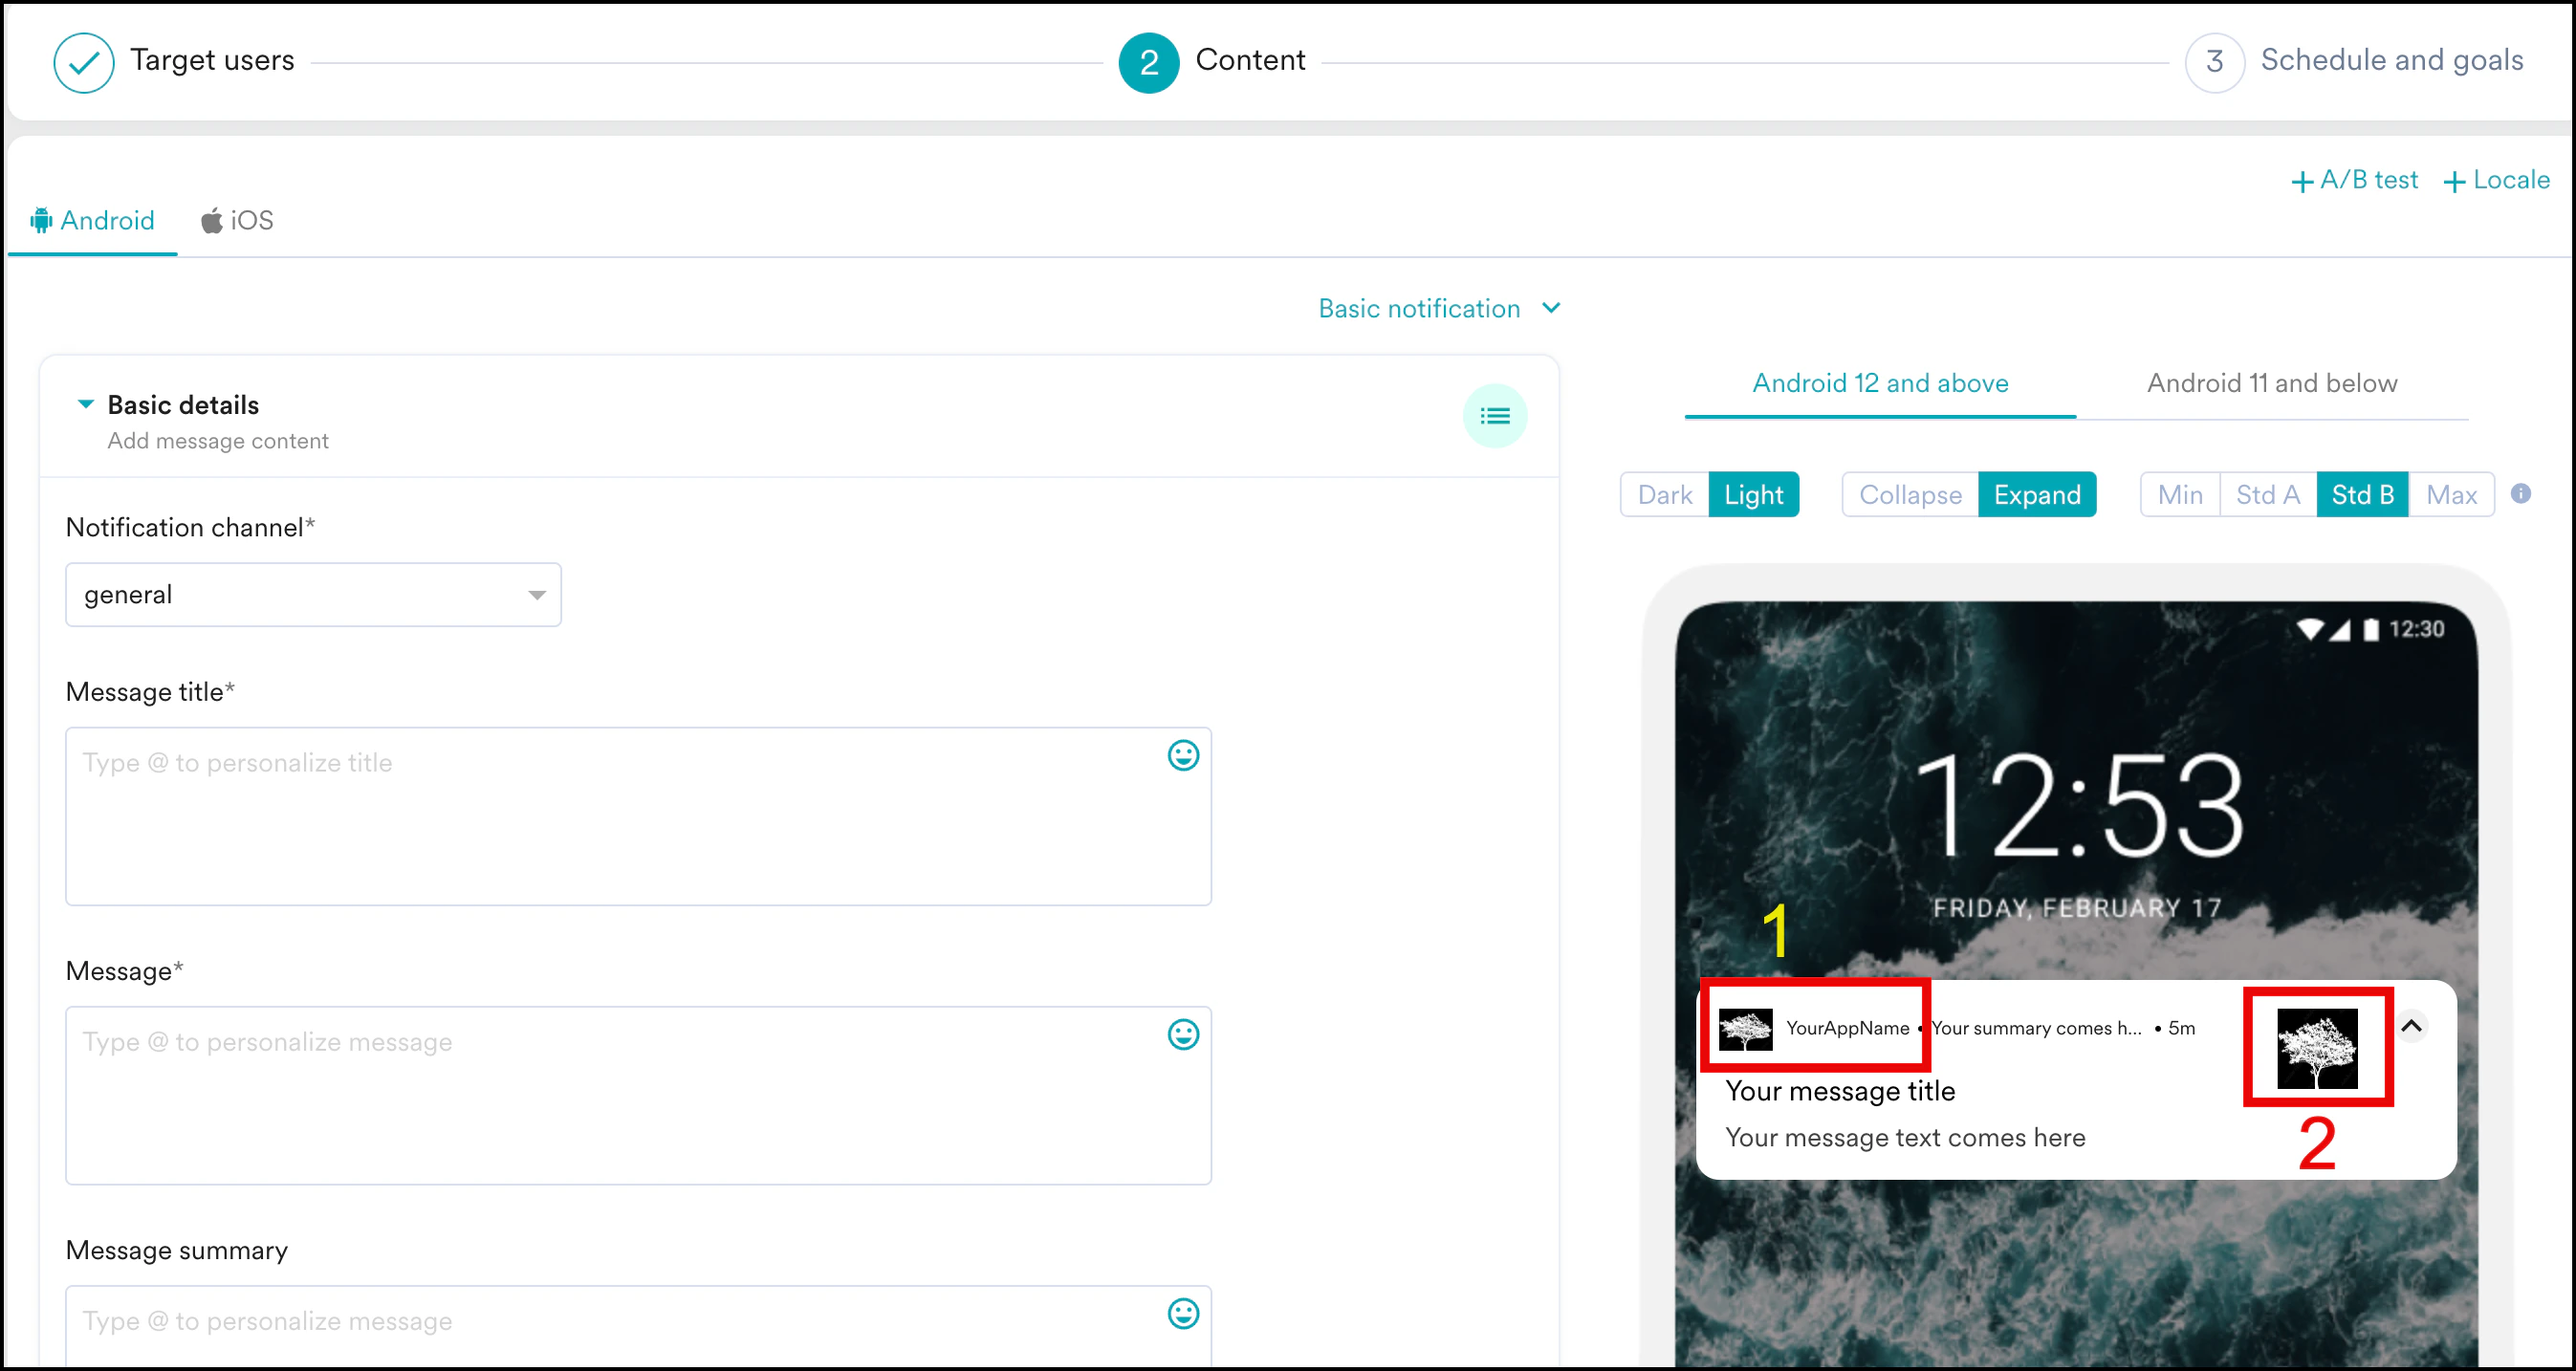 In this image, the number **1** highlights the **App Icon** and **App Name**. The number **2** highlights the **Large App Icon**.
### iOS
In this image, the number **1** highlights the **App Icon** and **App Name**. The number **2** highlights the **Large App Icon**.
### iOS
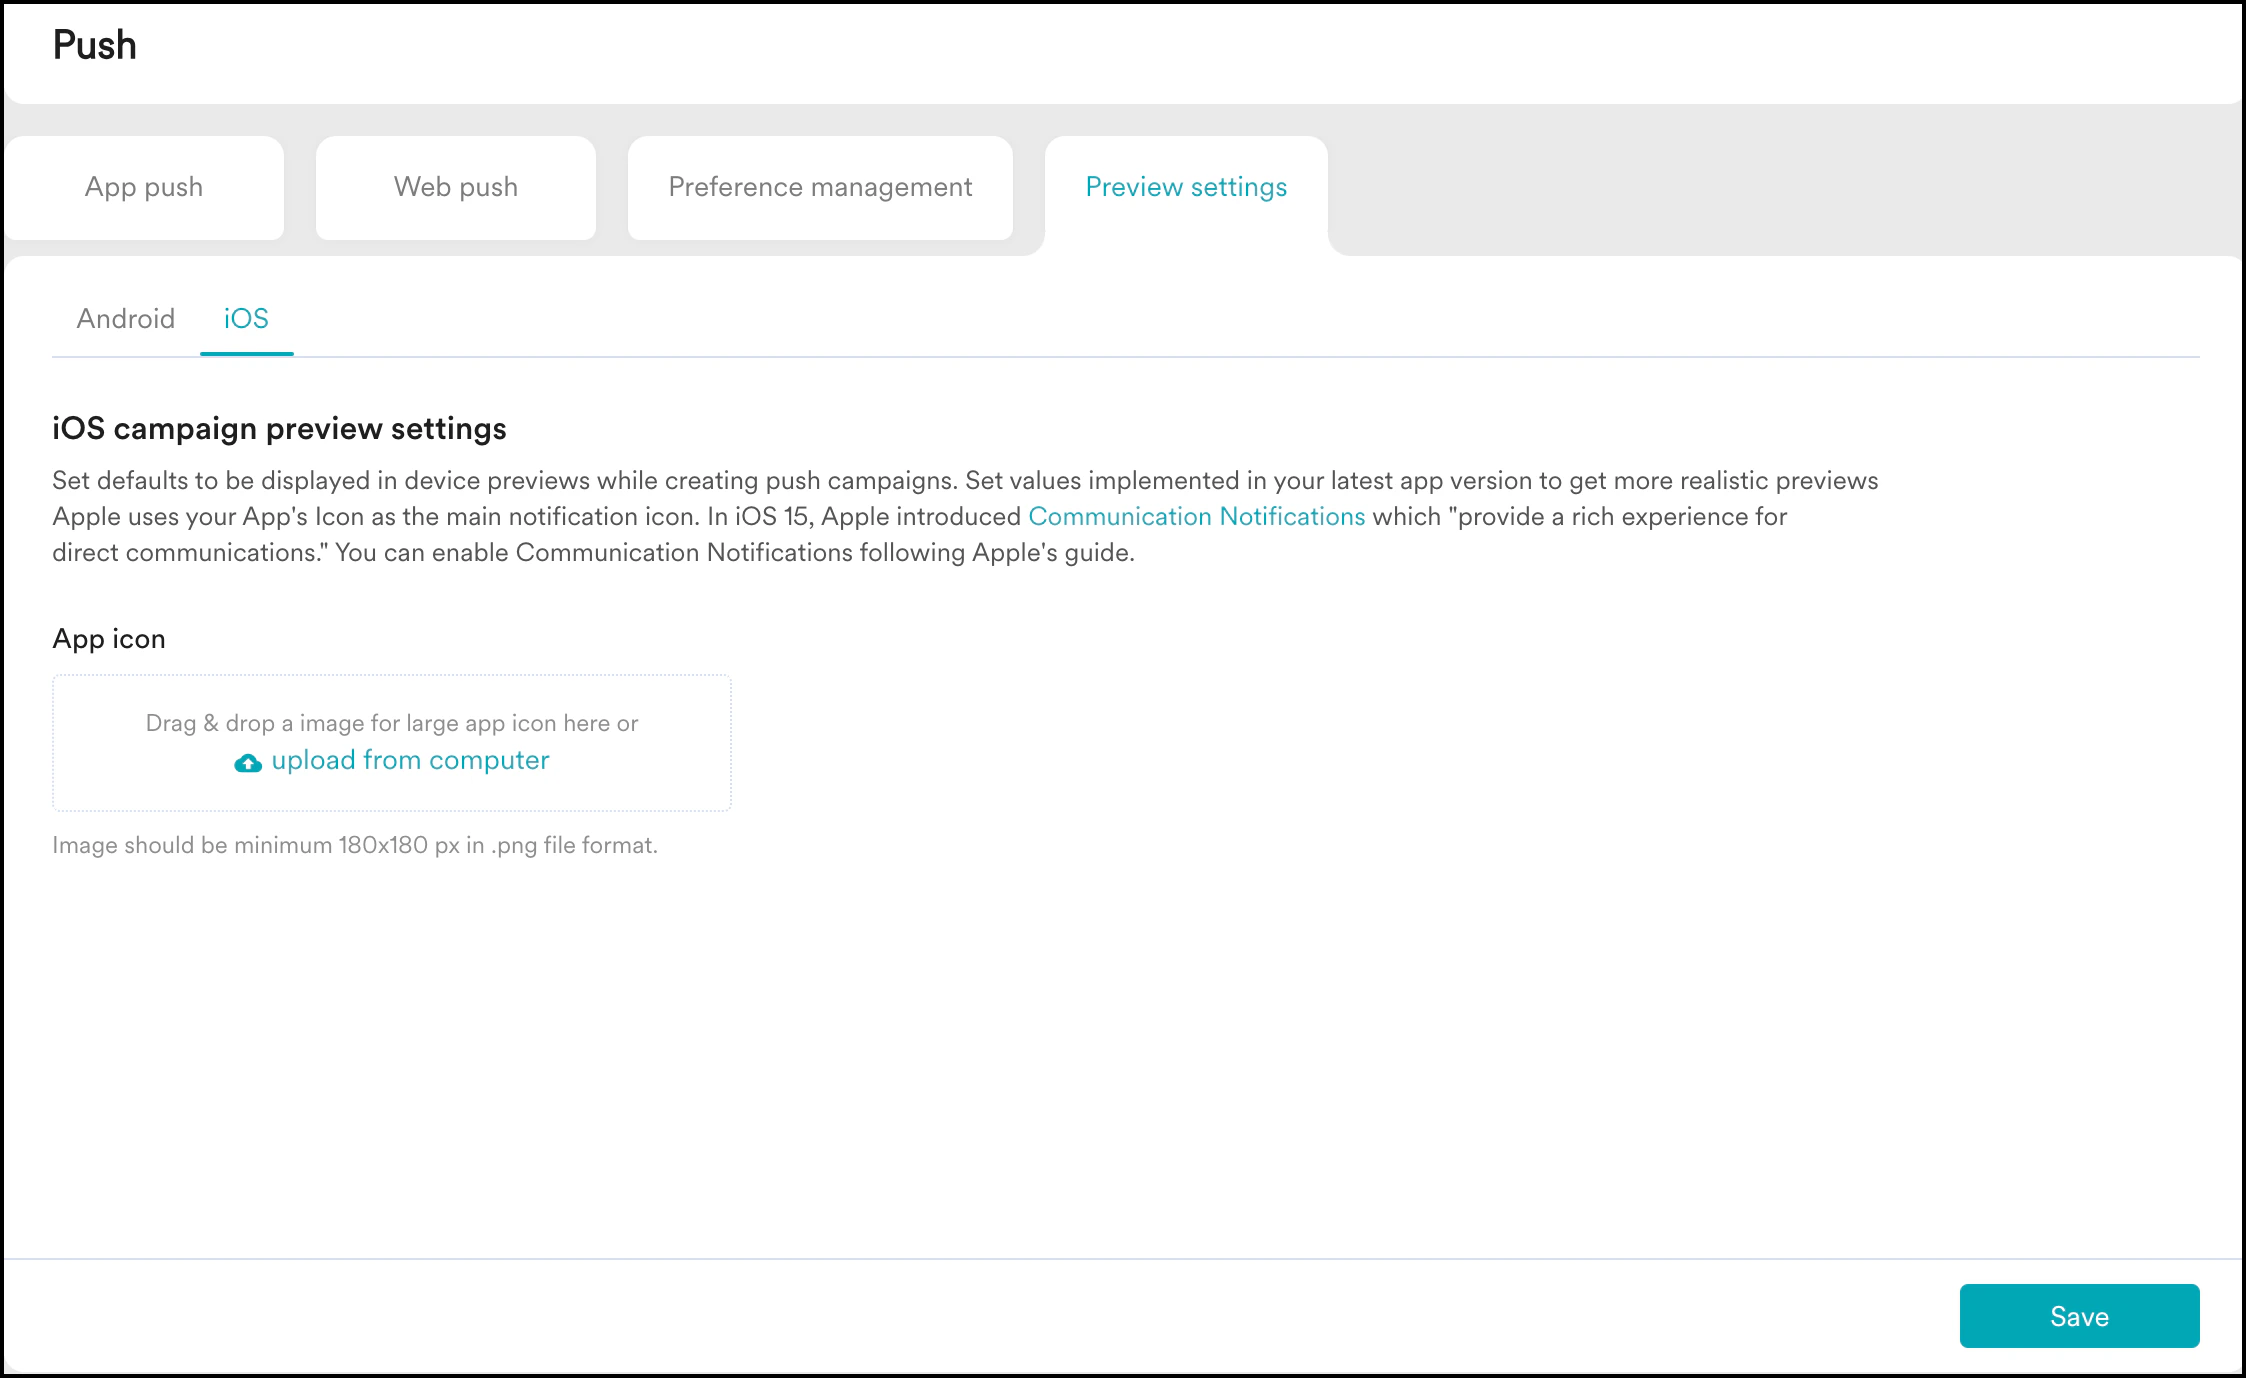 **App Icon**: You can upload your custom app icon by clicking on the upload box. Use the same icon you have used as the app icon for your iOS app.
* Minimum resolution: *180 x 180 px*
* Only images with the format *.png* are supported.
#### Campaign Preview
**App Icon**: You can upload your custom app icon by clicking on the upload box. Use the same icon you have used as the app icon for your iOS app.
* Minimum resolution: *180 x 180 px*
* Only images with the format *.png* are supported.
#### Campaign Preview
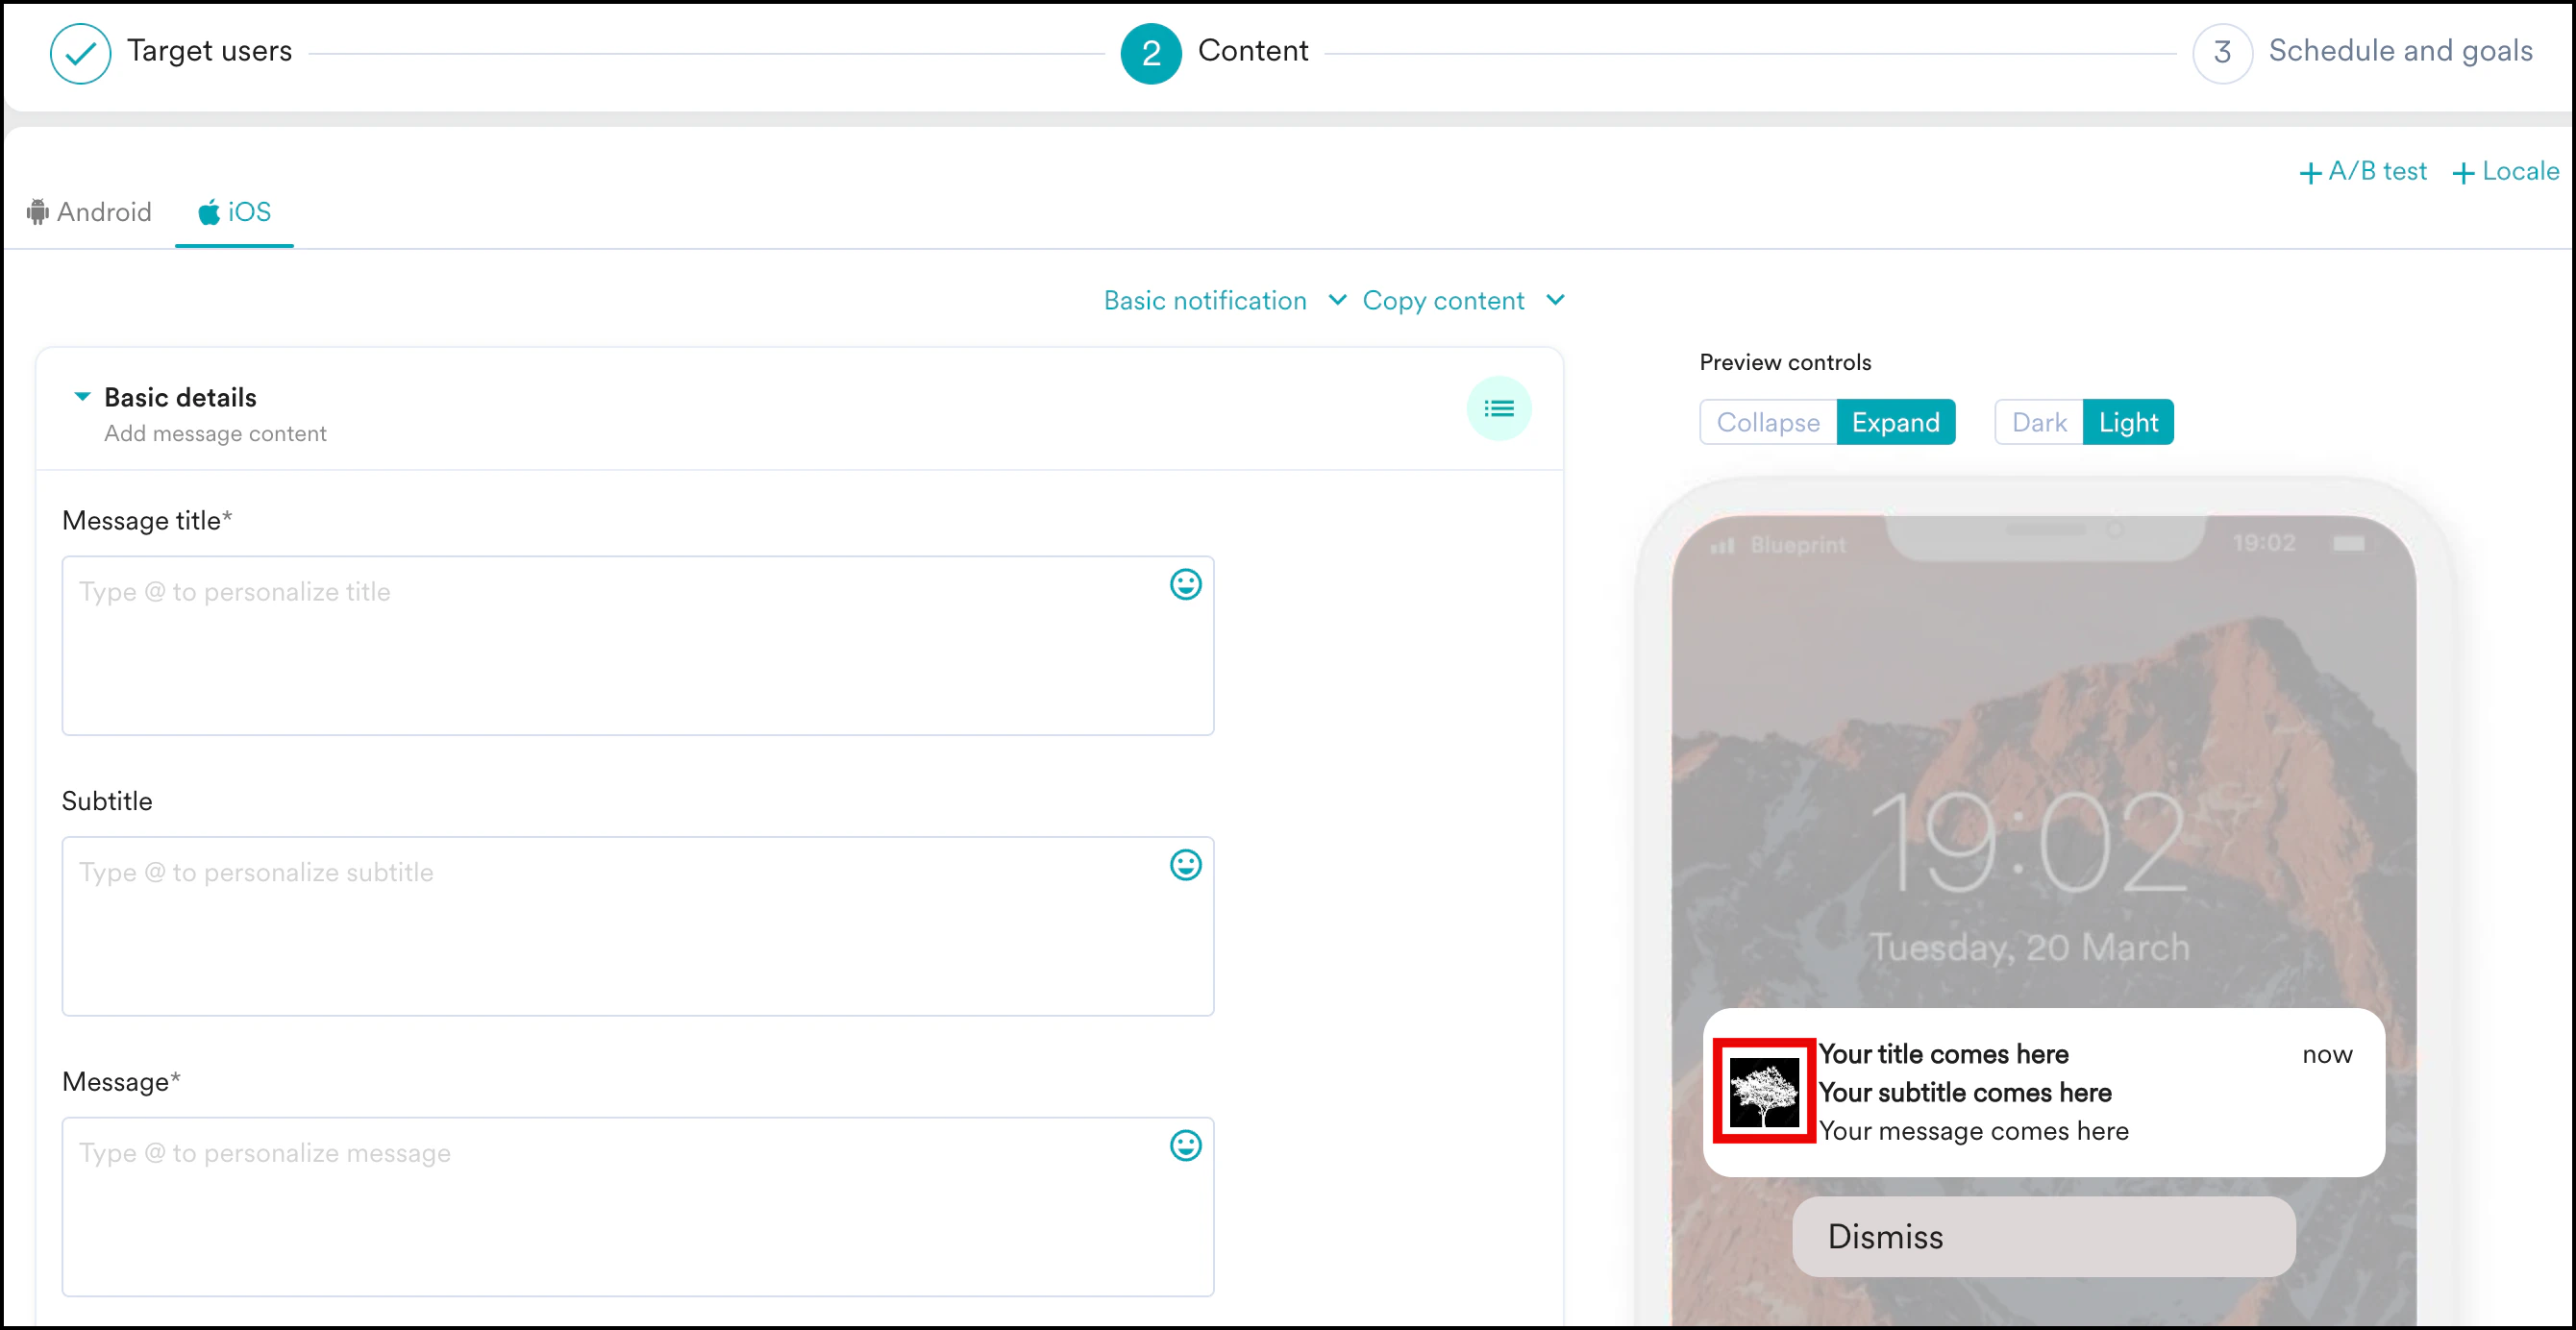 In this image, the highlighted box in the preview is the **App Icon**.