> ## Documentation Index
> Fetch the complete documentation index at: https://moengage.com/docs/llms.txt
> Use this file to discover all available pages before exploring further.
# Create OSM Campaign for TV
> Create On-site Messaging campaigns for TV platforms in MoEngage. Engage your TV app users with personalized messages at key moments to drive action.
# Overview
On-Site Messaging (OSM) campaigns are powerful tools to engage users directly on your TV application. This article walks you through the steps to create an On-Site Messaging (OSM) campaign specifically tailored for TV platforms in MoEngage. This feature is for digital marketers who want to deliver personalized messages to their TV app users at key moments to improve engagement and drive specific actions.
# Navigation
1. On the sidebar menu in MoEngage, hover over the **Engage** menu item .
The **Engage** menu appears.
2. Click **+ New Campaign**.
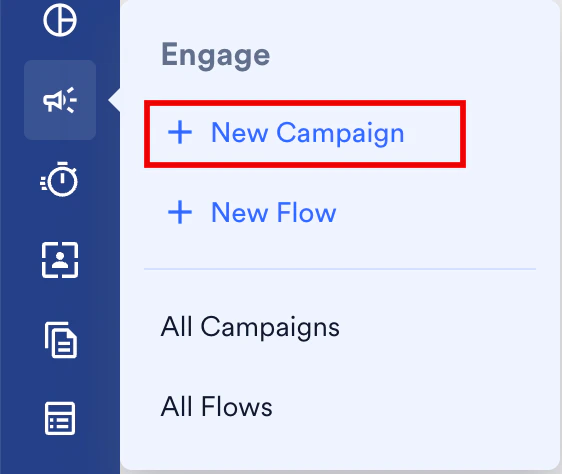 You can also click **All Campaigns** on the **Engage** menu and then click **+ Create campaign** on the All campaigns page.
3. On the **New Campaign** dialog box, under **Inbound**, click **On-site**.
You can also click **All Campaigns** on the **Engage** menu and then click **+ Create campaign** on the All campaigns page.
3. On the **New Campaign** dialog box, under **Inbound**, click **On-site**.
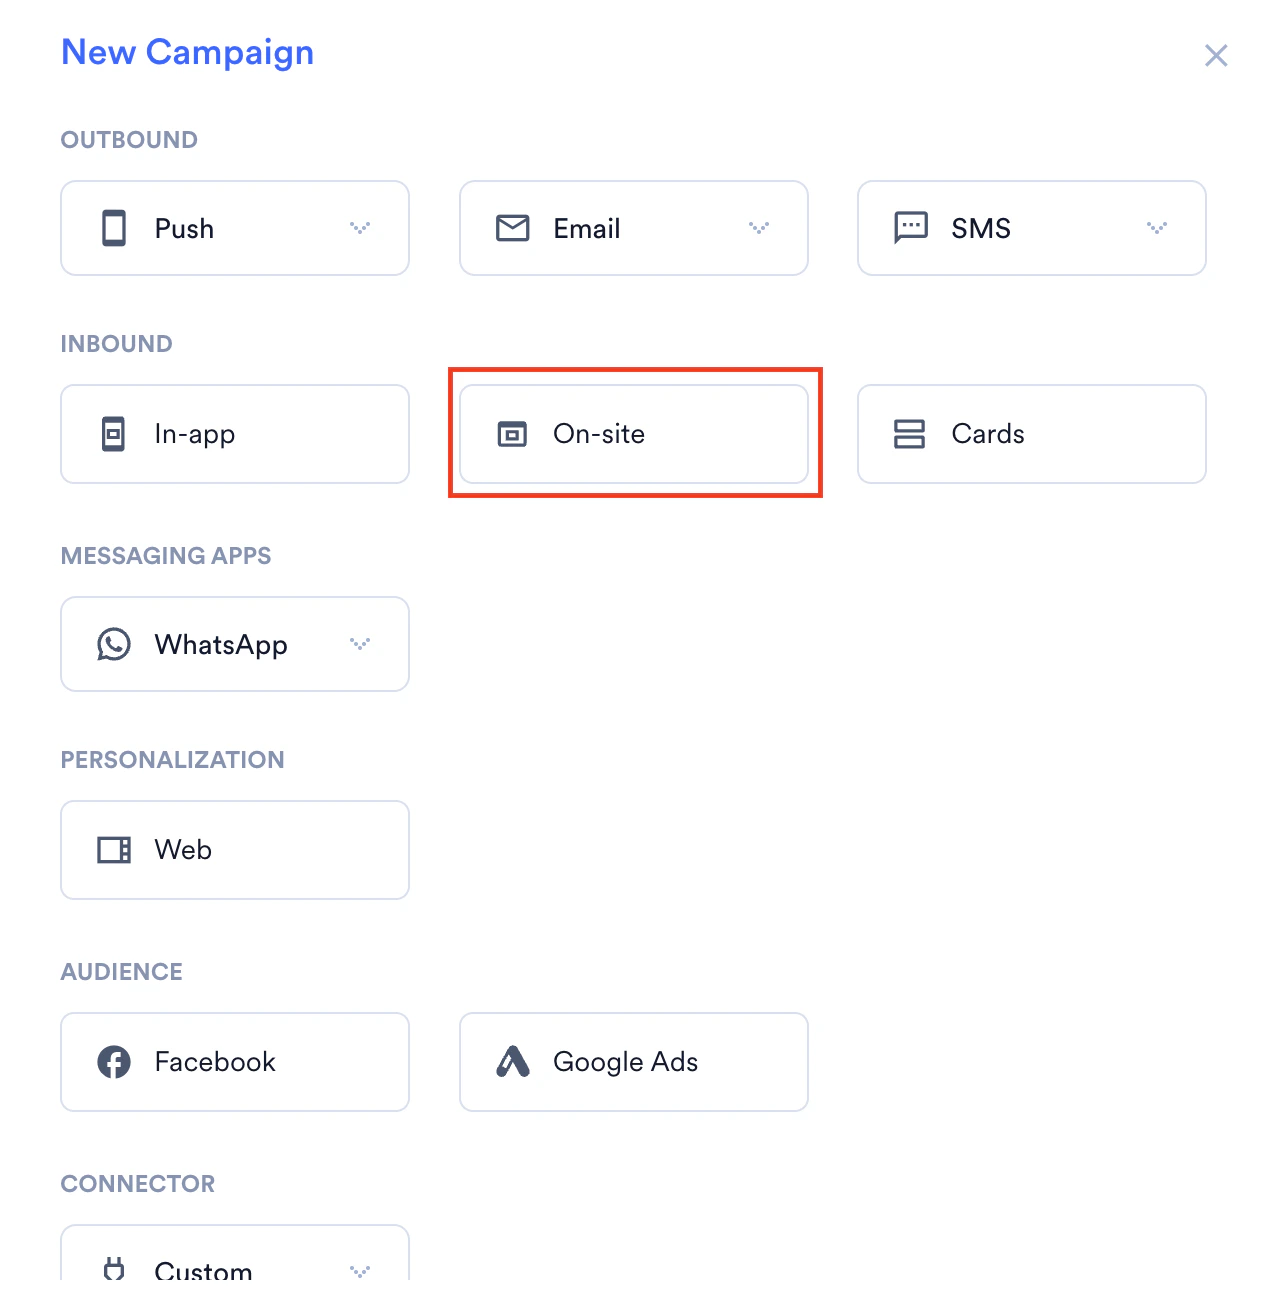 The OSM campaign creation page is displayed.
# Steps
Here are the three main steps to creating a TV On-Site Messaging campaign:
1. [**Target users**](#step-1-target-users): Define the audience for your campaign.
2. [**Content**](#step-2-content): Create the message content for your TV campaign.
3. [**Schedule and Goals**](#step-3-schedule-and-goals): Set the campaign's delivery time and define conversion goals.
## Step 1: Target Users
On the Target Users page, go to the **Target Platforms** section. Select **TV** as the platform, and then fill in the remaining campaign details.
The OSM campaign creation page is displayed.
# Steps
Here are the three main steps to creating a TV On-Site Messaging campaign:
1. [**Target users**](#step-1-target-users): Define the audience for your campaign.
2. [**Content**](#step-2-content): Create the message content for your TV campaign.
3. [**Schedule and Goals**](#step-3-schedule-and-goals): Set the campaign's delivery time and define conversion goals.
## Step 1: Target Users
On the Target Users page, go to the **Target Platforms** section. Select **TV** as the platform, and then fill in the remaining campaign details.
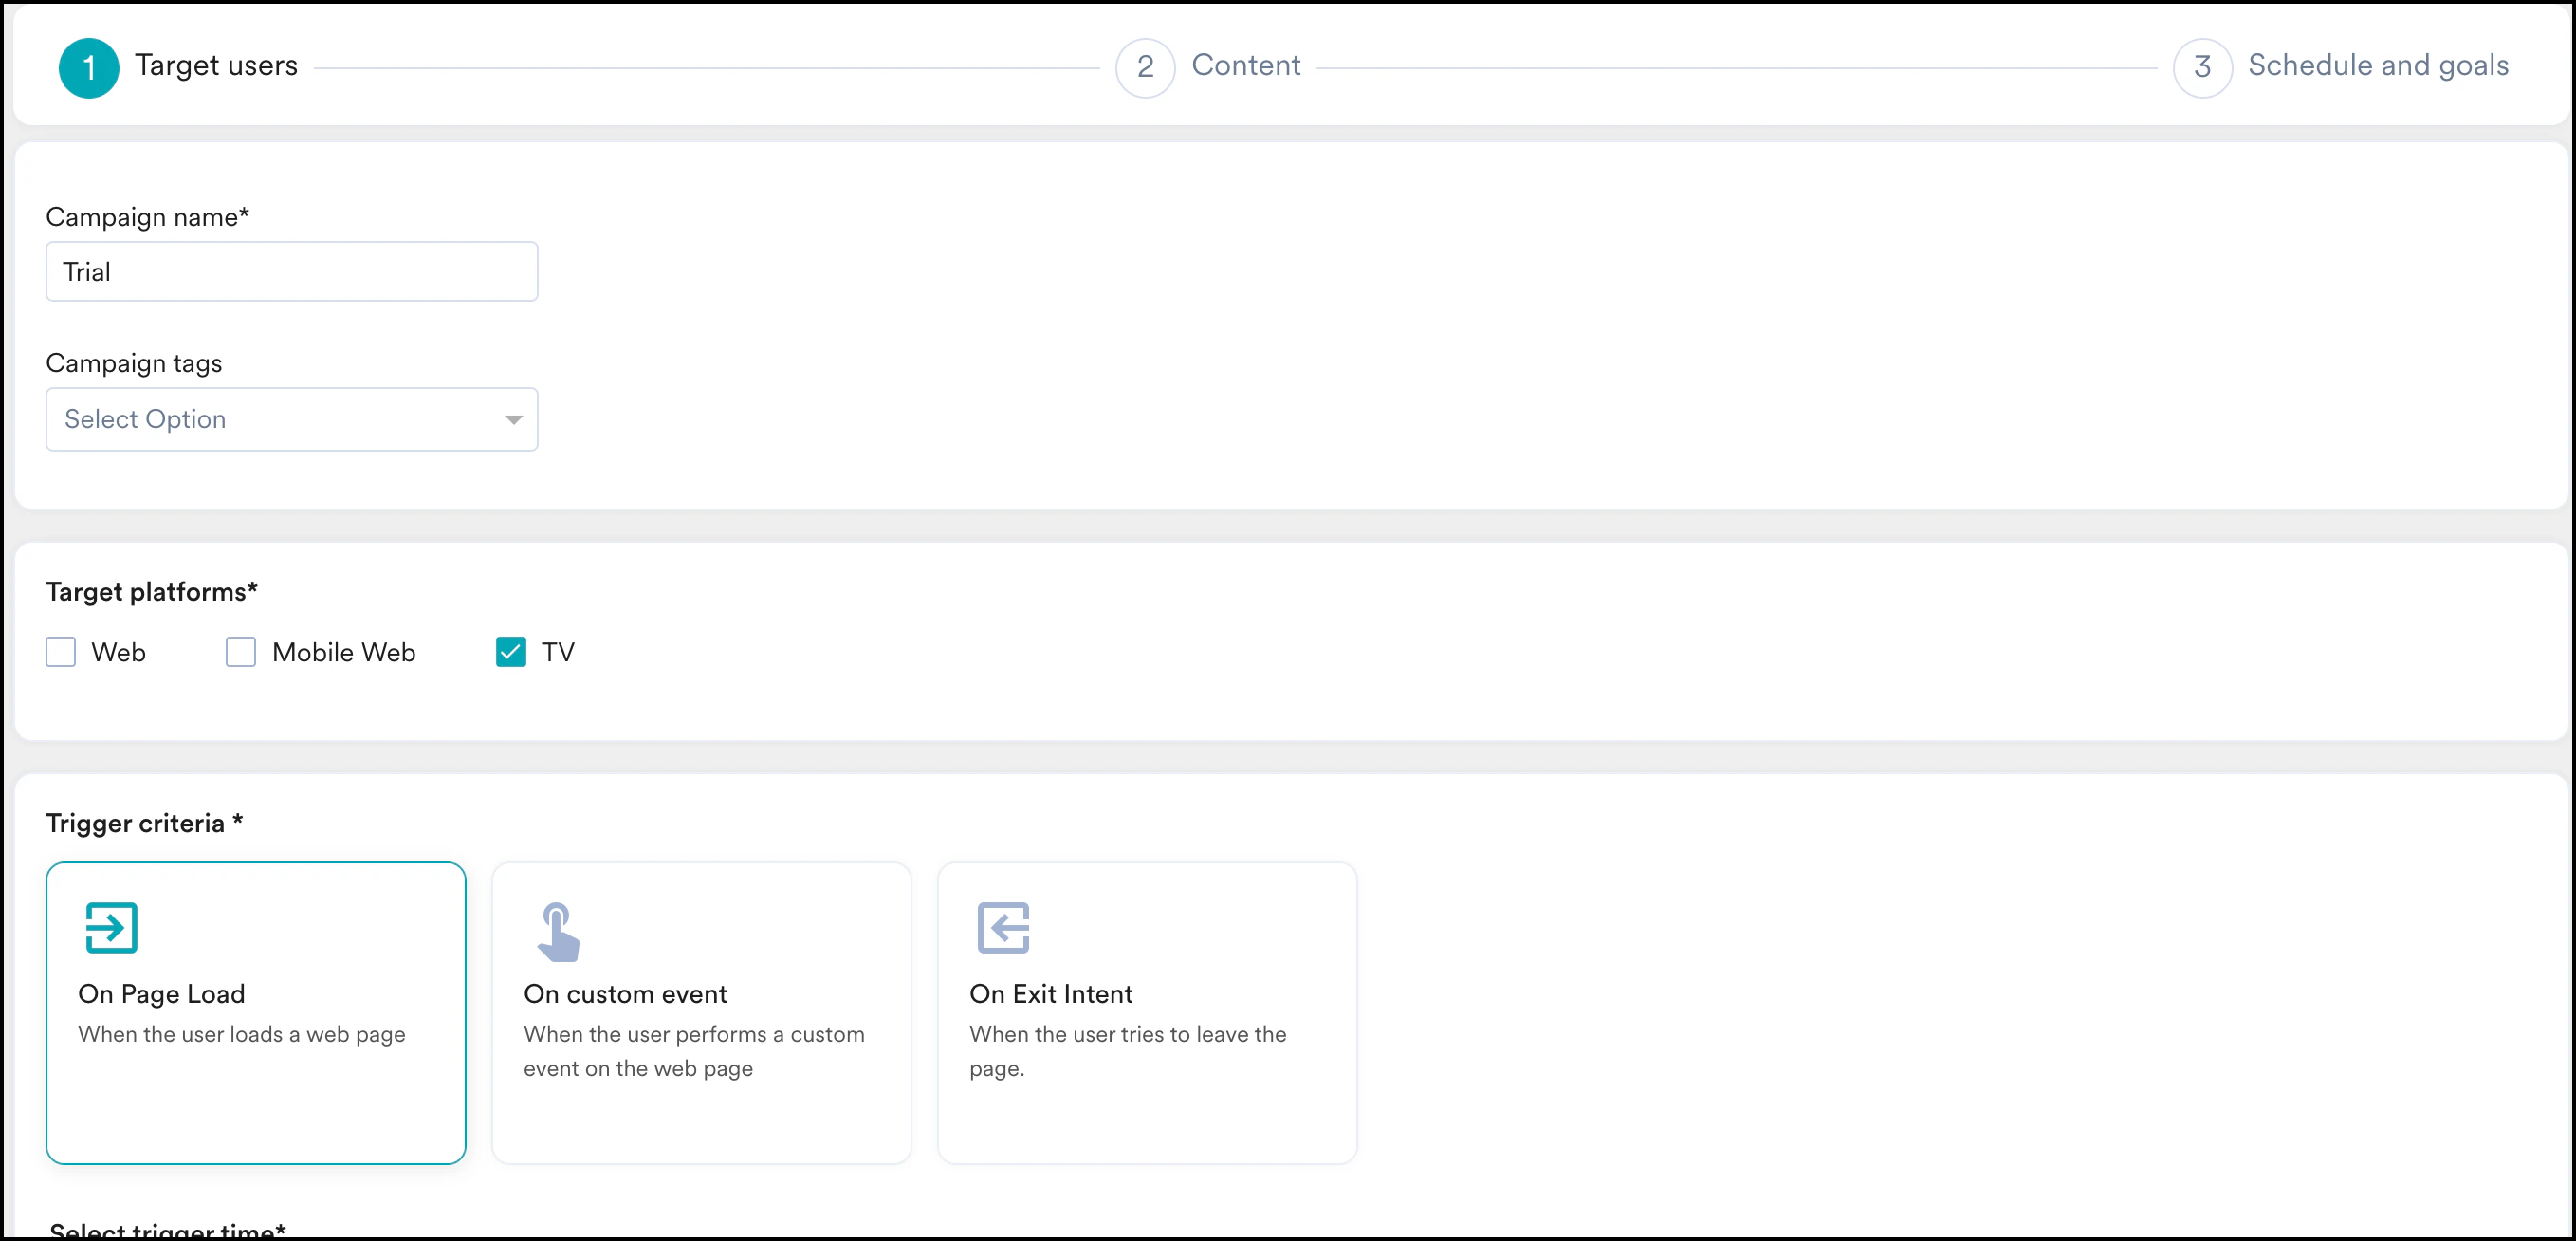 You must select only **TV** as a platform. You cannot select TV along with **Web** or **Mobile Web** platforms.
For more information about the various fields on this page, refer to [Target Users](/docs/user-guide/campaigns-and-channels/on-site-message/create/create-osm-campaign).
## Step 2: Content
You are redirected to the template selection page. From the available options, choose a TV template and click **Select Template** to open the editor.
You must select only **TV** as a platform. You cannot select TV along with **Web** or **Mobile Web** platforms.
For more information about the various fields on this page, refer to [Target Users](/docs/user-guide/campaigns-and-channels/on-site-message/create/create-osm-campaign).
## Step 2: Content
You are redirected to the template selection page. From the available options, choose a TV template and click **Select Template** to open the editor.
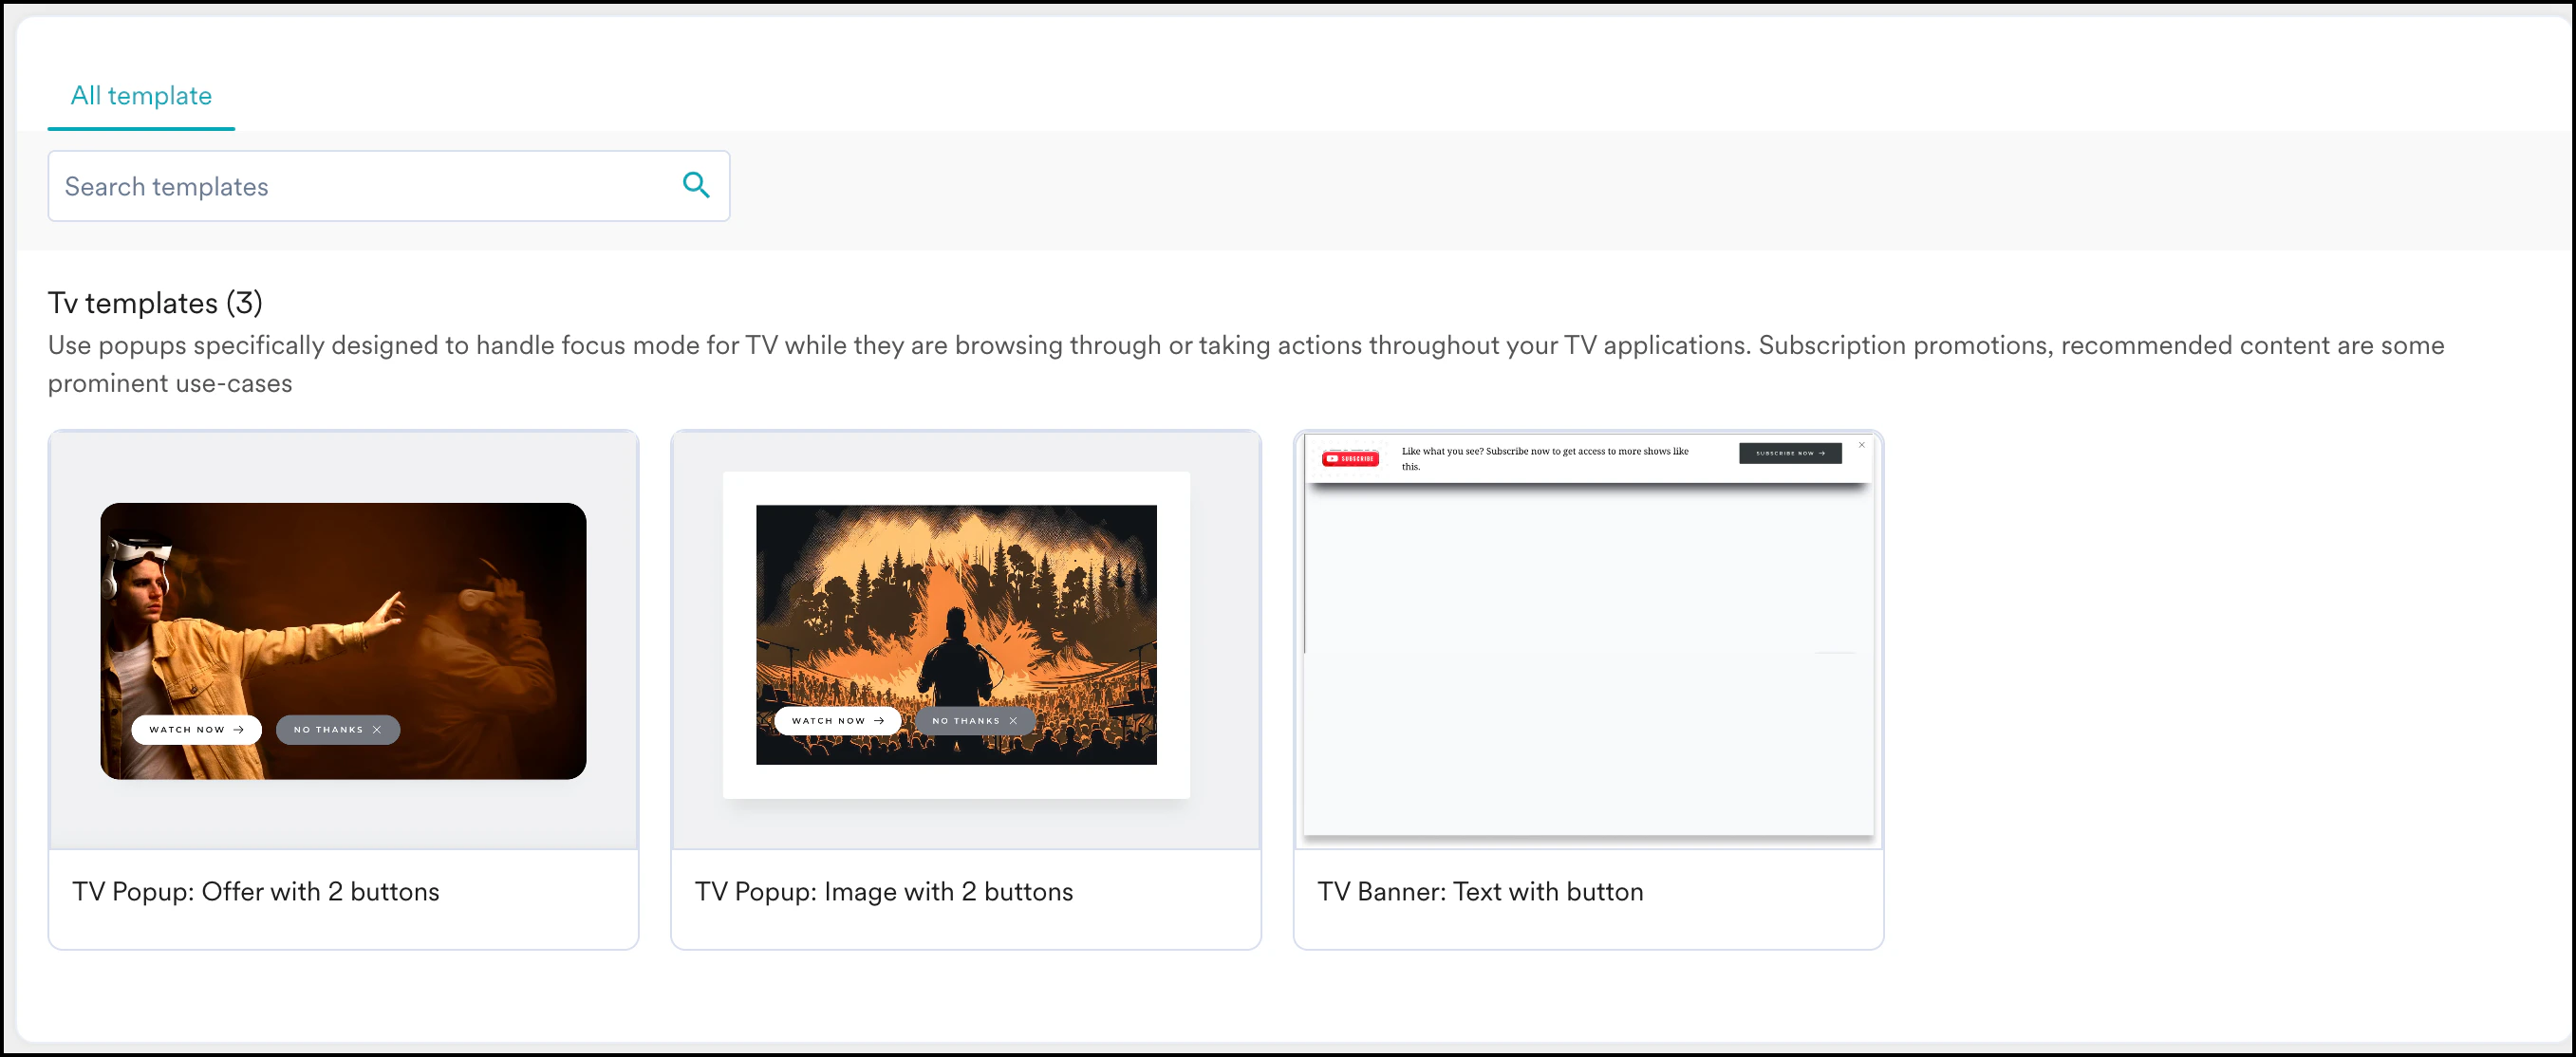 The OSM editor enables you to customize the template by editing images, backgrounds, and text.
For more information about the editing options in the OSM editor, refer to [OSM Editor](/docs/user-guide/campaigns-and-channels/on-site-message/create/osm-editor).
The OSM editor enables you to customize the template by editing images, backgrounds, and text.
For more information about the editing options in the OSM editor, refer to [OSM Editor](/docs/user-guide/campaigns-and-channels/on-site-message/create/osm-editor).
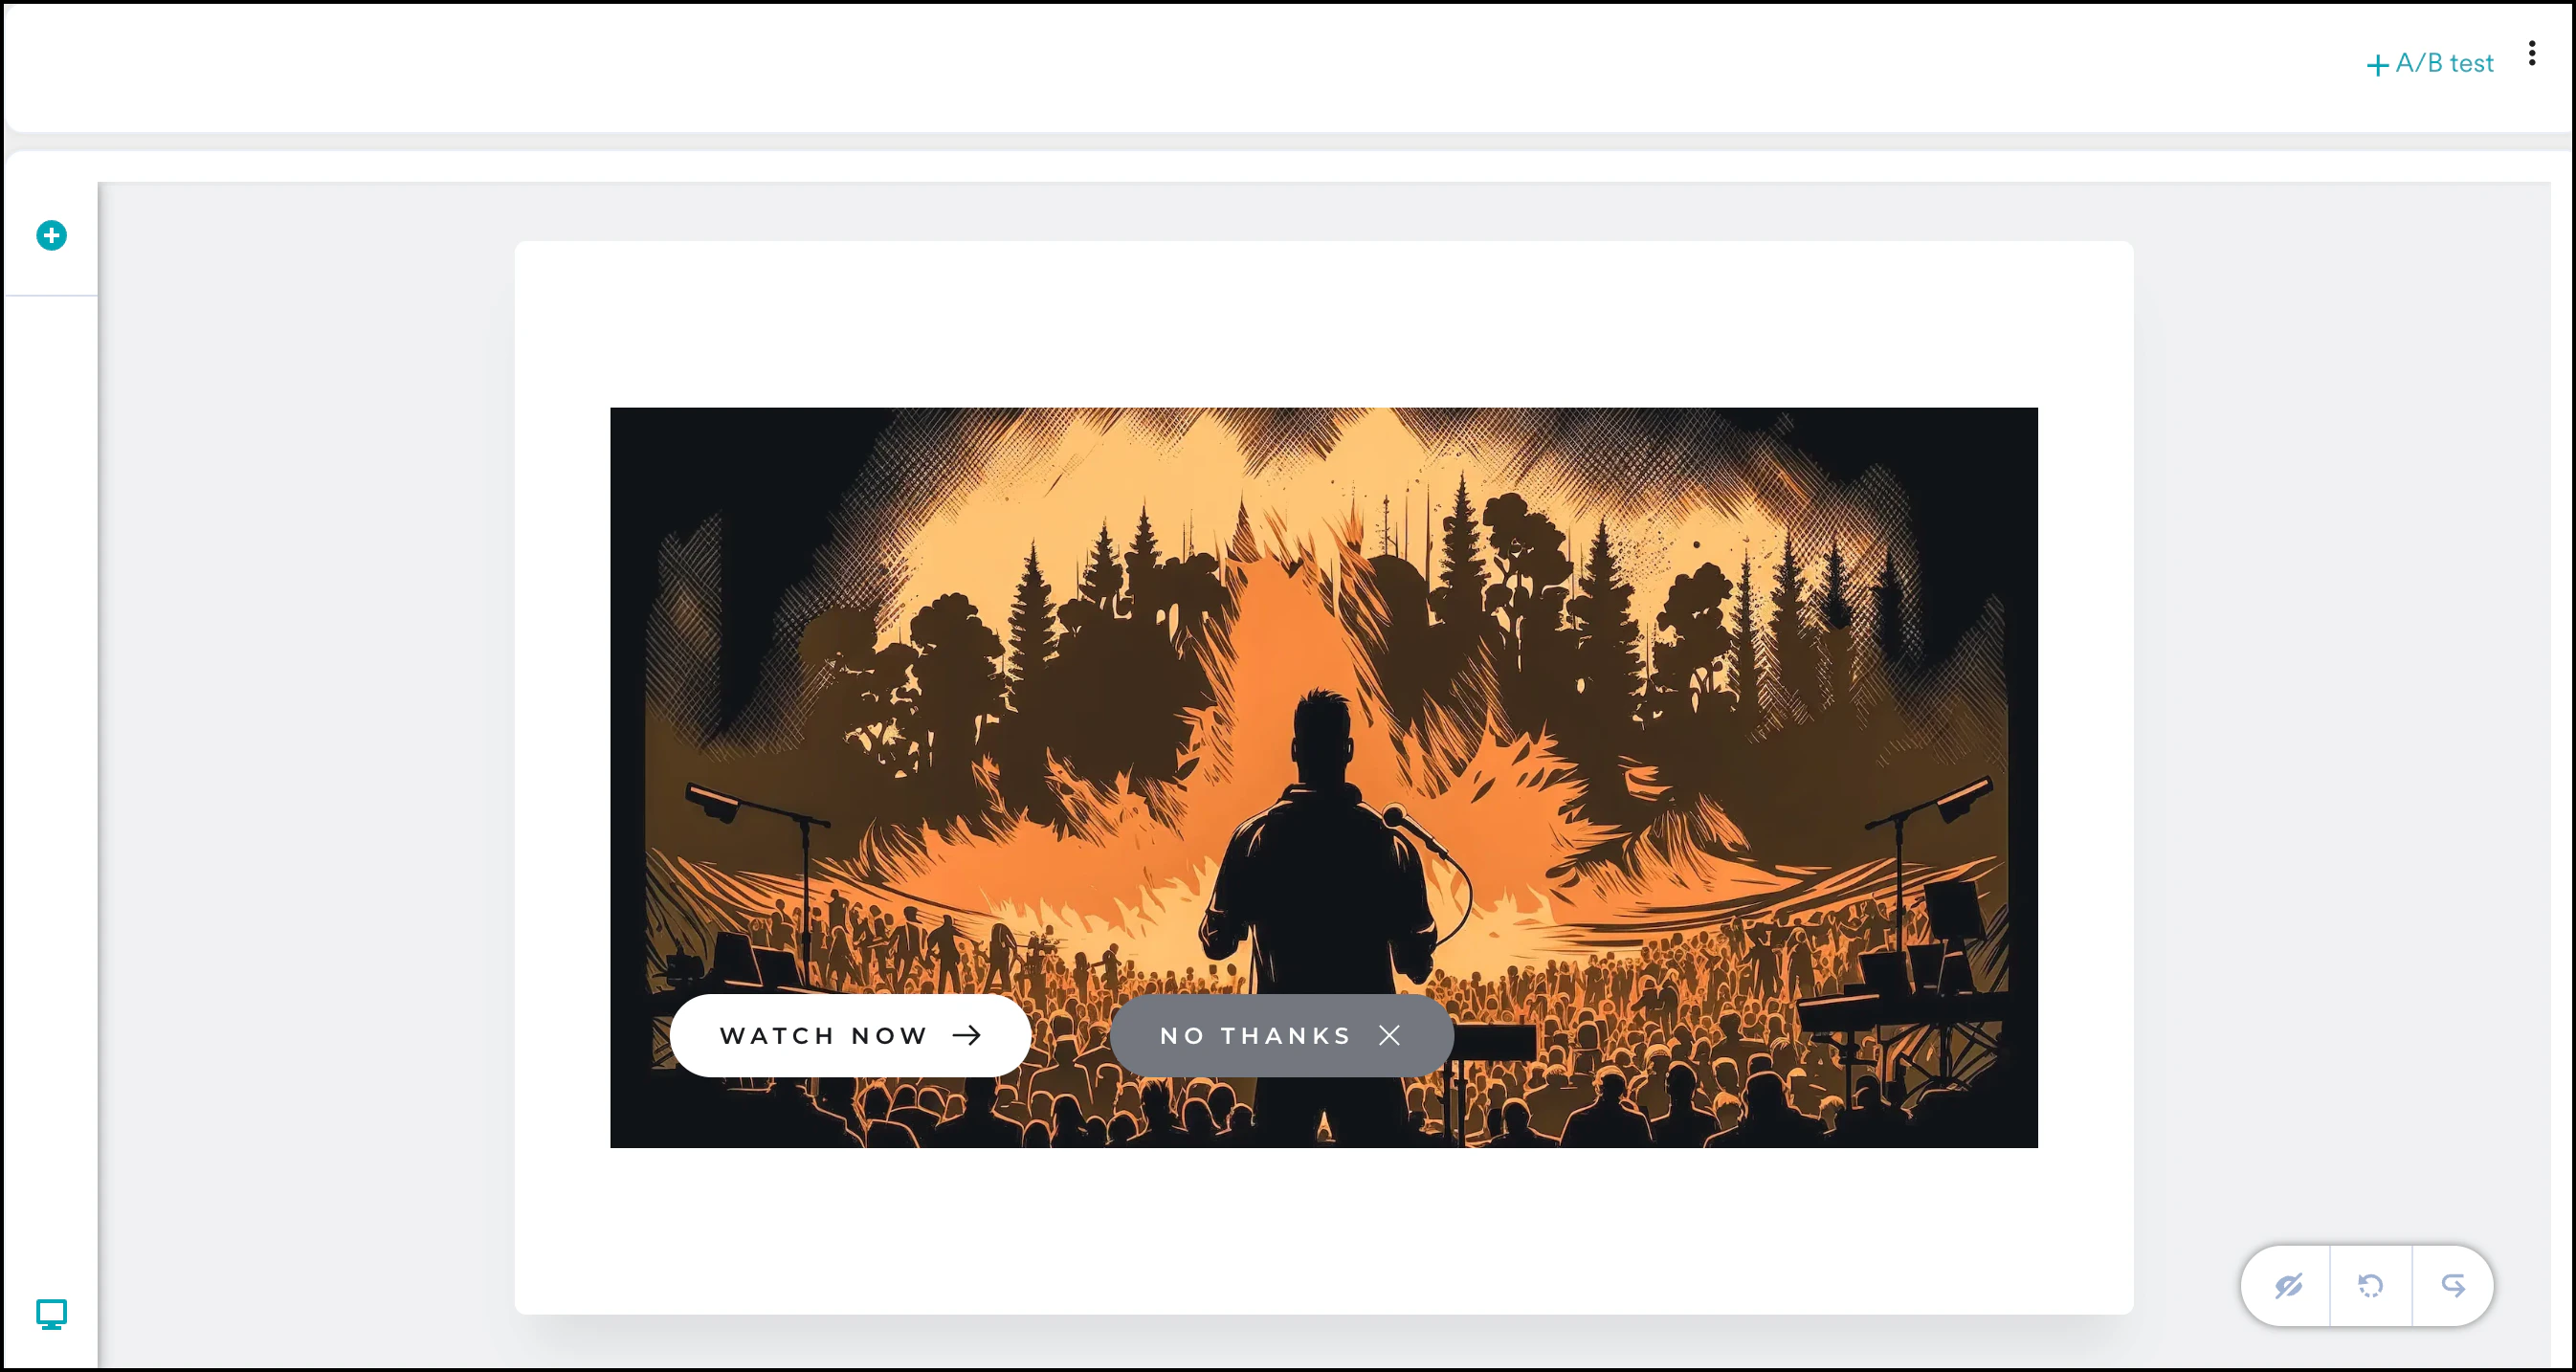 ### Edit Buttons for the Focus System
Unlike touch interfaces, TV relies on a focus state to guide user attention to interactive elements. This focus state is the starting point for navigation. TV navigation is restrictive because users rely solely on a remote control device.
When an element has focus, users can use navigation buttons on the remote control to move to other focusable elements or press the **OK** button (or a similar button, depending on the operating system) to activate the focused element.
The OSM editor allows you to edit buttons using the hover action. To edit the buttons:
1. Click the button you want to edit. The editing options display.
### Edit Buttons for the Focus System
Unlike touch interfaces, TV relies on a focus state to guide user attention to interactive elements. This focus state is the starting point for navigation. TV navigation is restrictive because users rely solely on a remote control device.
When an element has focus, users can use navigation buttons on the remote control to move to other focusable elements or press the **OK** button (or a similar button, depending on the operating system) to activate the focused element.
The OSM editor allows you to edit buttons using the hover action. To edit the buttons:
1. Click the button you want to edit. The editing options display.
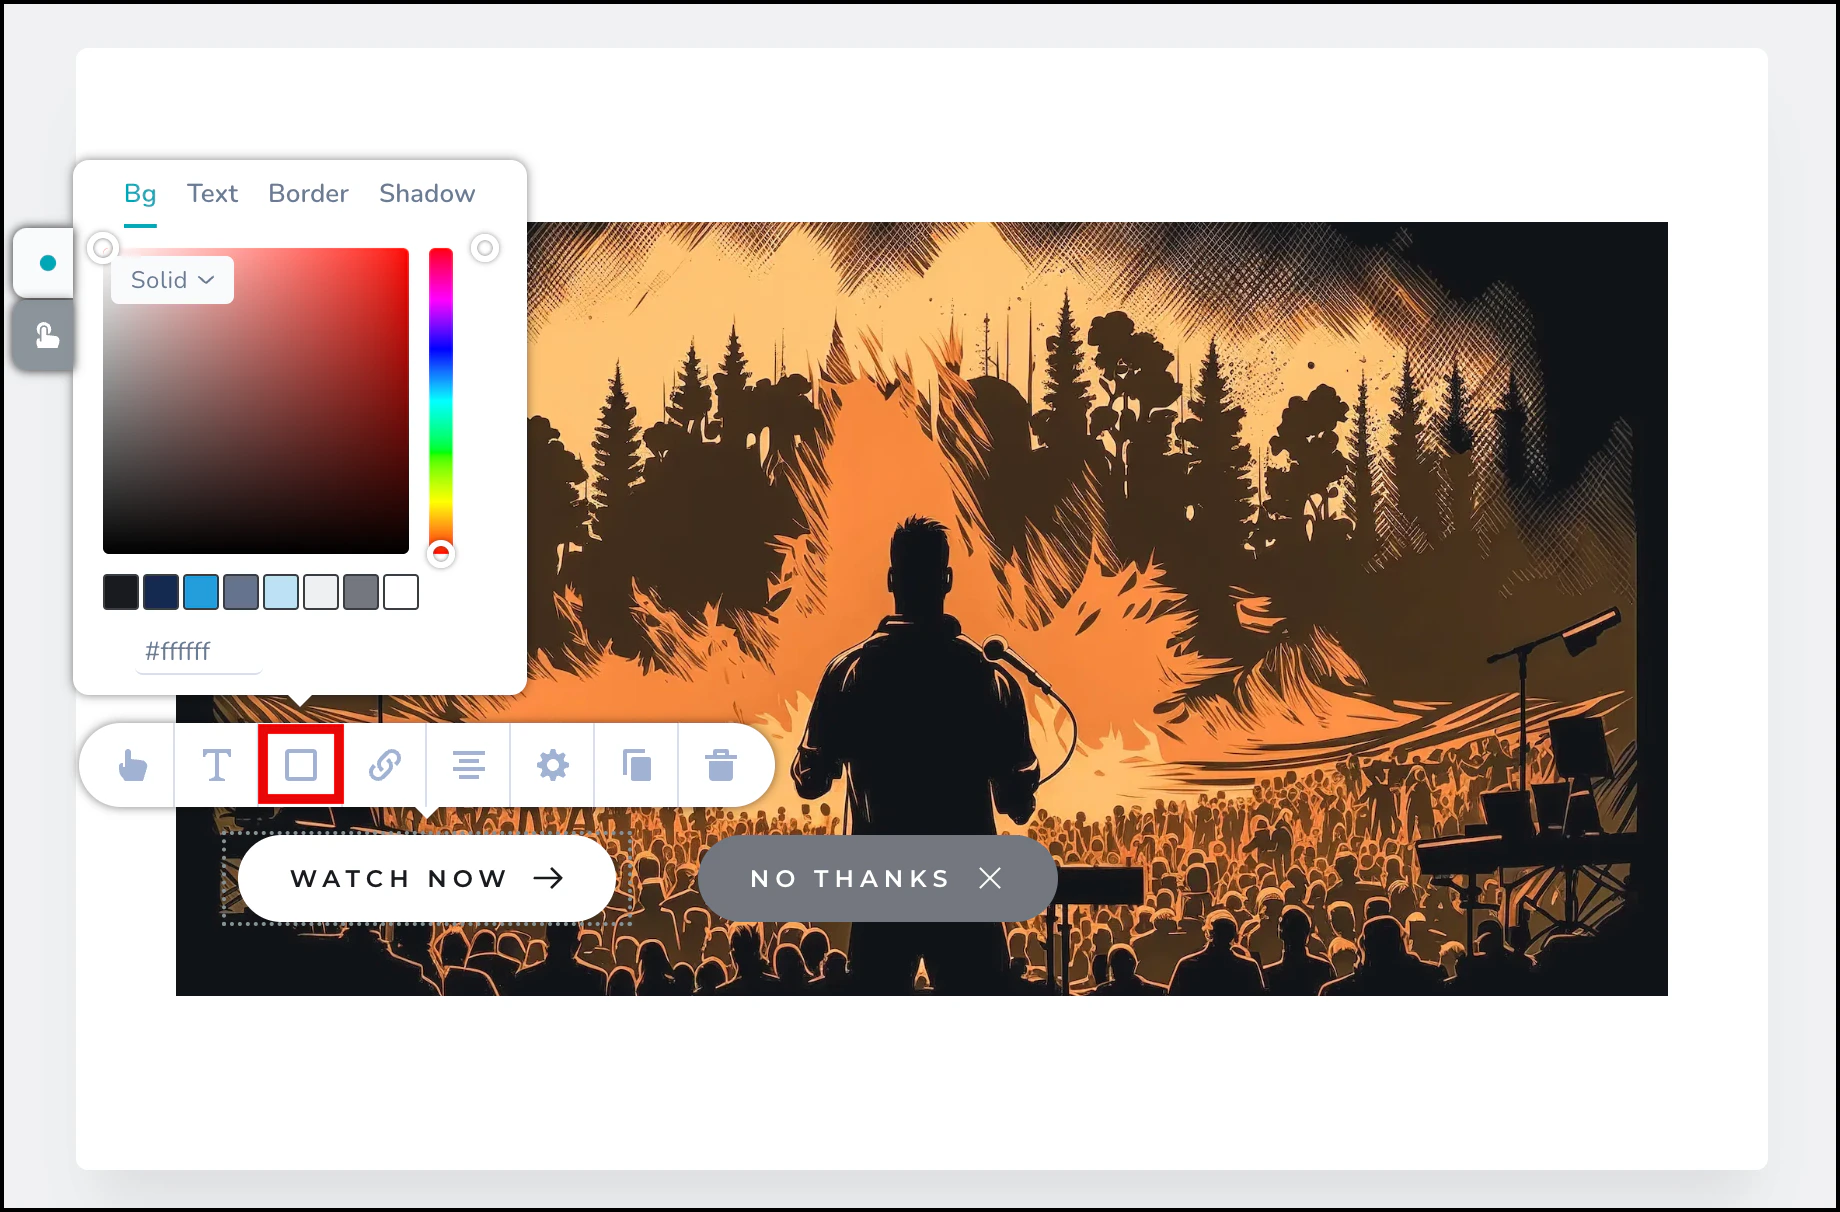 2. In the editing options, select the **Color** button (the square icon) to access hover mode. A dialog-box appears, where you can edit the text color, background color, border, and shadow of the selected button.
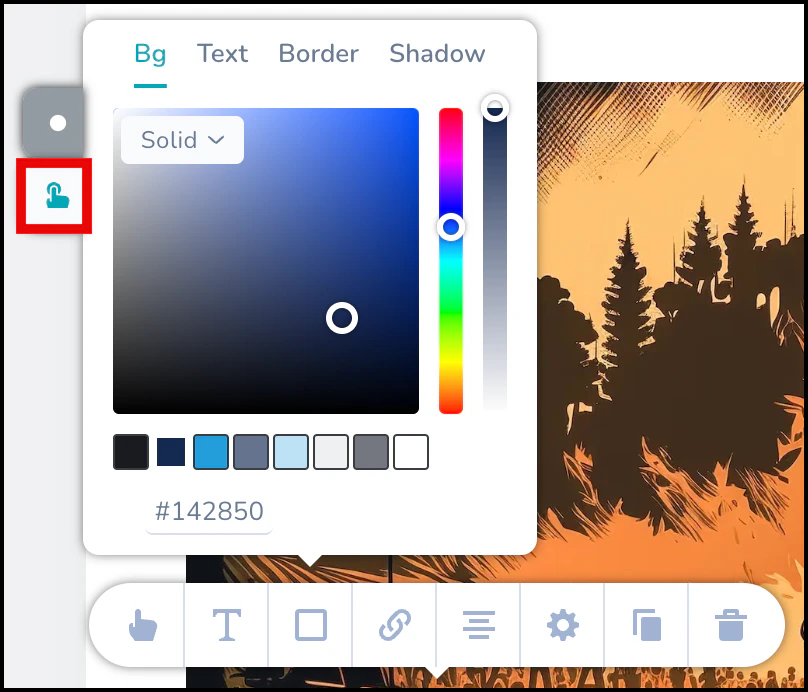
3. Click the **Hover** option to edit the button in focus mode. Make sure the button looks different in focus mode, as this helps with TV navigation.
2. In the editing options, select the **Color** button (the square icon) to access hover mode. A dialog-box appears, where you can edit the text color, background color, border, and shadow of the selected button.
3. Click the **Hover** option to edit the button in focus mode. Make sure the button looks different in focus mode, as this helps with TV navigation.
 After you make changes, click **Next** to continue to the Schedule and Goals page.
**Note**
* You must not add or remove buttons on TV templates. This ensures that focus navigation continues to work as expected.
* The **Display Settings** section is disabled for TV campaigns.
* The **Test Campaign** feature does not currently work for TV campaigns.
## Step 3: Schedule and Goals
Select the sending criteria, conversion goals, and other campaign details. For more information about the Schedule and Goals page, refer to [Scheduling and Goals](/docs/user-guide/campaigns-and-channels/on-site-message/create/create-osm-campaign).
After you make changes, click **Next** to continue to the Schedule and Goals page.
**Note**
* You must not add or remove buttons on TV templates. This ensures that focus navigation continues to work as expected.
* The **Display Settings** section is disabled for TV campaigns.
* The **Test Campaign** feature does not currently work for TV campaigns.
## Step 3: Schedule and Goals
Select the sending criteria, conversion goals, and other campaign details. For more information about the Schedule and Goals page, refer to [Scheduling and Goals](/docs/user-guide/campaigns-and-channels/on-site-message/create/create-osm-campaign).
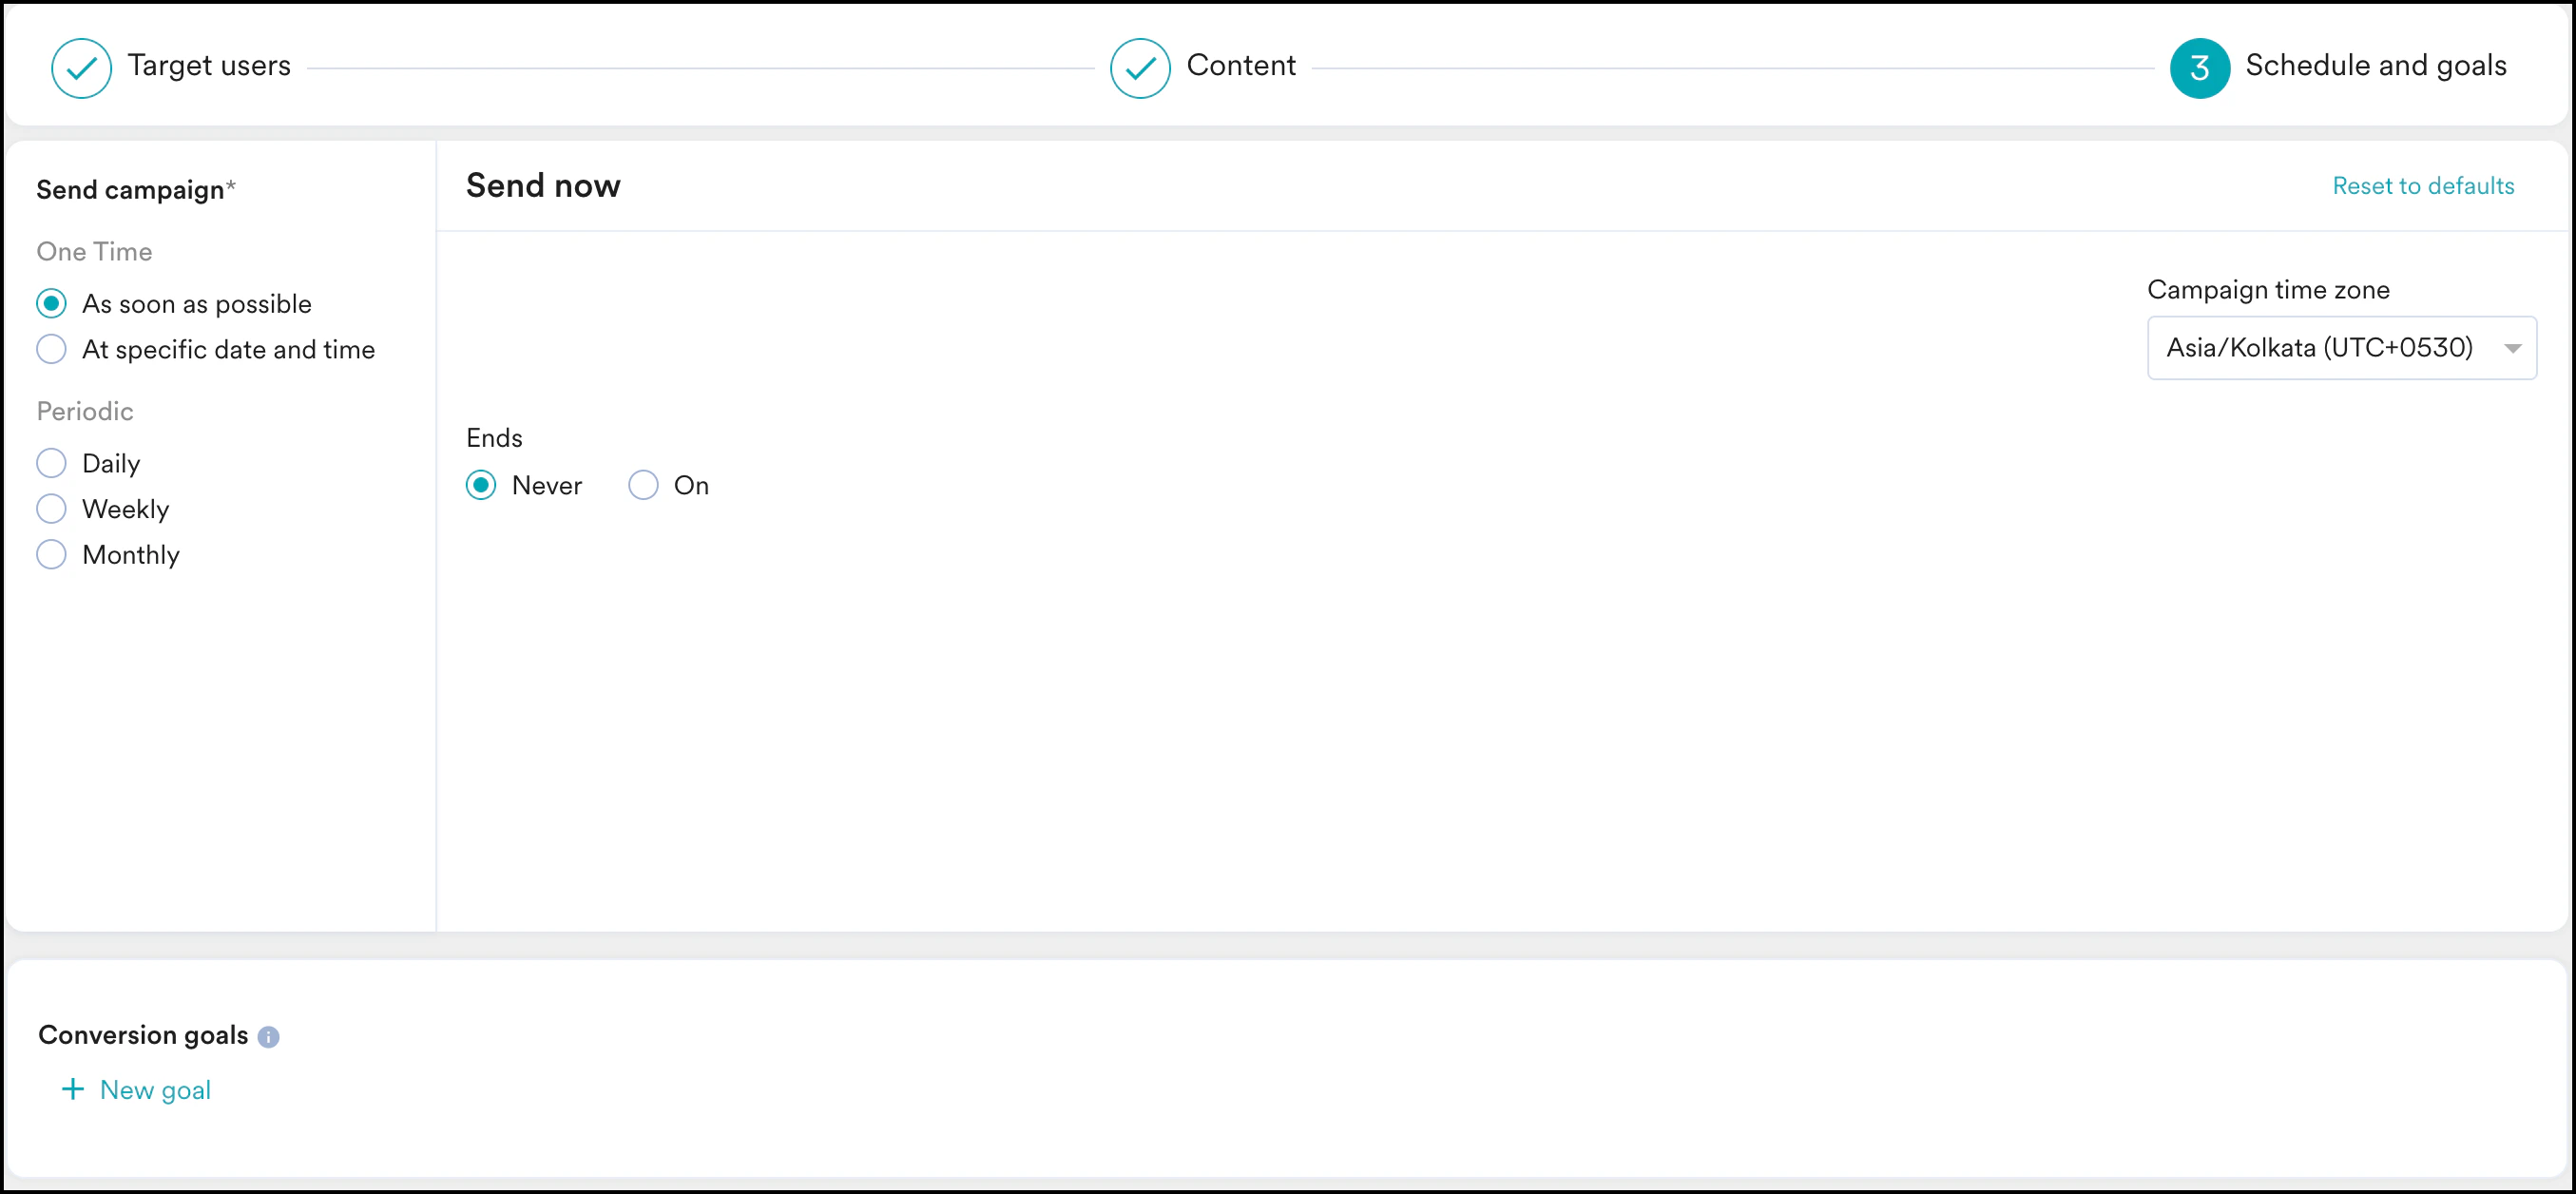 After entering these details, click **Publish** to launch your campaign.
## Next Steps
Now that you have created and published your TV On-Site Messaging campaign, refer to the following:
* [Analyze On-site Messaging Campaigns](/docs/user-guide/campaigns-and-channels/on-site-message/analyze/analyze-on-site-messaging-campaigns)
* Explore advanced customization options for your TV templates in the [OSM Editor](/docs/user-guide/campaigns-and-channels/on-site-message/create/osm-editor).
After entering these details, click **Publish** to launch your campaign.
## Next Steps
Now that you have created and published your TV On-Site Messaging campaign, refer to the following:
* [Analyze On-site Messaging Campaigns](/docs/user-guide/campaigns-and-channels/on-site-message/analyze/analyze-on-site-messaging-campaigns)
* Explore advanced customization options for your TV templates in the [OSM Editor](/docs/user-guide/campaigns-and-channels/on-site-message/create/osm-editor).