> ## Documentation Index
> Fetch the complete documentation index at: https://moengage.com/docs/llms.txt
> Use this file to discover all available pages before exploring further.
# Using Locales in On-site Messages
> Target users by language and region in MoEngage On-site campaigns. Add up to 256 locales to your account and 21 per campaign for localized content.
MoEngage's On-site campaigns let you target users in different languages and regions, helping you localize content, improve user engagement, and expand into new markets. You can tailor your messages to specific user groups based on their language, geography, or other characteristics.
You can add up to **256** Locales to your account and **21** Locales to each campaign (one of these 21 Locales is the default Locale).
For more details on adding Locales to your MoEngage account, see the [Localize Campaign Messages article](/user-guide/campaigns-and-channels/getting-started/campaign-content/localize-campaign-messages).
To set up and use Locales in MoEngage, follow these two main steps:
* **Step 1**: [Add New Locales to the MoEngage Account](#add-new-locales-to-the-moengage-account)
* **Step 2**: [Add Locales to On-site Campaigns](#add-locales-to-on-site-campaigns)
# Add New Locales to the MoEngage Account
To use Locales, select a **Drag & drop** template.
To add a new Locale to your MoEngage account:
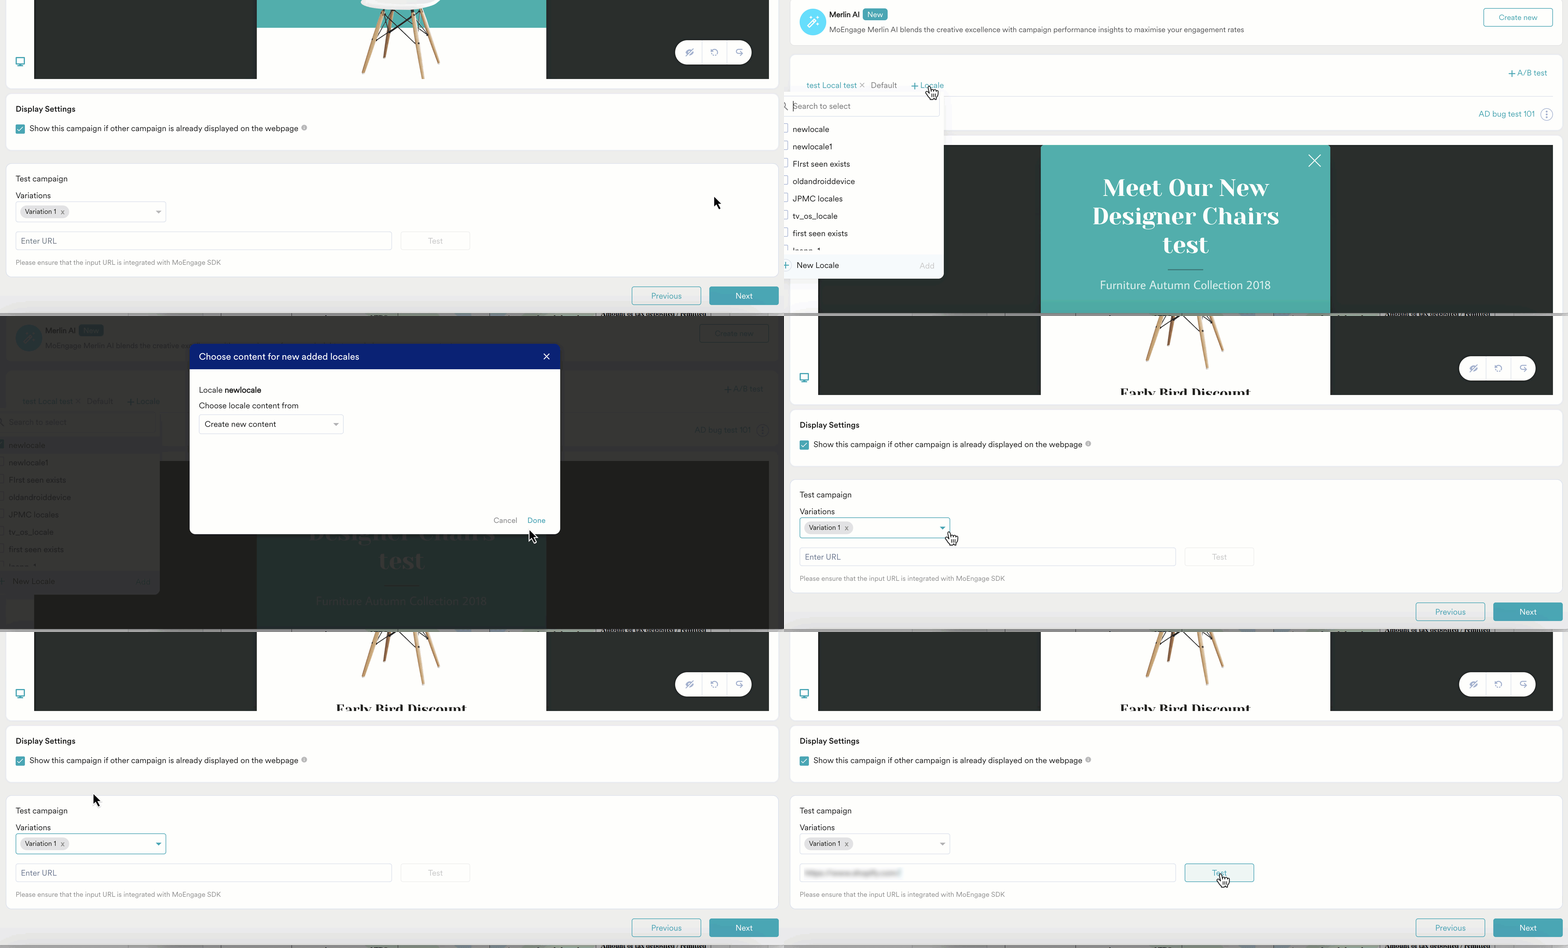
1. In the content creation step of your On-site campaign, click the  **Locale** button.
2. From the dropdown list, click **+ New locale**.
3. The **Add new locale** dialog box appears with the following options:
| Field | Description |
| ------------- | ---------------------------------------------------------------------------------------------------------------------------------------------------------------------------------------------------------------------------------------------- |
| Locale name | Type or paste the locale name you want to add. |
| User property | Select the user property from the attribute dropdown. |
| Filter | Click **+Filter** and enter the filter value for the Locale. For details, see the [Create Segments article](/user-guide/segment/segment-operations/create-segments). |
| Exclude users | Click **Exclude Users** to remove users from the campaign. For details, see the [Preference Management article](/user-guide/campaigns-and-channels/mobile-push/getting-started-with-mobile-push/preference-management-for-push-notifications). |
4. Click **Add** to save the new Locale to your account, or click **Cancel** to close the dialog box without saving.
**Locale** button.
2. From the dropdown list, click **+ New locale**.
3. The **Add new locale** dialog box appears with the following options:
| Field | Description |
| ------------- | ---------------------------------------------------------------------------------------------------------------------------------------------------------------------------------------------------------------------------------------------- |
| Locale name | Type or paste the locale name you want to add. |
| User property | Select the user property from the attribute dropdown. |
| Filter | Click **+Filter** and enter the filter value for the Locale. For details, see the [Create Segments article](/user-guide/segment/segment-operations/create-segments). |
| Exclude users | Click **Exclude Users** to remove users from the campaign. For details, see the [Preference Management article](/user-guide/campaigns-and-channels/mobile-push/getting-started-with-mobile-push/preference-management-for-push-notifications). |
4. Click **Add** to save the new Locale to your account, or click **Cancel** to close the dialog box without saving.  # Add Locales to On-site Campaigns
After you add Locales to your account, you can add them to an On-site campaign during creation or testing.
To add a Locale to an On-site campaign:
1. In the content creation step, click the **Locale** button.
2. From the Locale selector dropdown, select the Locales you want to add to the campaign.
3. Click **Add**.
The **Choose content for newly added locales** dialog box appears. In this dialog box, you can choose to create unique content for each Locale or copy content from the default Locale.
# Add Locales to On-site Campaigns
After you add Locales to your account, you can add them to an On-site campaign during creation or testing.
To add a Locale to an On-site campaign:
1. In the content creation step, click the **Locale** button.
2. From the Locale selector dropdown, select the Locales you want to add to the campaign.
3. Click **Add**.
The **Choose content for newly added locales** dialog box appears. In this dialog box, you can choose to create unique content for each Locale or copy content from the default Locale.
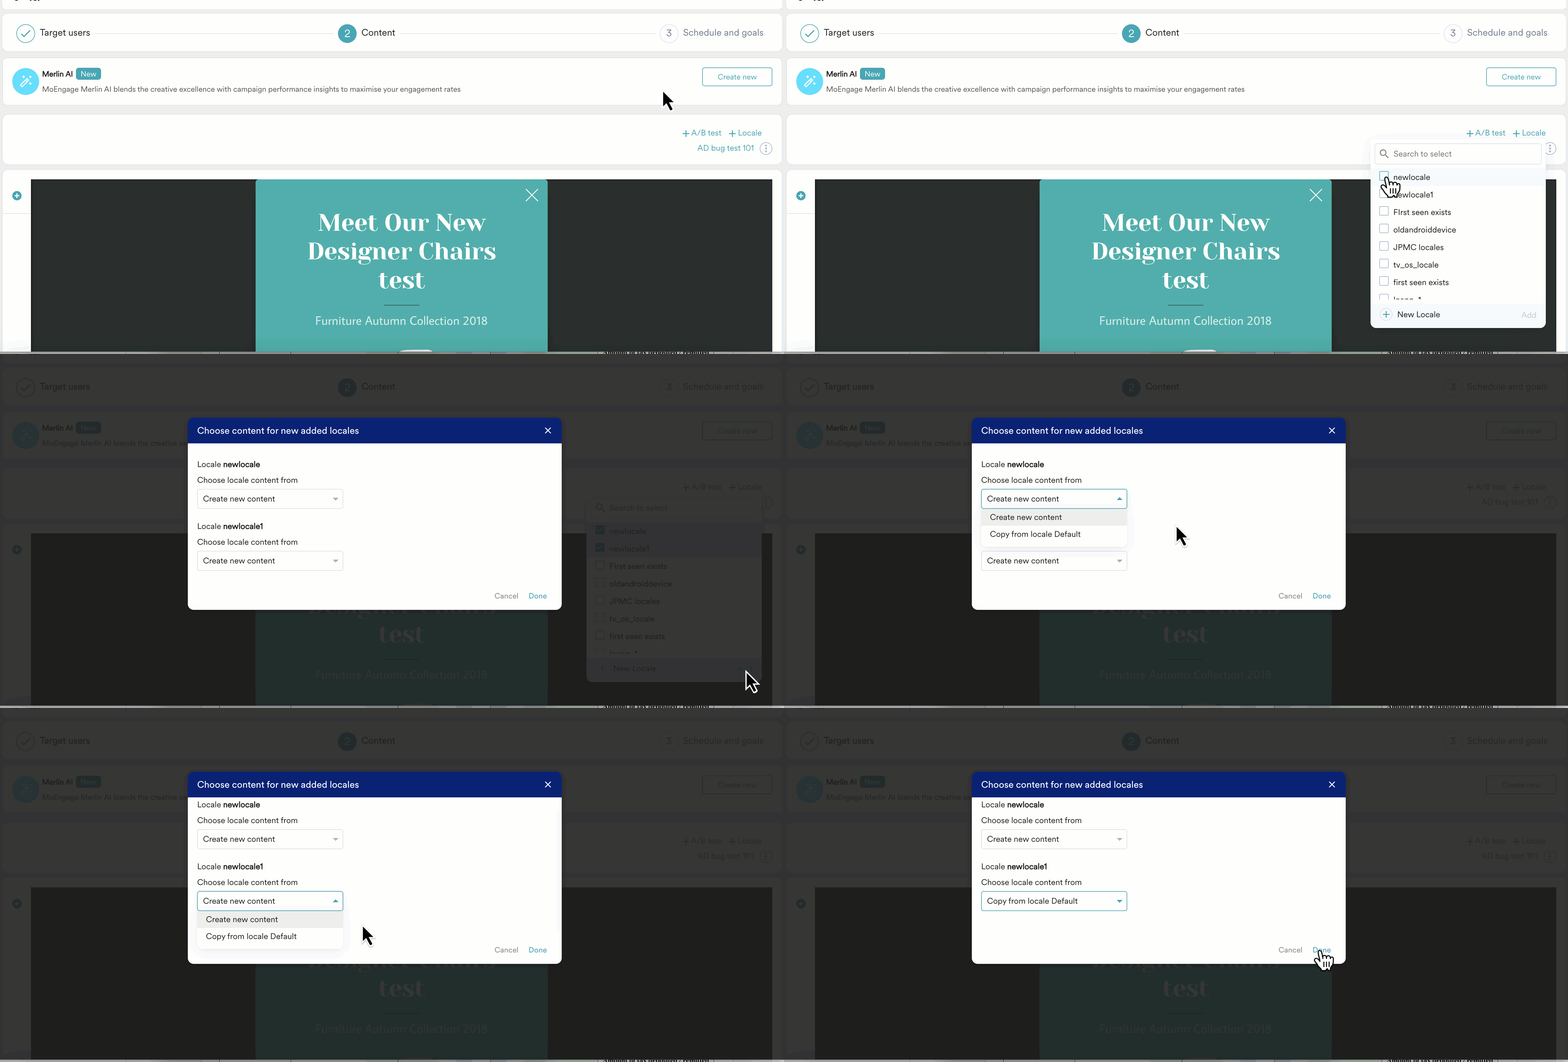 4. From the dropdown **Choose locale content from**, select one of the following options:
* **Create new content**\
This option adds the Locale to your campaign and lets you create content for it.
* **Copy from locale Default**\
This option adds the Locale and copies content from the default Locale to it.
5. Click **Done** to add the new Locale to the campaign, or click **Cancel** to close the dialog box without adding the Locale.
4. From the dropdown **Choose locale content from**, select one of the following options:
* **Create new content**\
This option adds the Locale to your campaign and lets you create content for it.
* **Copy from locale Default**\
This option adds the Locale and copies content from the default Locale to it.
5. Click **Done** to add the new Locale to the campaign, or click **Cancel** to close the dialog box without adding the Locale.  You can test each Locale on the selected variation while you create the campaign. See the following image for an example.