> ## Documentation Index
> Fetch the complete documentation index at: https://moengage.com/docs/llms.txt
> Use this file to discover all available pages before exploring further.
# HTML Landing Page Editor
> Use the MoEngage HTML landing page editor to import, paste, or upload your own HTML—including an HTML ZIP with assets—and build a landing page.
Use the HTML landing page editor to build a landing page from your own HTML. This is useful when you want to:
* Import a landing page you designed in another tool.
* Bring in HTML that your team has already developed.
* Write and build custom HTML directly in MoEngage.
You can add your HTML in one of two ways:
* **HTML Upload**: Write or paste your HTML in a code view.
* **HTML Zip Upload**: Upload a ZIP file that contains your HTML and its assets.
# Open the HTML Editor
1. On the left navigation menu, click **Content**, and then click **Landing pages**.
2. Click **Create a landing page** and define the page name and tags.
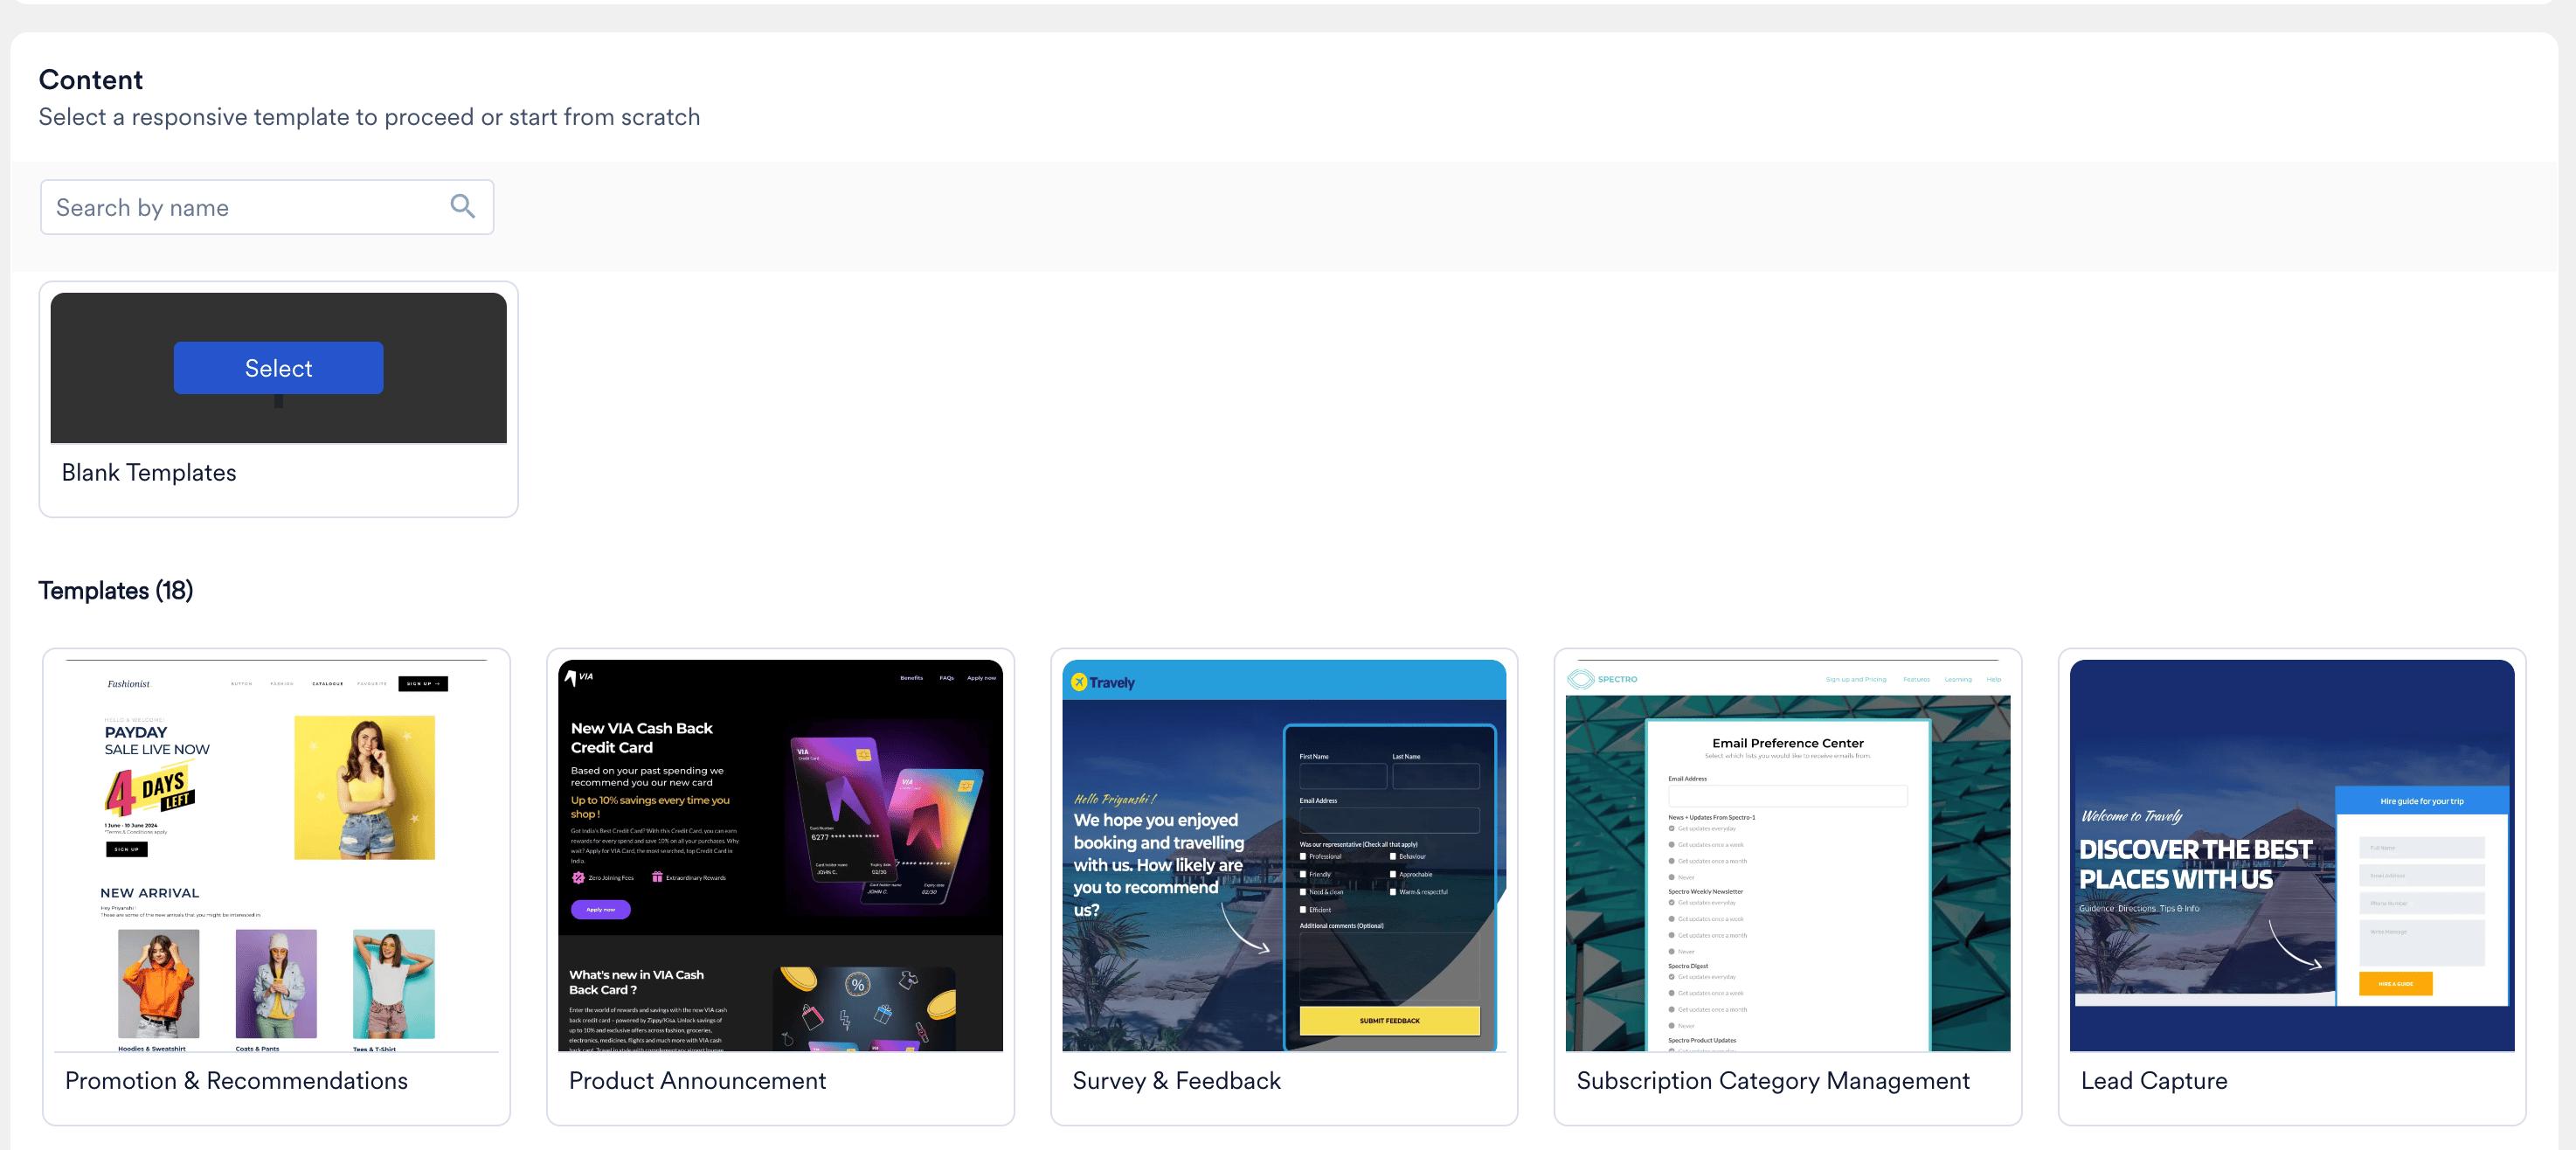
3. In the **Content** step, on the **Blank Templates** card, click **Select**.
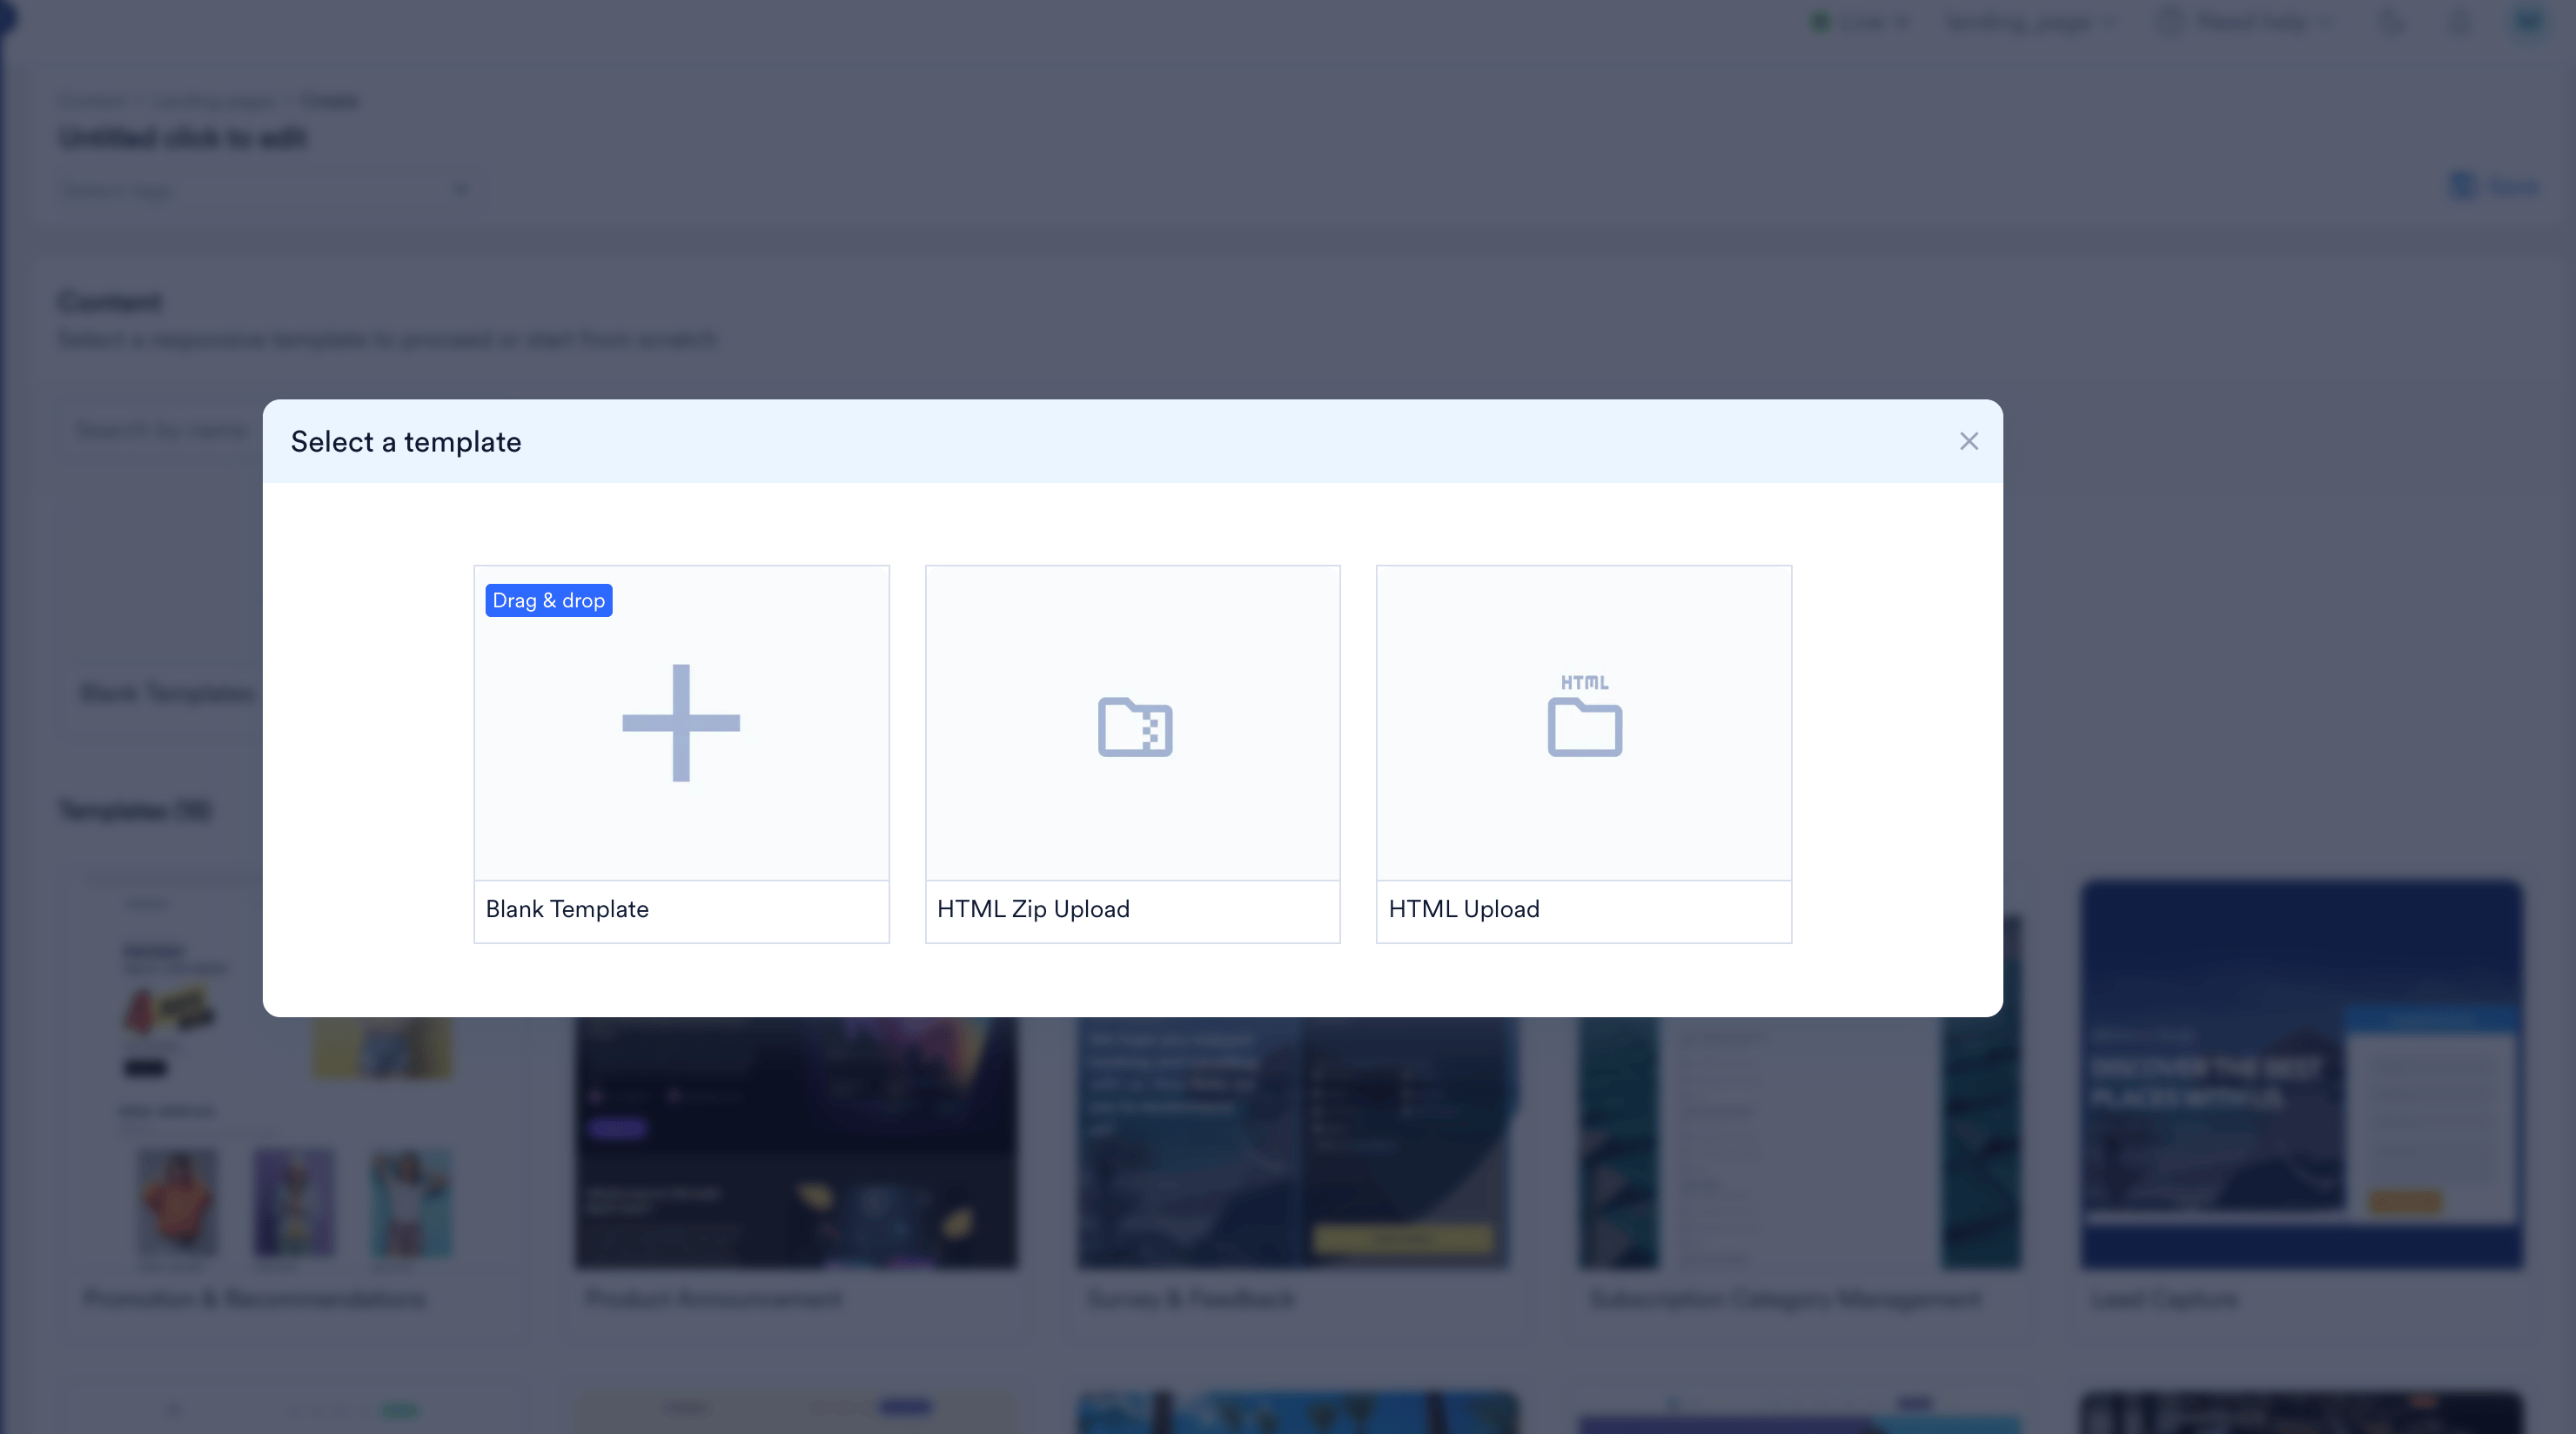
 4. In the **Select a template** dialog, choose **HTML Upload** or **HTML Zip Upload**.
 # HTML Upload
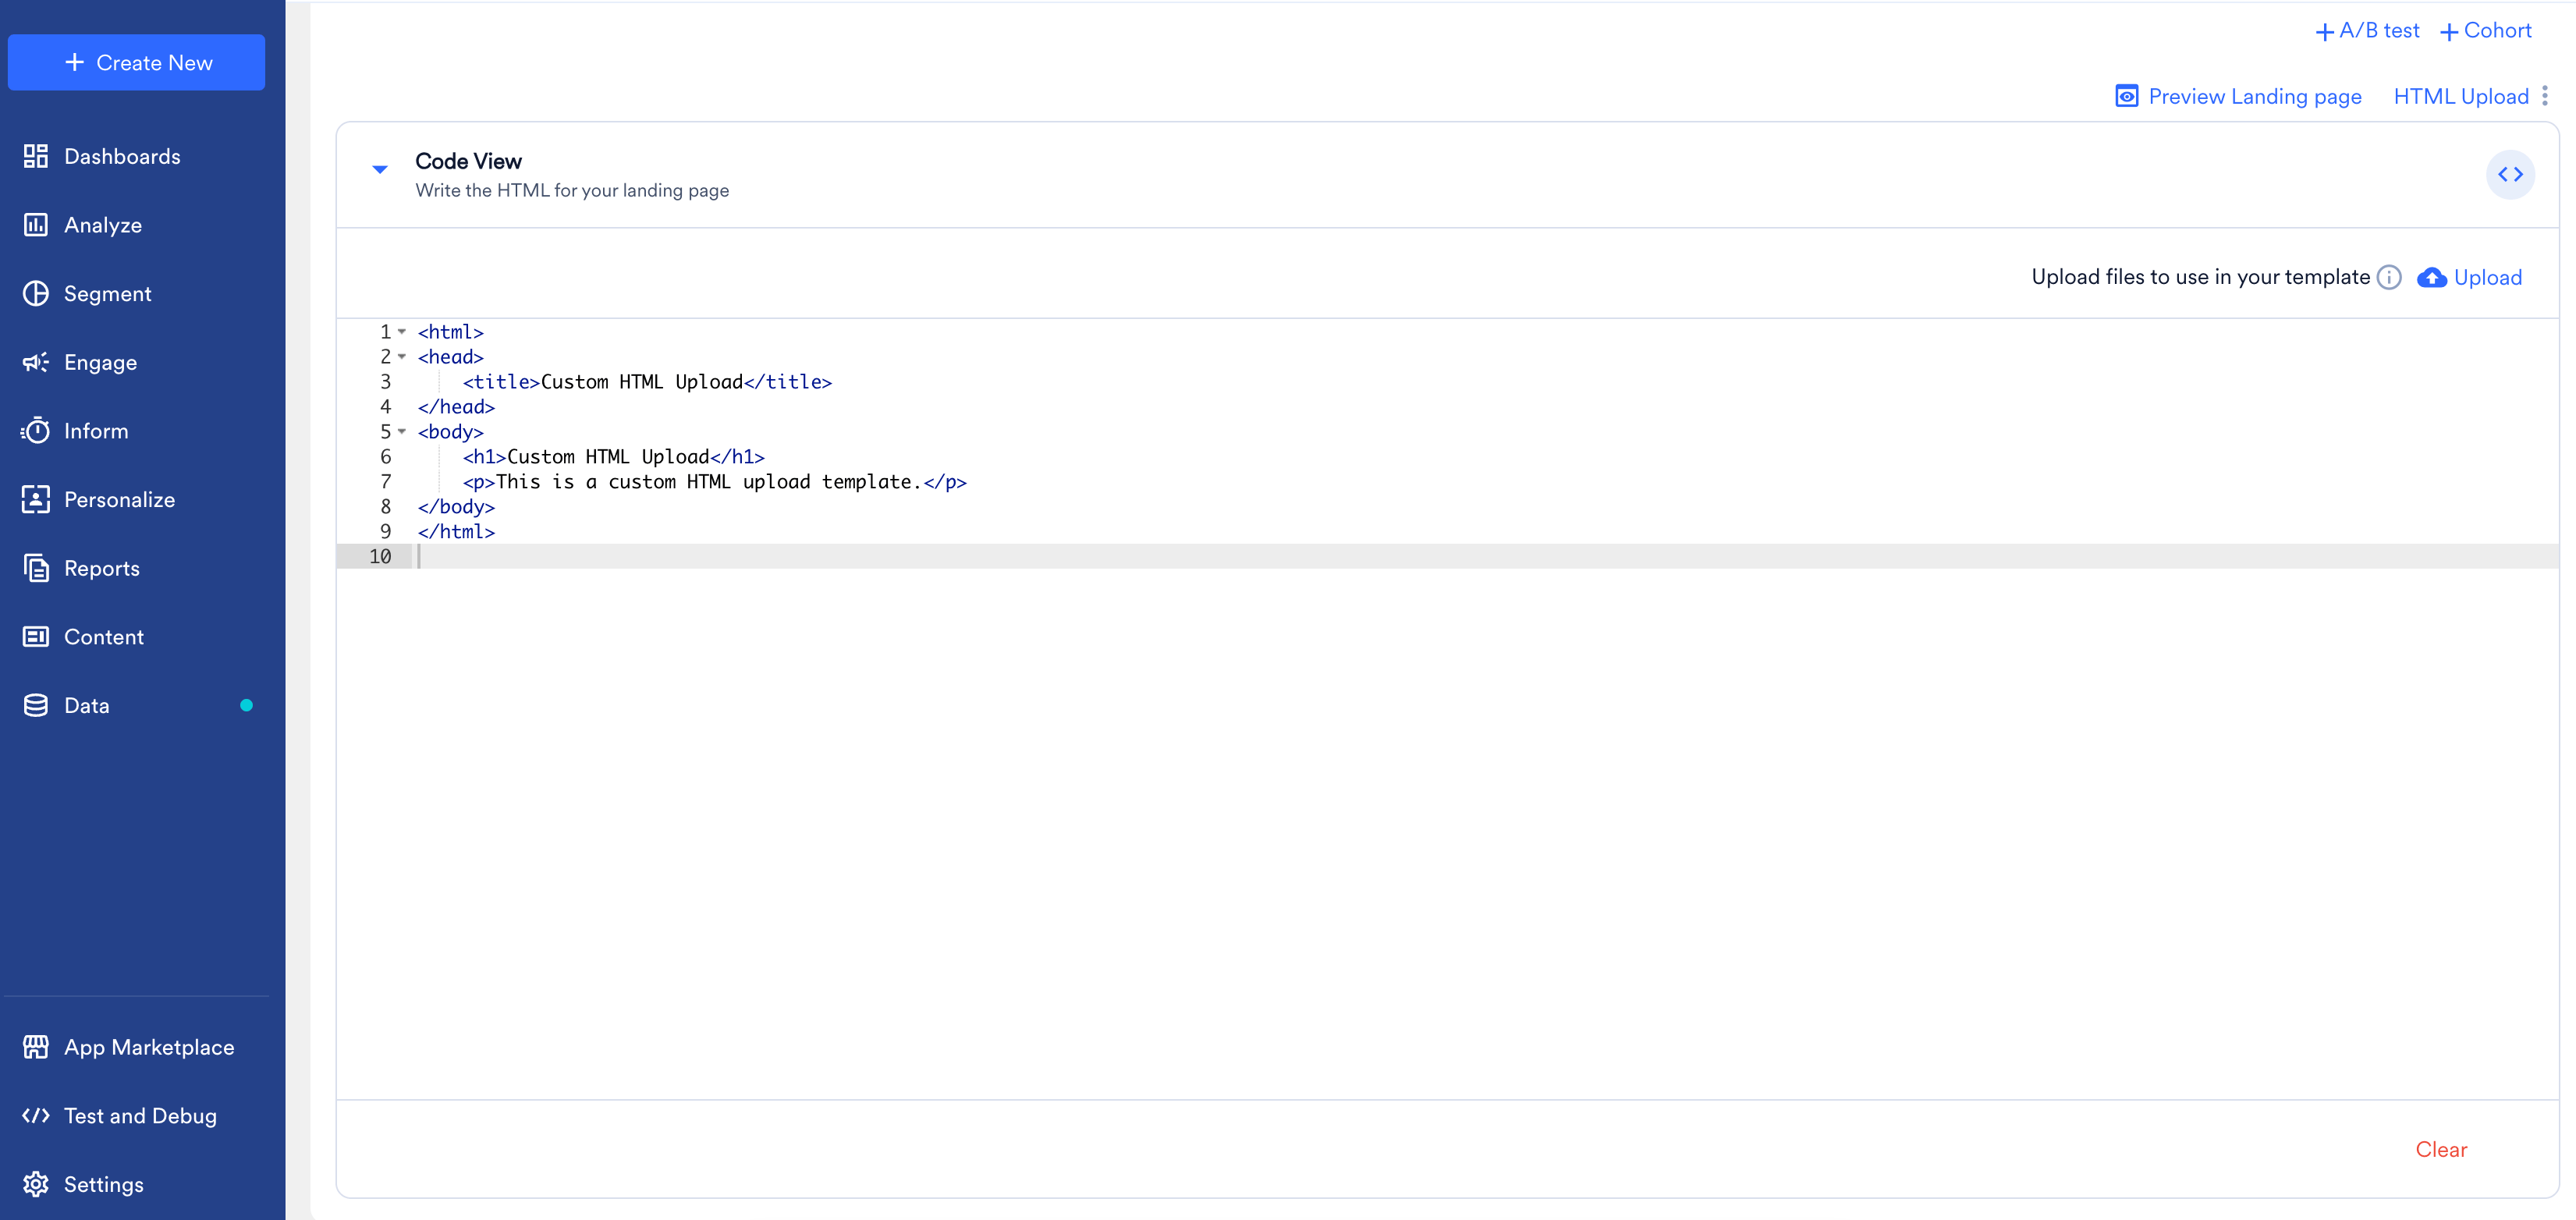
Choose **HTML Upload** to write or paste your HTML directly in the **Code View** editor. To add images or other assets that your HTML references, click **Upload** next to **Upload files to use in your template**. To start over, click **Clear**.
# HTML Upload
Choose **HTML Upload** to write or paste your HTML directly in the **Code View** editor. To add images or other assets that your HTML references, click **Upload** next to **Upload files to use in your template**. To start over, click **Clear**.
 # HTML Zip Upload
Choose **HTML Zip Upload** to upload a ZIP file that contains your HTML and its assets. In the **Zip template** dialog, drag and drop your file or click **Upload from computer**, and then click **Done**.
# HTML Zip Upload
Choose **HTML Zip Upload** to upload a ZIP file that contains your HTML and its assets. In the **Zip template** dialog, drag and drop your file or click **Upload from computer**, and then click **Done**.
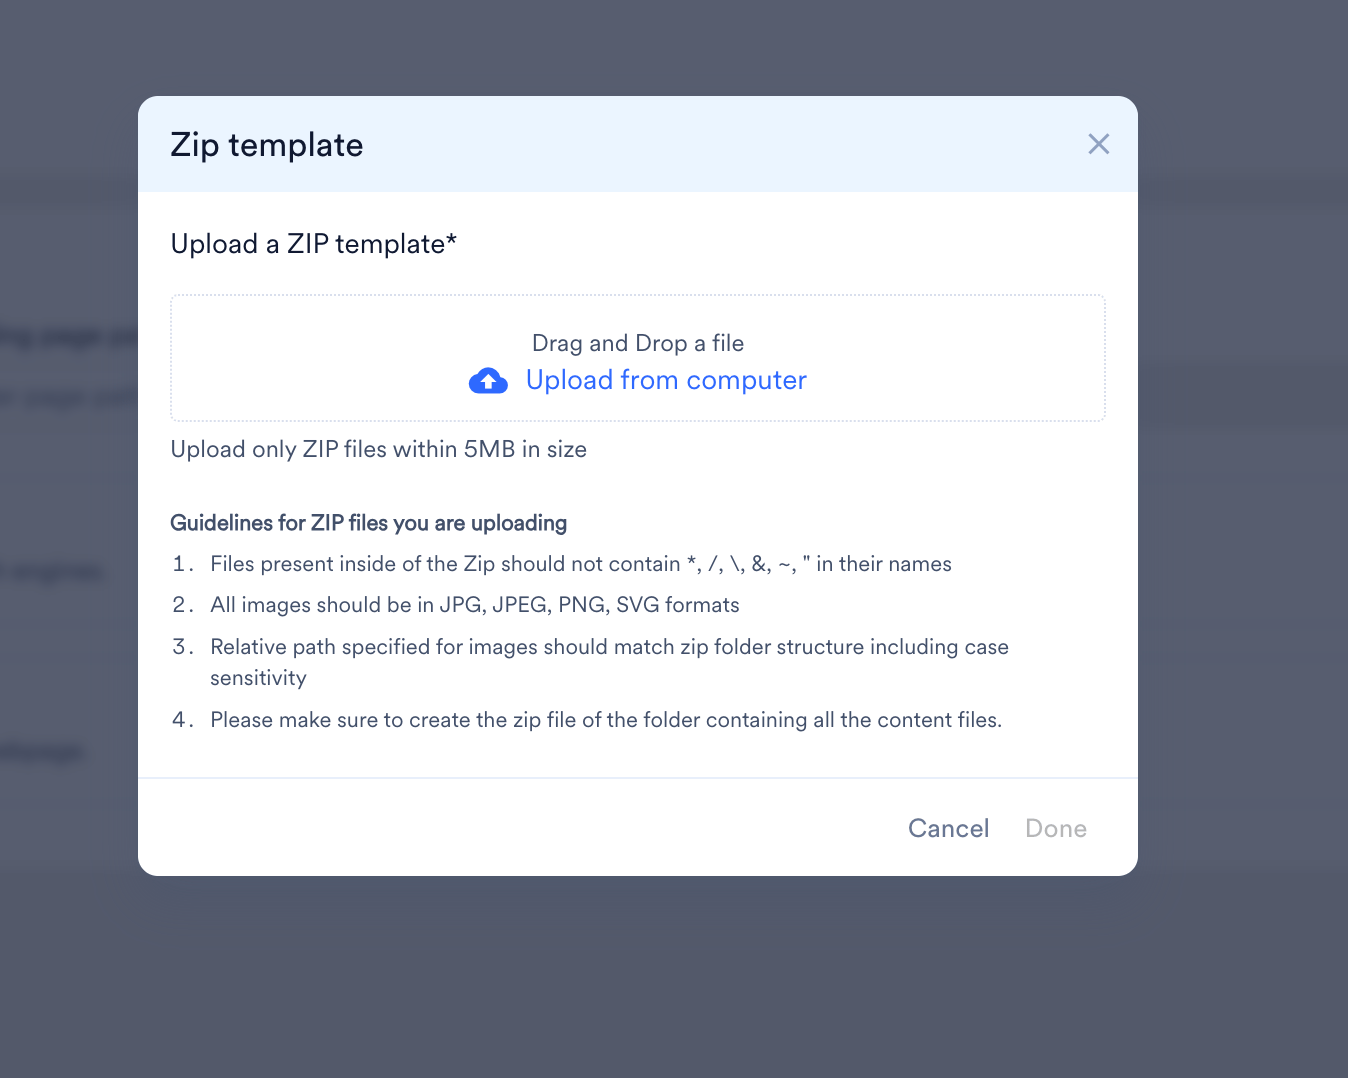 Upload only ZIP files within 5 MB in size. Follow these guidelines for the ZIP file:
* Files inside the ZIP must not contain `*`, `/`, `\`, `&`, `~`, or `"` in their names.
* All images must be in JPG, JPEG, PNG, or SVG format.
* The relative path specified for images must match the ZIP folder structure, including case sensitivity.
* Create the ZIP file from the folder that contains all the content files.
# Preview and Publish
After you add your HTML, click **Preview Landing page** to confirm it renders as expected, and then publish the landing page.
# Make the Page Interactive
To track clicks, capture form submissions, or read and write email subscription categories from a custom HTML landing page, use the MoEngage JavaScript bridge. For the available methods and examples, see [JavaScript Bridge for On-Site Messaging and Landing Pages](/docs/developer-guide/components-for-sdk/javascript-bridge/javascript-bridge-for-on-site-messaging-and-landing-pages).
Upload only ZIP files within 5 MB in size. Follow these guidelines for the ZIP file:
* Files inside the ZIP must not contain `*`, `/`, `\`, `&`, `~`, or `"` in their names.
* All images must be in JPG, JPEG, PNG, or SVG format.
* The relative path specified for images must match the ZIP folder structure, including case sensitivity.
* Create the ZIP file from the folder that contains all the content files.
# Preview and Publish
After you add your HTML, click **Preview Landing page** to confirm it renders as expected, and then publish the landing page.
# Make the Page Interactive
To track clicks, capture form submissions, or read and write email subscription categories from a custom HTML landing page, use the MoEngage JavaScript bridge. For the available methods and examples, see [JavaScript Bridge for On-Site Messaging and Landing Pages](/docs/developer-guide/components-for-sdk/javascript-bridge/javascript-bridge-for-on-site-messaging-and-landing-pages).