{% if ProductSet.YOUR_RECOMMENDATION_NAME %}{% for product in ProductSet.YOUR_RECOMMENDATION_NAME[0:6] %}{% endfor %}{% else %}MOE_NOT_SEND{% endif %}
```
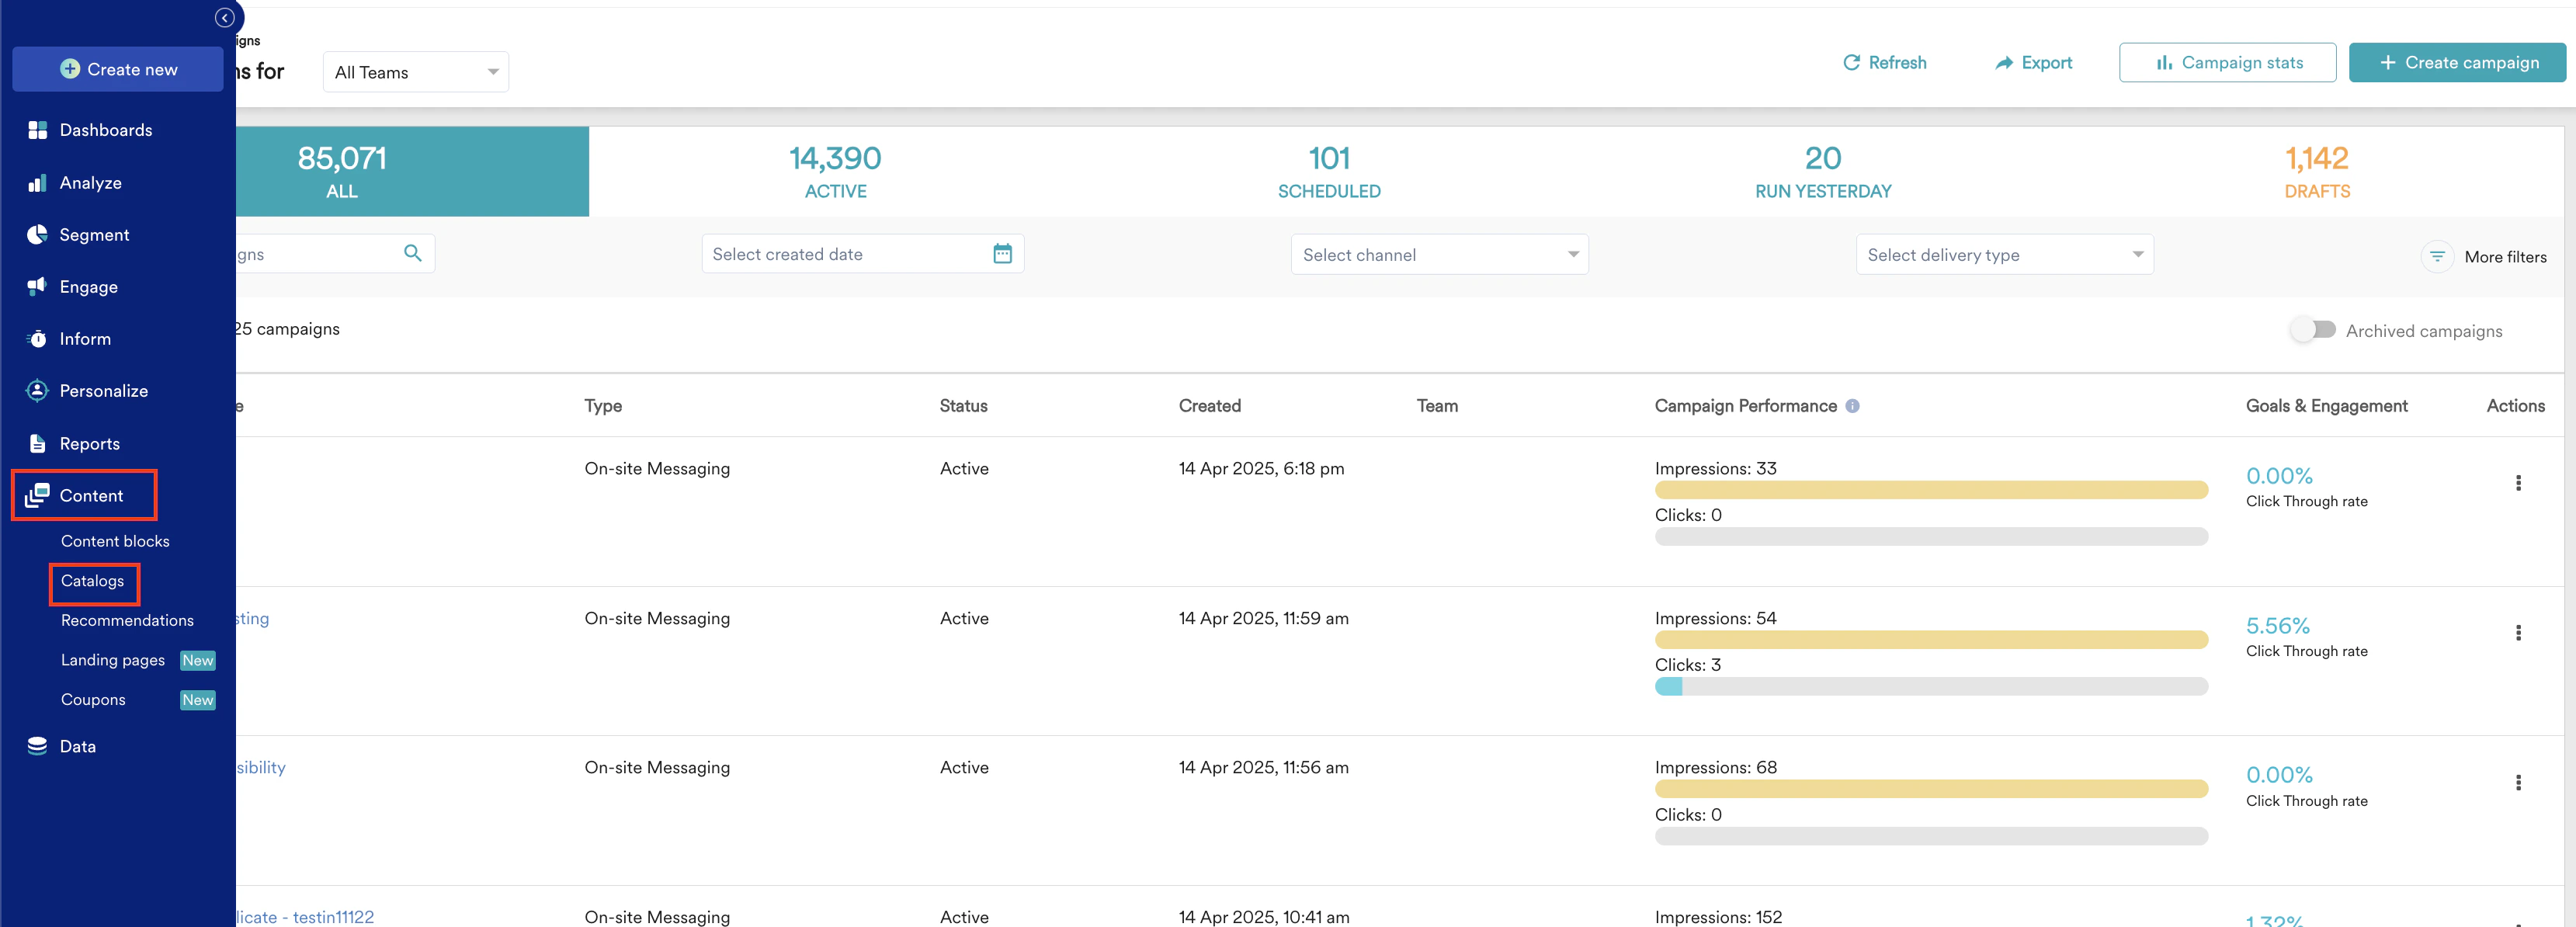 2. On the Catalogs page, click **Create Catalog**.
 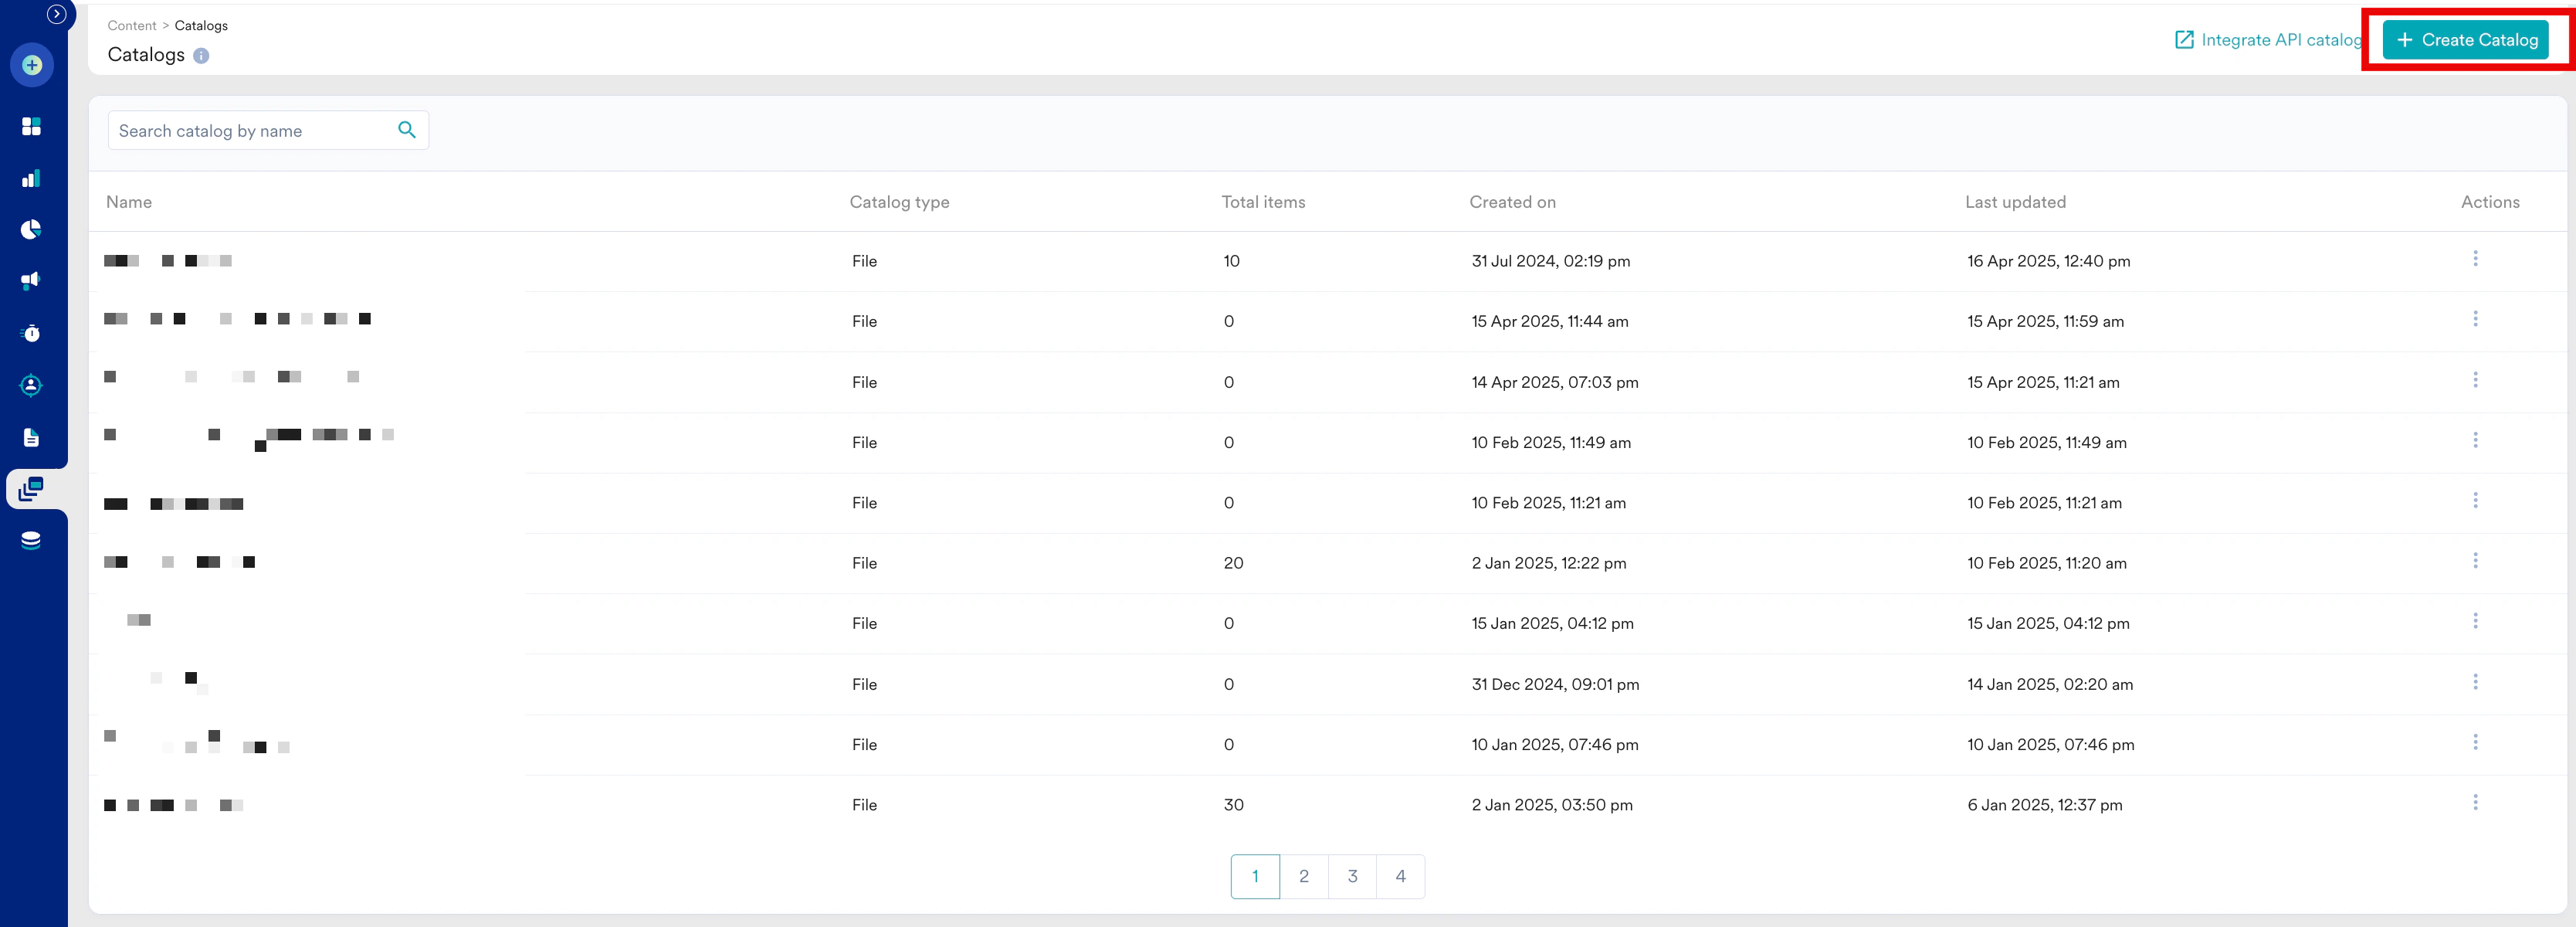 3. In the Catalog name box, type a name for the catalog to identify it, and click **Submit**.
 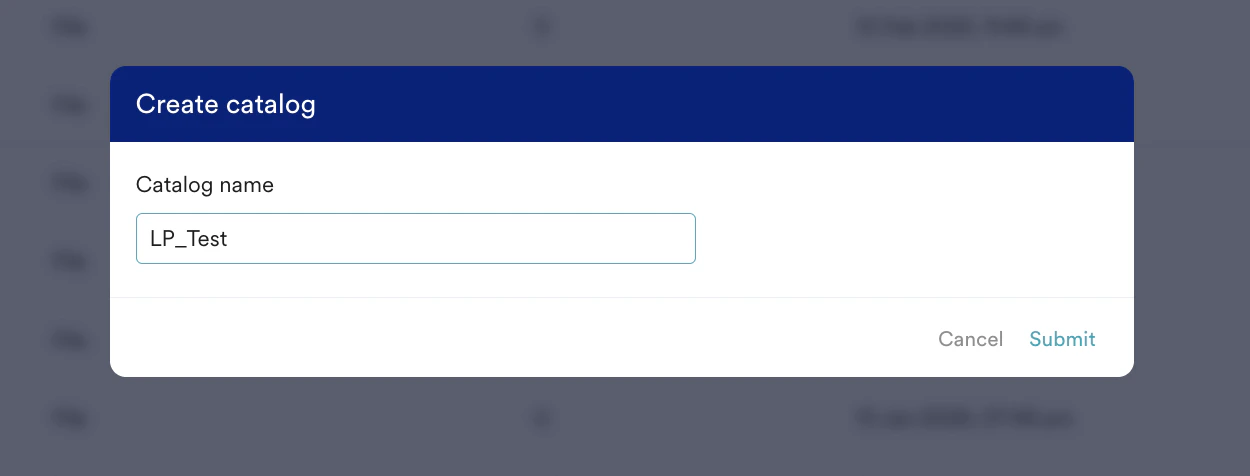 4. Prepare a CSV file with the following columns: title (the product's name), image\_link (the URL of the product image), and link (the URL that leads to the product's checkout page, such as [*https://www.example.com/productA/checkouts*](https://www.example.com/productA/checkouts)). An example feed might look like the following image:
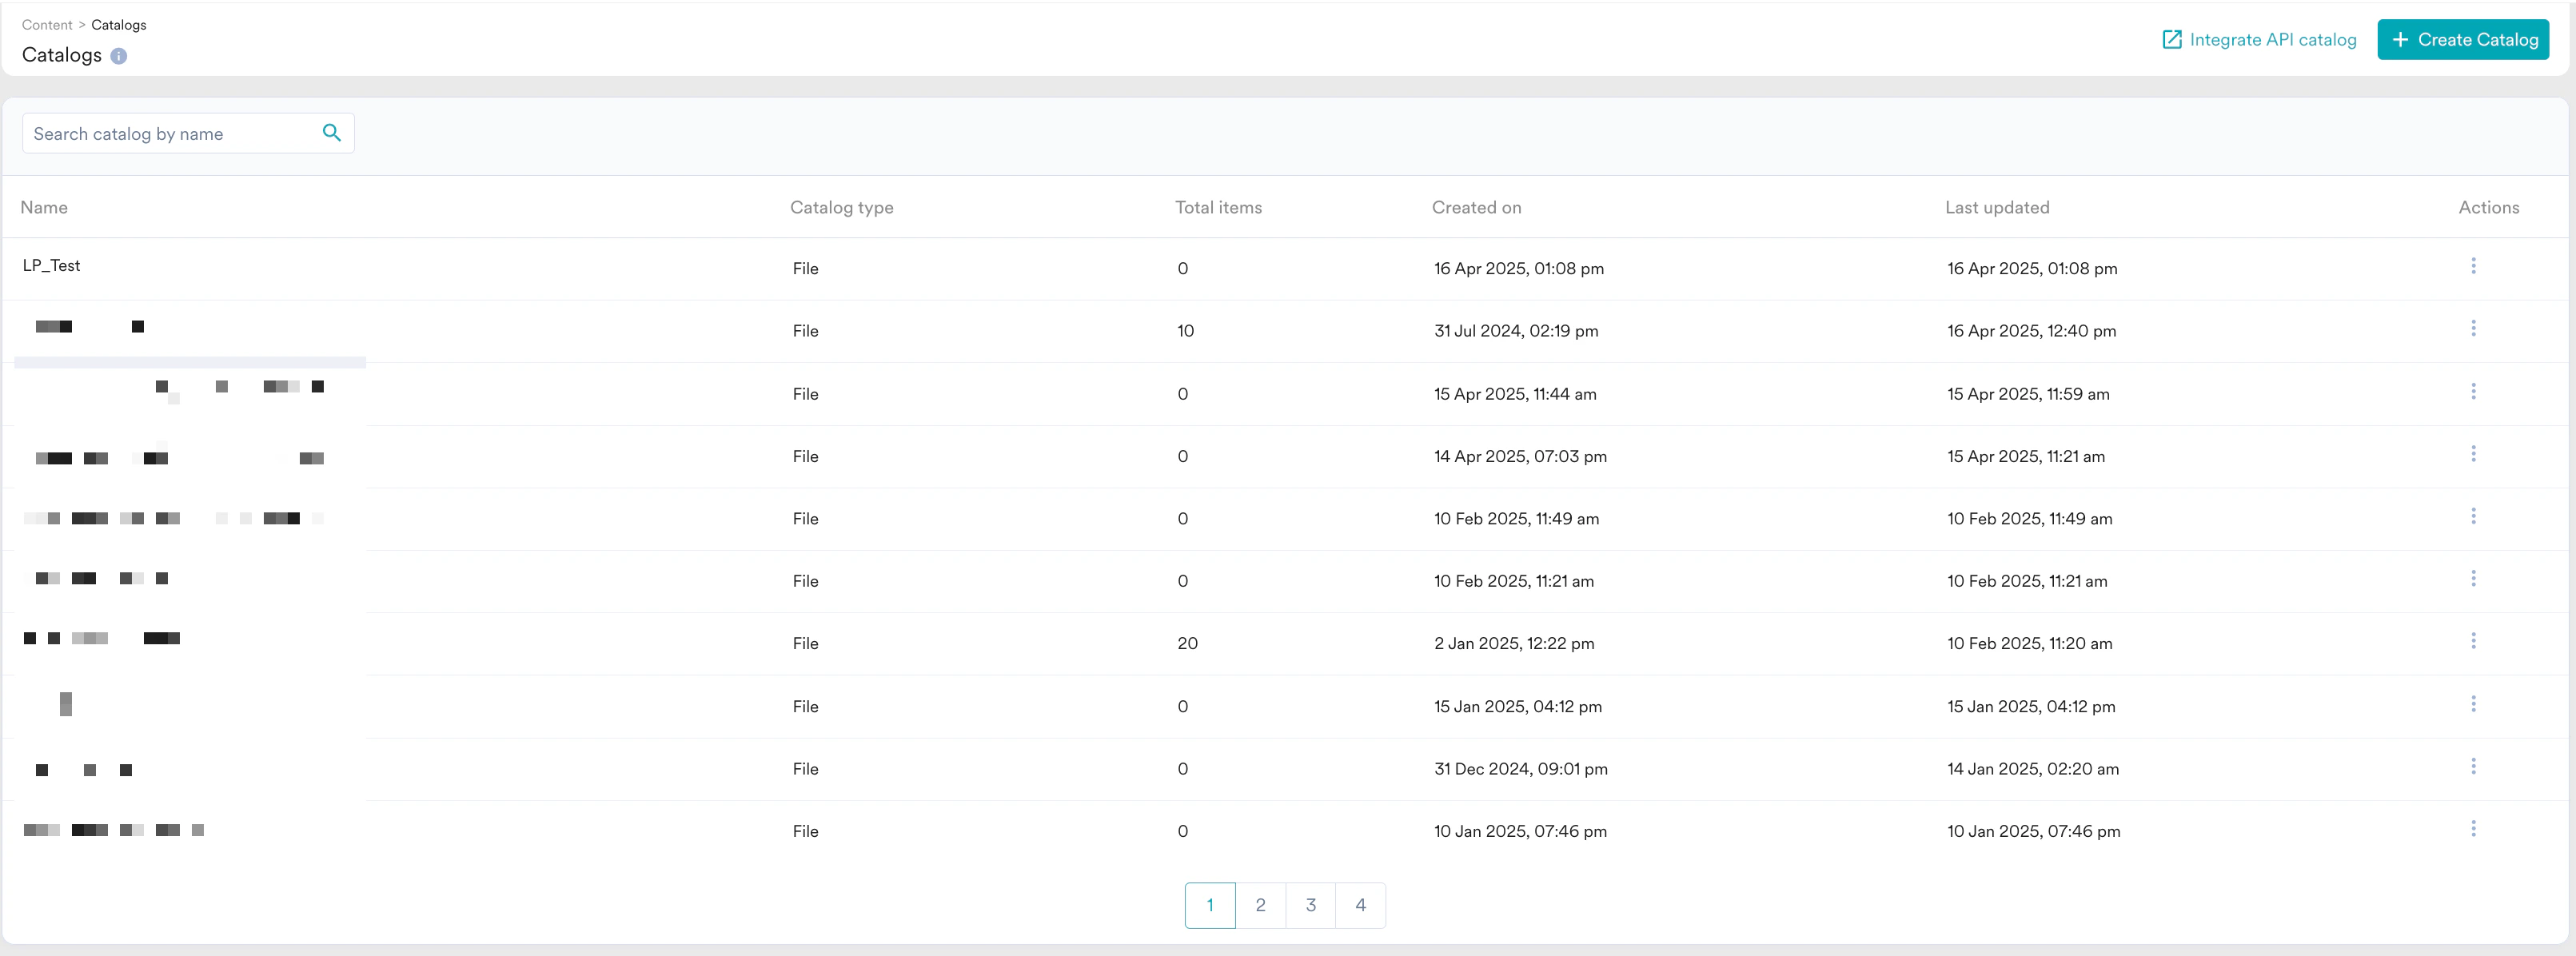
  5. On the **Catalogs** page, click the newly created catalog.
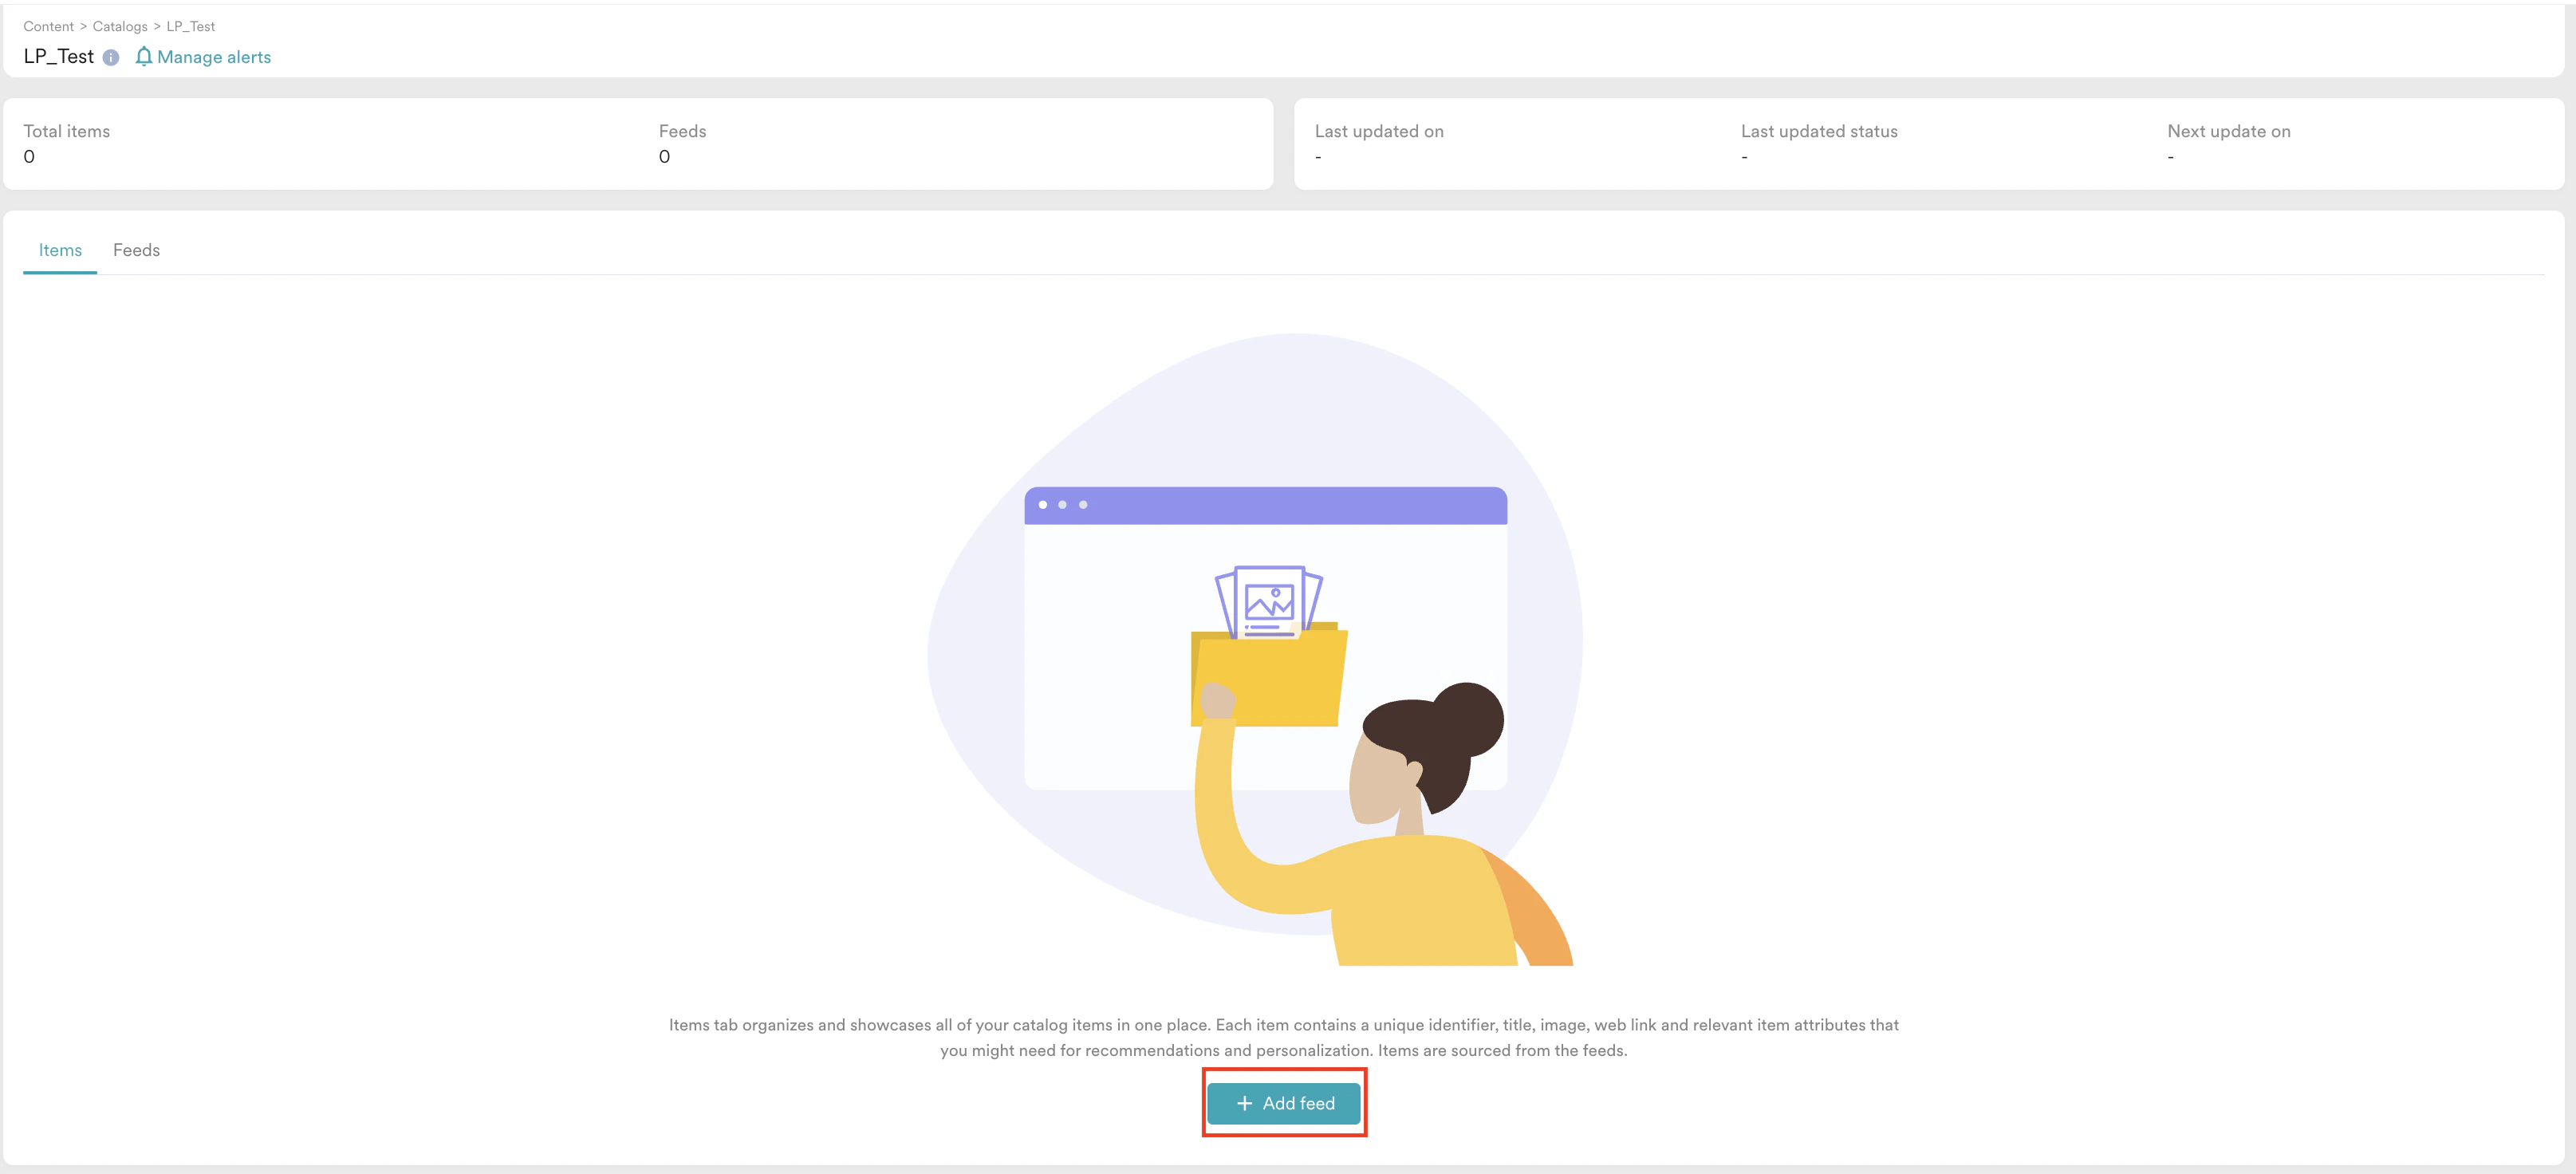
  6. Click **Add Feed**. The **Create feed** pop-up window appears.
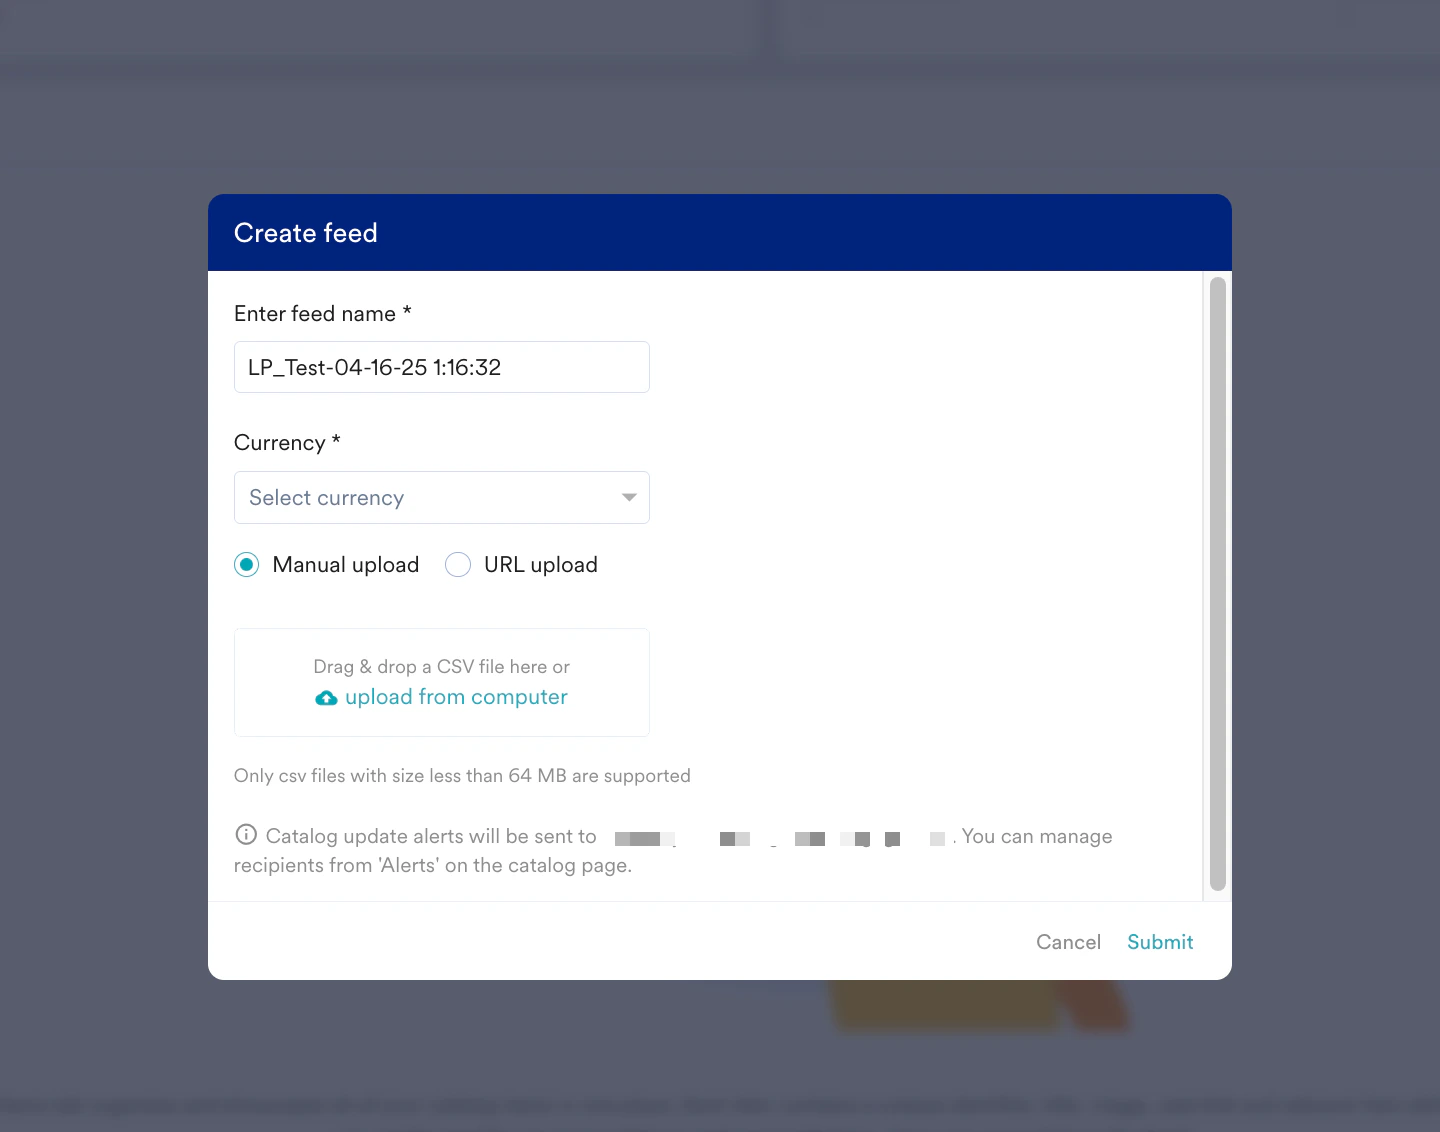
  7. Upload the CSV file from your computer and click **Submit**. For information on using URL upload, refer to [Creating a Catalog](/user-guide/content/recommendations/prerequisites/catalogs).
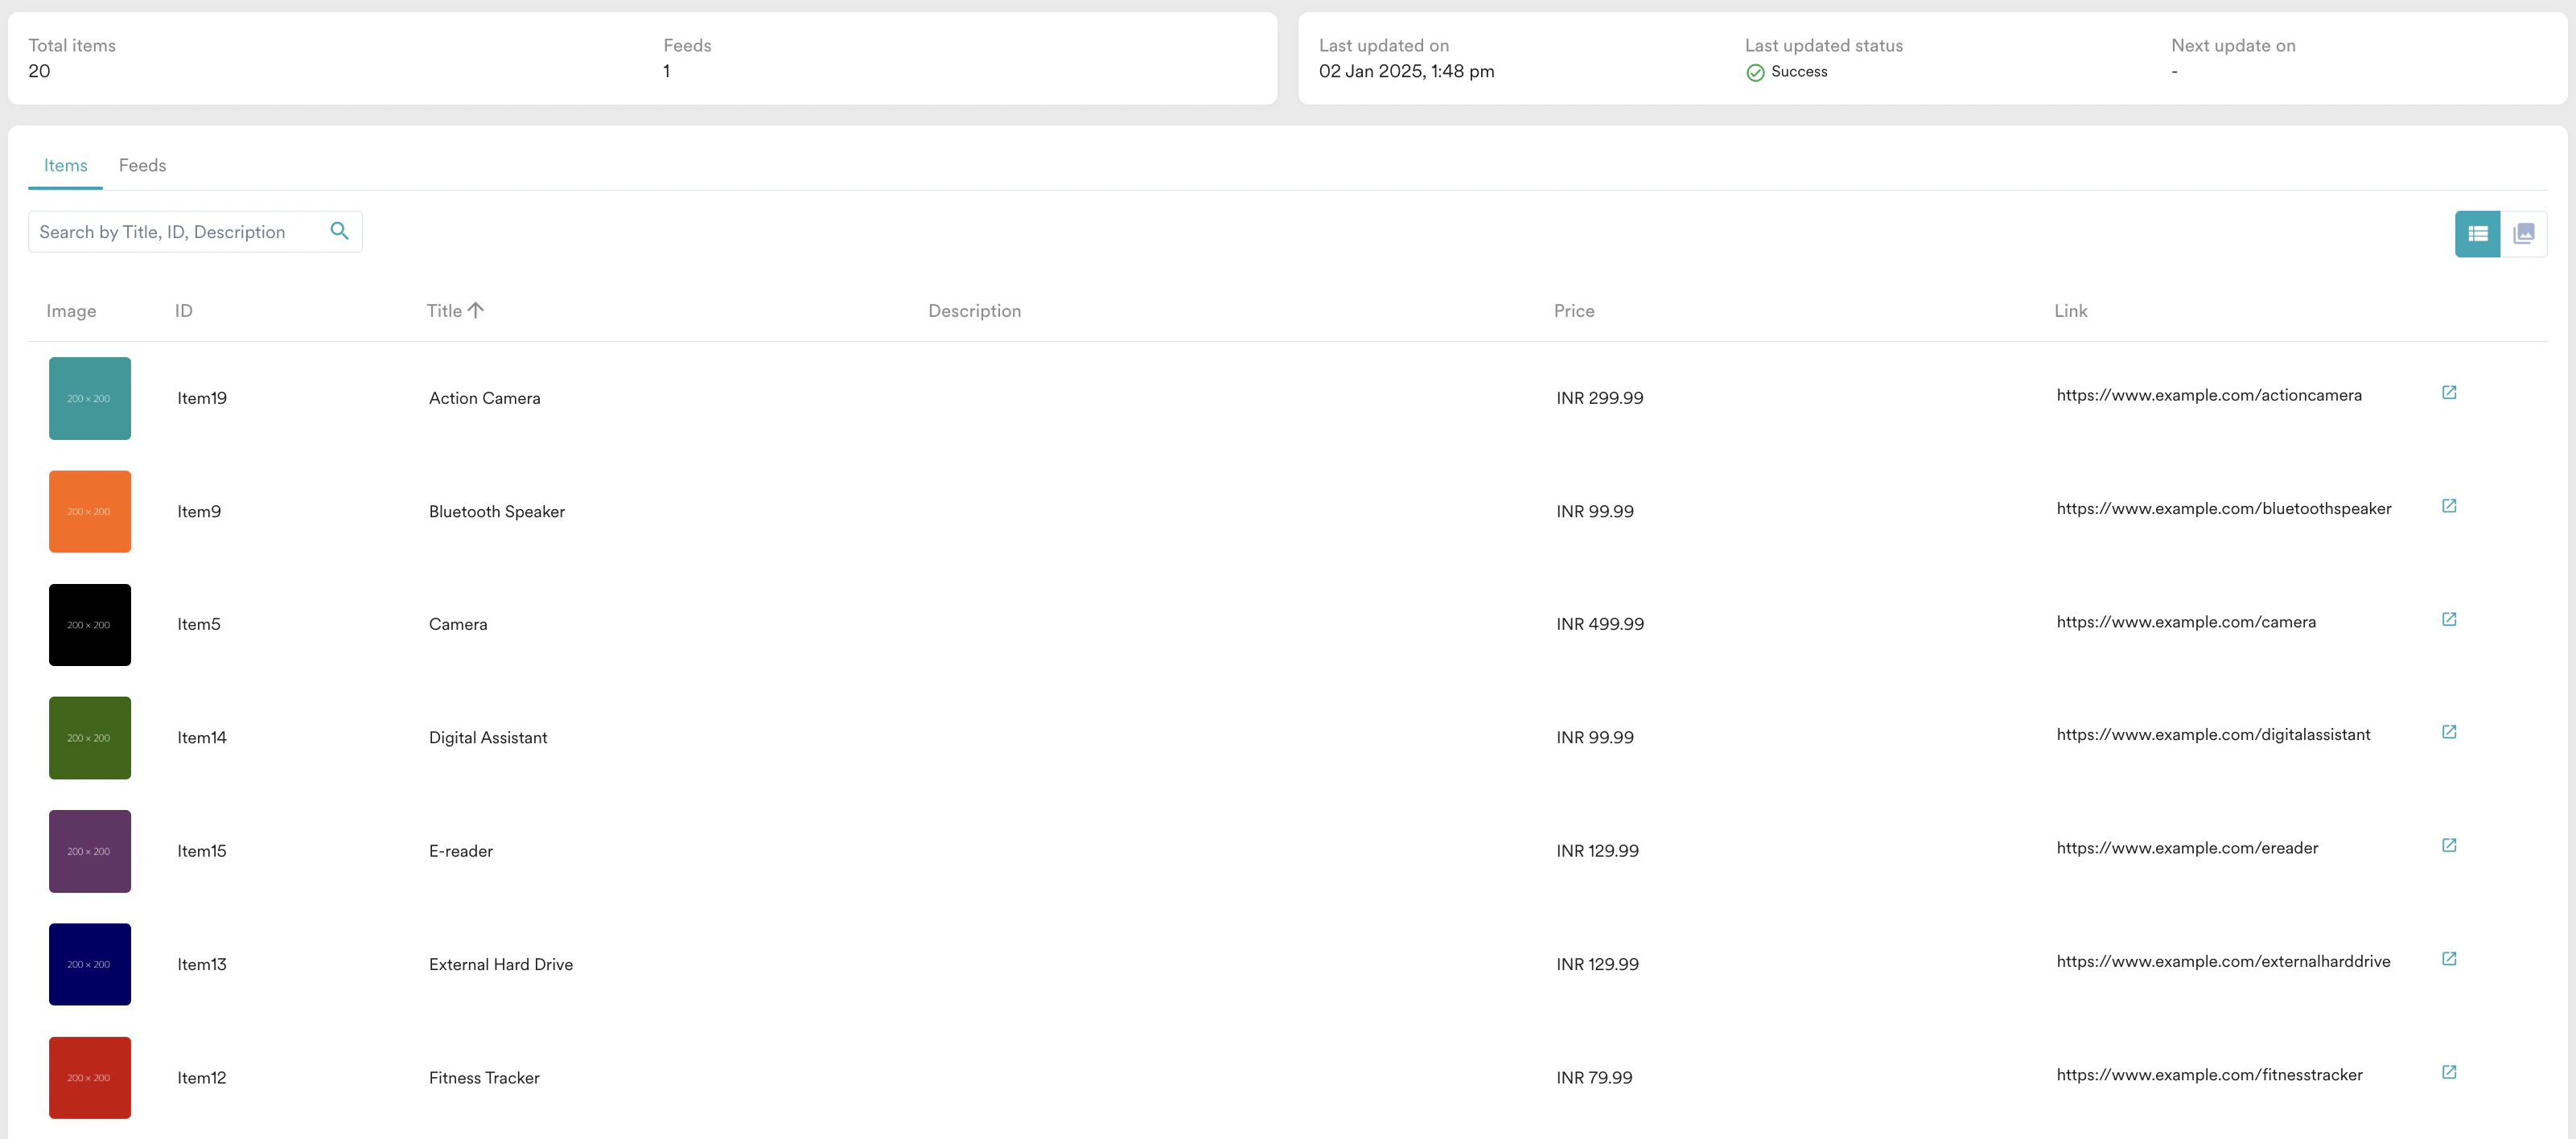
  8. After a successful upload, your item feed will look something like this.
  In the next step, we will create a recommendation for our catalog.
# Step 2: Create a Recommendation
In this section, we will create a recommendation to display all catalog items.
1. On the left navigation menu in the MoEngage dashboard, click **Content**, and then click **Recommendations**.
2. On the Recommendations page, click **+ Create recommendation**.
3. In the **Select recommendation model** section, we will use **Item attributes** type. You can learn more about recommendations [here](/user-guide/content/recommendations/getting-started/moengage-recommendations).
In the next step, we will create a recommendation for our catalog.
# Step 2: Create a Recommendation
In this section, we will create a recommendation to display all catalog items.
1. On the left navigation menu in the MoEngage dashboard, click **Content**, and then click **Recommendations**.
2. On the Recommendations page, click **+ Create recommendation**.
3. In the **Select recommendation model** section, we will use **Item attributes** type. You can learn more about recommendations [here](/user-guide/content/recommendations/getting-started/moengage-recommendations). 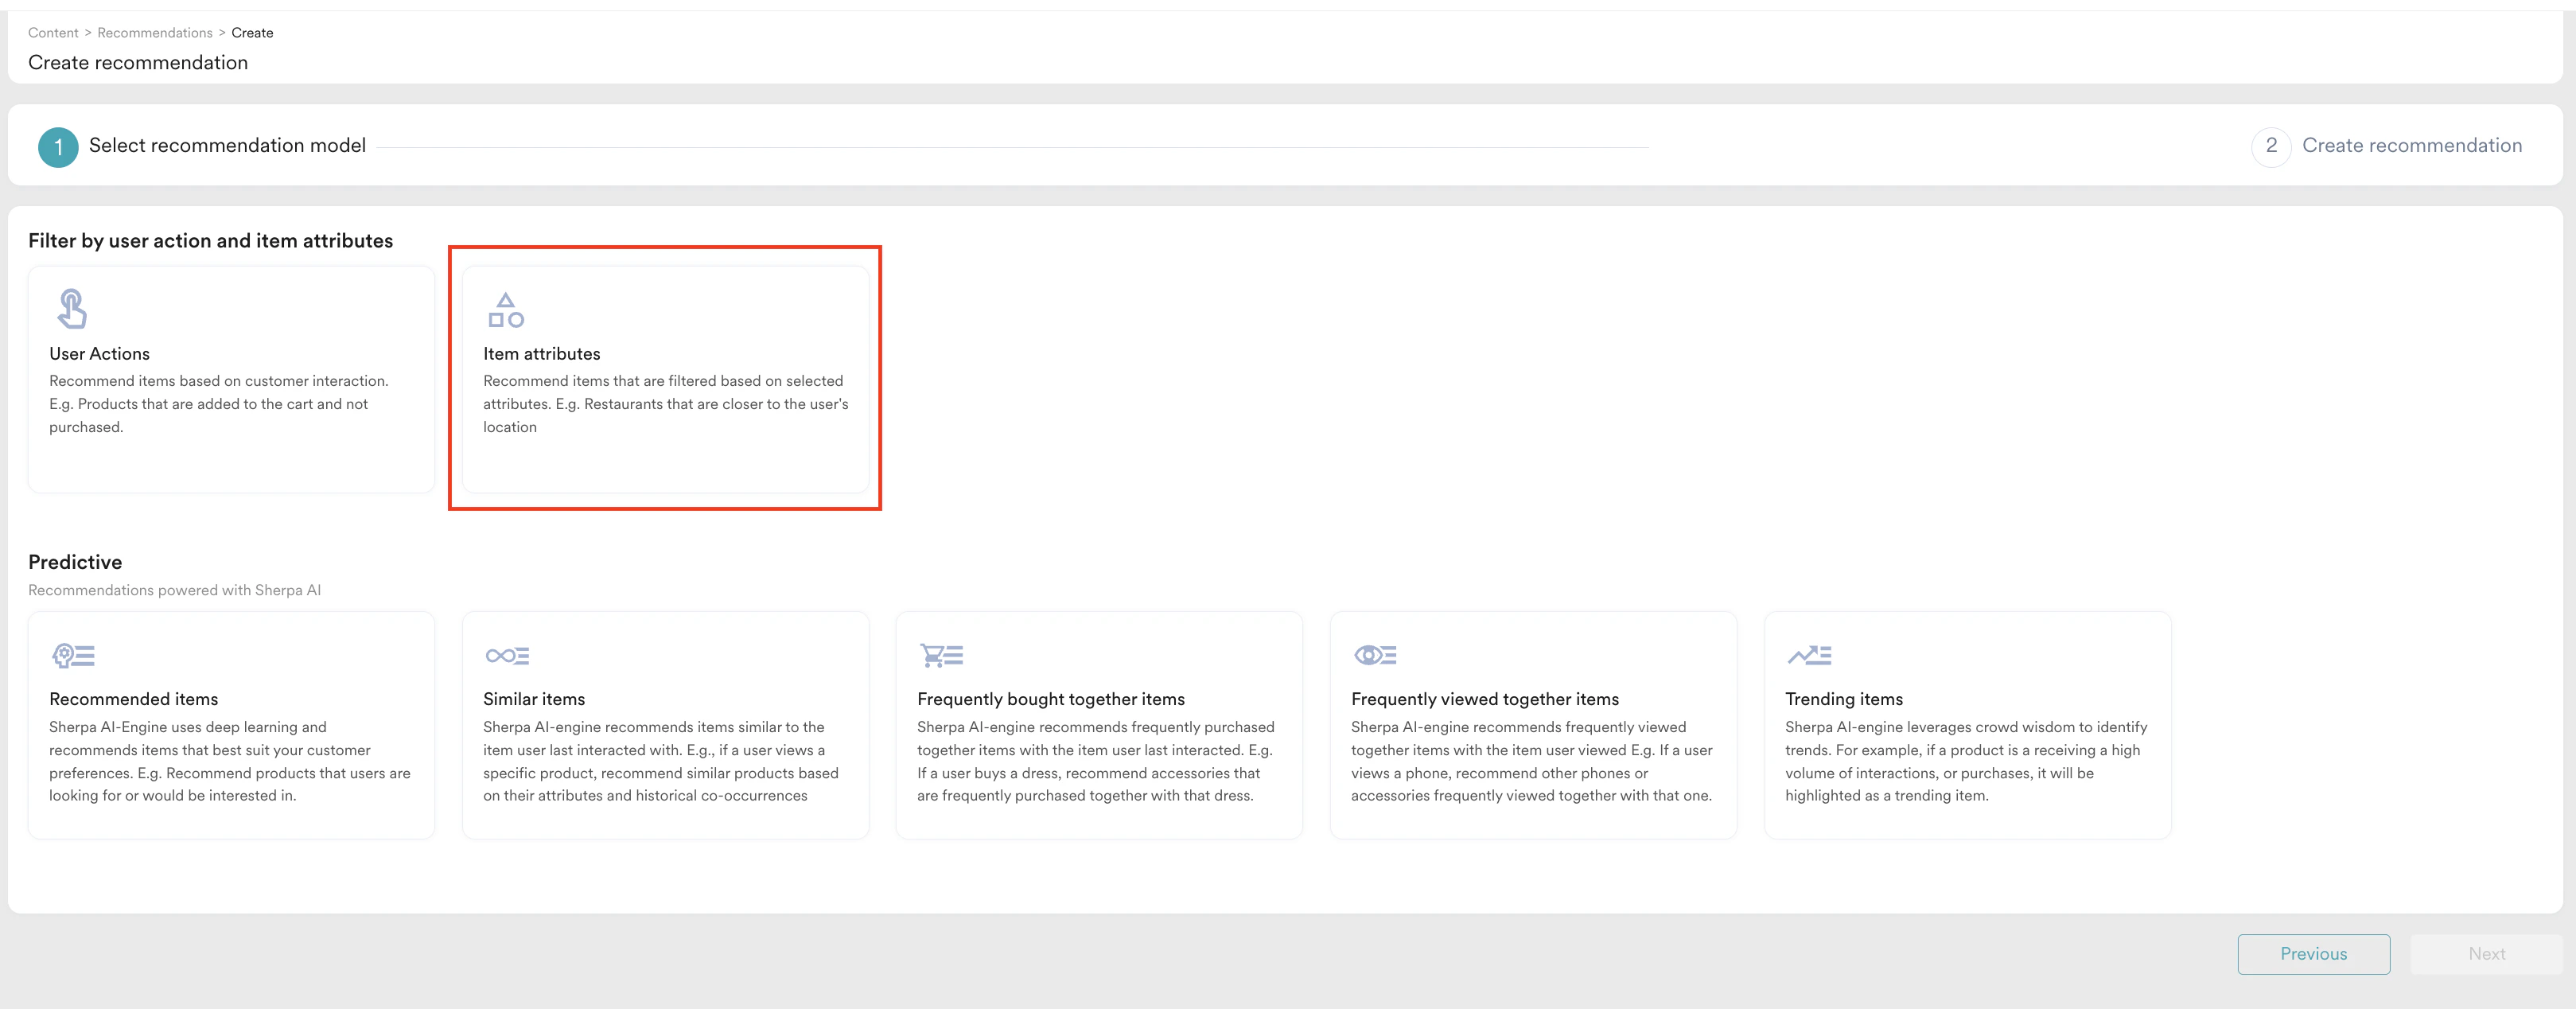 4. Click **Next**.
5. Enter a name and description for your recommendation.
6. In the **Catalog** list, select the catalog created in [Step 1](#step-1-create-a-product-catalog).
4. Click **Next**.
5. Enter a name and description for your recommendation.
6. In the **Catalog** list, select the catalog created in [Step 1](#step-1-create-a-product-catalog). 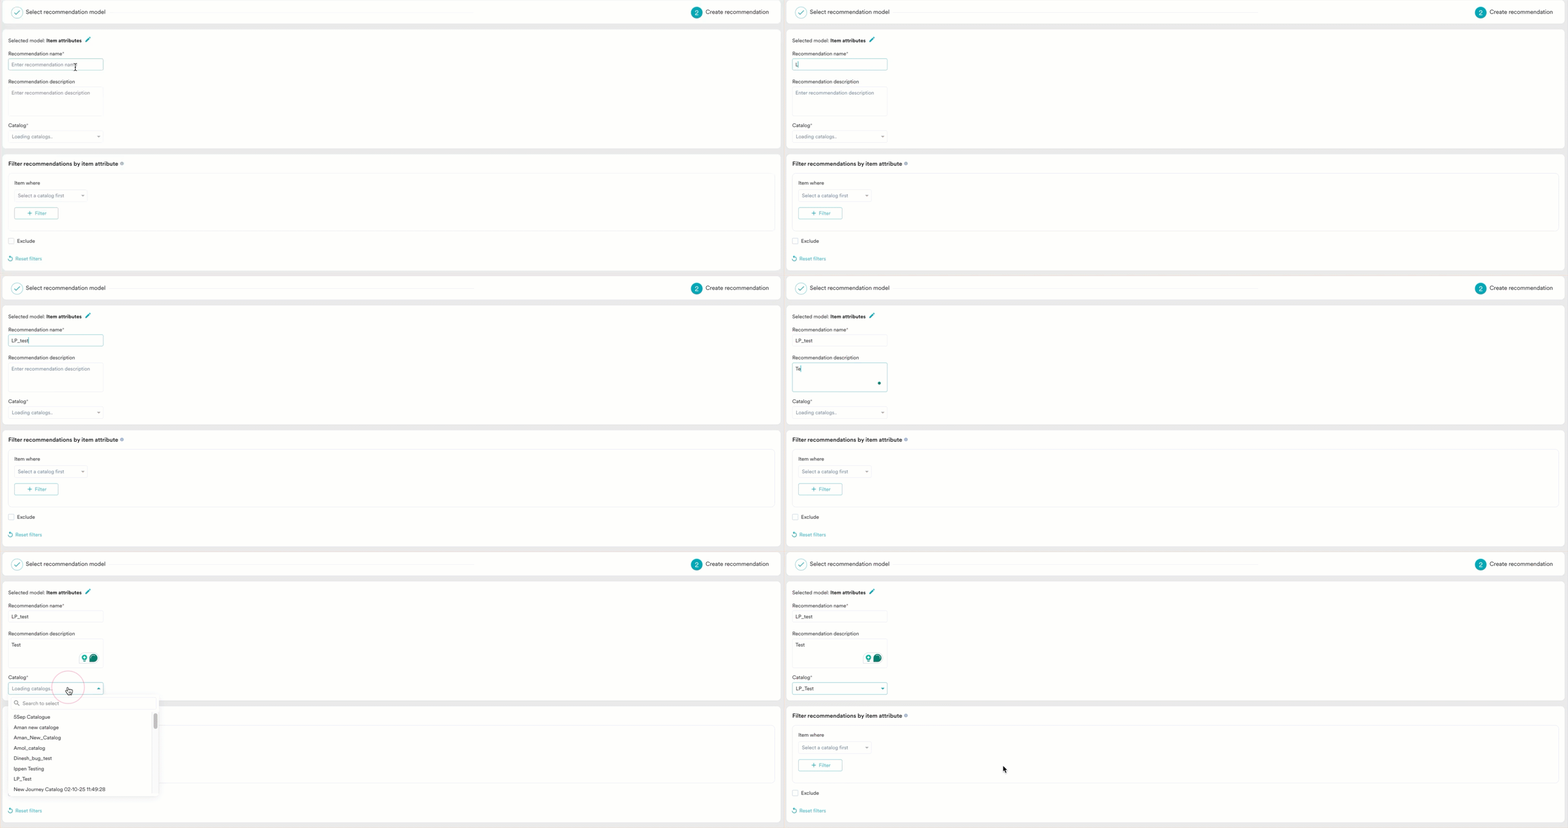 7. Set the filter as shown below:
  This will ensure all the products are shown when this recommendation is used. For more information on using filters, refer [here](/user-guide/content/recommendations/basic-recommendations/item-attribute-model).
8. Click **Create**.
In the next step, we will create a landing page with the recommendations.
# Step 3: Create the Landing Page
In this section, we will create a landing page with an embedded HTML element to dynamically render the products in a grid layout, each with a **Preorder now** button linking to a checkout page.
1. On the left navigation menu in the MoEngage dashboard, click **Content**, and then click **Landing pages**.
2. On the Landing pages page, click **Create a landing page**.
3. Enter a name for the landing page to identify and manage it easily, and select appropriate tags to categorize it.
4. In the **Content** section, click **Blank Template**.
This will ensure all the products are shown when this recommendation is used. For more information on using filters, refer [here](/user-guide/content/recommendations/basic-recommendations/item-attribute-model).
8. Click **Create**.
In the next step, we will create a landing page with the recommendations.
# Step 3: Create the Landing Page
In this section, we will create a landing page with an embedded HTML element to dynamically render the products in a grid layout, each with a **Preorder now** button linking to a checkout page.
1. On the left navigation menu in the MoEngage dashboard, click **Content**, and then click **Landing pages**.
2. On the Landing pages page, click **Create a landing page**.
3. Enter a name for the landing page to identify and manage it easily, and select appropriate tags to categorize it.
4. In the **Content** section, click **Blank Template**. 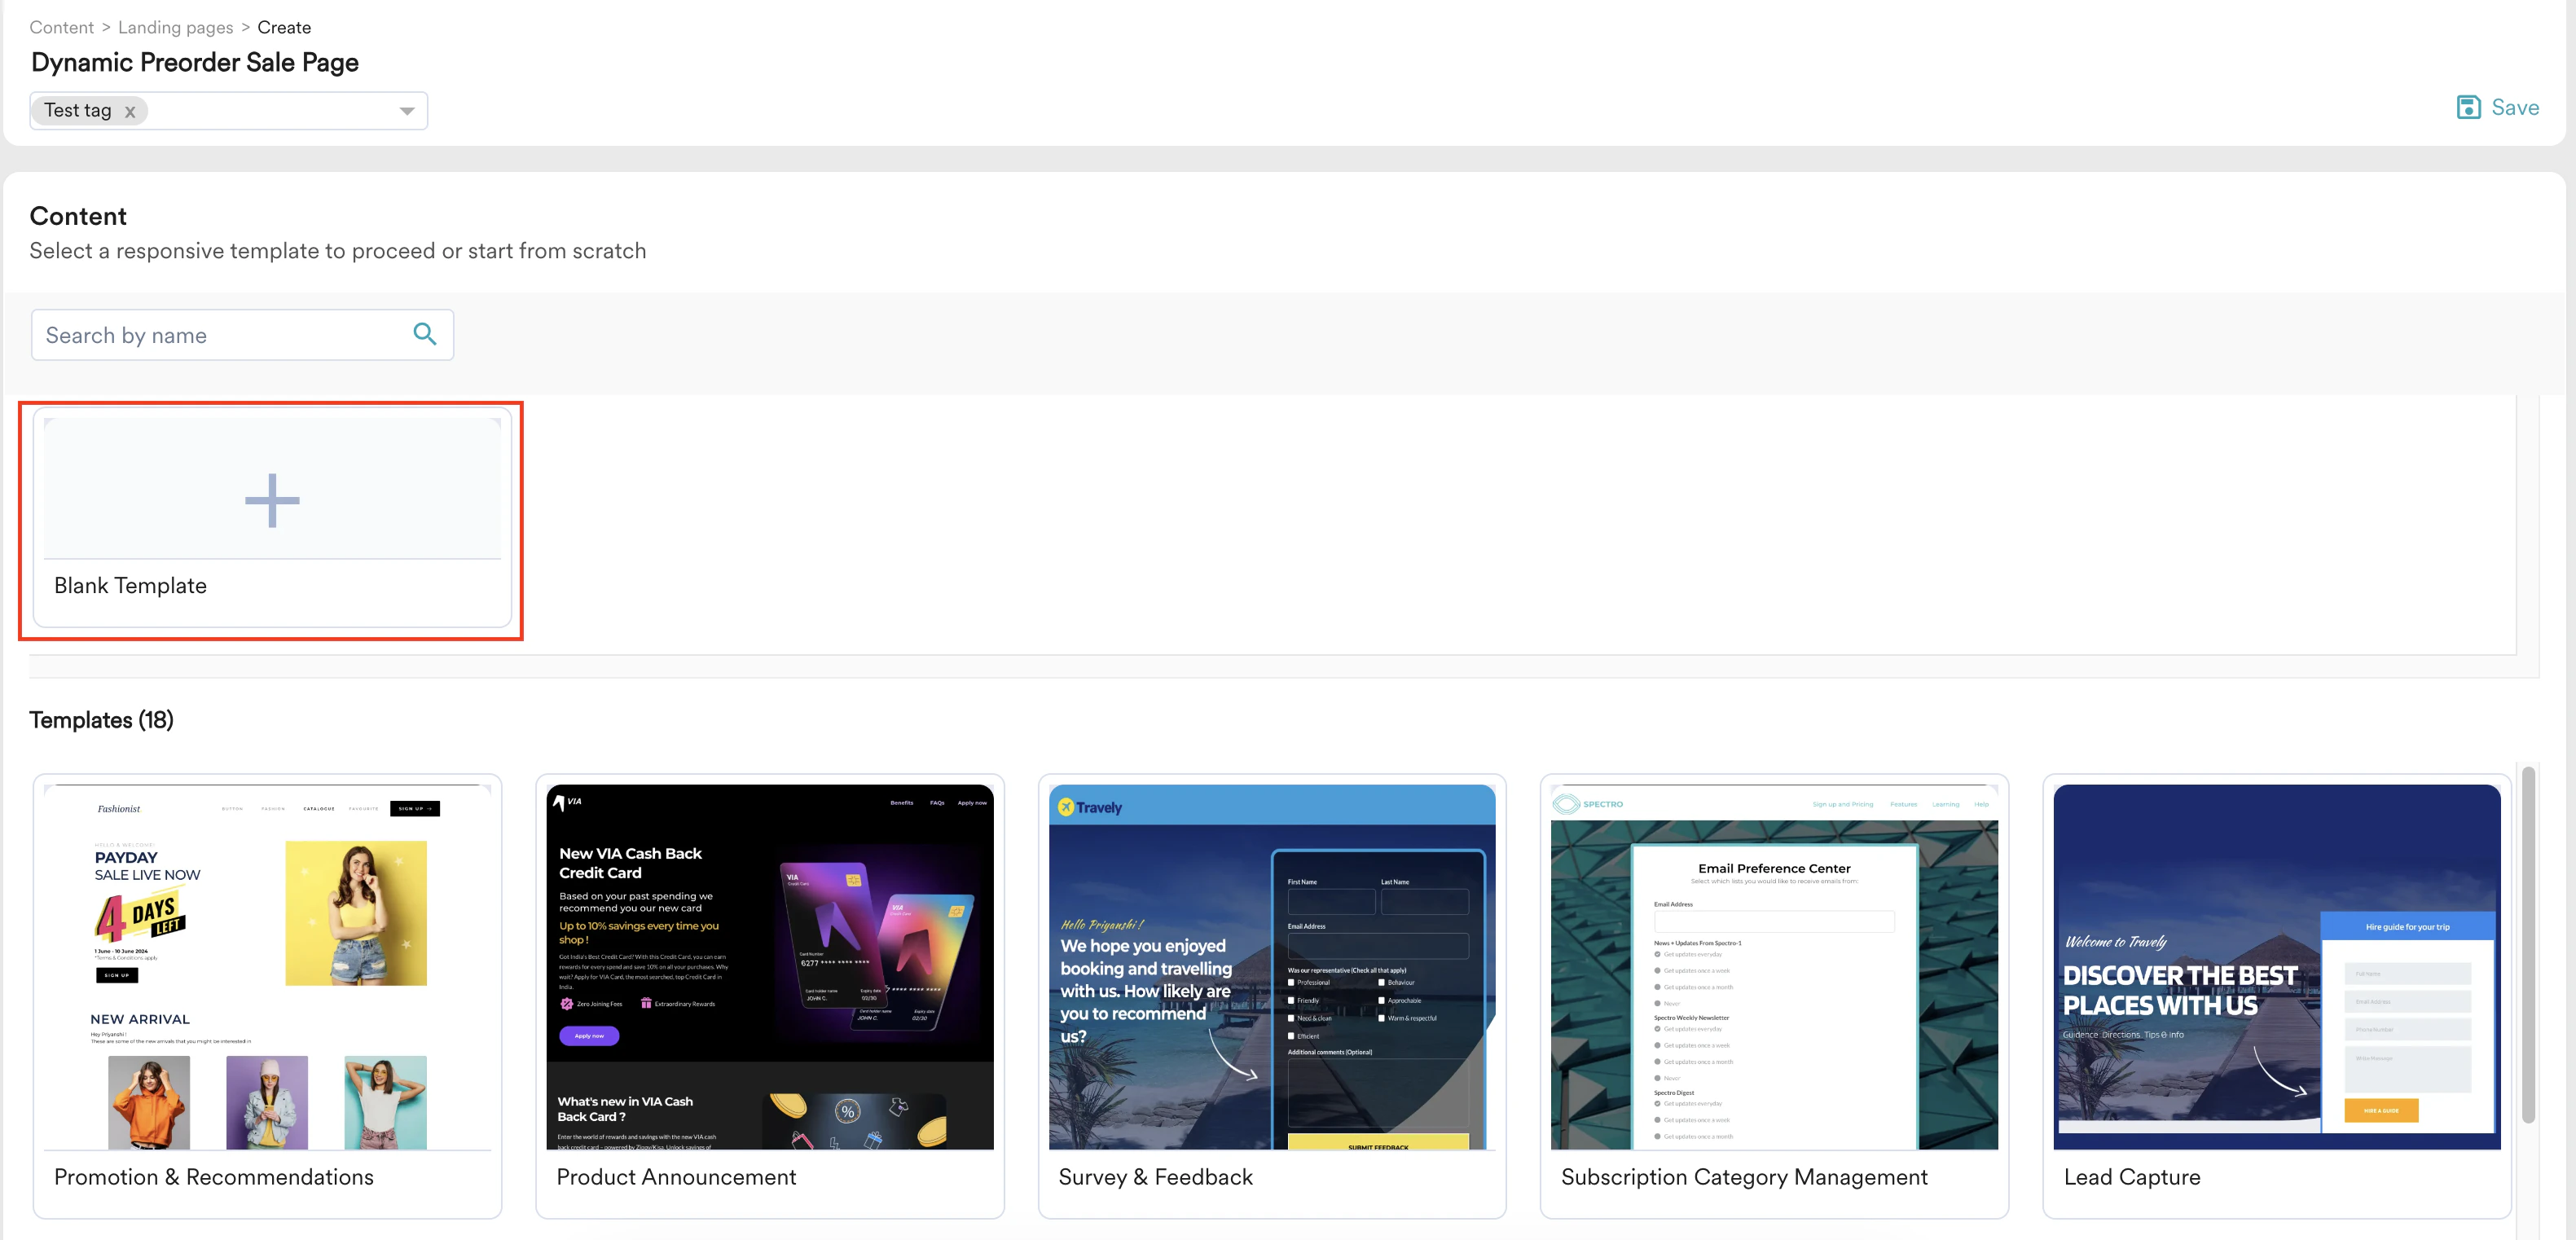 5. Add the desired text and images to your page. For more information, refer to [Landing Page Editor](/user-guide/content/landing-pages/create/landing-page-editor).
6. From the editor's left pane, drag and drop the "Embed" element onto the page. This element allows you to insert custom HTML code for dynamic content.
7. Within the embed element, click the first icon in the settings bar and paste the following HTML code, replacing YOUR\_RECOMMENDATION\_NAME with your recommendation name (for example, *LP\_test*):
5. Add the desired text and images to your page. For more information, refer to [Landing Page Editor](/user-guide/content/landing-pages/create/landing-page-editor).
6. From the editor's left pane, drag and drop the "Embed" element onto the page. This element allows you to insert custom HTML code for dynamic content.
7. Within the embed element, click the first icon in the settings bar and paste the following HTML code, replacing YOUR\_RECOMMENDATION\_NAME with your recommendation name (for example, *LP\_test*):
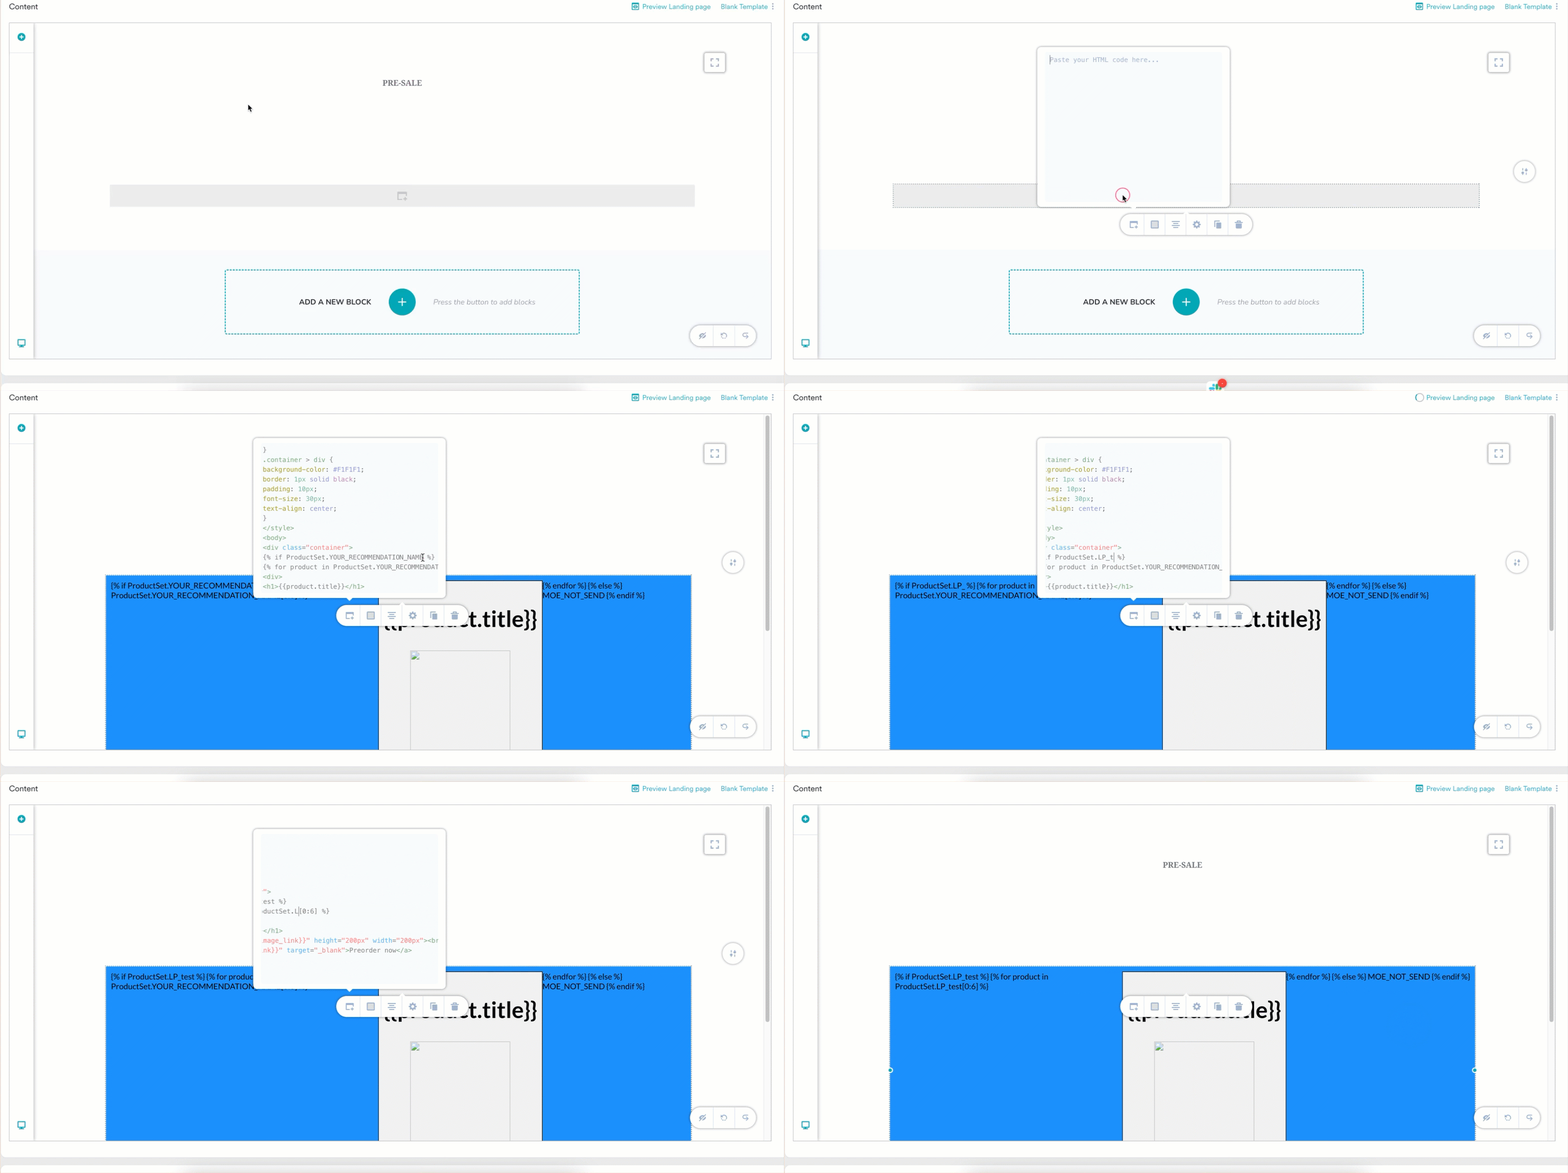 8. Customize the CSS within the embed element to match your preferred design, such as changing colors or grid layout. For example, you can modify the background color or adjust the grid columns.
9. Optionally, you can drag and drop additional elements, such as text or images (for example, a logo) above the product grid to enhance the landing page's appearance.
10. Configure the URL and settings for your landing page. For more information, refer to [Create a Landing Page](/user-guide/content/landing-pages/create/create-a-landing-page).
11. Click **Publish** to publish your landing page. The page will appear as shown below.
8. Customize the CSS within the embed element to match your preferred design, such as changing colors or grid layout. For example, you can modify the background color or adjust the grid columns.
9. Optionally, you can drag and drop additional elements, such as text or images (for example, a logo) above the product grid to enhance the landing page's appearance.
10. Configure the URL and settings for your landing page. For more information, refer to [Create a Landing Page](/user-guide/content/landing-pages/create/create-a-landing-page).
11. Click **Publish** to publish your landing page. The page will appear as shown below. 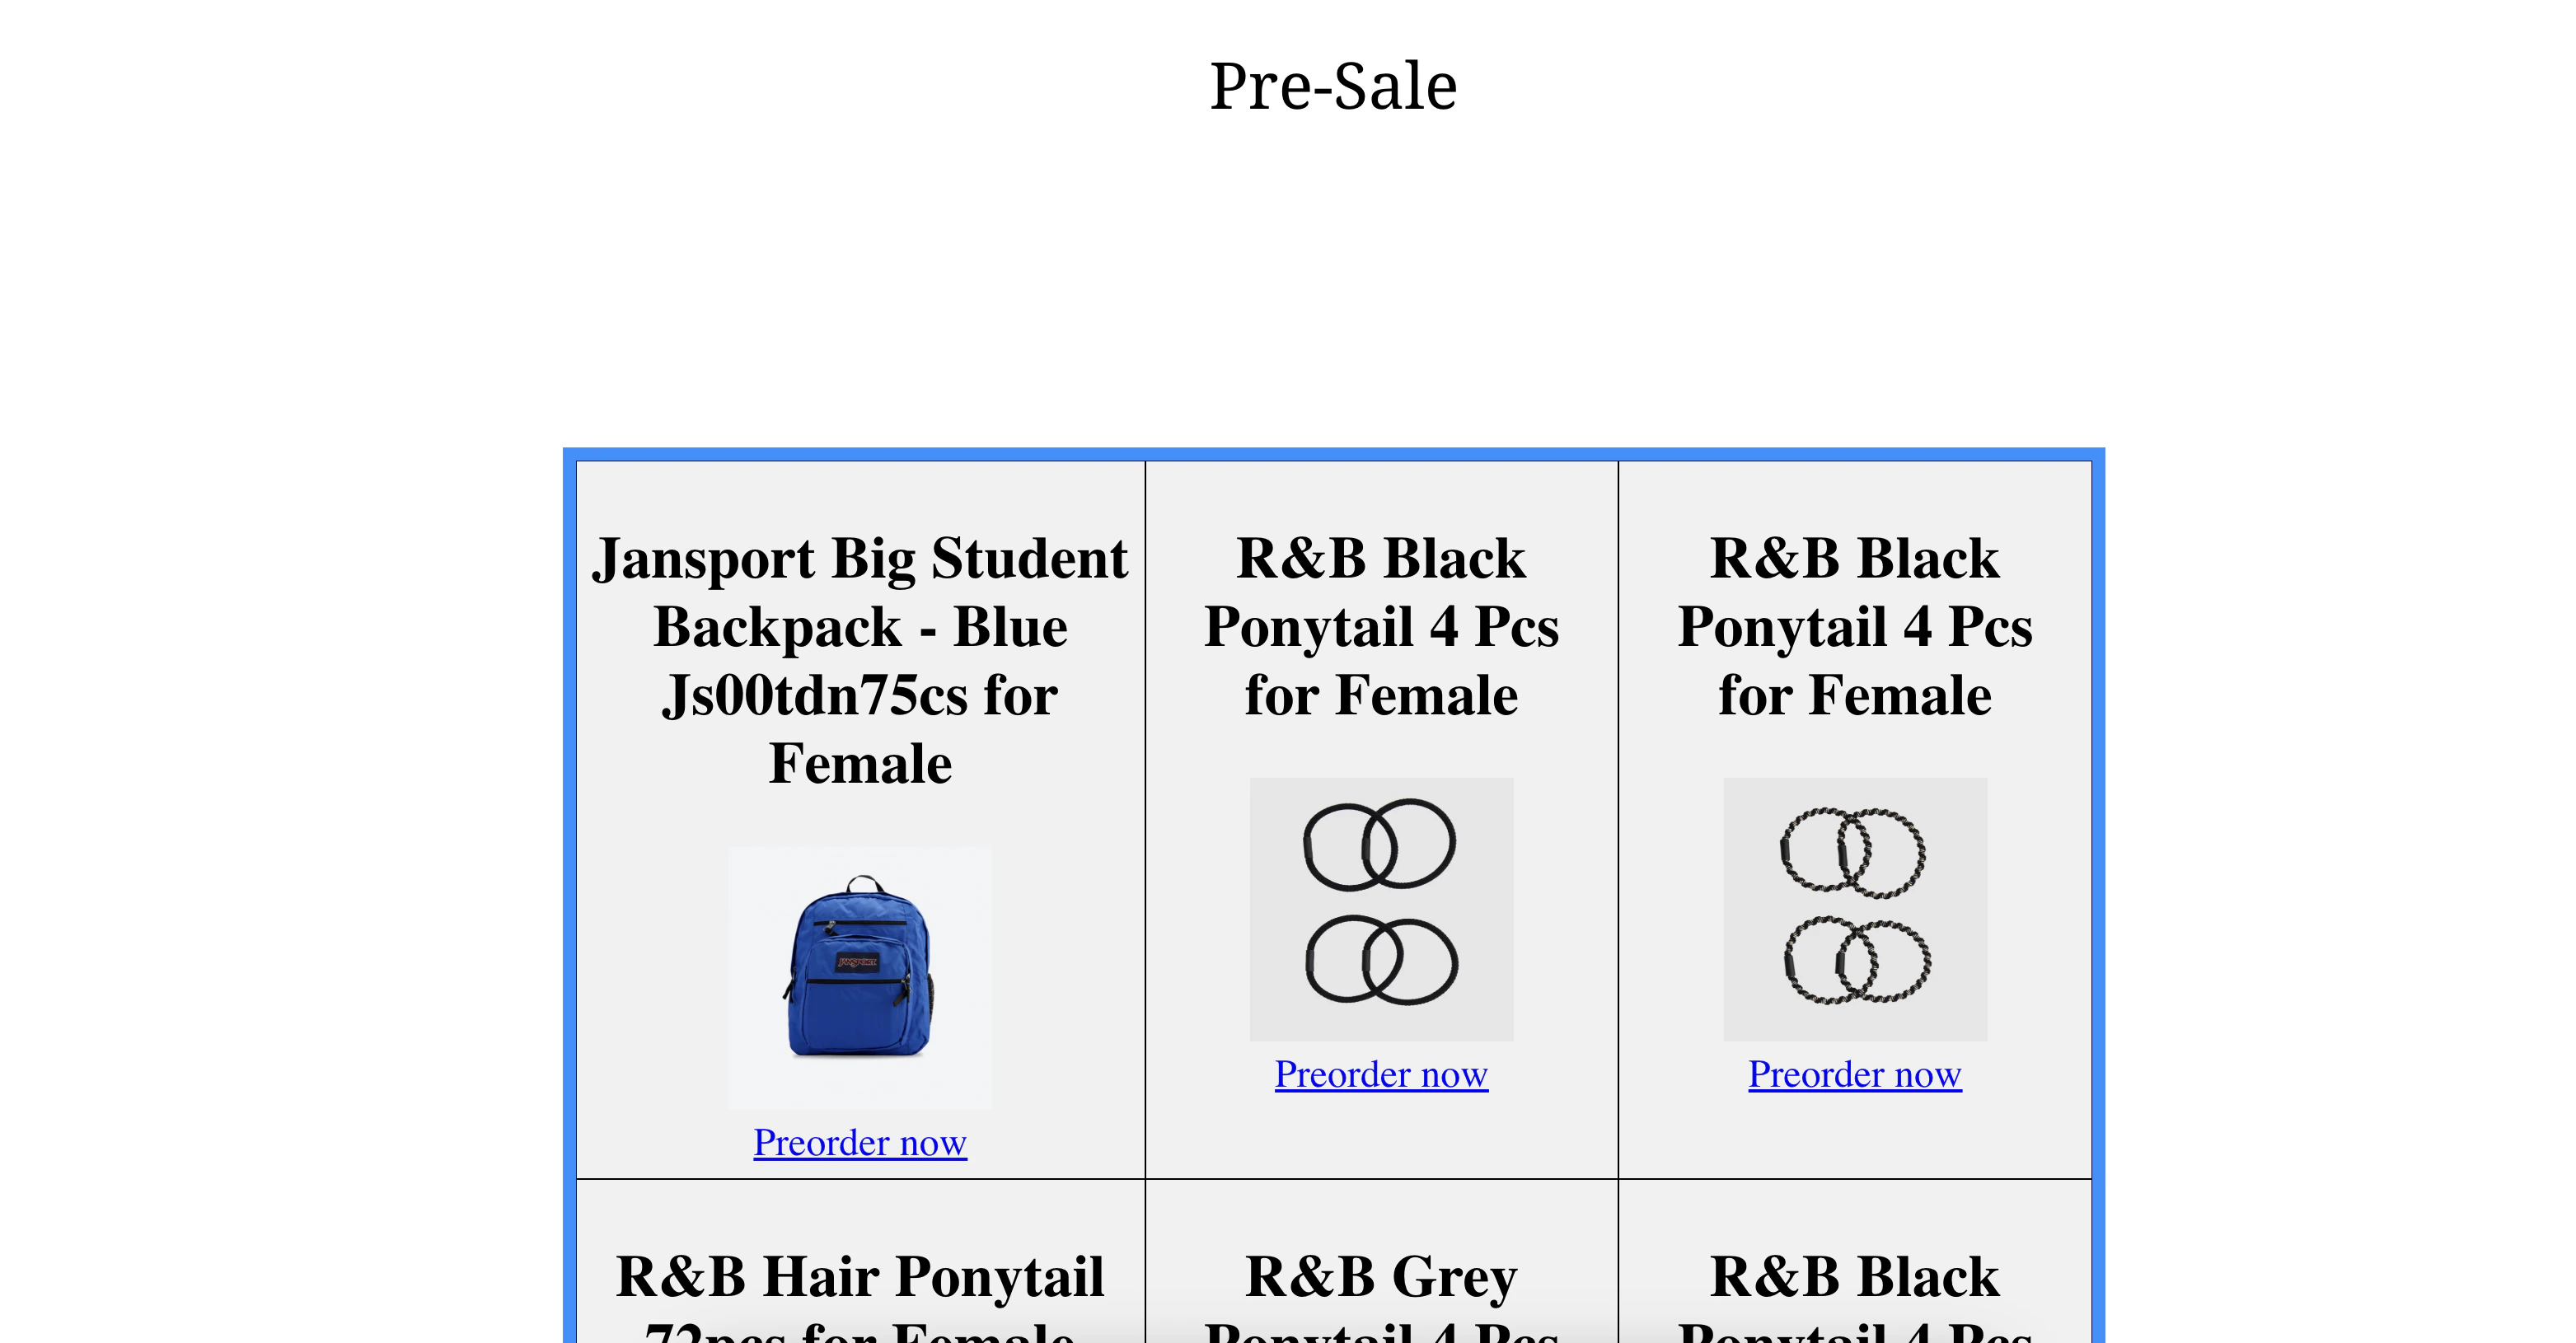 # Verification
To verify that the dynamic sale landing page is working correctly:
1. Visit the published landing page and ensure the grid displays the products from your catalog, each with a title, image, and functional **Preorder now** button.
2. Click **Preorder now** to confirm it directs to the correct checkout page for each product, as specified in the catalog.
# Conclusion
In this use case, we created a dynamic sale landing page by setting up a product catalog, configuring a recommendation, and embedding HTML for dynamic product display. This approach ensures users can browse and preorder products seamlessly, enhancing sales efficiency and customer engagement. Now that we have published the landing page, we can track views and clicks to understand how well our campaign is performing.
# Verification
To verify that the dynamic sale landing page is working correctly:
1. Visit the published landing page and ensure the grid displays the products from your catalog, each with a title, image, and functional **Preorder now** button.
2. Click **Preorder now** to confirm it directs to the correct checkout page for each product, as specified in the catalog.
# Conclusion
In this use case, we created a dynamic sale landing page by setting up a product catalog, configuring a recommendation, and embedding HTML for dynamic product display. This approach ensures users can browse and preorder products seamlessly, enhancing sales efficiency and customer engagement. Now that we have published the landing page, we can track views and clicks to understand how well our campaign is performing.