

MoEngage × Wootag
This integration enables an automated data flow from Wootag to MoEngage, triggering campaigns that you can personalize using dynamic event attributes.Use Cases
Integrating Wootag with MoEngage helps you address the following use cases:- Real-time signal monitoring: Wootag continuously monitors live contextual signals such as temperature or sports scores.
- Automated event triggers: Automatically fire MoEngage Business Events when rule conditions (for example, temperature above 40°C) are met.
- Dynamic personalization: Use Jinja templating to inject event data such as the city name or signal values directly into campaign content.
- Contextual lifecycle engagement: Deliver relevant offers or alerts based on a user’s current environment or interests.
Supported Moment Categories
The following table describes the signal categories available for triggering campaigns through Wootag:Integration
Prerequisites
- MoEngage Business Events: Your MoEngage Customer Success Manager must enable this feature before you proceed.
- Account access: Ensure you have active login credentials for both the MoEngage and Wootag dashboards.
- Moment Rules: You must have at least one Wootag Moment Rule (Weather, Sports, and so on) configured.
Step 1: Get Your MoEngage API Credentials
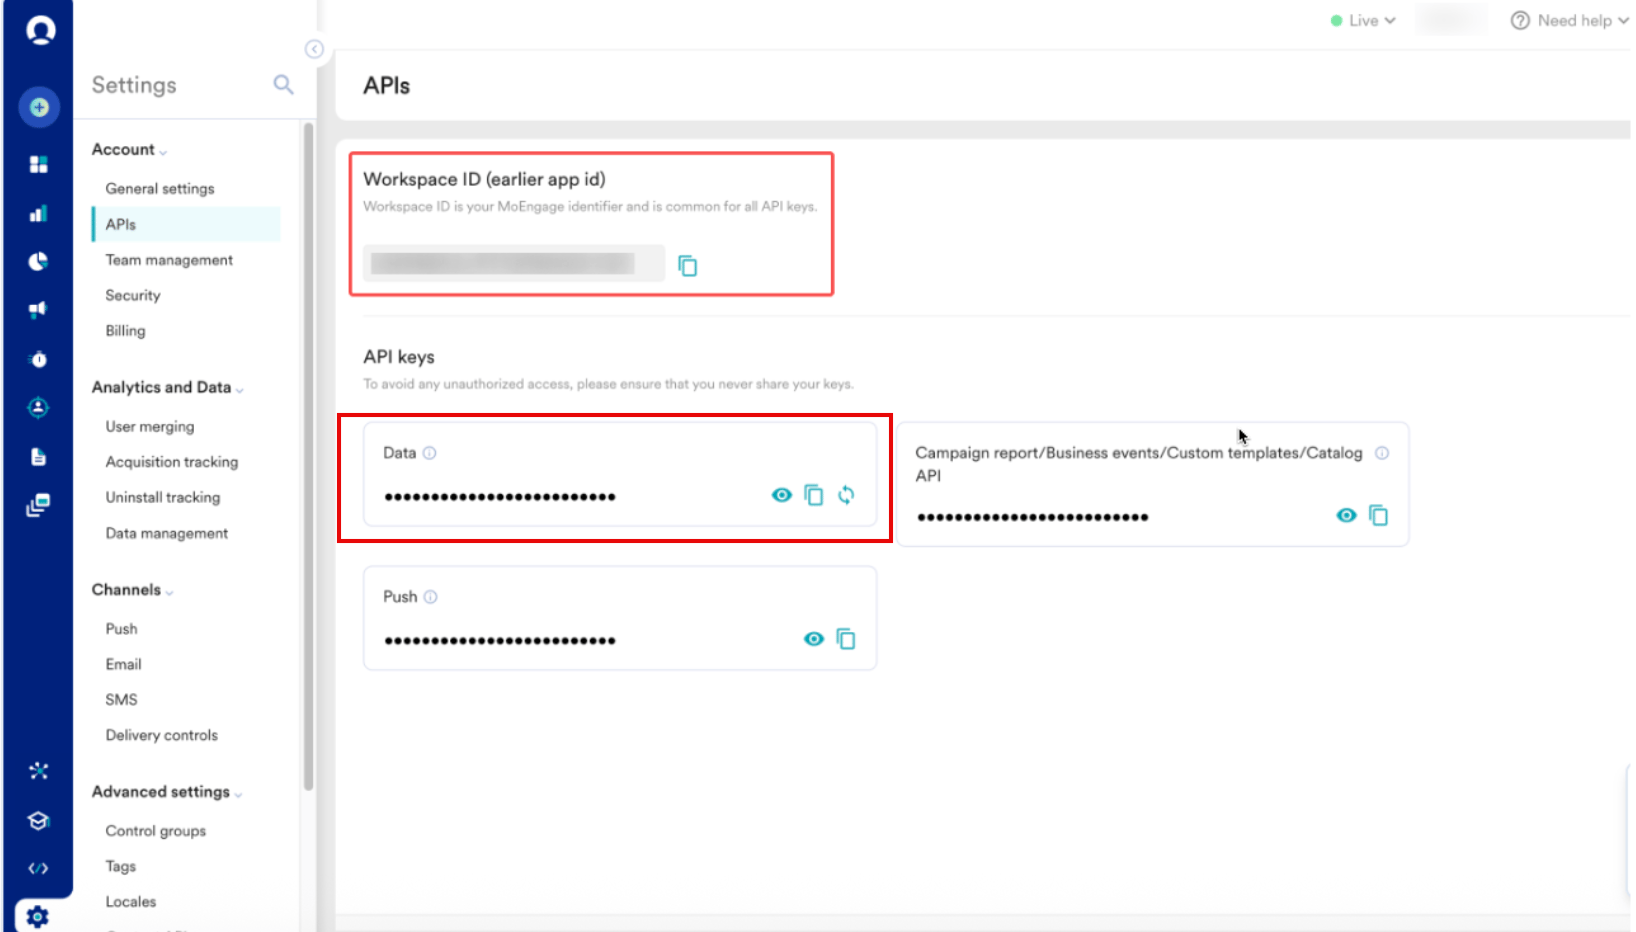
To get your MoEngage API credentials, perform the following steps:- On the left navigation menu in the MoEngage dashboard, click Settings > Account > APIs.
- On the APIs page, copy the following credentials:
- Workspace ID (earlier App ID): Your unique MoEngage workspace identifier.
- Event Key: The Campaign/Business Events API key.
- Find your data center code from your dashboard’s URL. The following table describes the data center names and URLs:
Step 2: Install the MoEngage App on Wootag
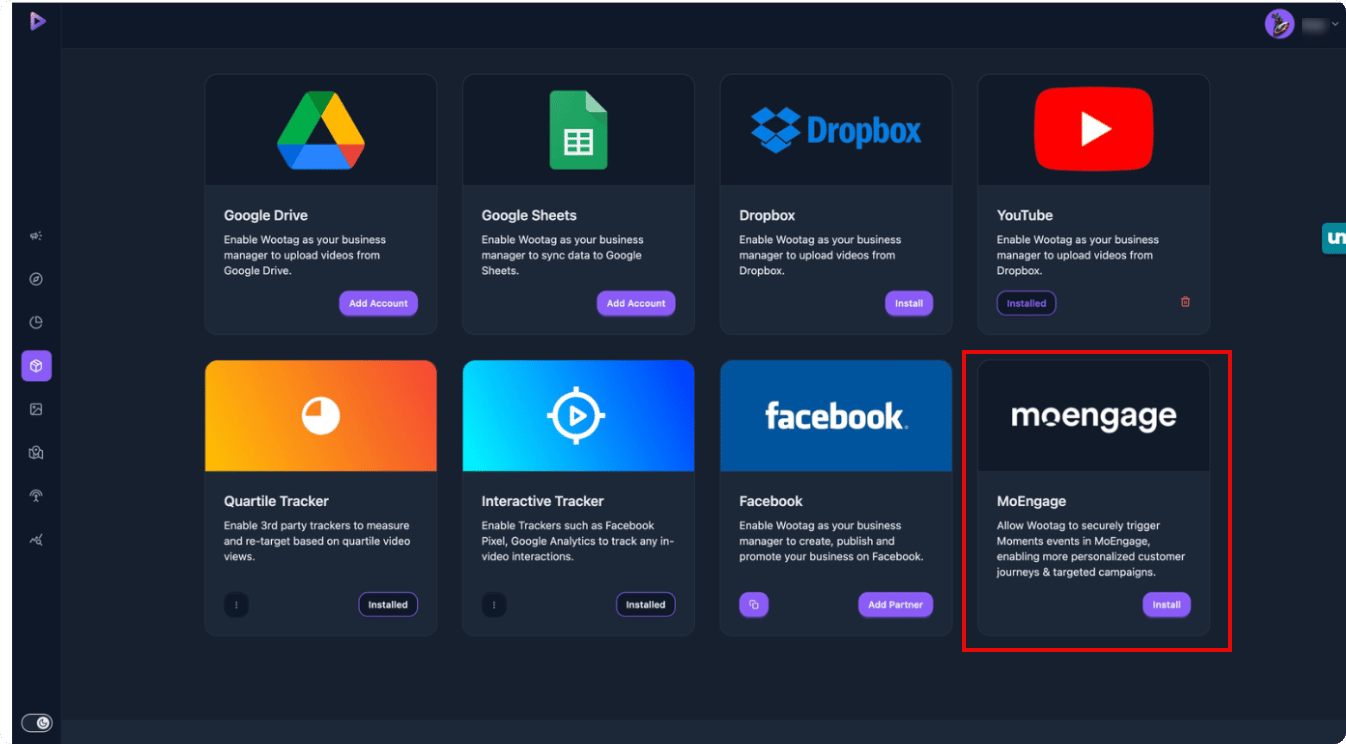
To connect MoEngage in the Wootag Apps Marketplace and enable triggers, perform the following steps:- Navigate to the Wootag Apps dashboard and log in.
- Click the Apps icon in the sidebar, and then locate the Moengage tile.
- Click Install.
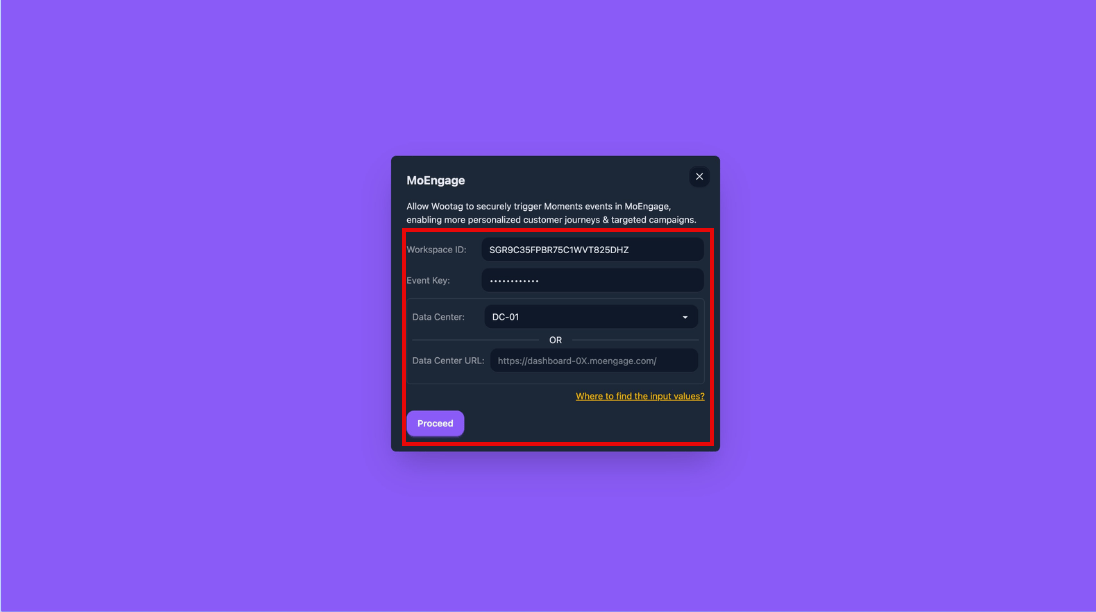
- Enter the following details in the credentials form:
- Click Proceed. A success message confirms the MoEngage installation.
Step 3: Configure Wootag Moment Rules
Define the signal conditions that trigger your MoEngage campaigns:- Go to the Rules section in the left sidebar.
- Create or edit a rule: define a rule name and select the Moment type (for example, Weather).
- Configure triggers: select conditions such as temperature above 40°C and set the city.
- Preview attributes: review the event data payload and Jinja syntax for personalization.
- Copy the JSON: use the Preview modal to copy the event data JSON for campaign setup.
Step 4: Create a Campaign in MoEngage
Wootag captures contextual live moments (such as extreme weather shifts, real-time sports updates, or market drops) and forwards them dynamically to MoEngage as trigger Business Events. After your rules are established, you can configure and launch your MoEngage campaigns using the following methods:- Directly from Wootag: Trigger and provision the MoEngage campaign inside the Wootag interface using native action tools.
- Via MoEngage: Construct and manage the event-triggered campaign inside the MoEngage Campaign dashboard, referencing the event parameters sent from Wootag.
- In Wootag, click the Campaign dropdown on your rule, and then select MoEngage.
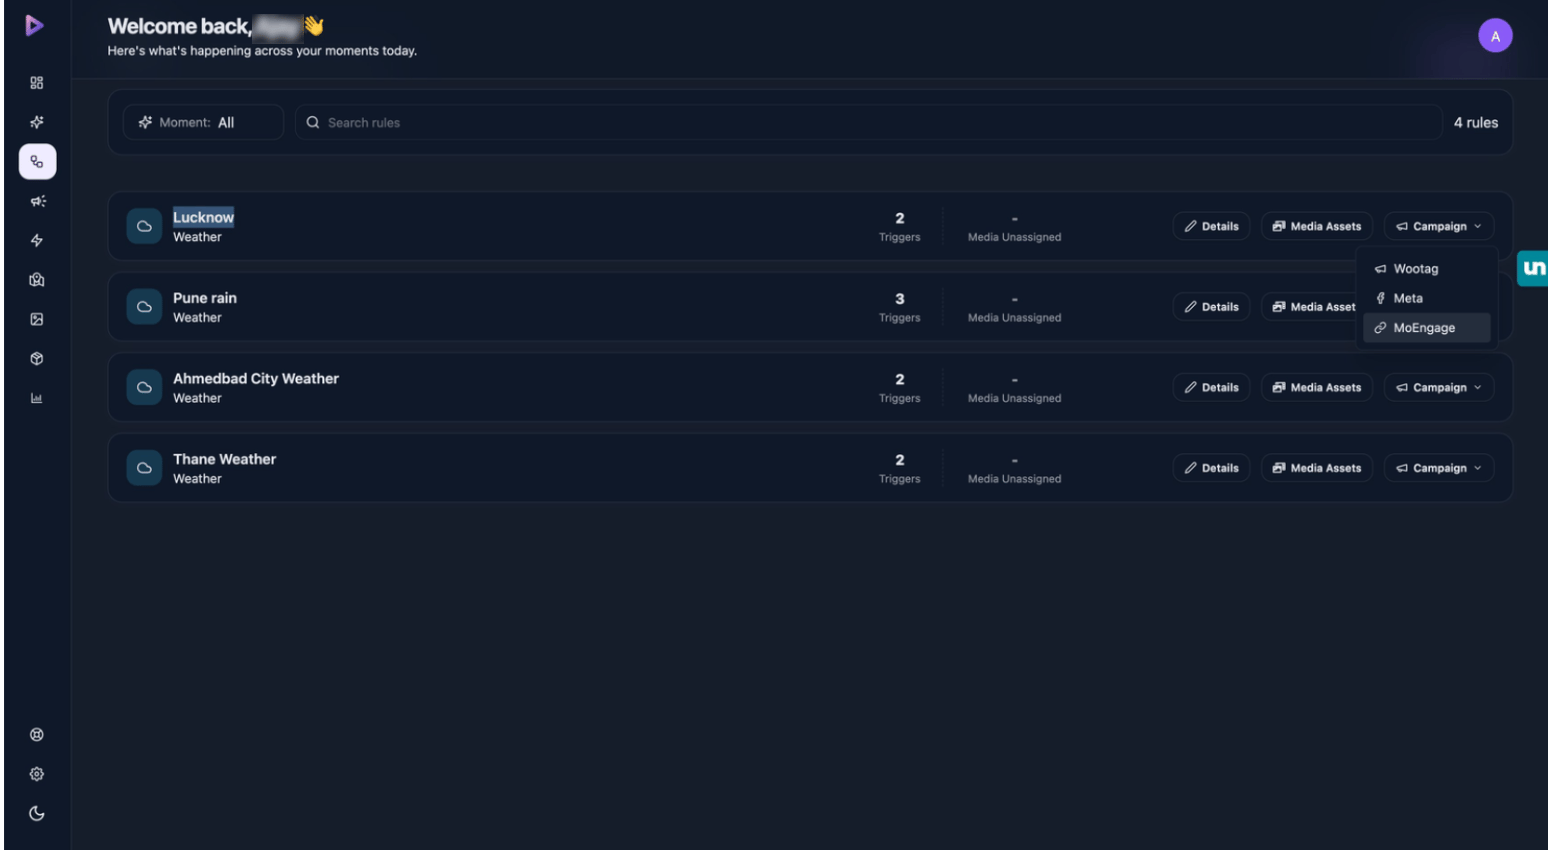
- Click Create MoEngage Campaign to set up a new triggered campaign.
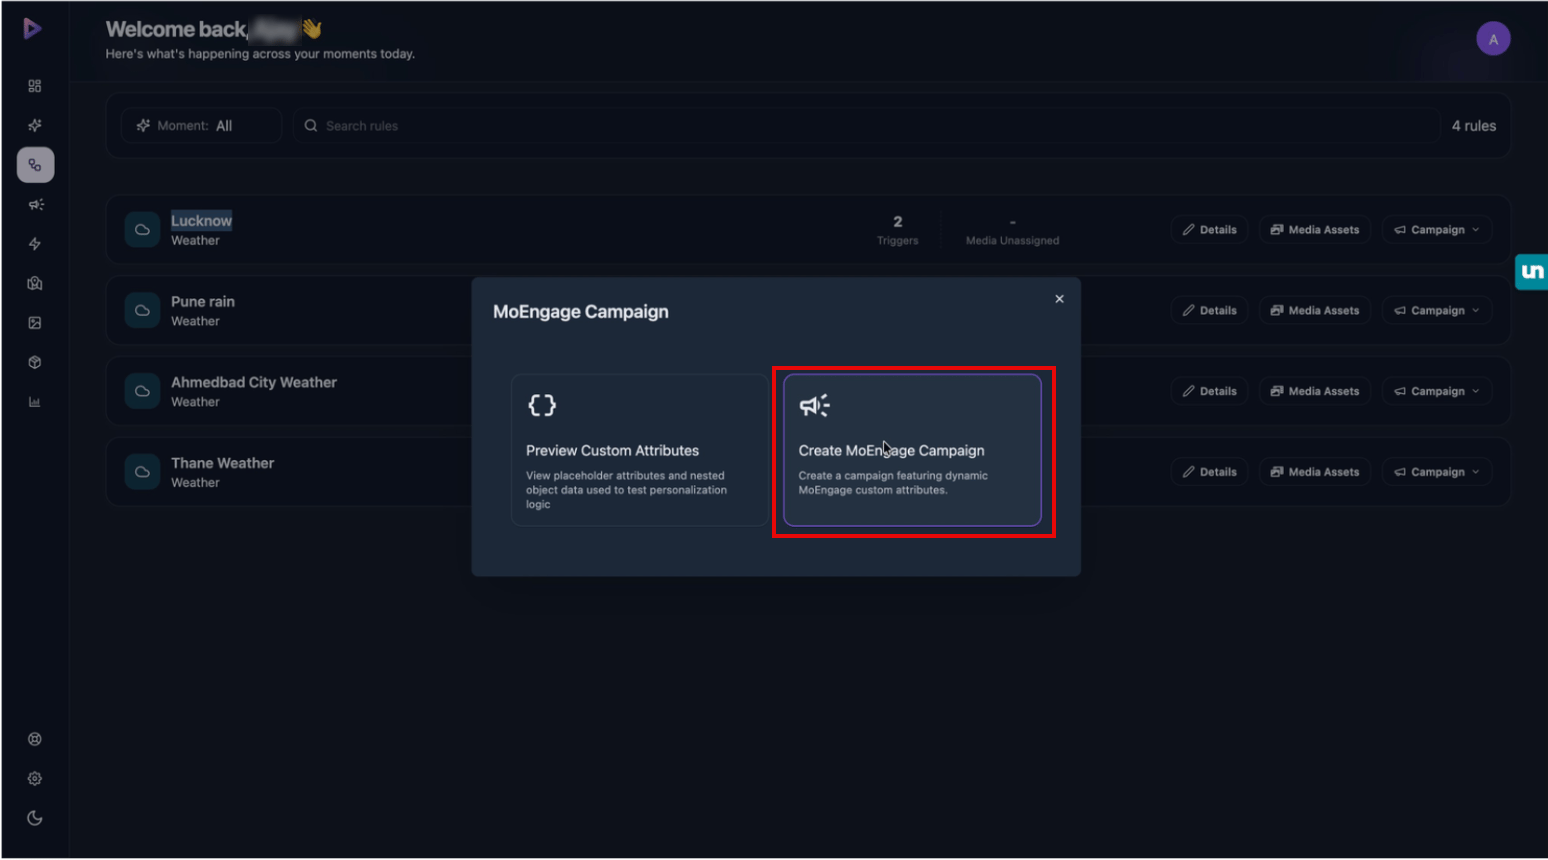
- Enter the campaign name, date range, and trigger interval to prevent over-messaging.
- In MoEngage, go to Campaigns > Email/Push (Business Event Triggered) to verify the campaign exists.
- Select the appropriate Business Event (for example, Lucknow) created by Wootag.
- In the Content section, use the Jinja editor to personalize messages with event data. Reference attributes using the syntax
{{ BusinessEventAttribute['name'] }}. For example: - Test your setup to confirm that users receive relevant contextual messages when rules fire.
- Preview the custom attributes payload in Wootag to confirm the JSON keys.
- Publish the campaign, and then monitor the Business Event analytics in MoEngage.
Runtime flowWhen a rule is met (for example, temperature rises above 40°C), Wootag initiates the MoEngage Trigger Business Event API, delivering a push or email personalized with live signal data. Verify rate limits (default 200 triggers per day) with your Customer Success Manager for high-frequency signals.