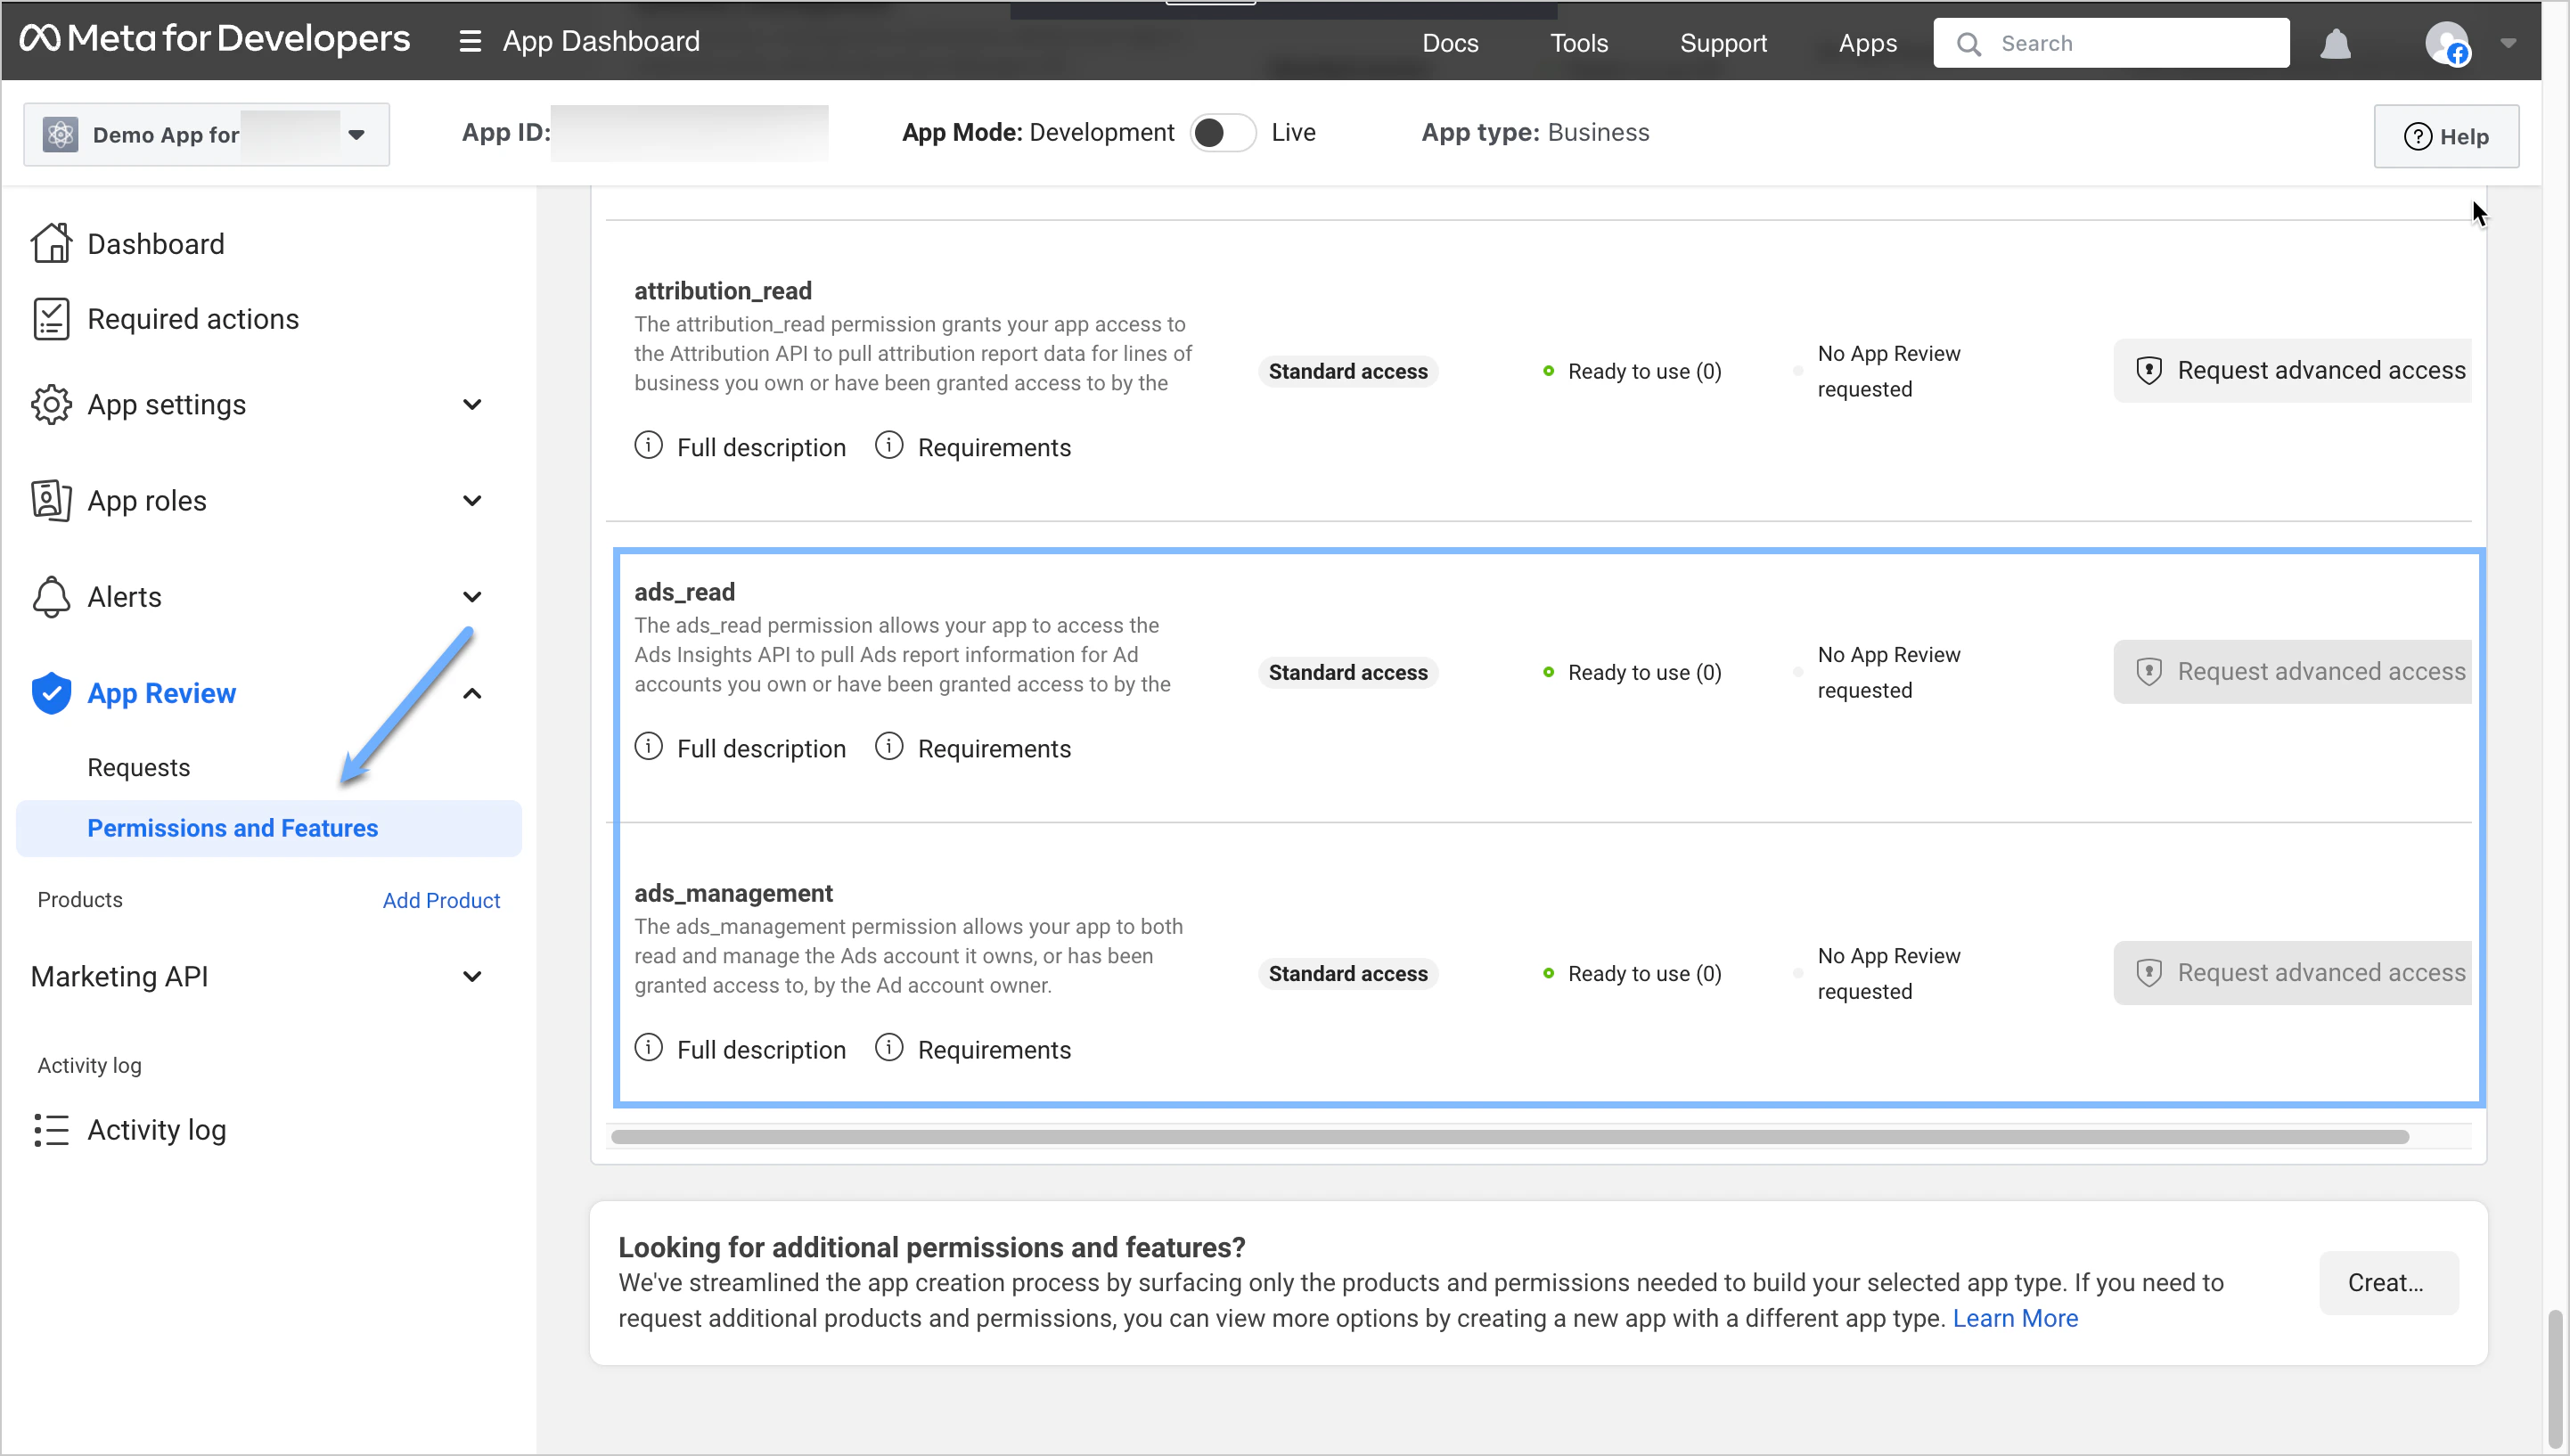
Required Meta App PermissionsThe MoEngage integration with Facebook Custom Audiences requires your Meta app to have STANDARD access for the Ads Management and Ads Read permissions. Without these permissions, MoEngage cannot add or remove users from your Facebook Custom Audiences.Here’s how permissions apply based on your Meta app type:
- If you create a new Business app, it automatically has STANDARD access for Ads Management and Ads Read permissions. This app type also does not have a development or live mode, simplifying setup.
- If you are using an older Business app that still has a Live mode, you must complete an App Review process to gain Ads Management and Ads Read permissions in Live mode. To avoid this, create a new Business app.
- If you create an app of type Gaming, Consumer, or None, you must undergo the App Review process to get Ads Management and Ads Read permissions when your app moves to Live mode.
Set up your Meta app
- Create a New App
- Use an Existing App
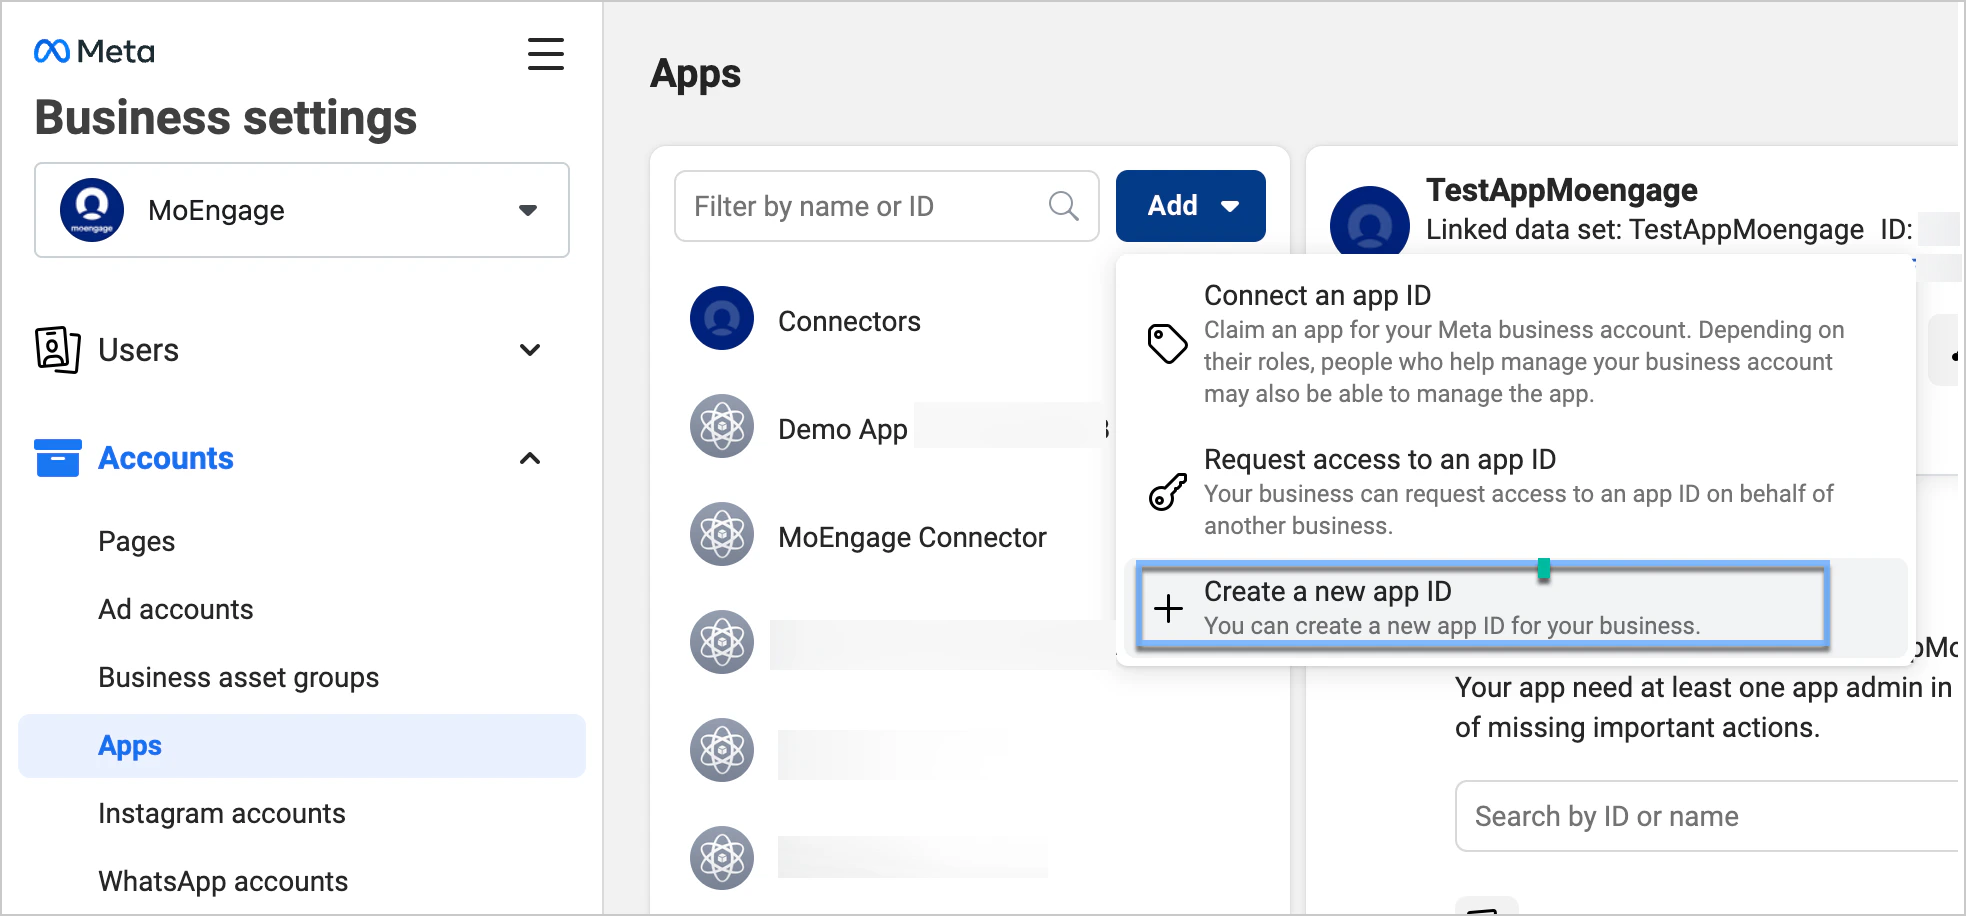
Create a new Meta app
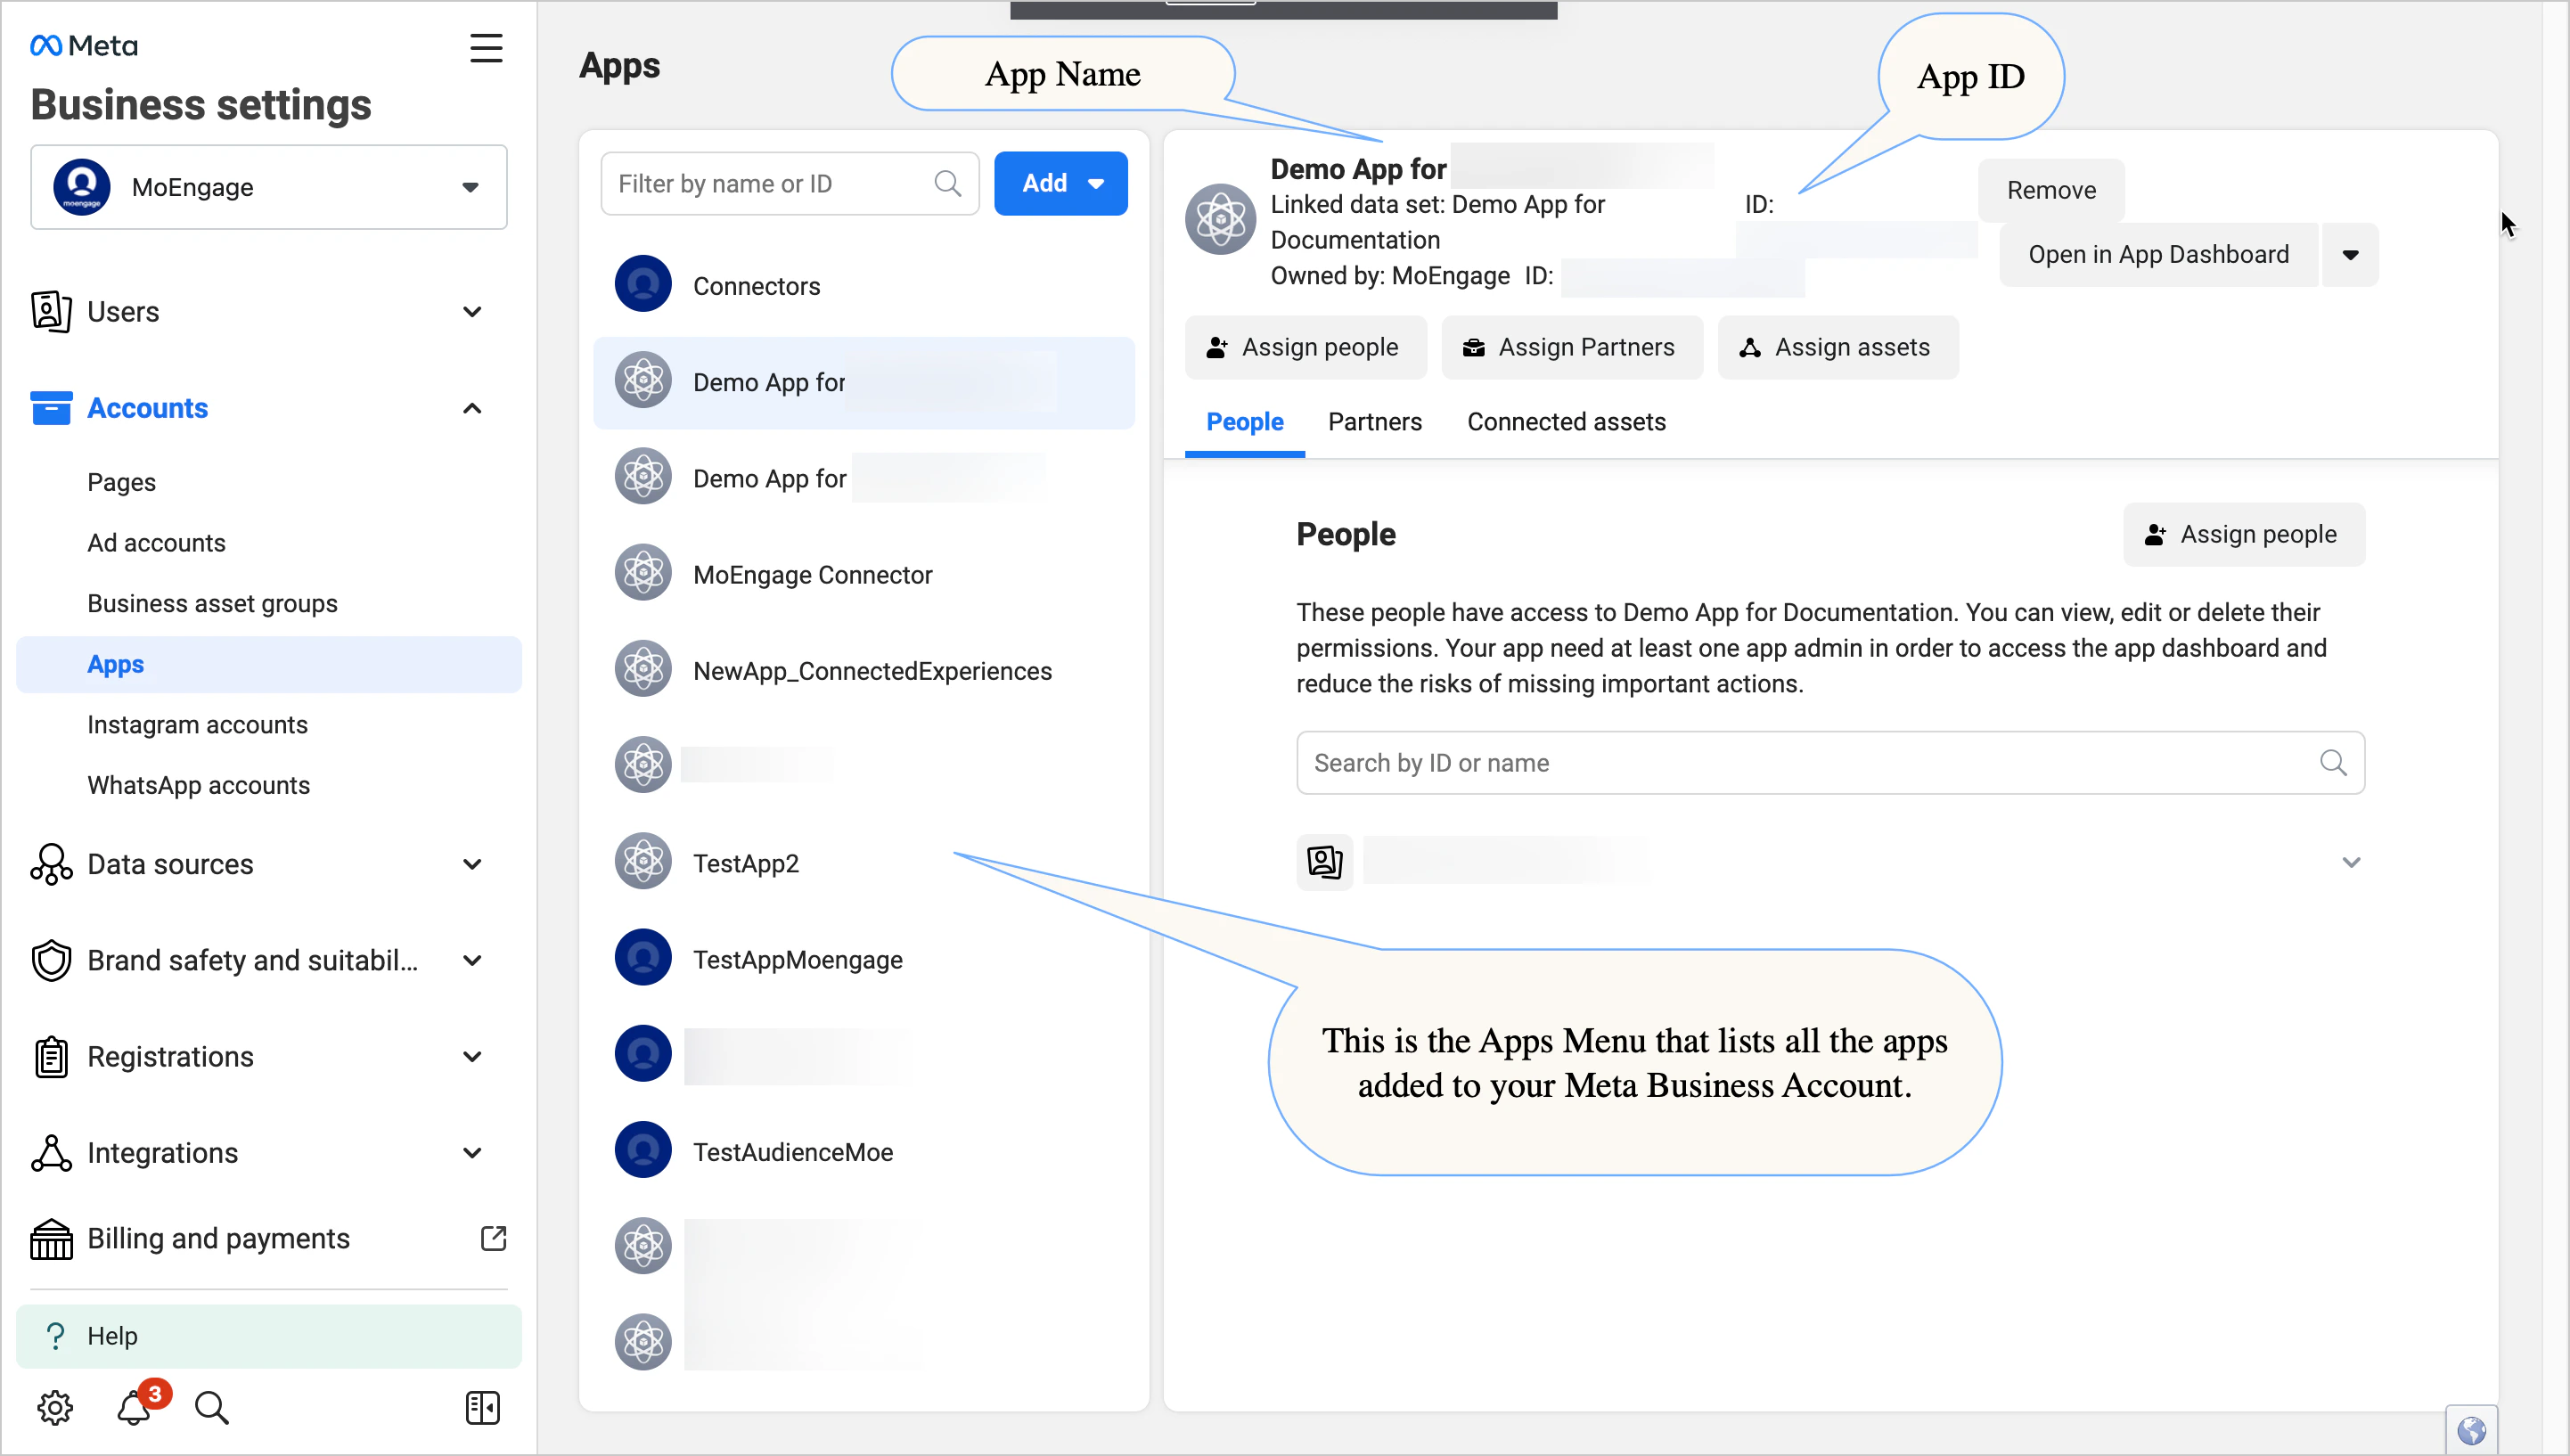
- Go to the Meta Business Settings page.
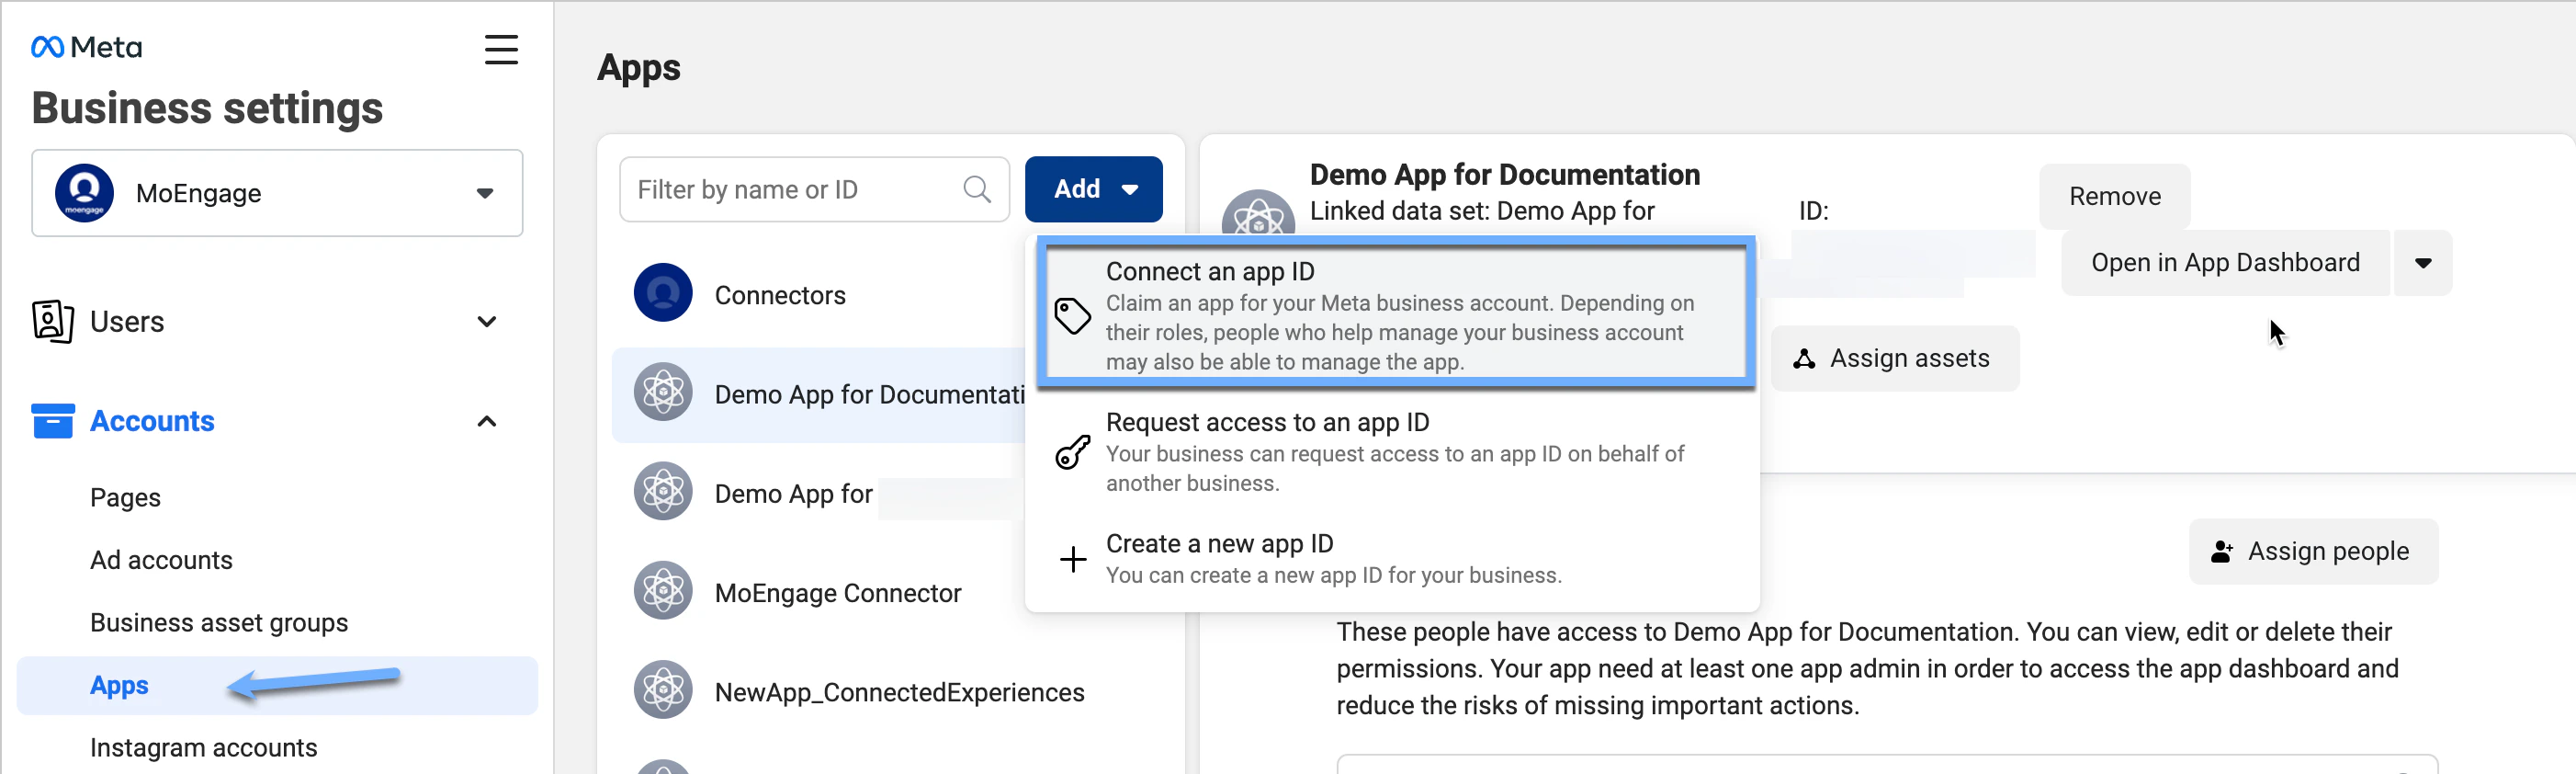
- In the left menu, click Accounts, and then click Apps.
- On the right side, on the Apps pane, click the Add drop-down menu.
- Click Create a New App ID.
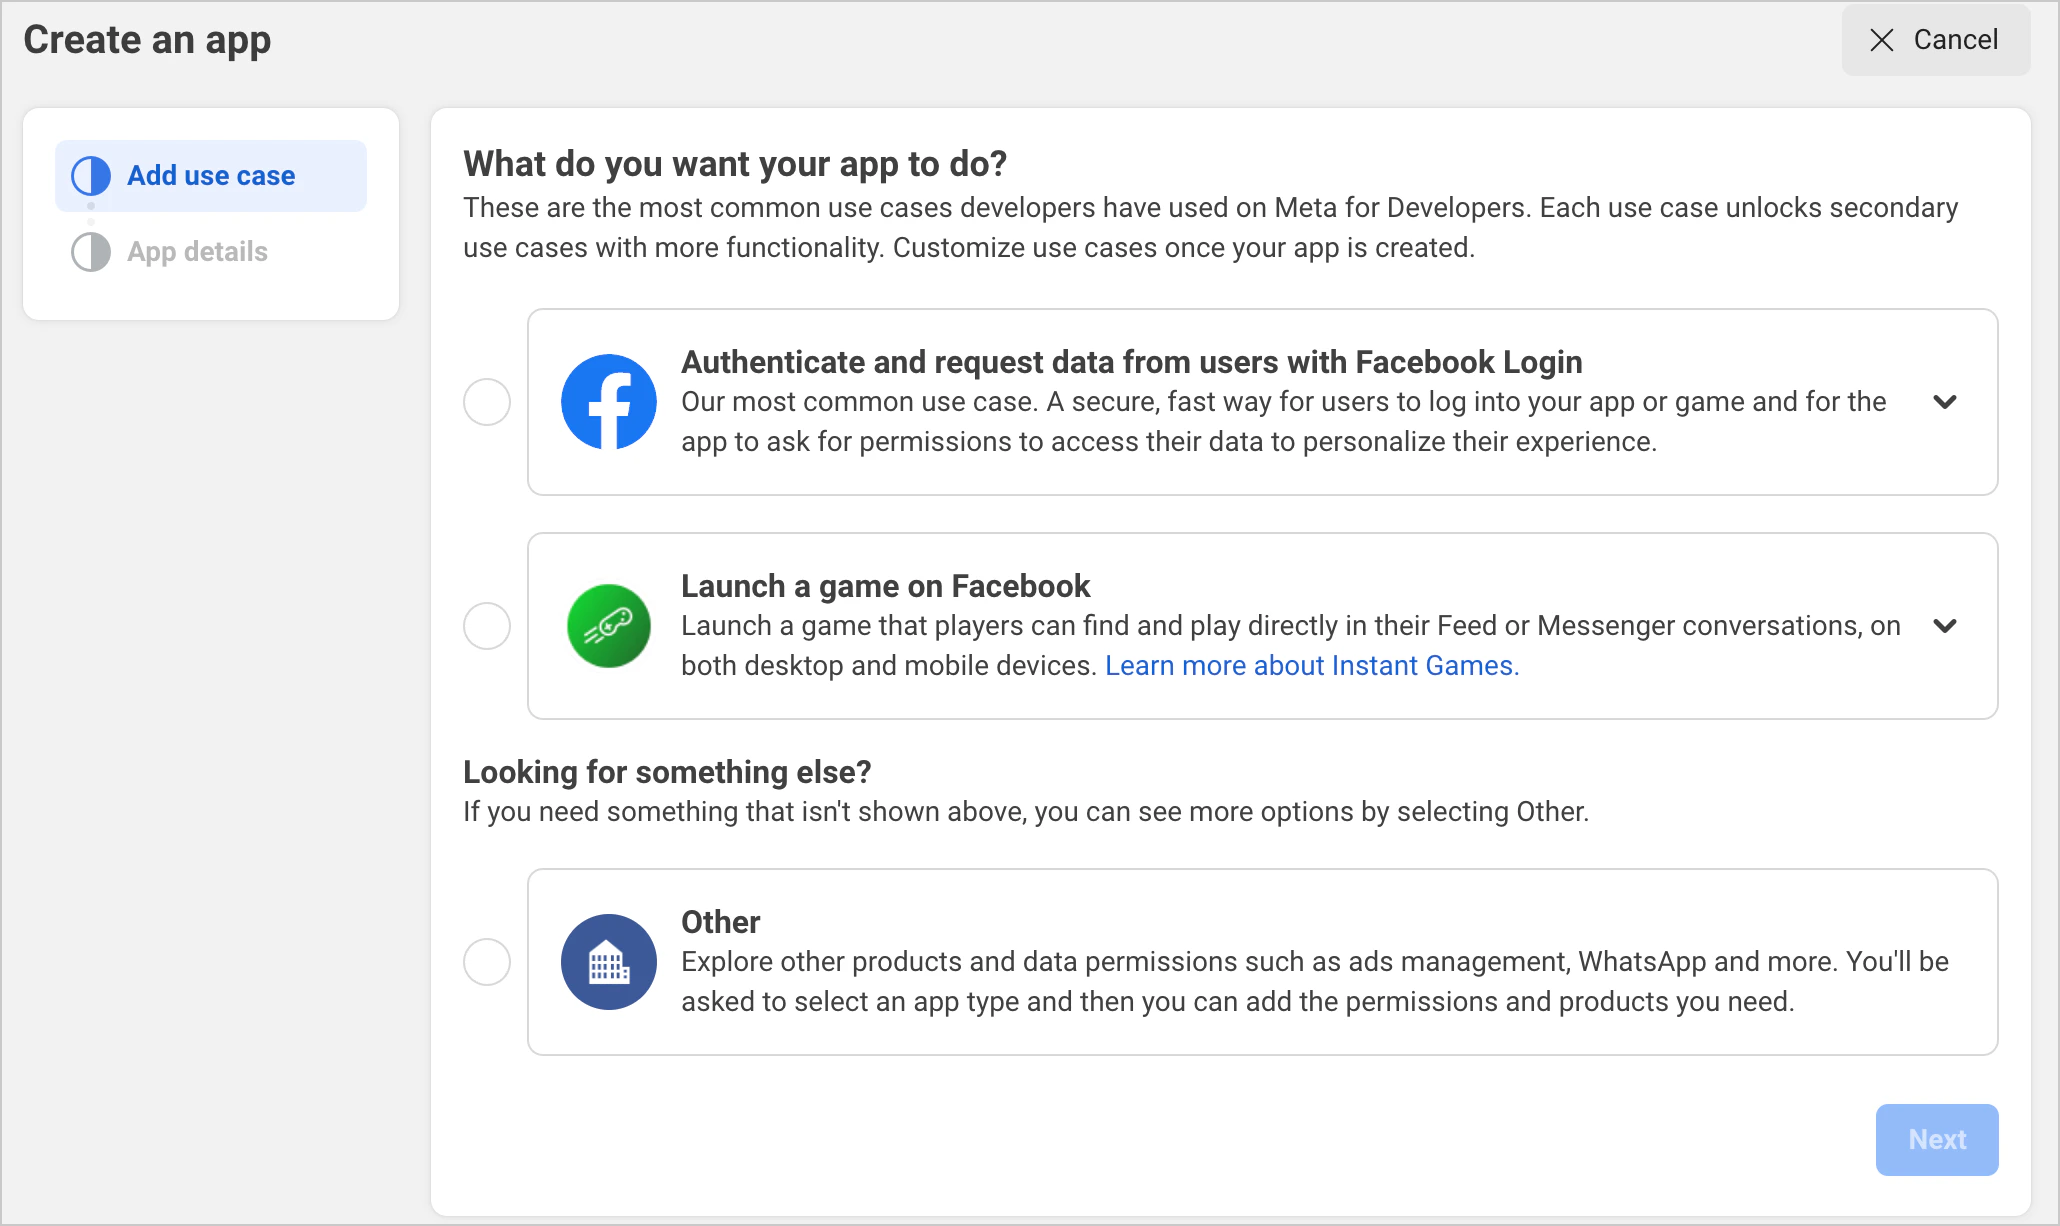
- On the next screen, select a use case for the app, and then click Next.
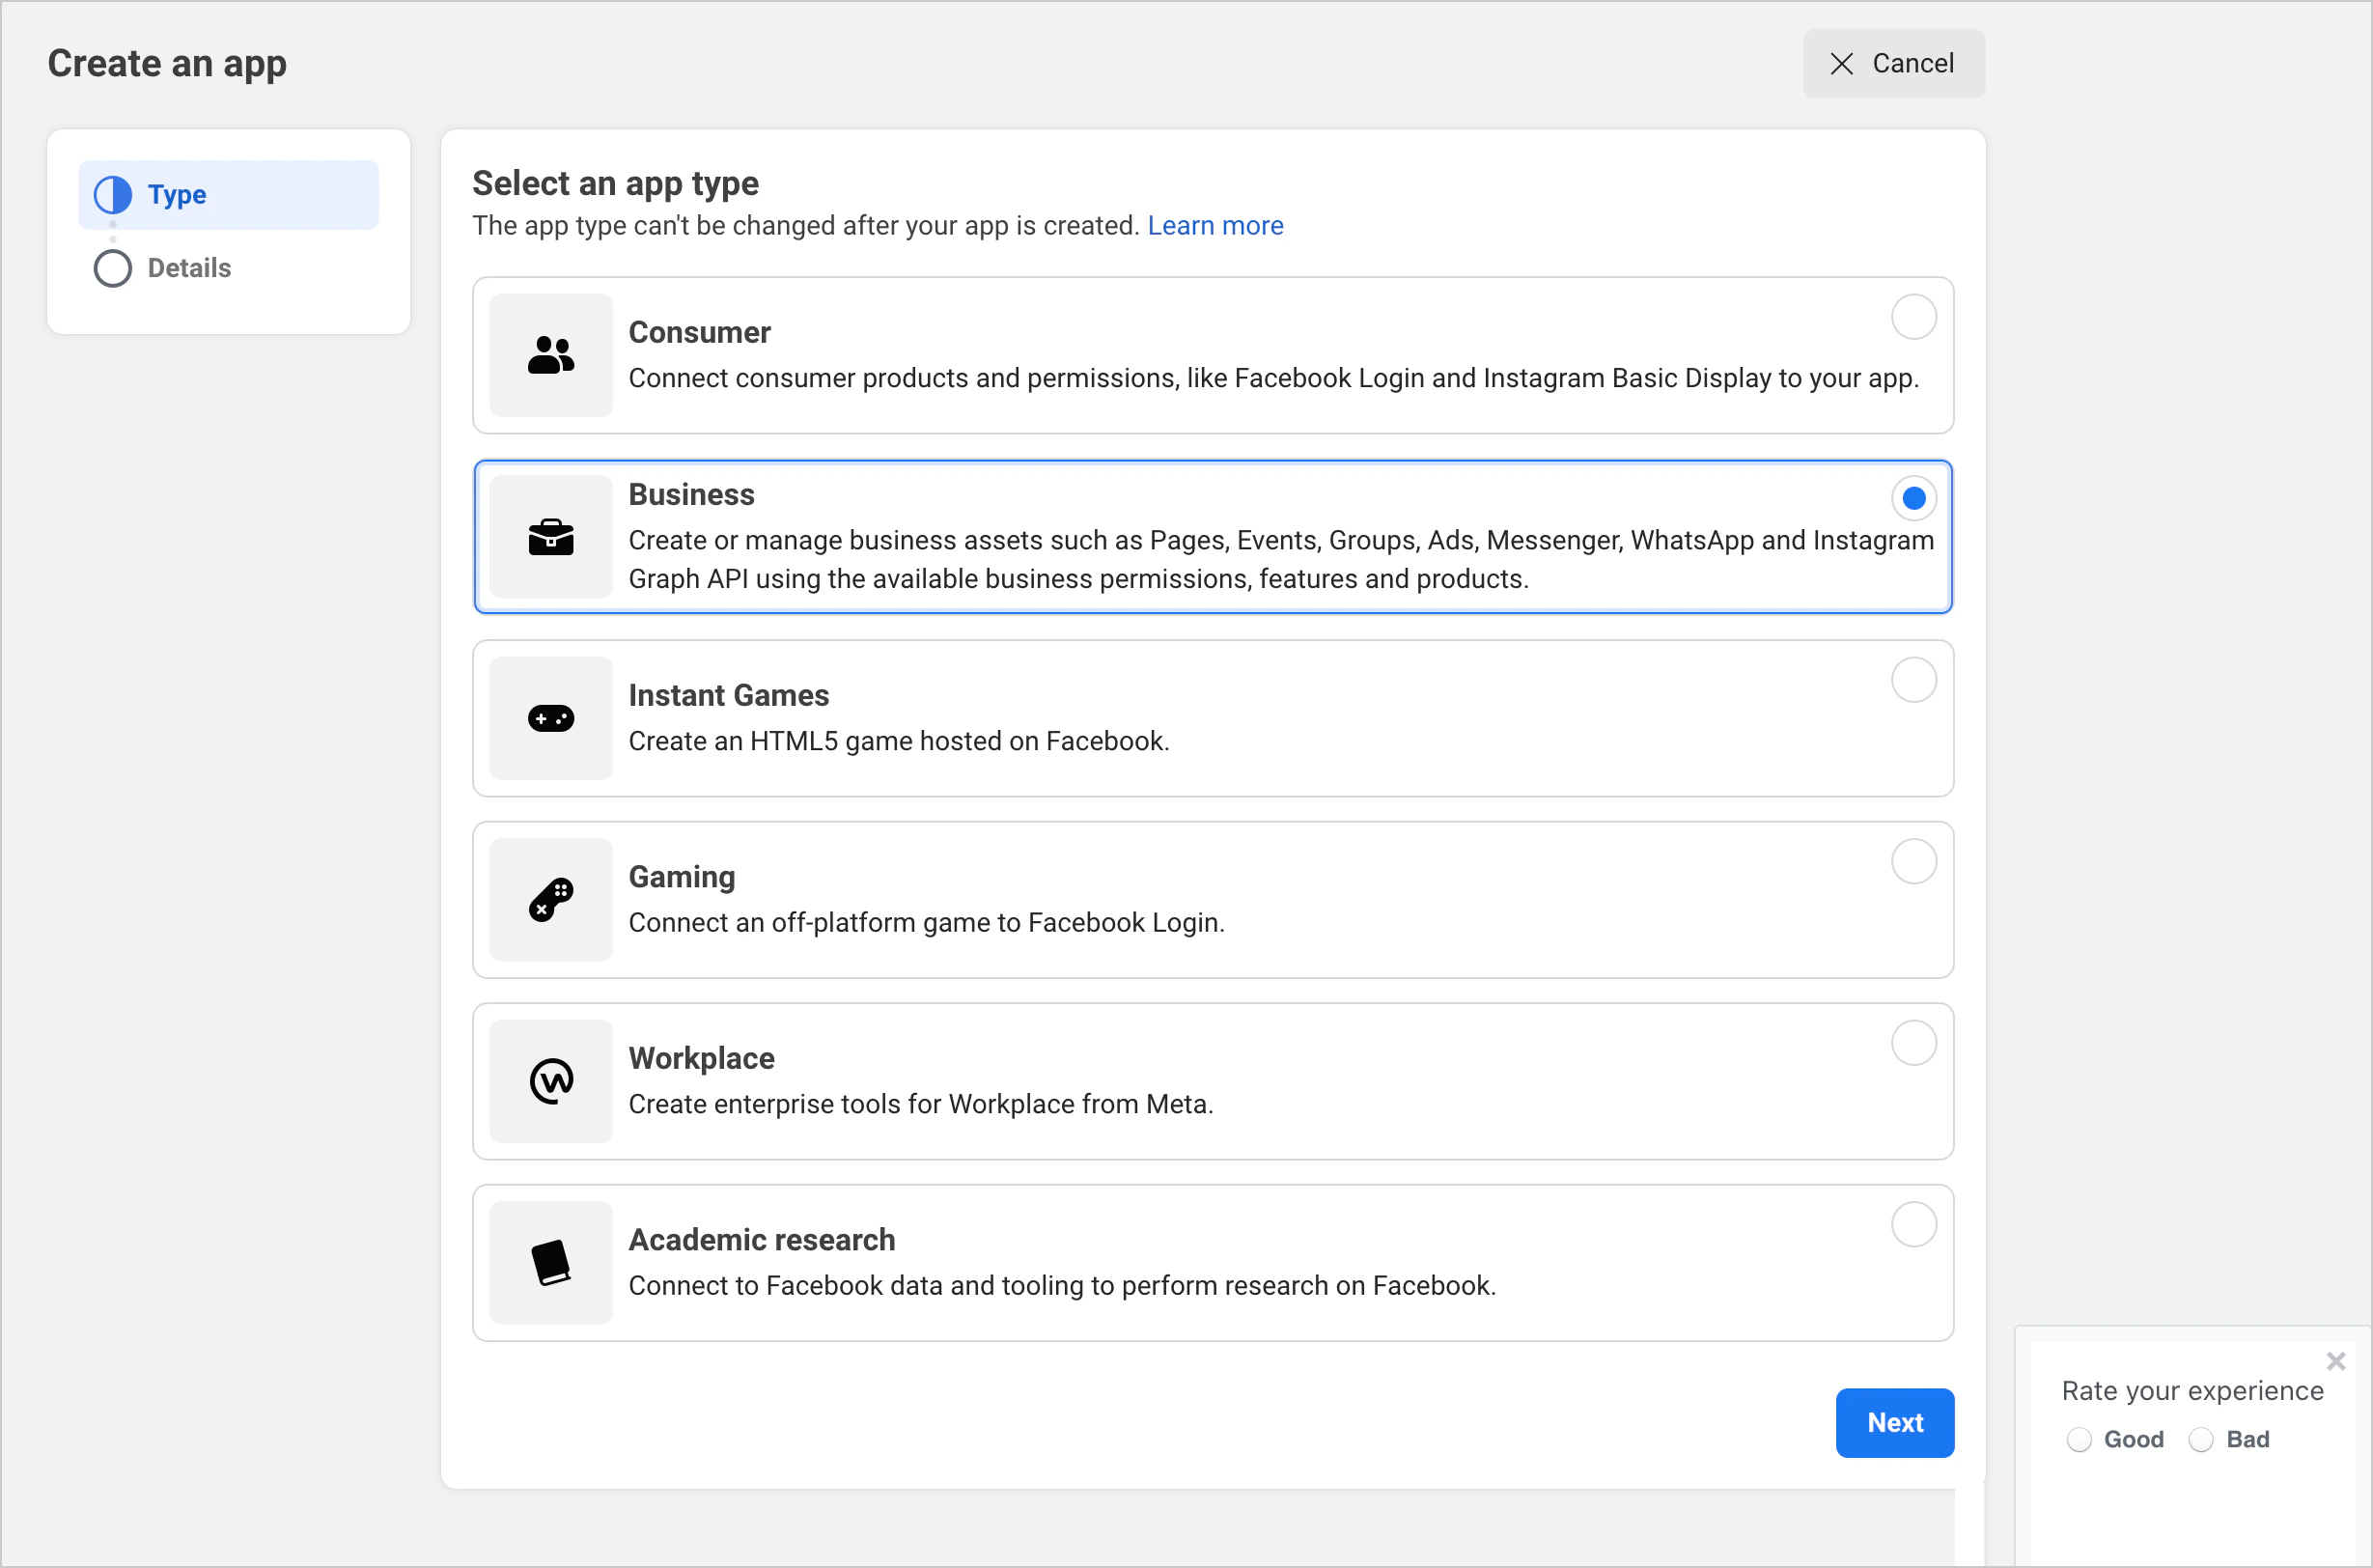
- Select an app type that describes the purpose of the app, and then click Next.
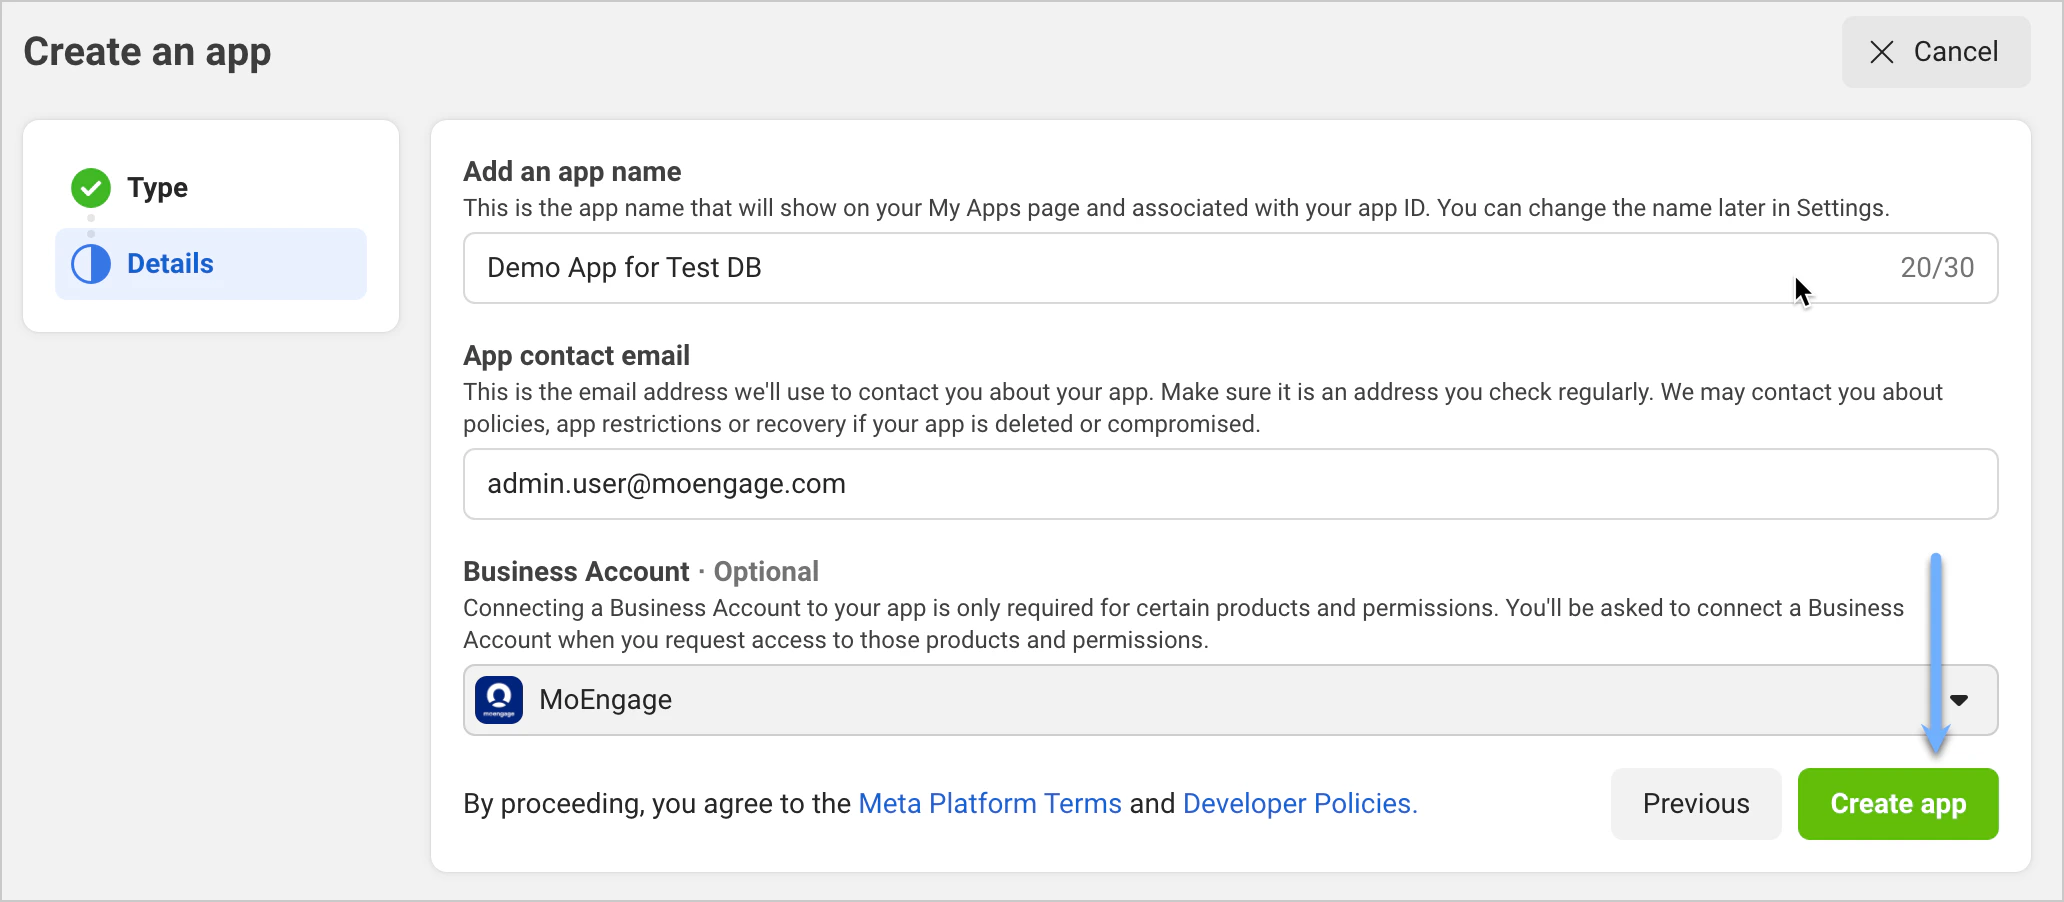
- On the Create an App screen, enter the following details:
- After filling in the details, click Create App.
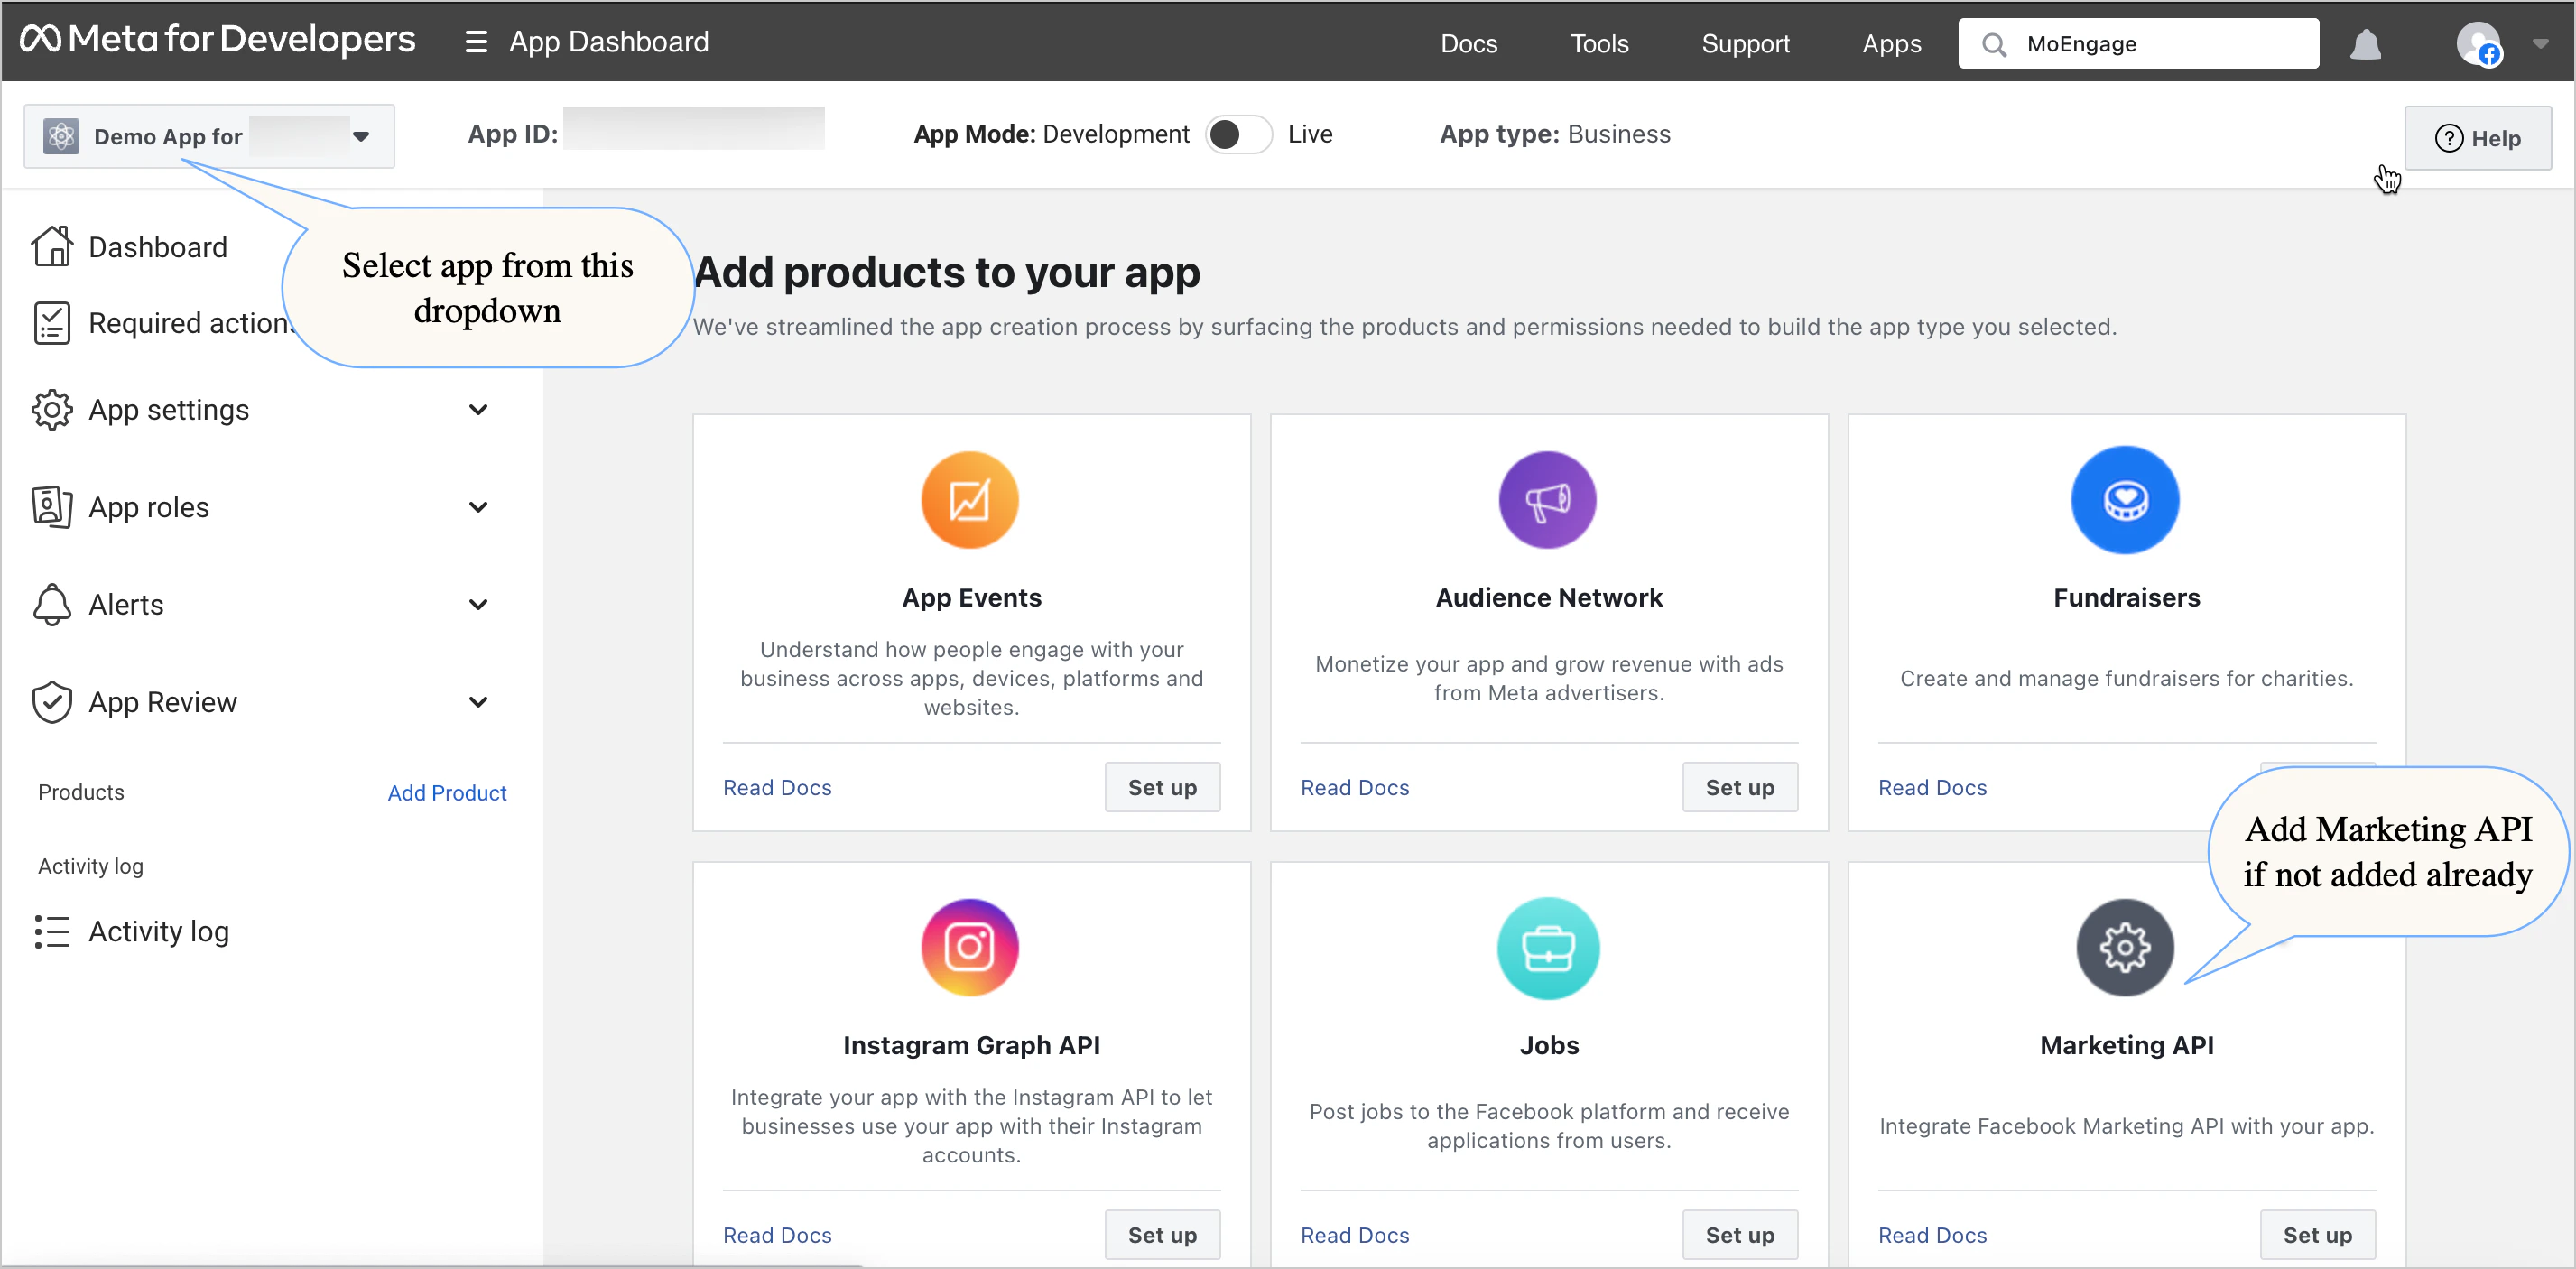
- The App dashboard opens. You can now add products to your app.
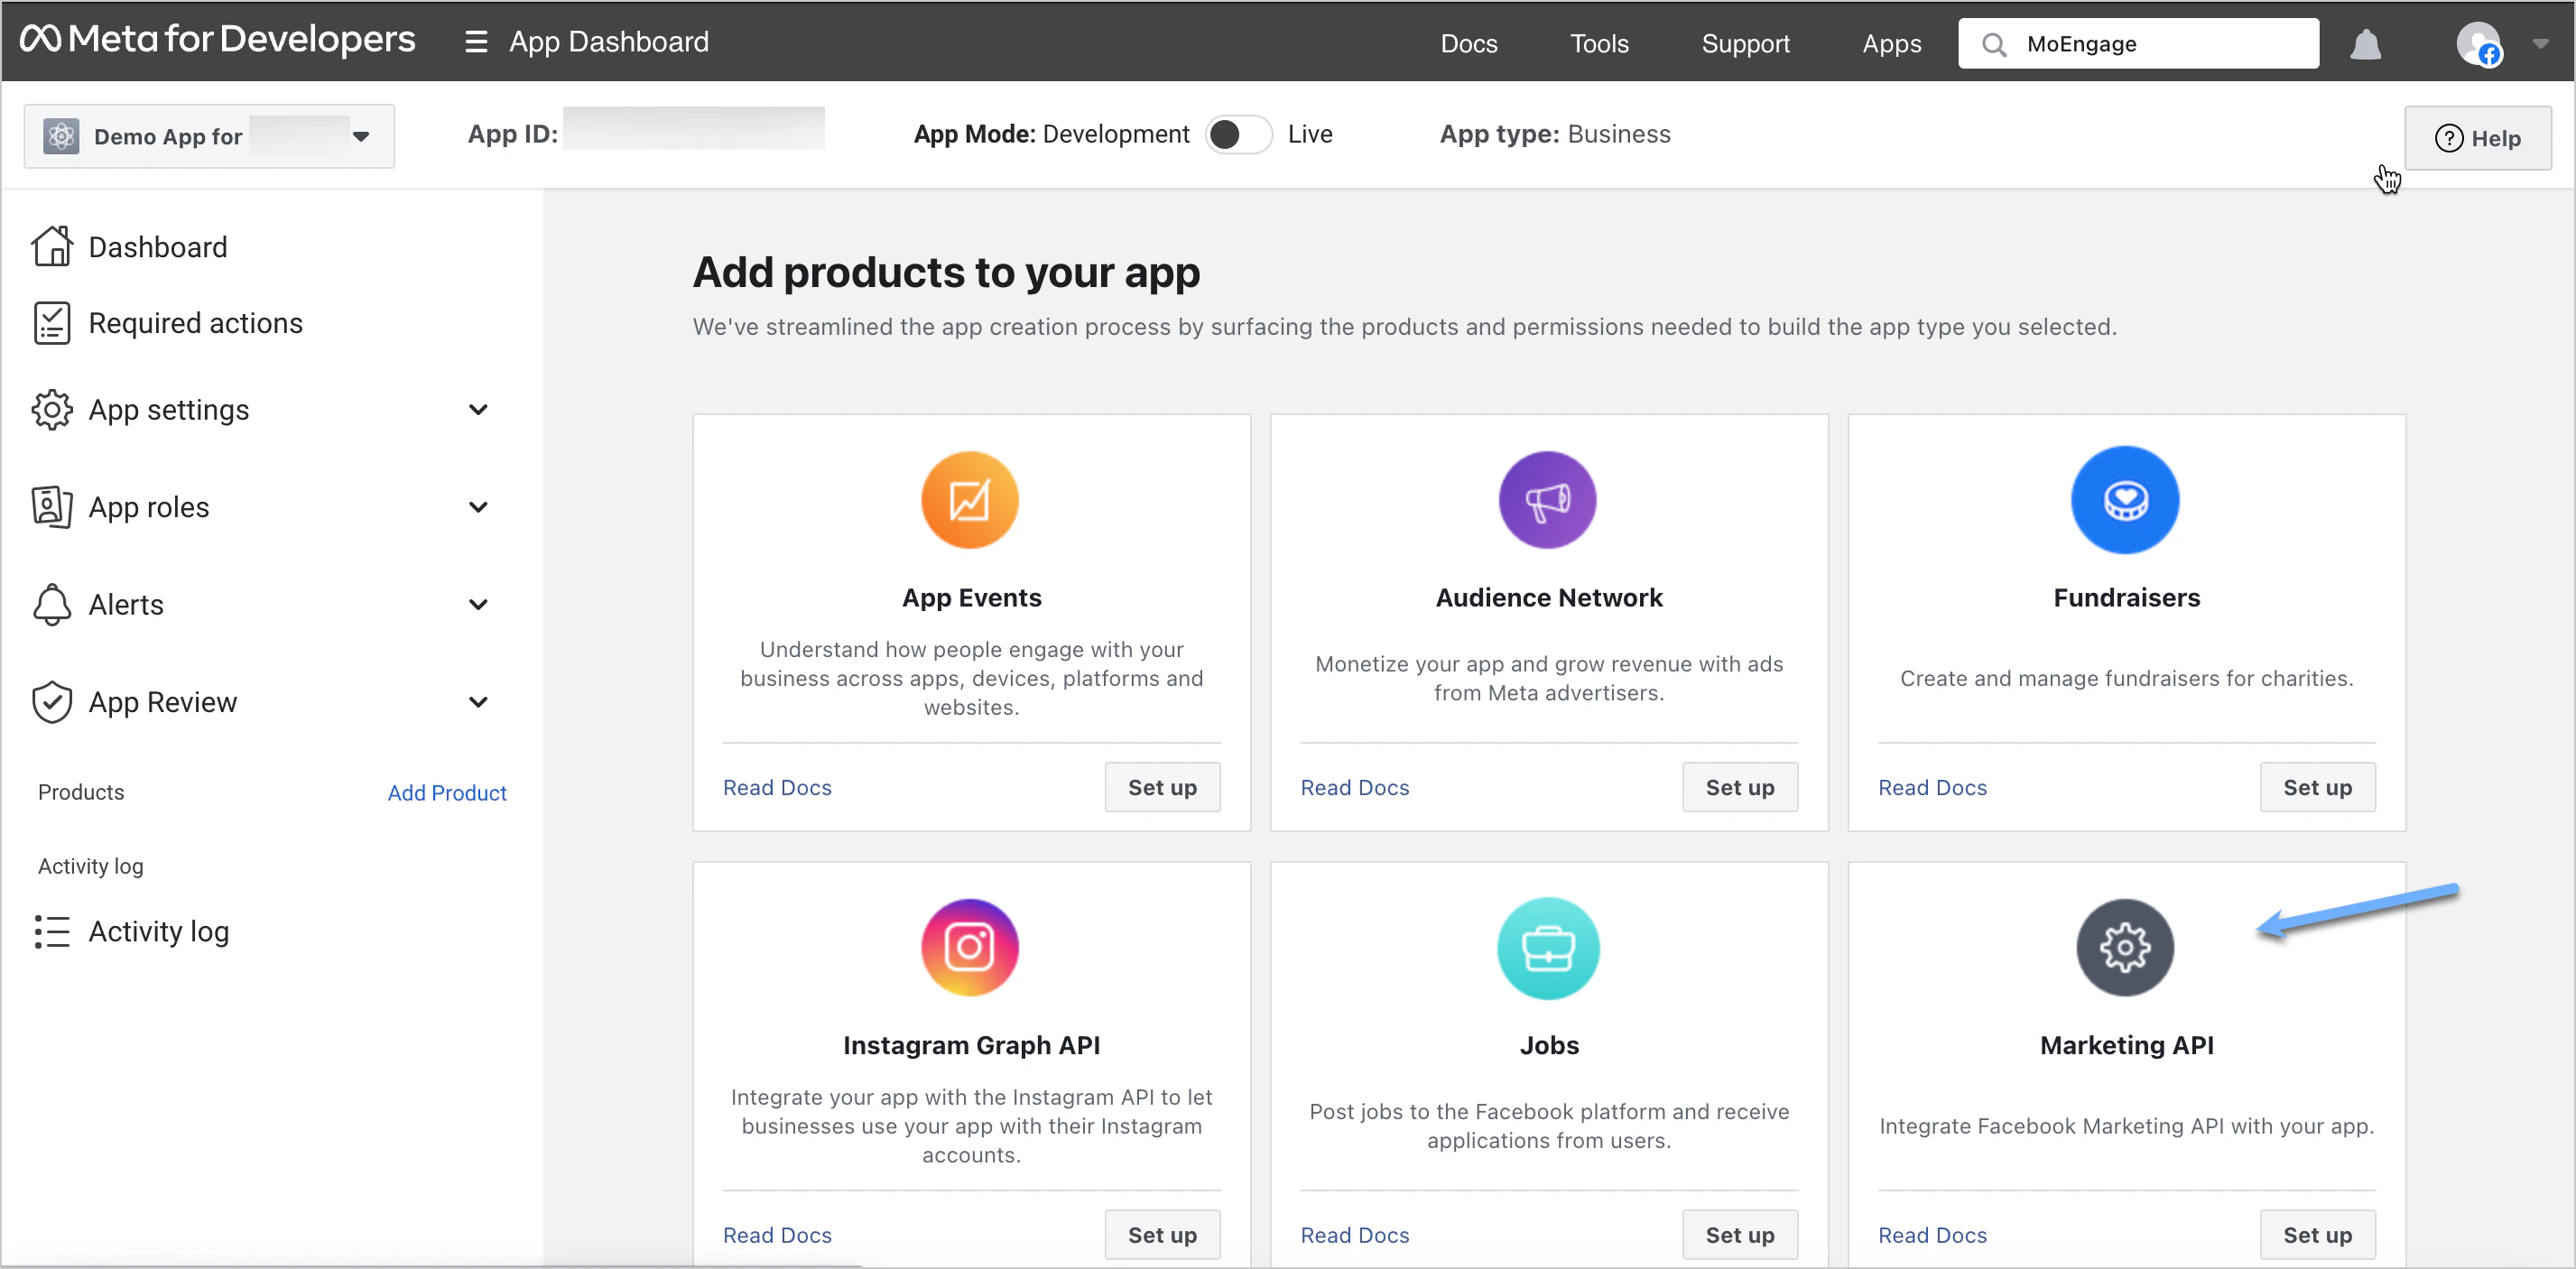
- Search for Marketing API (shown in the image above), and then click Set up. Your app is created in development mode and is ready for testing.
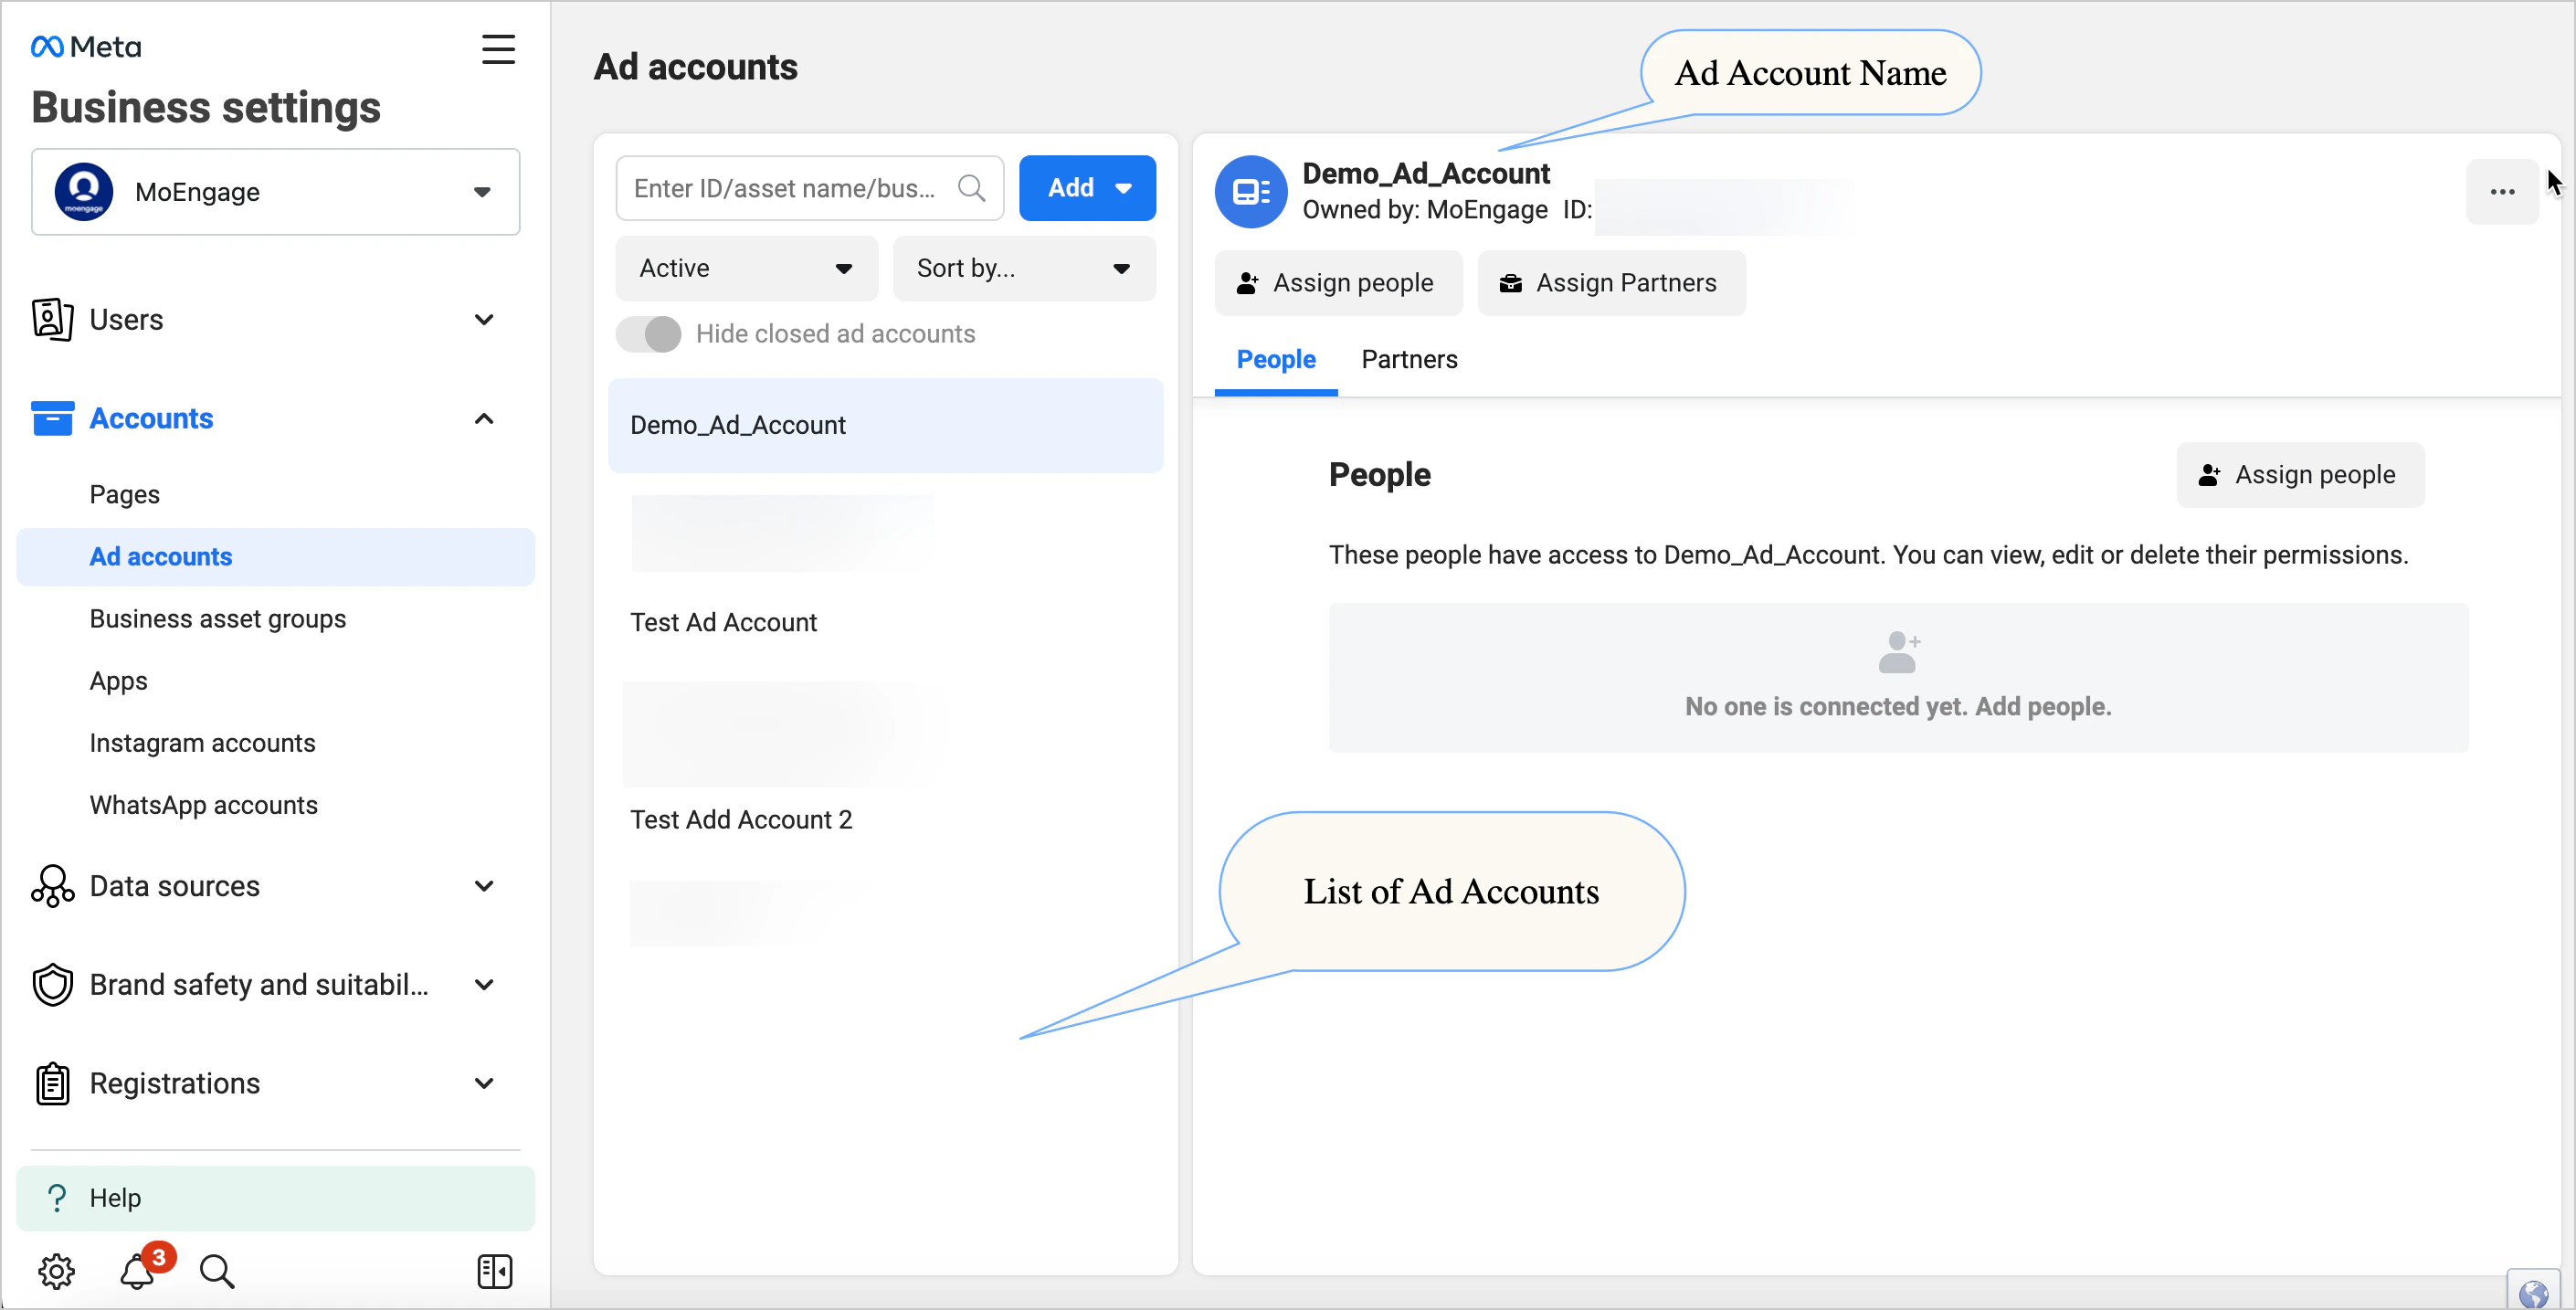
Set Up Your Meta Ad Account
- Create a New Ad Account
- Use an Existing Ad Account
Create a new Meta ad account
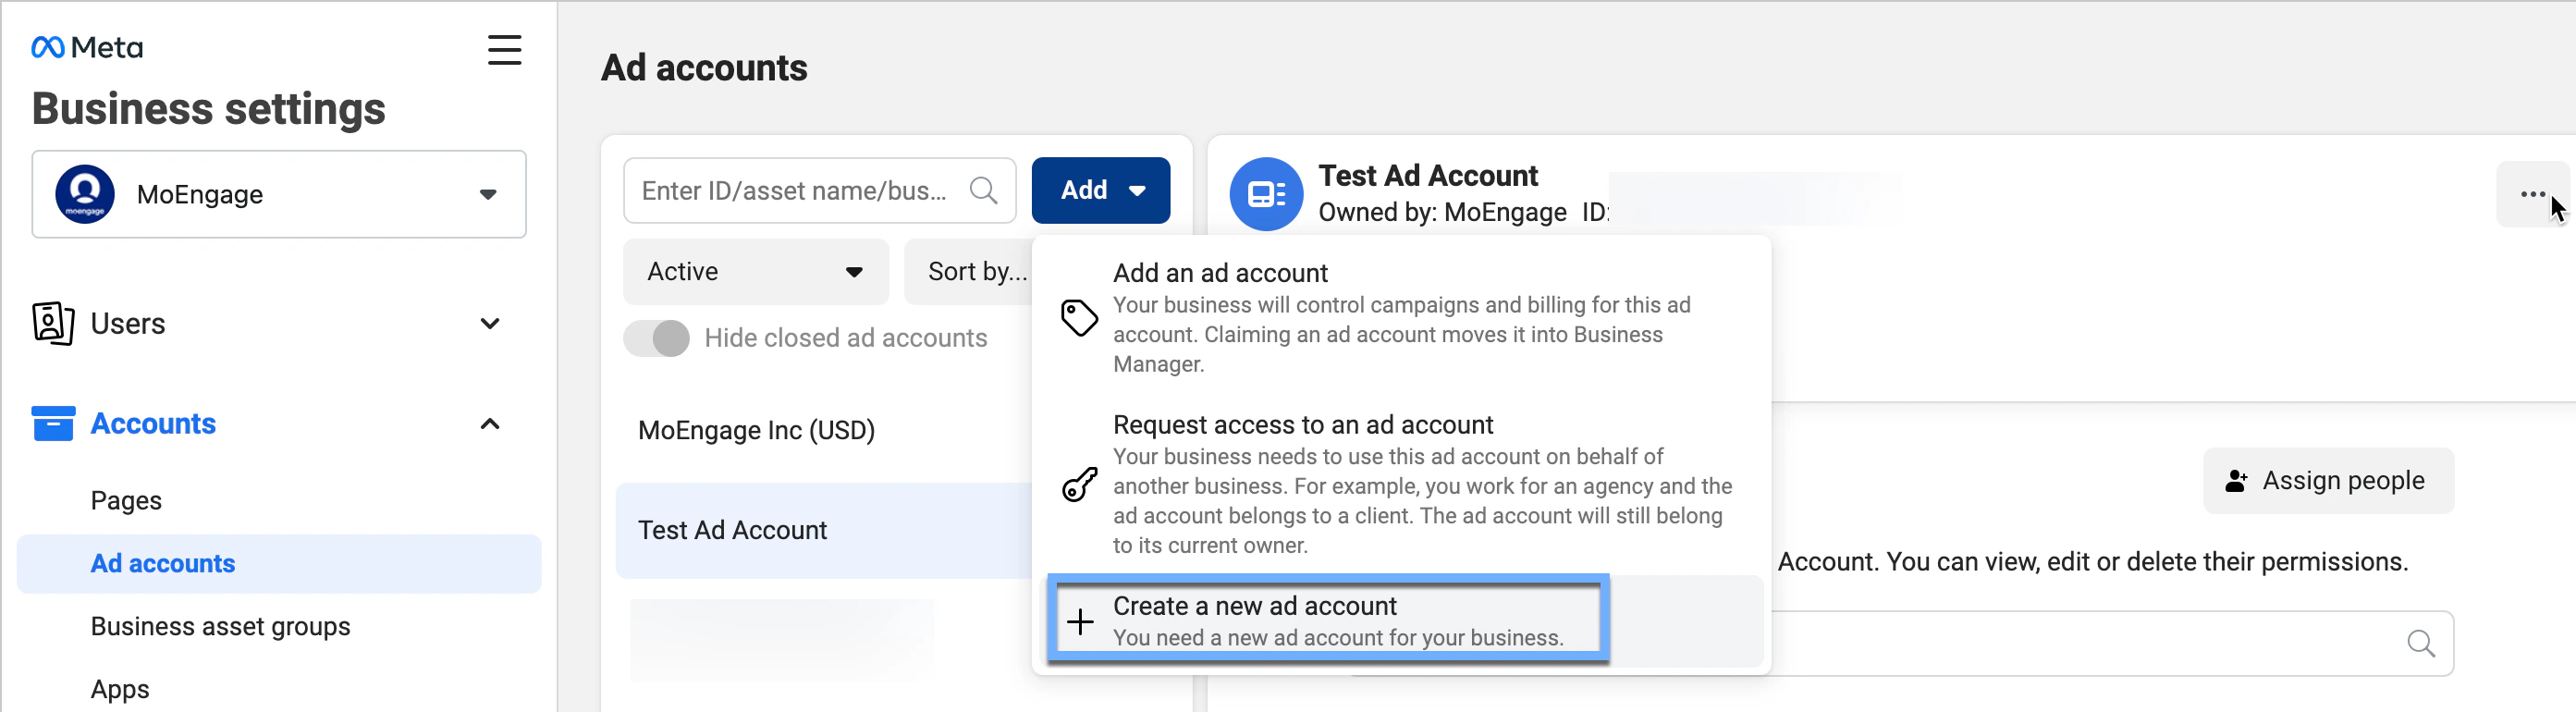
- Go to the Meta Business Settings page. In the left menu, click Accounts, and then click Ad Accounts.
- On the right side, in the Ad Accounts screen, click the Add drop-down menu, and then select Create a New Ad Account.
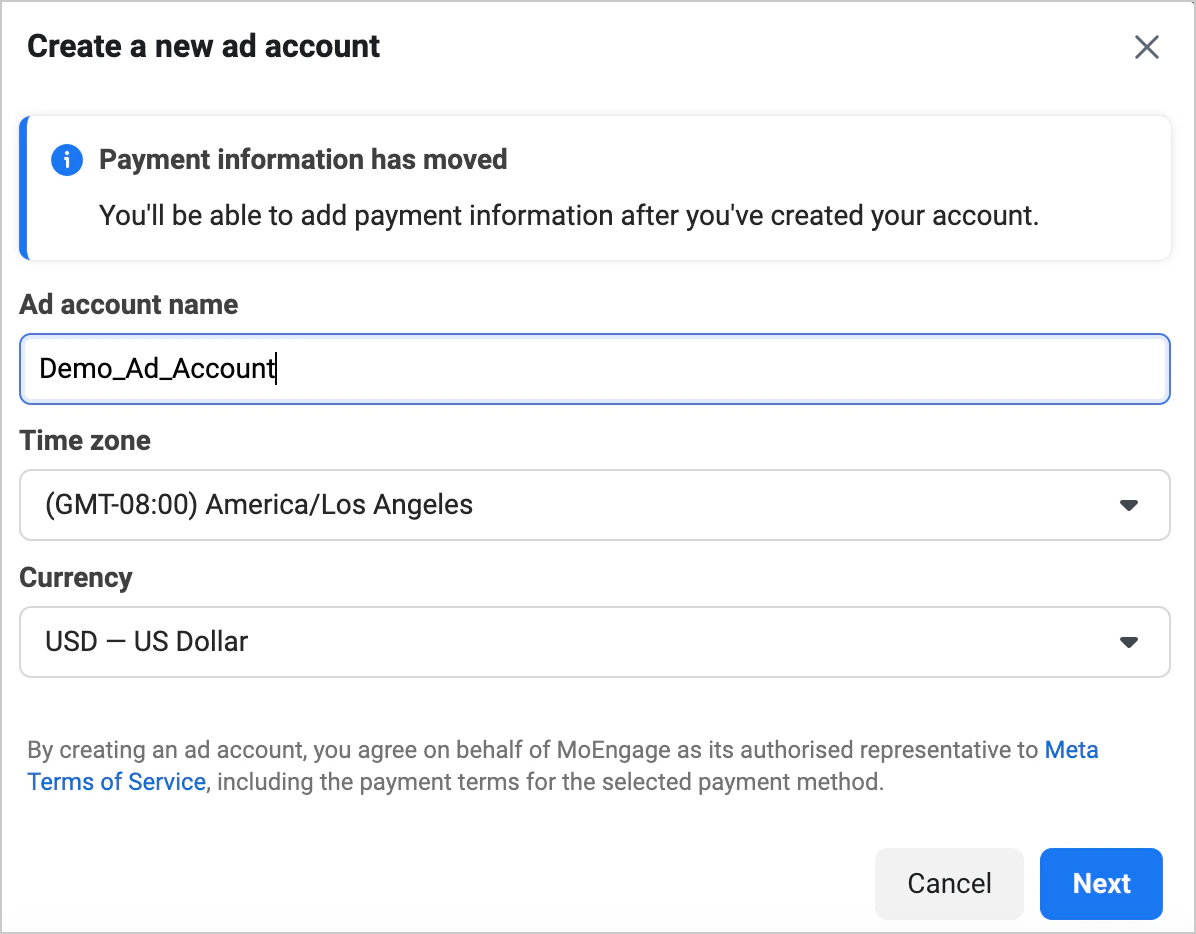
- Enter a name for the account, the time zone, and the currency. Click Next.
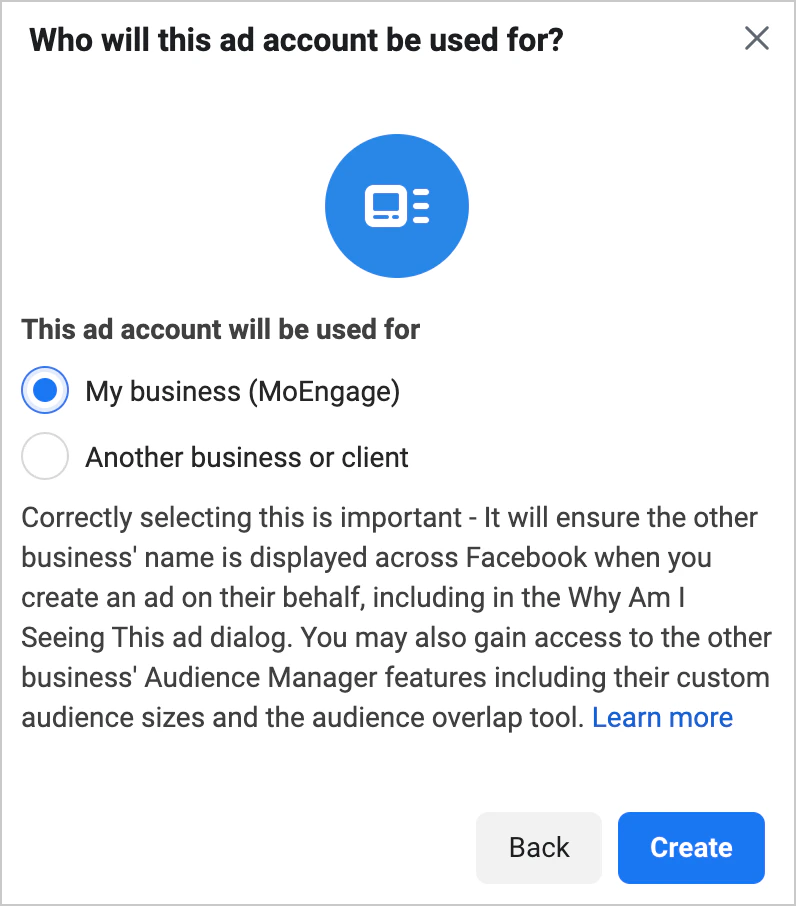
- On the Who Will This Ad Account Be Used For screen, select My Business. Click Create.
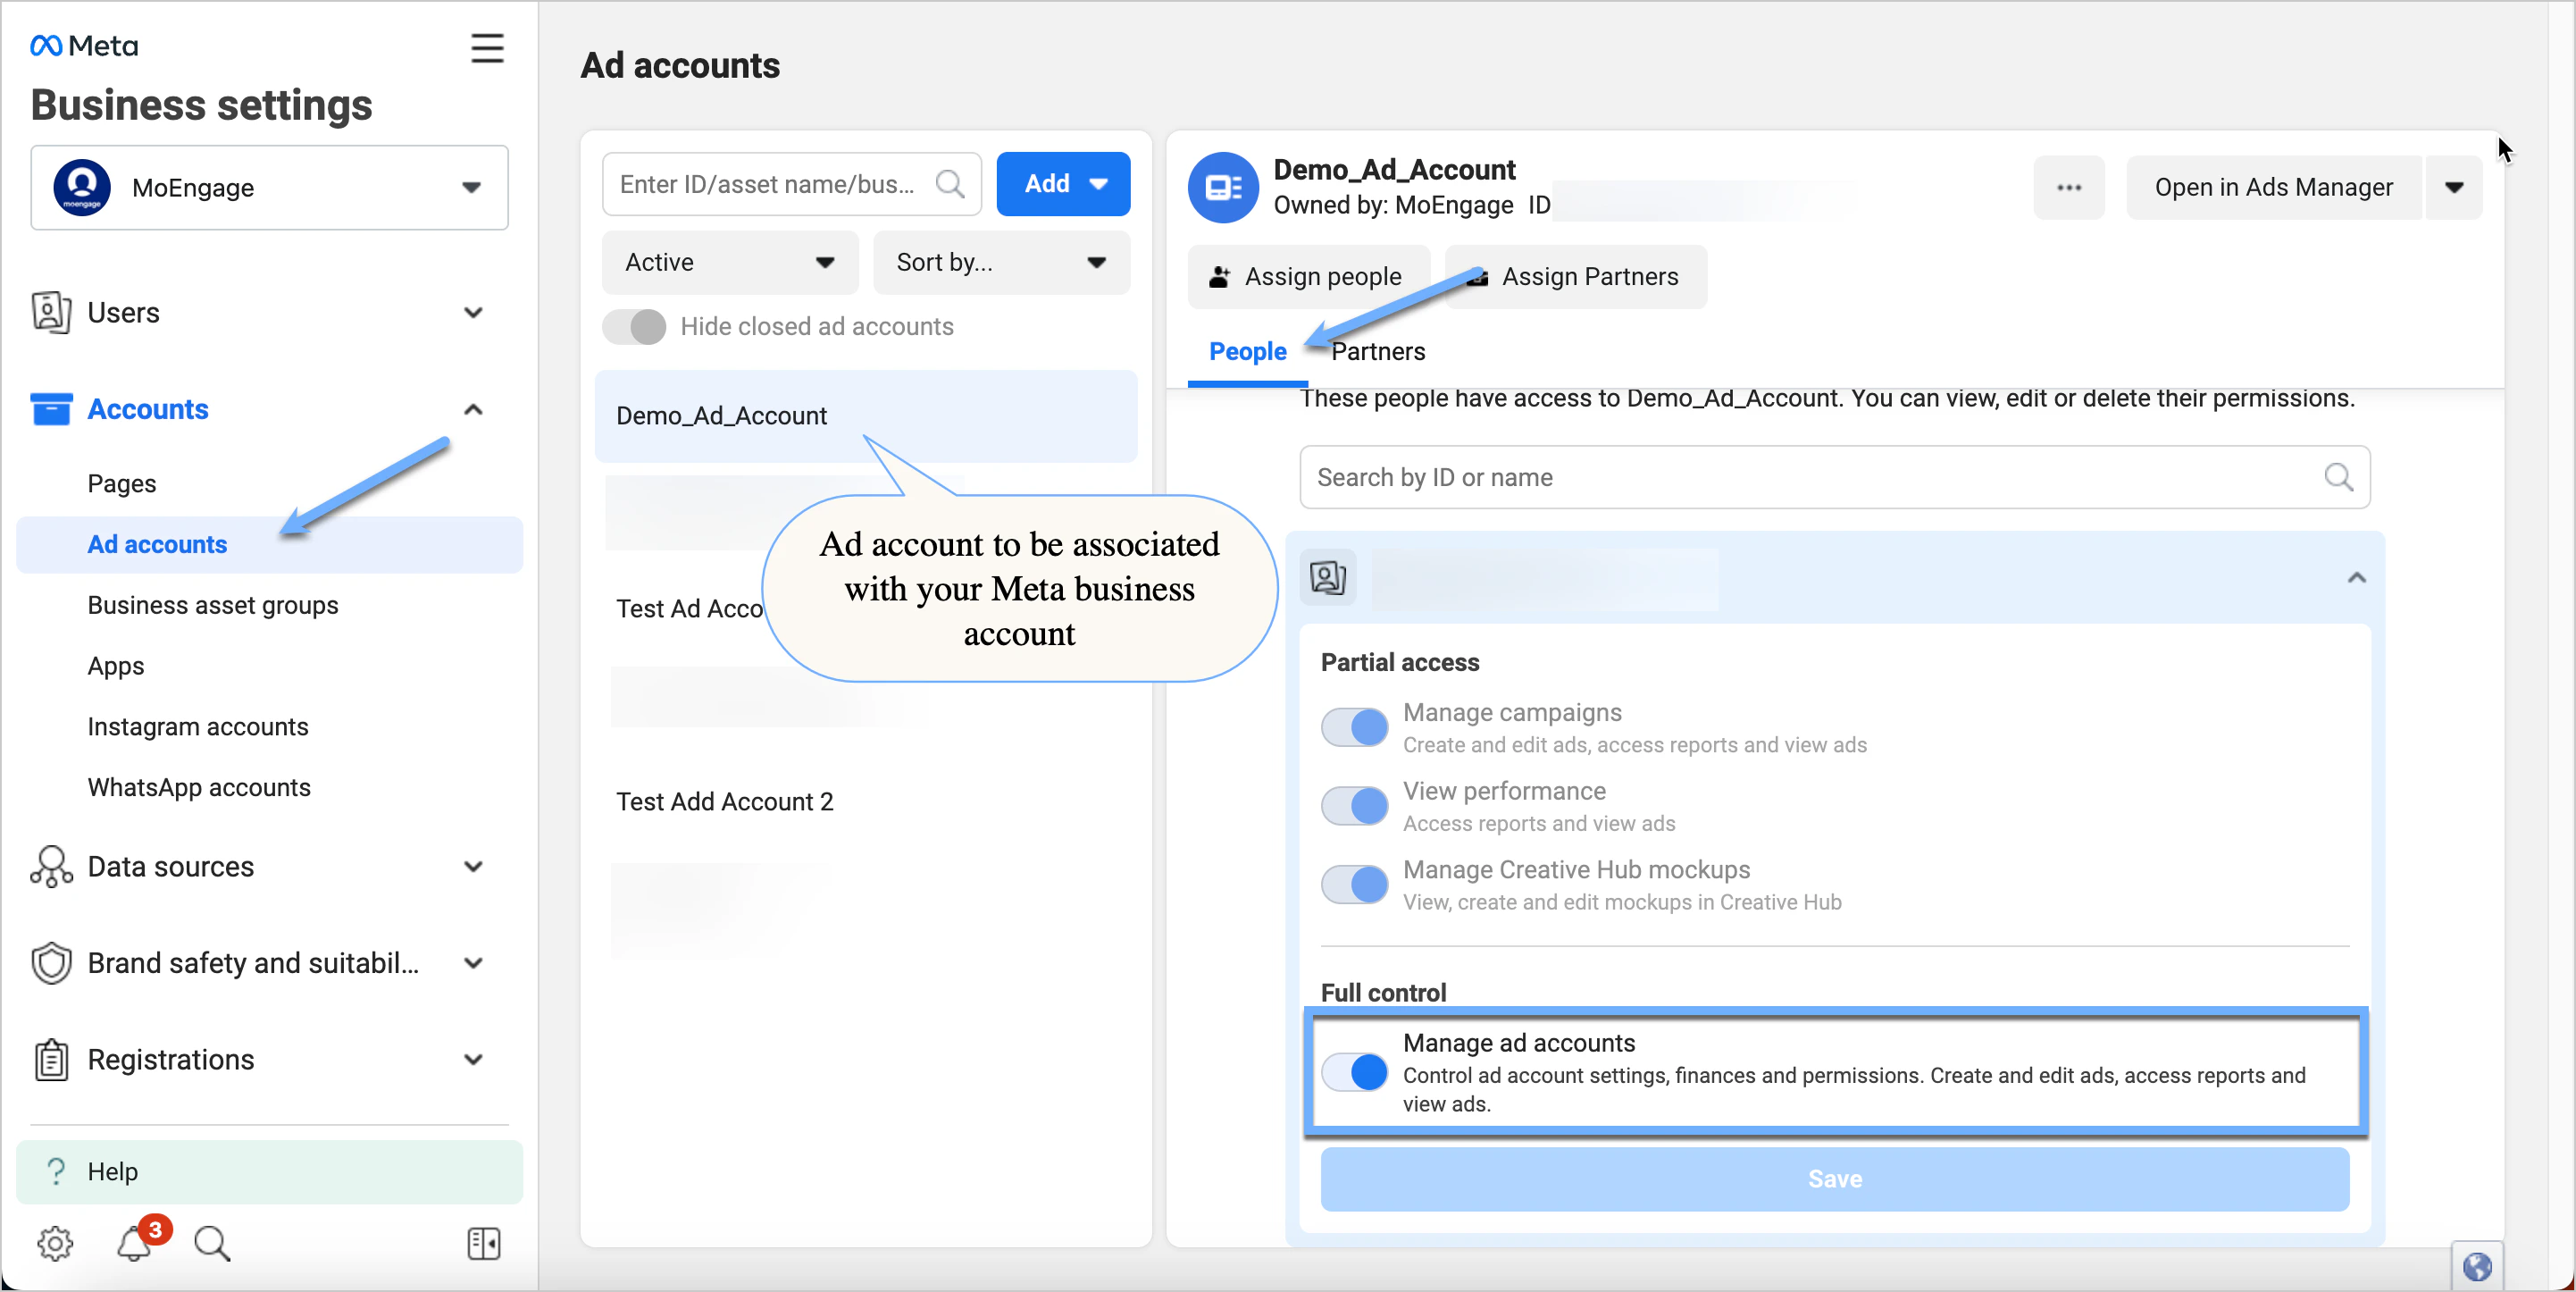
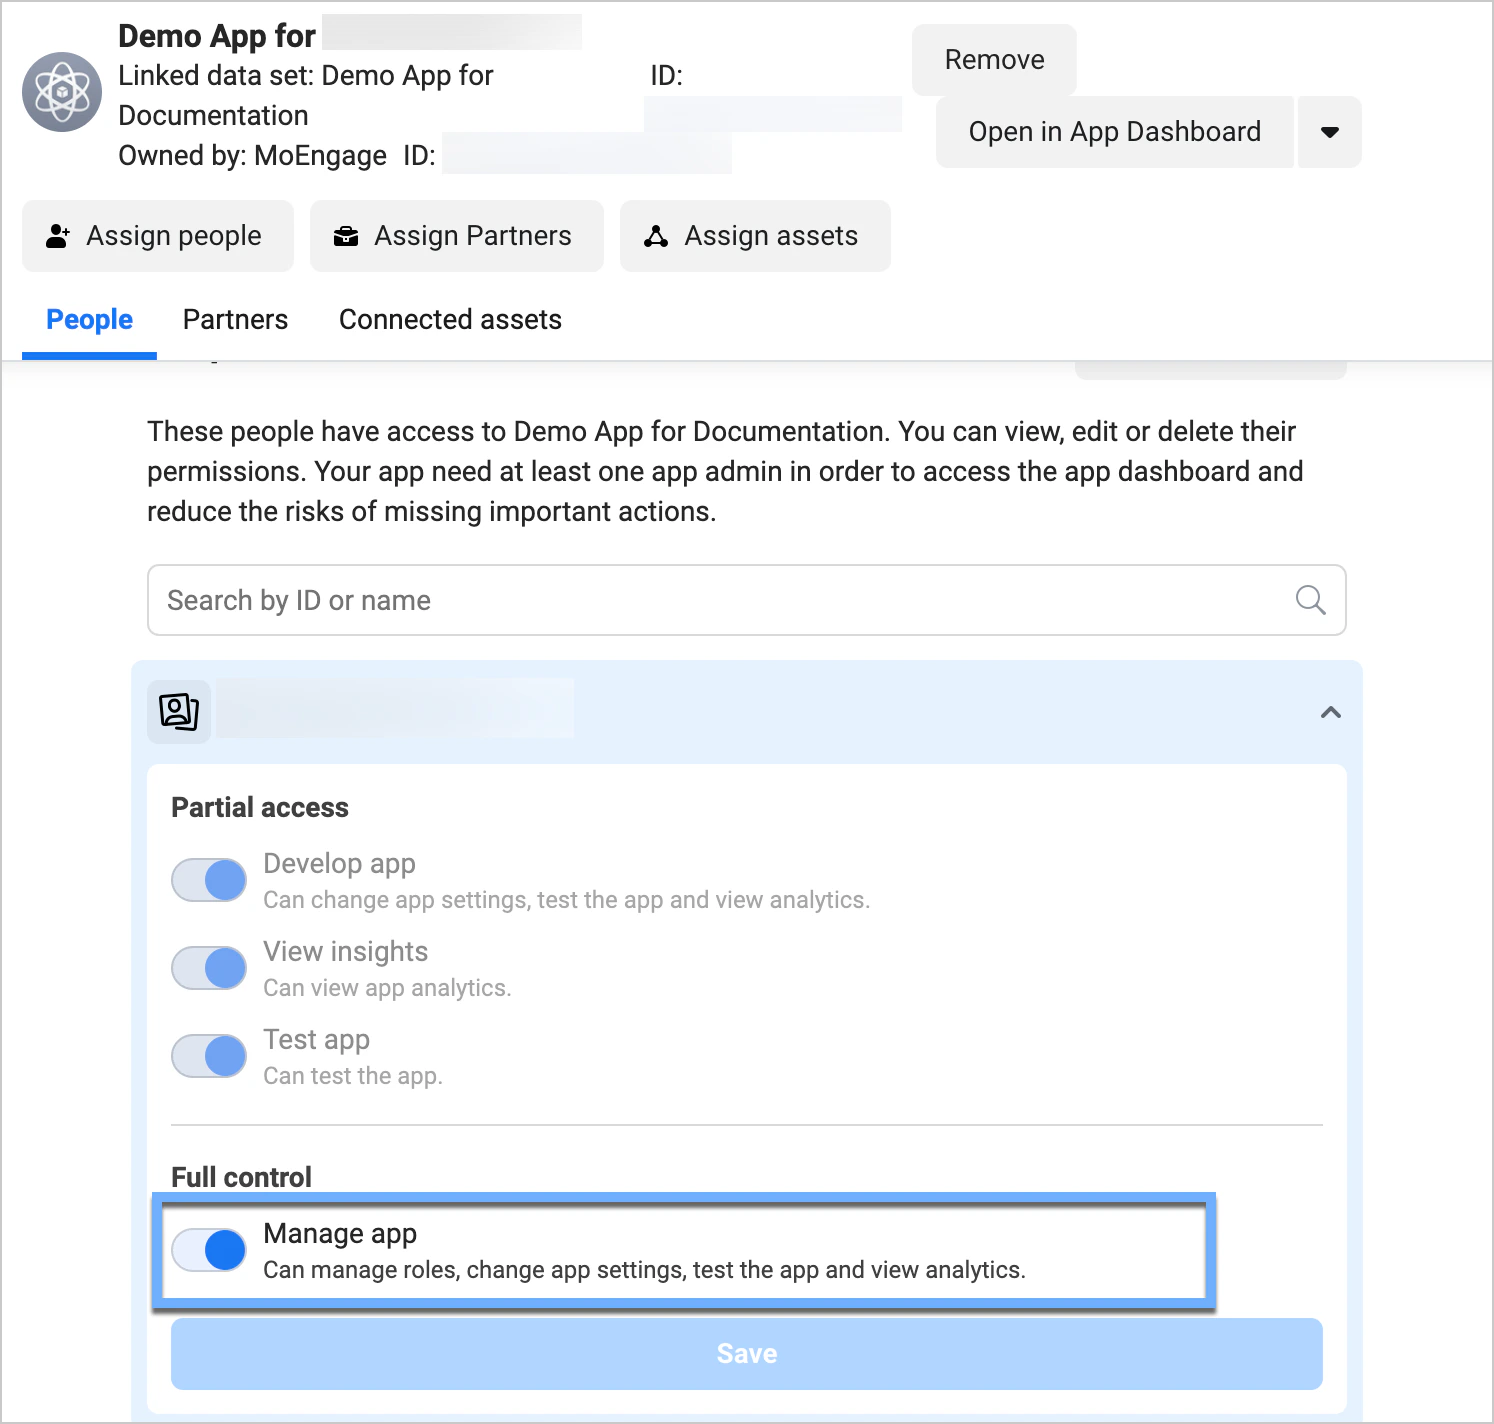
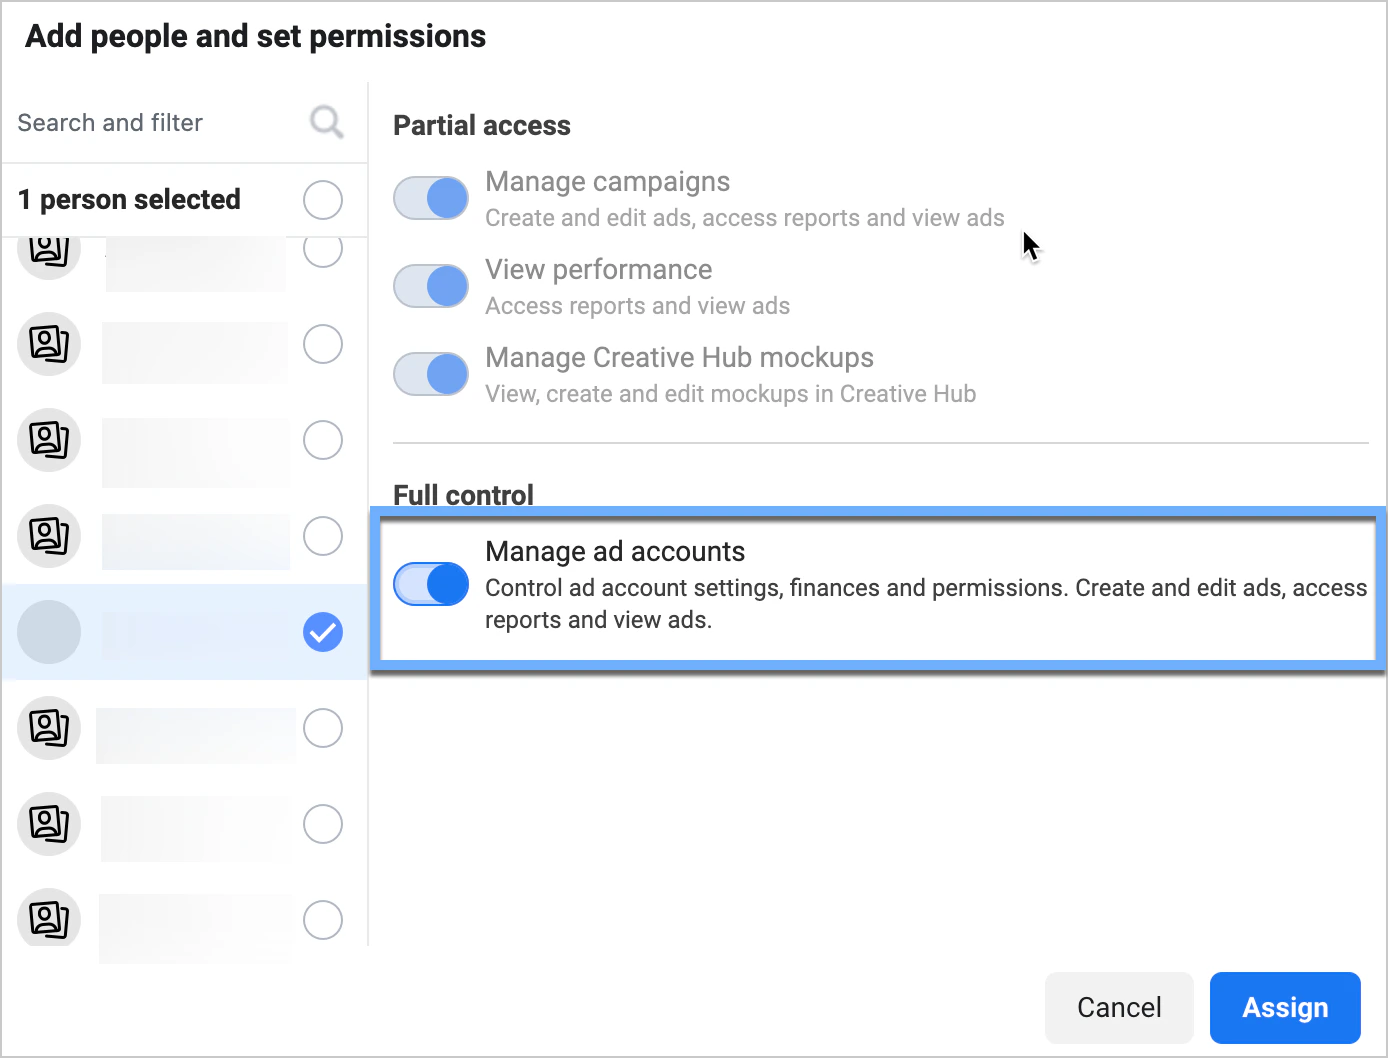
- On the next screen, you can add people and set permissions. Select your account, and then enable the Manage Account toggle. Click Assign.
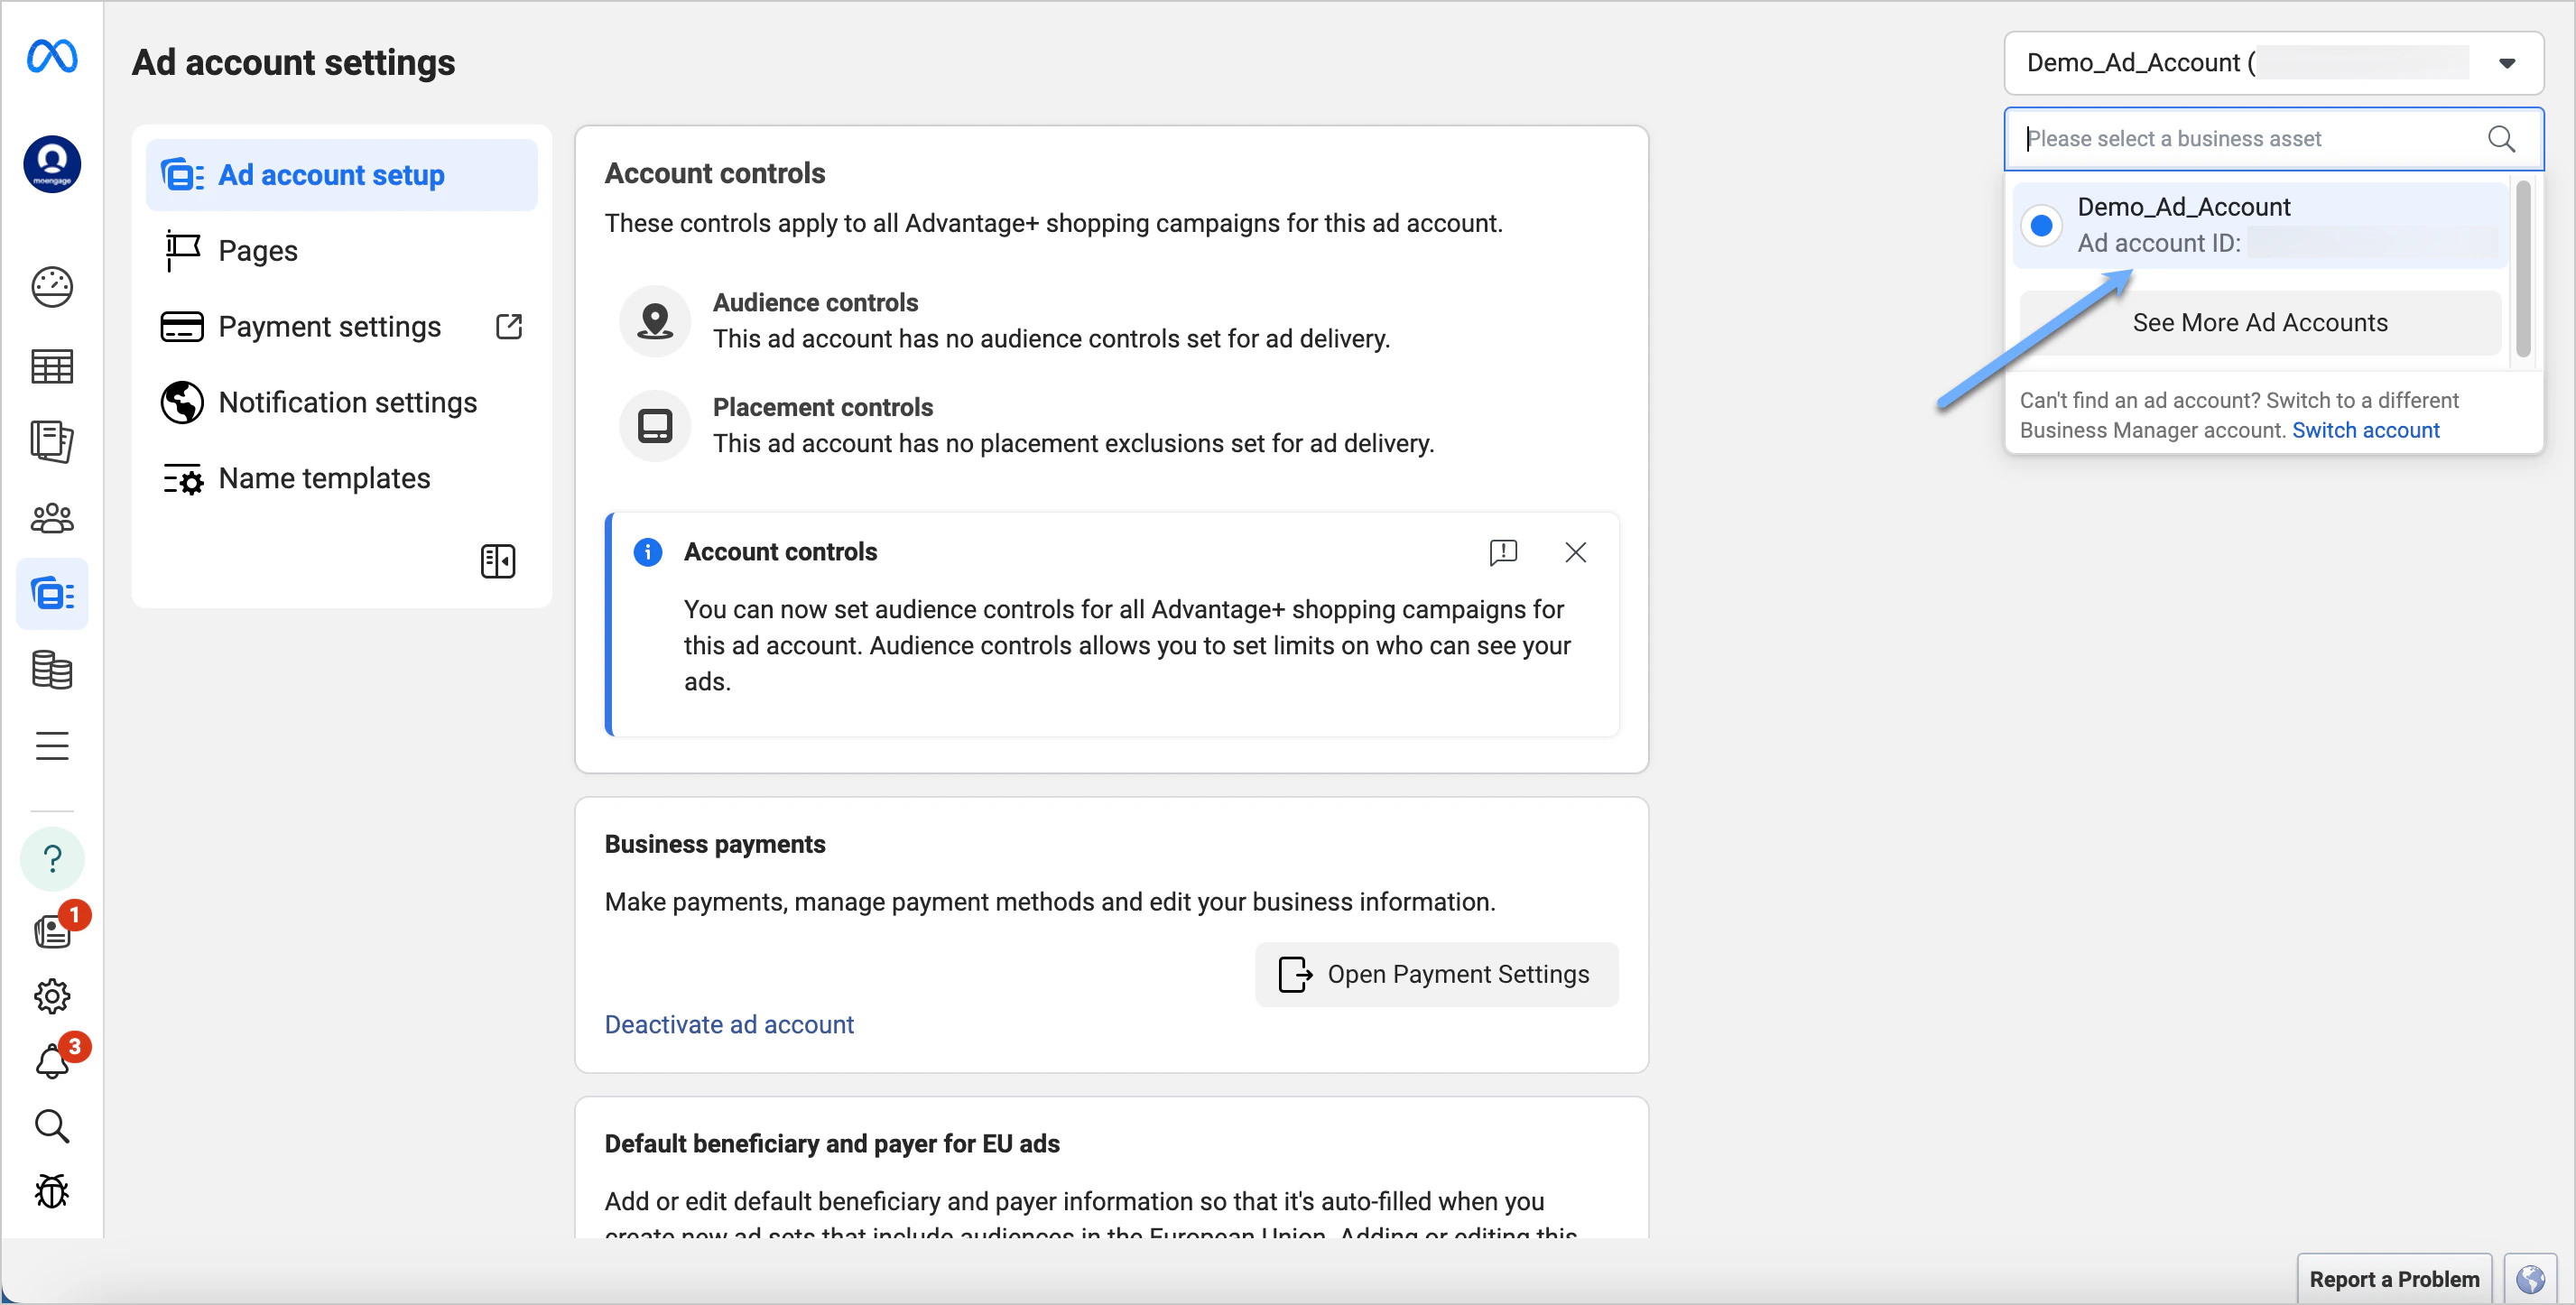
- Add your payment information. Once you add all necessary details, your ad account appears in the Ad Accounts menu.