Push Personalization
One can personalize one or multiple attributes in the same message. To insert personalization in any field value, enter ”@” and select the user attribute*.* We support personalization in:- Message fields- message title, body, summary,
- Rich content - Images & Coupon Codes
- Click Actions - Deep-link URI & value items for Key-Value pairs for both platforms - Android and iOS.
When you create a personalization condition or logic, it appears as a chip. To know more about Chip Actions, refer here.
Examples
Name Personalization
To address users by their first name, remind them of their last activity (viewed product, purchased product)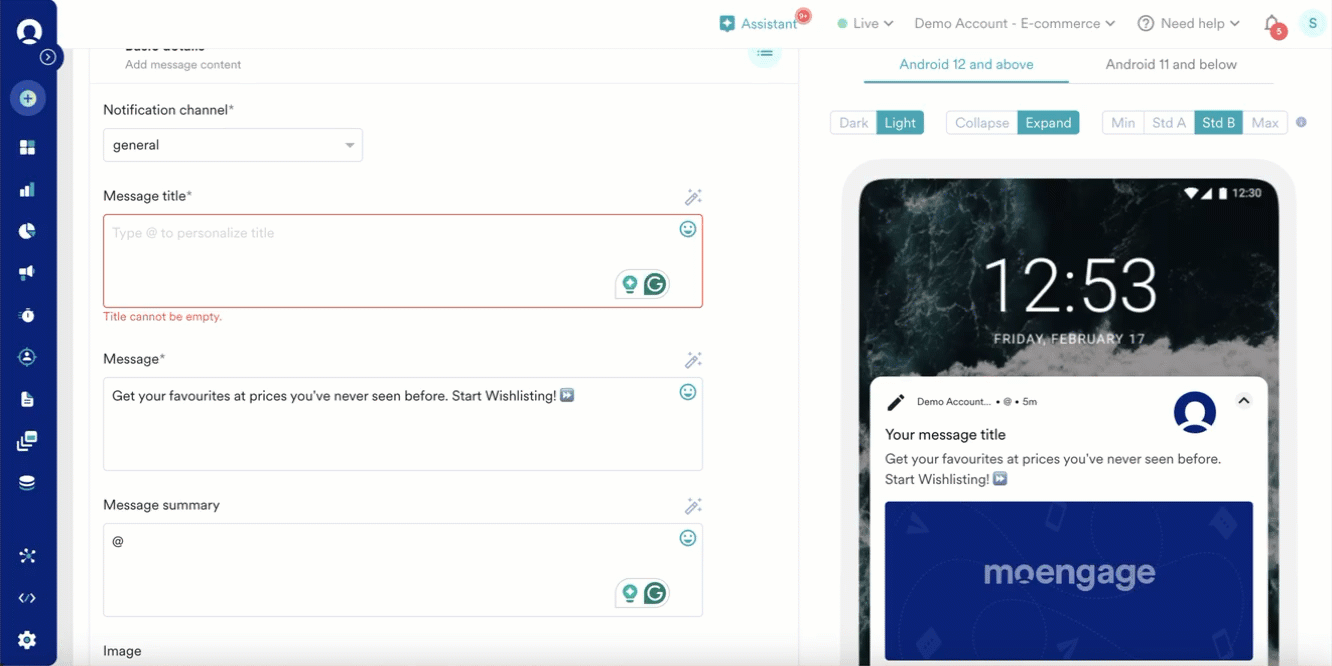
Image Personalization
To send a personalized Image to the user for products viewed but not bought by the customer.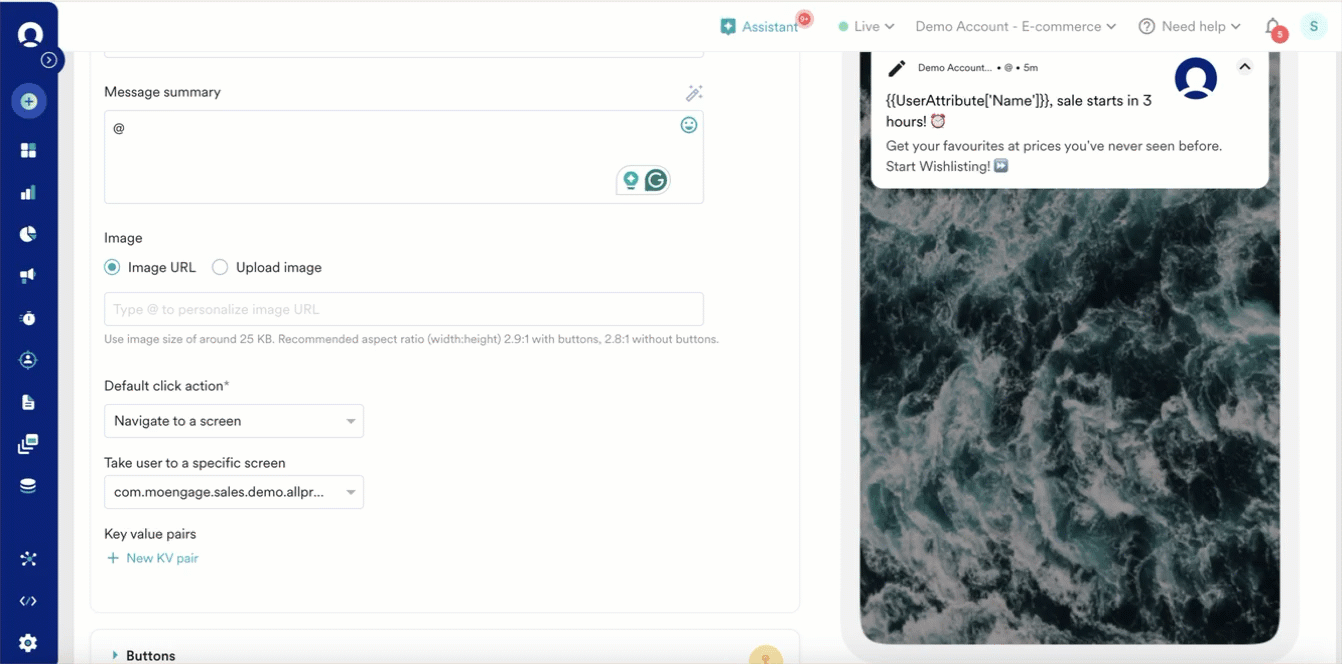
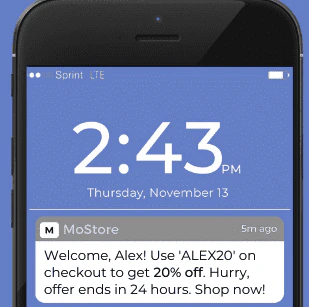
Coupon Code Personalization
To send a unique coupon code to every user. You need to save the User Level Coupon as a custom attribute and use it here. In the example, we have saved User-specific unique coupon code in an attribute named: Promo Code
Key-Value Pair Personalization
When you want to pass Unique User Attribute to the app and make a decision on basis of that. It can be used to pre-fill feedback forms or user surveys etc.
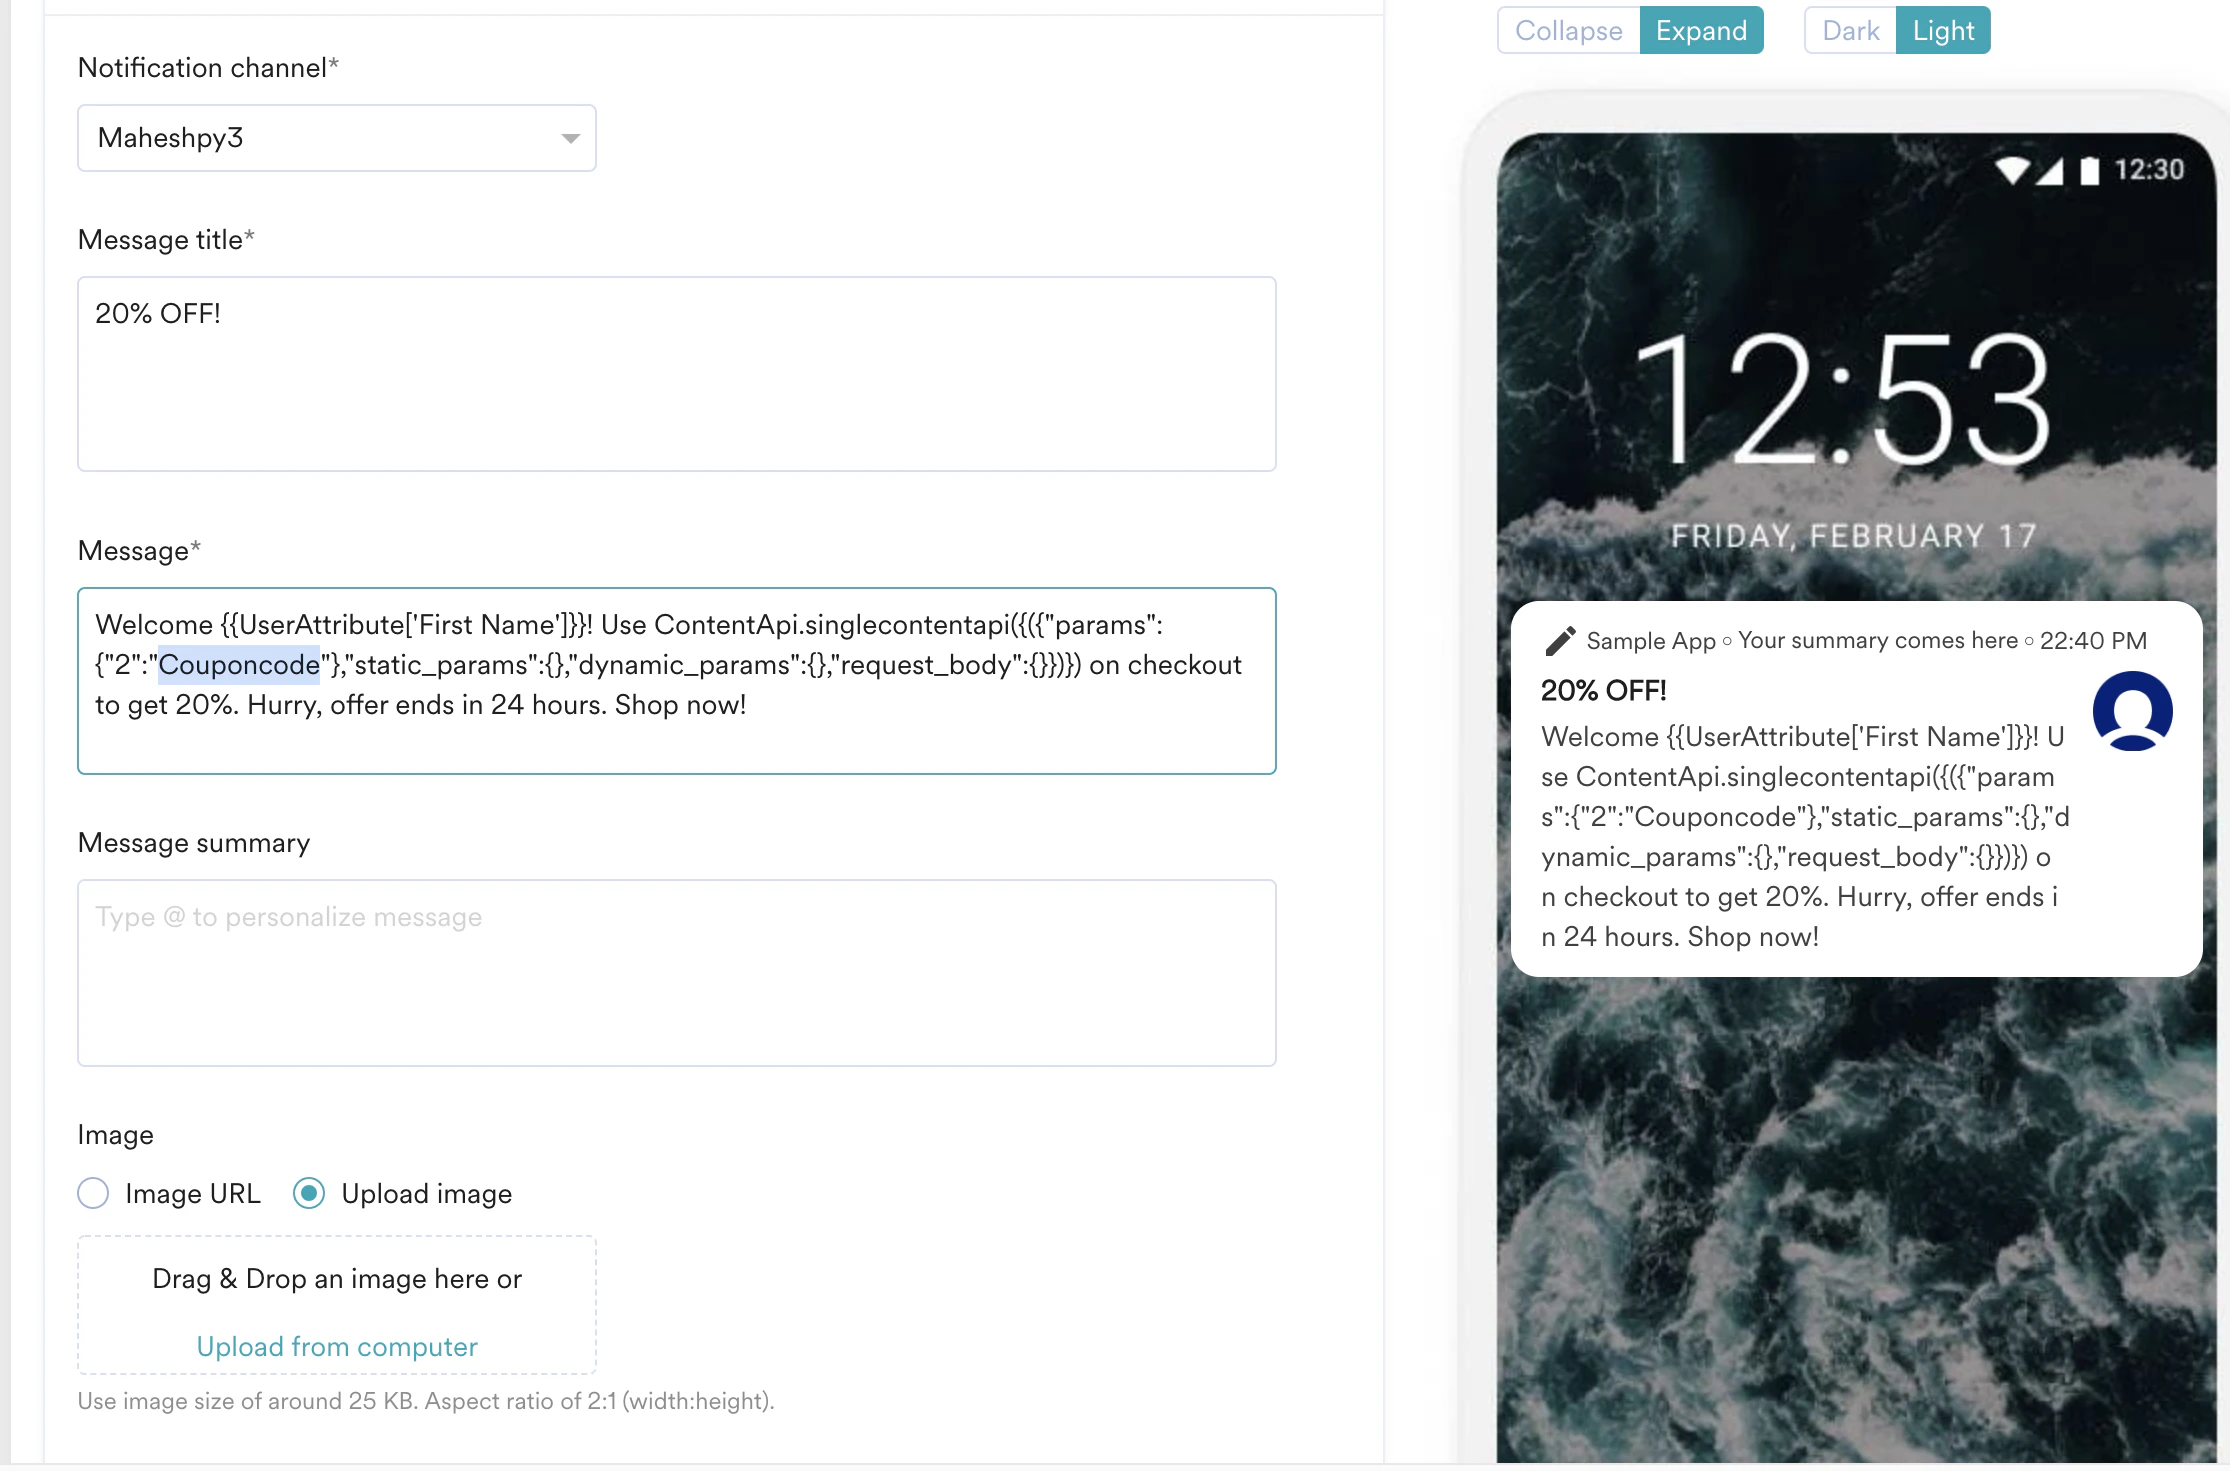
Personalization using Content APIs
Type ’@’ in the Message section and add the call to the Content API. The Push Personalization screen opens up when you type @. Choose the relevant Content API as shown below.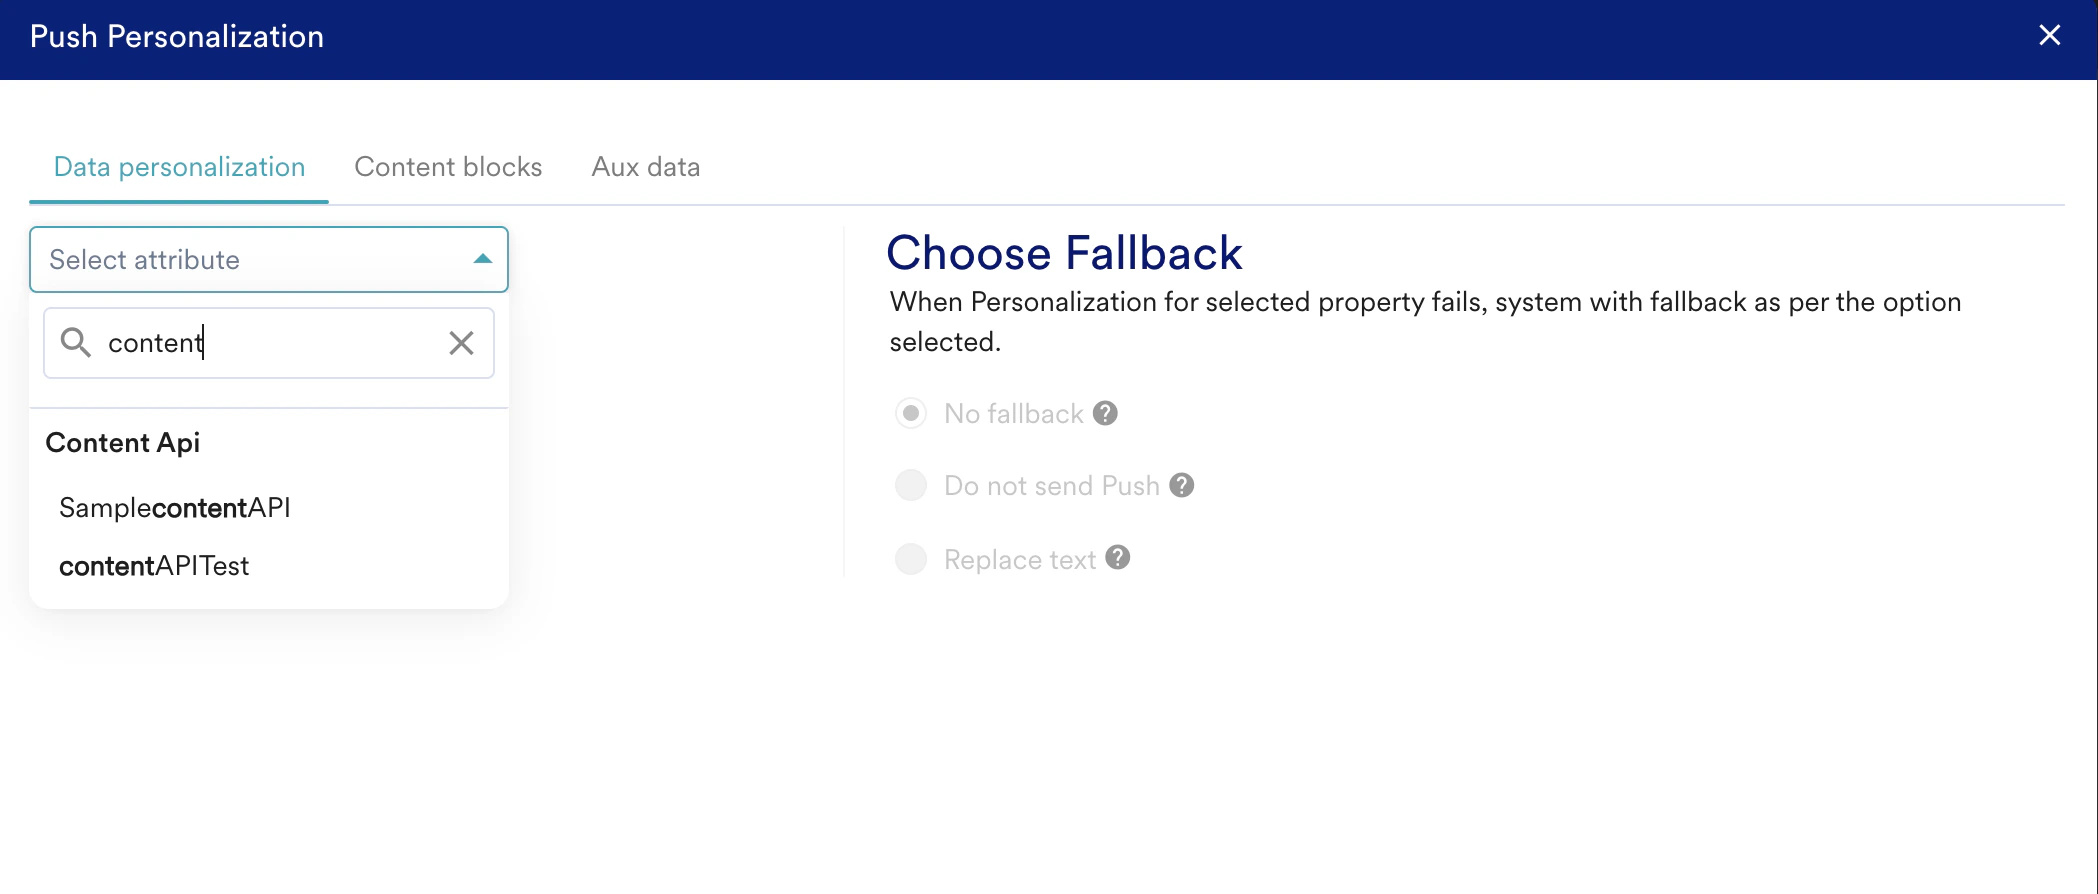
Personalize Content Using Auxiliary Data
You can personalize your Push content using auxiliary data by selecting the auxiliary data attributes in the personalization editor. To personalize content using Auxiliary Data attributes:- Enter @ in the fields such as Message title, Message, Message summary (wherever personalization is supported) to invoke the personalization editor.
- Select the Aux Data tab.
- In the Aux data drop-down list, select the Auxiliary Data file whose attribute you wish to use for personalization.
- In the Lookup value drop-down list, select the primary key specified for the Auxiliary Data during import. This will identify the user for whom the Auxiliary Data is being fetched.
- In the Attribute drop-down list, specify the attribute to be personalized using Auxiliary Data.
- Click Done. The Auxiliary Data JINJA will get added to the field or the editor.
Personalization Using Content Blocks
Content Blocks are reusable content that can be used across various campaigns. These are particularly useful for headers, footers, signature blocks, terms and conditions, and so on.Adding a Content Block
To add a content block, type @ in the message section and navigate to the content blocks tab in the personalization screen that pops up.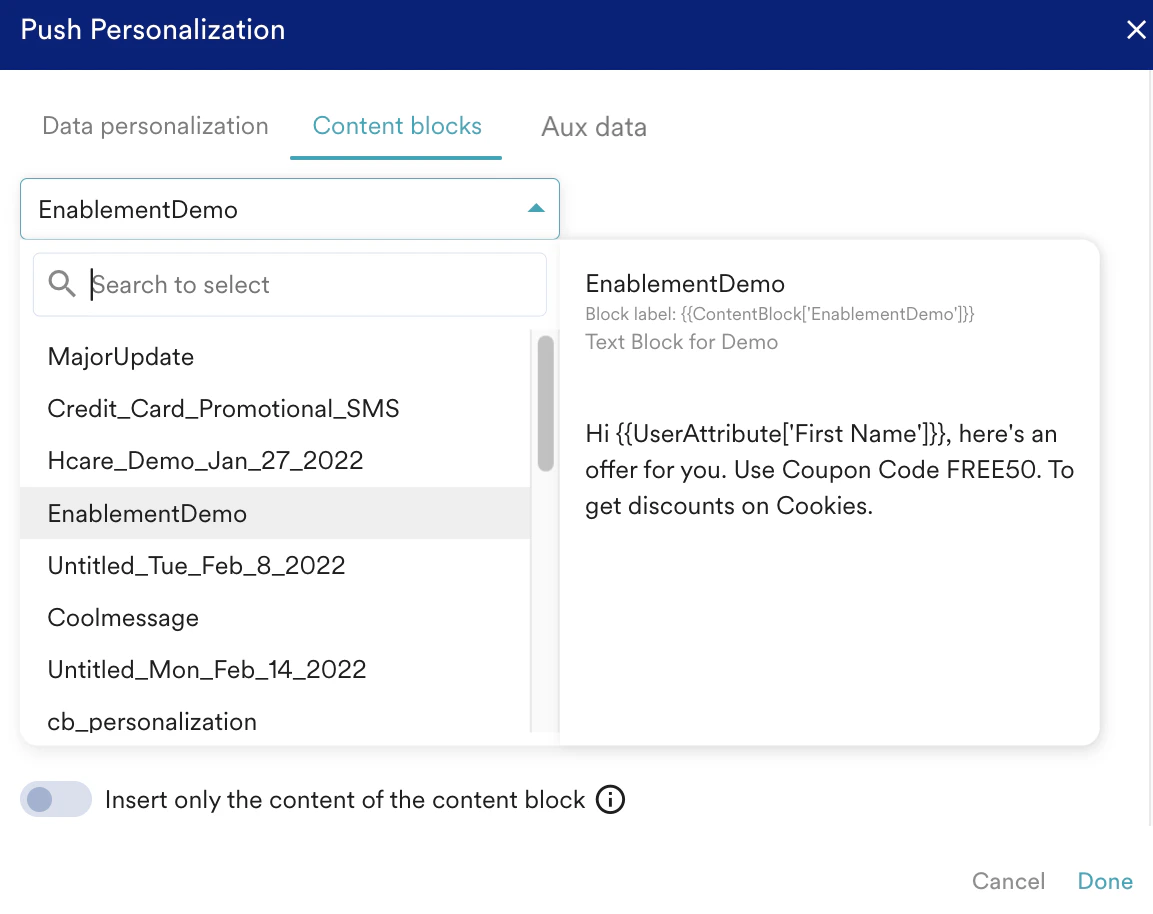
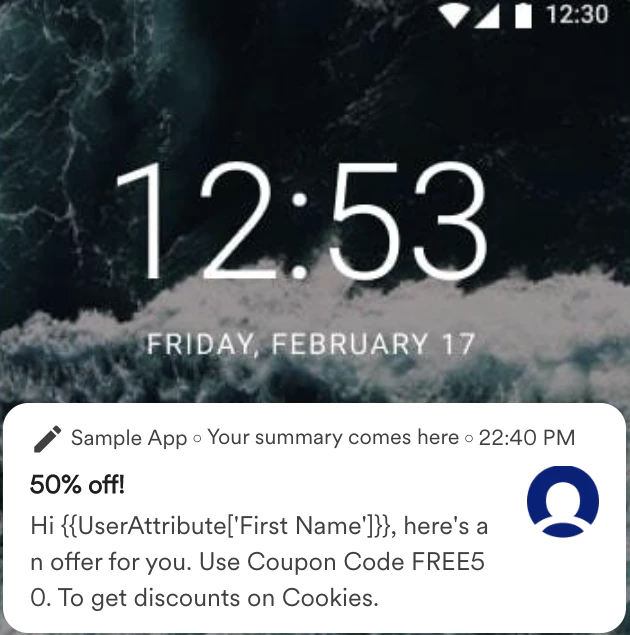
Preview of a message that contains a Content Block

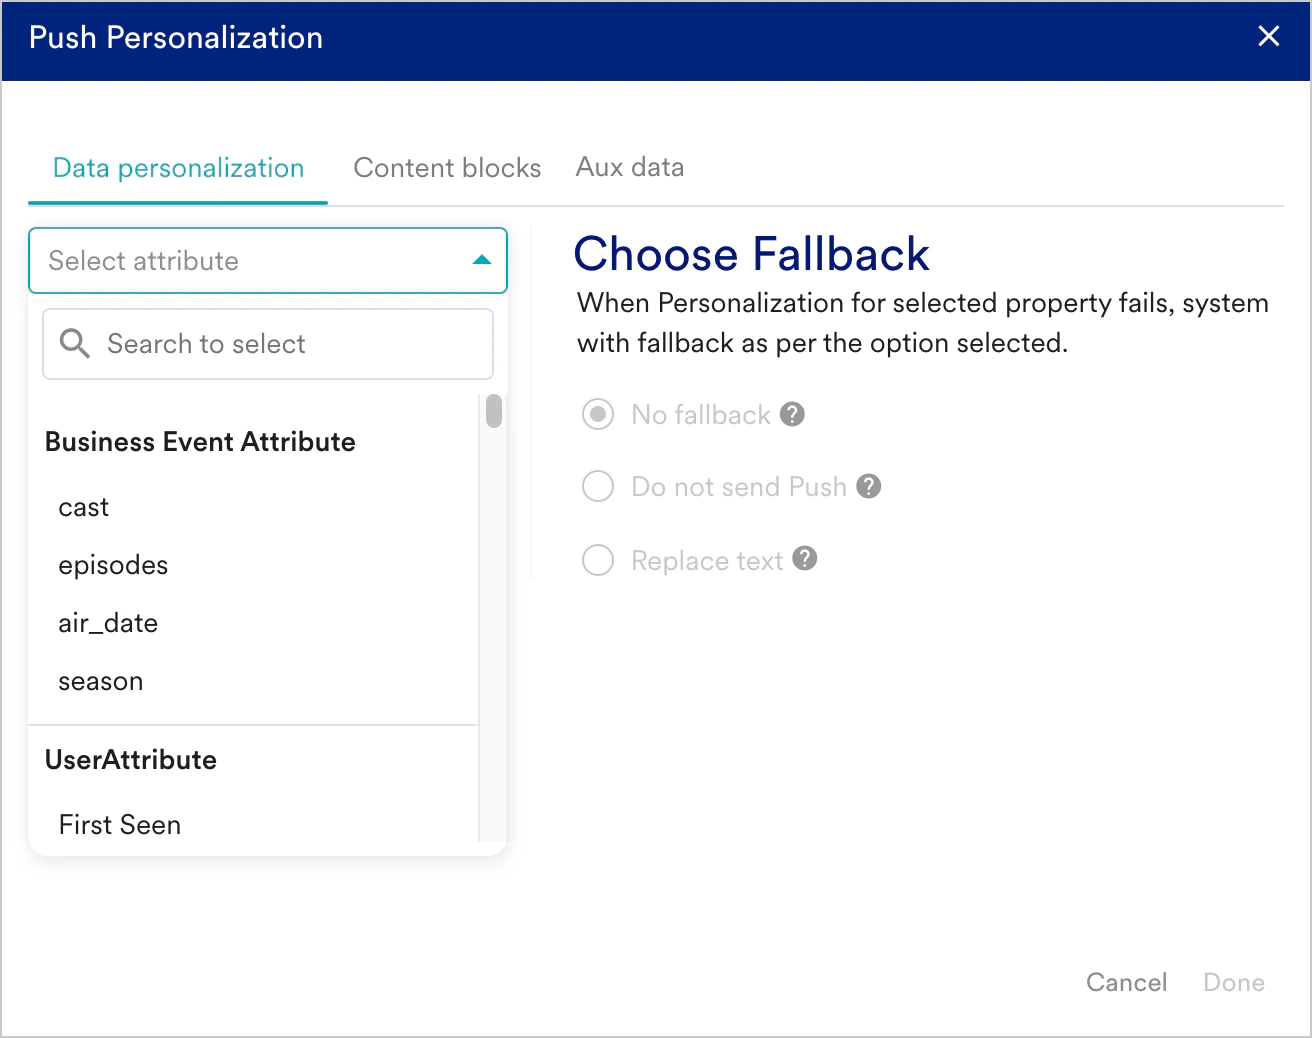
Fallback Messaging
There may be cases where personalization may fail due to untimely resolution of user attributes or other reasons. You can create an alternate (Fallback) to the personalization when there are failures.- No Fallback
Choose the option for personalized content. The option results in no alternates when the personalization does not work. - Do not send Push
Choose the option where if the personalization does not work, In-App messages are not sent. - Replace Text
Type or paste the text used when the personalization does not work.
| Personalization Successful | Fallback Message Set | Message |
|---|---|---|
| No | No | No message will be sent. Error: Personalization Failed |
| Yes | Yes | A personalized message will be sent |
| No | Yes | The fallback message will be sent |

Triggered Push Campaigns
- Event and Device Triggers
- Business Event Triggers
In Event Triggered and Device Triggered Push Notification, for personalization, you can additionally use the event attribute for the event the “IF” trigger is set upon. Other things remain similar to things mentioned in the Push Personalization section.