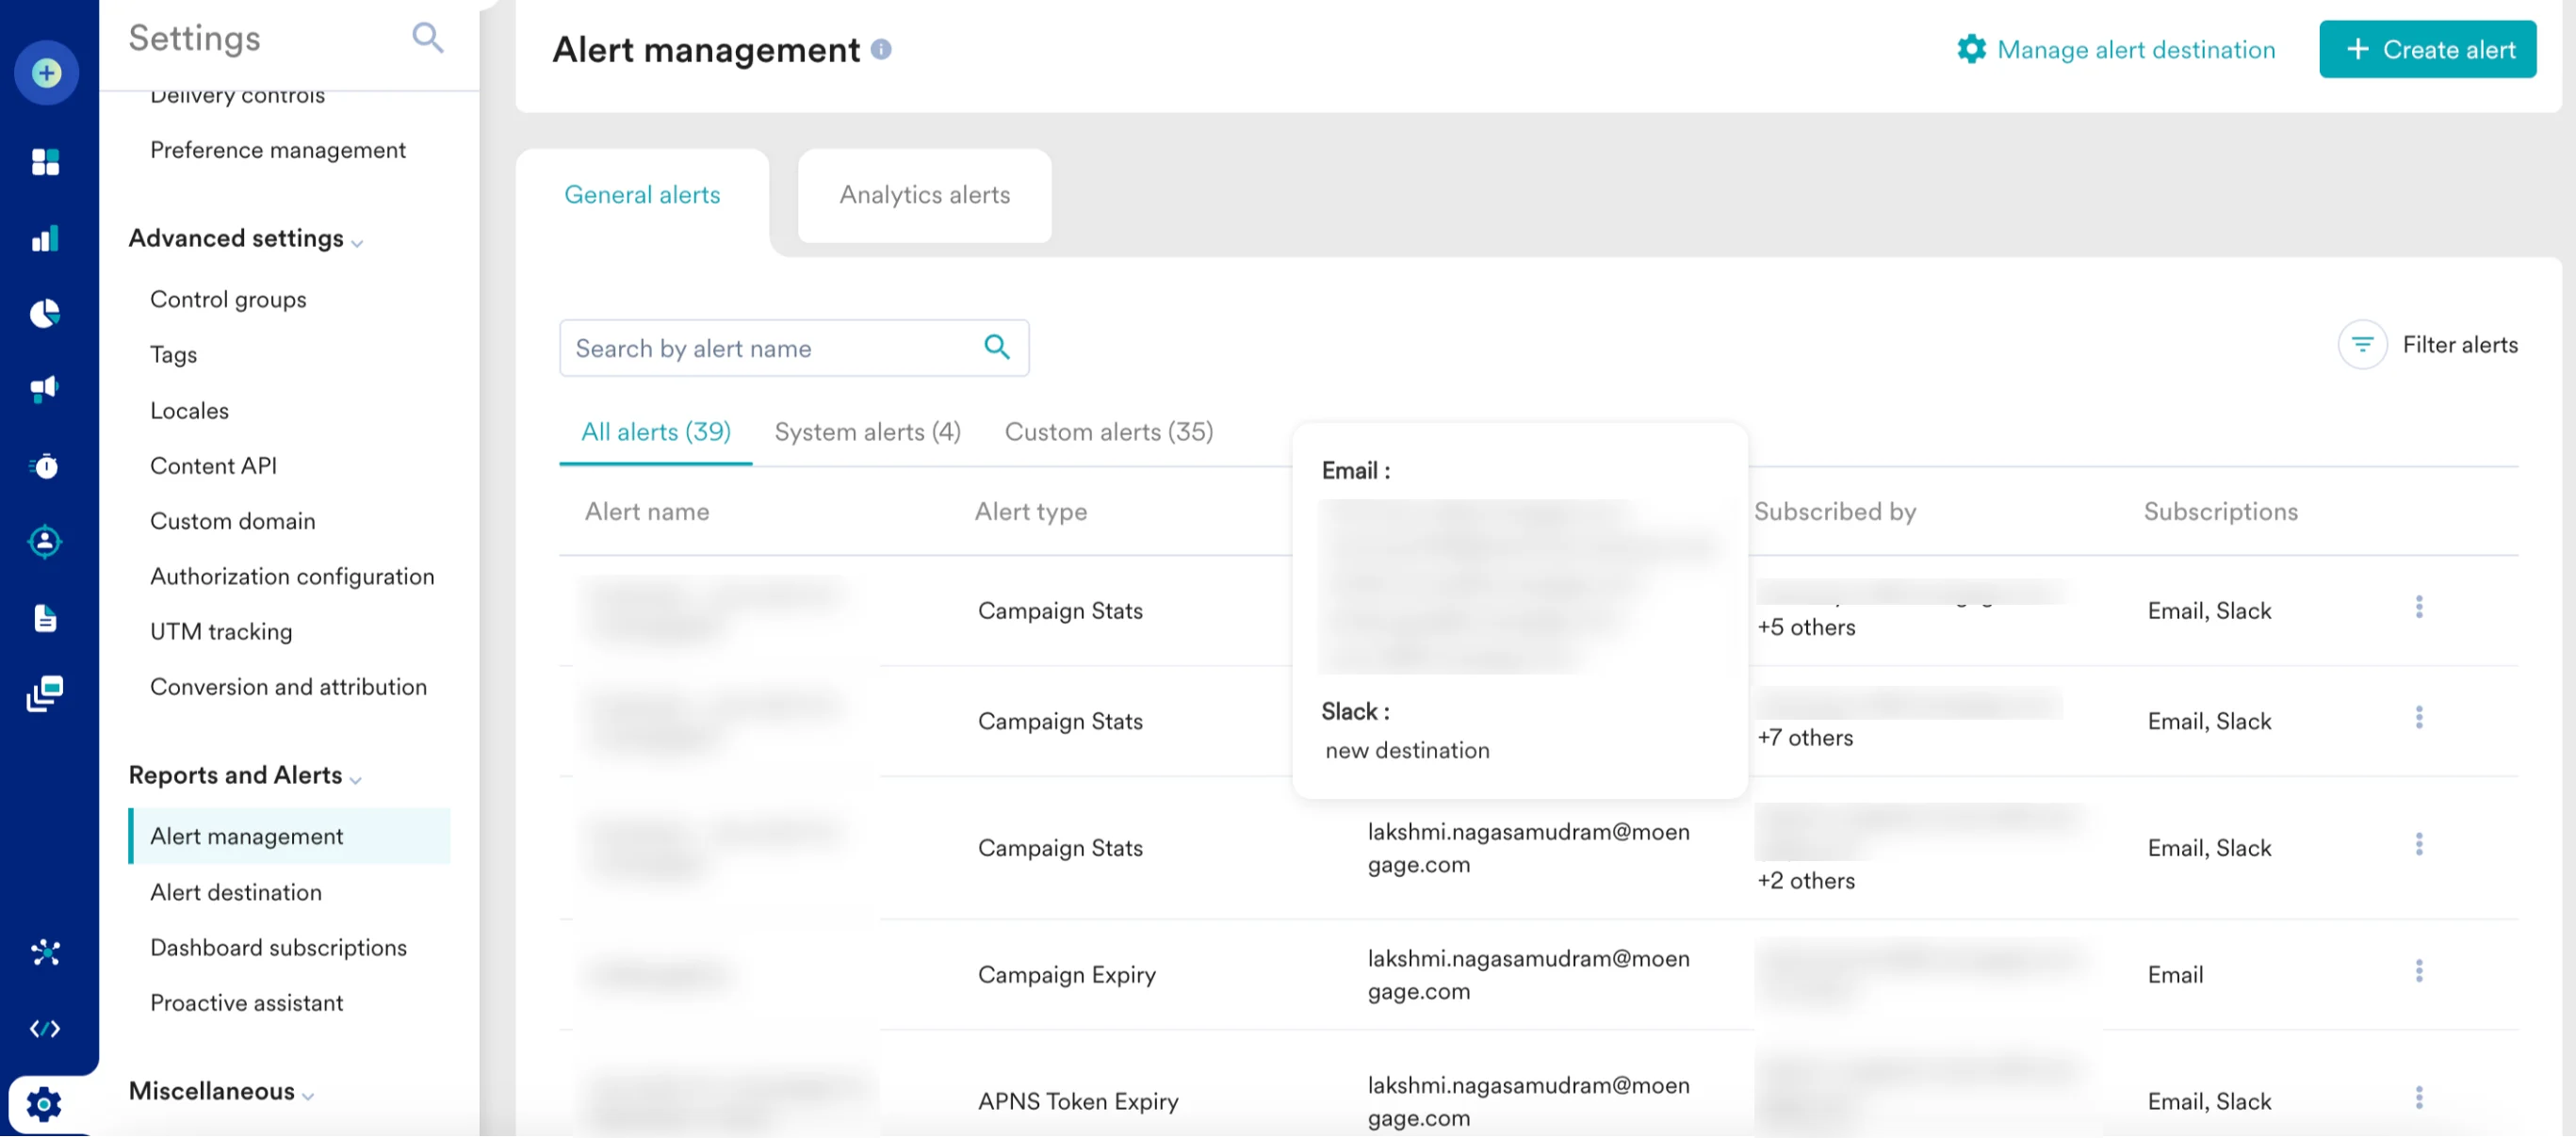
When a configured alert is triggered, MoEngage sends an HTTP POST request to your designated webhook URL, enabling seamless integration with your internal systems, monitoring tools, or third-party services.
Set Up Your Webhook URL
To set up a webhook destination, you must provide a URL. Your URL must be a publicly accessible endpoint that acceptsHTTP POST requests with a JSON body.
Your webhook URL is the address of your application or service that will listen for and process the incoming alert notifications.
Webhook Payload Structure
All webhook notifications follow a consistent JSON structure. The table below describes each field in the payload. Note that some fields, particularly within theentity_data object, are specific to certain alert types.
entity_data.content object
The following table describes the possible fields in each object in theentity_data.content array.
Verify the webhook signature
To ensure that webhook requests are authentic and originate from MoEngage, we include a digital signature in the request headers.It is recommended to validate this signature on your server to prevent unauthorized access and ensure data integrity.
Signature HTTP header. It is generated by creating a SHA-256 hash of your API key concatenated with the raw request body.
Generate and verify the signature
- Get your Campaign Report API key: Find this key in your MoEngage dashboard by navigating to Settings > Account > APIs.
- Prepare the signature string: Concatenate your Campaign Report API key, a pipe character (
|), and the raw JSON request body. Format:YOUR_API_KEY|RAW_REQUEST_BODY - Calculate the hash: Create a SHA-256 hash of the signature string and encode it as a hexdigest.
- Compare signatures: Compare the hash you generated with the value from the
Signatureheader in the incoming request. If they match, the request is authentic.
Python
Sample Payloads and cURL Requests
Below are samples ofcURL commands demonstrating the POST request and JSON payload your webhook endpoint will receive. Replace 'https://your-webhook-url.com/endpoint' with your actual endpoint URL.
Campaign stats (CAMPAIGN_STATS)
Absolute Threshold Alert
This alert triggers when a metric crosses a fixed value.cURL
Relative Threshold Alert (with Moving Average)
This alert triggers when a metric deviates from its historical moving average. A moving average is the average of a metric over a specific number of past periods (for example, the last 7 days), which helps identify significant deviations from recent performance trends.cURL
Flow Stats (FLOW_STATS)
These alerts are similar to campaign stats but focus on flow-level metrics.cURL
Campaign Expiry (CAMPAIGN_EXPIRY)
This alert notifies you when campaigns are nearing their expiration date.cURL
APNS Token Expiry (APNS_TOKEN_EXPIRY)
This alert warns you when your Apple Push Notification Service (APNS) token is about to expire. Note that this payload does not contain anentity_data object.
cURL
Facebook Token Expiry (FACEBOOK_TOKEN_EXPIRY)
This alert warns you when your Facebook token is about to expire. This payload also does not contain anentity_data object.
cURL
Integrate Alert Management via Webhook URL
1
Open app marketplace
On the left navigation menu of your MoEngage dashboard, click App marketplace.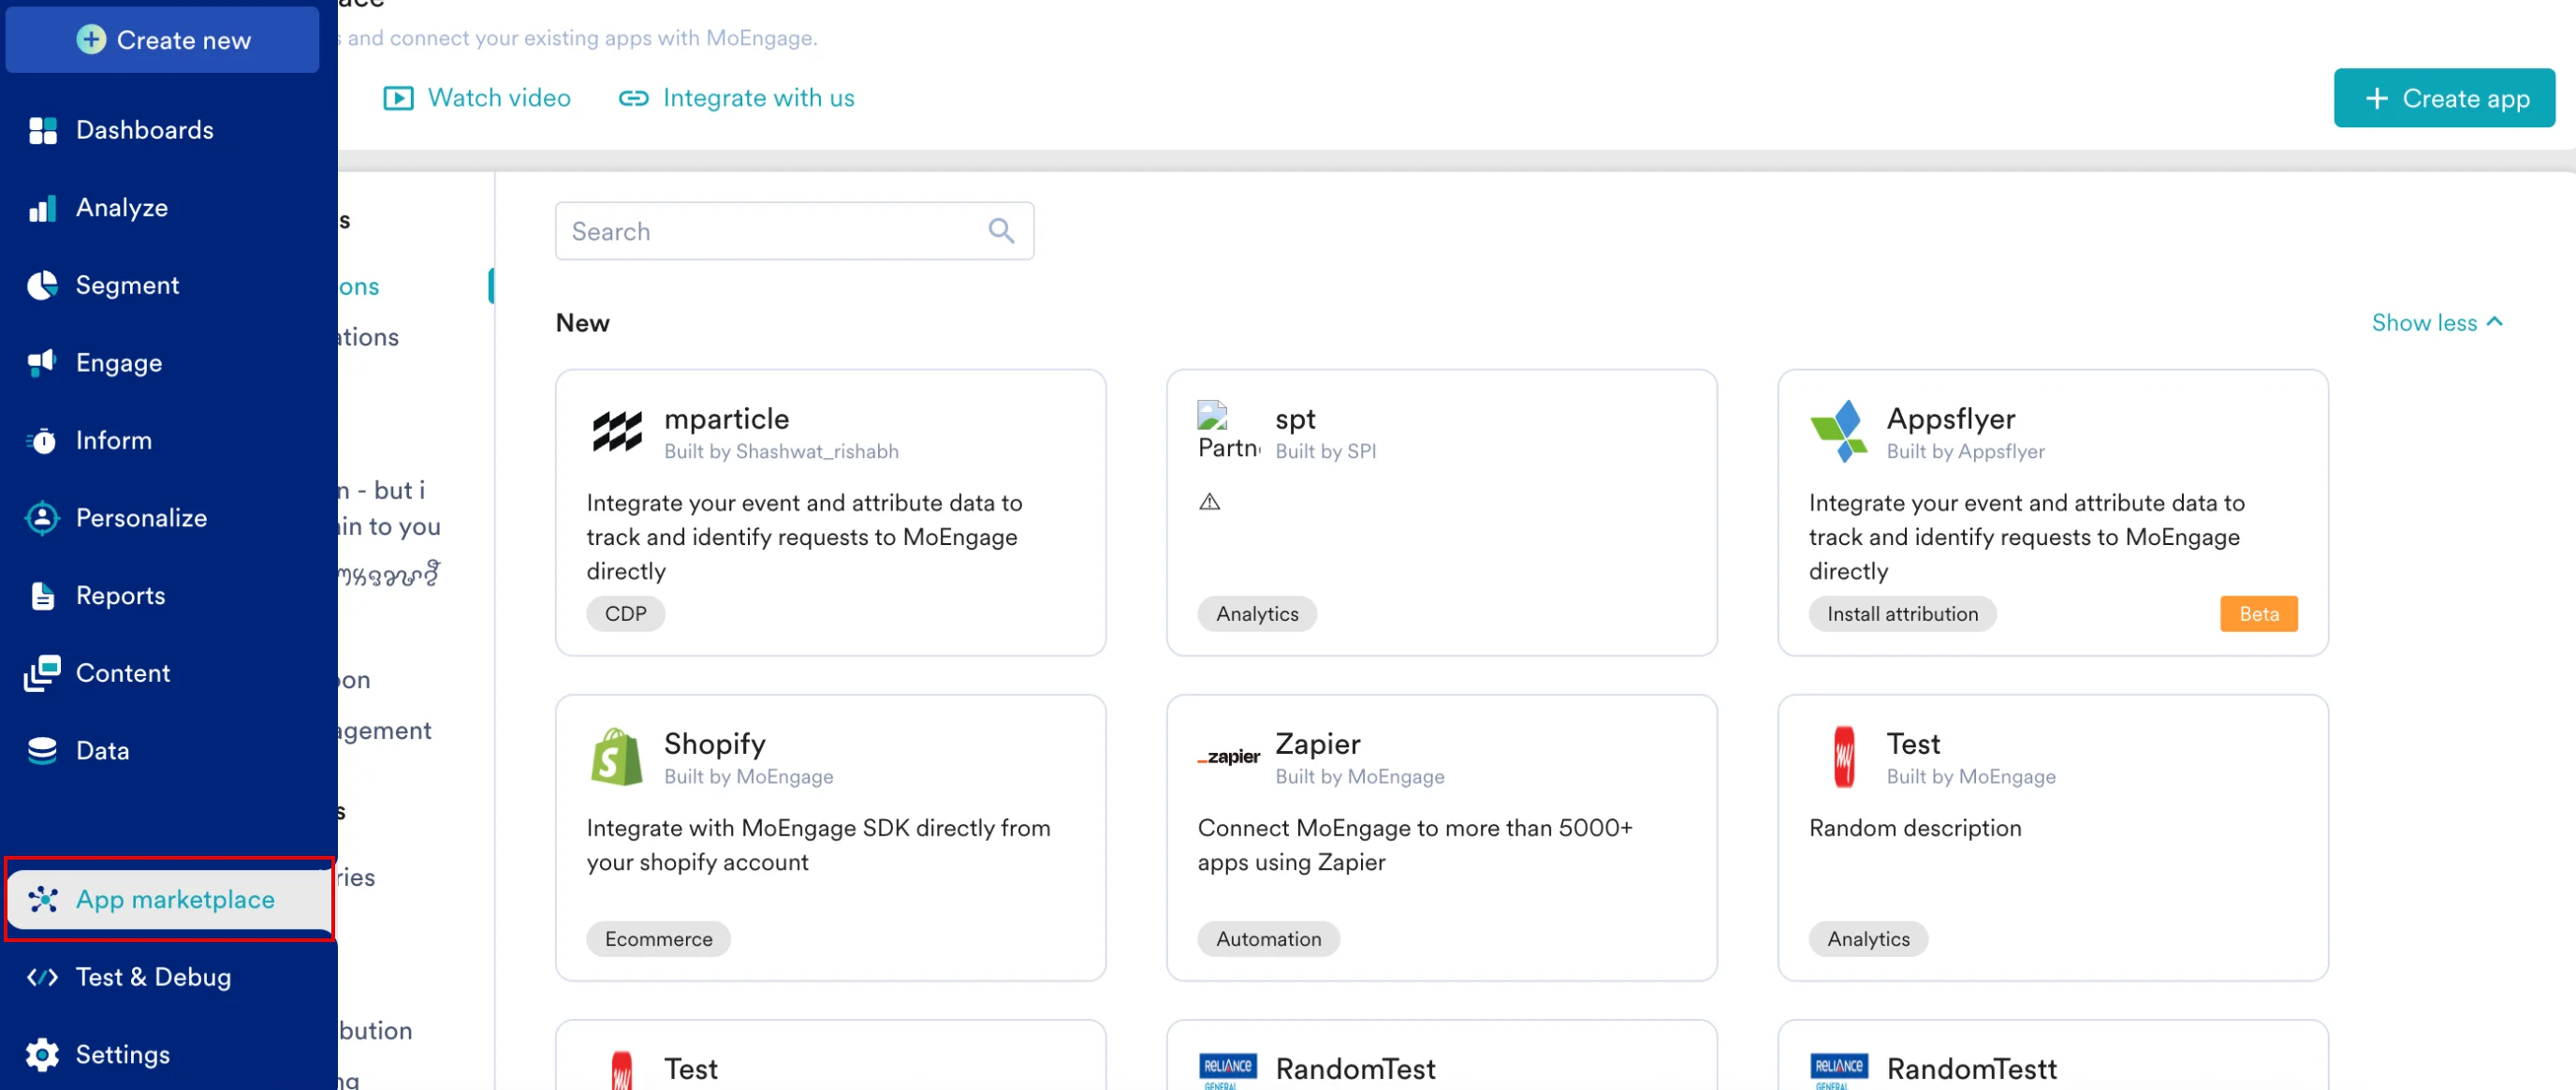
2
Select Webhooks
On the App marketplace page, click Alert management, and then select Webhooks.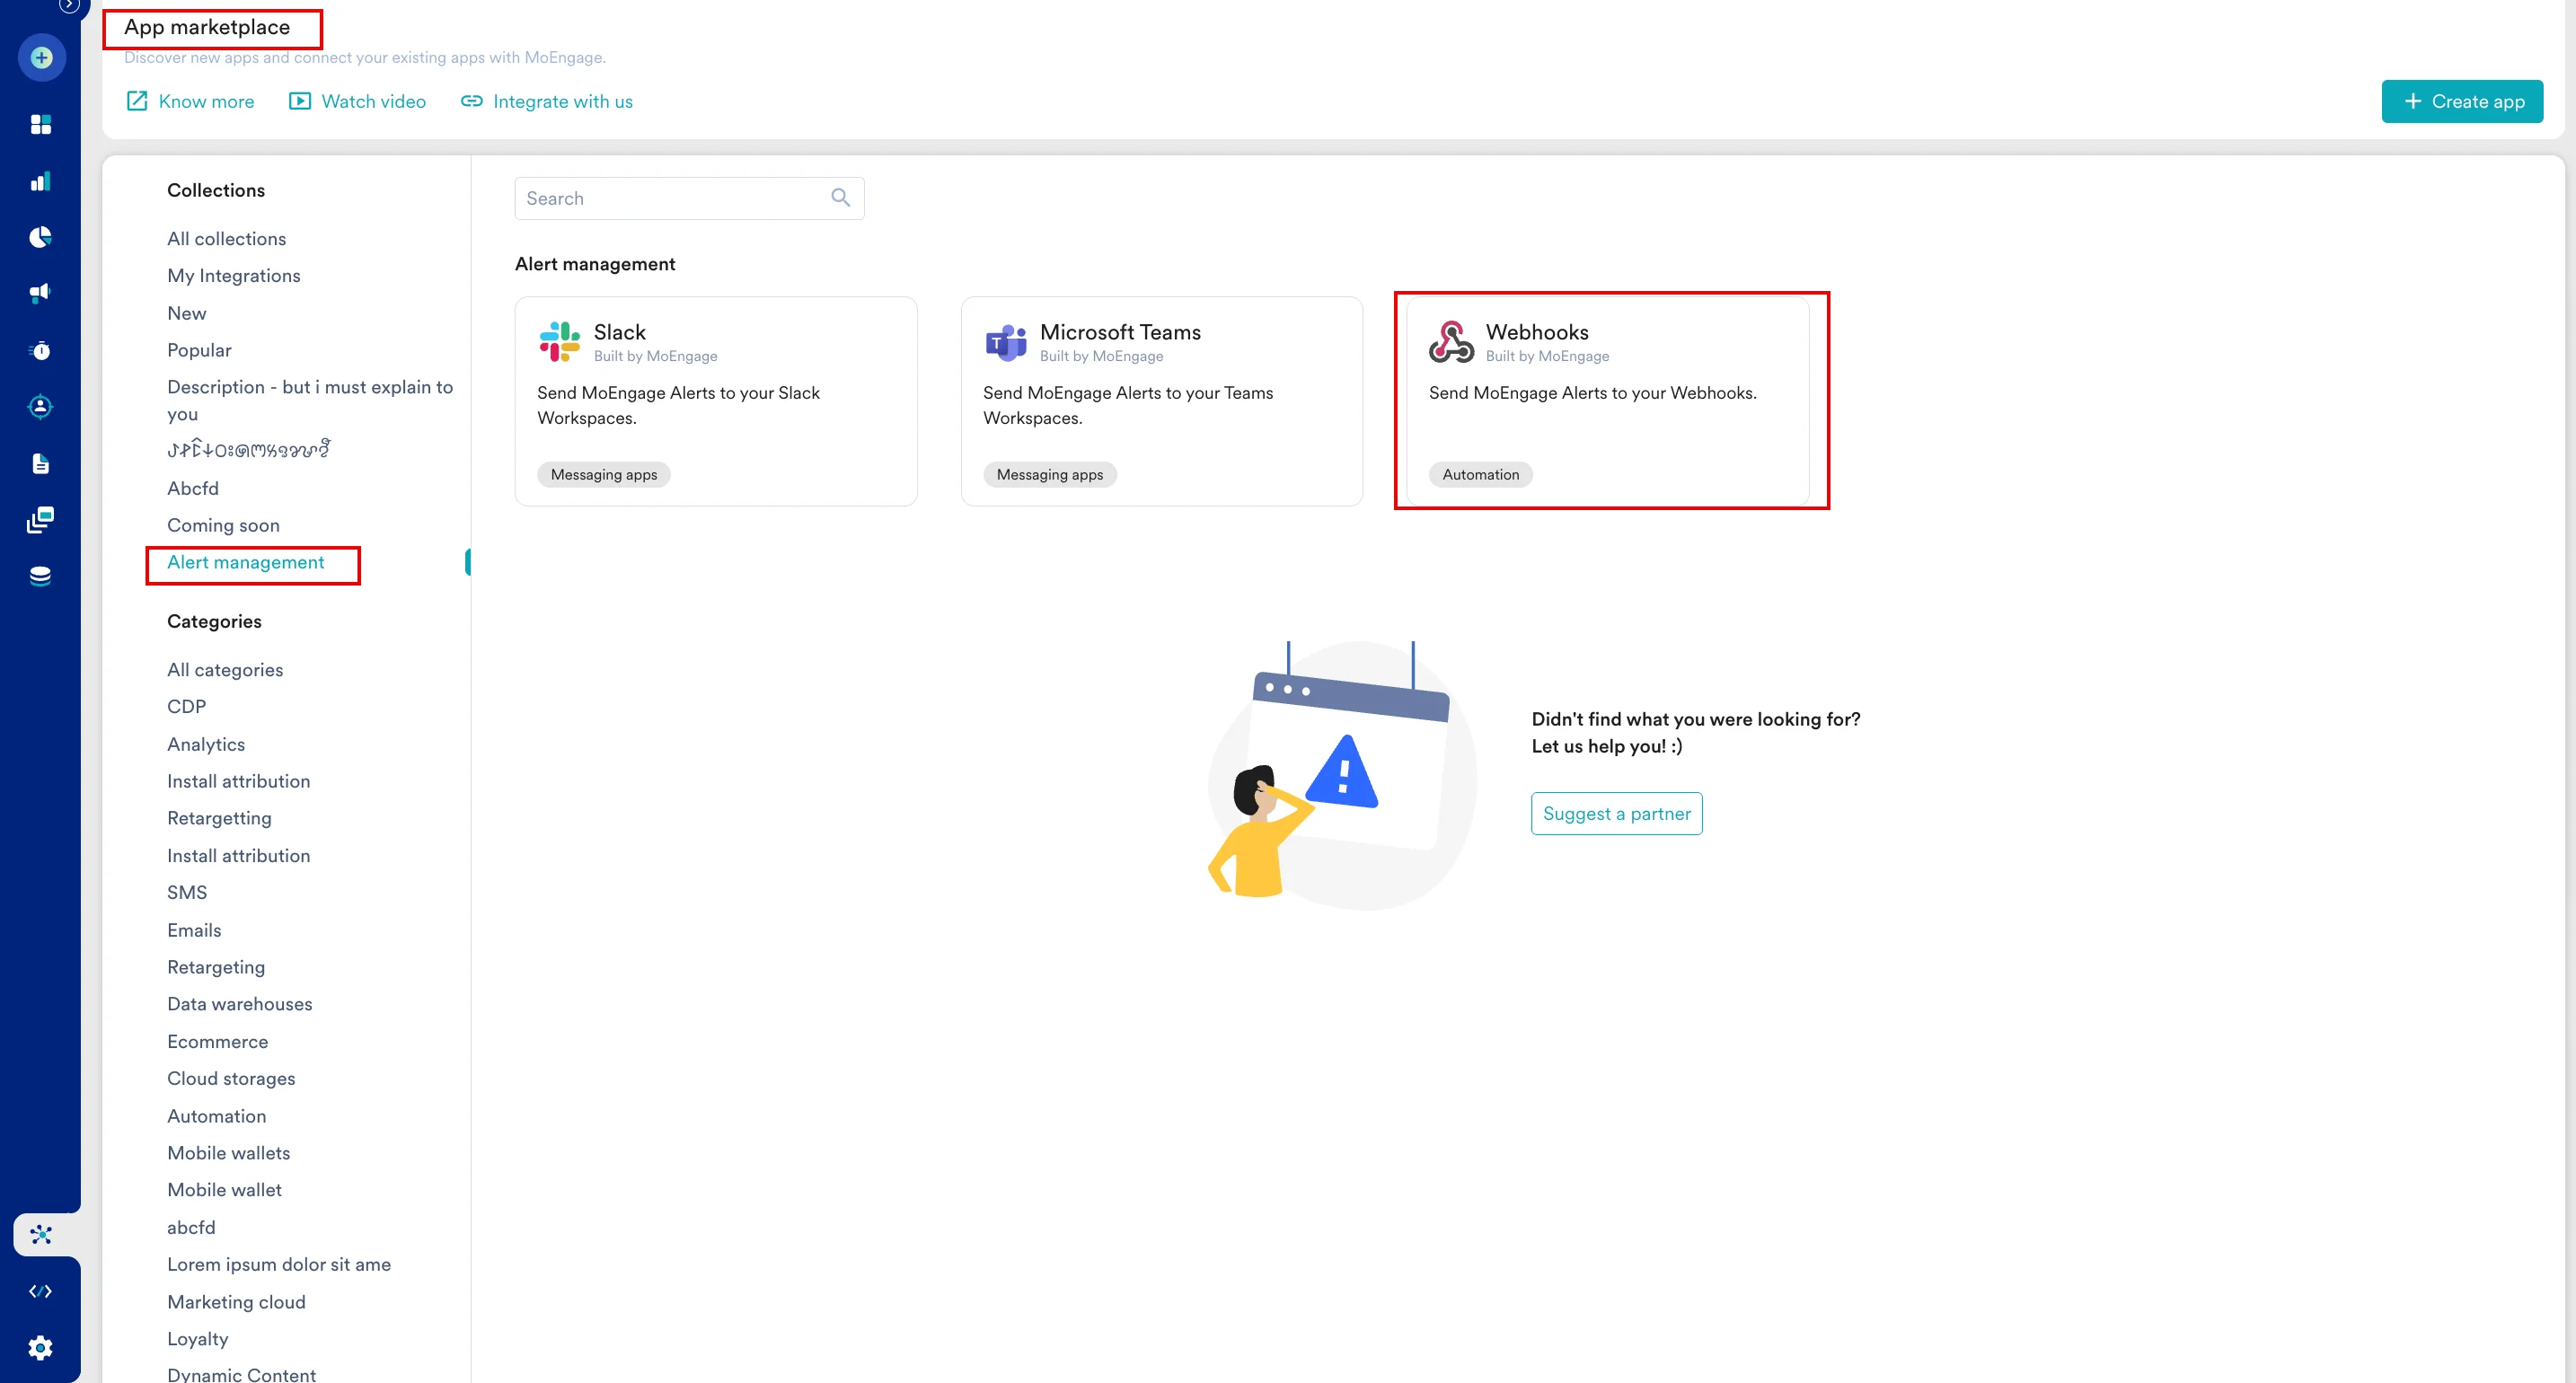
3
Open the Integrate tab
On the Webhooks page, click the Integrate tab.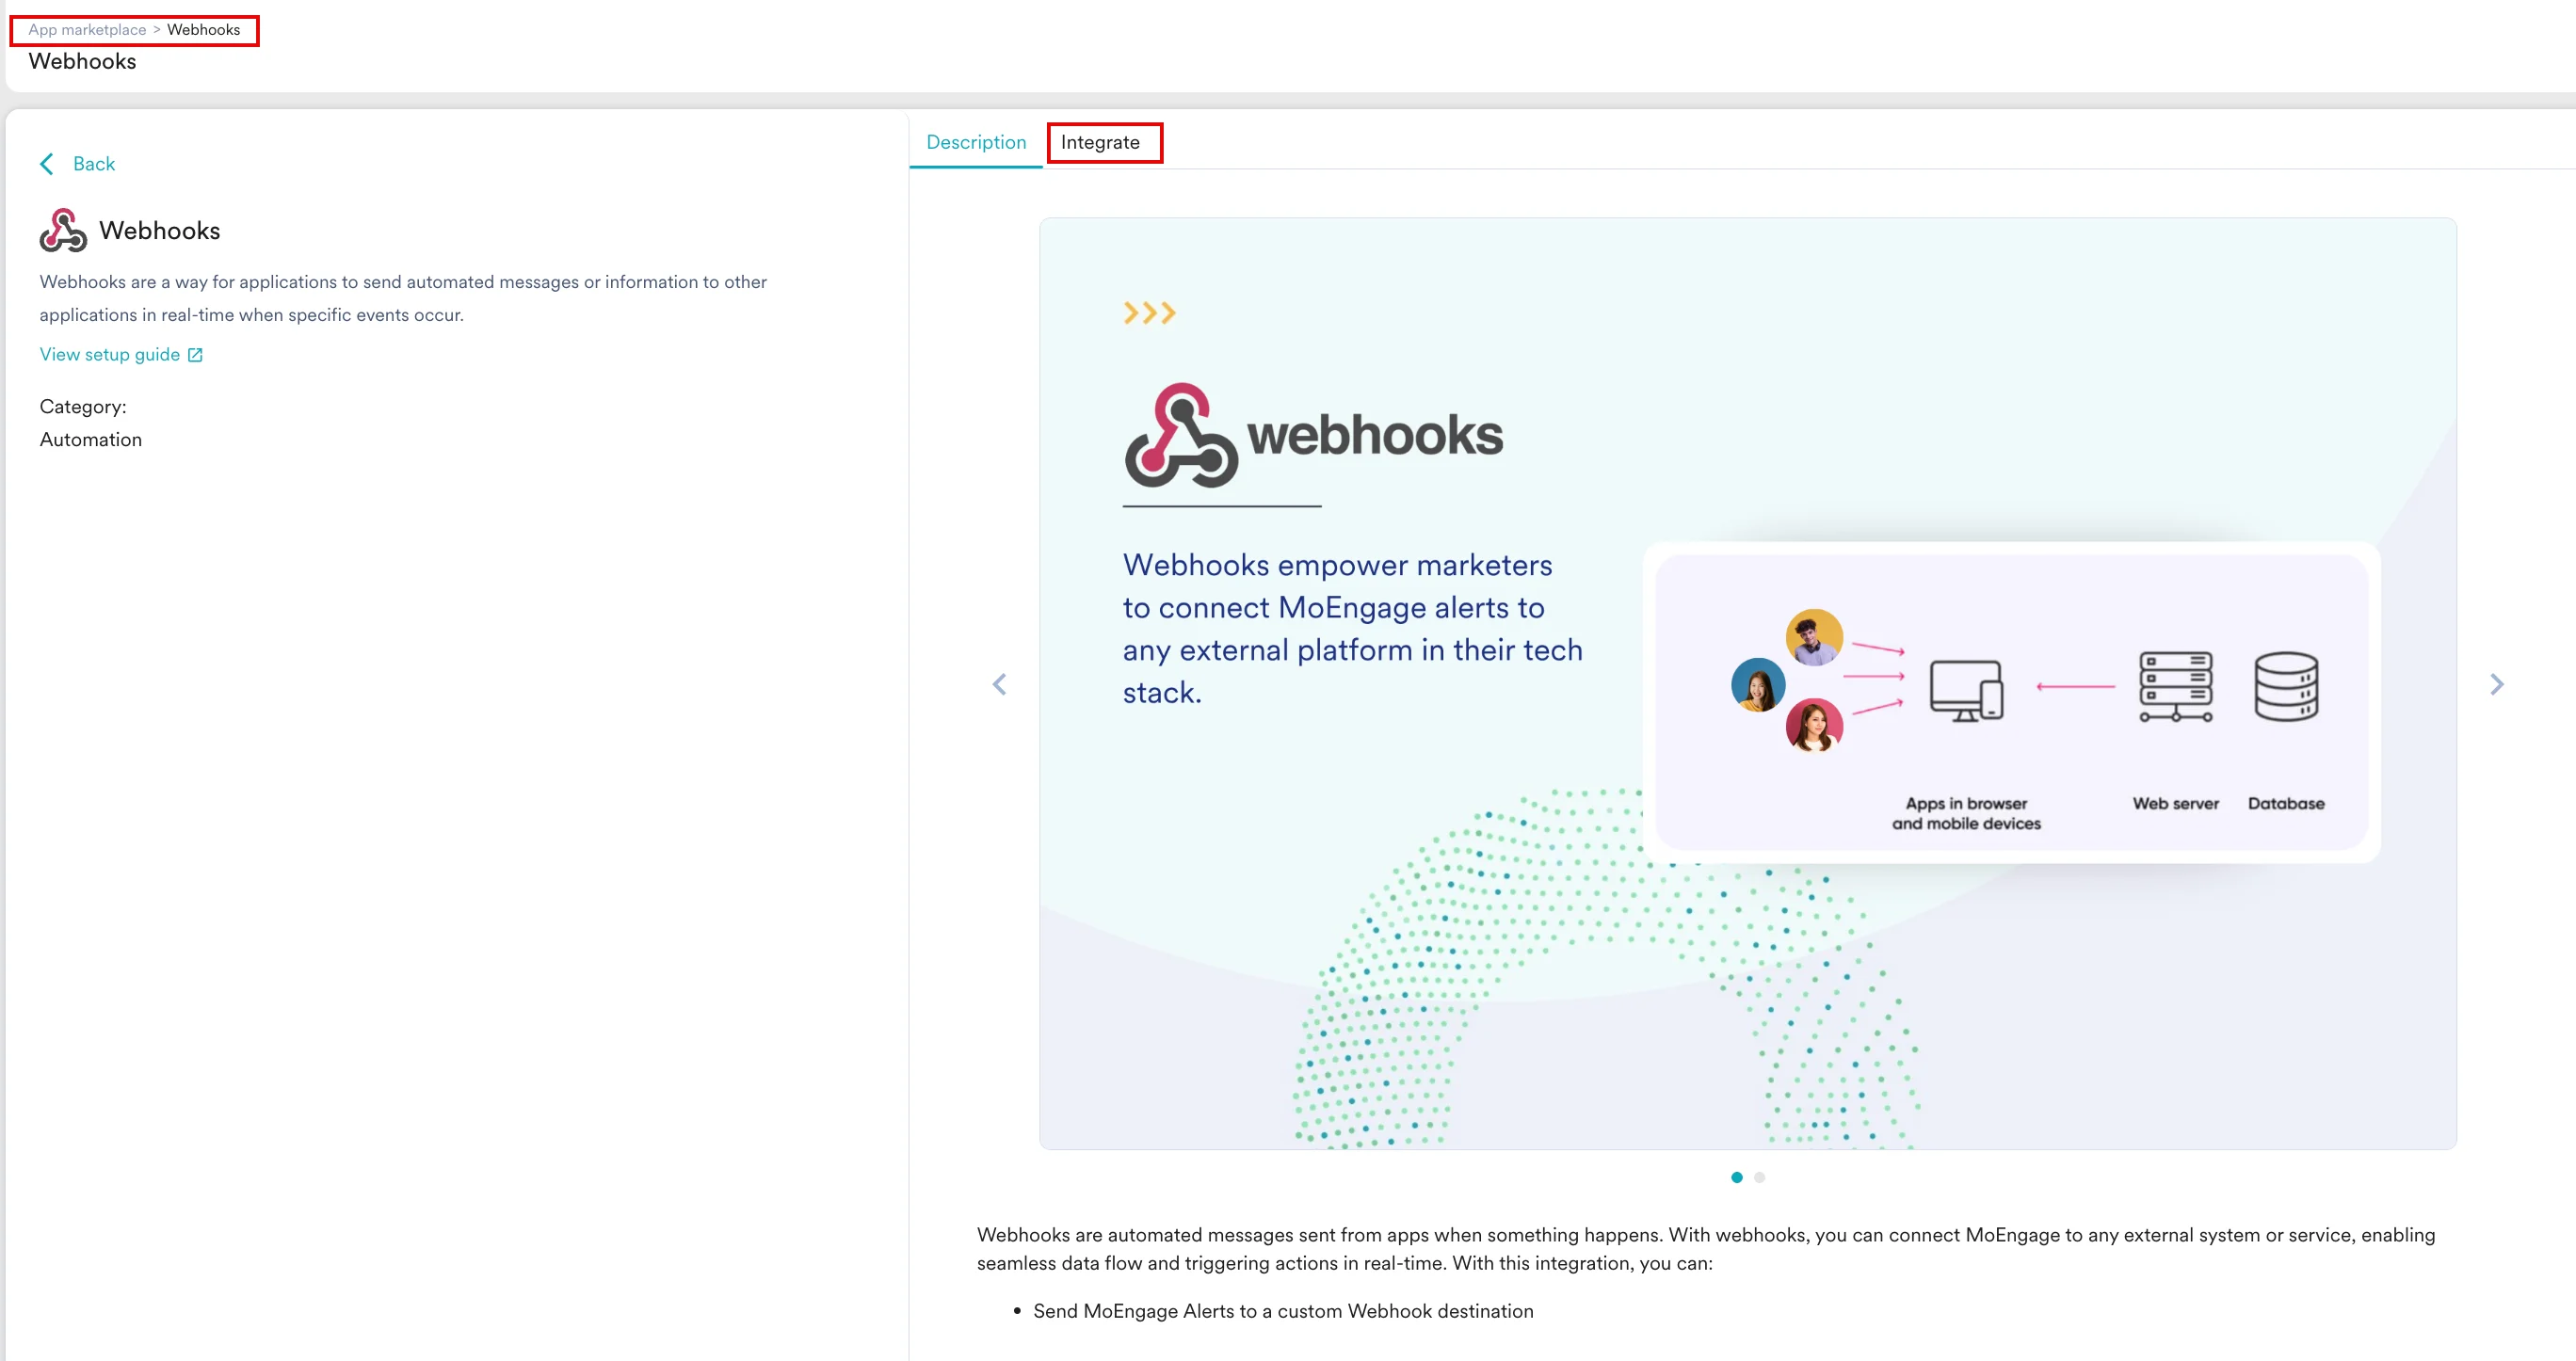
4
Enter connection details
On the Integrate tab, enter the following details:
- Connection name: Enter a name for the connection.
- Connection URL: Enter the webhook URL you created in the Set up your webhook URL section.
5
Connect
Click Connect.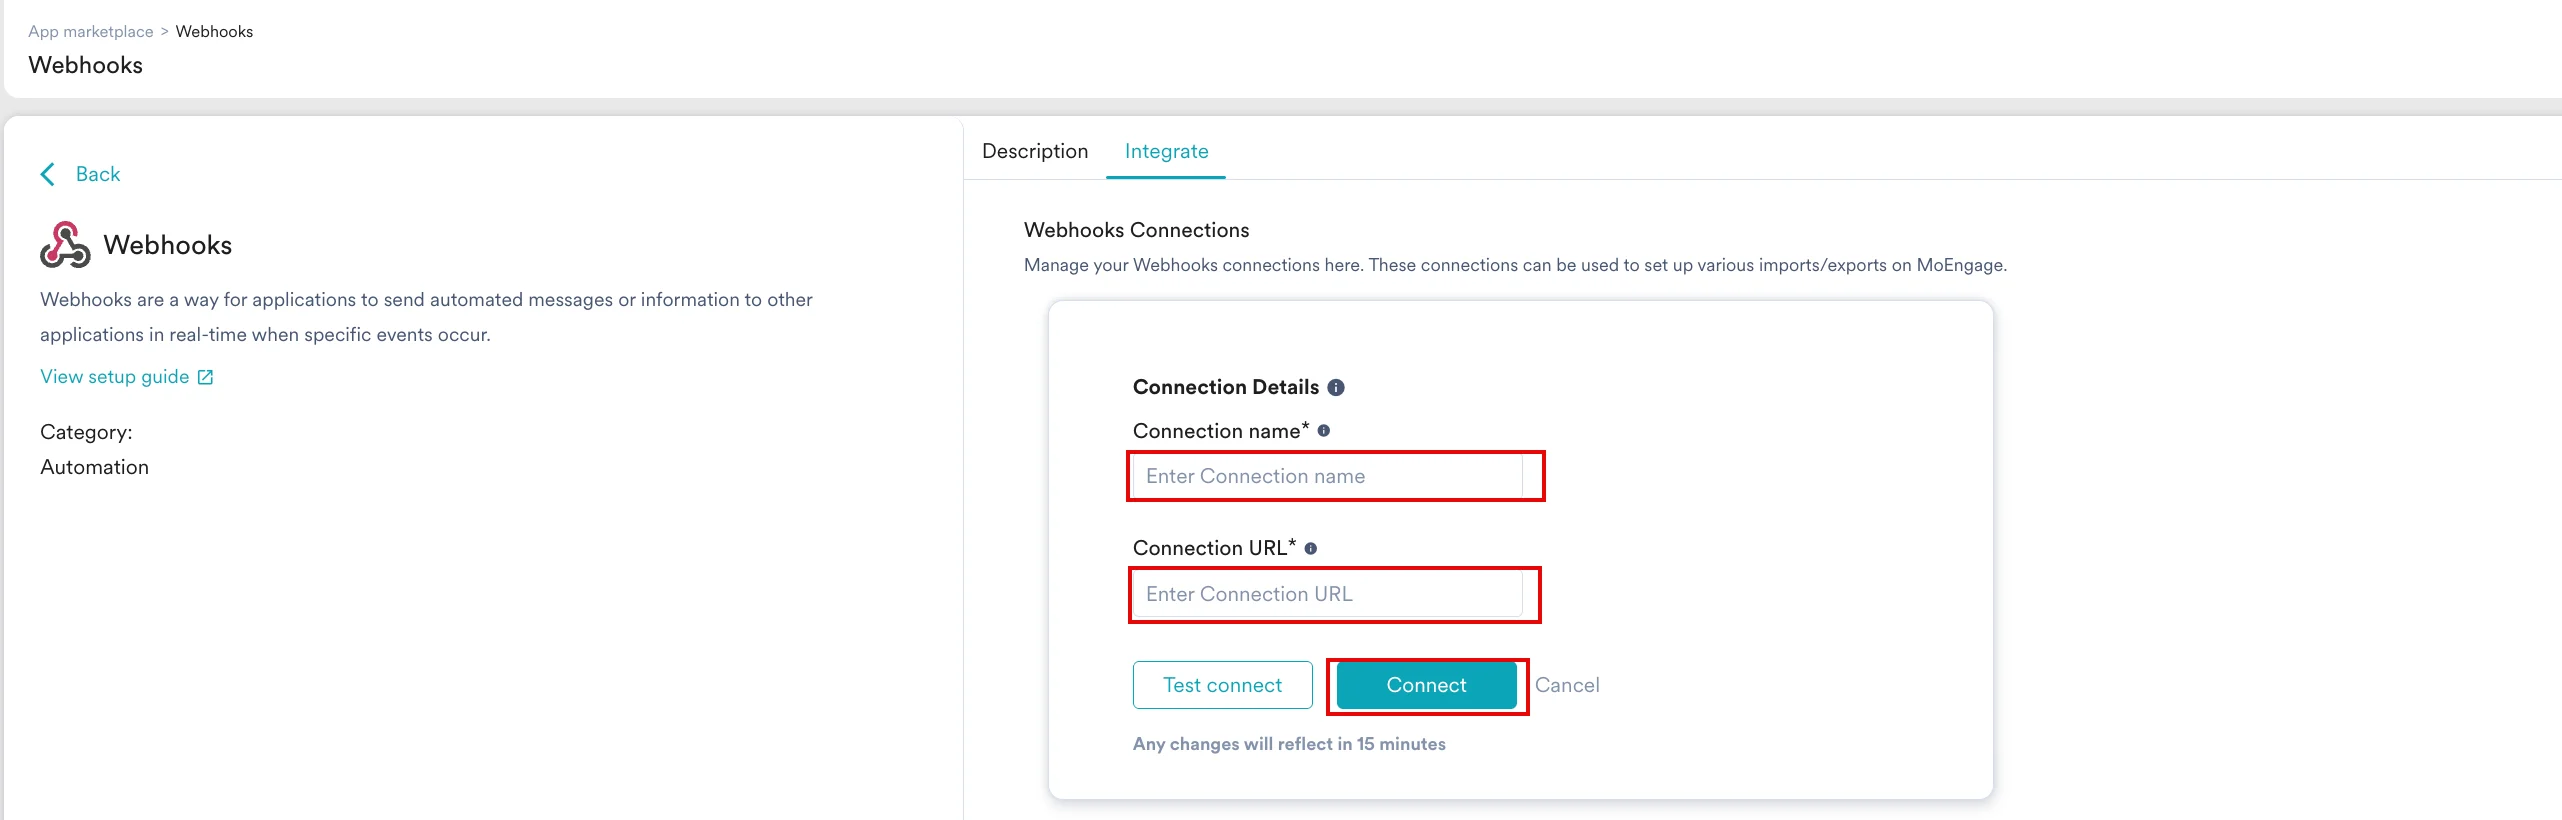
6
Select webhook as an alert destination
After the connection is defined, select the new destination from the Send Alerts On list while creating an alert on the Alert management page. You can select Email, Slack, or both.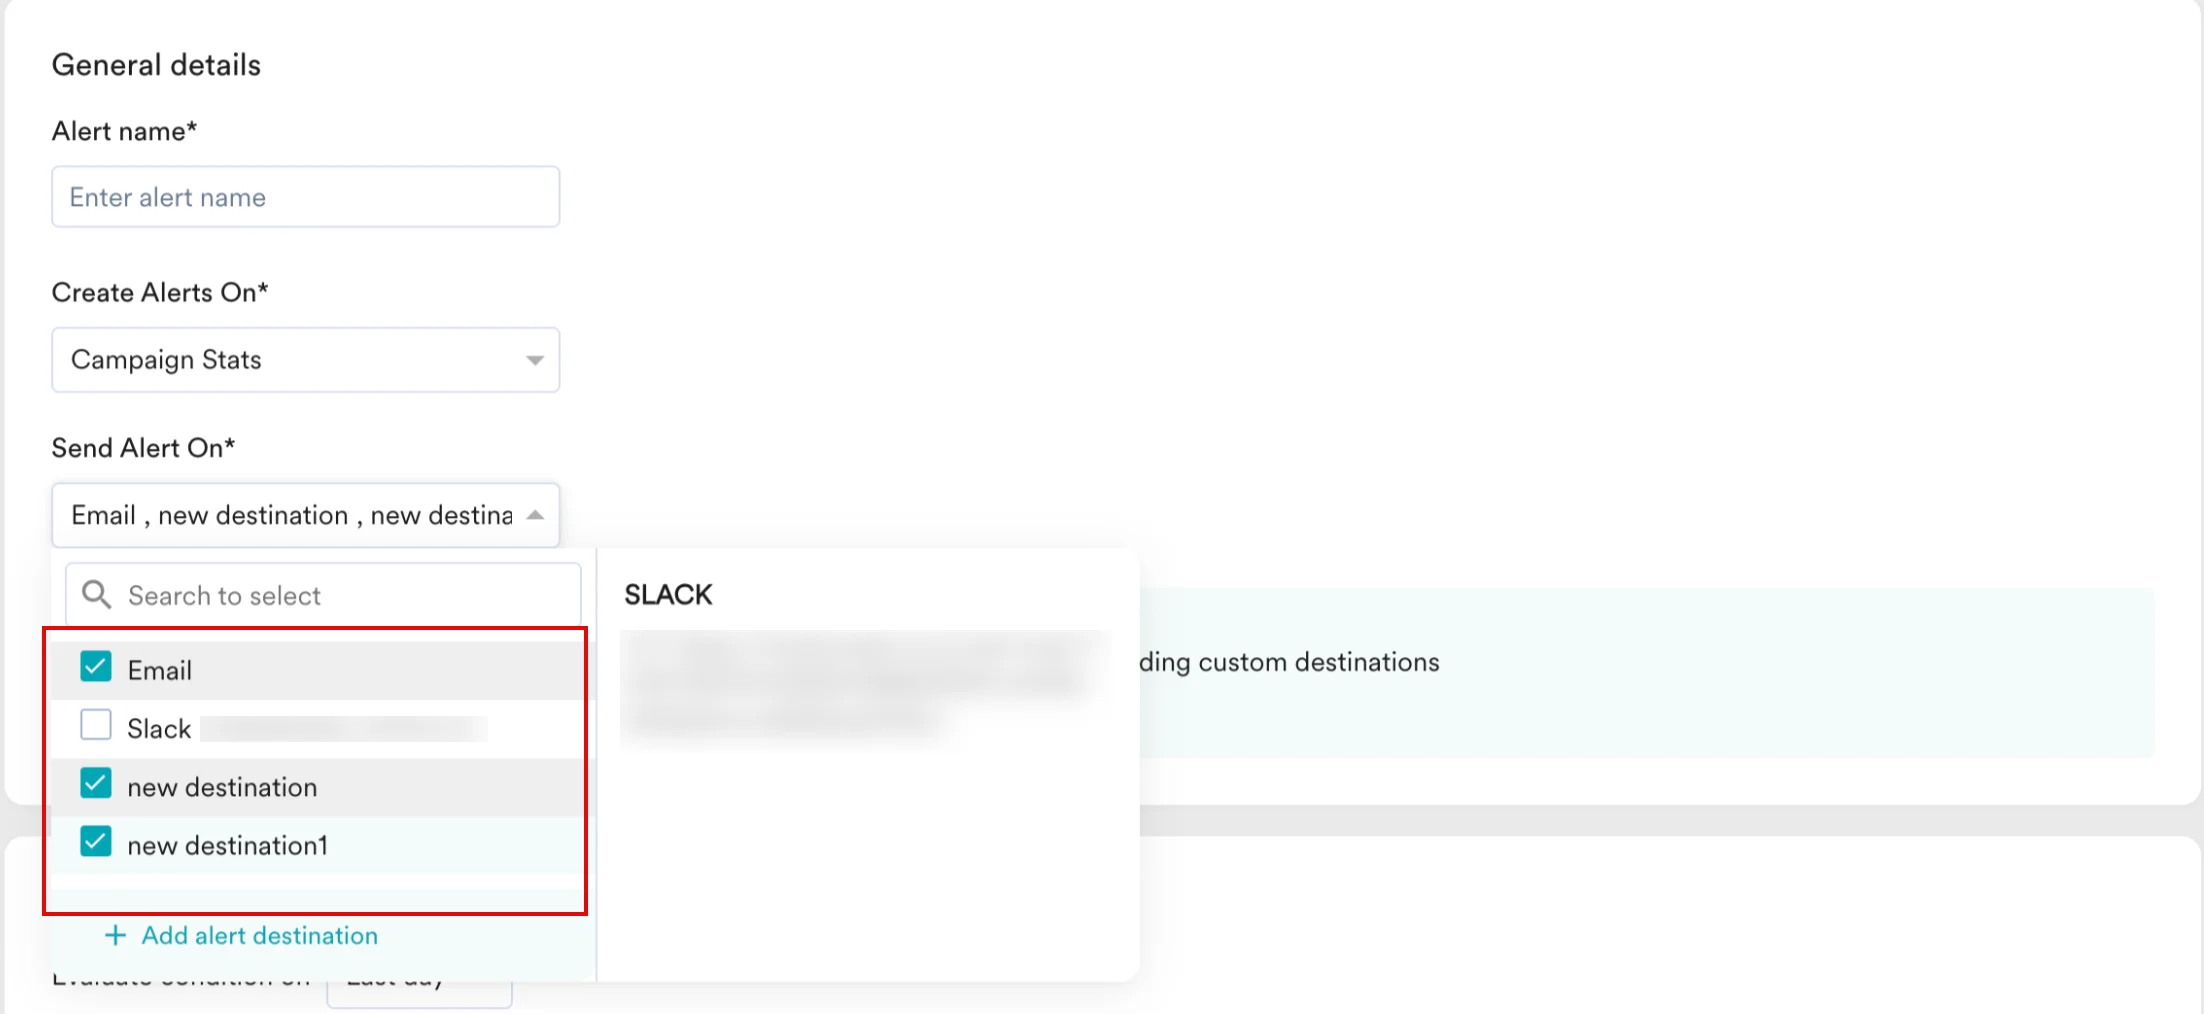
7
View configured destinations
After adding the destinations, you can view the defined alert destinations on the Alert management page.