Creating a Warehouse segment
Step 1: Set up your data source
- Big Query
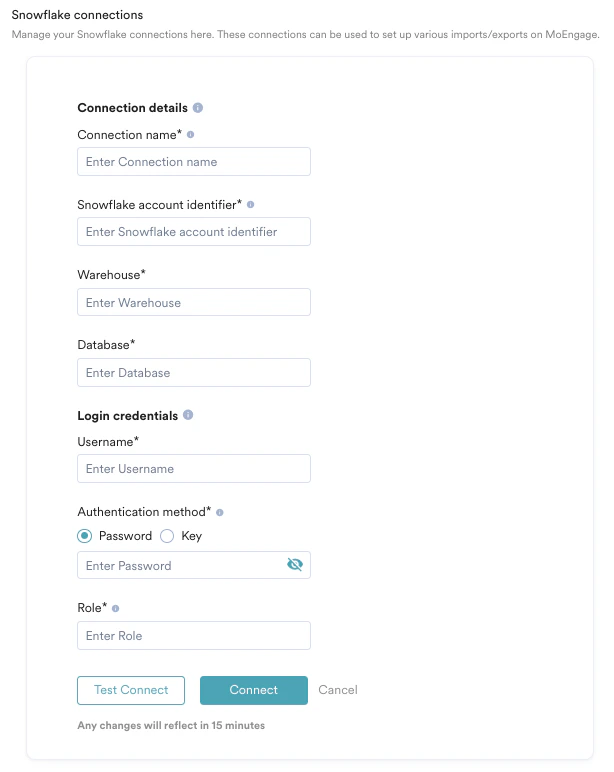
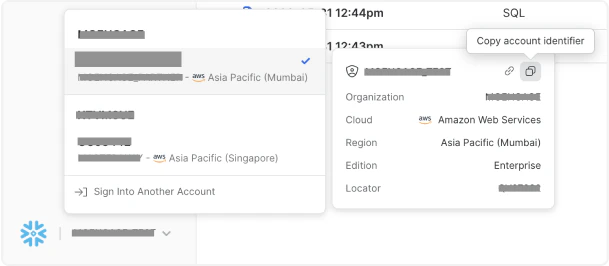
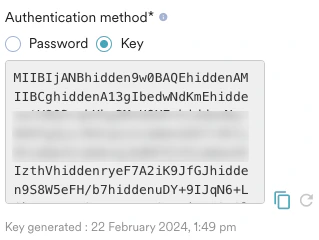
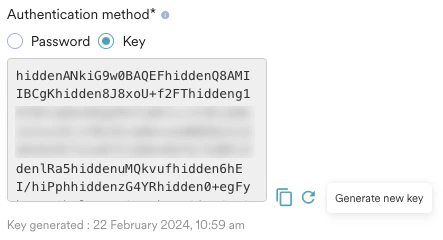
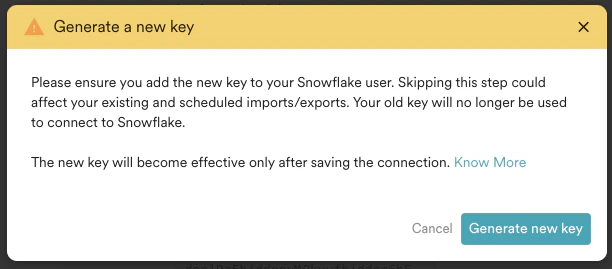
- Snowflake
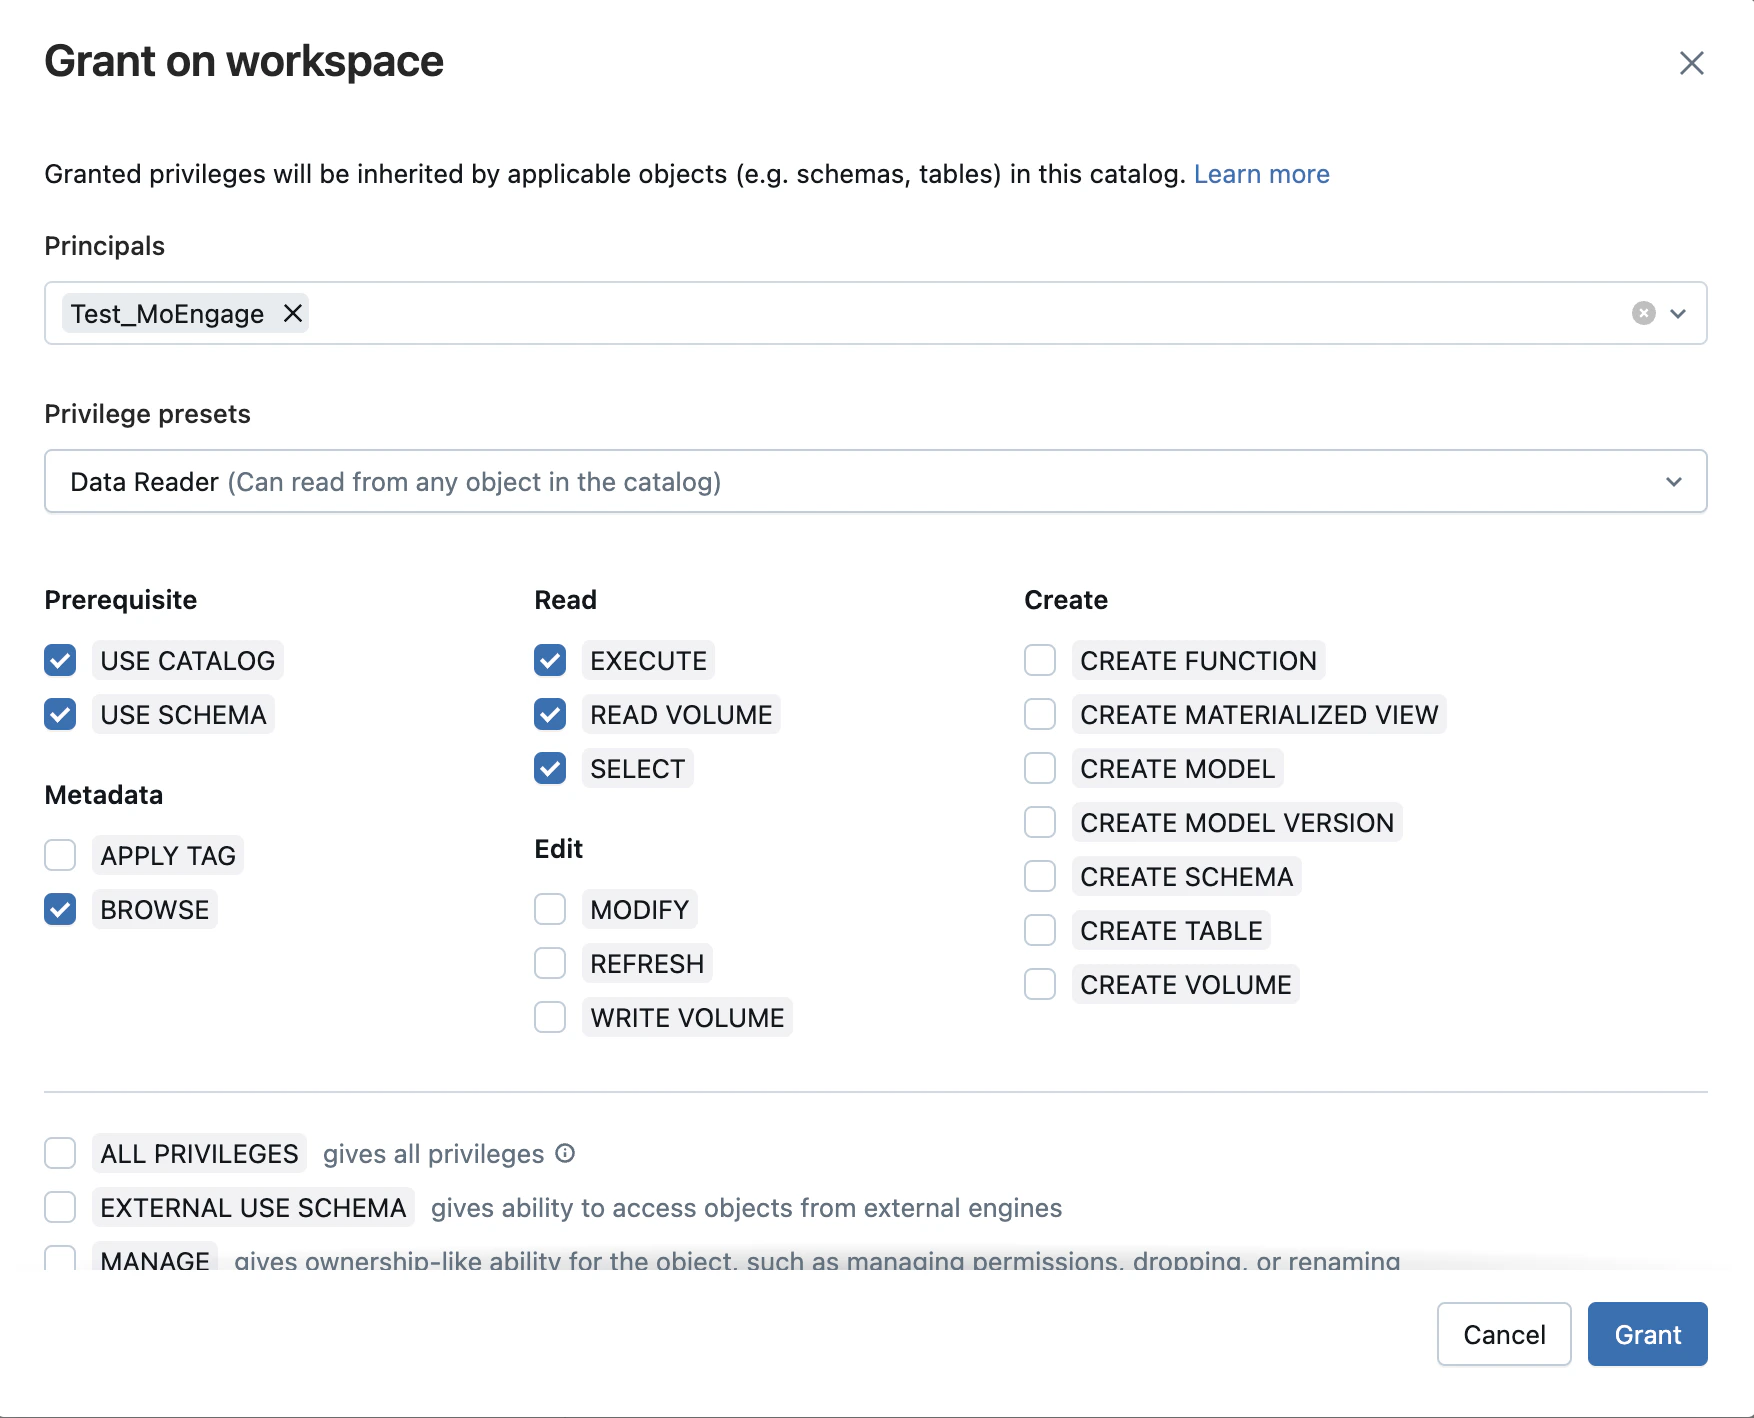
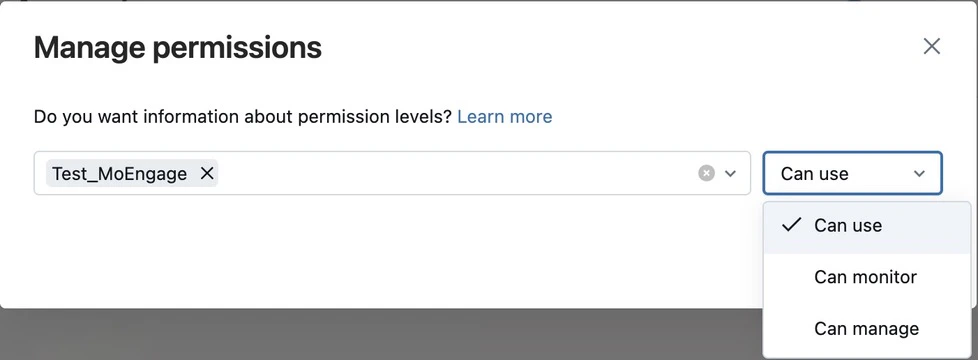
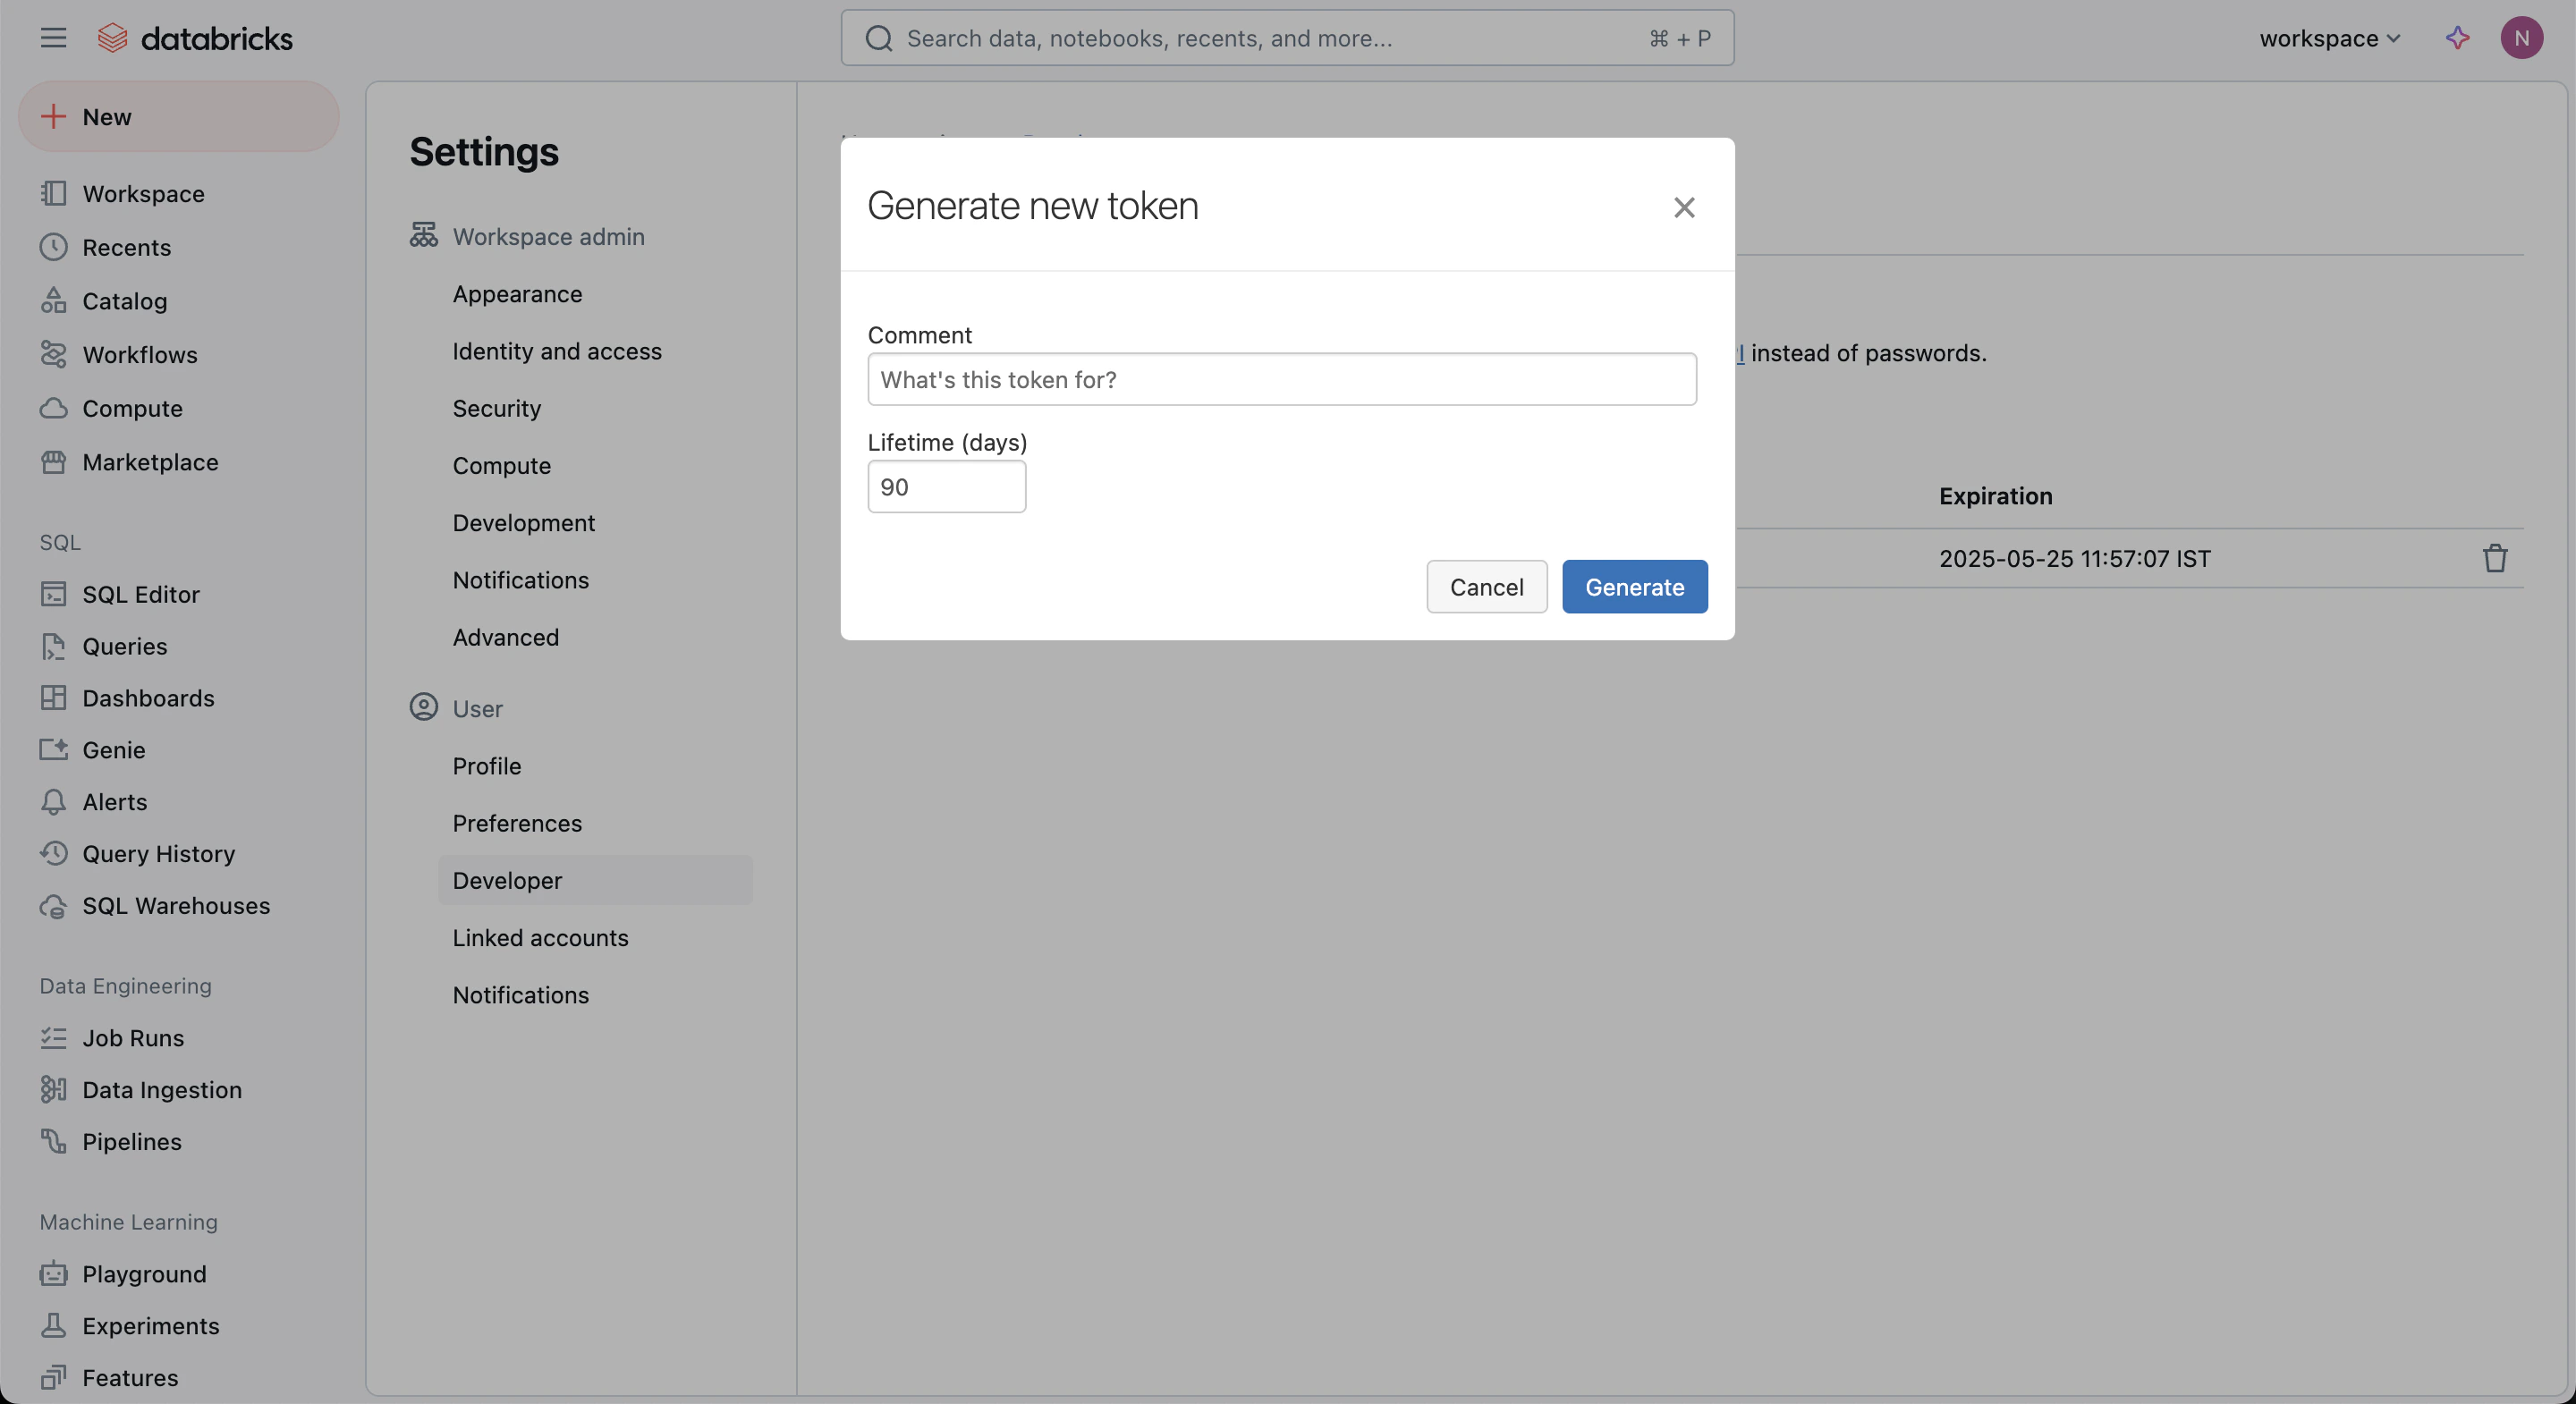
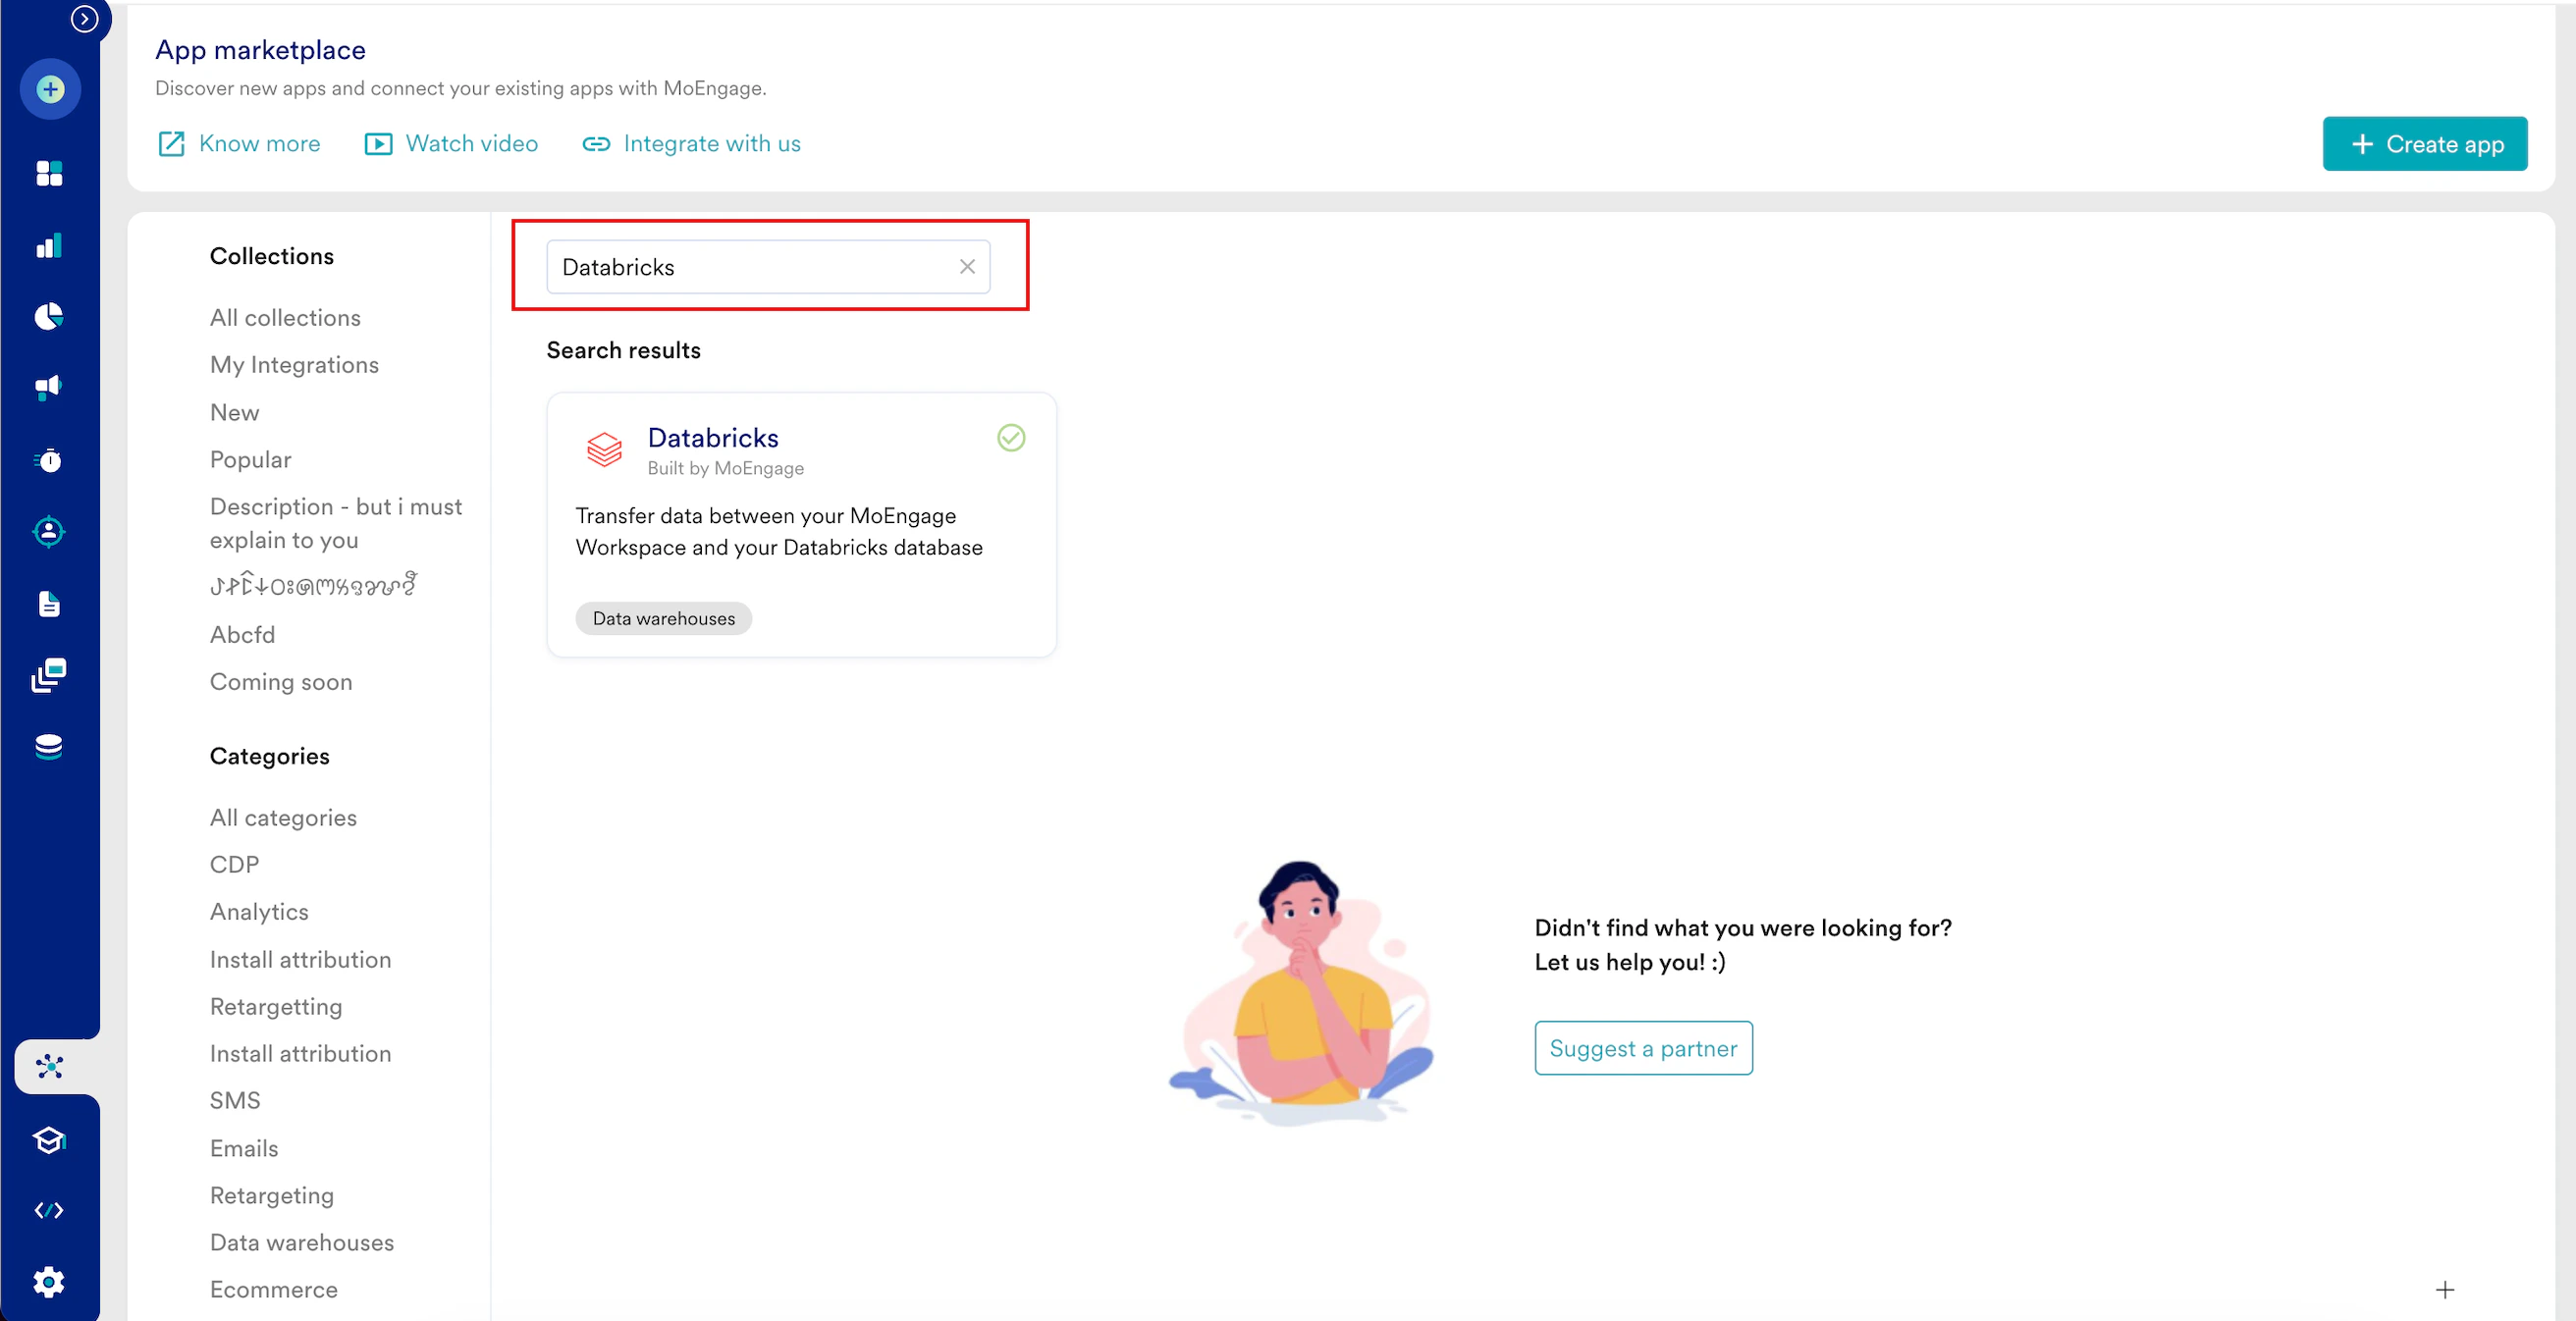
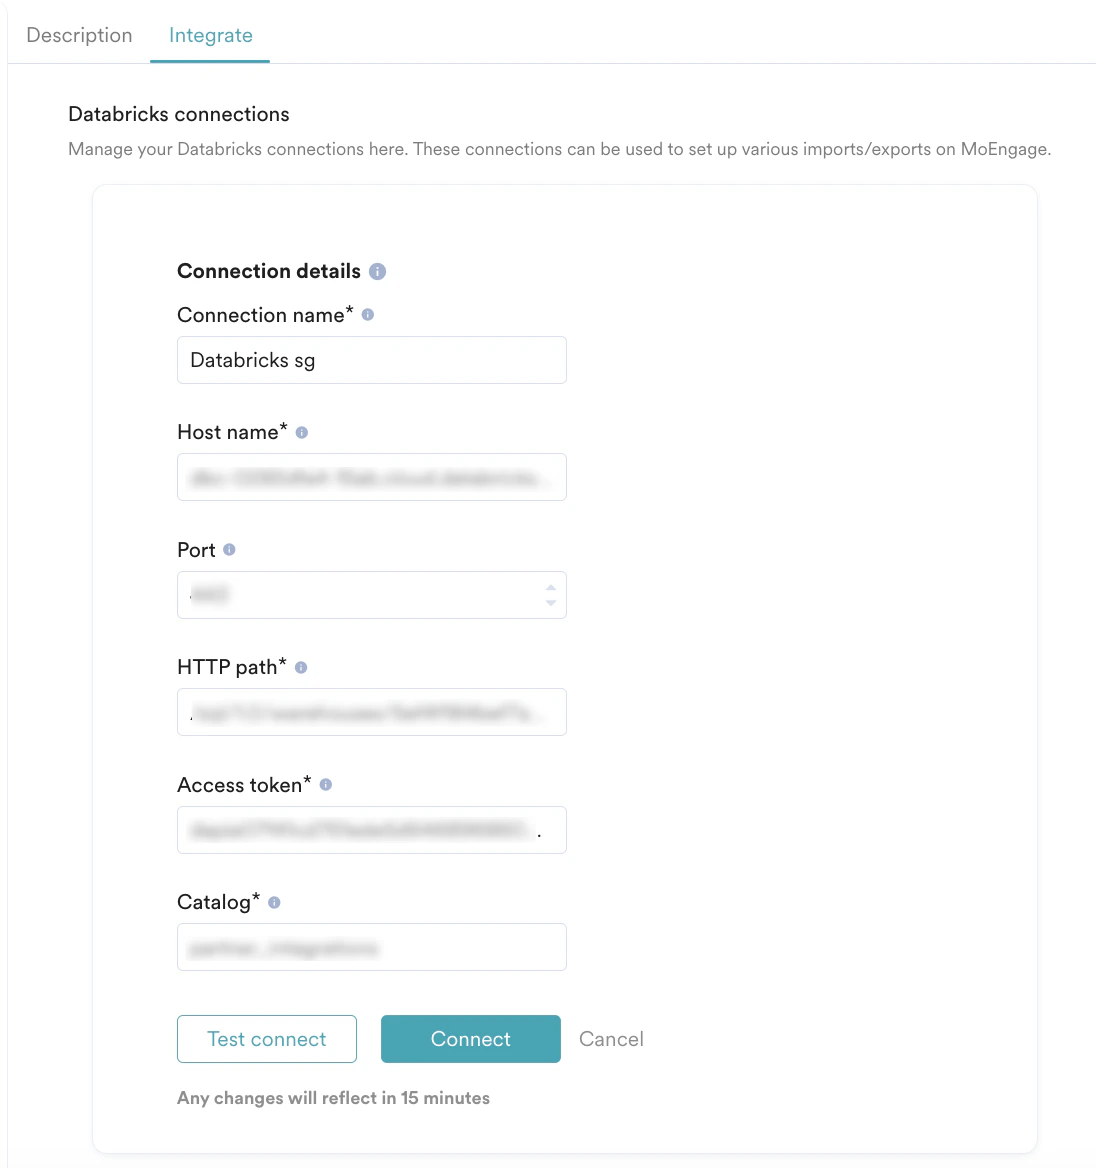
- Databricks
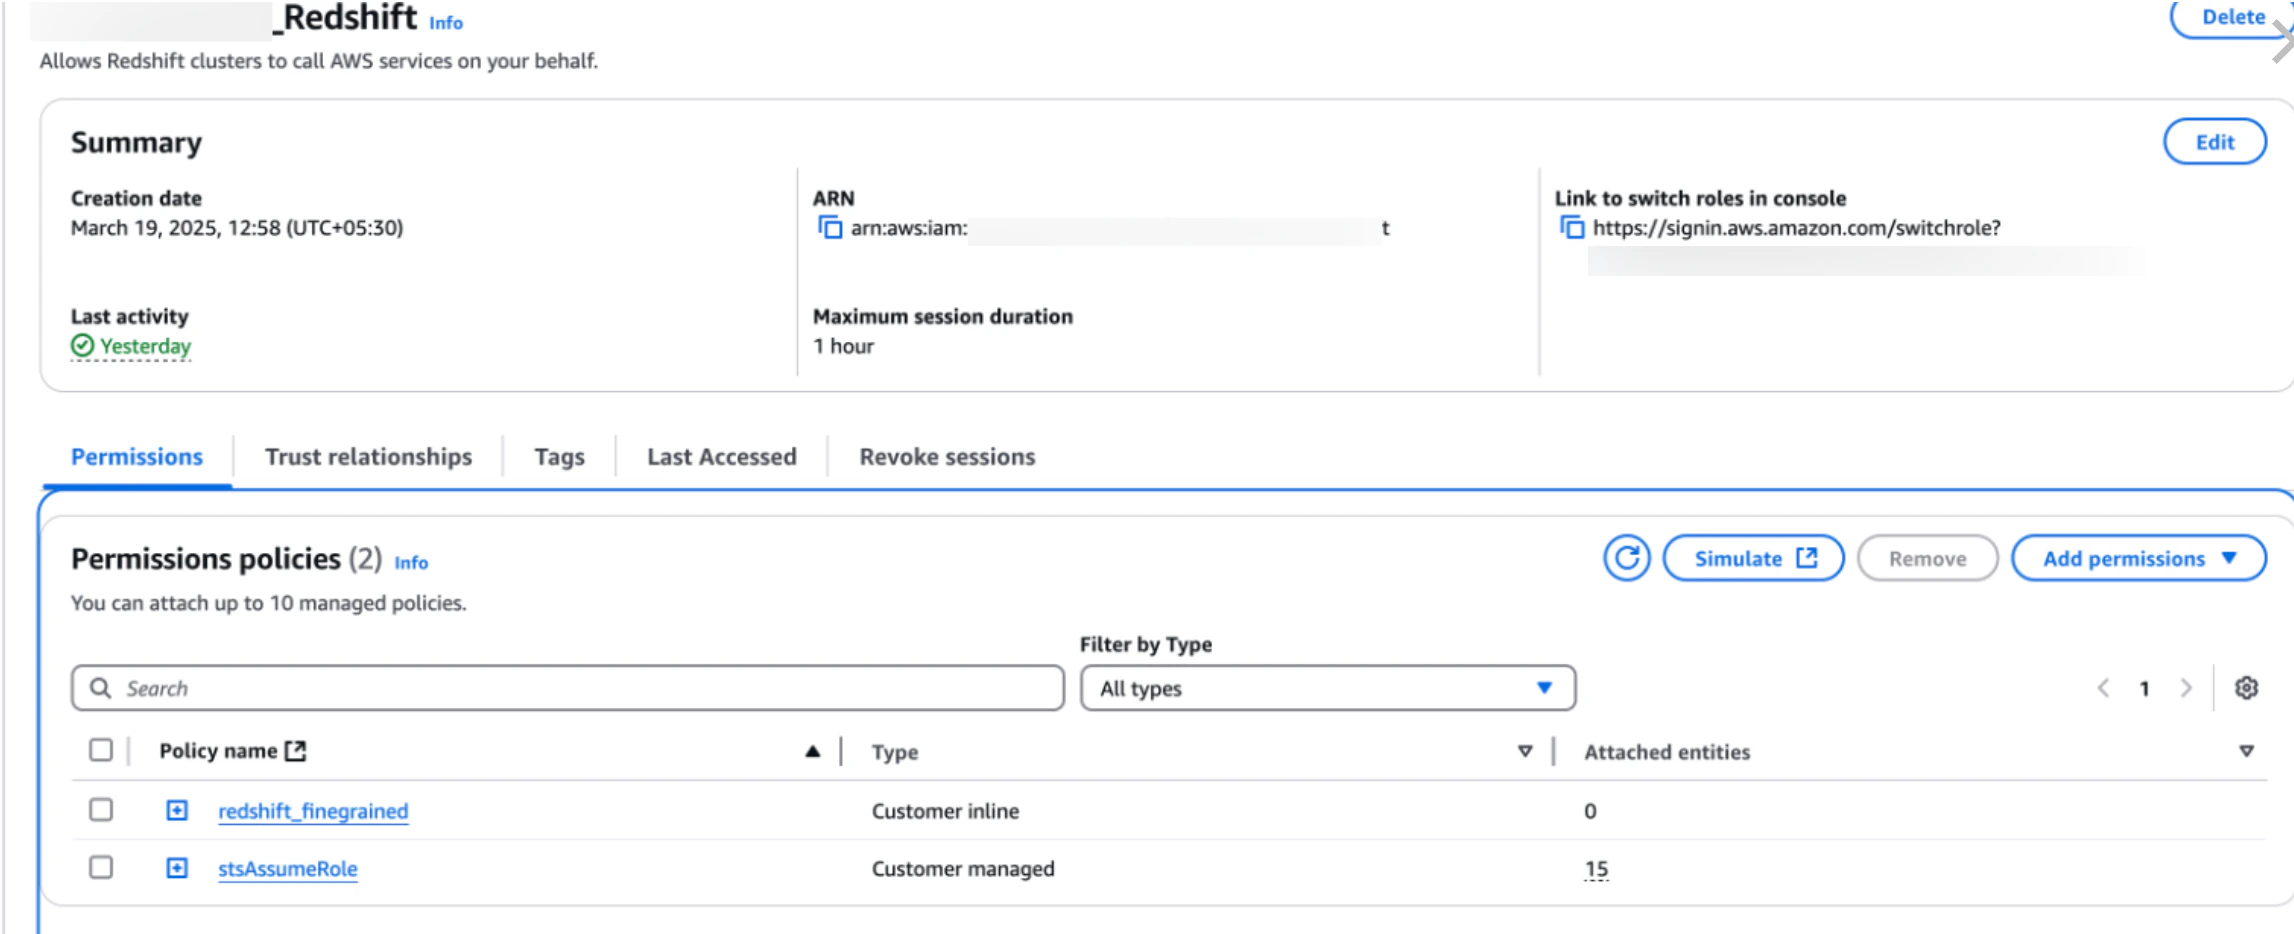
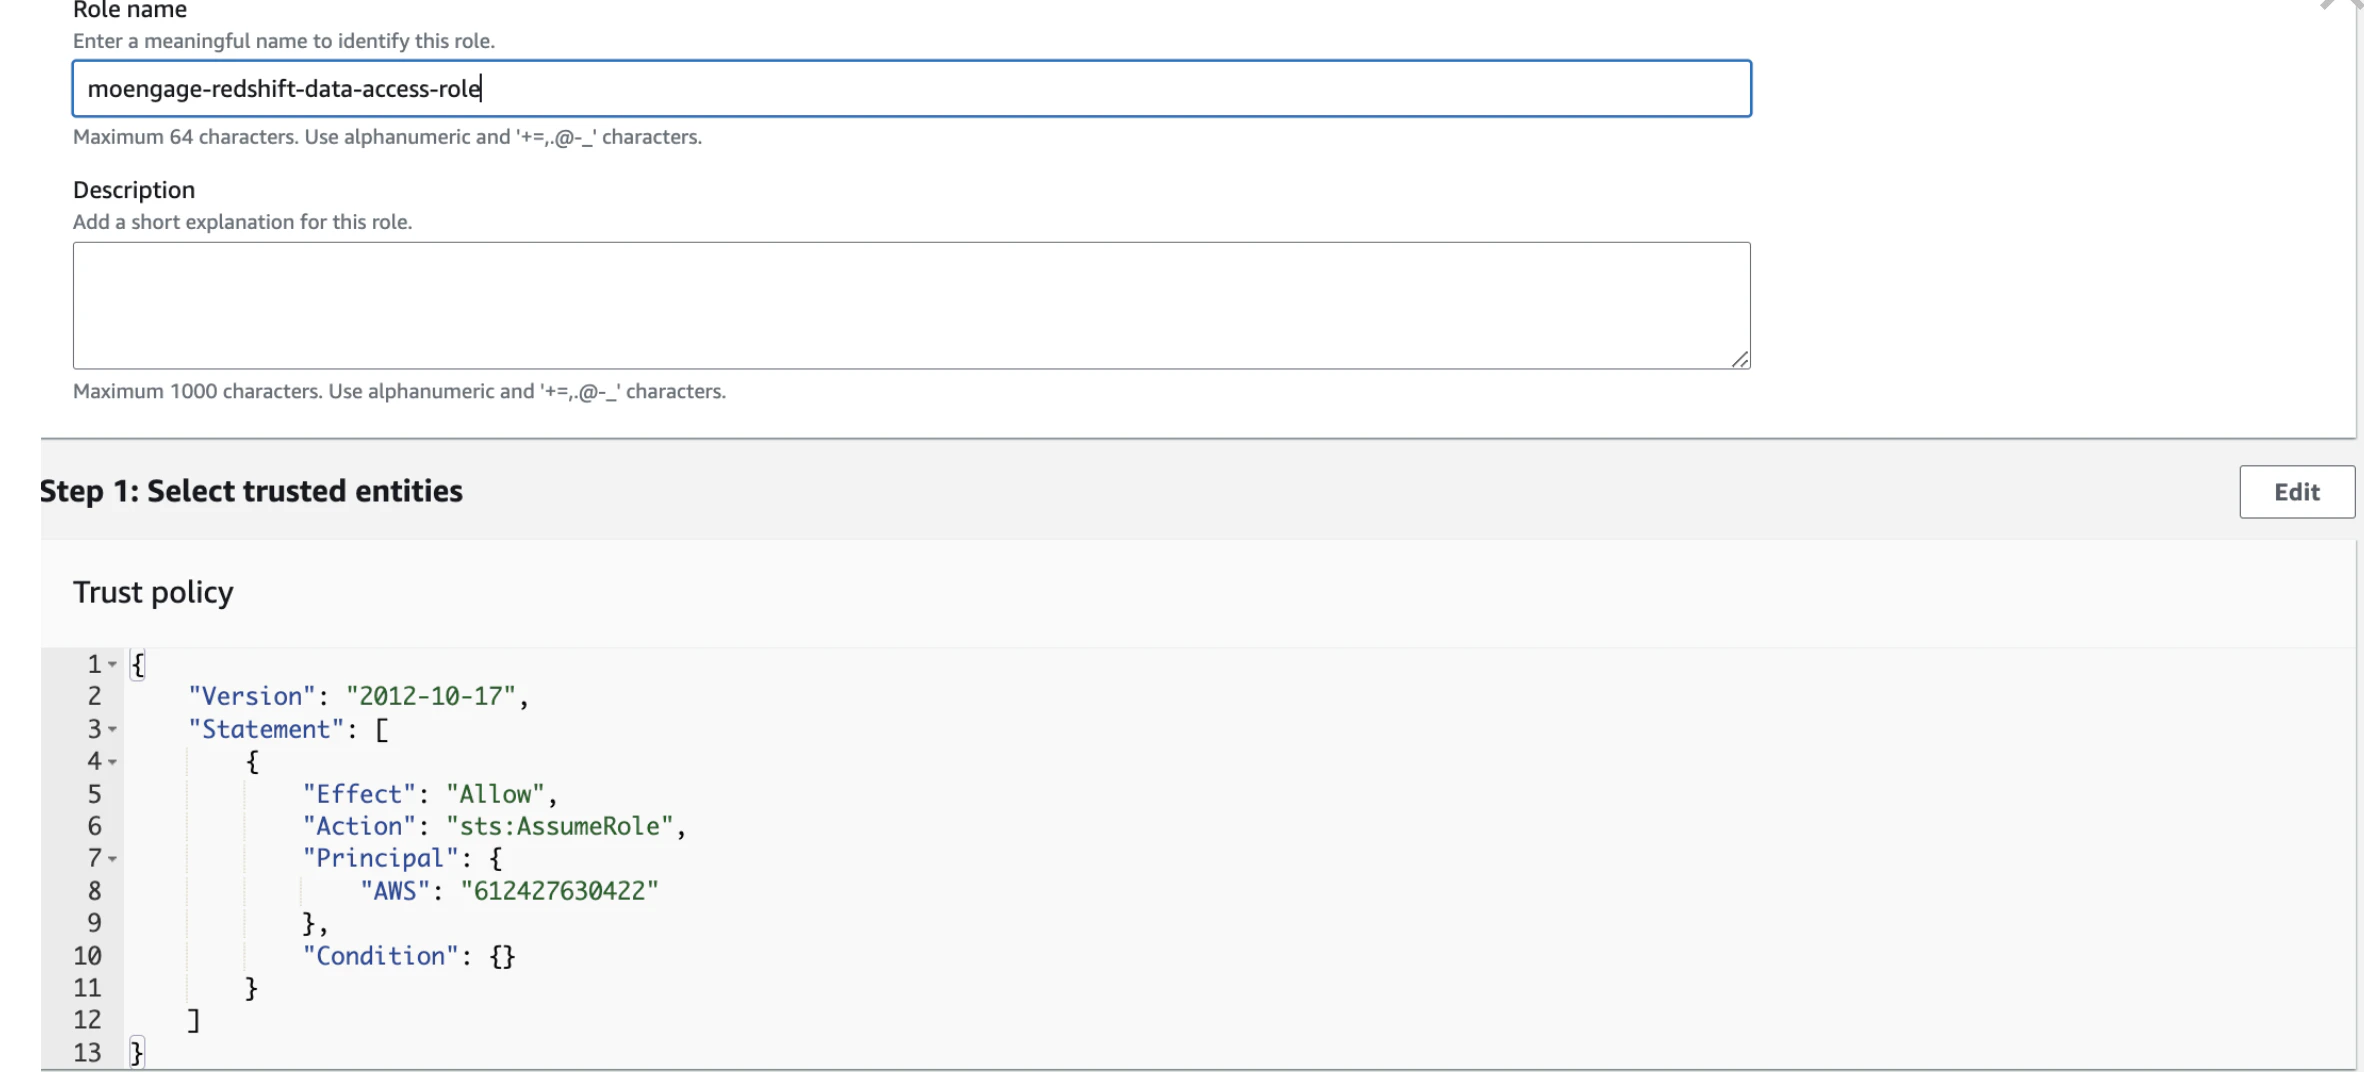
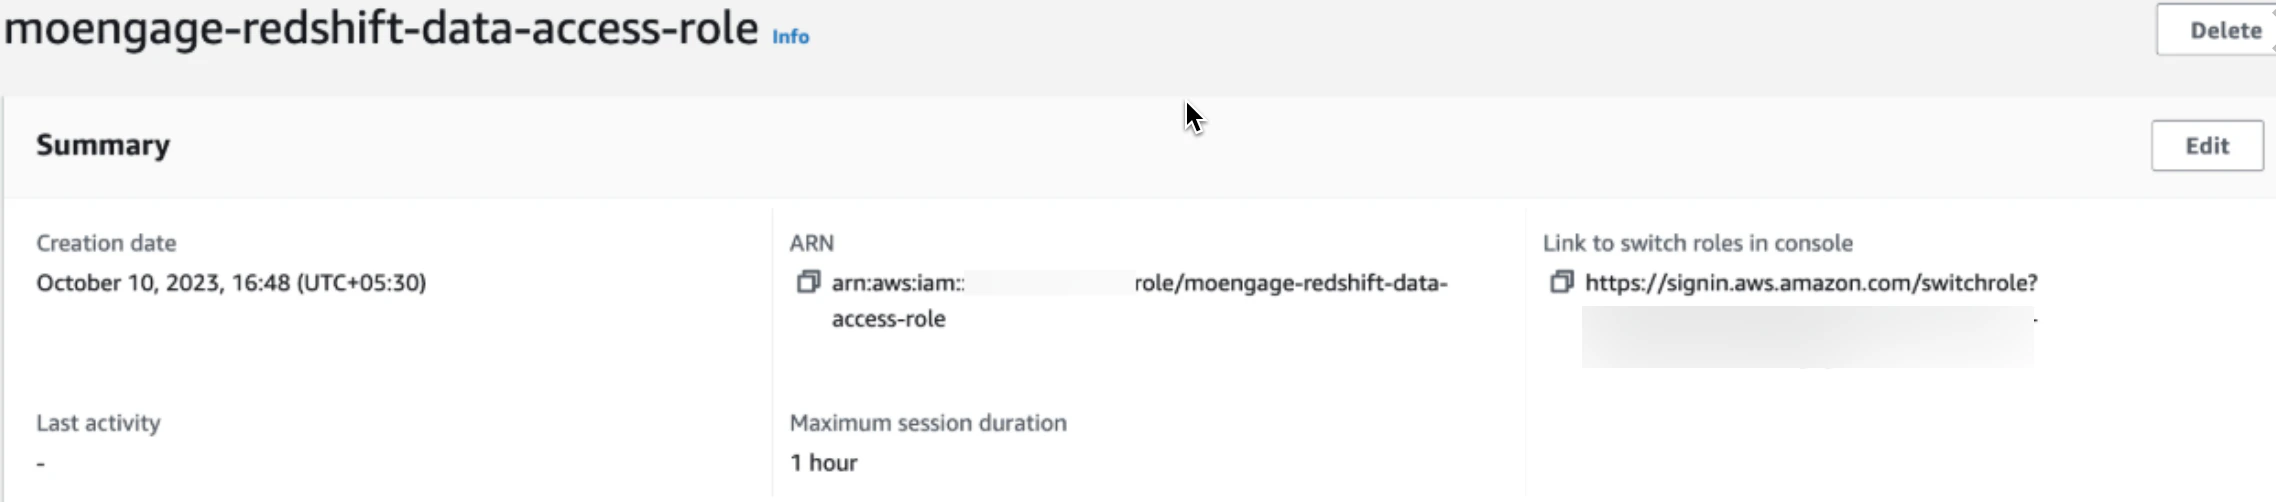
- Redshift
Follow the below steps to grant read access to certain tables in BigQuery to MoEngage. Additionally, it covers providing access to BigQuery Jobs API, enabling Moengage to submit jobs and download query results.These instructions assume you have administrative privileges in the Google Cloud Platform, specifically in the project that hosts the BigQuery dataset and jobs.
By following the above steps, you have successfully granted Moengage read access to specific tables in BigQuery.Additionally, you have authorized access to the BigQuery Jobs API, allowing them to submit jobs and download query results. It is essential to review and manage access permissions periodically to maintain data security.
Create a Service Account for MoEngage
- Open the Google Cloud Console.
- Navigate to the project housing the BigQuery dataset and jobs.
- Go to the IAM & Admin section and select Service Accounts.
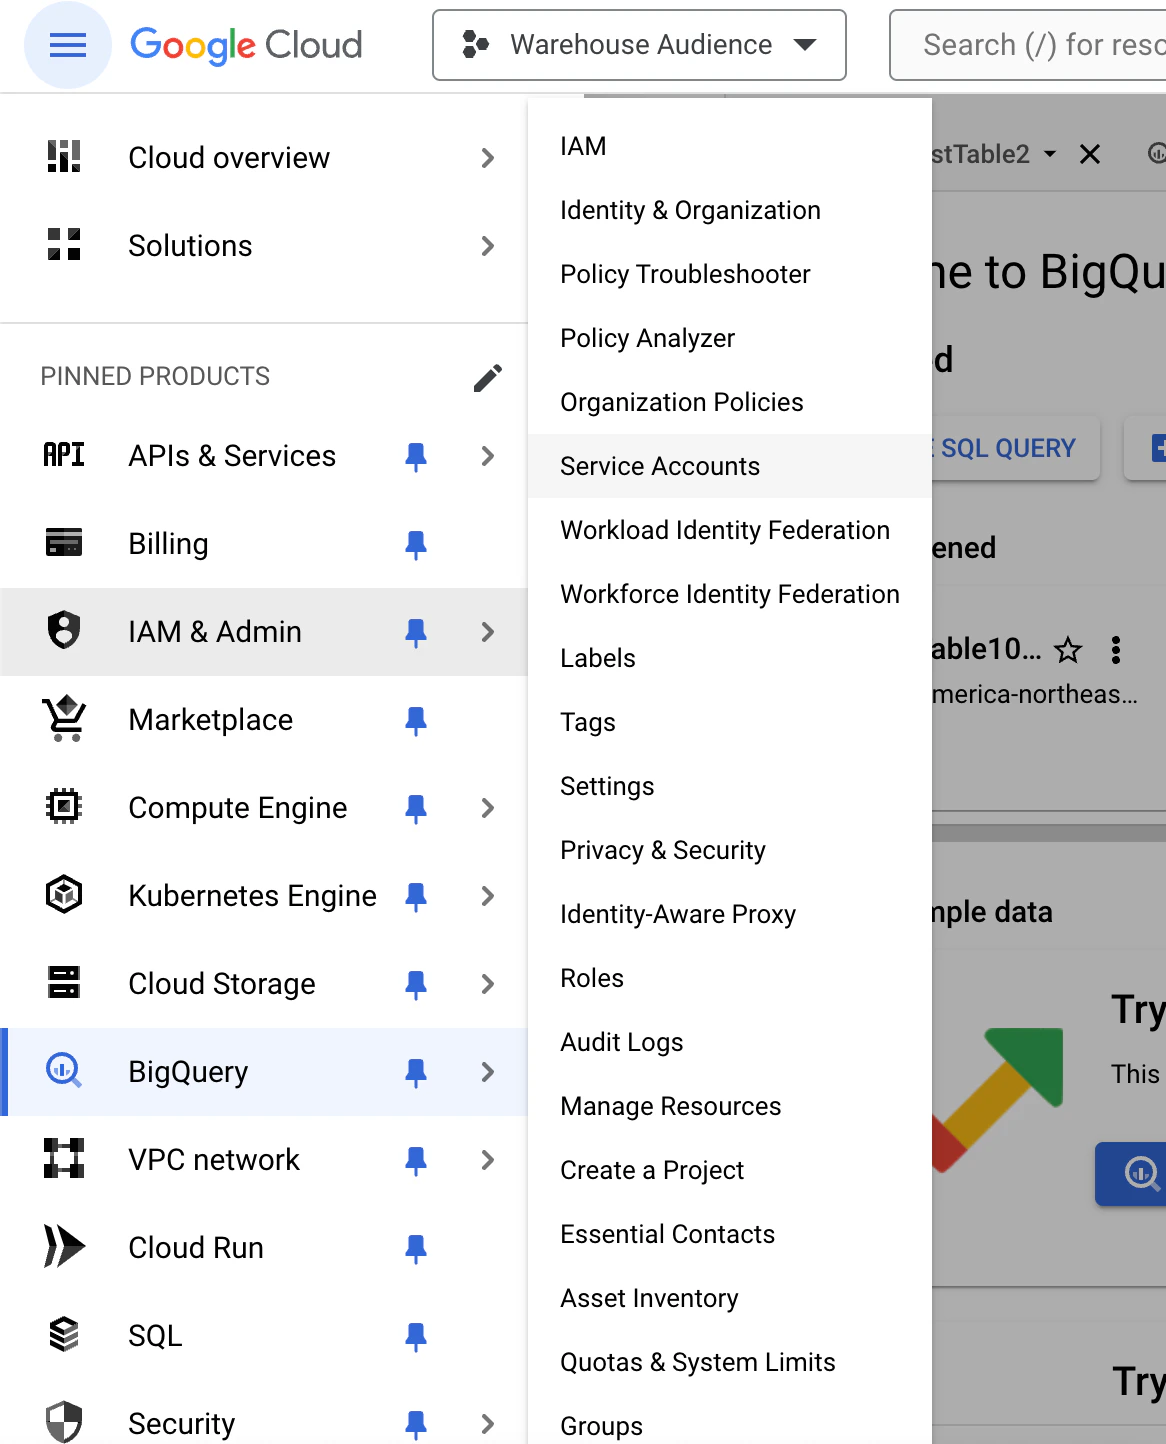
- Click Create Service Account.
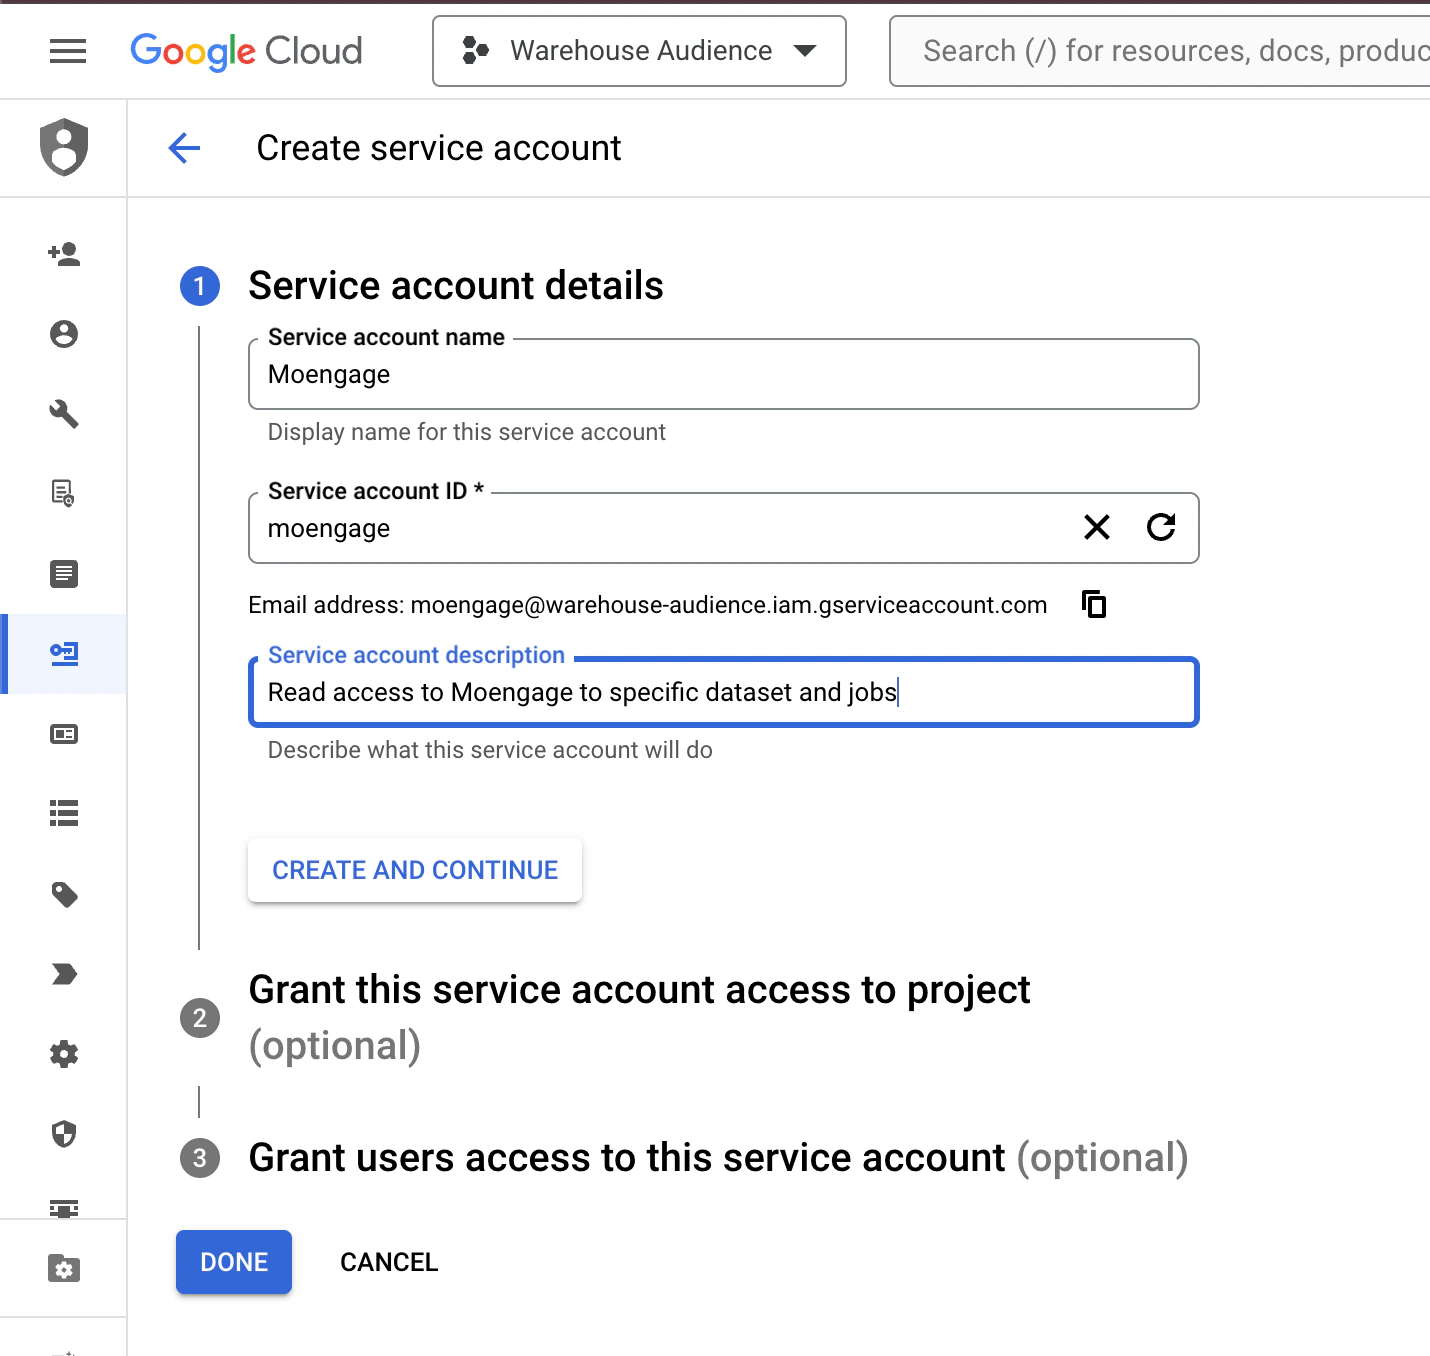
- Provide a name for the service account (e.g., moengage-access).
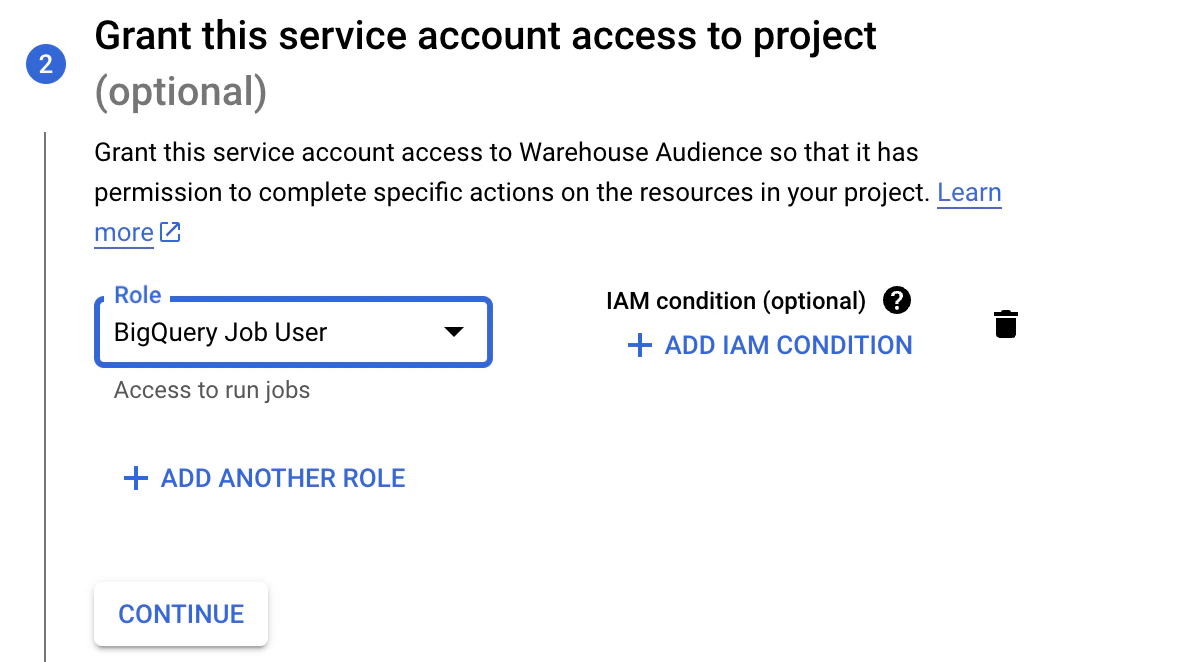
- Set the appropriate role for the service account as BigQuery Job User.
- Create the service account.
- Navigate to the service account and select the KEYS tab.
- Click the ADD KEY dropdown and then select Create new key.
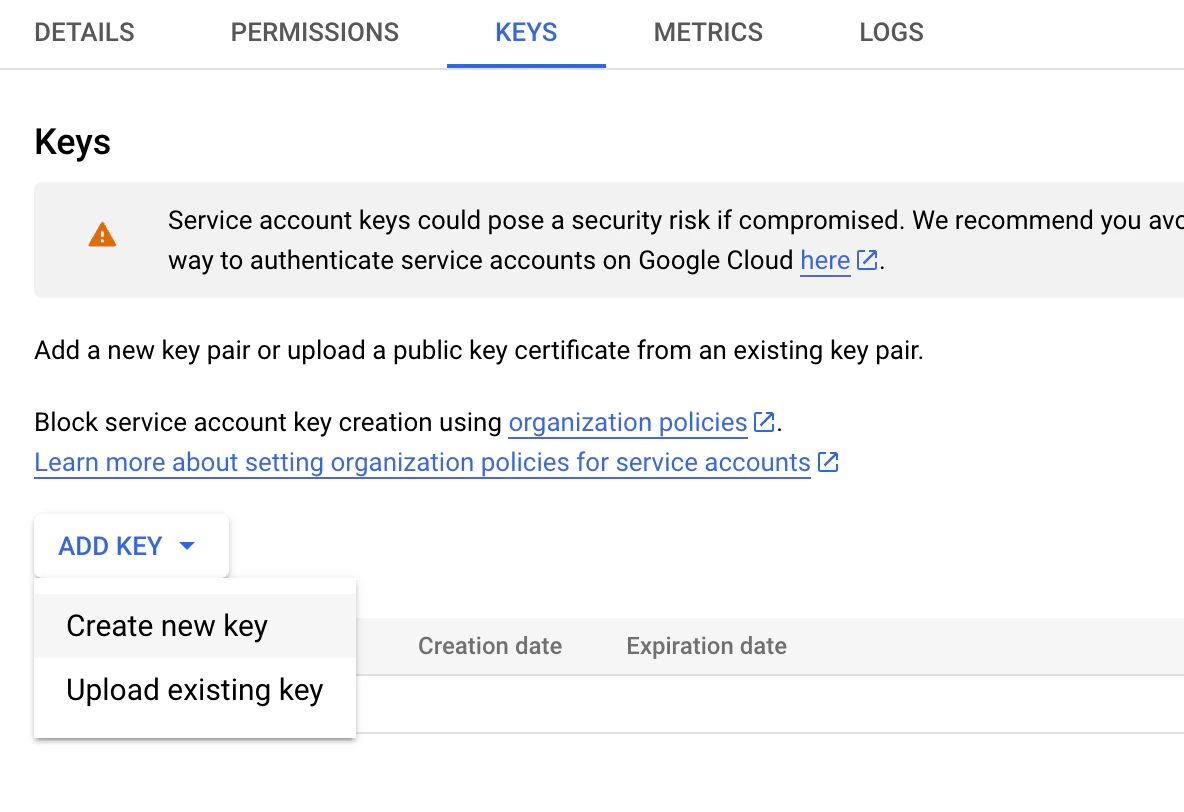
- Select JSON as the screen type in the pop-up
- Click CREATE to generate and download the JSON key file.
- Keep the JSON file securely and share it with MoEngag as below.
- JSON key file of the service account created for MoEngage as per the steps above
- Your MoEngage workspace name, along with your data cluster (DC)
- Your BigQuery location
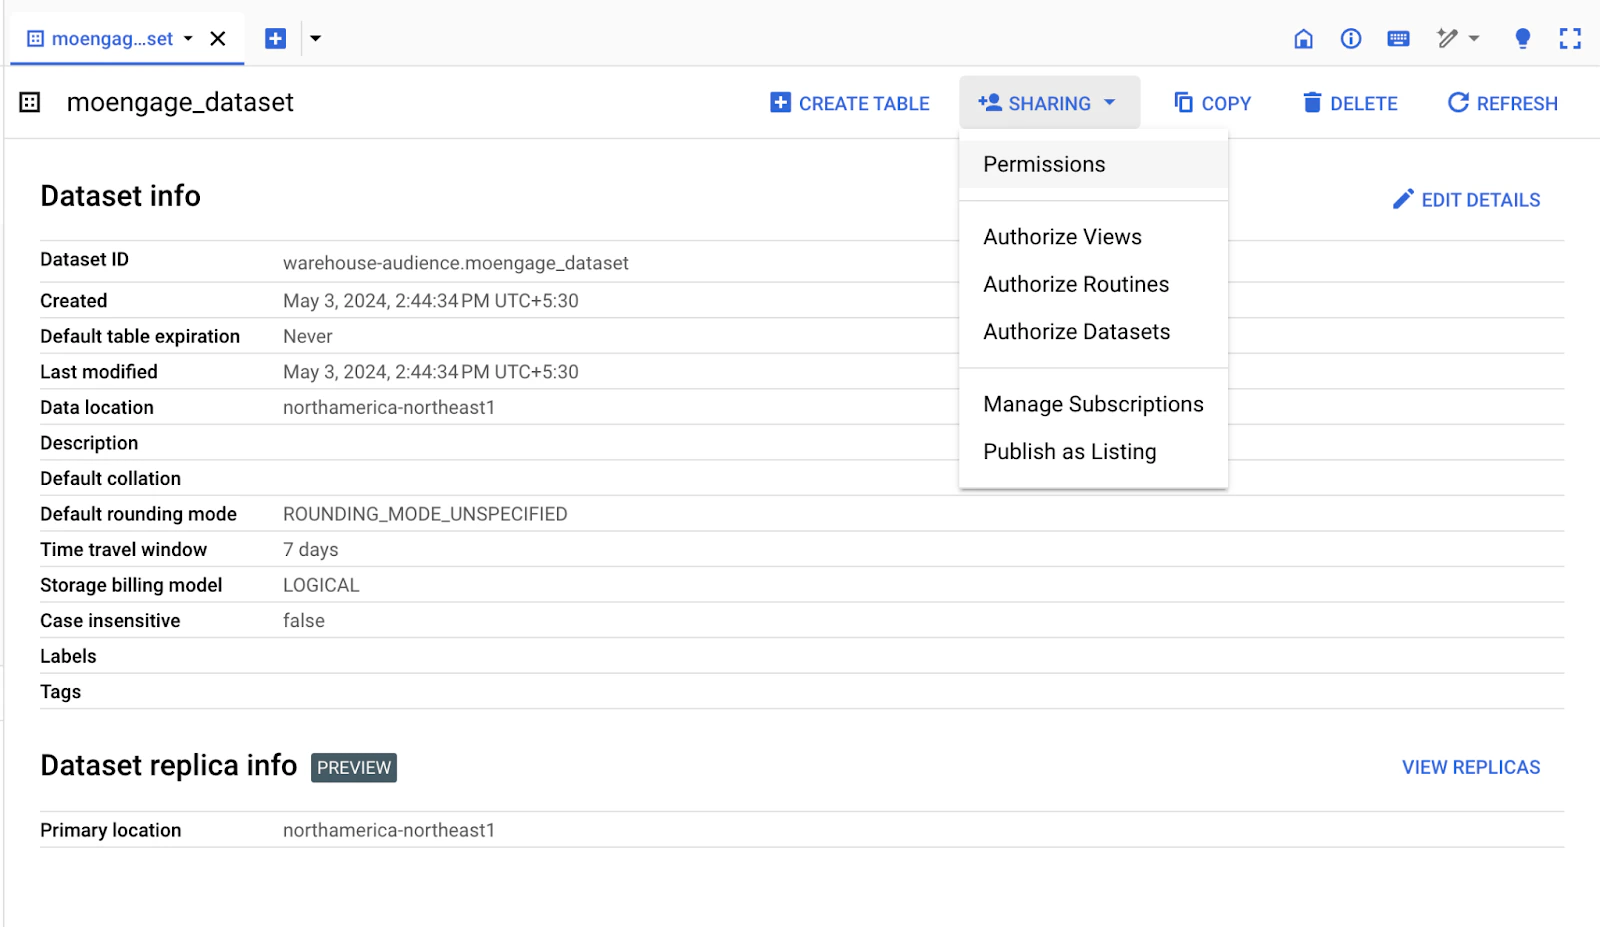
Share Access to Specific Tables with Moengage
- In the BigQuery console, navigate to the dataset containing the tables you want Moengage to access.
-
Click the SHARING dropdown and then select Permissions.
-
Add the service account’s email address (found in the JSON key file) as a member with the “BigQuery Data Viewer” role.
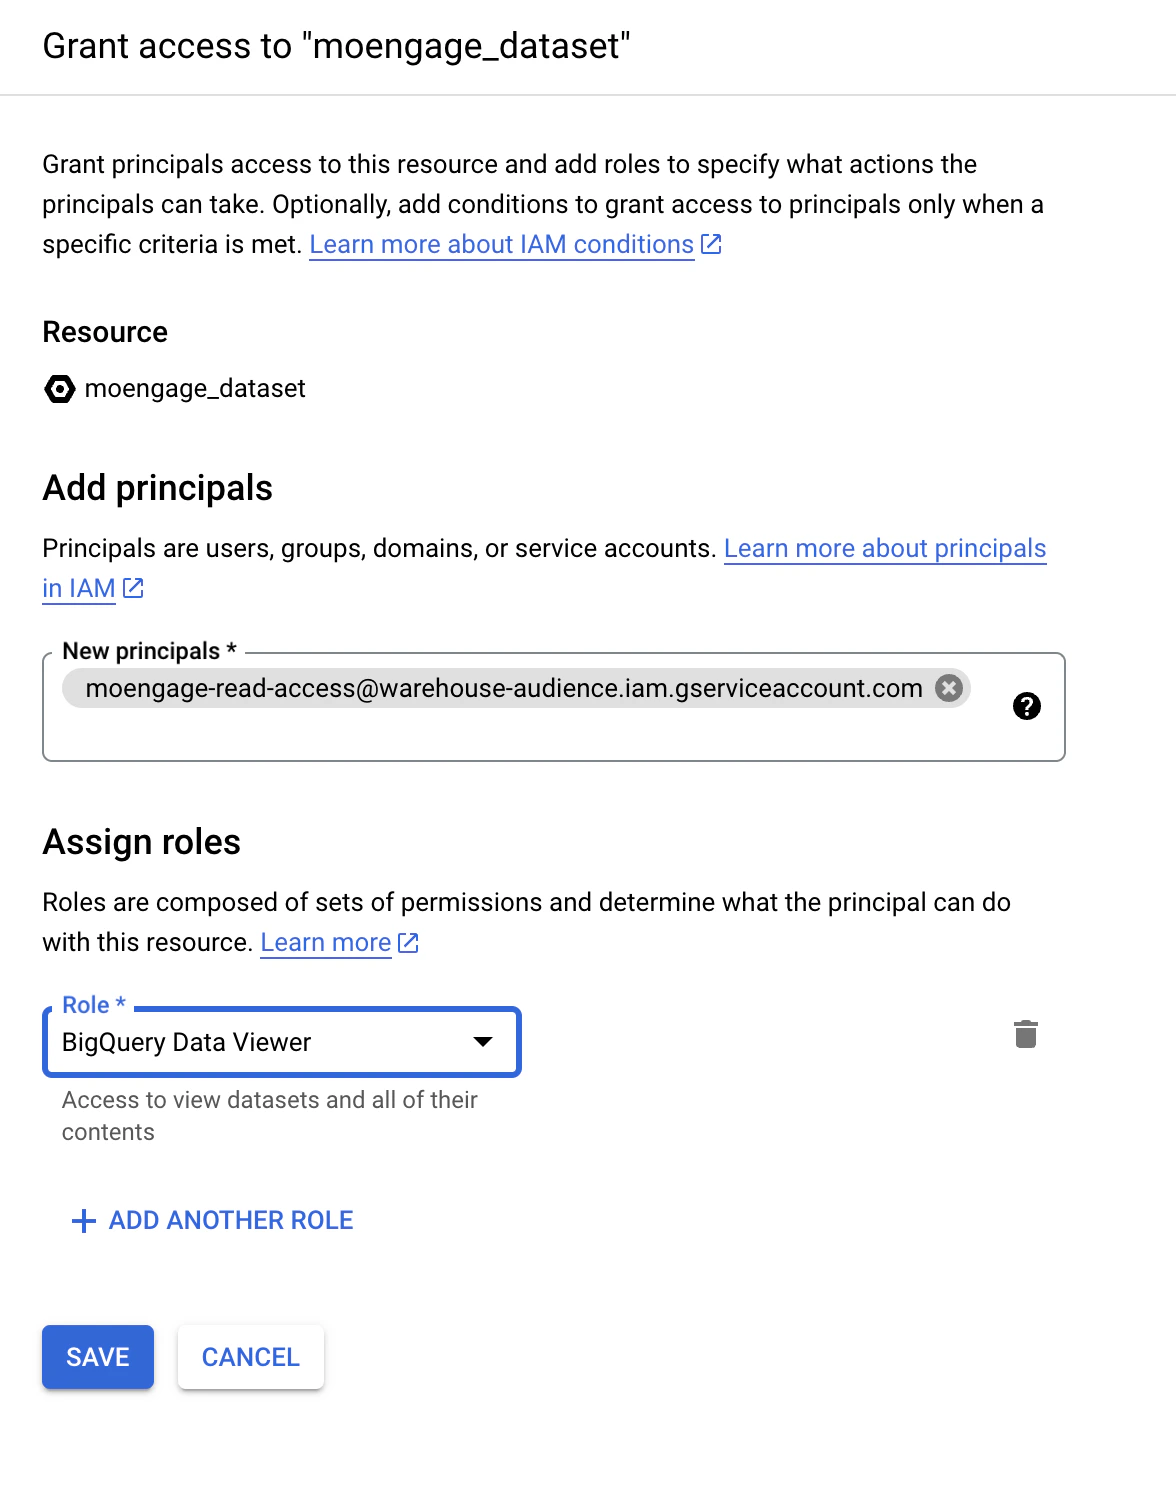
- Click Save to grant access to the dataset.
Grant Access to BigQuery Jobs API
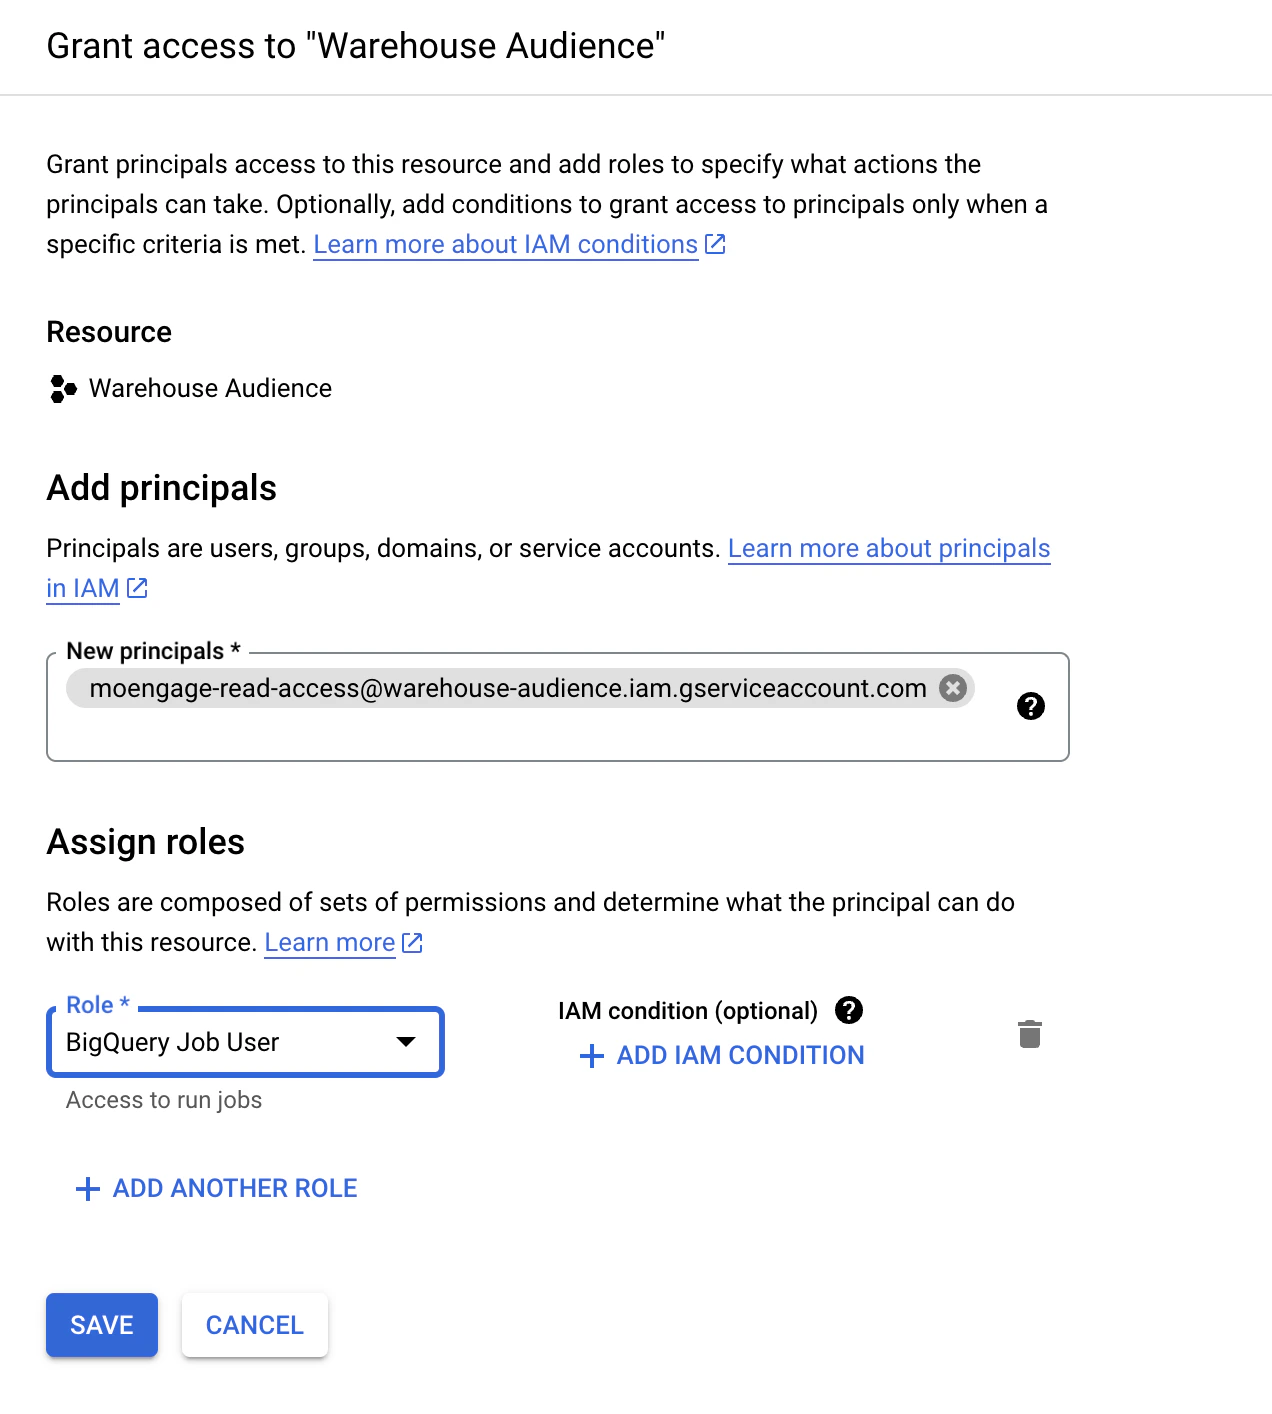
Skip if access is already given in the first step.- In the Google Cloud Console, go to the IAM & Admin section and then select IAM.
- Click Grant Accessto add a new member.
- Enter the service account’s email address (found in the JSON key file).
- Assign the Role as BigQuery Job User to enable interaction with the BigQuery Jobs API.
-
Click Save to grant access to the API.
Limit Access to Specific Tables (Optional)
Limit Access to Specific Tables (Optional)
- Open the JSON key file shared with Moengage.
- Locate the private_key_id attribute in the JSON content.
- In the BigQuery console, open the dataset with the desired tables.
- Select the table(s) you want to restrict access to and click on “Share Table” from the context menu.
- Add the service account’s email address as a member and restrict the role to “BigQuery Data Viewer” only for these table(s).


Step 2: Run a warehouse query
- Navigate to the Warehouse segment tab under Segment on the MoEngage dashboard.
- Here, you can choose the data warehouse connection which was set up in the previous step, from the Source dropdown on the top.
- Once a source is chosen, the data warehouse schema - database, tables, and columns, will be populated on the left panel. From here, you can search for any database, table, or column that you want to use in your query. The schema is refreshed every hour.
- You can enter your SQL query in the SQL editor on the right. You can perform any operations, such as joining multiple tables, sub-queries, aliases, etc., as required to return your optimal results.
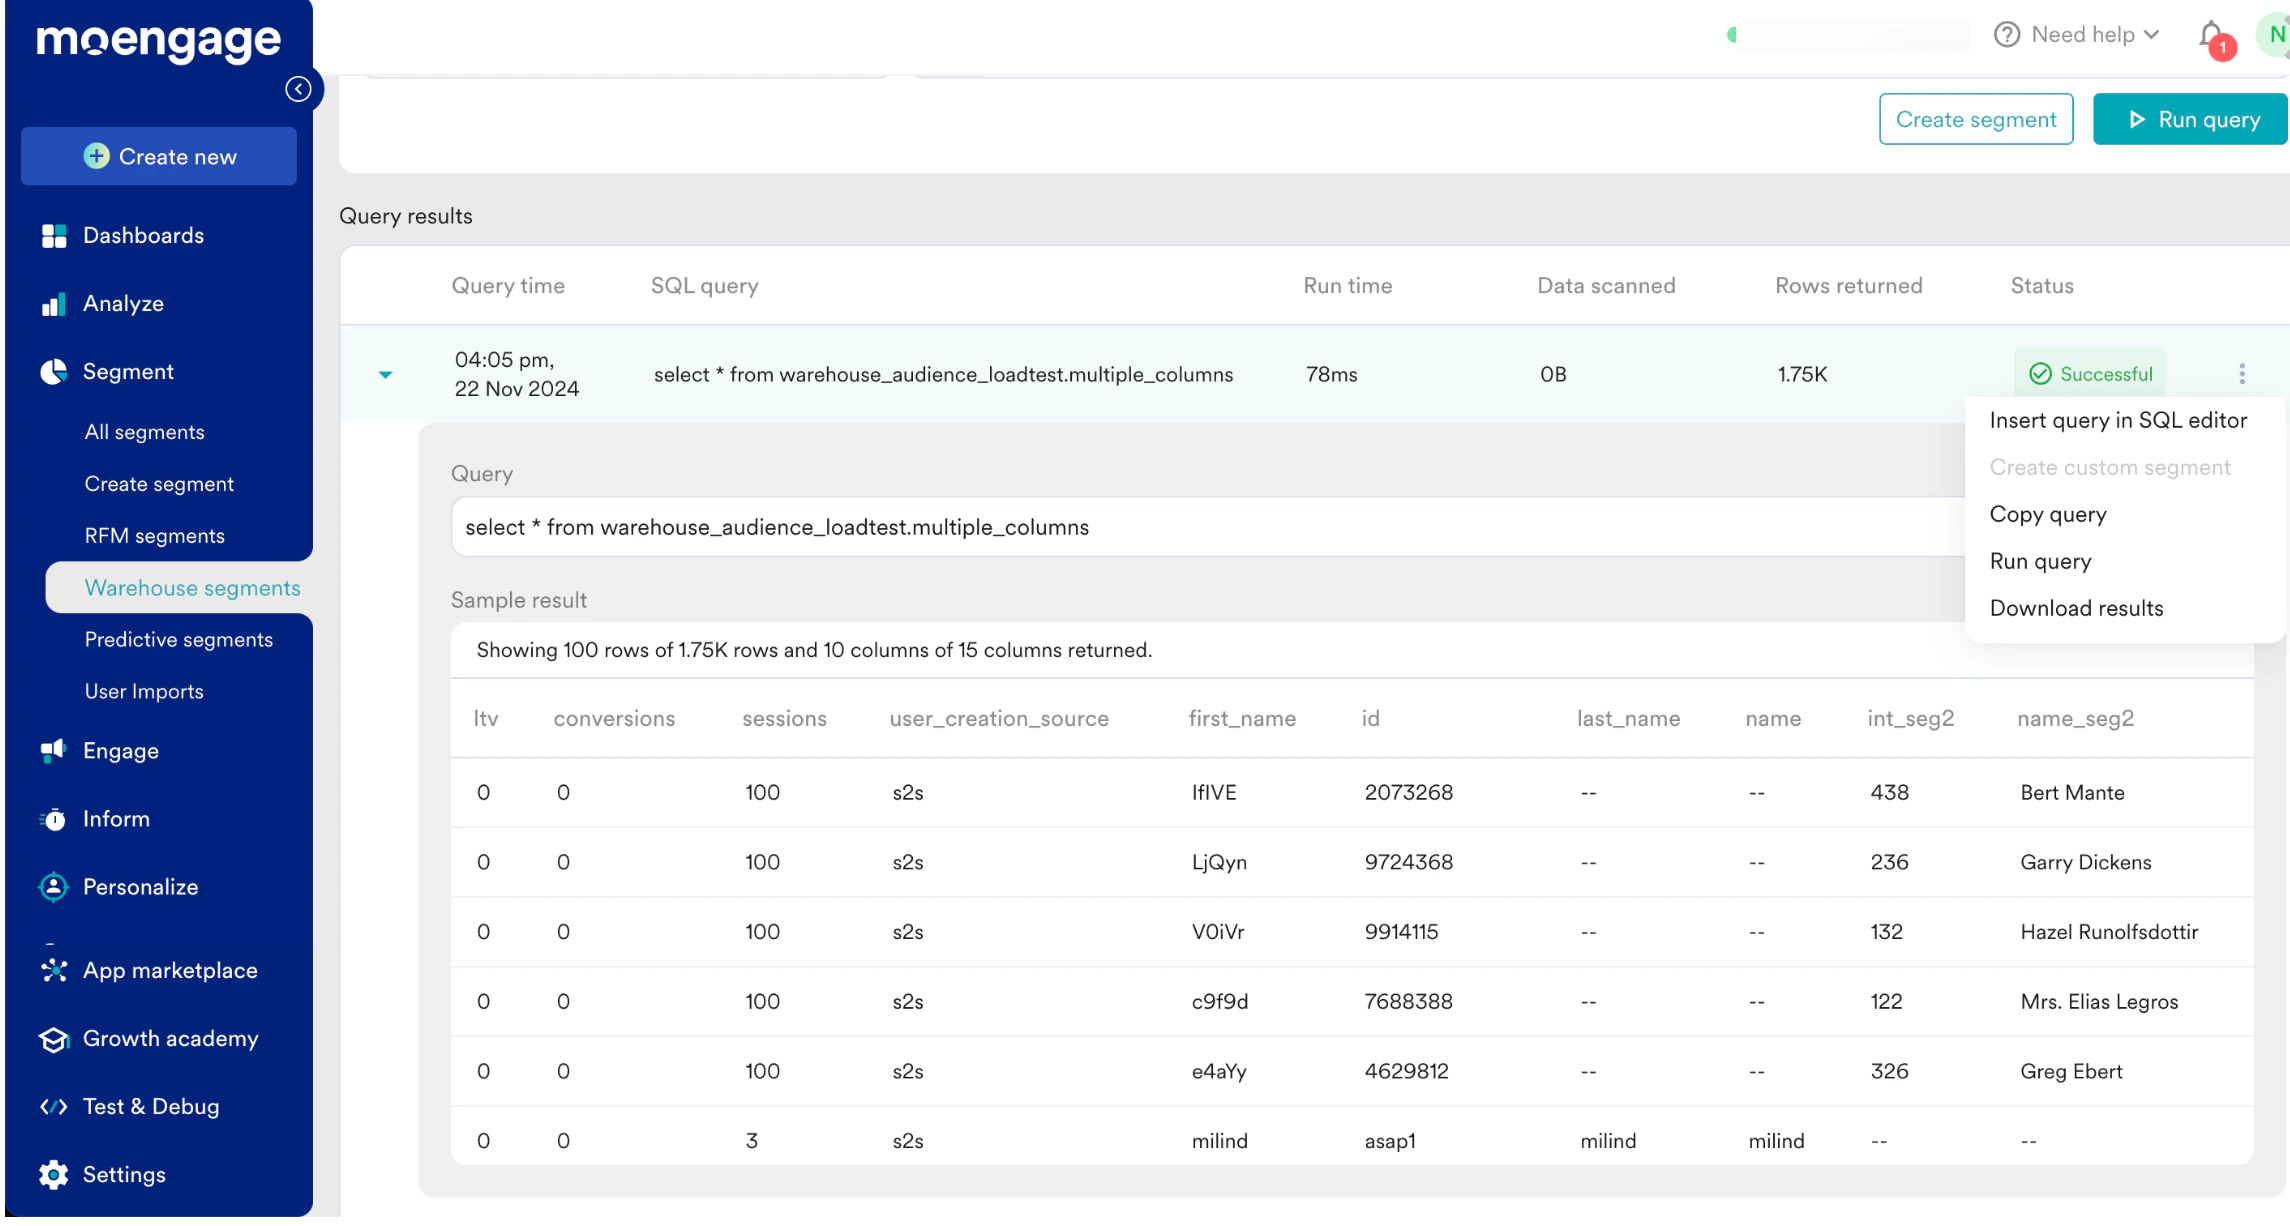
- Click on Run Query to run the SQL query in your data warehouse. You should be able to see a new row added in the Query results section below.
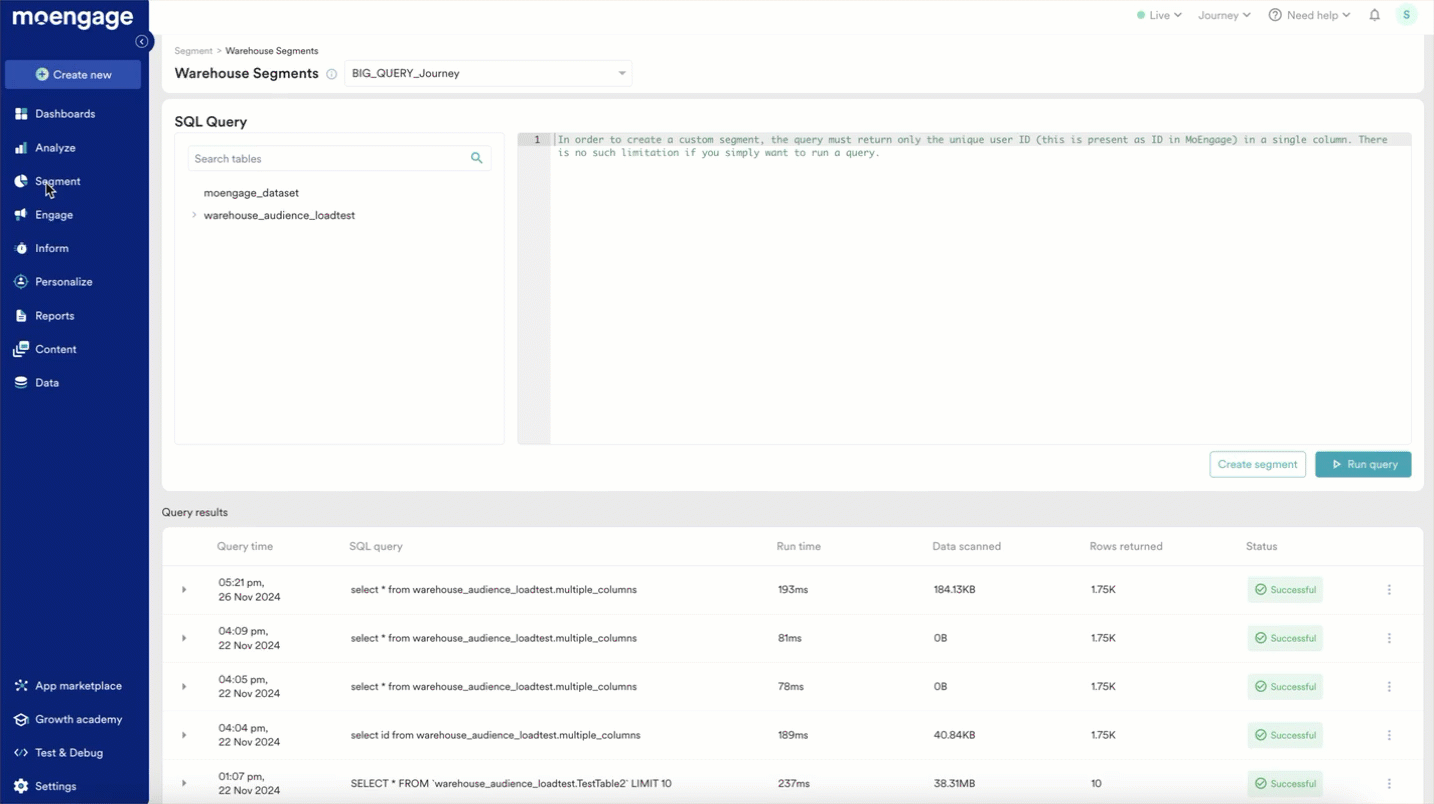
- The Query results section provides a list of recently run warehouse queries with query metrics such as Run time, Data scanned, and the number of rows of data returned by a specific query from your data warehouse. These metrics are useful for gauging the performance of your data warehouse queries and can be used to optimize your queries while you write them on MoEngage.
- Credits used per query are available for Snowflake.
- Databricks does not provide credits utilized when a query is executed; hence, regularly monitoring the usage is recommended.
- Redshift does not provide data scanned when a query is executed; hence, regularly monitoring the usage is recommended.
- The Query results section also provides the status of each warehouse query run from MoEngage. The status can be successful, failed, or processed.
- Once a query has run successfully, you should be able to expand the row from the Query results section and see the sample results of each query. We show up to 100 rows and 10 columns of data for each query.
- Each query result also has a set of actions that can be accessed from the 3-dot menu on each row.
- Insert in SQL editor: You can directly insert a particular SQL query from the Query results section on the editor.
Do note that this action will replace any existing query in the editor. - Create a custom segment: You can directly create a custom segment from any query result. However, we expect the query to return a single column of IDs (the unique user identification that is present as an ID in MoEngage) in order to be saved as a custom segment. Hence, this option will be active only for those queries that return a single column.
- Copy query: This action will copy the query to the clipboard.
- Run query: You can run the query from Query results directly using the Run query action. A new row will be added to the Query results section at the top for the new execution.
- Download results:You can download the results of a query using the download results action. The downloaded file will contain a maximum of 100 rows and 100 columns of data
- Insert in SQL editor: You can directly insert a particular SQL query from the Query results section on the editor.
- Preview Table: Now you can one-click preview a few sample rows from any table listed in the schema section. On hovering over a table name in the schema, you should be able to see an eye icon, clicking on this will run a sample query on the table providing up to 10 rows of data as a preview.
Step 3: Define a warehouse custom segment
Once the SQL query is finalized, you can proceed to create a custom segment. We expect the custom segment query to return a single column of IDs (the unique user identification that is present as an ID in MoEngage). Give a name and a description for the segment.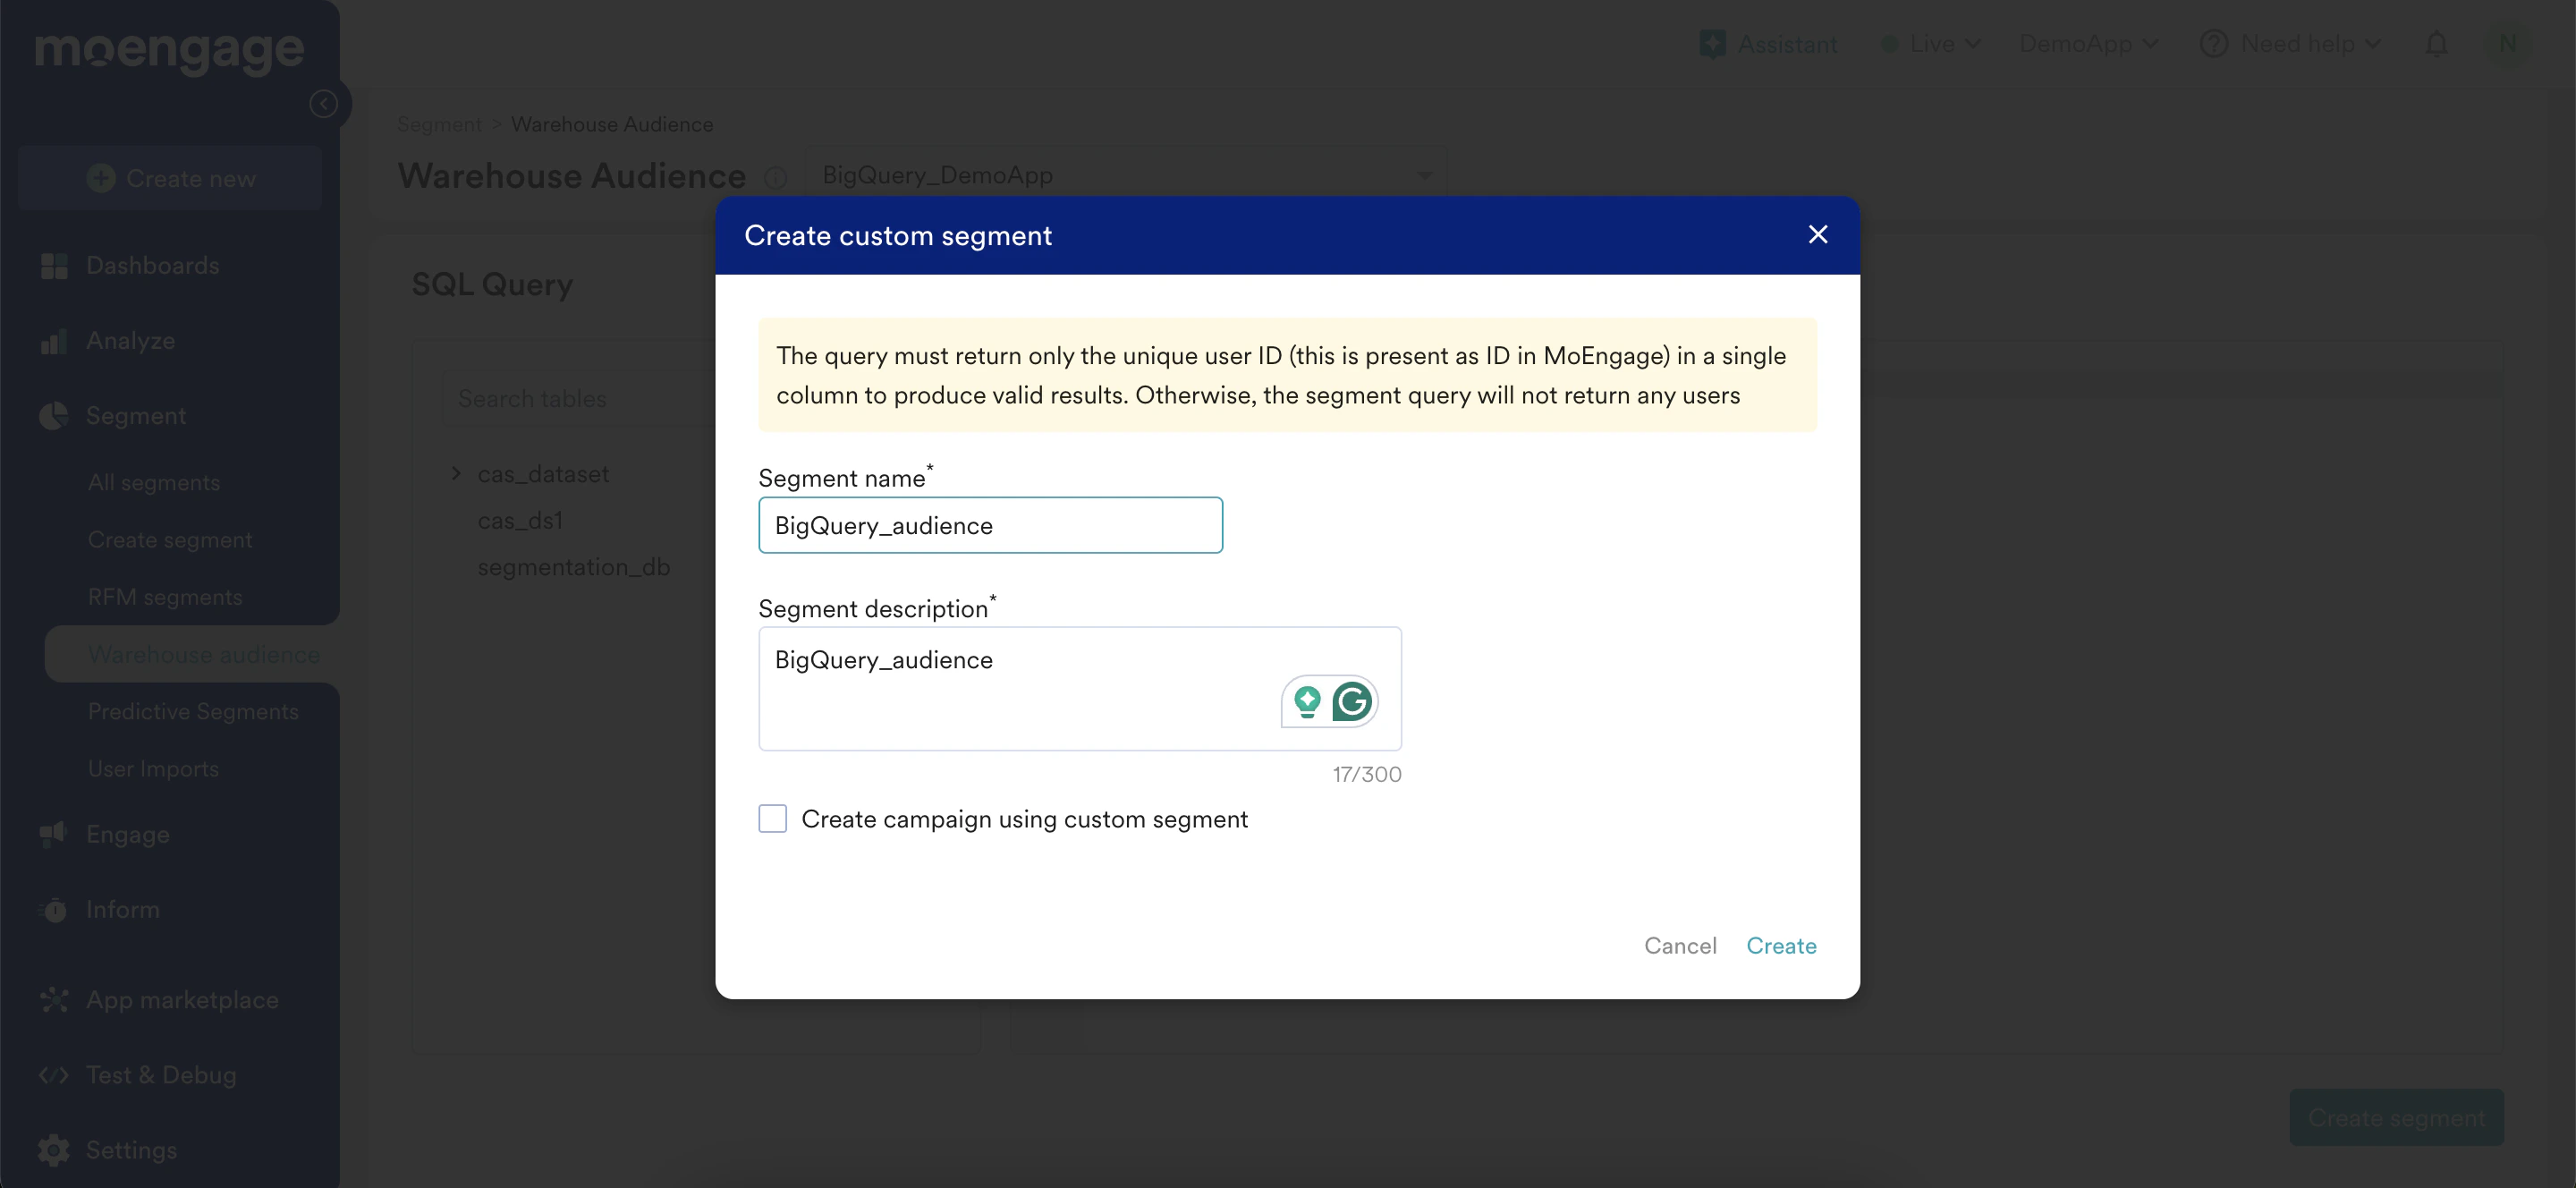
Step 4: Use the warehouse custom segment
Custom segments created using warehouse segment are of type Warehouse - SQL. They will be listed on the All Segments page.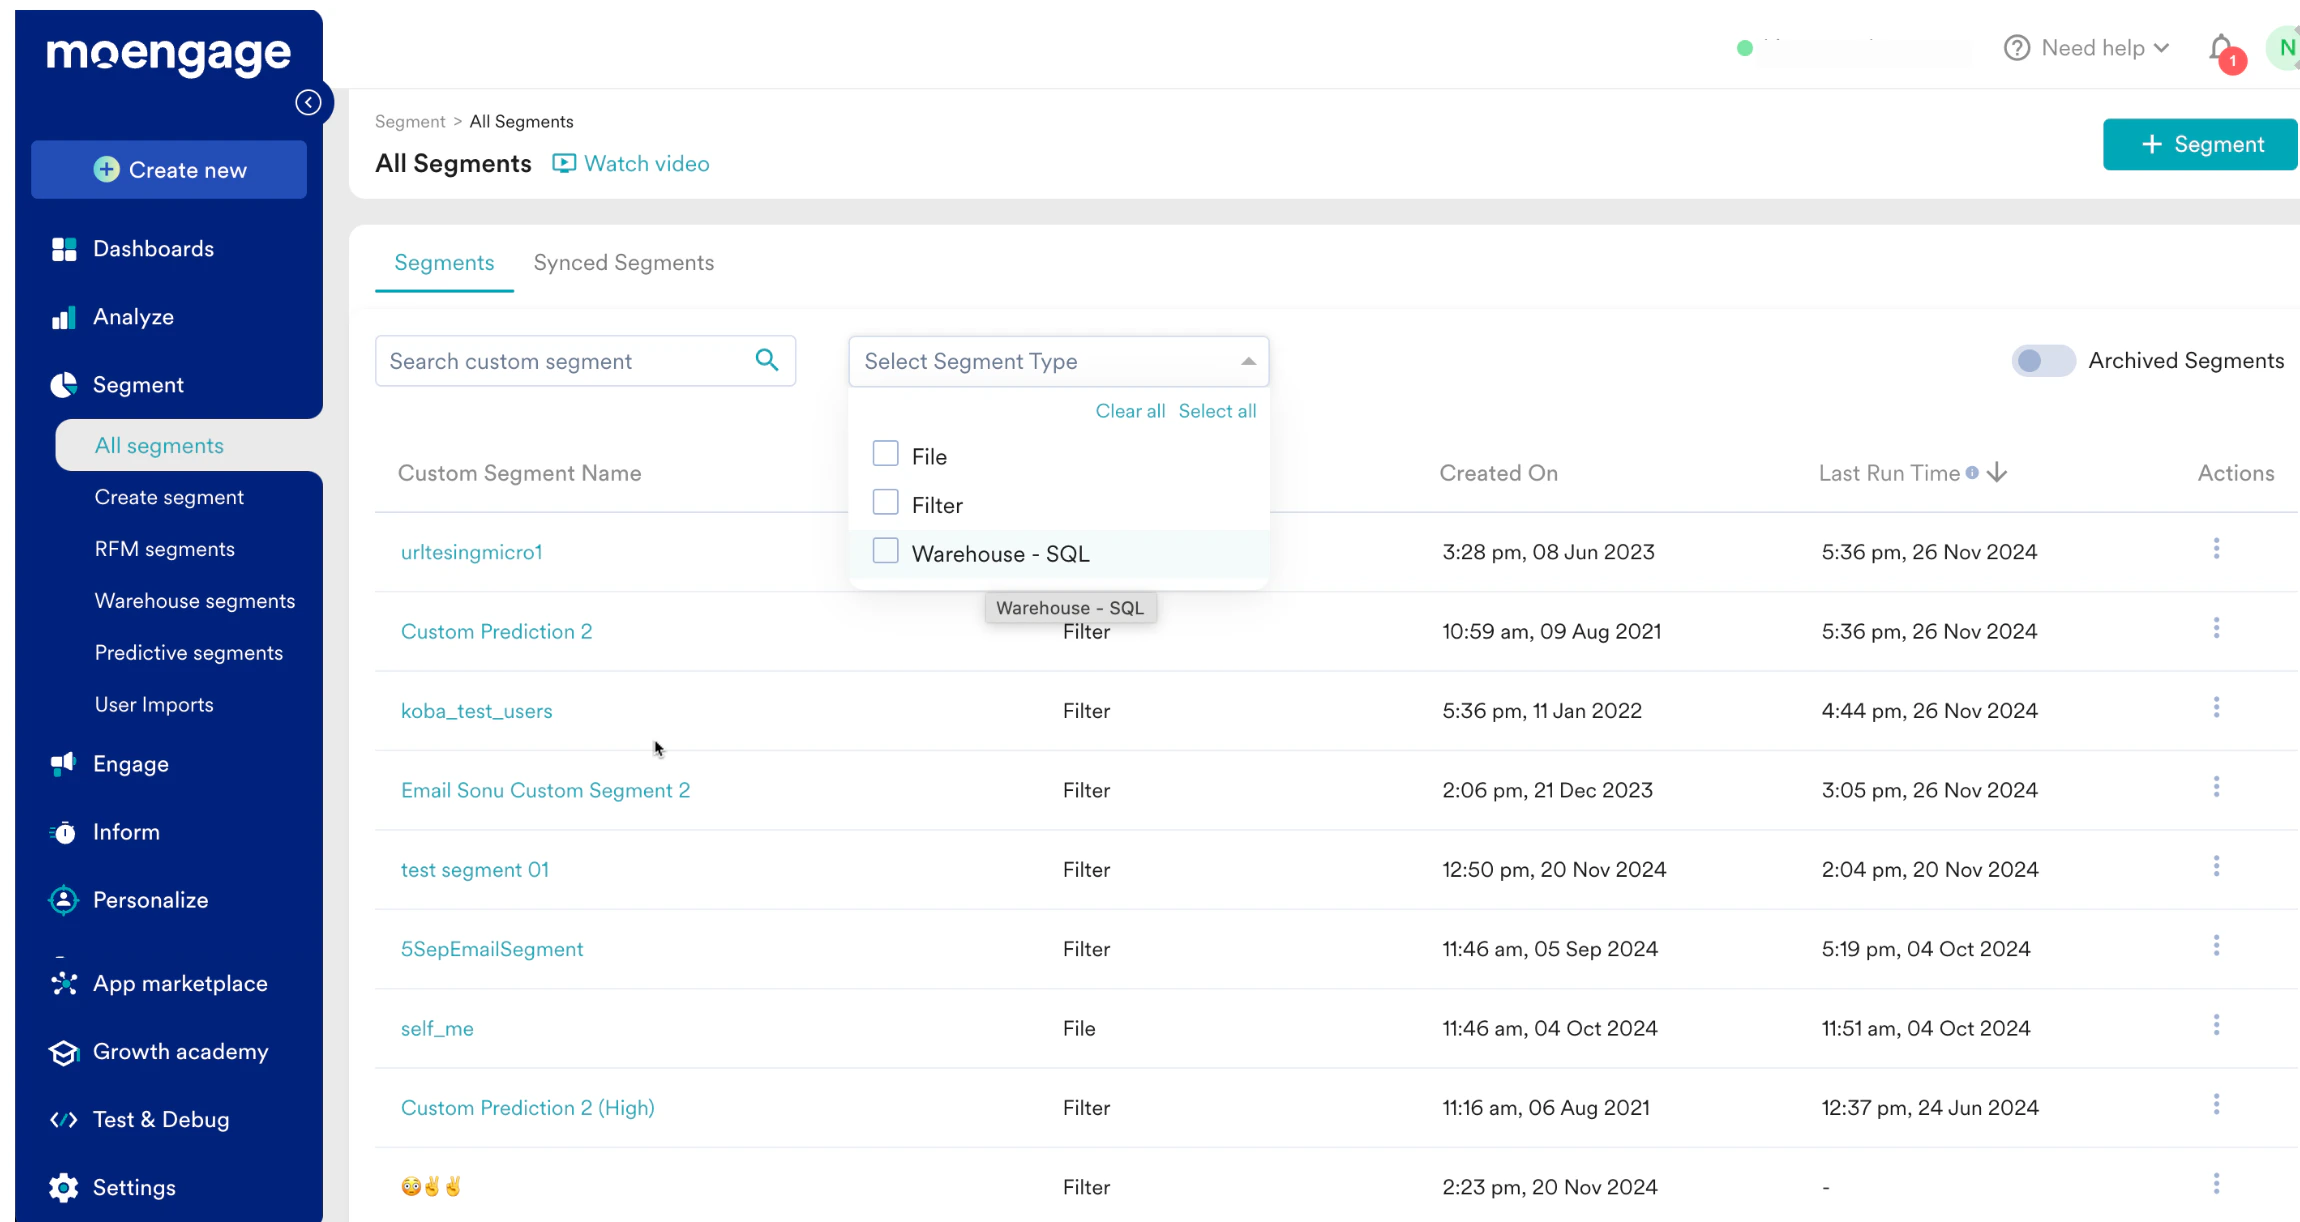
Actions possible on external custom segments:
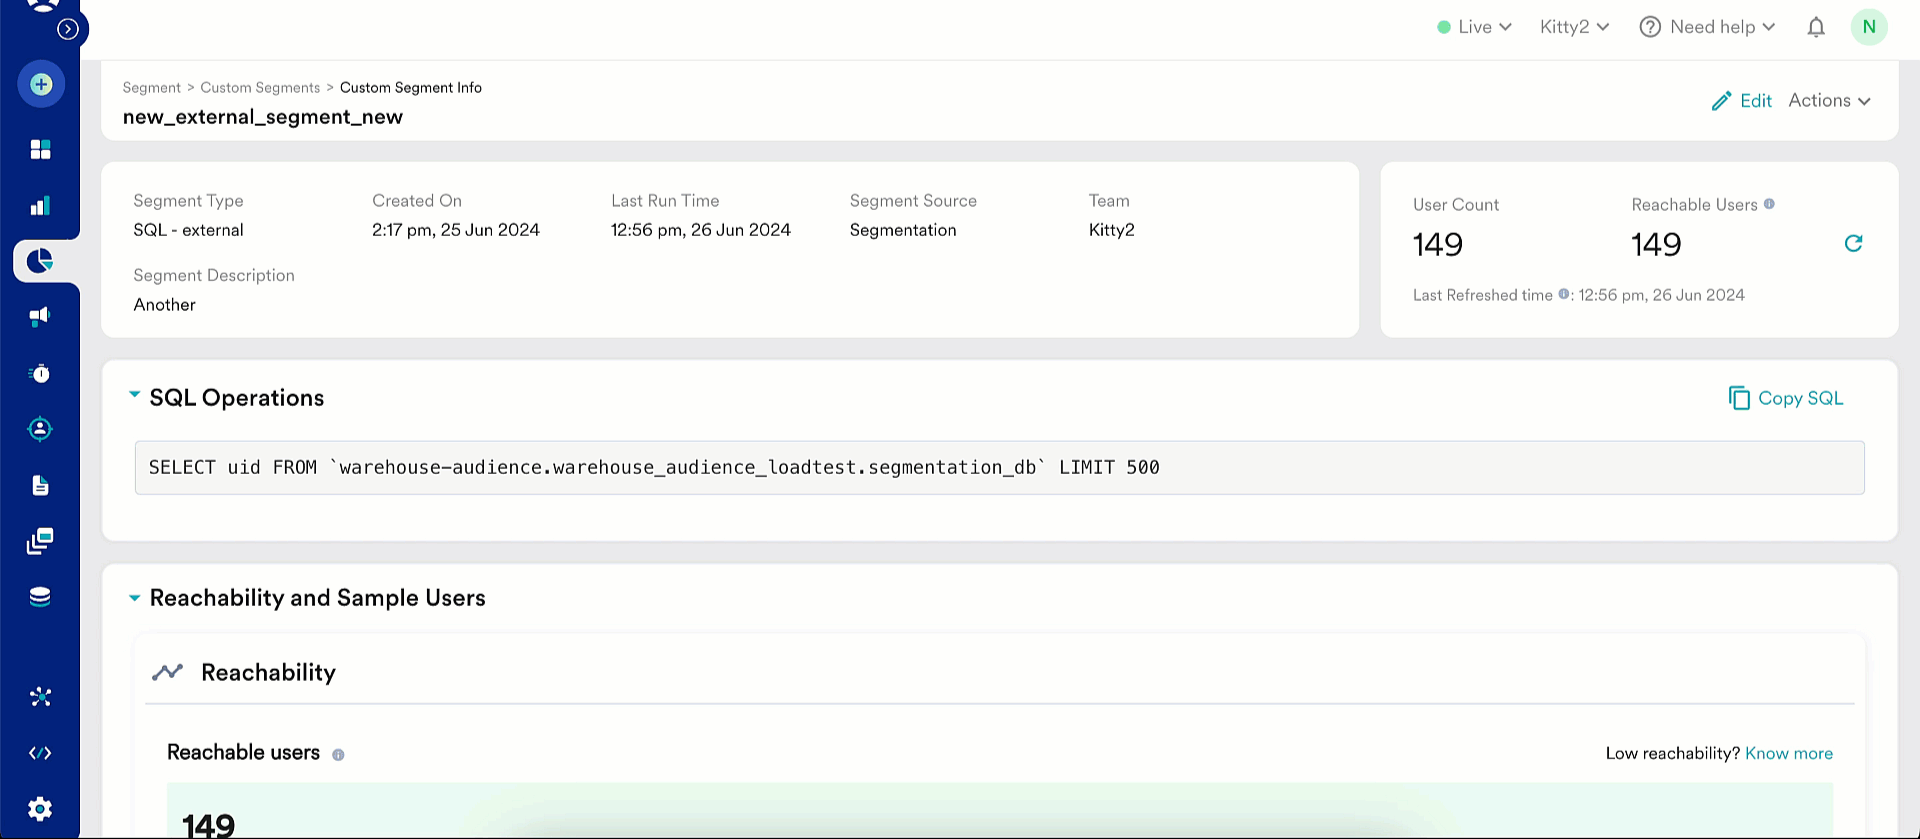
- View - View the details of the custom segment on the segment info page. Here you can:
- View the SQL query that defines the segment
- Run the custom segment to update user count - This is when MoEngage connects to your data warehouse, runs the SQL query, and updates the user count.
- Edit - You can edit the SQL query that was used to define the custom segment
- Create campaign - You can create a campaign directly from the All Segments page. The target audience section of campaign creation will be populated with the selected custom segment.
- External data warehouse segments can be combined with other custom segments as well as user attributes, and behaviors captured in MoEngage.
Refresh the user count of a Warehouse segment
You can update the user count of an external data warehouse segment in two ways:- On campaign run-time - The data warehouse segment that is part of the Target audience of a campaign will auto-refresh at the campaign run-time.
- Run the custom segment from the segment info page - You can also run the segment manually from the segment info page.
Considerations
- One warehouse segment can be defined on one data warehouse connection. You can combine multiple custom segments pointing to different sources and create a new custom segment.
- Running analysis - Behaviour, Funnel, etc., will not refresh the user count of a warehouse segment. The target audience containing a warehouse segment will either:
- Return 0 if the segment has never run.
- Return the last run count of users if the segment has run before.