

MoEngage × Amazon S3
Integrate MoEngage with Amazon S3 by using the App Marketplace to establish a direct connection between your S3 bucket and your MoEngage workspace. After you establish this connection, MoEngage uses this centralized connection to transfer files for automated data imports and exports.Use Cases
Amazon S3 integration with MoEngage helps you with the following use cases:- Synchronize real-time behavioral segments.
- Import users and events.
- Export campaign interaction events.
Advantages
The integration with MoEngage helps you with the following advantages:Reduce Integration Time
- Eliminates the need for external Extract, Transform, and Load (ETL) tools.
- Replaces complex data pipelines with a one-time configuration process.
- Minimizes reliance on development and technology teams.
Faster Data Processing
- Processes and queries high-volume data in near real time.
- Propagates schema updates automatically without manual reconfigurations in MoEngage.
- Lowers data-transfer costs compared to traditional external cloud pipelines.
Integration
PrerequisitesEnsure you have an AWS account with administrative Identity and Access Management (IAM) privileges. You must be able to create roles, manage bucket access policies, and generate programmatic access credentials for your target Amazon S3 bucket.
Step 1: Set Up Authentication
Select the authentication method that matches how you plan to use the connection. MoEngage recommends the cross account role method because it supports both imports and exports and avoids storing long-term credentials.Cross account role Preferred — supports both imports and exports
Cross account role Preferred — supports both imports and exports
In this method, you create one IAM role in your AWS account and allow a single MoEngage role to assume it. You need two values from MoEngage: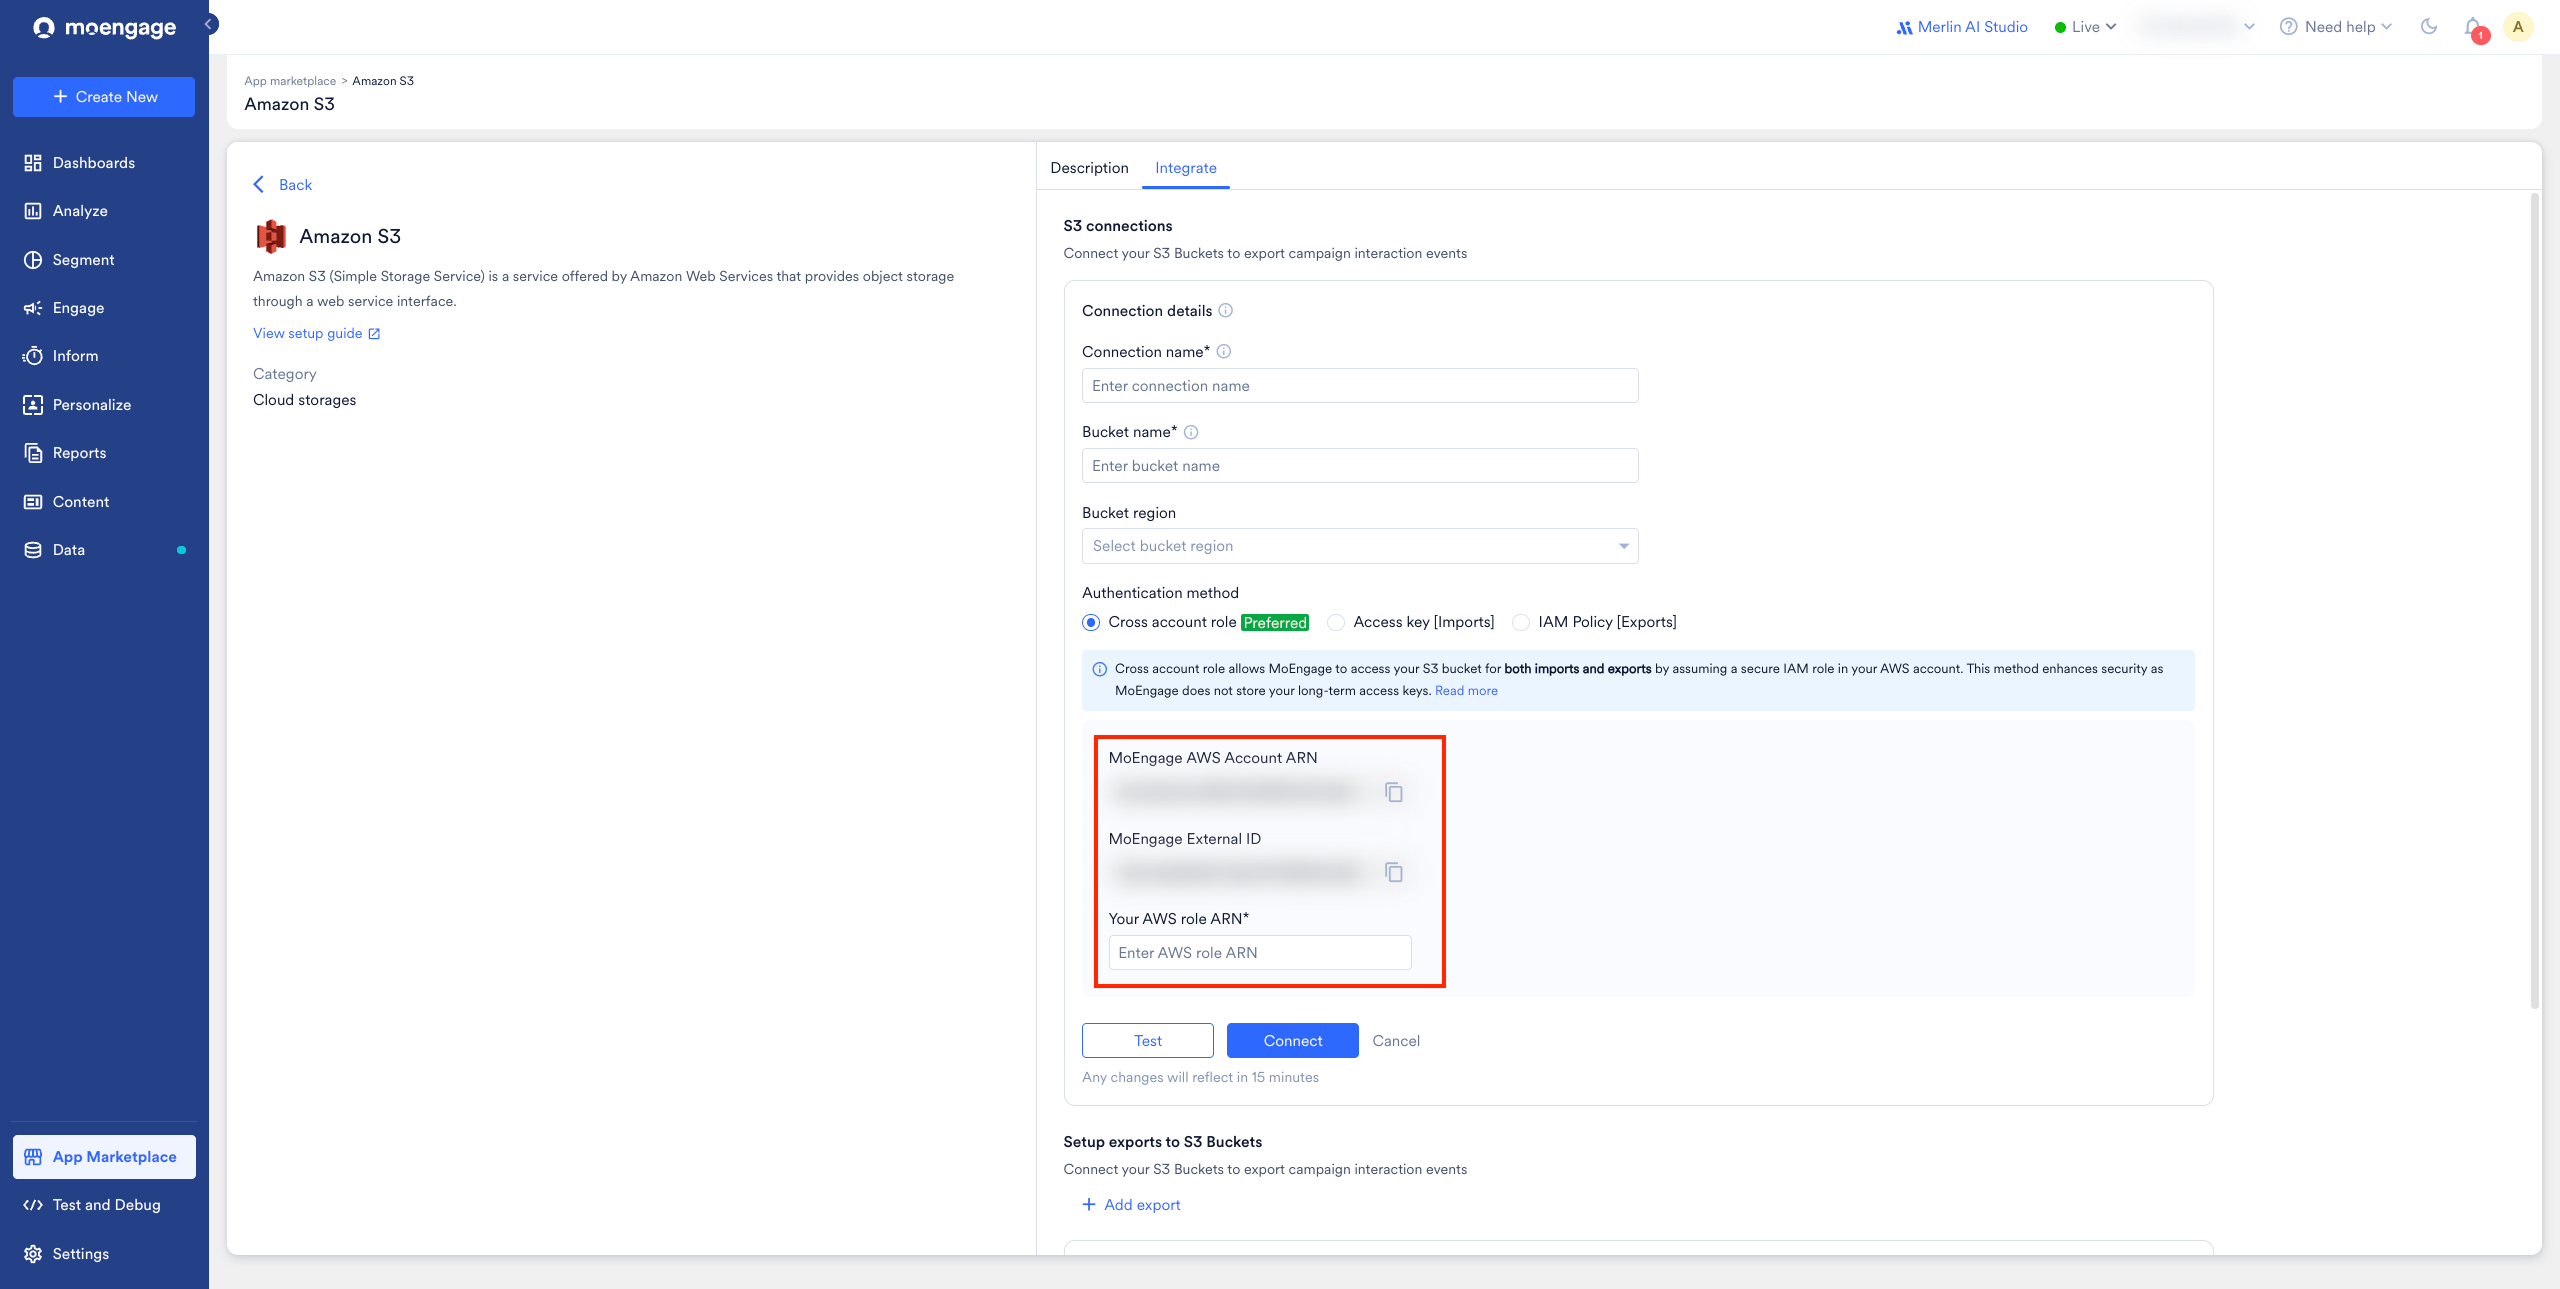
- MoEngage AWS Account ARN: The only MoEngage identity your role will trust.
- MoEngage External ID: A value unique to your workspace, in the format
moe-external-xxxxxxxxxx.
Where to find these valuesIn MoEngage, go to Amazon S3 > Integrations > Add Connection. The MoEngage AWS Account ARN and your workspace’s MoEngage External ID appear on the Add Connection form (see Step 3: Connect Amazon S3 on the App Marketplace). Copy them before you configure AWS.
- Sign in to the AWS Management Console and open the IAM service.
- In the left navigation, choose Roles, and then click Create role.
- For Trusted entity type, select Custom trust policy.
- In the Custom trust policy editor, paste the following trust policy, replace the placeholders with the values from the App marketplace, and then click Next. The trust policy defines who may assume your role.
The
sts:ExternalIdcondition scopes this role to your workspace only. Do not change or remove it. - On the Add permissions screen, click Next. You attach the bucket permissions later, in Step 2: Grant Permissions.
- On the Name, review, and create screen, enter a Role name that begins with the required prefix
moe-export-(for example,moe-export-moengage-s3). A role whose name does not start withmoe-export-fails to connect, because MoEngage can only assume roles with this prefix. - Click Create role.
- Open the role you created and copy its Role ARN (for example,
arn:aws:iam::111122223333:role/moe-export-moengage-s3). You paste this into the Add Connection page in Step 3.
Access key [Imports] — supports imports only
Access key [Imports] — supports imports only
Instead of a role, you provide an AWS access key pair that has read access to your bucket.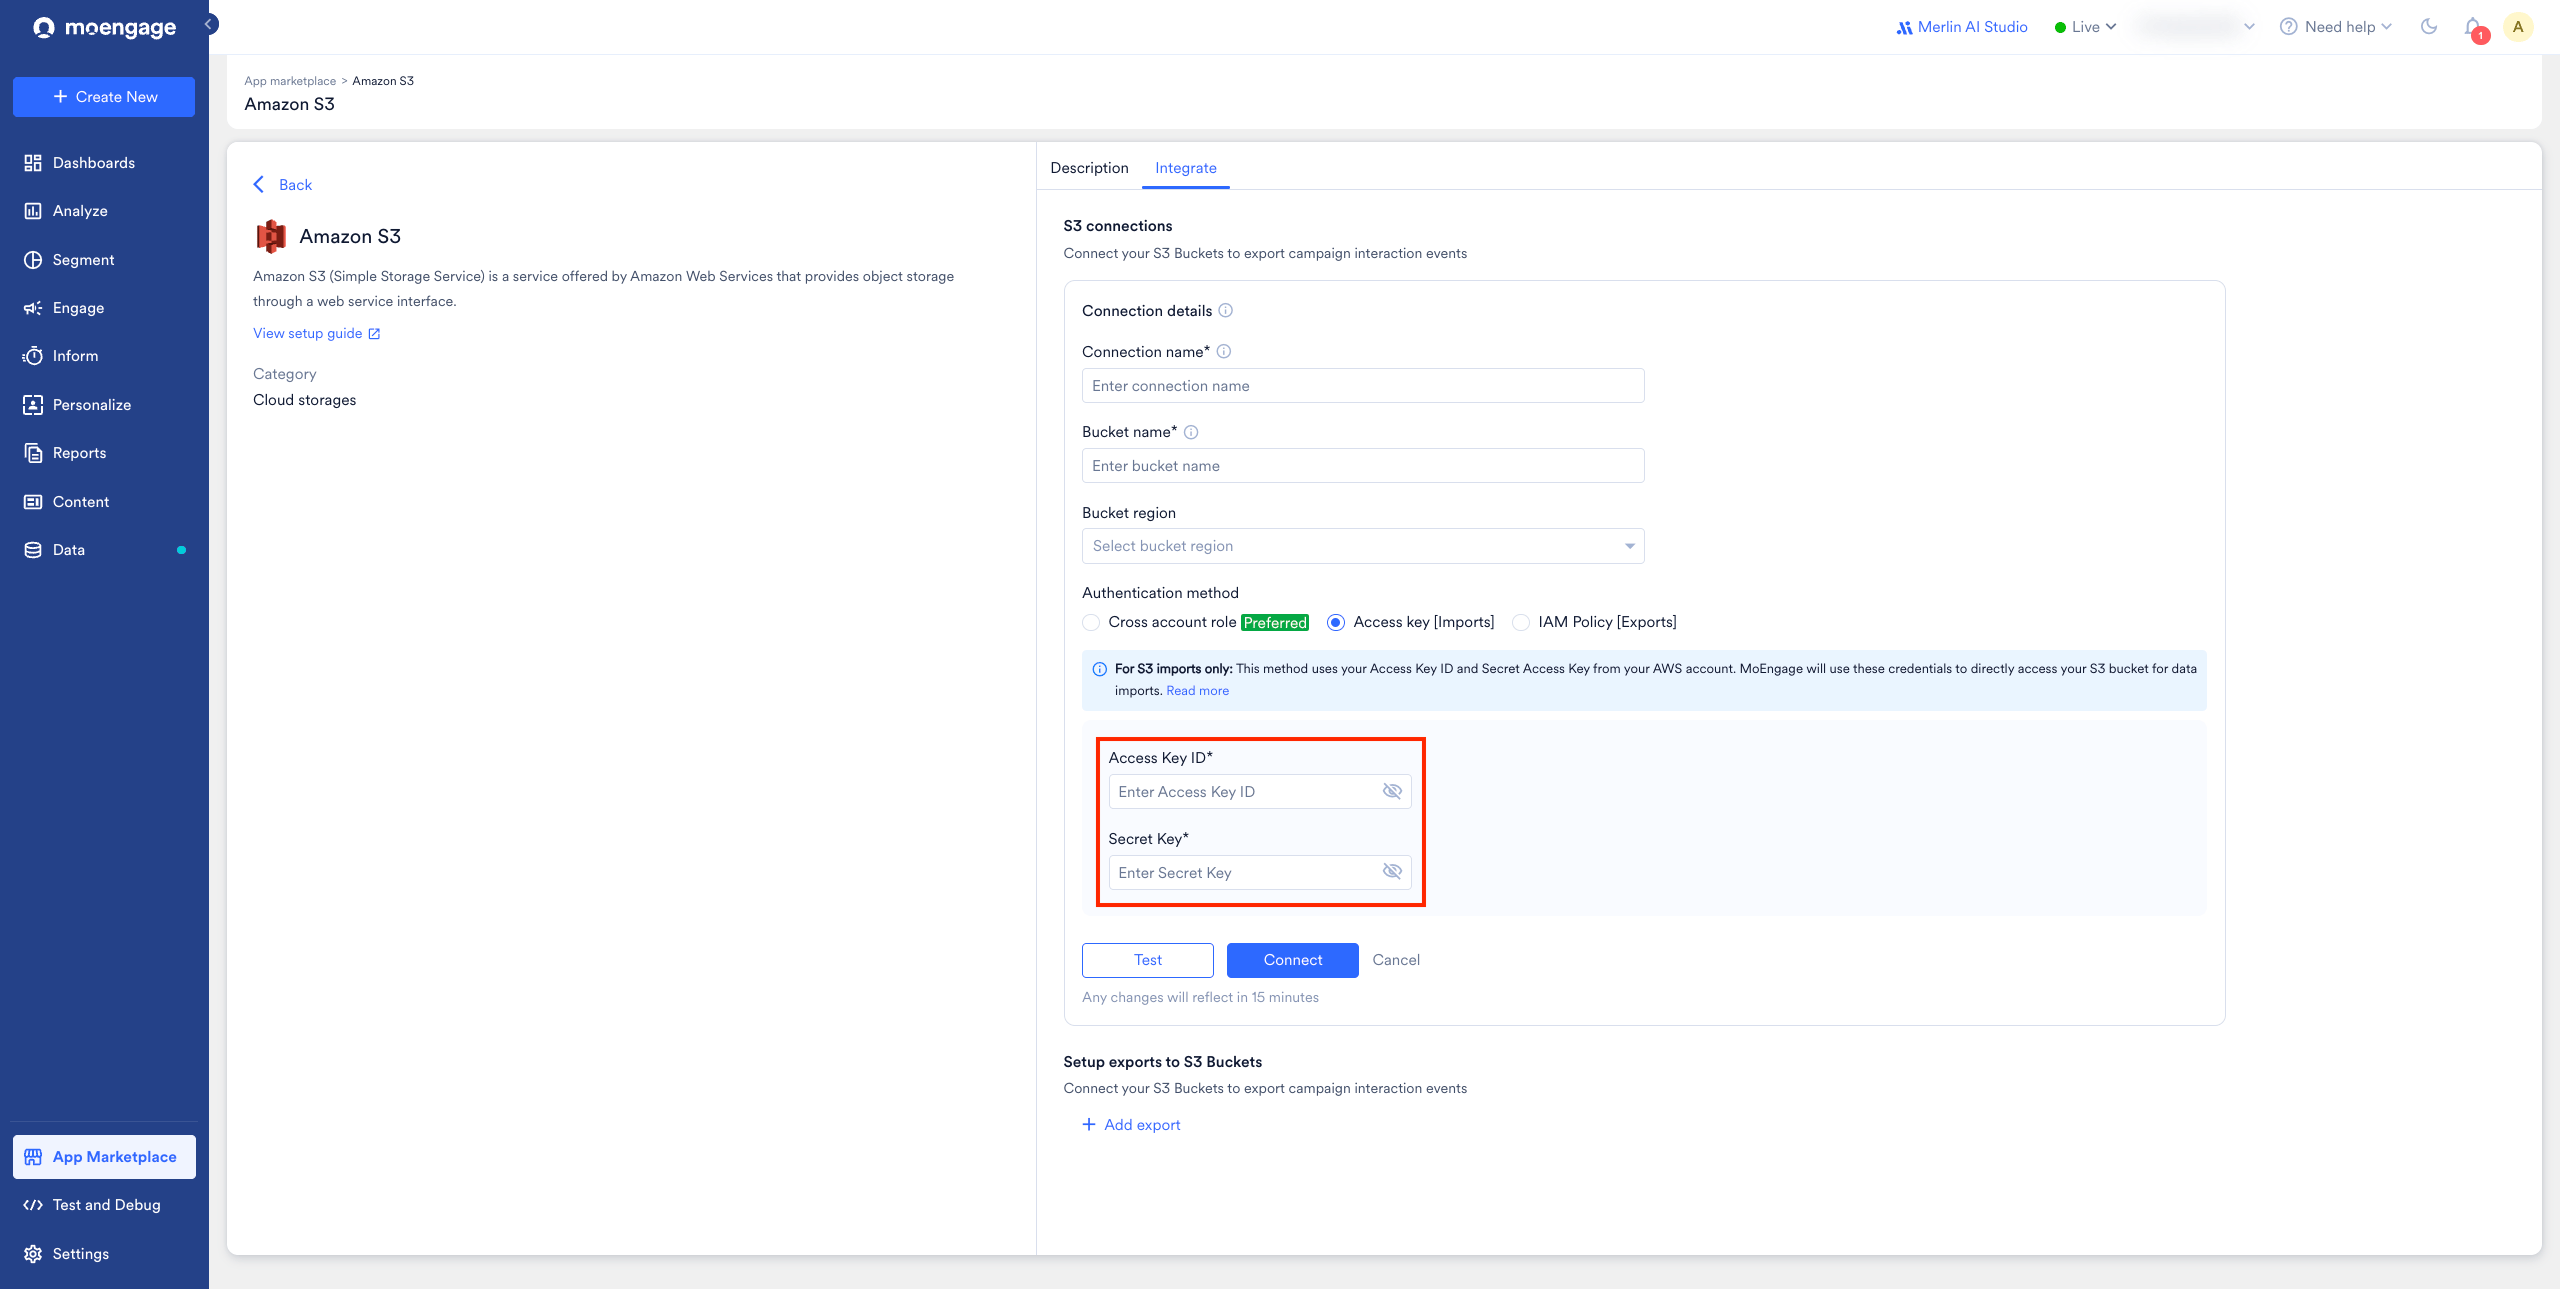
- In your AWS account, create an IAM user (or use an existing programmatic user) and generate an Access Key ID and Secret Access Key.
- Attach a permission policy granting read access to your bucket (see Step 2: Grant Permissions → Imports tab).
- Enter the Access Key ID and Secret Access Key on the Add Connection page (see Step 3: Connect Amazon S3 on the App Marketplace).
IAM Policy [Exports] — supports exports only
IAM Policy [Exports] — supports exports only
In this method, you grant MoEngage’s export role access directly through your S3 bucket policy (there is no role for MoEngage to assume). MoEngage uses a single export role for this method across all data centers, so no per-data-center ARN table is needed:
- Open the AWS Management Console > S3, select your bucket, and go to Permissions > Bucket policy > Edit.
- Add the following statement. Replace
<INSERTPOLICYID>and<INSERTSID>with values of your choice (any unique identifiers), andyour-bucket-namewith your bucket name. Keep the MoEngage Principal ARN exactly as shown.
Step 2: Grant Permissions
Attach the permission policy that matches your direction of data flow. For the cross account role and access key methods, attach it as an inline policy: open your role (or IAM user) > Permissions tab > Add permissions > Create inline policy > JSON editor > paste the policy > Next > name it (for example,moe-s3-access) > Create policy.
In each example, the bucket is named your-bucket-name and files live under the moengage/ folder. Replace these with your own bucket name and folder path.
Bucket ARN vs. object ARNBucket-level actions like
ListBucket use the bucket ARN (arn:aws:s3:::your-bucket-name). Object-level actions like GetObject and PutObject use the object ARN (arn:aws:s3:::your-bucket-name/moengage/*).- Imports
- Exports
MoEngage needs read access to list and fetch your files.The
s3:prefix condition is optional. It restricts ListBucket to the moengage/ folder. Remove it to allow listing the whole bucket.Step 3: Connect Amazon S3 on the App Marketplace
To connect your S3 bucket in the MoEngage dashboard:- On the left navigation menu in the MoEngage dashboard, click App marketplace.
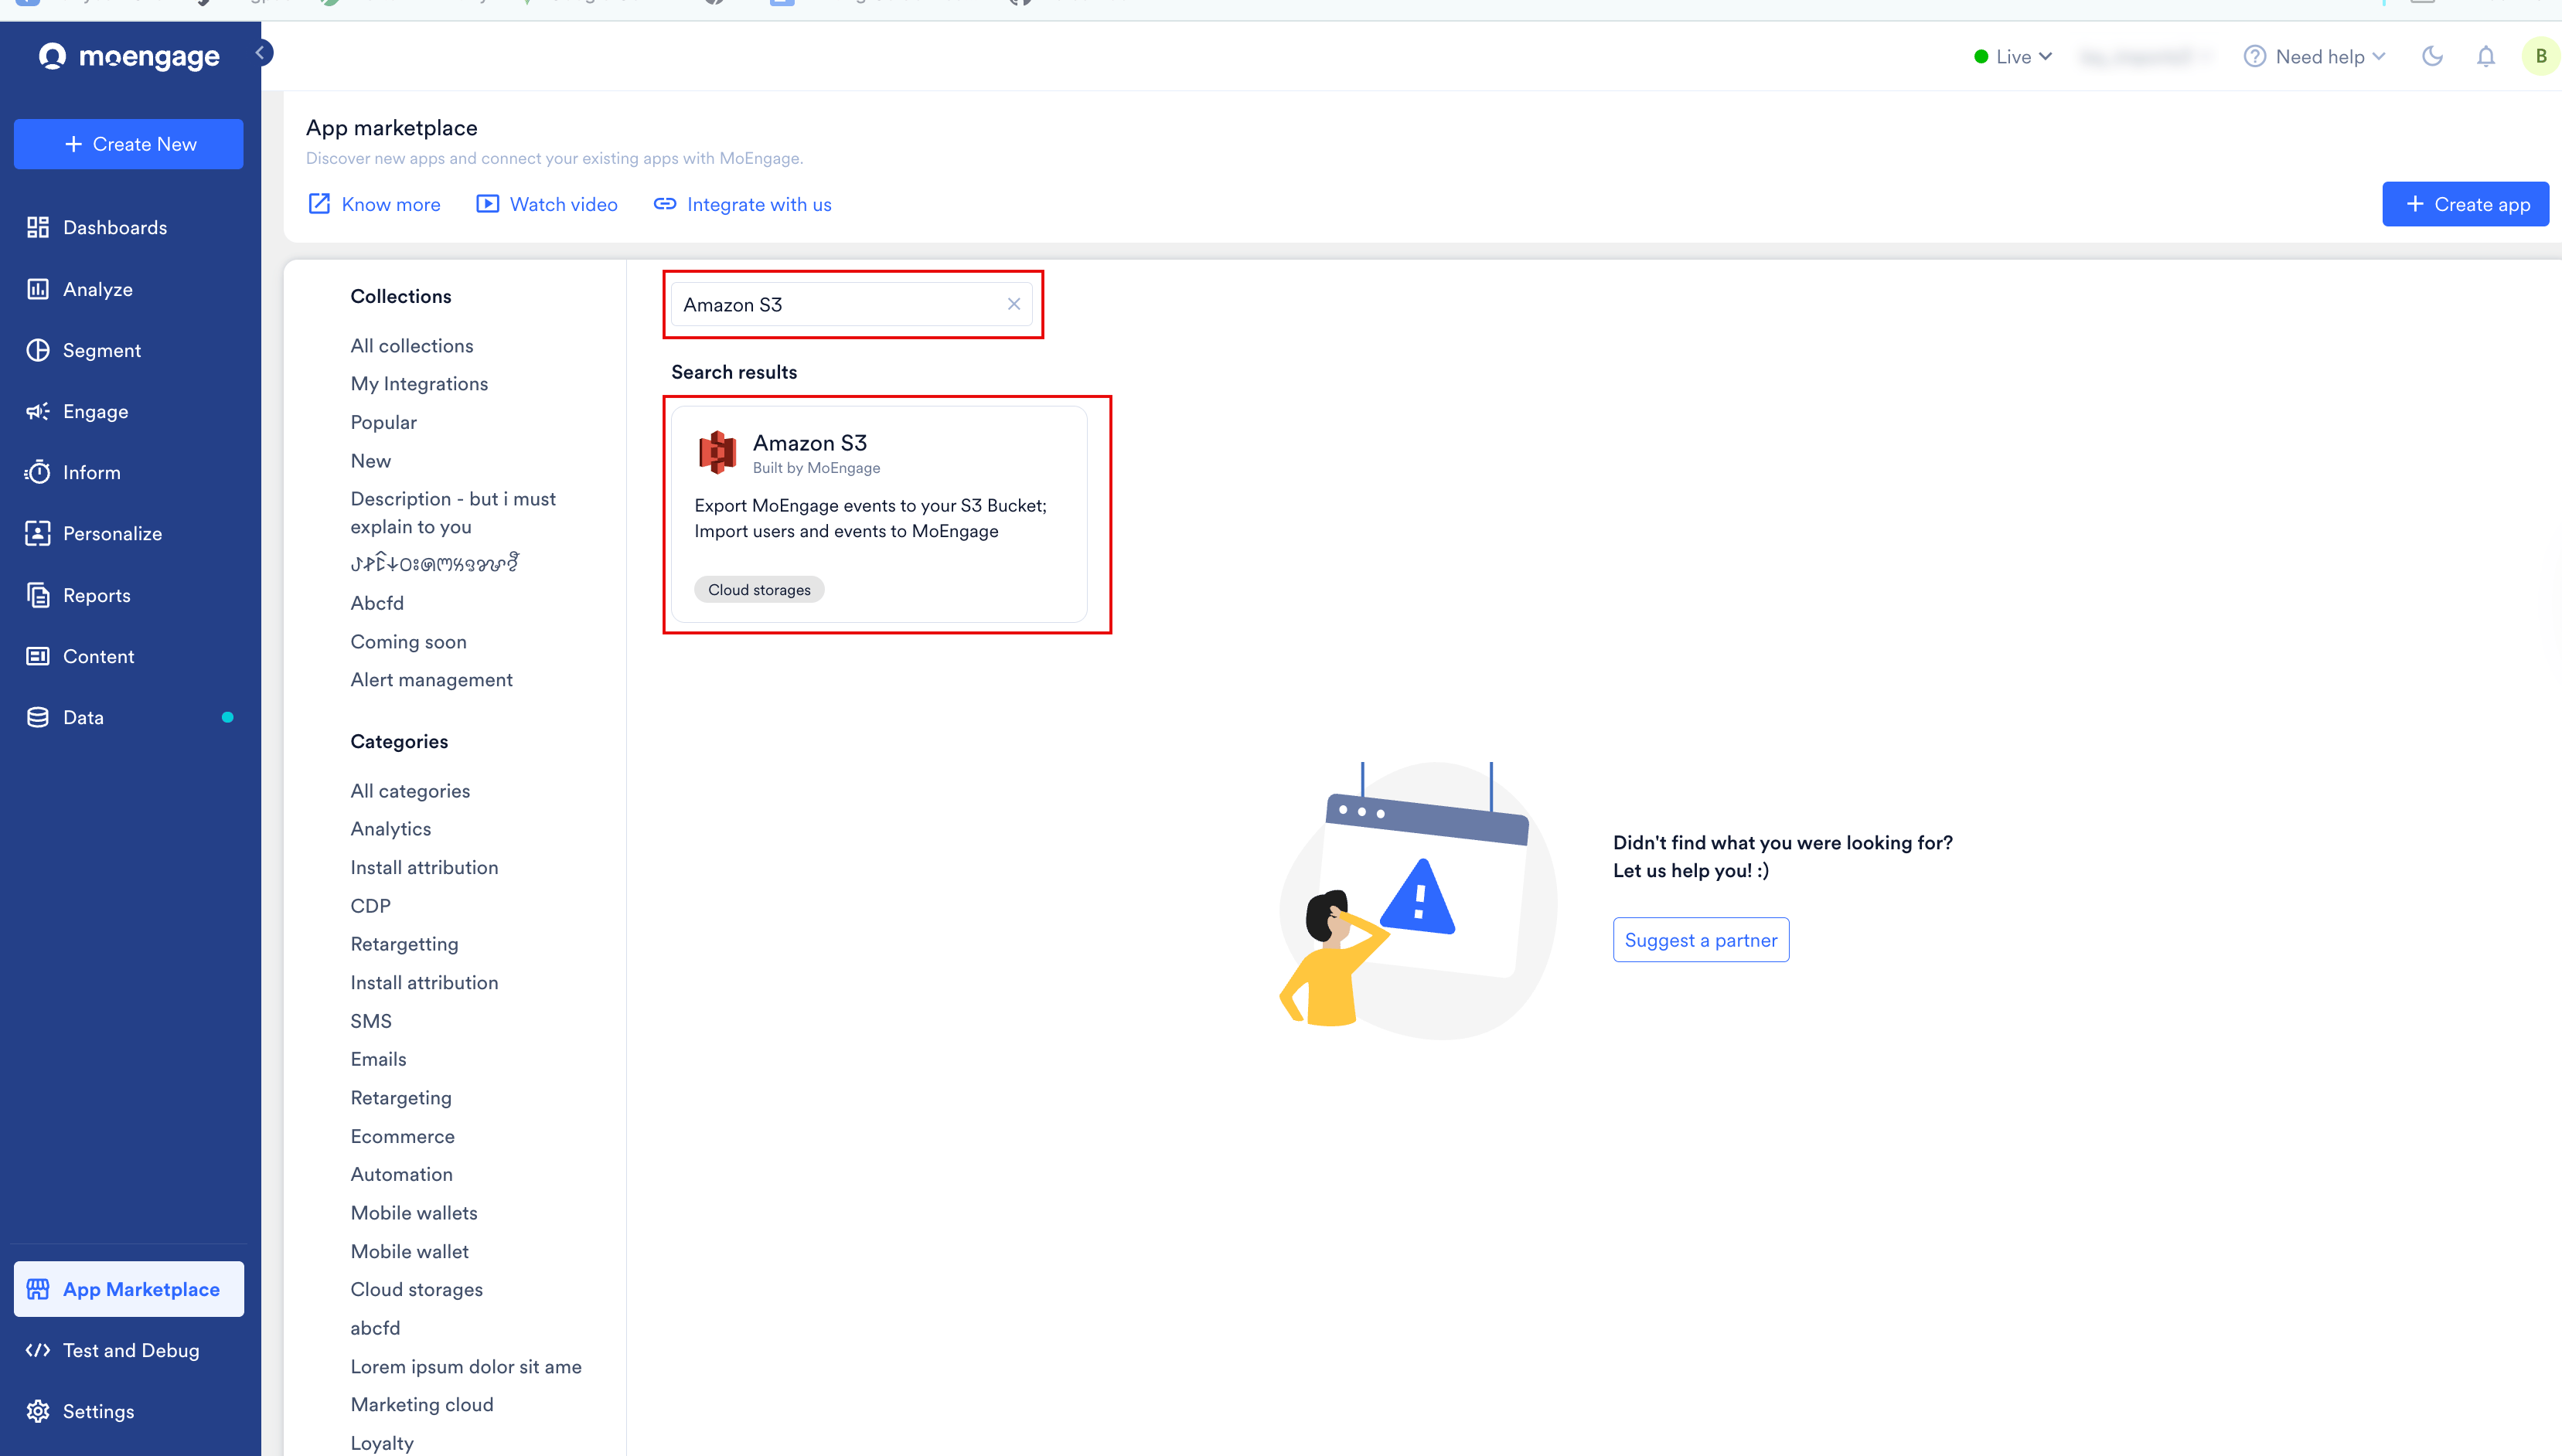
- On the App Marketplace page, search for Amazon S3.
- Click the Amazon S3 tile.
- On the Amazon S3 page, go to the Integrate tab and click +Add Connection.
- In the S3 connections section, enter the following settings:
- Click Test to validate your credentials, and then click Connect to activate the Amazon S3 integration.
 Configuration changes can take up to 15 minutes to propagate to your active campaigns and connections.
Import Users and Events
To configure user and event data imports using this connection, see the S3 Data Imports Guide.Export Events
Exporting data from MoEngage to Amazon S3 uses MoEngage Streams, which is a paid add-on. To check what’s available for your plan, refer to Plans and Pricing. To enable it for your account, contact your MoEngage Customer Success Manager (CSM) or the Support team.