Introduction
Twilio is a customer engagement platform used by hundreds of thousands of businesses and more than ten million developers worldwide to build unique, personalized customer experiences.Prerequisites You must have access to your Twilio dashboard.
Configure as SMS/MMS connector (Service Provider)
Twilio also supports MMS. You can follow the same procedure below to configure Twilio as your MMS sender.
- Navigate to Settings > Channel > SMS, MMS & RCS > Sender configuration.
- Click +Add Service Provider in the upper-right corner.
- Select Twilio in the Add Sender screen.
- When setting up your account for the first time, you must enter the authentication details. After you log in to your Twilio account, you can find the required details in your Twilio console.
- Username: This is the Twilio Account SID.
- Password: This is the Twilio Auth Token.
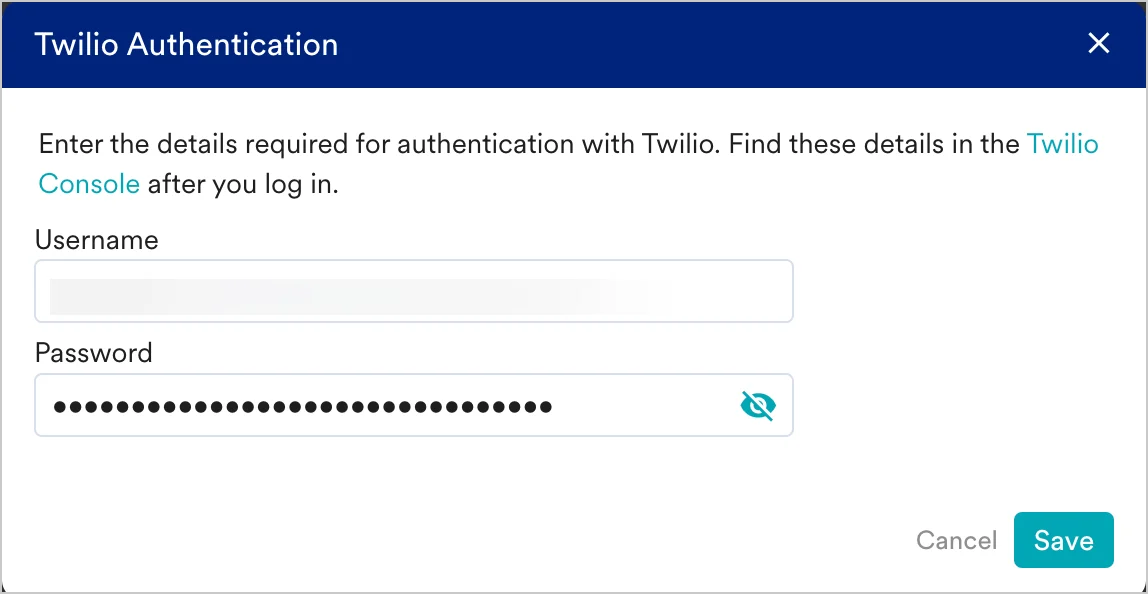
- After entering the Twilio Account SID and Auth token, click Save to save the authentication details.
Twilio authentication is at the account level, and you do not need to add this for each sender. However, if you need to change the authentication parameters, you can click the “Reauthenticate” link next to Twilio and update the settings.
- Add the following details in the Sender Details screen.
| Field | Description |
|---|---|
| Mark as default | This toggle will be disabled during sender creation. The first sender to be created in your MoEngage account will be marked as the default sender for your SMS campaigns. You can change the default sender by following the steps outlined in Marking a sender as default. |
| This sender supports MMS | Select this checkbox to configure Twilio as an MMS sender. |
| Sender name | This field identifies the readable sender name that can be used while creating a campaign or alert. |
| Sender type | The sender type can be one of the following: * Short Code * Long Code * Messaging Service * Alphanumeric Sender ID Select the appropriate sender type. |
| Sender ID | This is the number from which SMS will be sent to your users. Ensure that you add the corresponding number for the type you selected. For more information, refer to ShortCodes, LongCodes, and MessagingServices.Note : When the Sender type is Messaging Service , enter the Messaging Service SID in the Sender ID field. |
| Mobile Originated (MO) callback URL | This callback URL depends on the data center (DC) to which your workspace belongs. The following are the callback URLs:
|
| SMS unsubscribe text | The input text provided in this field appears when you select the SMS opt-out instruction checkbox while creating content for your SMS campaign. The SMS opt-out instruction enables you to include a text in the created SMS campaign that allows your customers to opt out of receiving further SMS messages. Note that this field is only available when you enable the Manage keyword based responses toggle under Keyword management. |
- Send a test SMS to verify your configuration.
- Click Save to save the Sender Configuration.
- You can also check your account balance by clicking Check balance.
Delivery Callback
For both long and short codes, MoEngage automatically tracks delivery receipts by passing the delivery callback URL in the API call to Twilio. You don’t need to perform any additional configuration to track SMS delivery. For Messaging Services, you need to add the Delivery Callback URL in the Twilio dashboard for each messaging service. To do this:- Log in to your Twilio Dashboard.
- Go to Messaging > Services.
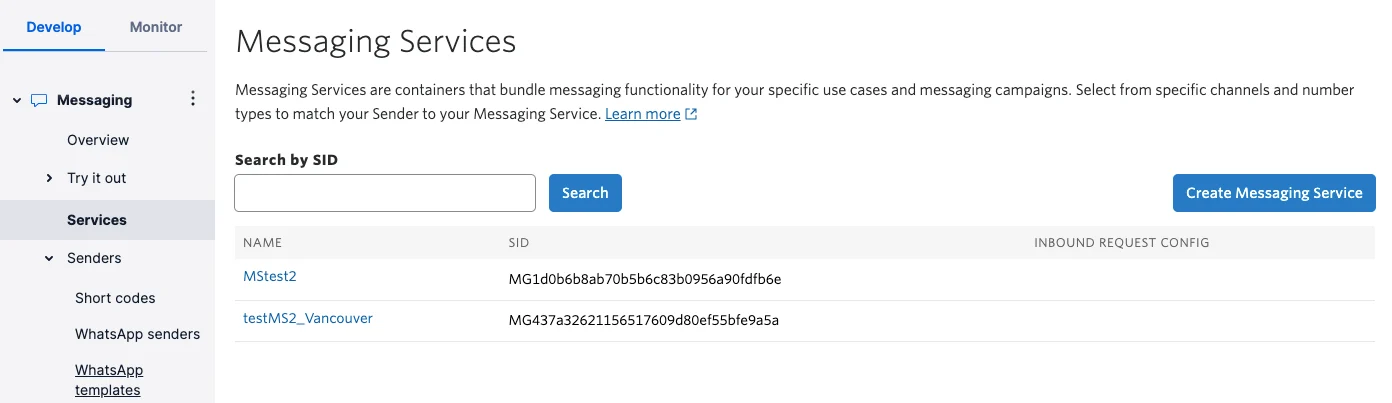
- Select a Messaging service. You will see a different menu on the left panel.
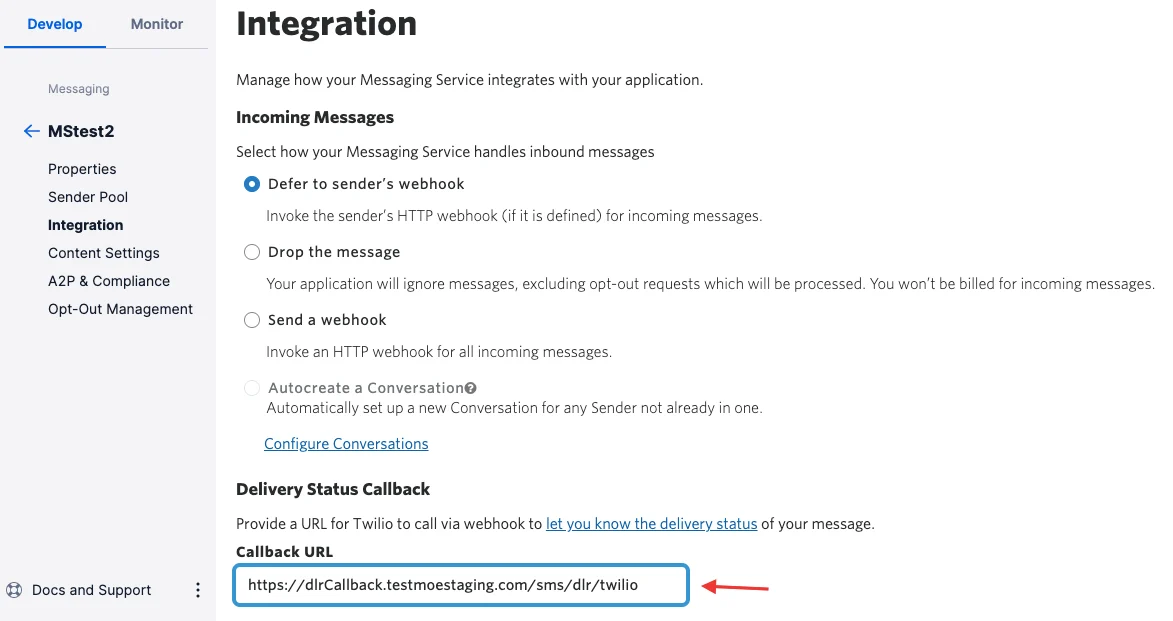
- Click the Integration tab under the Messaging service name. Scroll to Delivery Status Callback and enter the Callback URL - https://api-01.moengage.com/sms/dlr/twilio.
Configure Content Settings
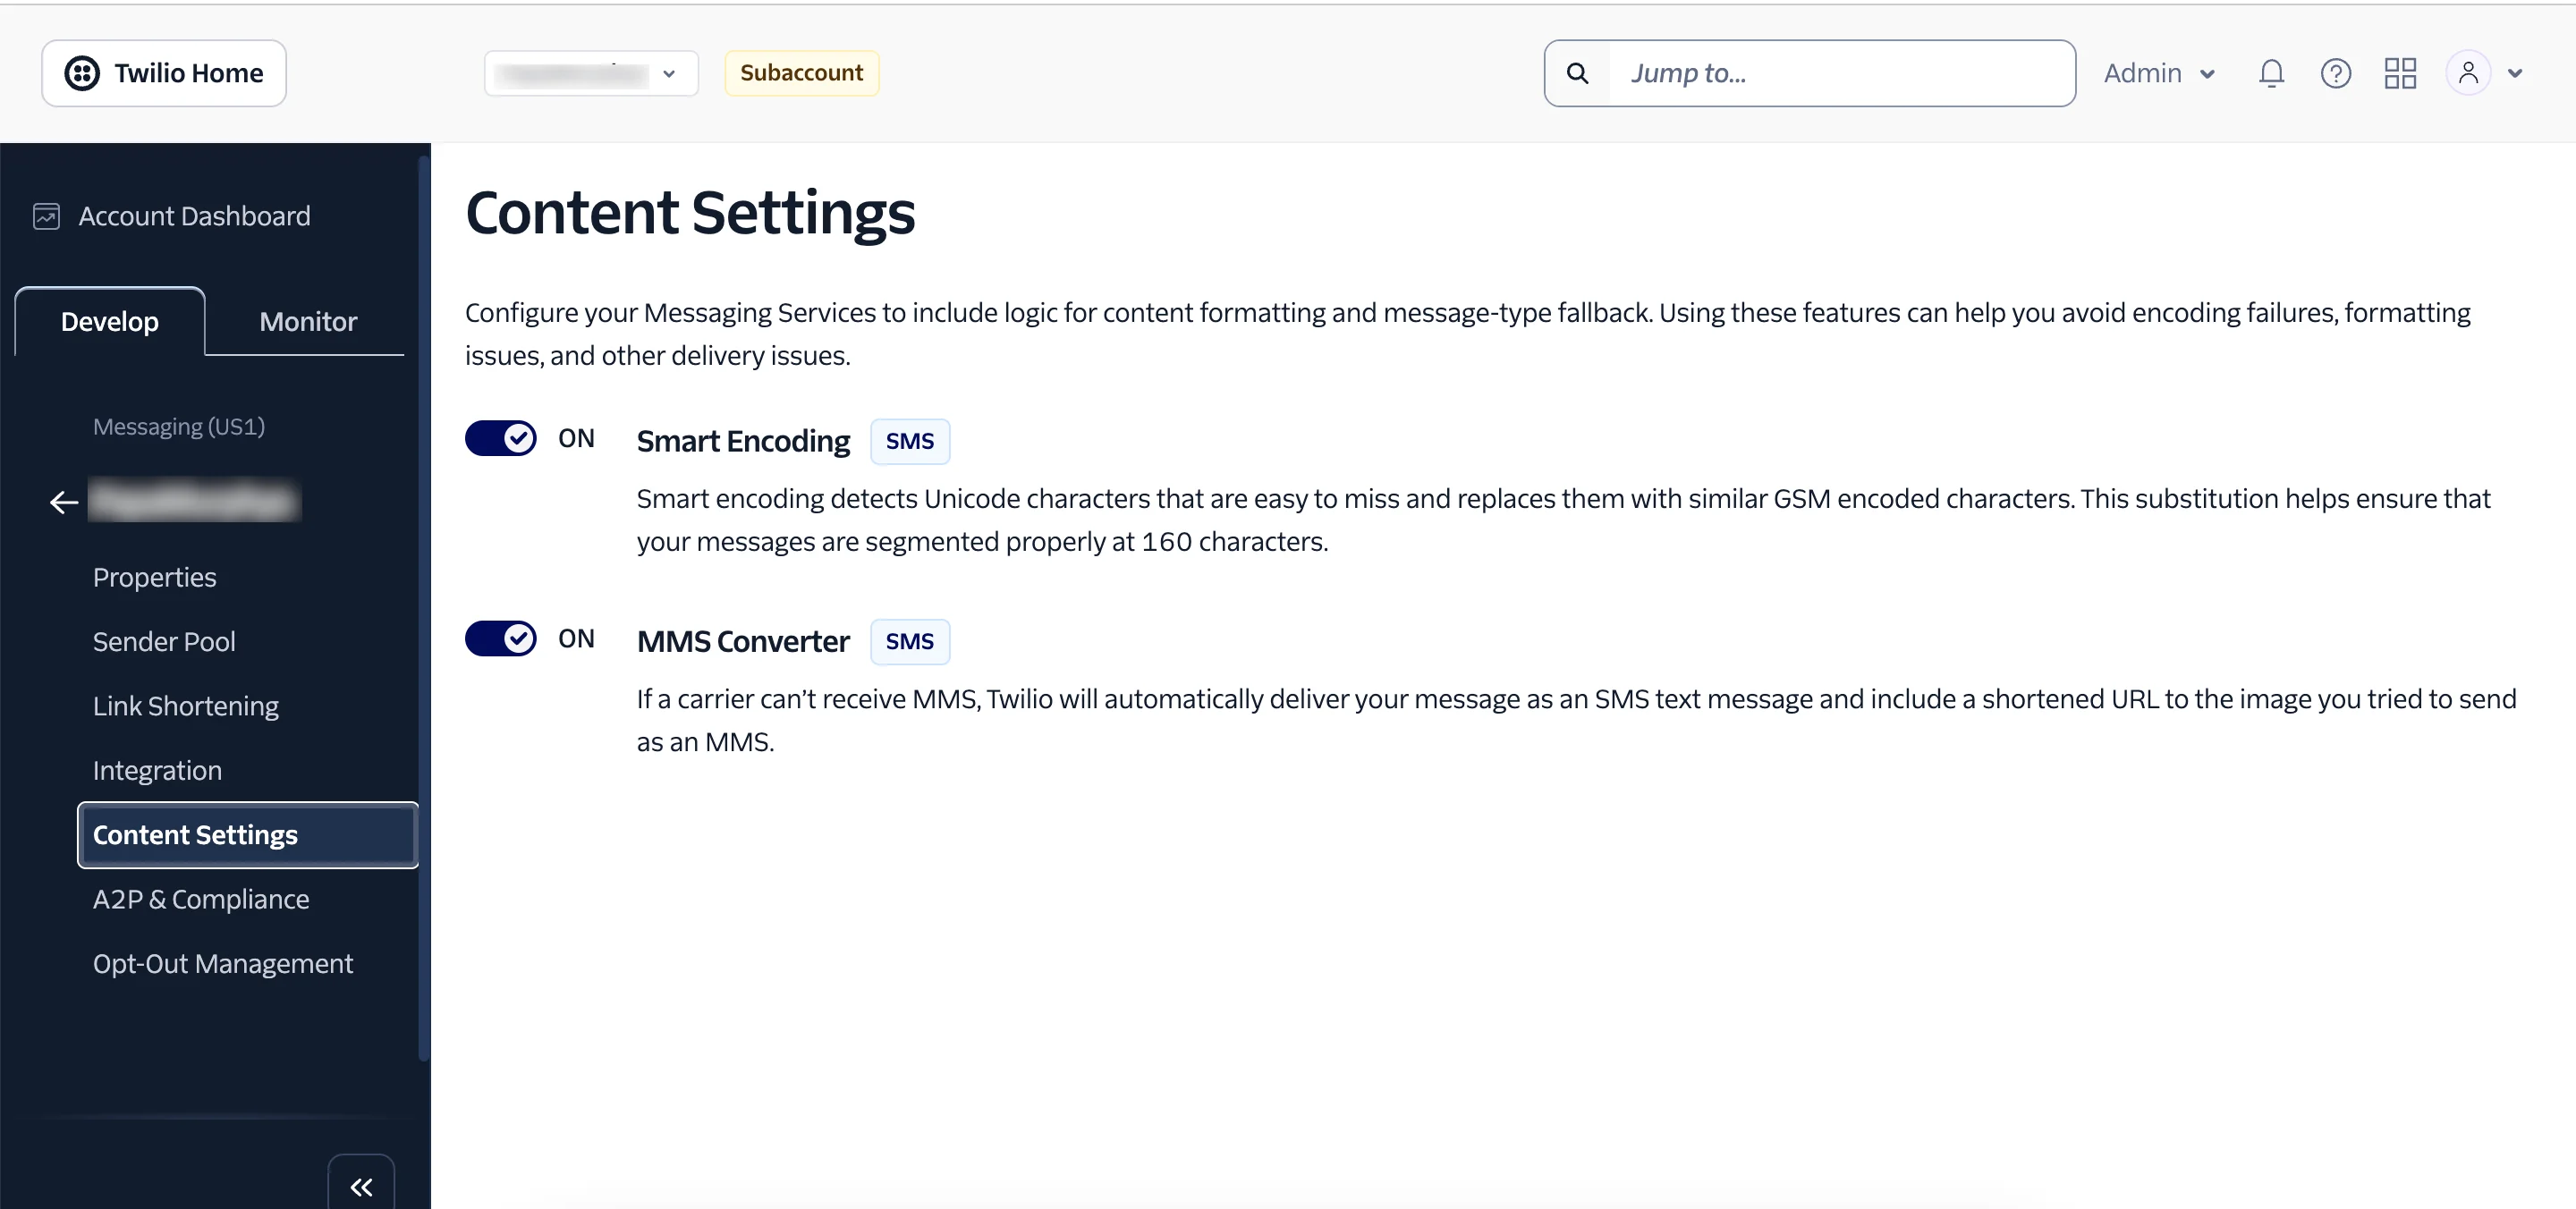
When configuring Twilio as your MMS sender, you must enable the MMS Converter in the Twilio dashboard. This allows you to send outbound MMS messages to destinations that don’t support the format. For these messages, the MMS Converter replaces the attached media with a short URL in the message body that links to the file. Perform the following steps to enable this setting:- Log in to the Twilio console.
- Navigate to the messaging service that needs to be configured, and click Content Settings.
- Turn on the MMS Converter toggle.
Configure Keyword Management
This section describes how to configure keyword management.Changes in MoEngage Settings
To configure keyword management, you must enter the following two fields in the Sender Details screen of the MoEngage dashboard. These fields appear only when you enable the Manage keyword-based responses toggle under Keyword management.
- Mobile Originated (MO) callback URL: This callback URL depends on the DC you belong to. The following are the callback URLs:
- For DC 01 - https://api-01.moengage.com/v1/campaigns/outbound/sms/callbacks/mo/twilio
- For DC 02 - https://api-02.moengage.com/v1/campaigns/outbound/sms/callbacks/mo/twilio
- For DC 03 - https://api-03.moengage.com/v1/campaigns/outbound/sms/callbacks/mo/twilio
- For DC 04 - https://api-04.moengage.com/v1/campaigns/outbound/sms/callbacks/mo/twilio
- SMS unsubscribe text: The SMS unsubscribe text allows you to include a text in the created SMS campaign that helps your customers opt out of further SMS messages. The input text provided in this field is displayed as an opt-out text when you select the SMS opt-out instruction checkbox while creating content for your SMS campaign.
Changes in Twilio Console
For any configured sender, perform the following steps to configure key management in the Twilio console:- Log in to the Twilio console.
- Navigate to the messaging service that needs to be configured, and click Integration.
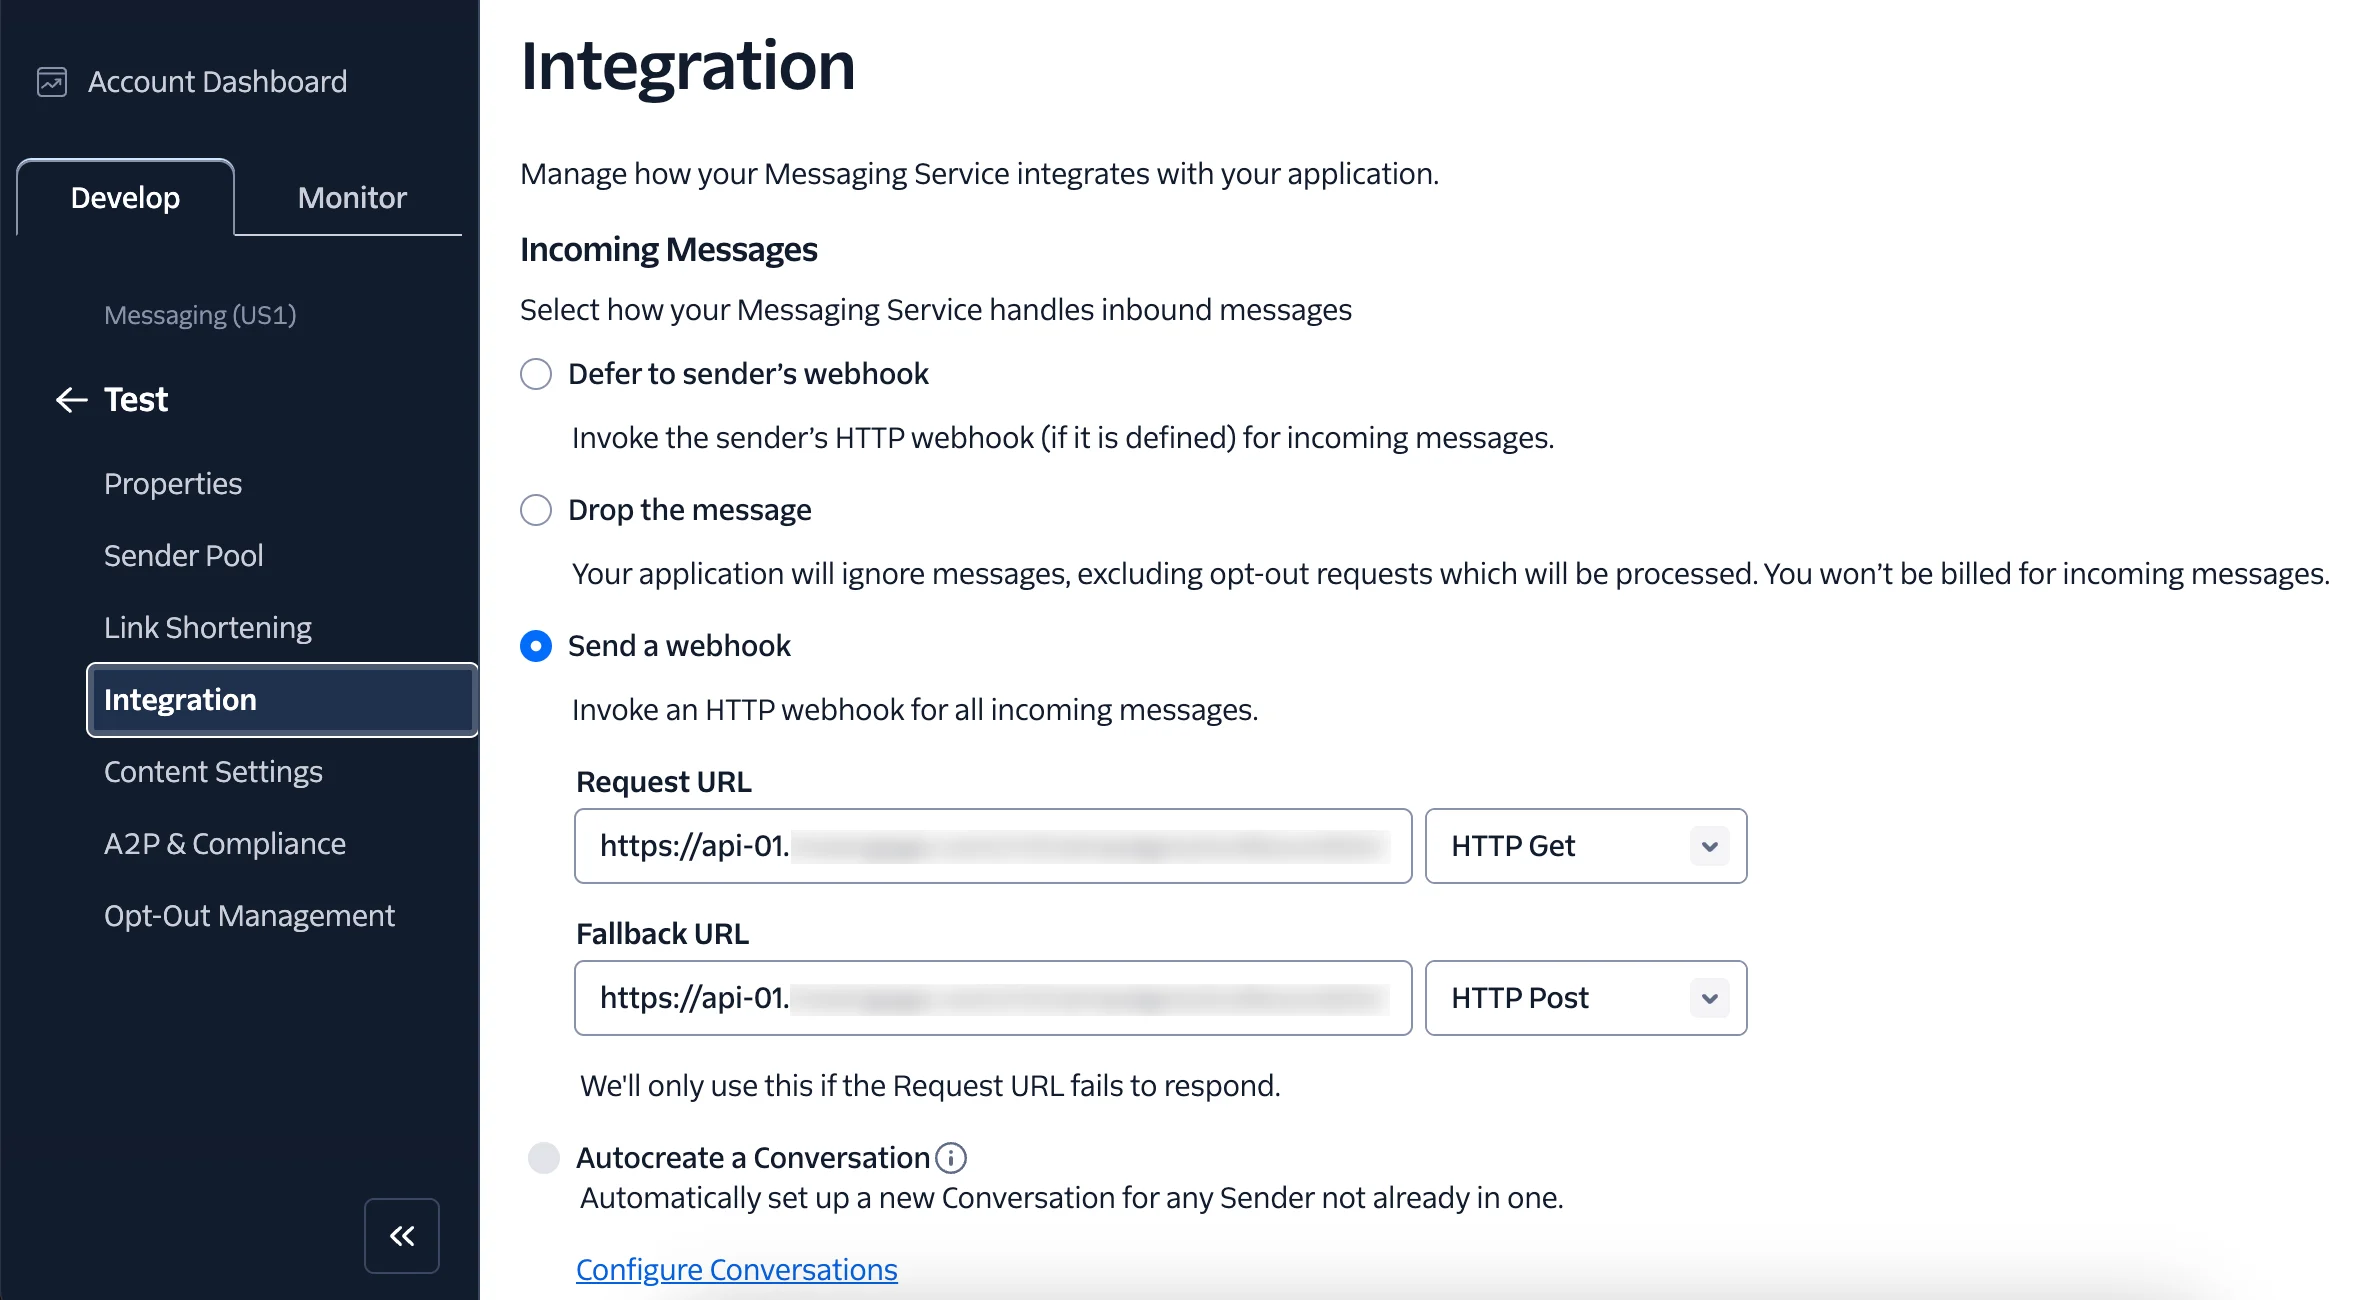
- Under Incoming Messages, select Send a webhook.
- In the Request URL field, enter the same callback URL you added in the Mobile Originated (MO) callback URL field of the MoEngage dashboard.
- Select the method as HTTP Get.
Next Steps
- Create an SMS campaign using the Getting Started for creating SMS campaign.
- Set the Frequency Capping for SMS.
- Set the Current Service Provider.