

PrerequisitesBasic Recommendations must be enabled for your account before you use catalog sync for personalization. Accounts on the Enterprise plan have Basic Recommendations enabled by default. If you use a different plan, you can contact your Customer Success Manager or the MoEngage Support team to enable this feature.
Catalog Sync Operation
MoEngage syncs your Shopify product catalog by fetching data from your store in real time. Once synced, your catalog serves as a data source for product recommendation blocks, dynamic content in messages, and segmentation filters. Catalog sync is not enabled by default. To activate it, navigate to your Shopify integration settings in MoEngage and turn the Catalog Sync toggle on. Note that the toggle requires a one-time setup step on the MoEngage side before it takes effect.Configure Catalog Sync
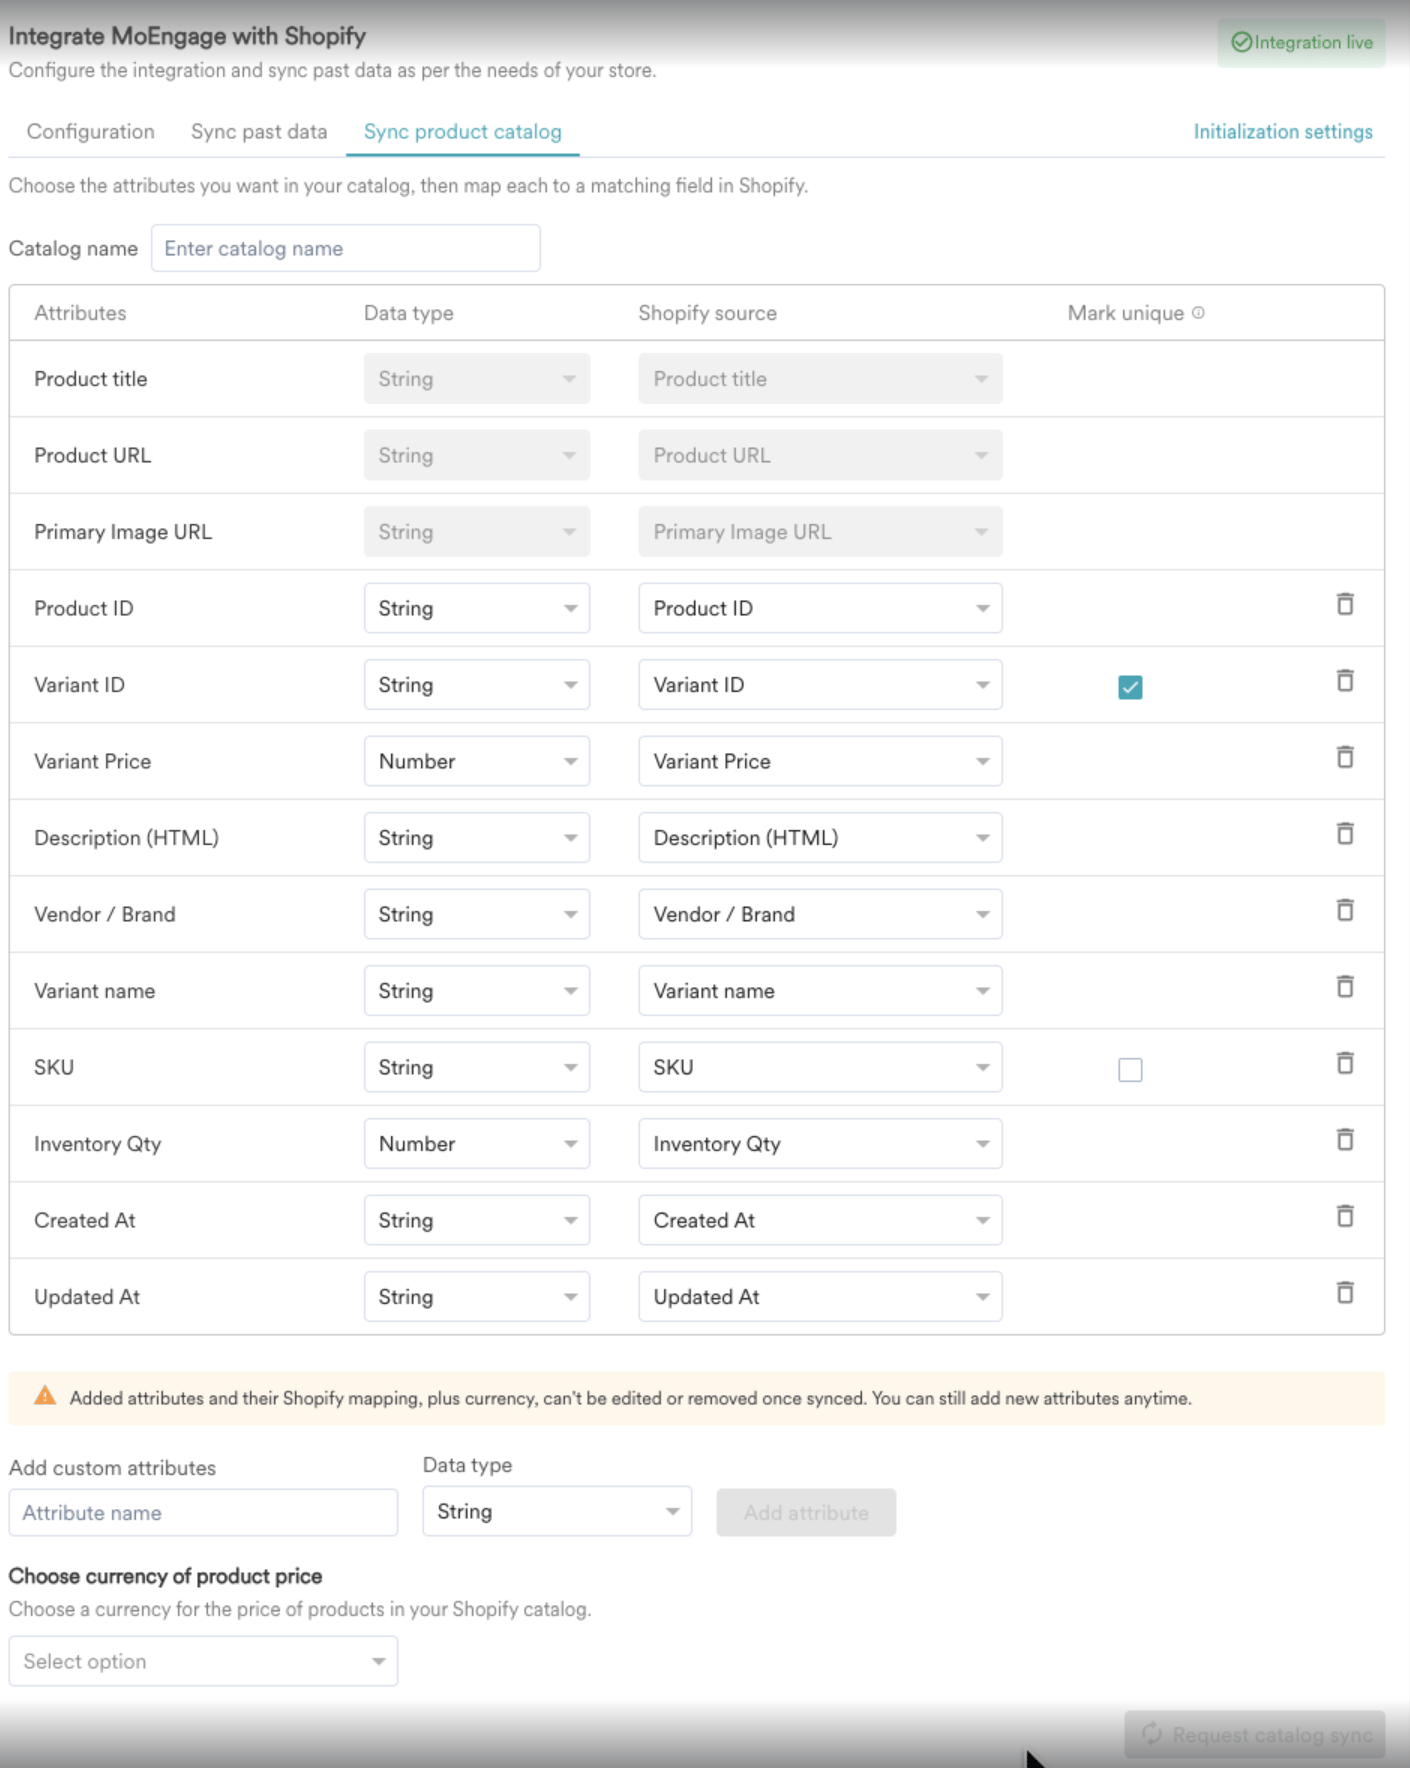
Before you request the first sync, define your catalog schema. You name the catalog, map each attribute to a Shopify source, choose the attribute that identifies an item uniquely, and select the currency for product prices. To configure and start the catalog sync, perform the following steps:- In your Shopify admin, navigate to Apps > MoEngage.
- Click the Sync product catalog tab.
- In Catalog name, enter a name for your catalog.
- For each attribute in the table, select a Data type and a Shopify source.
- Select the Mark unique checkbox for the attribute that uniquely identifies each item in your catalog.
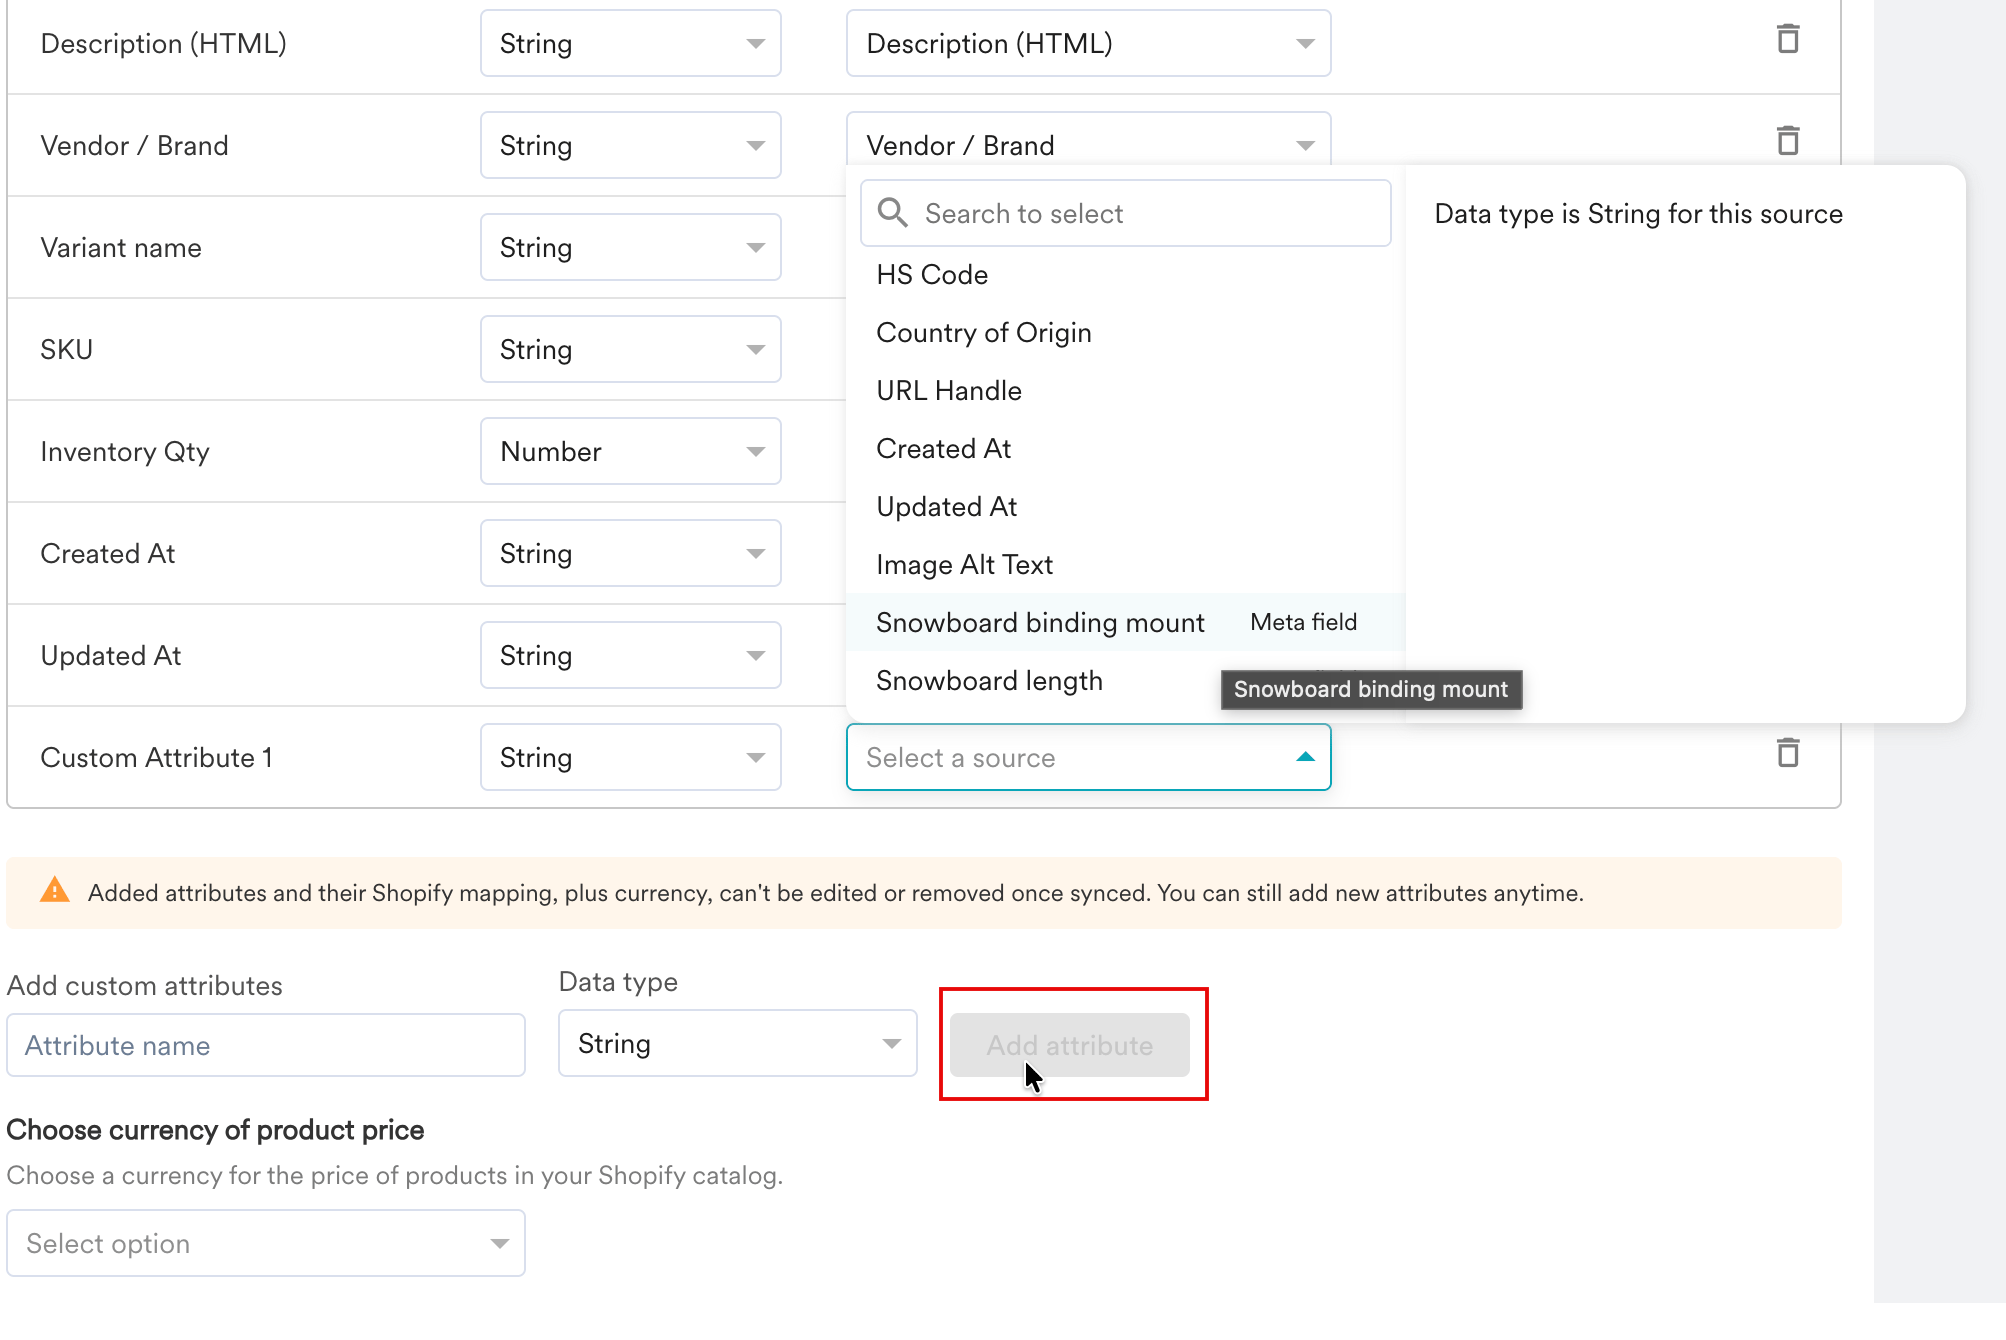
- To map an attribute that the table does not already list, enter a name under Add custom attributes, select a Data type, and click Add attribute.
- Under Choose currency of product price, select the currency your product prices use.
- Click Request catalog sync.
- In the Confirm catalog sync dialog, click Confirm.
Choose the Unique Identifier
Every catalog needs one attribute that identifies each item uniquely. Select the Mark unique checkbox on that attribute’s row. You can mark Variant ID, SKU, or a custom attribute as the unique identifier. You cannot change the unique identifier after the first sync completes, so choose an attribute whose value is different for every item. If two or more items share the same value, MoEngage treats them as the same item and keeps only the most recent values it receives for that identifier, which means the earlier item is overwritten in your catalog.Configuration You Cannot Change After the First Sync
MoEngage fixes part of your schema once the first sync completes successfully, so review your mapping before you request the sync. After the first successful sync, you cannot rename or delete the attributes already in the table, change their data types, change their Shopify sources, or change the catalog currency. You can add new custom attributes at any time, and MoEngage includes them in the next sync.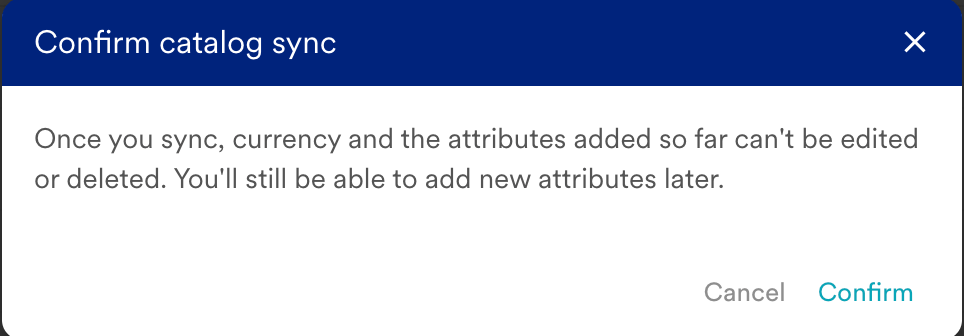
Sync Frequency
After the first sync completes, MoEngage keeps your catalog up to date in real time. When a product changes in Shopify, that change reflects in your MoEngage catalog without waiting for a scheduled refresh, so campaigns that rely on catalog attributes such as product price, image, or availability use current values.Real-time catalog sync is in early access.
Synced Attributes
MoEngage prefills the mapping table with the following product attributes. Before the first sync, you can change the data type or Shopify source of any of them, remove the ones you do not need, and add your own.Excluded Data
The following data does not sync in the default catalog sync:- Third-party app fields: Only native Shopify product fields and your Shopify metafields are available as sources.
Essential Considerations for Sync and Personalization
To use your catalog data effectively, review the following information:Catalog Enrichment for Webhooks
Catalog Enrichment for Webhooks
Webhook events, such as Shopify - Order Placed and Shopify - Add to Cart, do not include product or image URLs in their payloads. To use these attributes in campaign personalization, use catalog enrichment at send time. MoEngage looks up the relevant product in your synced catalog and attaches the attributes to the message. For more information, refer here.
Data Consistency Requirements
Data Consistency Requirements
Field values must be consistent in type across your catalog for products to import correctly. For example, if the Variant Name field contains text strings for most products but numeric values for others, MoEngage skips the products with numeric values. You can review your Shopify data for inconsistent formats in the SKU, Price, and Variant Name fields before you sync.
Verify the Catalog Sync
To confirm the sync completes correctly, perform the following steps:- In your MoEngage dashboard, navigate to Content > Catalog and check the total product count.
- Compare this count to your active product count in Shopify (Shopify admin > Products, filtering for active, non-draft items).
- If the count is lower than expected, check your Shopify product data for fields with inconsistent values, particularly Variant Name.
- If products are still missing despite consistent data, contact support with your workspace ID and the approximate number of missing products.
Troubleshoot
To troubleshoot catalog issues, review the following table:InformationIf you have questions about your Shopify integration, read our FAQs.