This integration is part of the Salesforce CRM integration add-on. To check what’s available for your plan, refer to Plans and Pricing. To enable it for your account, contact your MoEngage Customer Success Manager (CSM) or the Support team.
Integration step
Use case
Install MoEngage app
Required for both Salesforce-to-MoEngage and MoEngage-to-Salesforce integrations.
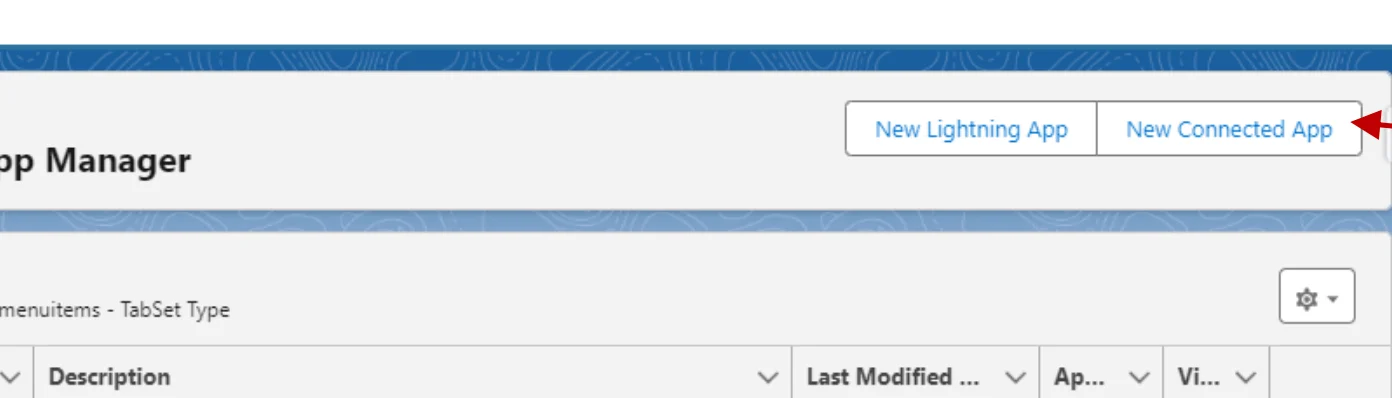
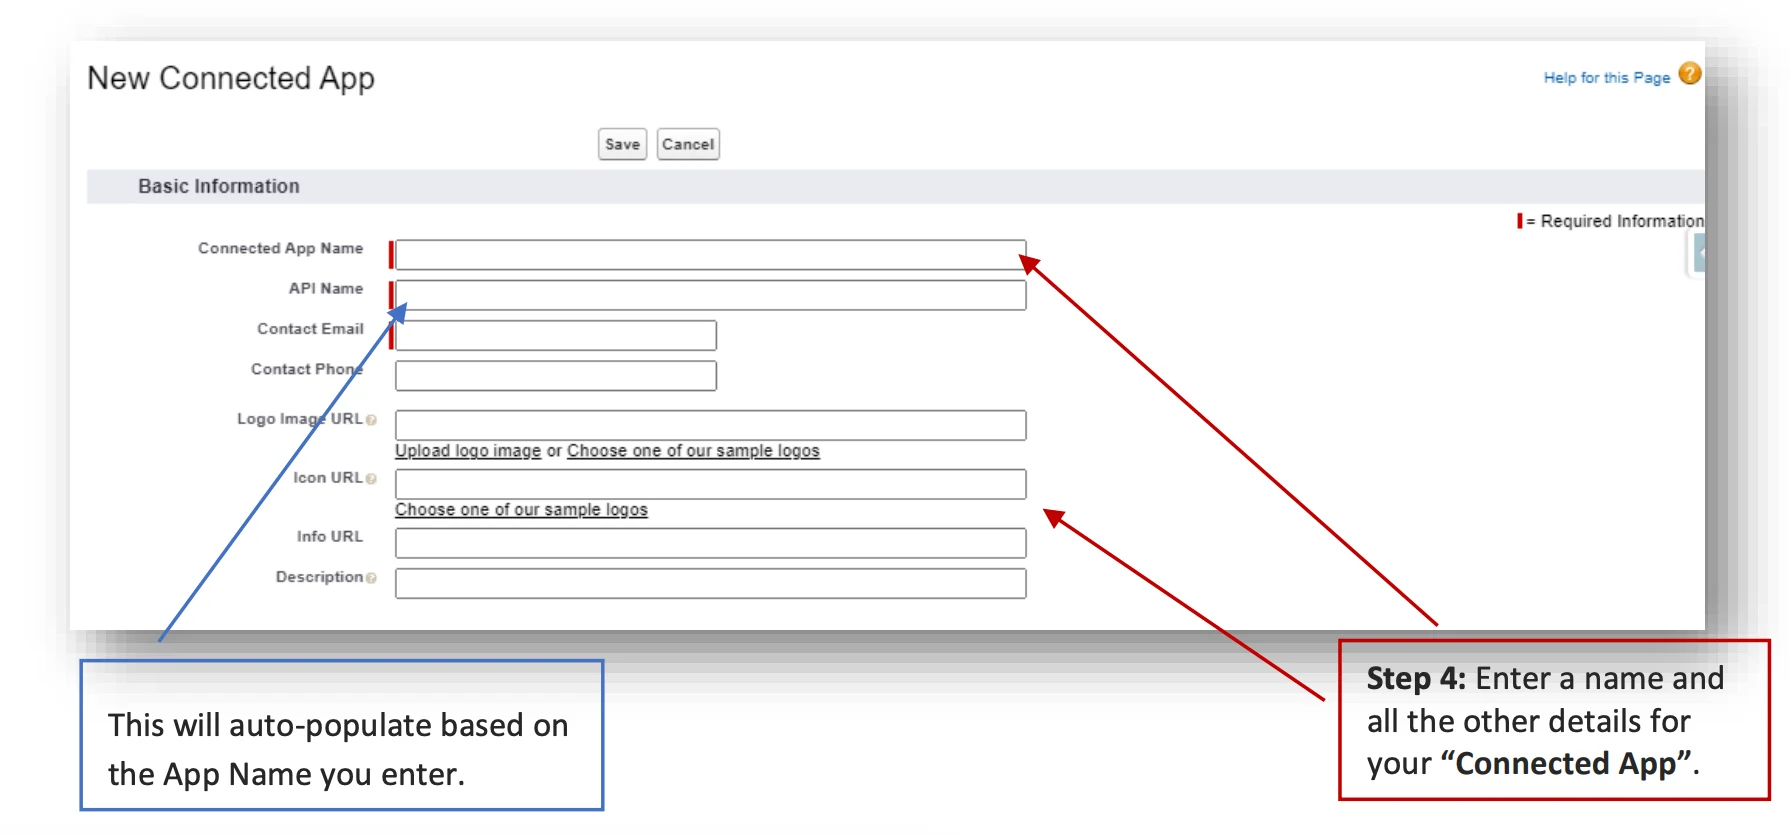
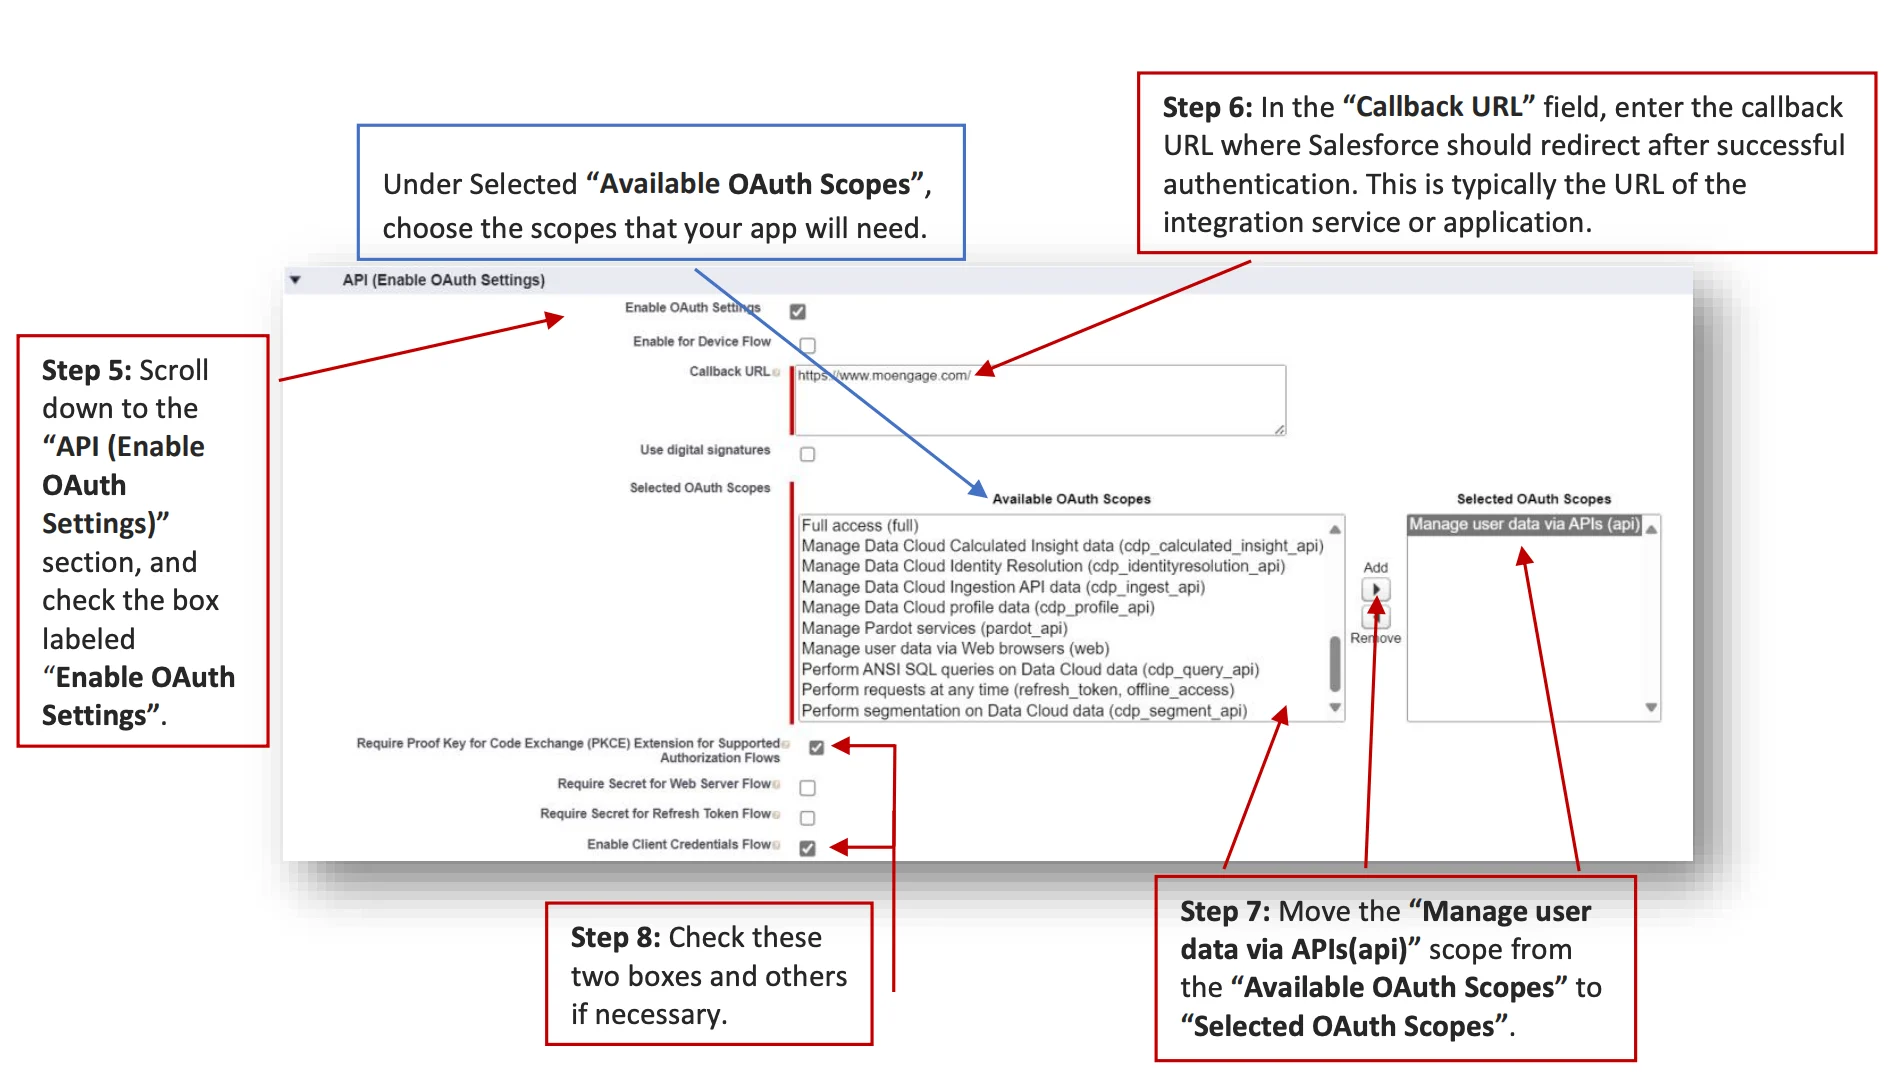
Create a connected app
Required only for MoEngage-to-Salesforce integration. Not needed for Salesforce-to-MoEngage data flow.
Open your web browser and go to the Salesforce AppExchange website.
2
Log in
If you haven’t already logged in, click Log In and enter your Salesforce credentials.
3
Search for MoEngage
In the search bar, type MoEngage and press Enter. Click the MoEngage app to open its details page.
4
Initiate the installation
Click Get It Now on the MoEngage app page.
5
Select Salesforce organization
Choose the appropriate Salesforce org (for example, Production). Then click Install in Production to proceed.
6
Confirm installation details
Review the installation details provided.
Agree to the terms and conditions by selecting the appropriate checkbox.
7
Complete the installation
Click Confirm and Install to begin the installation process.
8
Install in your organization
Select whether to install MoEngage for Admins only, All Users, or Specific Profiles. Depending on your option, you may need to grant your users the relevant MoEngage app permissions. Click Install.After clicking Install, approve remote site settings by selecting the checkboxes for the four API endpoints corresponding to the MoEngage data centers.
If you do not see MoEngage in the listed apps, contact your dedicated Customer Success Manager. They will share the app build separately.
The MoEngage app comes with the following permission sets.
Permission set
Permissions
MoEngage Admin Permission
Assign to users who will create and manage the syncs. No additional permissions are required for admin users. This permission provides access to:
Manage MoEngage Connections within Salesforce
Manage syncs and mappings
Access the Sync Queue and Use Manual Retry
Manage the Delete Processed Sync Scheduler
MoEngage User Permission
Assign to users who will interact with the synced objects (for example, Leads, Contacts) by creating or updating them. This permission provides access to:
Custom profile users: No need to assign any permission set.
Standard profile users: Assign the MoEngage User Permission permission set to users who create or update mapped object records.
Admin users: No permissions are needed for general access. Assign the MoEngage Admin Permission set to specific admins who require access to configuration settings.
Managing user permissions with custom views
We recommend creating a list view to manage permissions easily. From your Salesforce dashboard:
1
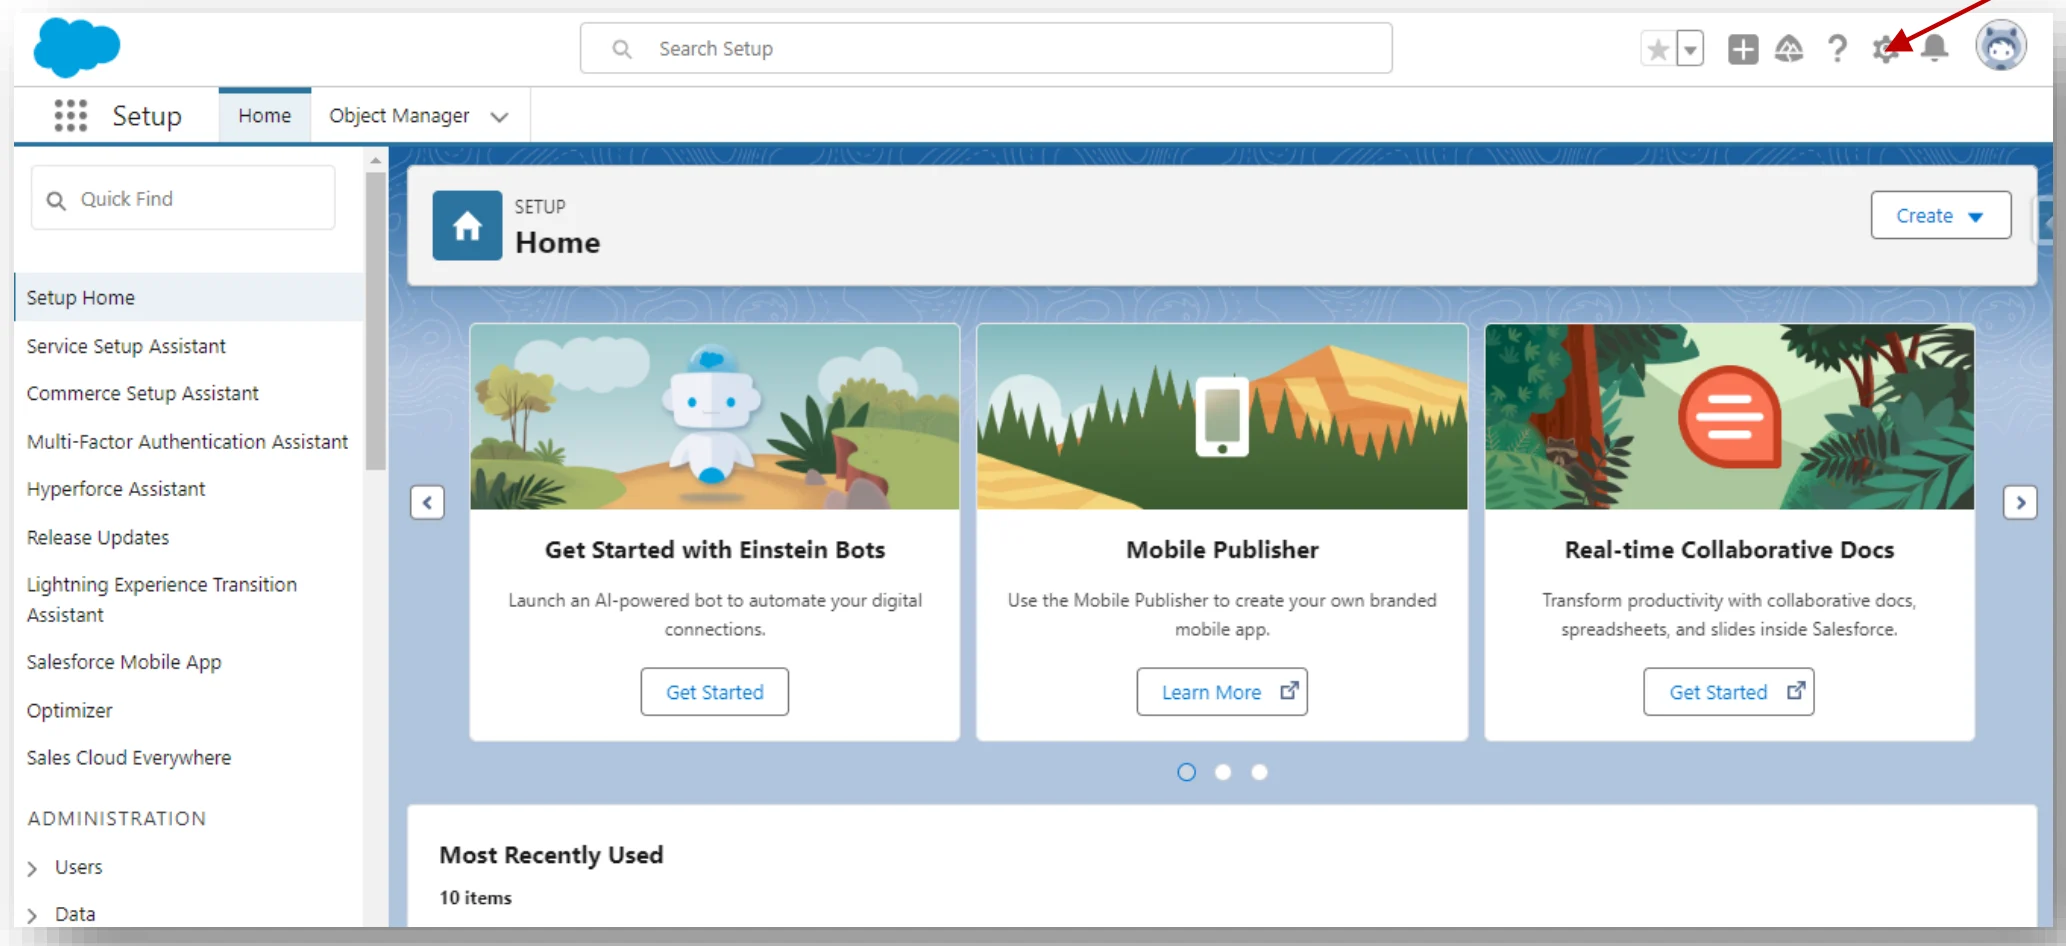
Open Setup
Click the gear icon in the top right corner and select Setup.
2
Find Users
In the Quick Find box, type Users and select Users.
3
Create a new view (optional)
Click Create New View only if no relevant list view exists; otherwise, use an existing view.
4
Configure the view
Enter a Label for the new list view.
(Optional) Adjust the Filter Criteria to target specific users.
Select the Available Fields to display in the list view.
Choose your preferred Validity option, then click Save to create the list view.
Next, to assign MoEngage app permissions:
1
Open Setup
Click the gear icon in the top right corner and select Setup.
2
Open Permission Sets
In the Quick Find box, type Permission Sets and select Permission Sets.
3
Choose the permission set
Click MoEngage Admin Permission or MoEngage User Permission.
4
Manage assignments
Click Manage Assignments, then Add Assignments.
5
Choose the list view
Choose the list view you created earlier to display relevant users.
6
Assign permissions
Select the checkbox at the start of each row for users to assign the permission set, then click Next. Review your selection and click Assign to complete the process.
Creates (or verifies) the required configuration custom-setting records.
Schedules the Delete Processed Syncs job.
If created during install, the job is owned by the package installer. Reschedule it under an admin user (with the MoEngage Admin Permission set assigned) by going to Setup > Scheduled Jobs > Delete Processed Syncs > Manage > Reschedule Job.
If a job with the same name already exists, the system does not duplicate it.
When a full or partial copy sandbox is created from a production environment with an active MoEngage sync, the MoEngage package is automatically installed and the sync is enabled by default.
To prevent syncing in the sandbox environment, deactivate all connections associated with the MoEngage package.
If a sandbox template is used and MoEngage package objects are deselected for sync during creation:
The package connections are not copied to the sandbox.
In Developer and Developer Pro sandboxes, no data of standard or custom objects is copied over, so no sync data is copied to the sandbox.
Only custom settings data (connections and authentication information) is copied. You will see connections in these sandboxes, but no mapping records are present.
These sandbox types do not require deactivation. We still recommend deactivating connections before creating them.
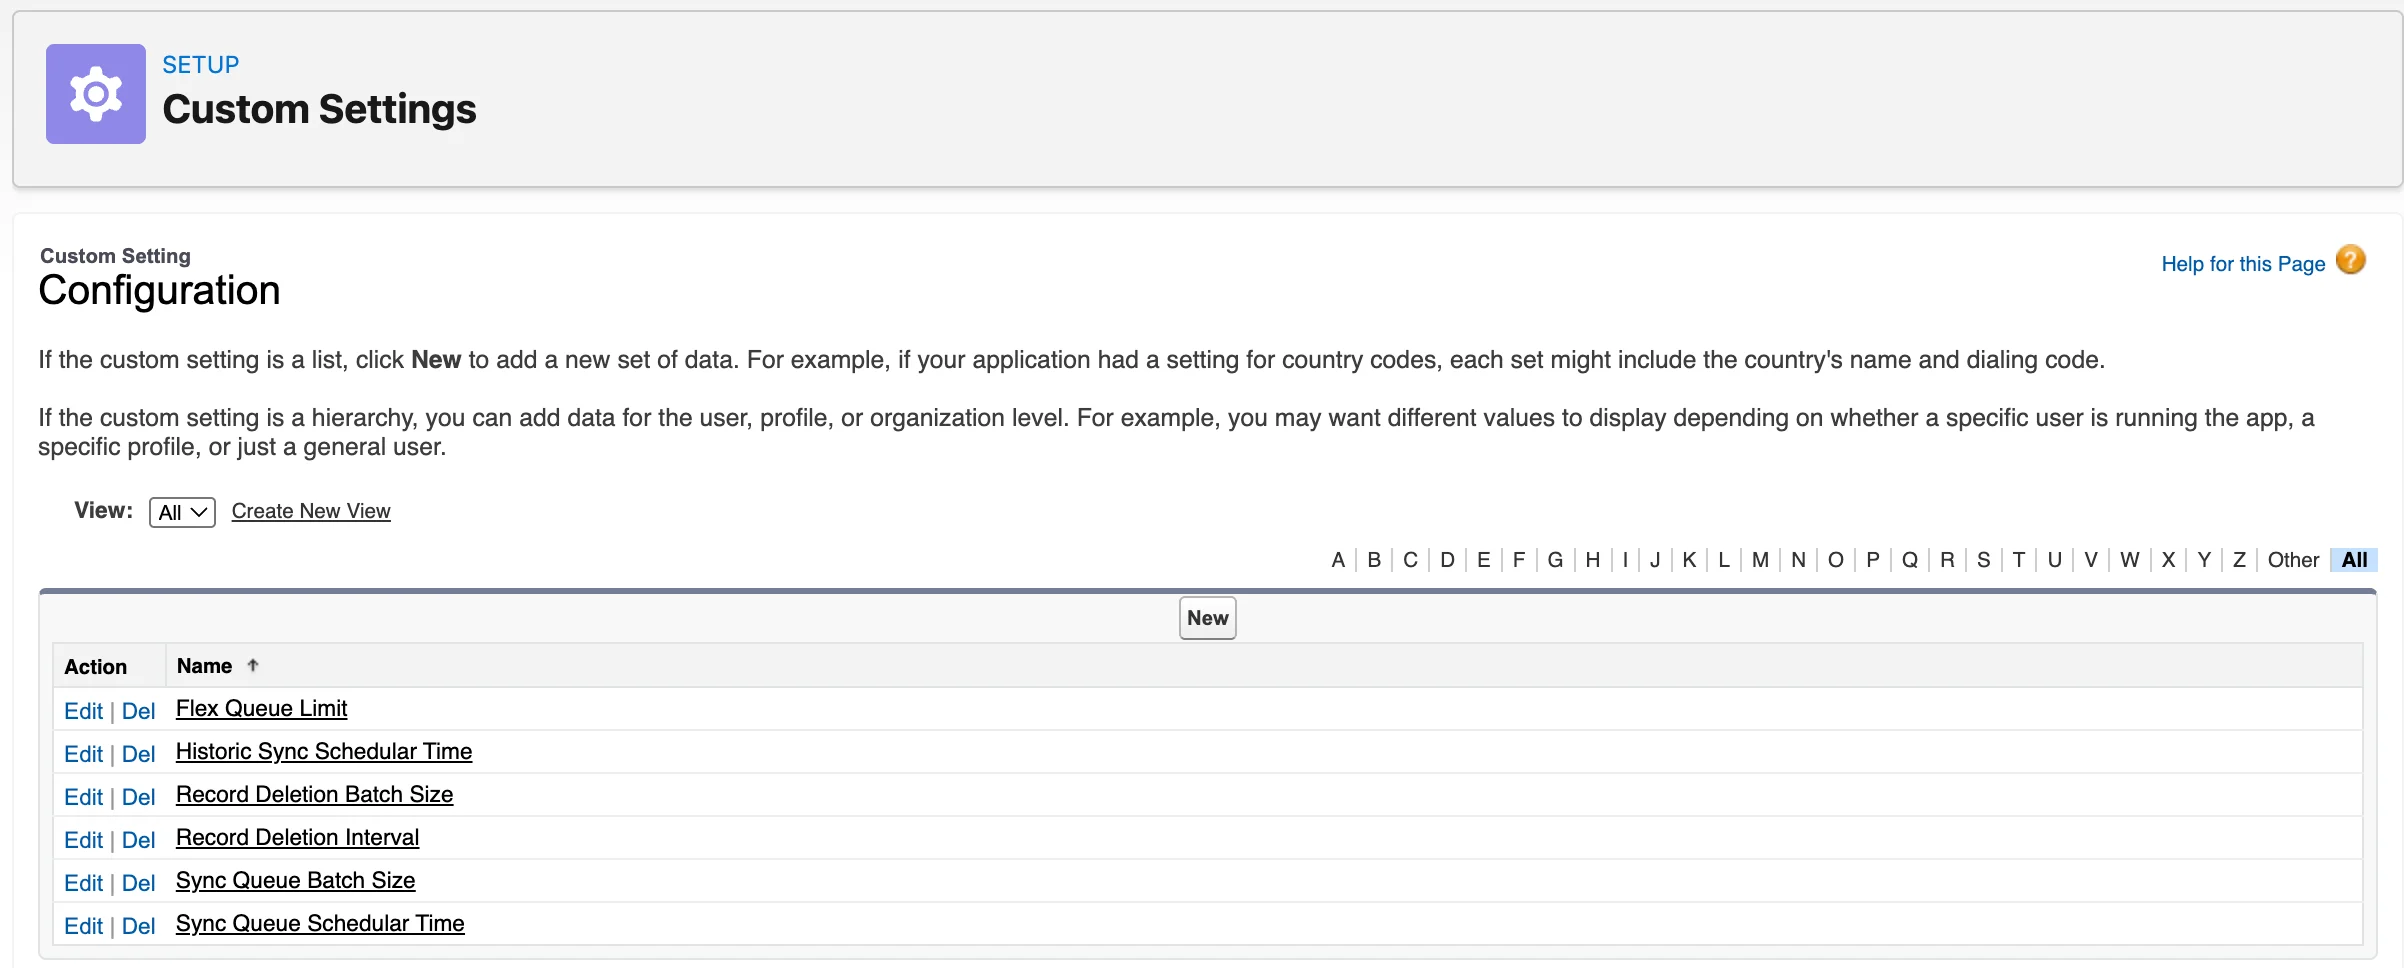
When the app is installed, a public configuration custom setting is created with the following default values. Administrators can adjust these values at any time.To access the custom settings:
1
Open Setup
Go to Setup and, in the Quick Find search bar, type Custom Settings.
2
Open Custom Settings
Click Custom Settings from the results.
3
Open Configuration
Click Configuration. You will see a list/detail view with six rows representing the settings.
Setting name
Default
Purpose
Valid values
Flex Queue Limit
50
New sync batches are submitted only when the org’s Flex Queue has fewer than this number of jobs.
Positive whole number less than 100. No negatives or decimals.
Historic Sync Scheduler Time (minutes)
5
If the Flex Queue is full, Historical Sync jobs are rescheduled after this delay.
Positive whole numbers. No negatives or decimals.
Record Deletion Batch Size
2000
Batch size used by the cleanup job.
Positive whole numbers. No negatives or decimals.
Record Deletion Interval (days)
7
How long to keep successful Sync Queue records (and related Exceptions) before cleanup.
Positive whole numbers. No negatives or decimals.
Sync Queue Batch Size
20
Default batch size for real-time processing.
Positive whole numbers. No negatives or decimals.
Sync Queue Scheduler Time (minutes)
5
If the Flex Queue is full, real-time processing jobs are rescheduled after this delay.
Positive whole numbers. No negatives or decimals.
These values are created automatically by post-install scripts. Admins can review and adjust them at any time to align with org-specific requirements.
Sending data from MoEngage to Salesforce is part of the Streams add-on. To check what’s available for your plan, refer to Plans and Pricing. To enable it for your account, contact your MoEngage Customer Success Manager (CSM) or the Support team.
Skip these steps if you only want to send data from Salesforce to MoEngage. They are required only for the bi-directional integration — that is, sending event data from MoEngage back to Salesforce.
Step 3: Fetch the consumer key and consumer secret
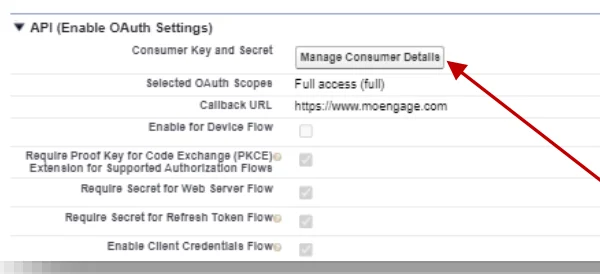
Once the app is created, you can access the Consumer Key and Consumer Secret in the API (Enable OAuth Settings) section. These are essential for setting up the data flow from MoEngage to Salesforce.
1
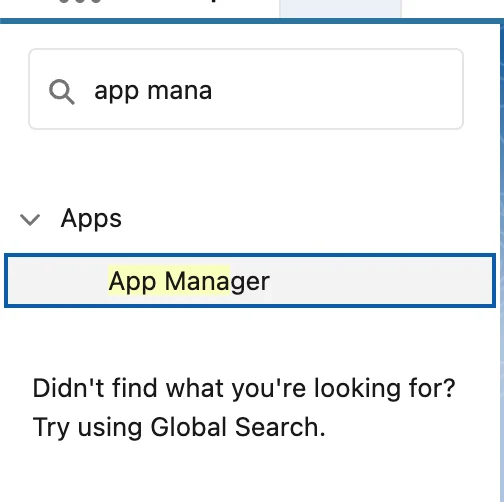
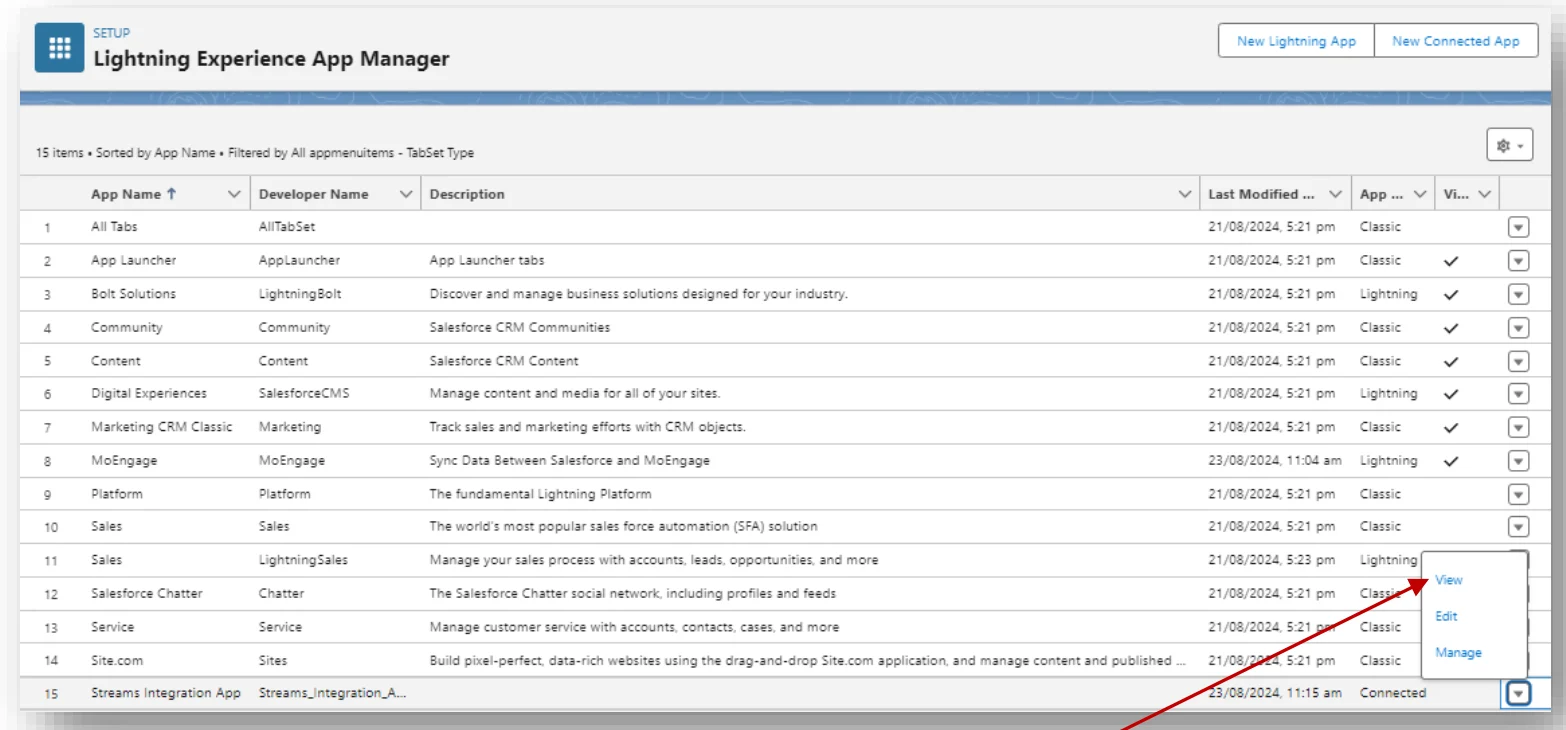
Return to App Manager
Open the App Manager.
2
View your app
Click the dropdown arrow next to your app and select View.
3
Open Manage Consumer Details
Scroll down to the API (Enable OAuth Settings) section and click Manage Consumer Details.
4
Copy the credentials
Click Copy below the Consumer Key and Consumer Secret fields to copy each value.
Step 4: Add the MoEngage Sync Configuration permission set
1
Open Setup
Click the gear icon in the top right corner and select Setup.
2
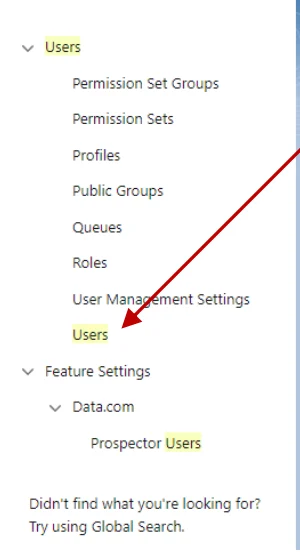
Find Users
In the Quick Find box, type Users and select Users.
3
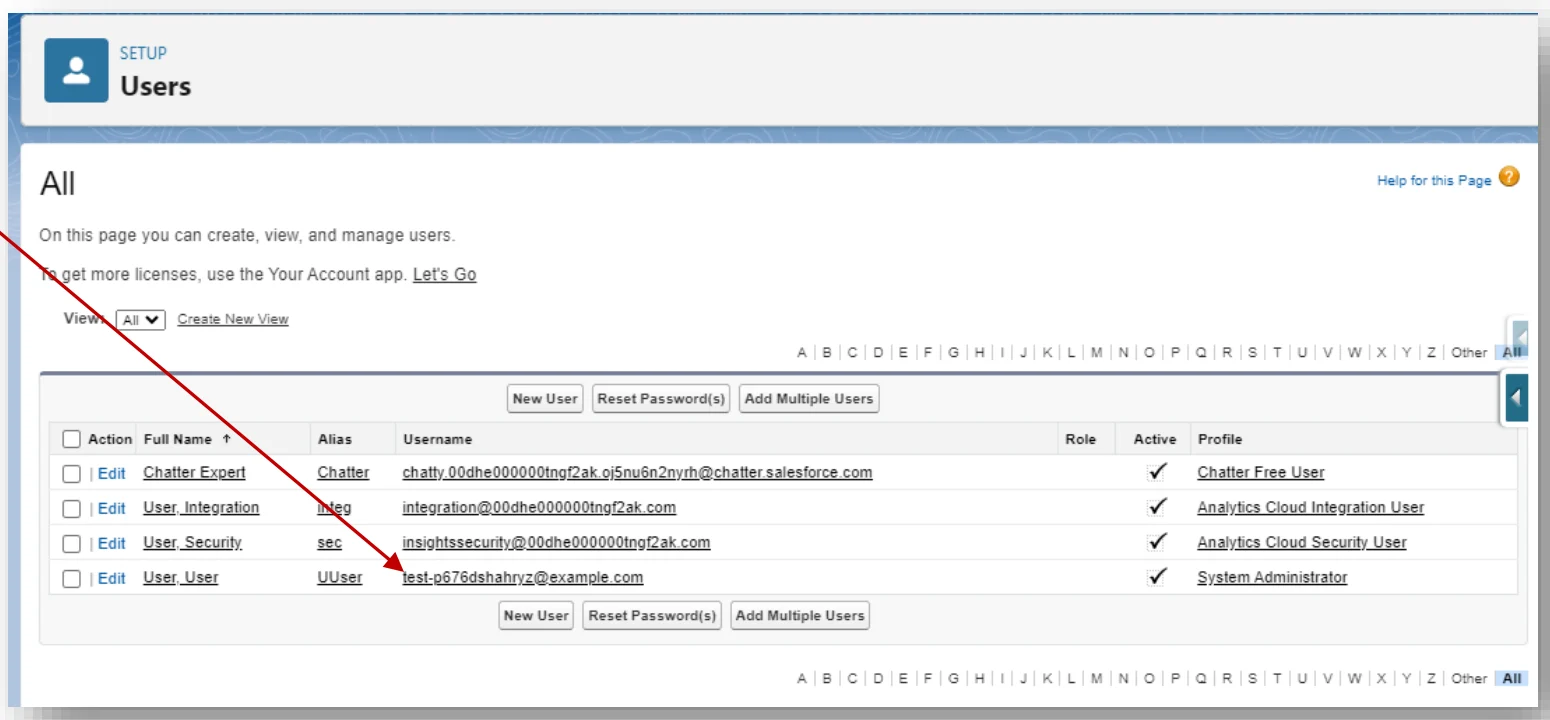
Select a user
Select the username of the user you want to assign permissions to.
4
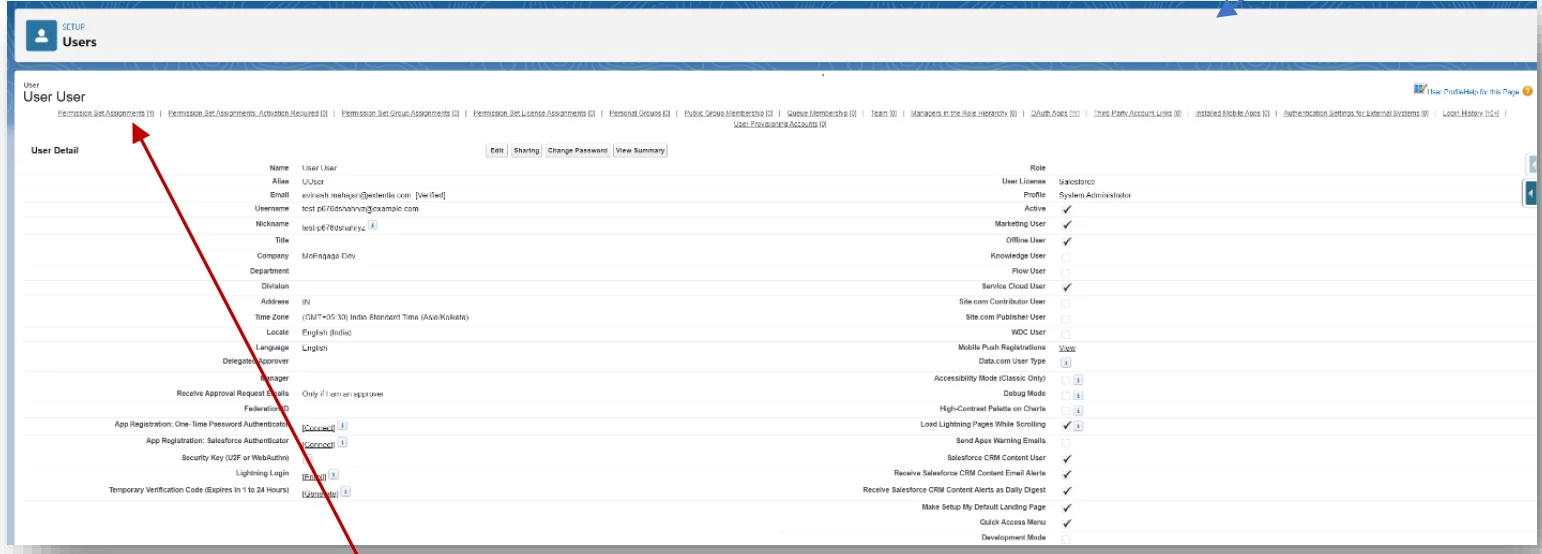
Open Permission Set Assignments
Click Permission Set Assignments.
5
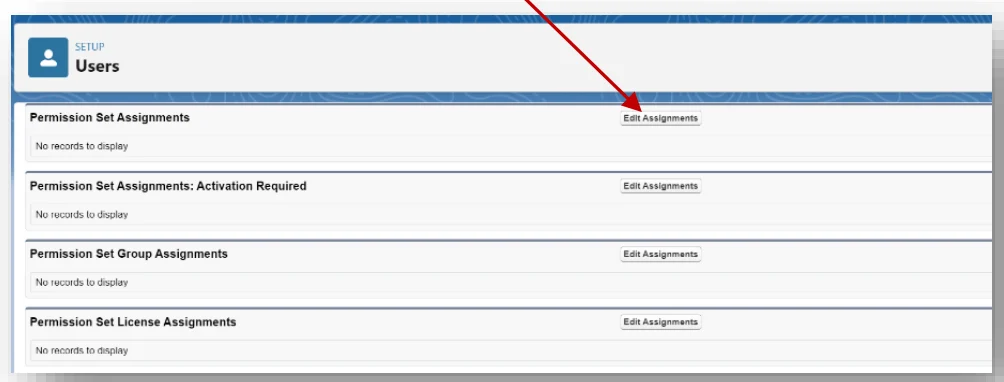
Edit assignments
The page automatically scrolls down to Permission Set Assignments. Click Edit Assignments.
6
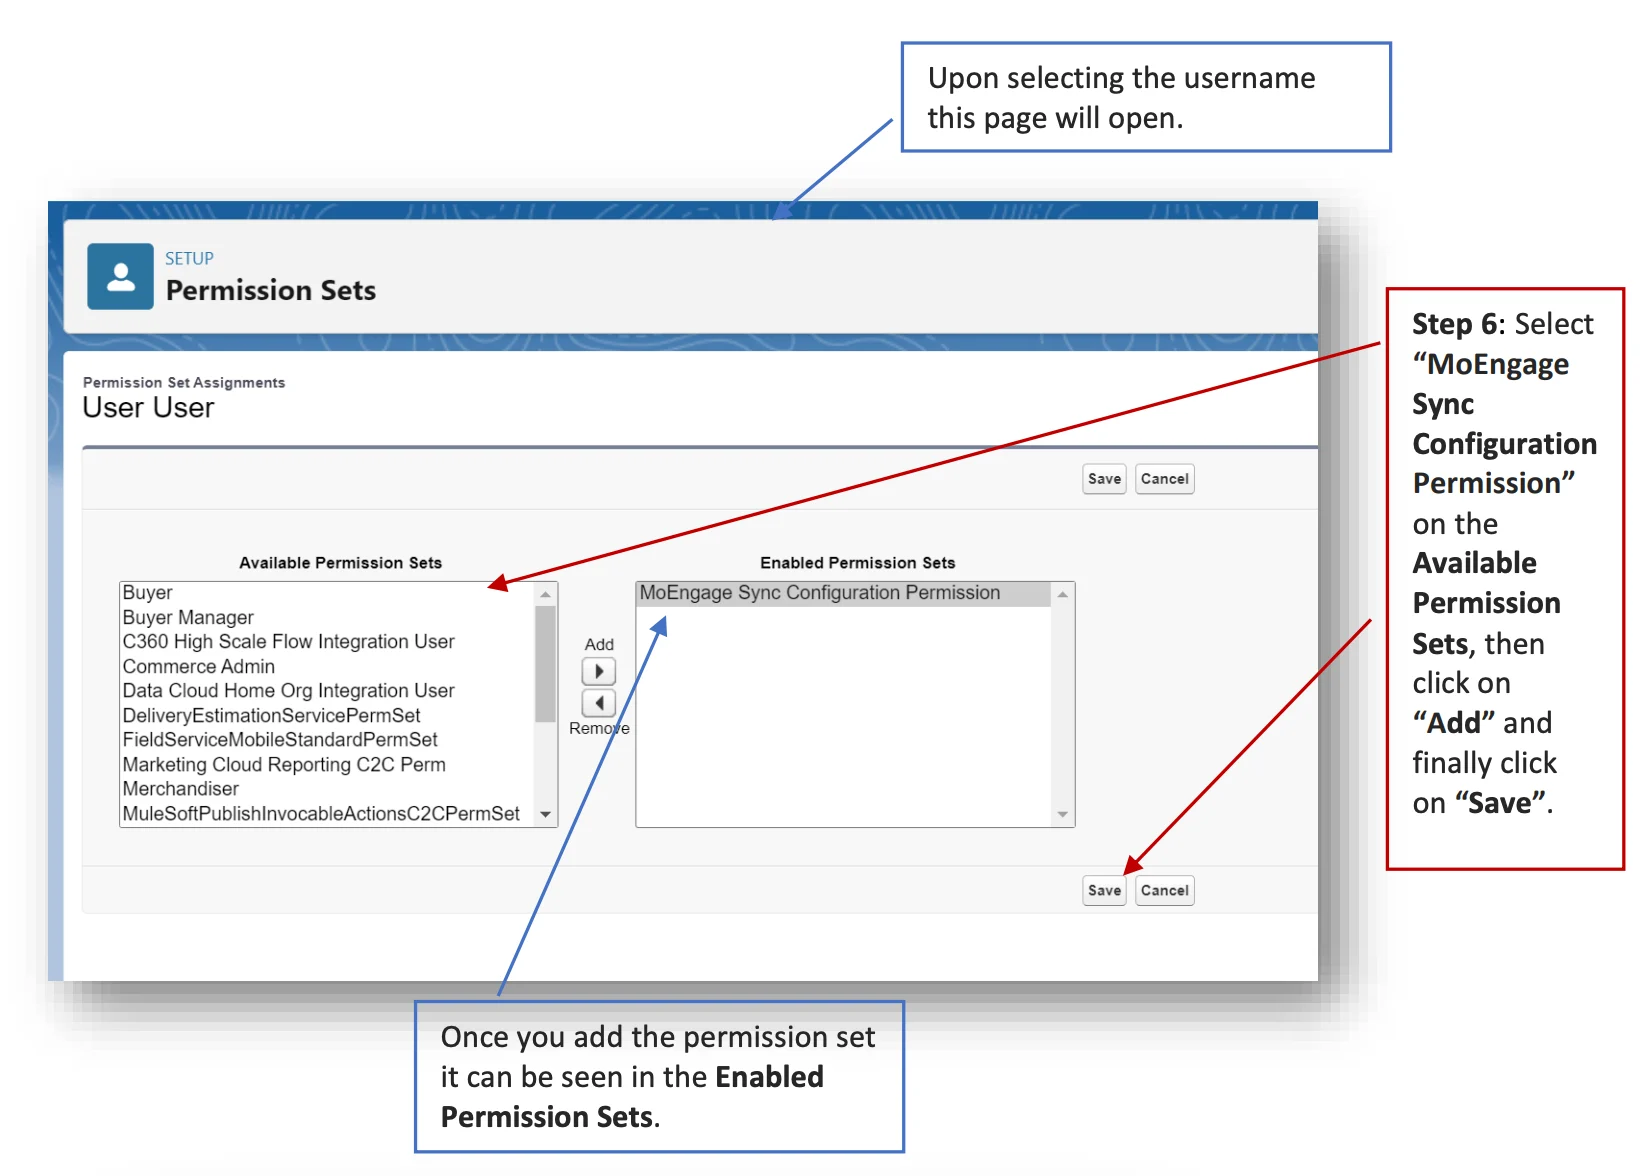
Assign the permission set
Select MoEngage Sync Configuration Permission in the Available Permission Sets column and click Add. The permission set then appears in the Enabled Permission Sets column.
7
Save
Click Save.
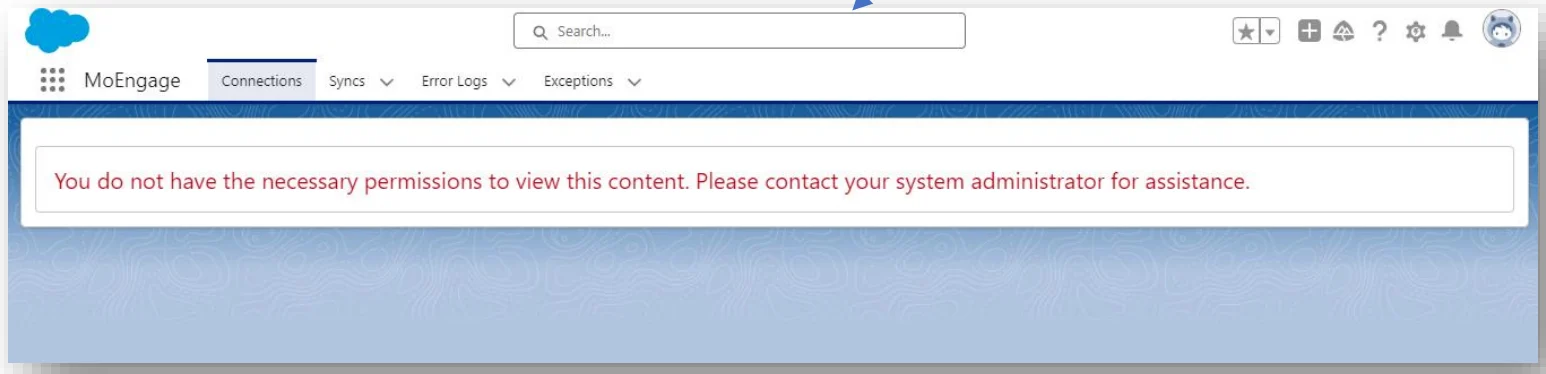
If the correct permission set is not assigned, you will receive an error message similar to the following.