

Introduction
MoEngage lets you import users, events, and auxiliary data into your workspace from files (Amazon S3, SFTP, or a manual CSV upload) and directly from your data warehouse (Snowflake, BigQuery, or Databricks). This page helps you choose the right source for your use case. Once you pick a path, its dedicated setup page walks you through the entire process.If your system requires IP whitelisting, refer to IP Whitelisting in MoEngage before setting up a data import.
Sources and Supported Entities
Each source supports a different set of entity types. Use this matrix to confirm your source can import the data you need. File Sources
Data Warehouses
Entity types:
- Registered Users: Users already registered on MoEngage. Also used to update existing users in bulk.
- Anonymous Users: Users who have not yet registered on MoEngage.
- Events (Standard and User-Defined): Standard events such as Campaign Interaction Events, as well as your own user-defined events.
- Auxiliary Data: User data ingested into MoEngage temporarily for specific business purposes. Available for file-based sources only (S3, SFTP, and Manual Upload), not for data warehouses.
Choose Your Import Path
Select the import method that matches where your data lives:Set Up a File Import
Automate imports from files dropped in Amazon S3 or an SFTP server, on a one-time or periodic schedule.
Set Up a Data Warehouse Import
Import directly from Snowflake, BigQuery, or Databricks tables and views. Connection-driven, with one-time or periodic syncs.
Manual Uploads
Upload a CSV directly in the dashboard for users or events. One-time only, no periodic scheduling.
Auxiliary Data
Import supplementary data via S3, SFTP, or CSV, using a simple primary-key mapping model.
How Imports Work
The following mechanics are common to every import source. Source-specific setup steps, limits, and failure behavior live on each source’s setup page.Imports Dashboard
The Data Imports dashboard lists all your imports and their key details:Import schedule and detail times shown on the Data Imports dashboard use your app’s configured timezone. If no app timezone is set, they display in UTC by default. Set the app timezone from Settings to see these times in your preferred timezone. This display timezone is separate from the requirement that mapped timestamp columns (such as Event time or Updated at) always be in UTC.
Import Statuses
Every import on the dashboard carries one of the following statuses:- Scheduled: The run is scheduled to execute in the future.
- Pending: One or more files in the run are held back because an hourly or daily import limit is reached. The run resumes on its own when the limit frees up, so no action is needed.
- Processing: The run is in progress.
- Successful: Every file in the run succeeded.
- Partial Success: The run finished with a mix of succeeded and failed files.
- Failed: Every file in the run failed. Hover over the status to see the reason.
- Archived: Someone archived the import. Archiving is a manual action rather than something MoEngage does on its own, and it cannot be undone, so an archived import cannot be restored. The run and file history of an archived import stays available.
- Expired: The import passed its end date. MoEngage sets this status itself, which is what separates it from Archived.
A run that still contains a pending file stays Pending, even when other files in the same run have already failed. The run resolves to Partial Success only after every file reaches a final state.
To see how each scheduled run performed, click the kebab menu under Actions, and then click View. For more information, refer to Run History. You can export a copy of an imported file for up to 60 days.
Check Import Limits
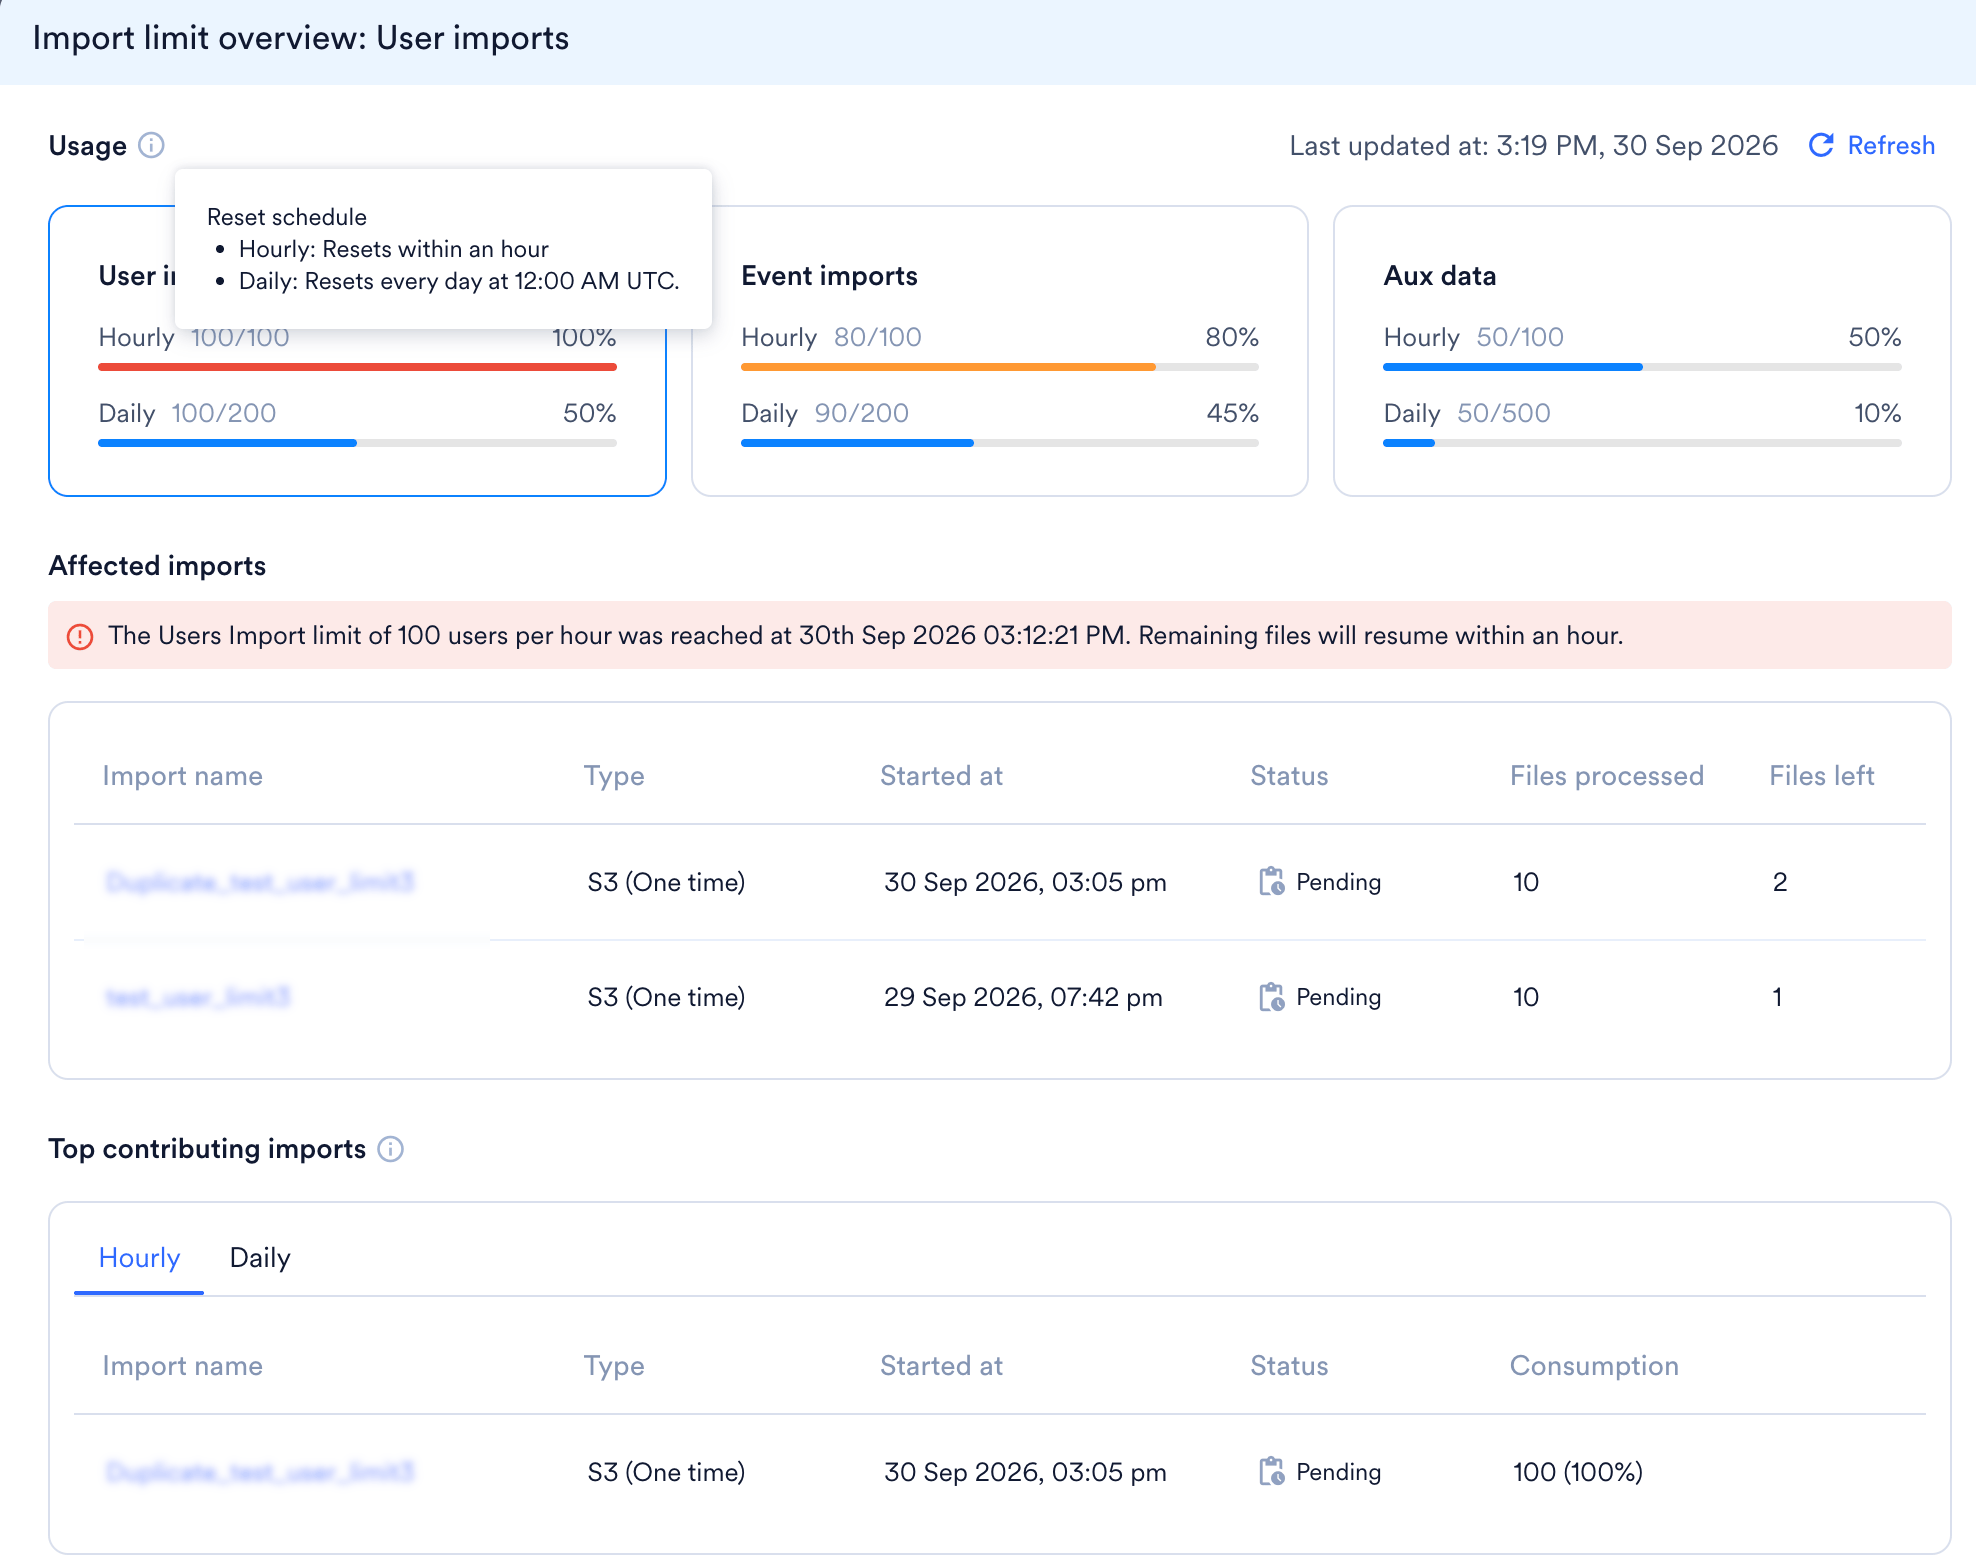
MoEngage applies separate hourly and daily import limits to three categories: User imports, Event imports, and Aux data. The Import limit overview tells you how much of each limit you have consumed, when the limits reset, which of your imports are held back, and which of them consumed the most. These limits apply to file imports from Amazon S3, SFTP, and CSV upload. Data warehouse imports use a separate limit pool that this drawer does not cover.Open the Import Limit Overview
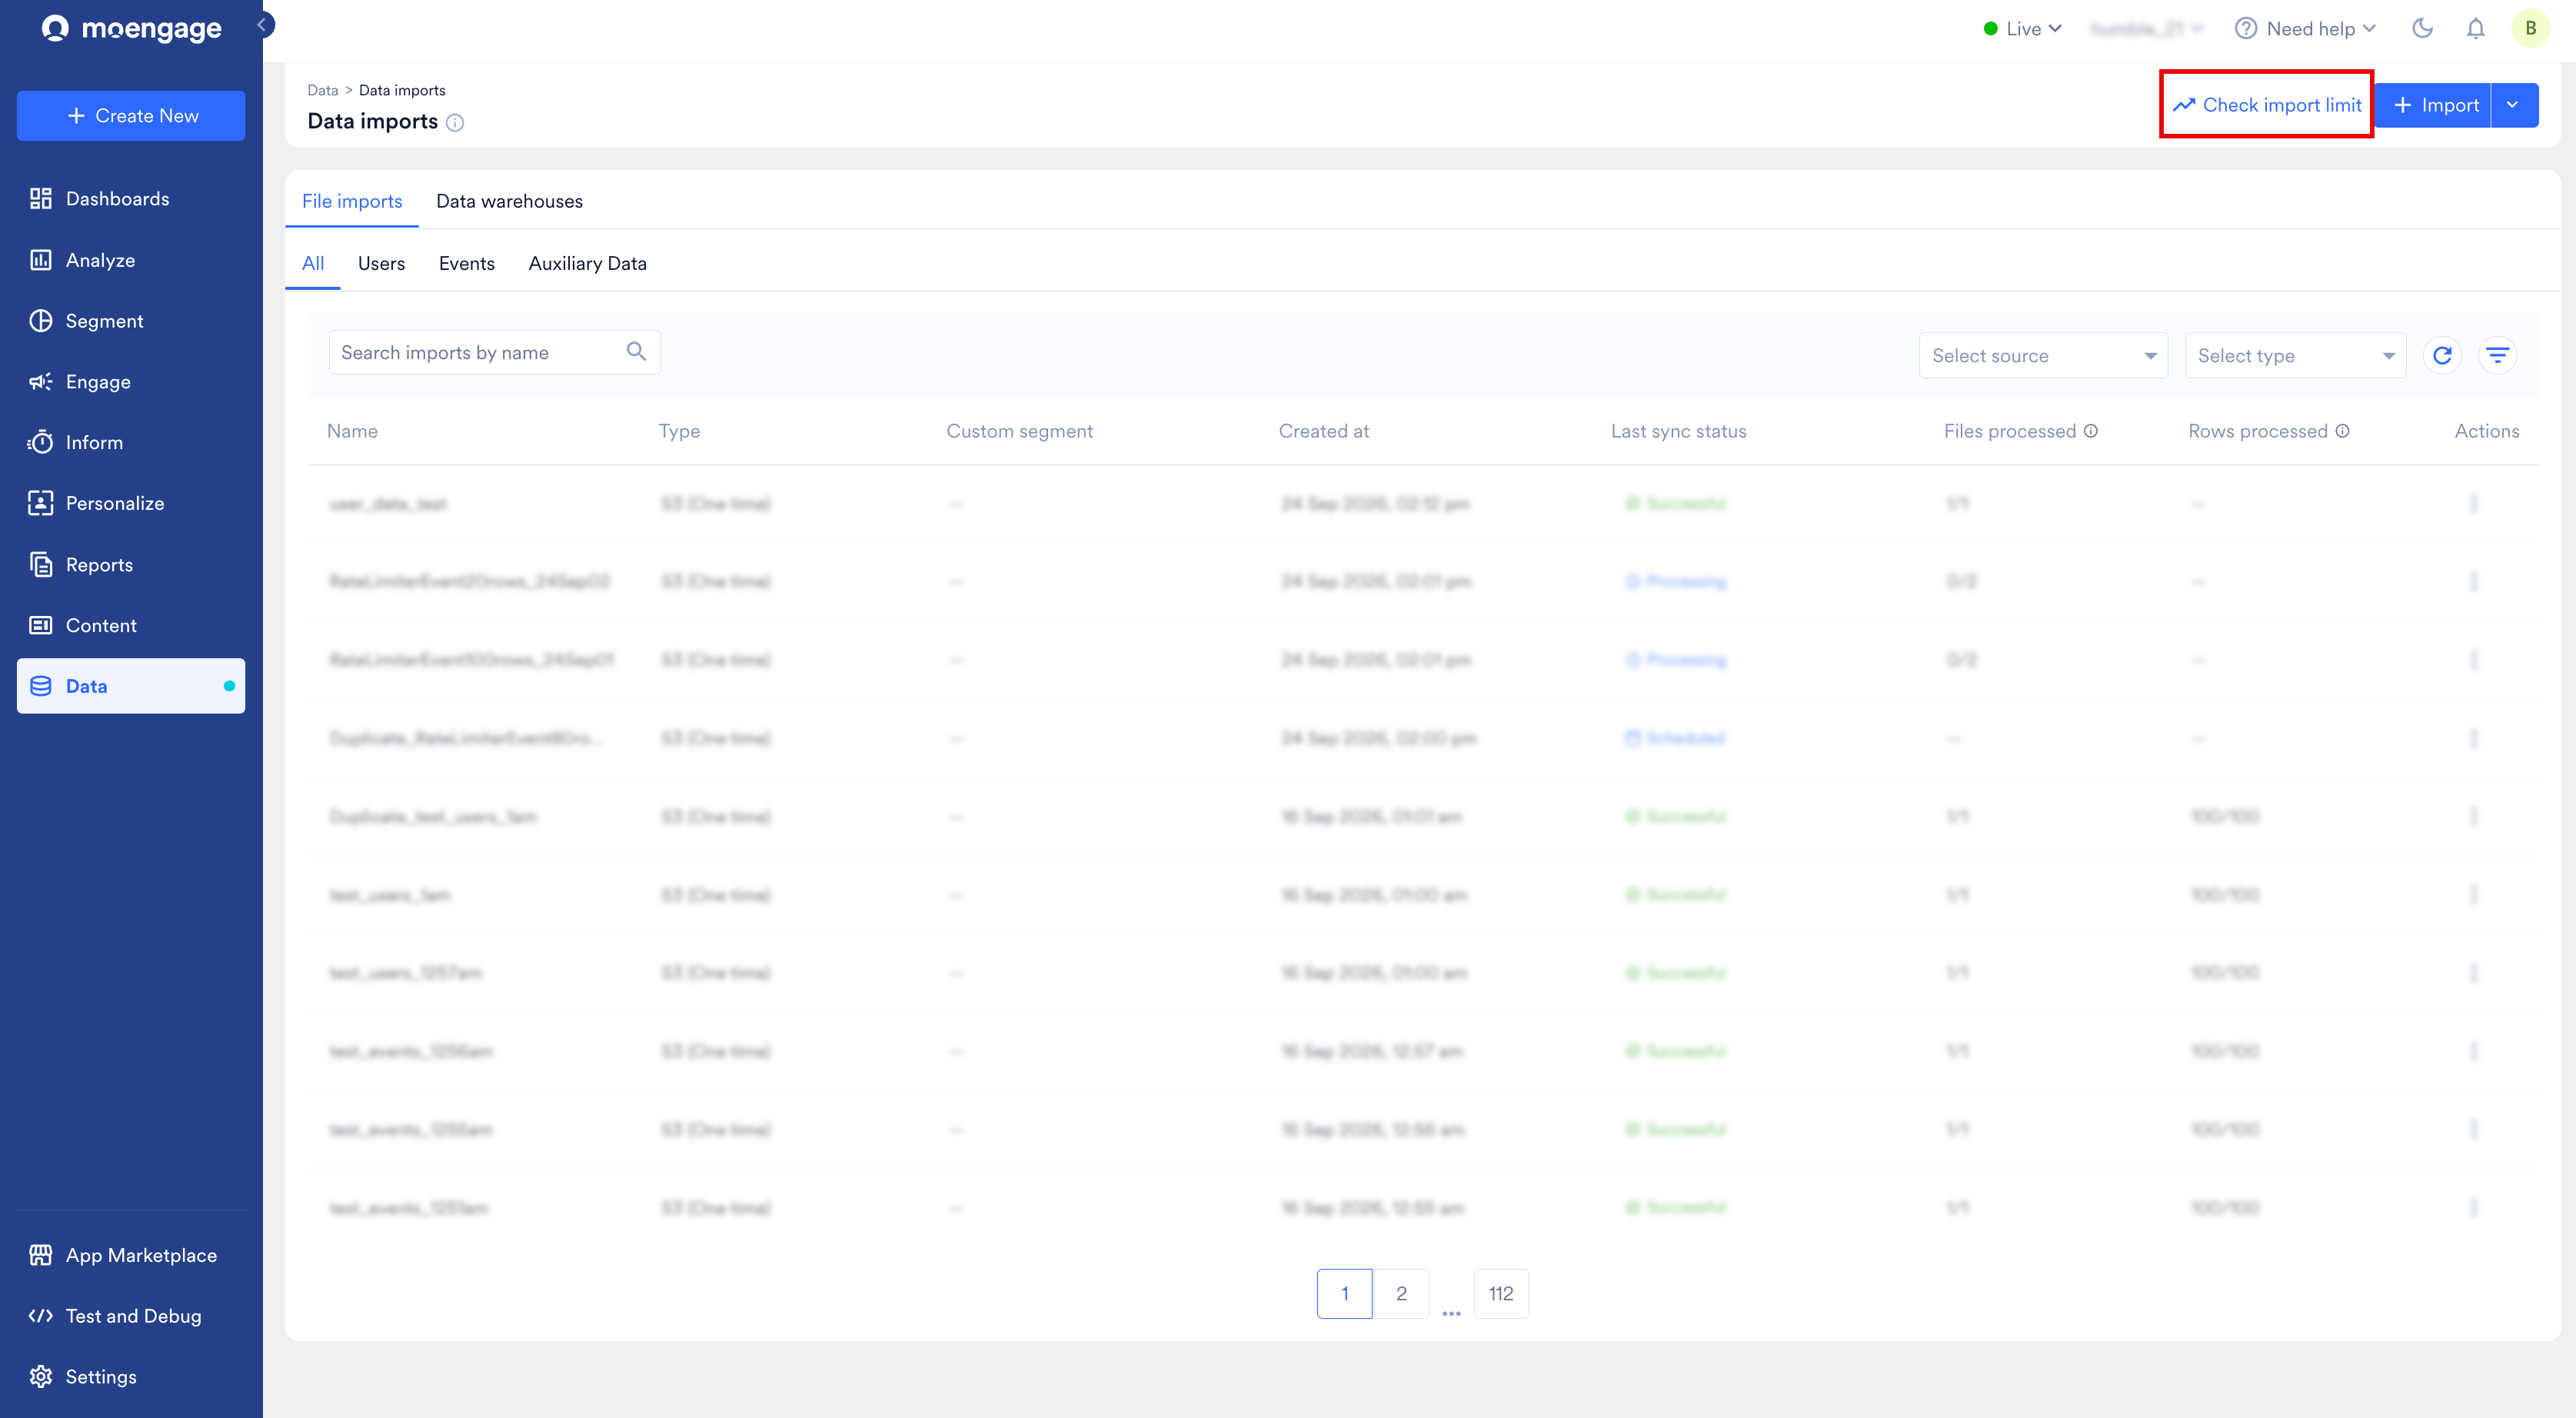
You can open the Import limit overview from the Data imports page, or while you are setting up an import. To open it from the Data imports page, perform the following step:-
Click Check import limit, beside Import.
-
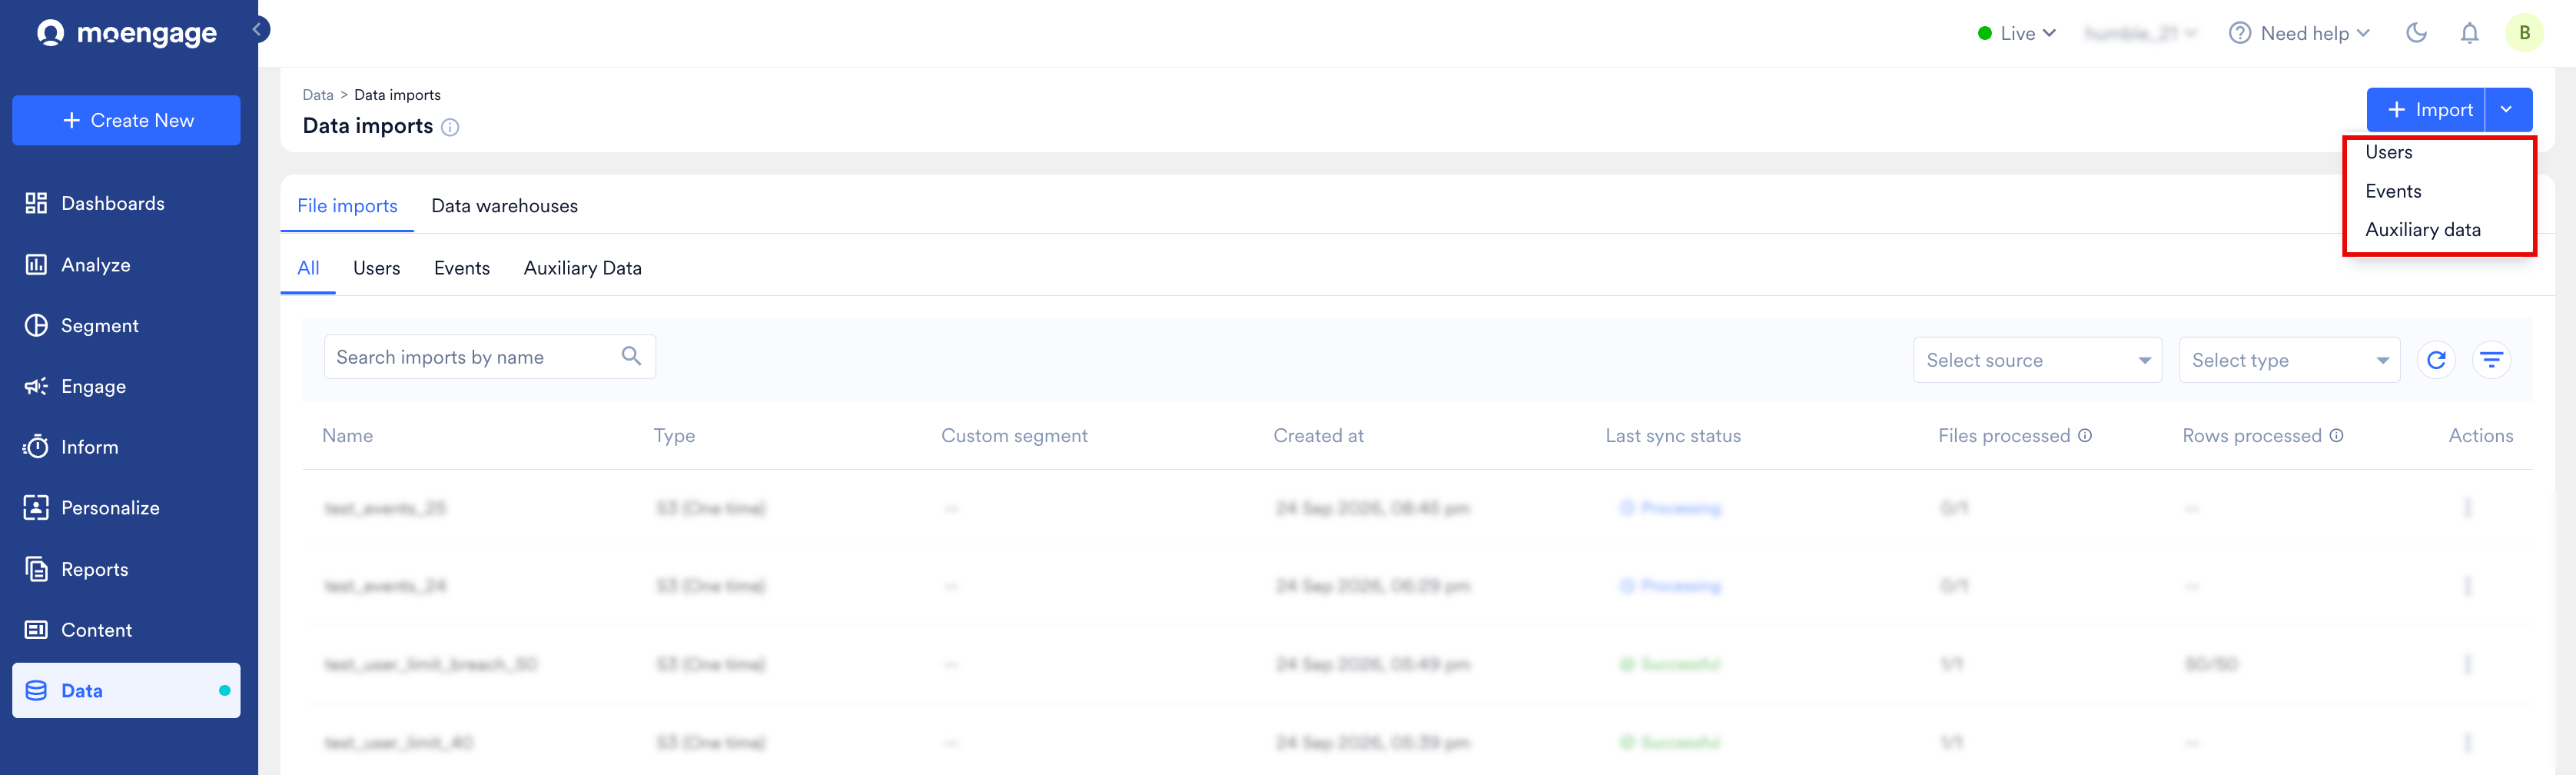
Click + Import, and then click Users, Events, or Auxiliary data.
-
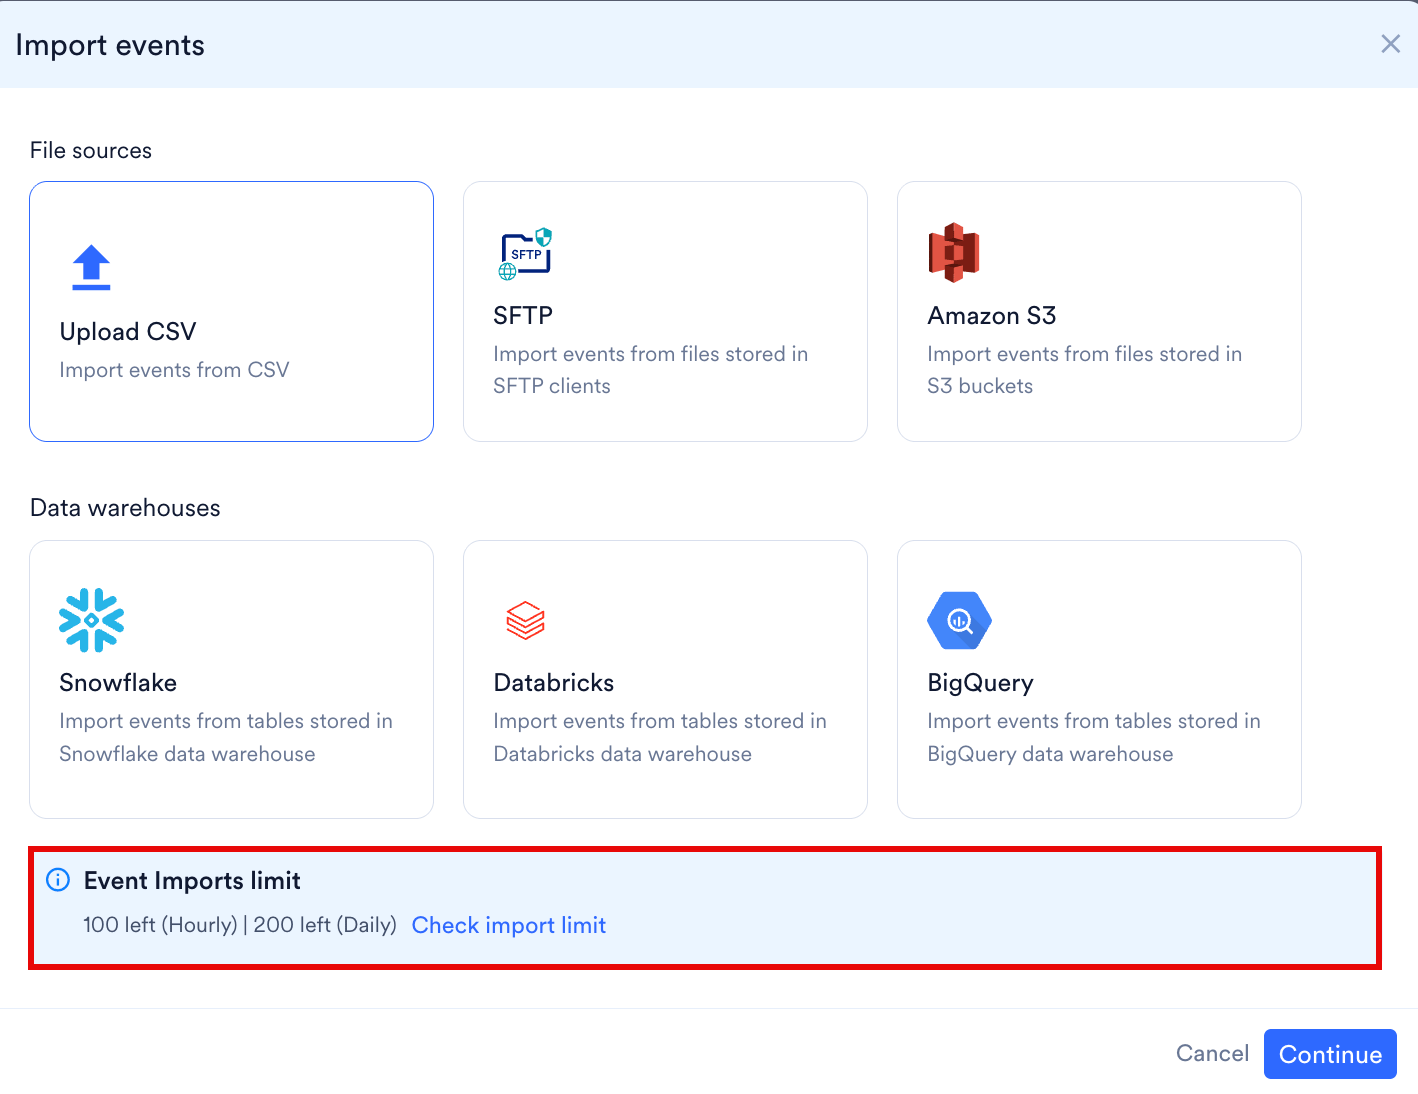
In the dialog box, click Check import limit.
Know Before You Reach a Limit
MoEngage notifies you as you approach a limit, so you can reschedule an import before it is held back. A banner appears at the top of the Data imports page when you reach 80% of a limit, warning that new imports might be delayed, and again when you reach a limit, naming the category and when imports resume. When more than one limit is reached, the banner names no resume time, because the affected limits can reset at different times; open the Import limit overview to see each one. The banner appears on every tab, so a limit reached in one category is visible while you are viewing another. When you are below 80% on every limit, MoEngage shows no banner.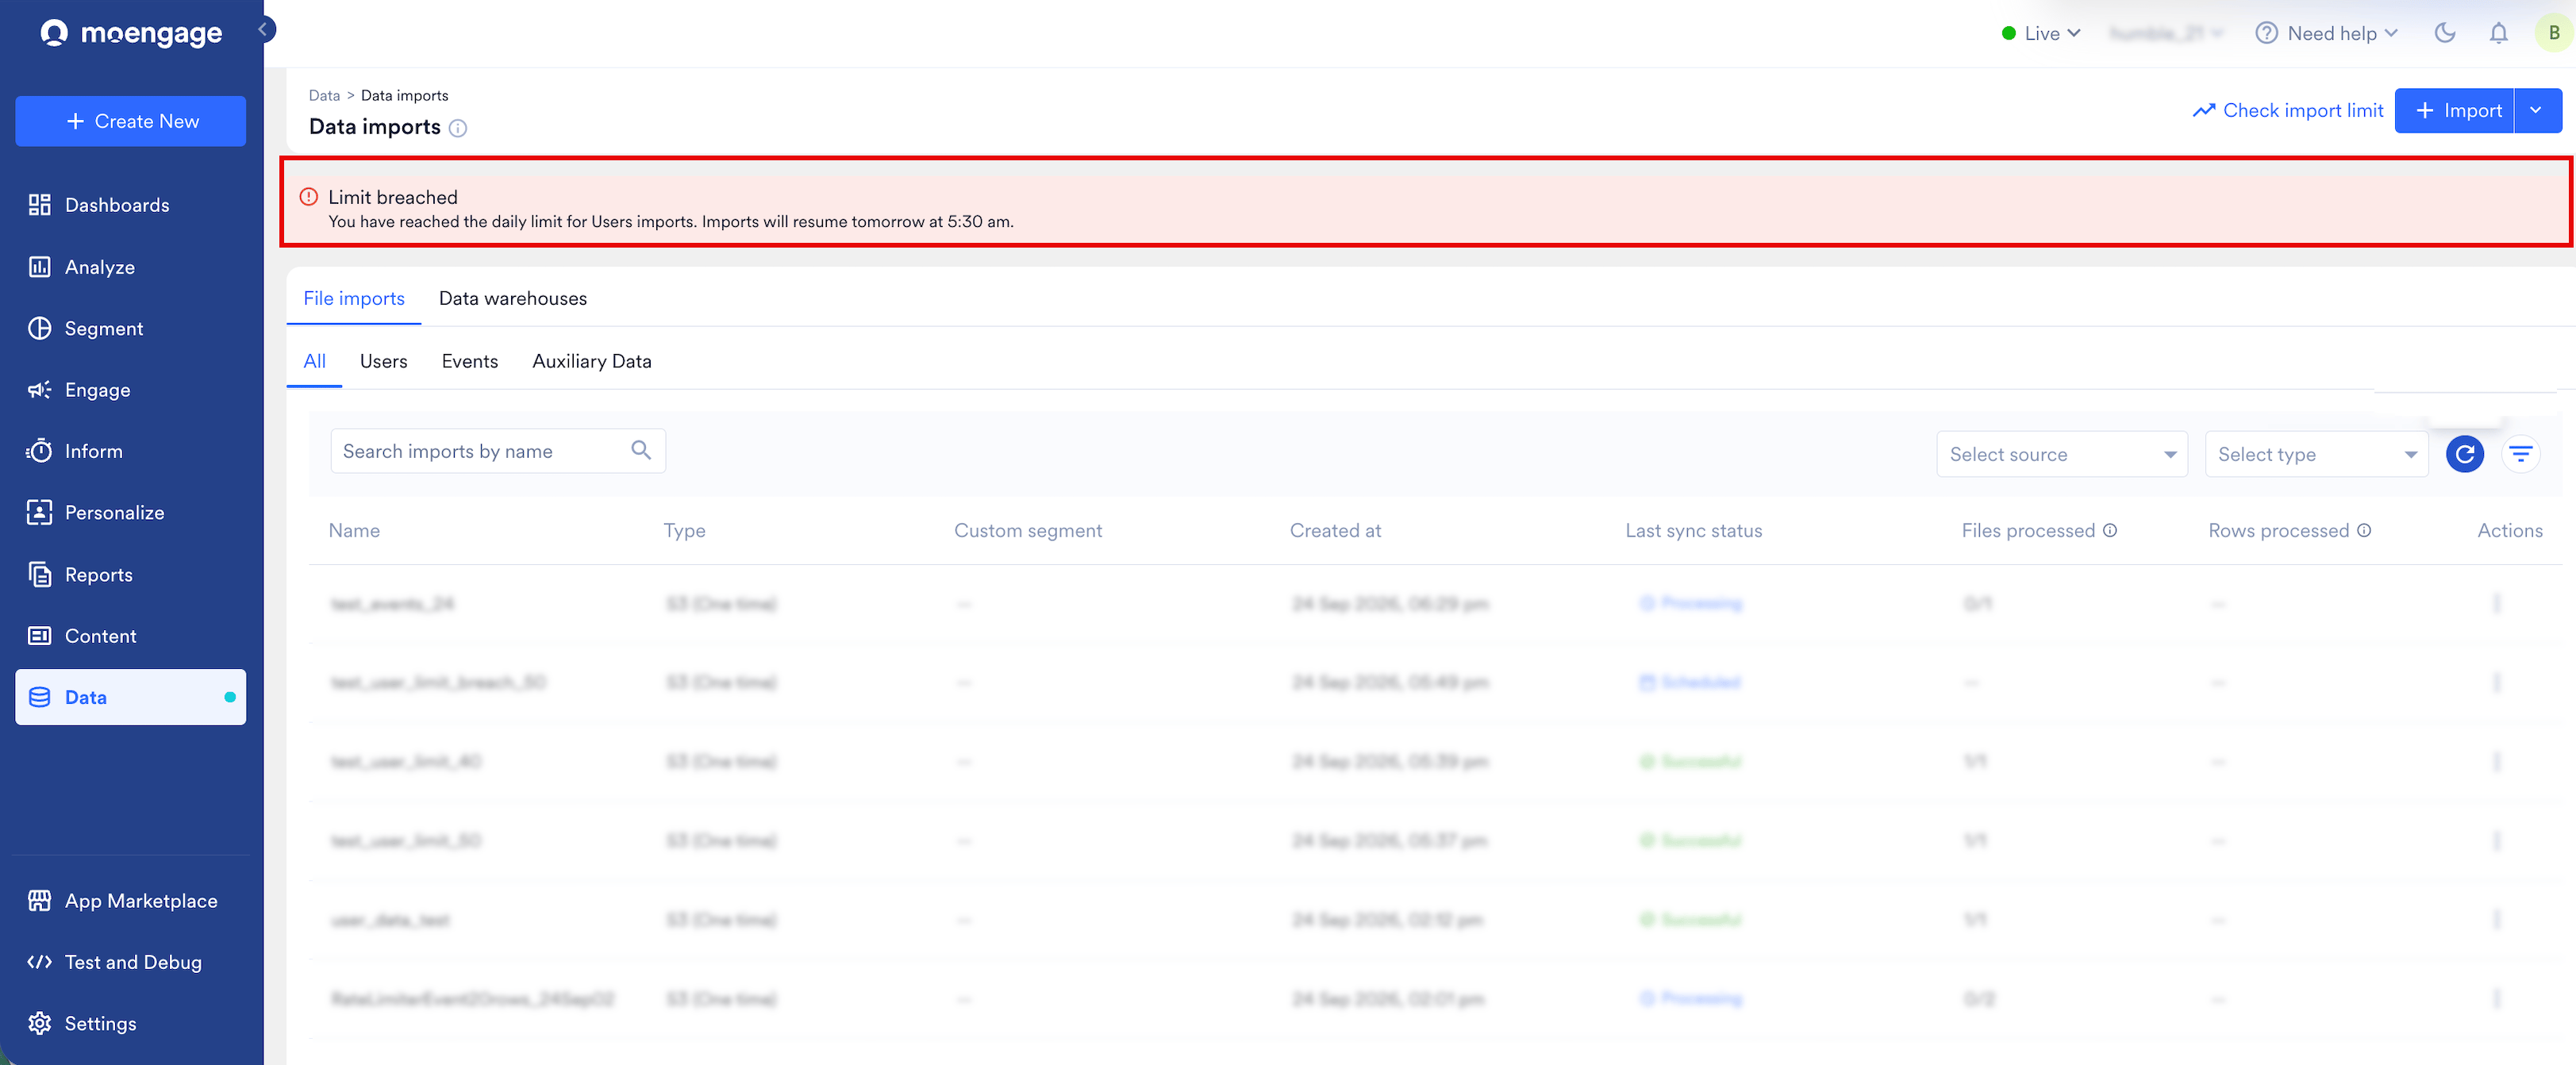
Check How Much You Have Consumed
The Import limit overview shows one card for each category, with your hourly usage above and your daily usage below. The progress bar on each card shows how much of that limit you have consumed, as an amount against the limit and as a percentage. To read the usage, perform any of the following actions:- Hover over the information icon beside Usage to view when each limit resets.
- Click Refresh to update the figures.
- Click the User imports, Event imports, or Aux data card to see the detail for that category.
Check Which Imports Are Affected
Affected imports lists the imports held back by a limit, with a banner naming the limit that was reached and when the held-back files resume.
The table lists every import held back because a limit was reached. If the hourly limit is reached, those imports resume as soon as the limit frees up. If the daily limit is reached, the pending and scheduled imports for that day resume the next day.
Check Which Imports Consumed the Most
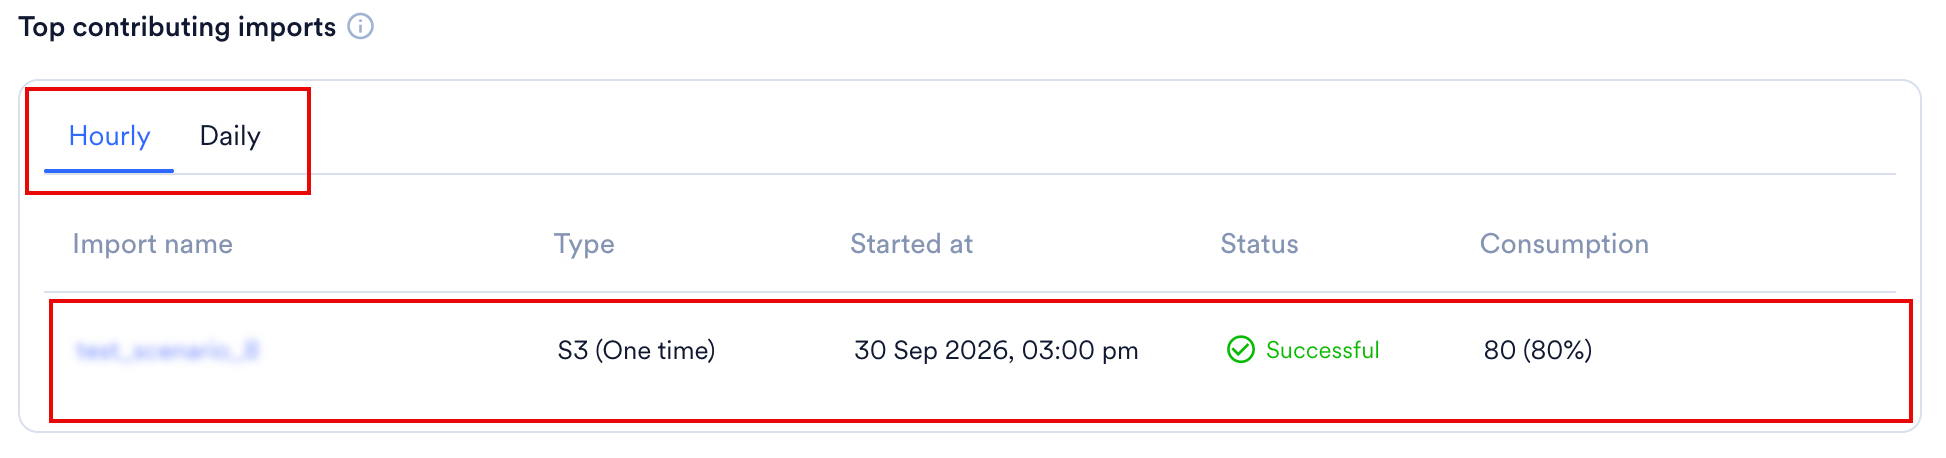
Top contributing imports shows which of your imports used the most of the limit, so you can find the cause before you add or reschedule an import. Top contributing imports appears after at least one import in the category completes a run. The Hourly and Daily tabs change the period the table covers:- Click Hourly for the imports that ran within the current rolling one-hour window.
- Click Daily for the imports that ran since the last reset at 12:00 AM UTC.
Trigger Imports
You can trigger imports in the following ways:- Manually: Trigger a periodic import from the imports page by clicking Actions. Triggering an import within five minutes of its scheduled time may cause an error.
- API: Trigger imports using the File Imports Trigger API. Data Warehouses do not currently support these APIs.
Mapping Files and Data Mapping
A mapping file contains the mappings between each source column and a MoEngage attribute, along with the data type of the column. The file must be in JSON format. Instead of mapping columns one by one on the dashboard, you can upload a mapping file to automate the mapping.- CSV Files
- JSON Files
column(required): The column name from the source file. For Level 2 keys in a JSON file, use dot notation (key1.key2).moe_attr(required): The MoEngage attribute to map the column to. Ensure each column maps to a uniquemoe_attr.type(optional): The data type of the column. See the supported types below.datetime_format(optional): The date-time format. Mandatory for DateTime fields only.is_skipped(optional): A boolean field. Any column markedtrueis skipped during import.
Standard User Attributes for Reference
Map your source columns to MoEngage standard user attributes using the keys below. For the exhaustive list, refer to your Data Management dashboard.Supported Attribute Types
MoEngage does not support the
| (pipe) character in non-array type columns. Ensure your String, Numeric, and Boolean columns do not contain this character.Reserved Keywords for User Attributes
MoEngage reserves the following keys. Do not use them when you map or track user attributes.USER_ATTRIBUTE_UNIQUE_IDUSER_ATTRIBUTE_USER_EMAILUSER_ATTRIBUTE_USER_MOBILEUSER_ATTRIBUTE_USER_NAMEUSER_ATTRIBUTE_USER_GENDERUSER_ATTRIBUTE_USER_FIRST_NAMEUSER_ATTRIBUTE_USER_LAST_NAMEUSER_ATTRIBUTE_USER_BDAYUSER_ATTRIBUTE_NOTIFICATION_PREFUSER_ATTRIBUTE_OLD_IDMOE_TIME_FORMATMOE_TIME_TIMEZONEUSER_ATTRIBUTE_DND_START_TIMEUSER_ATTRIBUTE_DND_END_TIMEMOE_GAIDINSTALLUPDATEMOE_ISLATstatususer_idsource
Supported Datetime Formats
Use these formats in thedatetime_format field of your mapping file, or when configuring date-time columns during setup.
Frequently Asked Questions
My imports have failed. How do I check what went wrong?
My imports have failed. How do I check what went wrong?
Click the ellipsis on the right and click View to look up the Import details. Hover over the Failed Status to learn the reason.
What if a scheduled import adds the data into a recently archived segment?
What if a scheduled import adds the data into a recently archived segment?
In such cases, the new data will still be added to the archived segment. You can unarchive the segment as required.
Can an import be stopped while it's running?
Can an import be stopped while it's running?
Once an import process starts, it can’t be stopped midway. This is because the data goes through several steps, and interrupting it could lead to incomplete or inconsistent results. It’s best to let the current import finish.
How can I stop future runs of a scheduled import?
How can I stop future runs of a scheduled import?
Yes, you can stop future scheduled imports from running automatically. To do this, find the import schedule and select the Archive option from the Actions menu on the Data Imports dashboard. This will prevent it from running on its next scheduled time.
What should I do if an import seems stuck or is taking a long time?
What should I do if an import seems stuck or is taking a long time?
If an import appears to be stuck or is taking longer than usual, it’s best to wait. The system has checks in place to handle these situations automatically and retry if necessary. Manually starting the same import again while it’s still processing can cause conflicts and may prevent the original import from completing successfully.