

Availability of this feature depends on your MoEngage plan and may require a paid add-on. To check what’s available for your plan, refer to Plans and Pricing. To get this feature, contact your MoEngage Customer Success Manager (CSM) or the Support team.
Types of Imports
MoEngage can import the following from your data warehouse:- Registered Users: Users who are already registered on MoEngage. Also used to bulk-update existing users.
- Anonymous Users: Users who are not yet registered on MoEngage.
- Events (Standard and User-Defined): Standard events such as Campaign Interaction Events, as well as your own user-defined events.
Auxiliary Data is not supported for data warehouse imports. It is available for file-based sources only. See Auxiliary Data.
Prepare Your Data
MoEngage does not require a specific table schema. Every column can be mapped or skipped on the dashboard. Before you set up the import, note how MoEngage detects changed rows:- User Imports
- Event Imports
For periodic User Imports, MoEngage syncs only the data that changed since the last sync. It uses a timestamp (date + time) column, commonly named
updated_at, to identify changed rows. You can name this column anything, as long as it holds the timestamp of when the row last changed, and map it on the dashboard.How Periodic Sync Detects Changed Rows
For periodic imports, MoEngage syncs each run over a fixed time window[last_run_time, next_run_time), half-open and non-overlapping, advancing on a fixed wall-clock cadence (for an hourly import, last_run_time + 1 hour), never derived from the data seen. A row is included in a run only if its mapped reference timestamp (Updated At for users; Updated At, or Event Time when not mapped separately, for events) falls inside that window.
Because windows only ever move forward, a row whose reference timestamp is earlier than the current last_run_time is permanently missed, not delayed, and not caught up on a later run. This applies no matter why the timestamp is early: upstream pipeline delay, an intentional backfill, a missing Updated At mapping, or a timezone conversion that shifts the value backward. The first, historic run has no lower bound, which is why it never loses data this way. See the note in Step 3.
Deep dive: entity behavior, timezone pitfalls, and a worked example
Deep dive: entity behavior, timezone pitfalls, and a worked example
Users vs Events
Users, a singleUpdated At column drives both what changed and when it changed; the two cannot be decoupled. To avoid permanent misses, ensure Updated At reflects table write-time, not business or event time. This is commonly done with a view whose column defaults to CURRENT_TIMESTAMP on insert, so even late-arriving writes get a current, ever-advancing timestamp.Events, two separate mappable columns:Event Time, the true, possibly-backdated business timestamp, used for analytics.Updated At, drives the delta filter; defaults toEvent Timeif not mapped separately.
Updated At to table write-time lets genuinely backdated events still import via periodic sync without corrupting Event Time for analysis. If you leave Updated At defaulted to Event Time, backdated events carry the same permanent-miss risk as users. Events are immutable in MoEngage once imported, there is no update-in-place for a previously synced event.The Reference Column Must Be Genuine UTC
Across all three warehouses, the mapped reference column’s values must be genuine UTC. What MoEngage does with that column differs:- Snowflake
- BigQuery
- Databricks
MoEngage converts the column using
CONVERT_TIMEZONE('UTC', col). For a TIMESTAMP_NTZ column, the conversion first interprets the naive value using the session’s effective timezone (session → user → account, in that precedence). If that timezone isn’t actually UTC, an already-correct value is double-shifted. Check it with SHOW PARAMETERS LIKE 'TIMEZONE' and, if needed, set it at the user level for the MoEngage connection user.Worked Example
- User Imports
- Event Imports
Suppose you create an hourly Users import at
10:07 UTC. The first next_run_time fast-forwards to the next hour boundary, 11:00 UTC, and the historic run imports every matching row up to 11:00. Each table below shows the full source table state after a run, along with the run that imported each row.After the historic run (imports everything with Updated At < 11:00):Before Run 1,
u_101 is written with Updated At = 11:30. Run 1 covers the window [11:00, 12:00):u_101 (11:30) falls inside [11:00, 12:00), so Run 1 imports it cleanly.Before Run 2, two more rows land: u_102 with Updated At = 12:00:00, and u_103, physically written to the table at 12:45 but carrying a backdated Updated At = 09:15. Run 2 covers [12:00, 13:00):u_102 sits exactly on the boundary: it was excluded from Run 1 (< 12:00 fails there) and imported by Run 2 (>= 12:00 passes), no gap, no double-count. u_103 carries Updated At = 09:15, already earlier than Run 2’s lower bound of 12:00, and earlier than the 11:00 historic cutoff too, so no run’s window contains it.Run 3 covers [13:00, 14:00). No new rows have landed, and u_103 is still sitting in the table:u_103 never appears in any run, because 09:15 is earlier than every future last_run_time. It is permanently missed, even though it was added to the table only moments before Run 3.Recovering Missed or Backdated Data
Once data is already missed, periodic sync will not pick it up. To recover it, or to intentionally backfill, build a one-time view containing the corrected or missed records and run a one-time import against it. One-time imports have no lower-bound filter, so they capture every matching row regardless of reference timestamp. Alternatively, duplicate the import (which triggers a fresh historic run) or edit the schedule’s start time backward to forcelast_run_time to recompute.Required Access Permissions
MoEngage requiresREAD access to your warehouse. Grant the permissions below to an existing database user or a dedicated MoEngage user.
- Snowflake
- BigQuery
- Databricks
Grant MoEngage
READ access to the database you want to import from. For the connection setup and required grants, see the Snowflake connection guide.Set Up the Import
Set up your import in three steps: select your connection and table source, map your columns to MoEngage attributes, and select the import frequency. To start, on the MoEngage sidebar go to Data > Data imports, open the Data warehouses tab, click + Import in the upper-right corner, and select Users or Events.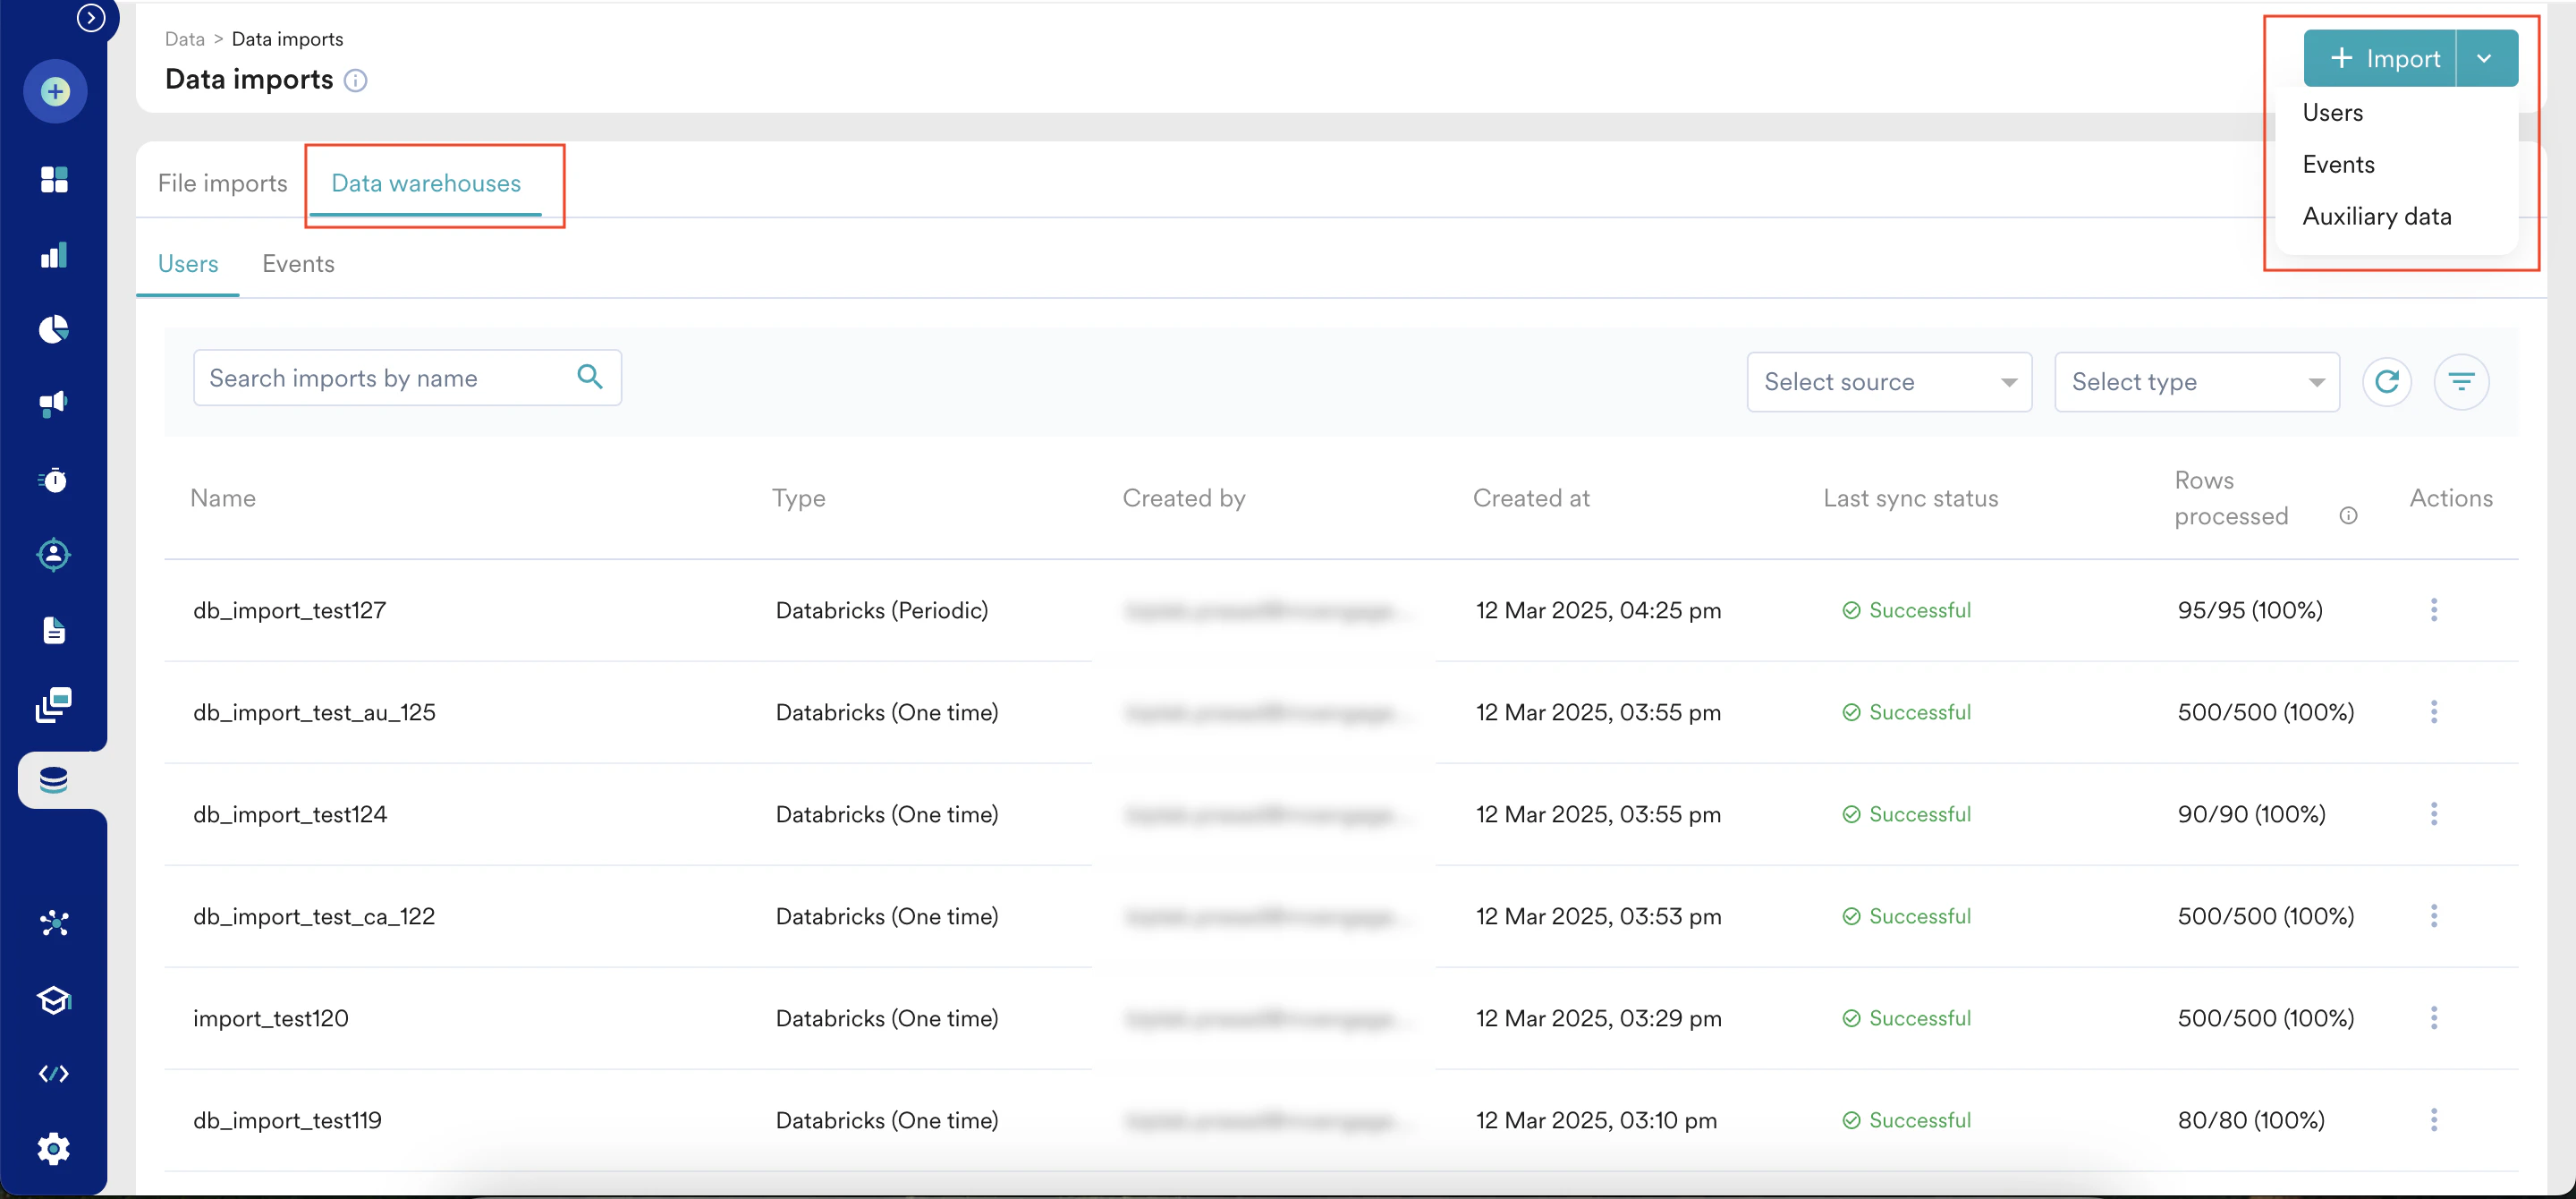
- Snowflake
- BigQuery
- Databricks
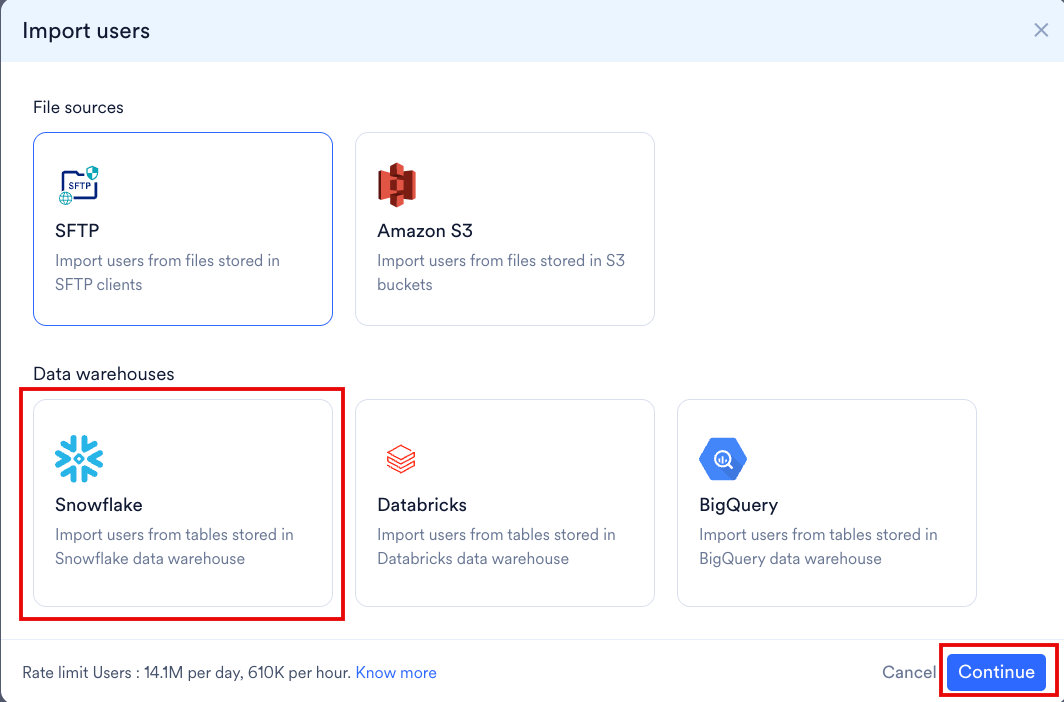
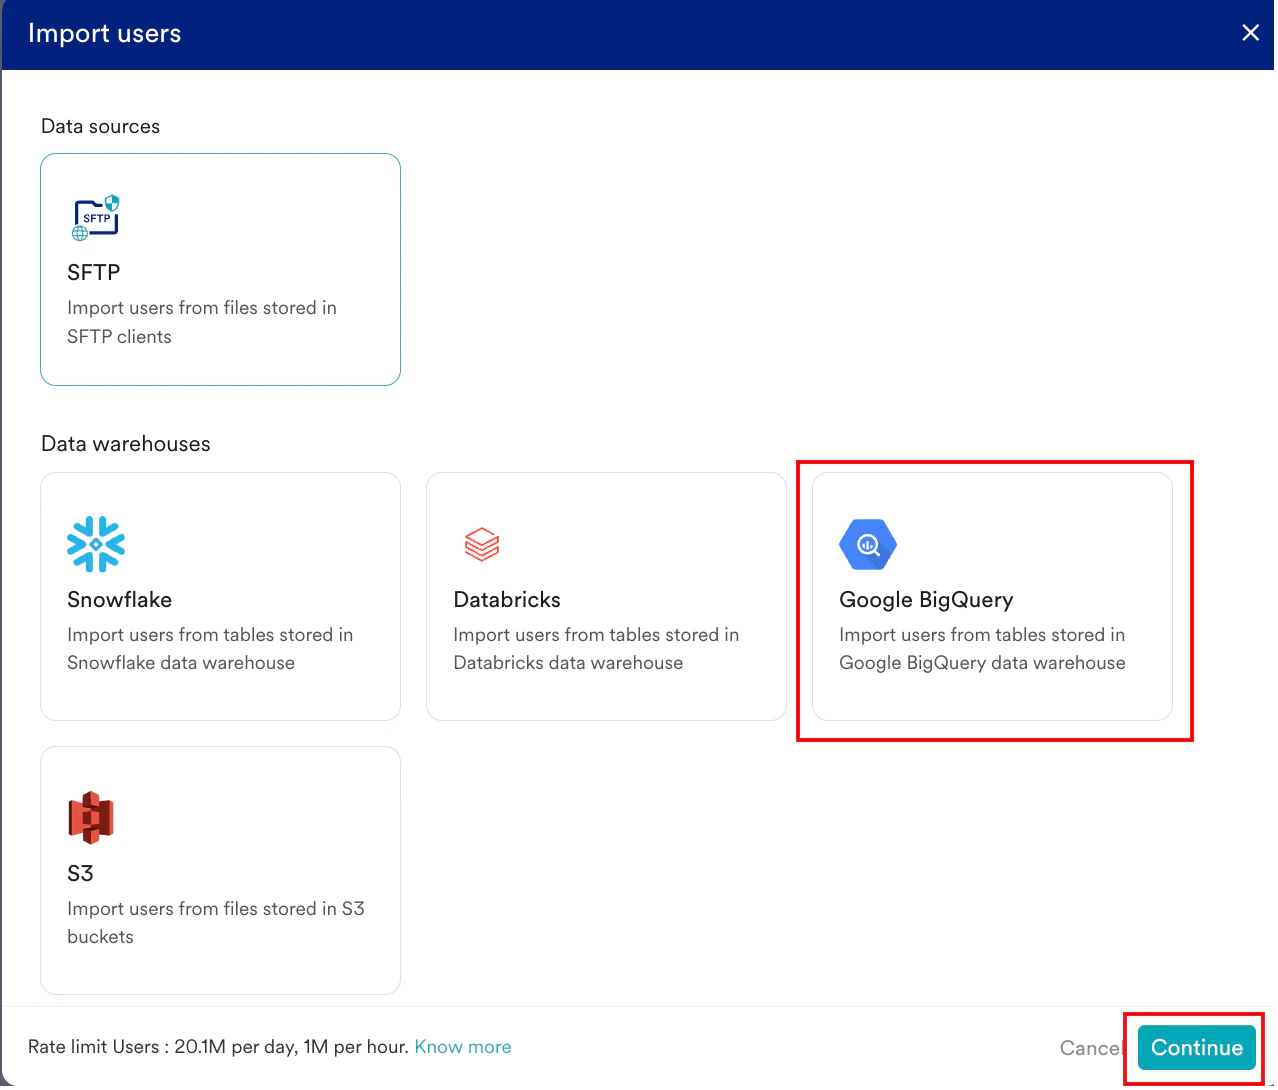
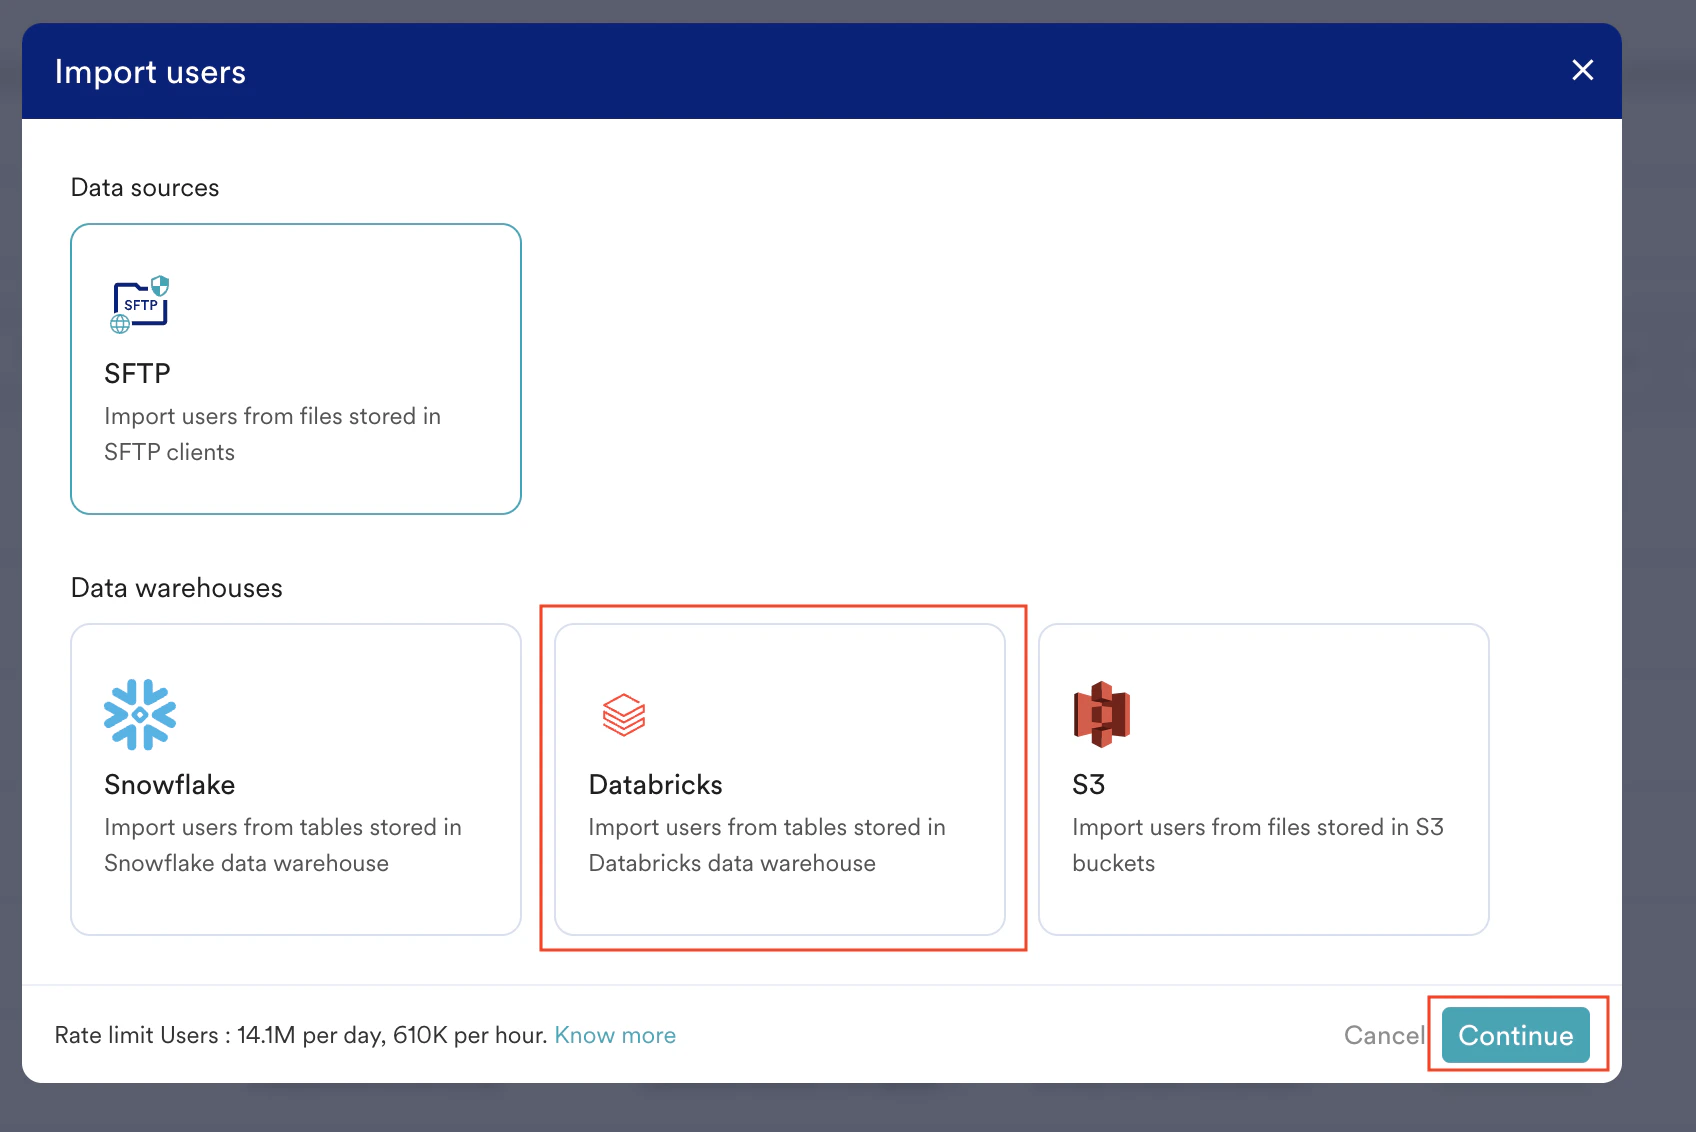
Step 1: Select Your Connection and Table Source
Enter a name for this import to identify it on the Imports Dashboard. Based on the import type, your next steps vary:- User Imports
- Event Imports
Select whether to import Registered users, Anonymous users, or both together.
- Snowflake
- BigQuery
- Databricks
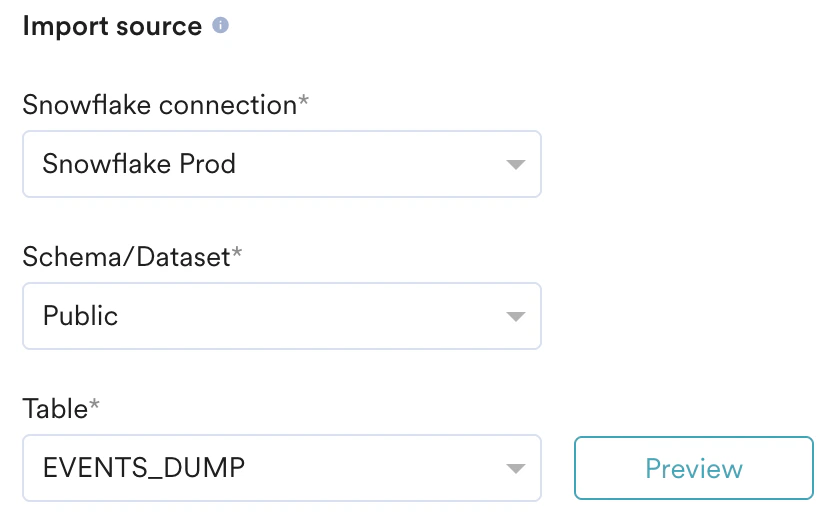
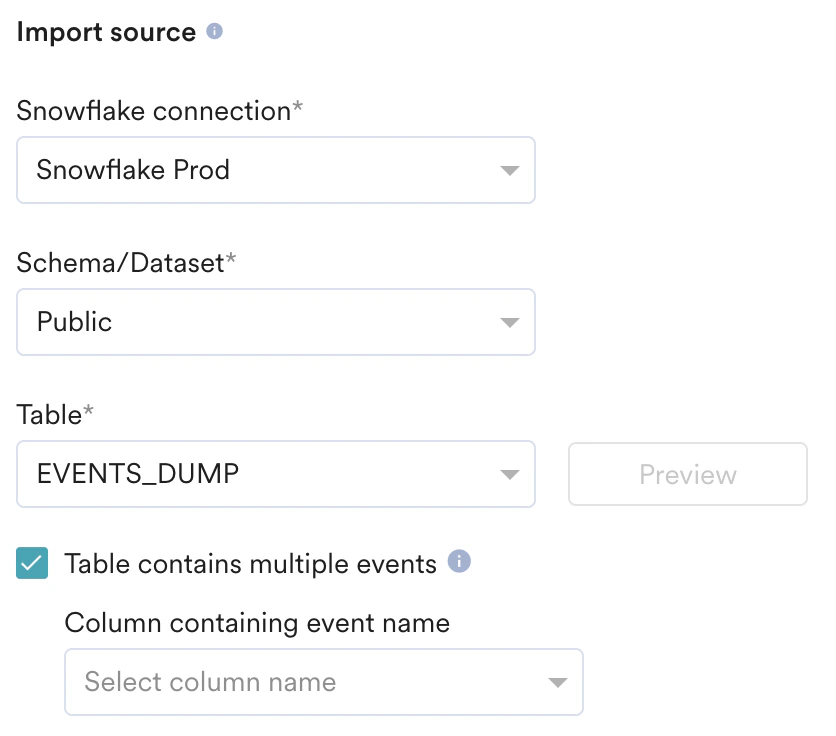
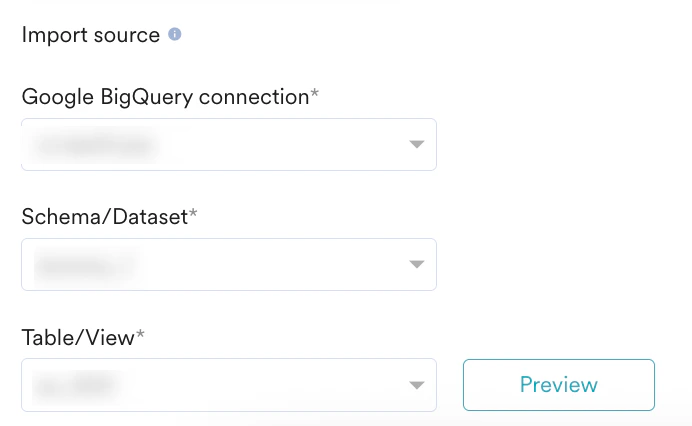
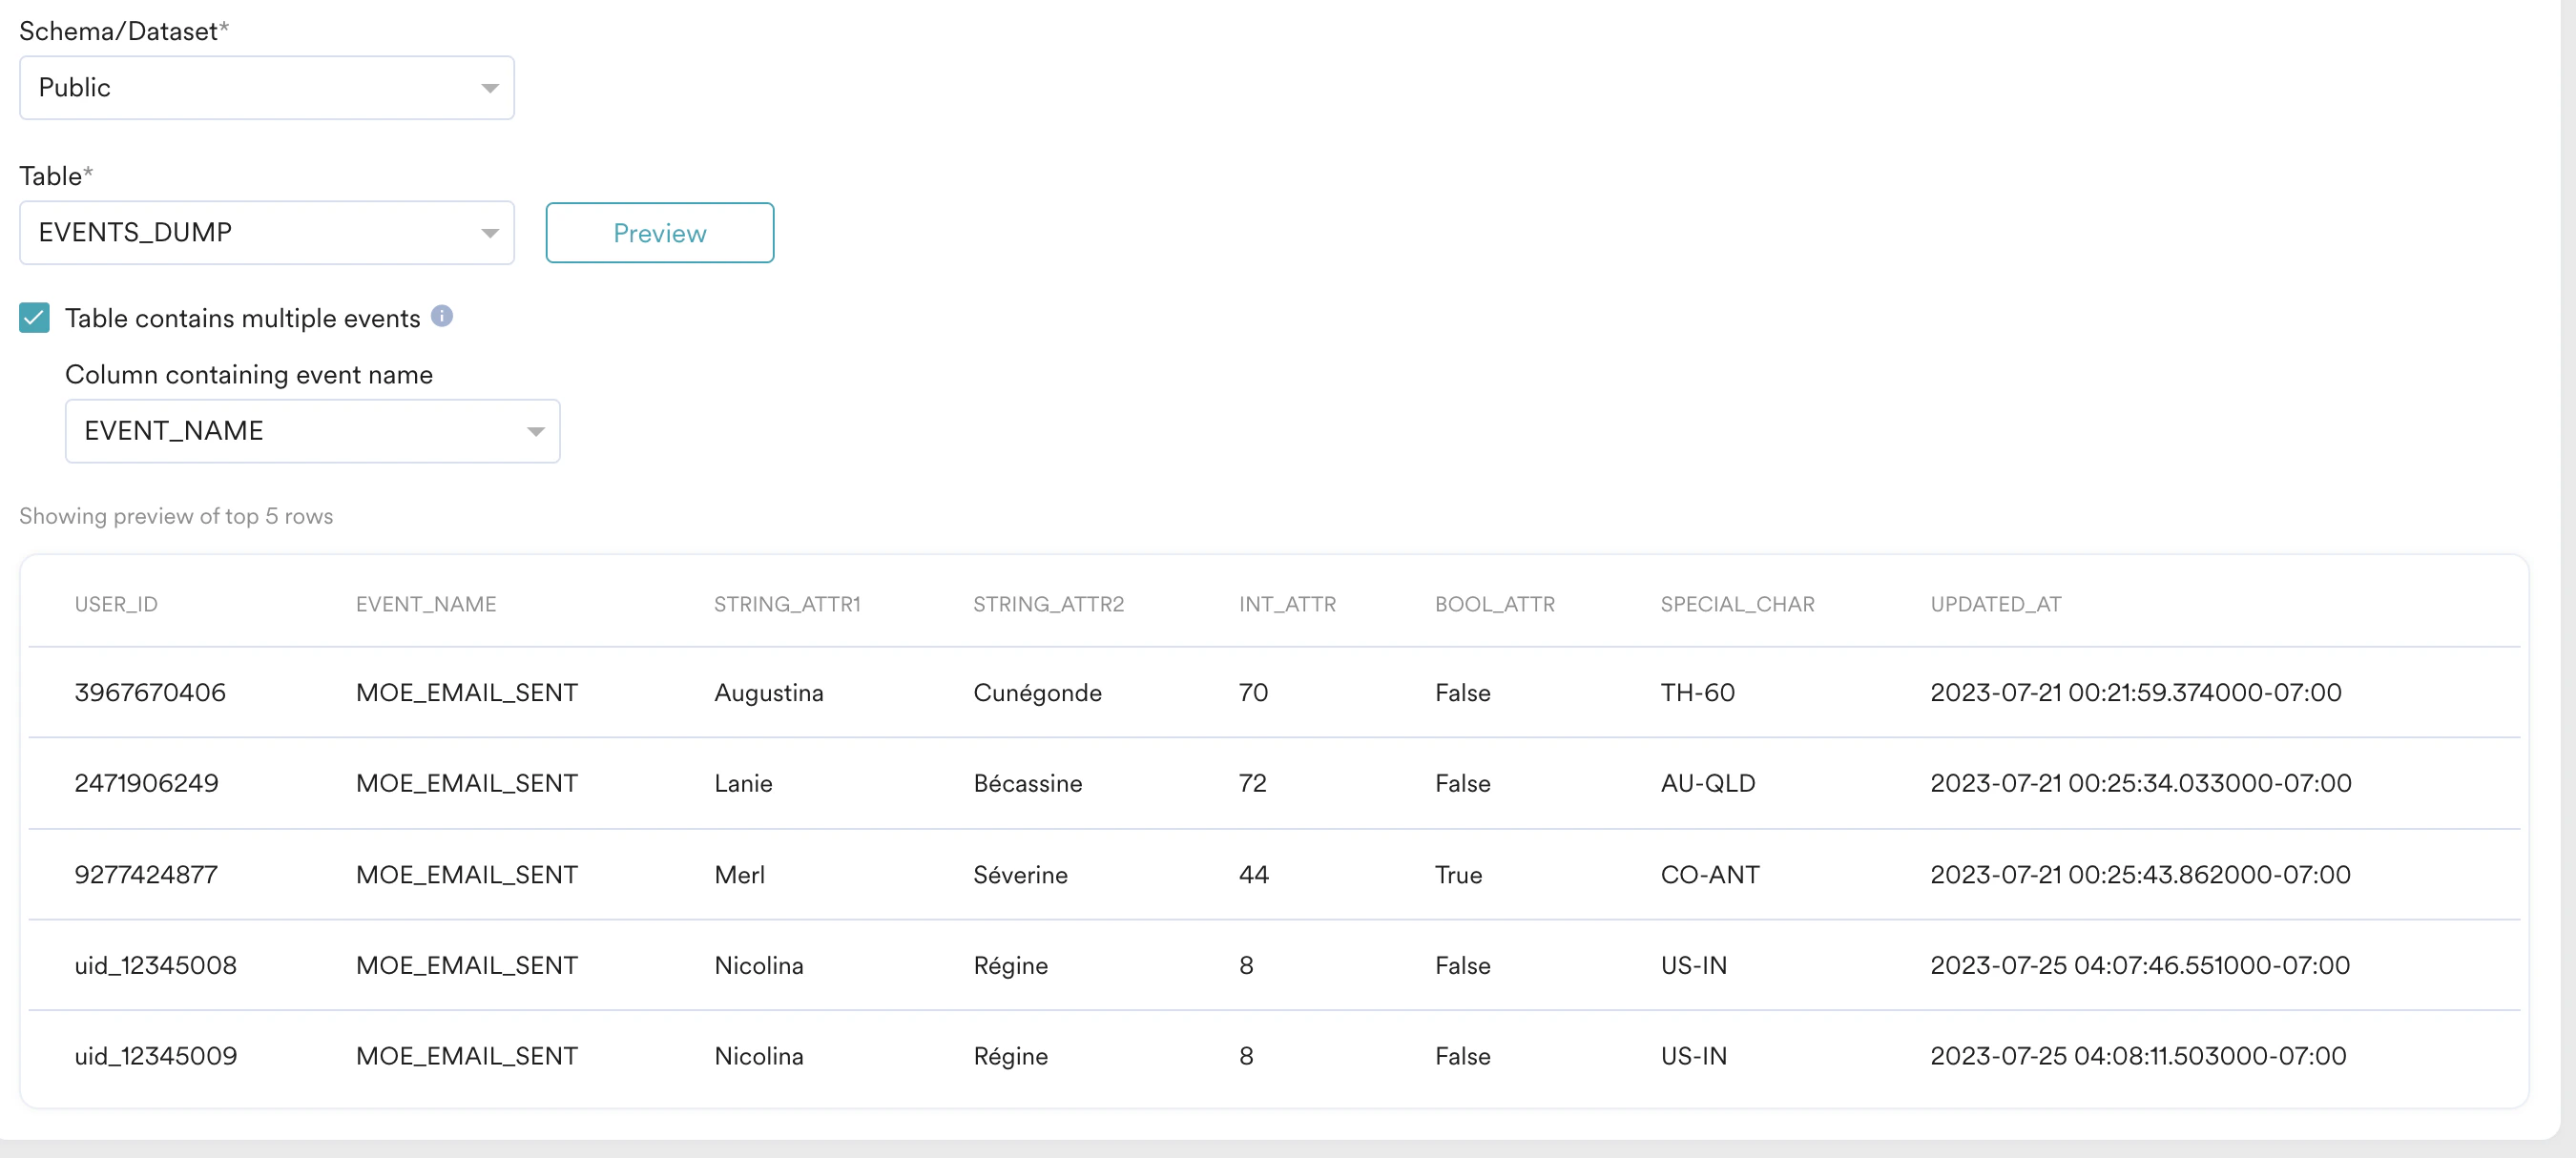
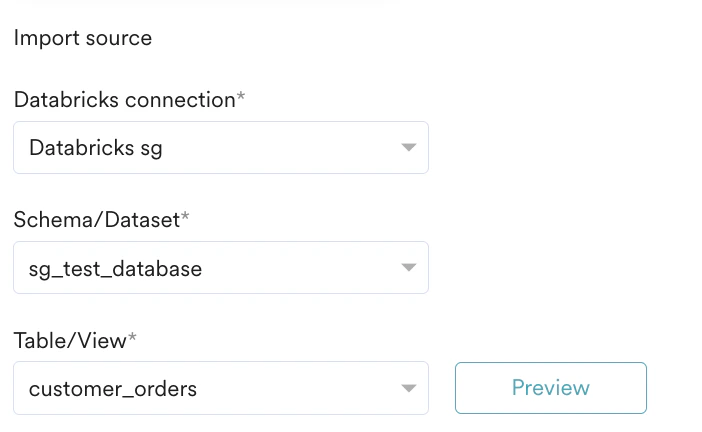
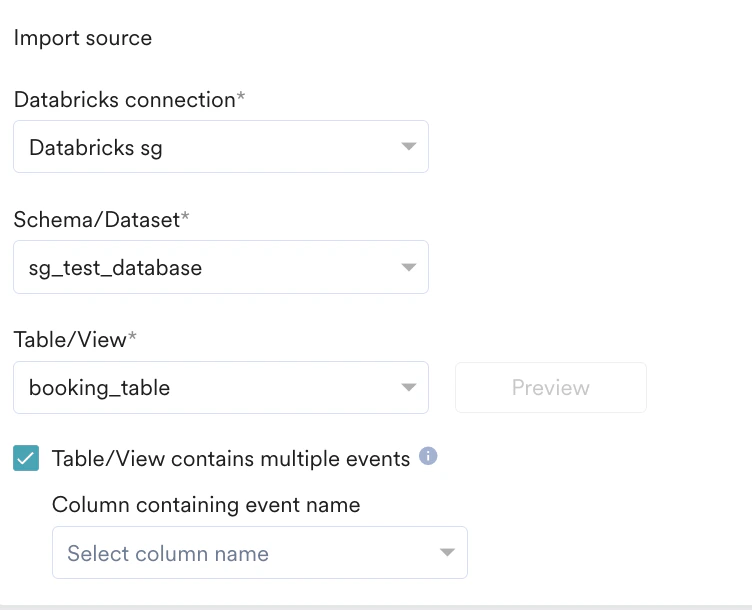
Step 2: Map Your Columns to MoEngage Attributes
Map each table column to a MoEngage attribute. For every column you see:- Column name: The source column, with a sample value from the fetched table.
- Map attribute: The MoEngage attribute to map to. Some attributes accept multiple data types, so pick the column’s data type. For DateTime columns, also pick the format.
- Action: Optionally skip the column. Skipped columns are not imported.
Mandatory Mappings
The timestamp column type differs by warehouse:- Snowflake
- BigQuery
- Databricks
User Imports
User Imports
Event Imports
Event Imports
Mapping Files
Optionally, auto-map your columns by uploading a mapping file. Click Upload mapping file at the top-right of the mapping table and select your file. MoEngage auto-configures the mapping; if the mapping file references attributes that don’t exist yet, a modal lets you create them during import. A mapping file contains the mappings between each source column and a MoEngage attribute, along with the data type of the column. The file must be in JSON format. Instead of mapping columns one by one on the dashboard, you can upload a mapping file to automate the mapping.- CSV Files
- JSON Files
column(required): The column name from the source file. For Level 2 keys in a JSON file, use dot notation (key1.key2).moe_attr(required): The MoEngage attribute to map the column to. Ensure each column maps to a uniquemoe_attr.type(optional): The data type of the column. See the supported types below.datetime_format(optional): The date-time format. Mandatory for DateTime fields only.is_skipped(optional): A boolean field. Any column markedtrueis skipped during import.
Standard User Attributes for Reference
Map your source columns to MoEngage standard user attributes using the keys below. For the exhaustive list, refer to your Data Management dashboard.Supported Attribute Types
MoEngage does not support the
| (pipe) character in non-array type columns. Ensure your String, Numeric, and Boolean columns do not contain this character.Reserved Keywords for User Attributes
MoEngage reserves the following keys. Do not use them when you map or track user attributes.USER_ATTRIBUTE_UNIQUE_IDUSER_ATTRIBUTE_USER_EMAILUSER_ATTRIBUTE_USER_MOBILEUSER_ATTRIBUTE_USER_NAMEUSER_ATTRIBUTE_USER_GENDERUSER_ATTRIBUTE_USER_FIRST_NAMEUSER_ATTRIBUTE_USER_LAST_NAMEUSER_ATTRIBUTE_USER_BDAYUSER_ATTRIBUTE_NOTIFICATION_PREFUSER_ATTRIBUTE_OLD_IDMOE_TIME_FORMATMOE_TIME_TIMEZONEUSER_ATTRIBUTE_DND_START_TIMEUSER_ATTRIBUTE_DND_END_TIMEMOE_GAIDINSTALLUPDATEMOE_ISLATstatususer_idsource
- Columns mapped to a non-existent MoEngage attribute (that you don’t create via the modal) are left blank for manual mapping.
- Columns in the mapping file but not in your source table or view are ignored.
- Columns in the table but missing from the mapping file are left blank for manual mapping.
Support for Object Data Type
MoEngage can import JSON columns as an Object data type (Object Data Type support must be enabled for your account). MoEngage maps only top-level attributes, nested attributes are not supported. You can map existing Object attributes or create new ones during mapping. Store the JSON in the correct column type for your warehouse:- Snowflake
- BigQuery
- Databricks
Change the column data type to
VARIANT. The stored value must be valid JSON. For more information, see the Snowflake JSON basics tutorial.Portfolio Support (Project-Level Routing)
You can route imported events to specific projects in your MoEngage portfolio workspace using column mapping. Map your project identifier column (such asbrand_name or app_id) to the MoEngage attribute moe_project_name. Values must match your MoEngage project names exactly (matching is case-sensitive).
- Successful routing: If the value matches a project in your portfolio, MoEngage ingests the user or event at that project level.
- Fallback: If the mapping is missing, blank, or does not match a project name, MoEngage ingests the data at your global portfolio level.
Save Users as a Segment
When importing users, turn on Save as a custom segment to add the imported users to a MoEngage segment. Enter a segment name and select the identifier column. Users are added to this segment on every sync (append only, no users are removed), so you can target them with campaigns.Import Behaviour
- User Imports
- Event Imports
For User Imports, select Skip new users during this import under Import Behaviour to bulk-update attributes without creating new users. MoEngage creates no new users from this import, and a row whose identifier is not already in MoEngage is ignored.
Send Import Notifications
Turn on Send import status to and select up to 10 email recipients. MoEngage emails you when an import is created, succeeds, or fails. When your mappings are complete, click Next.Step 3: Select the Import Frequency
Define when MoEngage syncs with your table:- One-Time: Run as soon as possible or at a scheduled date and time. All matching rows are imported.
- Periodic: Run hourly, daily, weekly, or monthly, with intervals and advanced configurations.
Import schedule and detail times shown on the Data Imports dashboard use your app’s configured timezone. If no app timezone is set, they display in UTC by default. Set the app timezone from Settings to see these times in your preferred timezone. This display timezone is separate from the requirement that mapped timestamp columns (such as Event time or Updated at) always be in UTC.
Supported Datetime Formats
Use these in thedatetime_format field of your mapping file, or when configuring DateTime columns during mapping.
Snowflake only: Snowflake imports additionally support
"datetime_format": "YYYY-MM-DD hh:mm:ss.sTZD", for example, 2019-01-31 17:54:14.957299-08:00 or 2019-01-31 17:54:14.957299+08:00.Duplicate Imports
You can configure only one unique import at a time. An import is a duplicate when all of these match an existing import:- Import type: Users or Events.
- Import sub-type: Event name, or Registered / Anonymous / All users.
- Warehouse connection.
- Schema/Dataset and Table/View.
Limits
Data warehouse imports are subject to the following ingestion rate limits (defaults, contact MoEngage to increase):
The first run of any import is a historical sync that pulls in all matching rows and uses the higher migration limit. Every subsequent periodic run uses the normal limit.
Import Failure Policy
In the event of a connection failure (for example, credentials, network, or warehouse unavailability), a recurring import retries up to 10 times. If all retries fail, the import is marked FAILED.Restart a Failed Import
A FAILED import requires manual intervention:- Investigate and resolve the underlying issue on your warehouse (for example, update credentials, check permissions, or ensure warehouse availability).
- Manually duplicate the import from the MoEngage UI to restart it.
- Check the imported data for duplicates. Duplicating a failed import starts a new historical import, so if the original import previously succeeded, this may create redundant data. To control data flow, MoEngage recommends using views.
- The first successful run of any new recurring import is always a historical import (it fetches all data from the configured table/view).
- Because the historical run pulls in all matching rows, a very large single import can fail to complete, for example, the run may time out or its schedule may expire, due to payload-size and processing-time limits. If you have a large dataset, split it into multiple smaller imports (for example, by date range) instead of importing everything in a single sync.
Manage Your Imports
To monitor your imports, understand import statuses, or trigger a run manually or via API, see How Imports Work on the Imports Overview.Frequently Asked Questions
My imports have failed. How do I check what went wrong?
My imports have failed. How do I check what went wrong?
Click the ellipsis on the right and click View to look up the Import details. Hover over the Failed Status to learn the reason.
What if a scheduled import adds the data into a recently archived segment?
What if a scheduled import adds the data into a recently archived segment?
In such cases, the new data will still be added to the archived segment. You can unarchive the segment as required.
Can an import be stopped while it's running?
Can an import be stopped while it's running?
Once an import process starts, it can’t be stopped midway. This is because the data goes through several steps, and interrupting it could lead to incomplete or inconsistent results. It’s best to let the current import finish.
How can I stop future runs of a scheduled import?
How can I stop future runs of a scheduled import?
Yes, you can stop future scheduled imports from running automatically. To do this, find the import schedule and select the Archive option from the Actions menu on the Data Imports dashboard. This will prevent it from running on its next scheduled time.
What should I do if an import seems stuck or is taking a long time?
What should I do if an import seems stuck or is taking a long time?
If an import appears to be stuck or is taking longer than usual, it’s best to wait. The system has checks in place to handle these situations automatically and retry if necessary. Manually starting the same import again while it’s still processing can cause conflicts and may prevent the original import from completing successfully.
Can I import data across tables?
Can I import data across tables?
No. Writing manual queries (to perform joins, and so on) is not supported. Create a dedicated table or view with all the columns you want to import into MoEngage.
Do you support importing Views?
Do you support importing Views?
Yes. MoEngage also supports importing data from your data warehouse Views. If you grant MoEngage access to read Views, they are automatically listed in the Table/View selection dropdown.
Can I do a historical import?
Can I do a historical import?
Yes. Creating a one-time import is essentially the same as importing historical data, because MoEngage pulls in all the rows on the first sync.
My import shows status Successful but 0 rows were processed, what does this mean?
My import shows status Successful but 0 rows were processed, what does this mean?
A Successful status with 0 rows processed is not necessarily an error, it often means the run genuinely found no rows to process. The most common causes are:
- No new or changed rows since the last run. After the first import, subsequent runs only include rows added or updated since the previous sync, based on the mapped reference (
Updated at) column. If nothing changed, no rows are processed. - No rows match the selected event. For event imports, MoEngage processes only the rows whose Event Name column matches the event you selected. If none match, no rows are processed.
- The mapped reference column isn’t genuine UTC: Or it reflects business/event time rather than write-time, so backdated rows fall outside the current window and are permanently skipped (see the warehouse-specific guidance and periodic-sync behavior explained earlier on this page).
- Snowflake
- BigQuery
- Databricks
No Snowflake-specific questions beyond the above.