

Early AccessAI Campaign Decisioning is available only for Push. To enable it for your workspace, contact your MoEngage Customer Success Manager (CSM) or the Support team.
Users with the required policy permissions can create policies. You can also define a custom role with permissions to create and manage policies.
Terms to Know
Create a Campaign Decisioning Policy
In the MoEngage dashboard, click Decisioning, and then click Campaign decisioning policy. On the Campaign decisioning policy page, click + Create policy.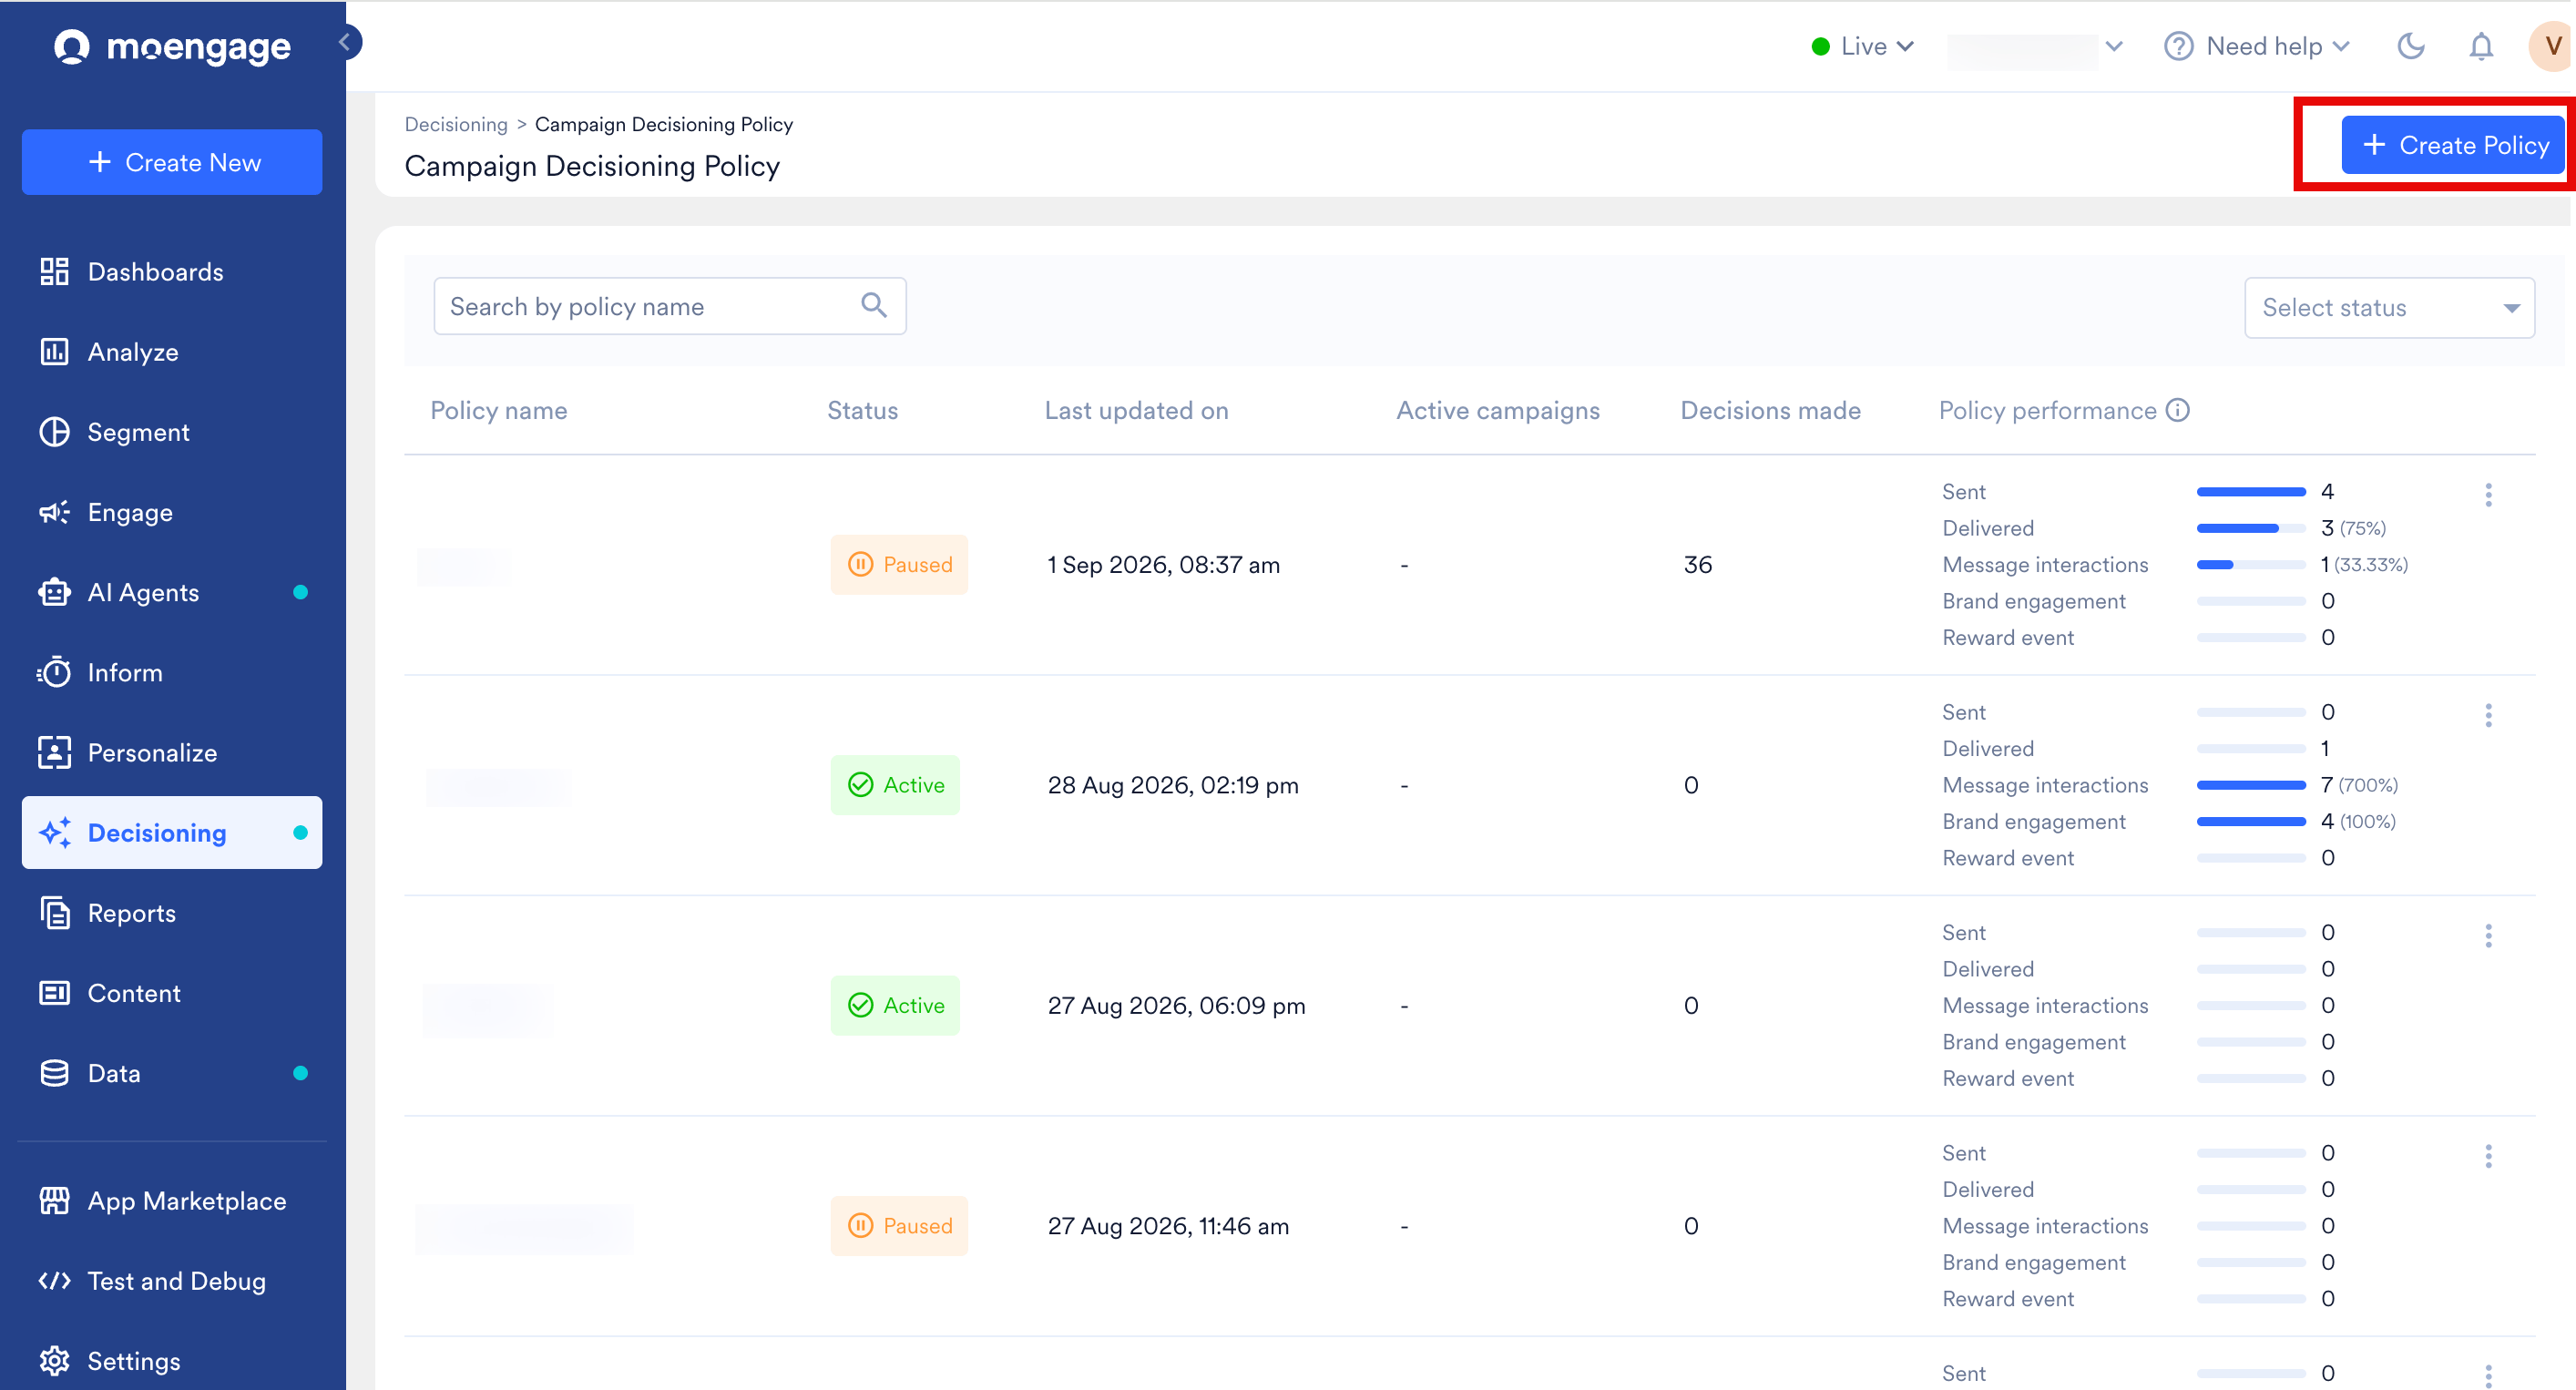
Goals
Perform the following steps to configure Goals.- Enter the policy name, purpose, and reward event.
-
In the Performance metrics section, configure the metrics measured against your control group. Metrics are split into Positive and Negative and grouped under Reward event, Brand engagement, Message interactions, and Custom metrics. App/site opened is included by default under Brand engagement and cannot be removed. You can add or remove other events, add up to three manual custom metrics, and the same event cannot appear as both positive and negative.
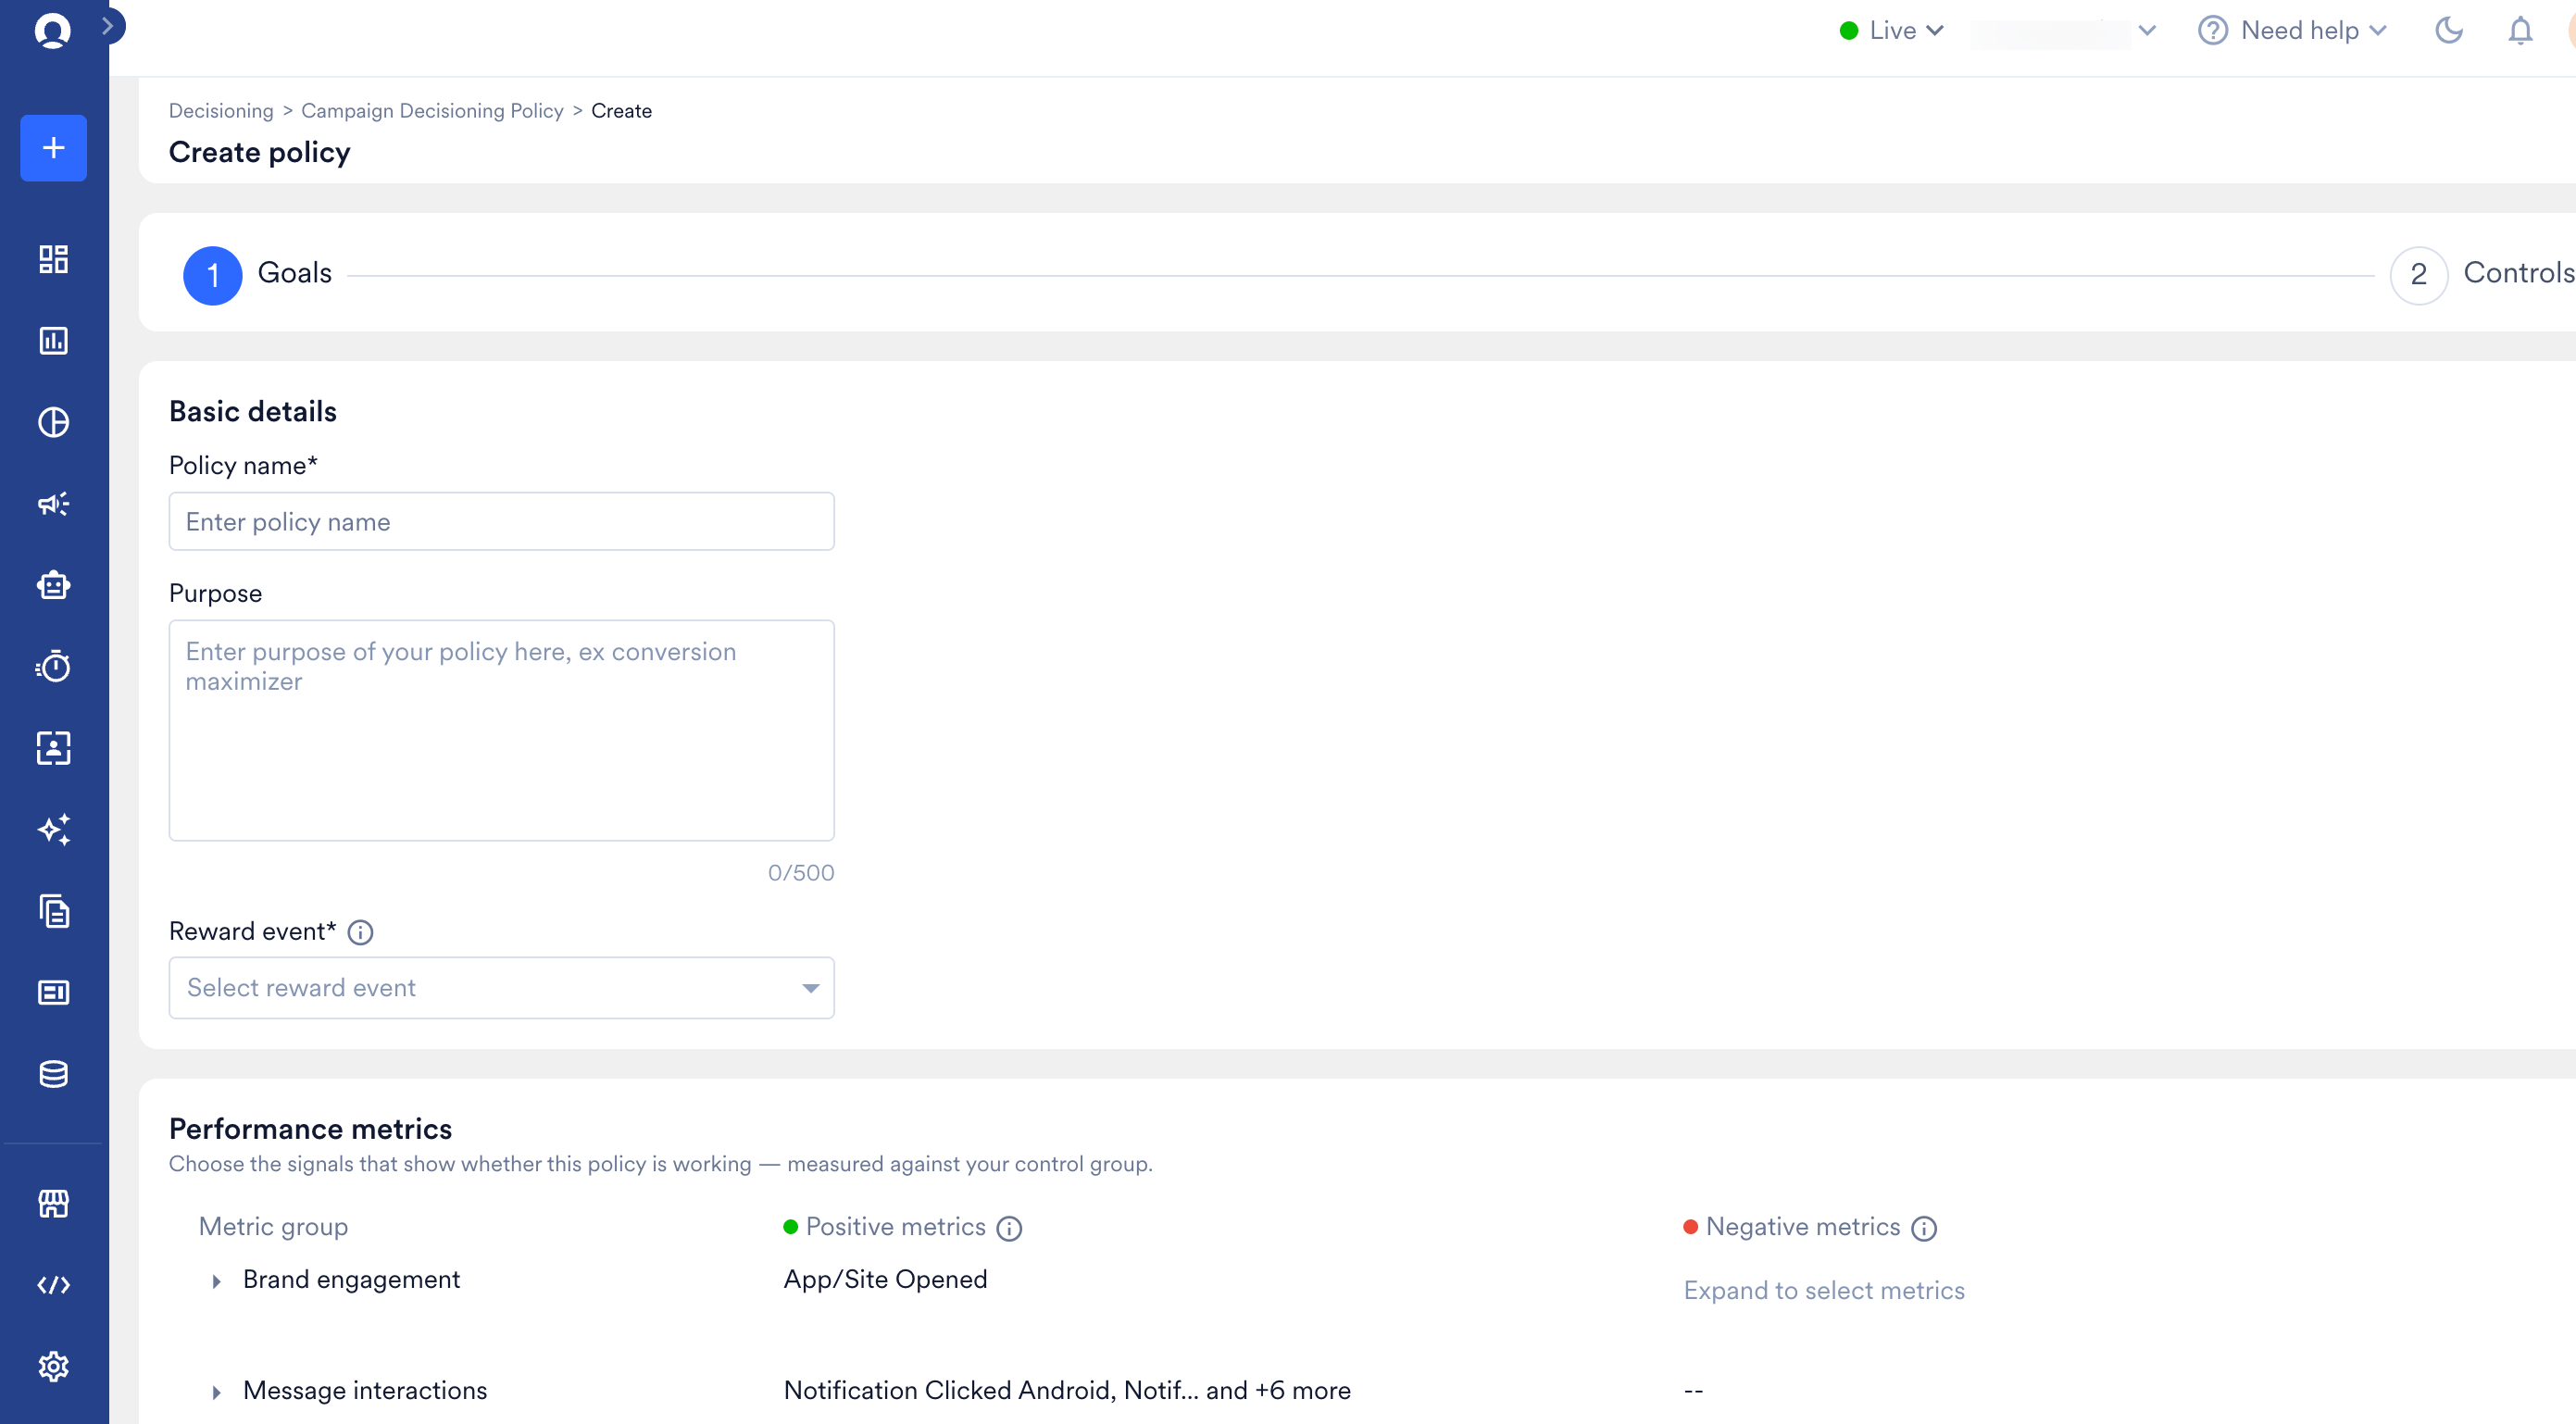
- Positive relation: The event is positively related to business goals.
- Irrelevant: The event is not related to business goals.
- Negative relation: The event is negatively related to business goals.
- Click Next.
Controls
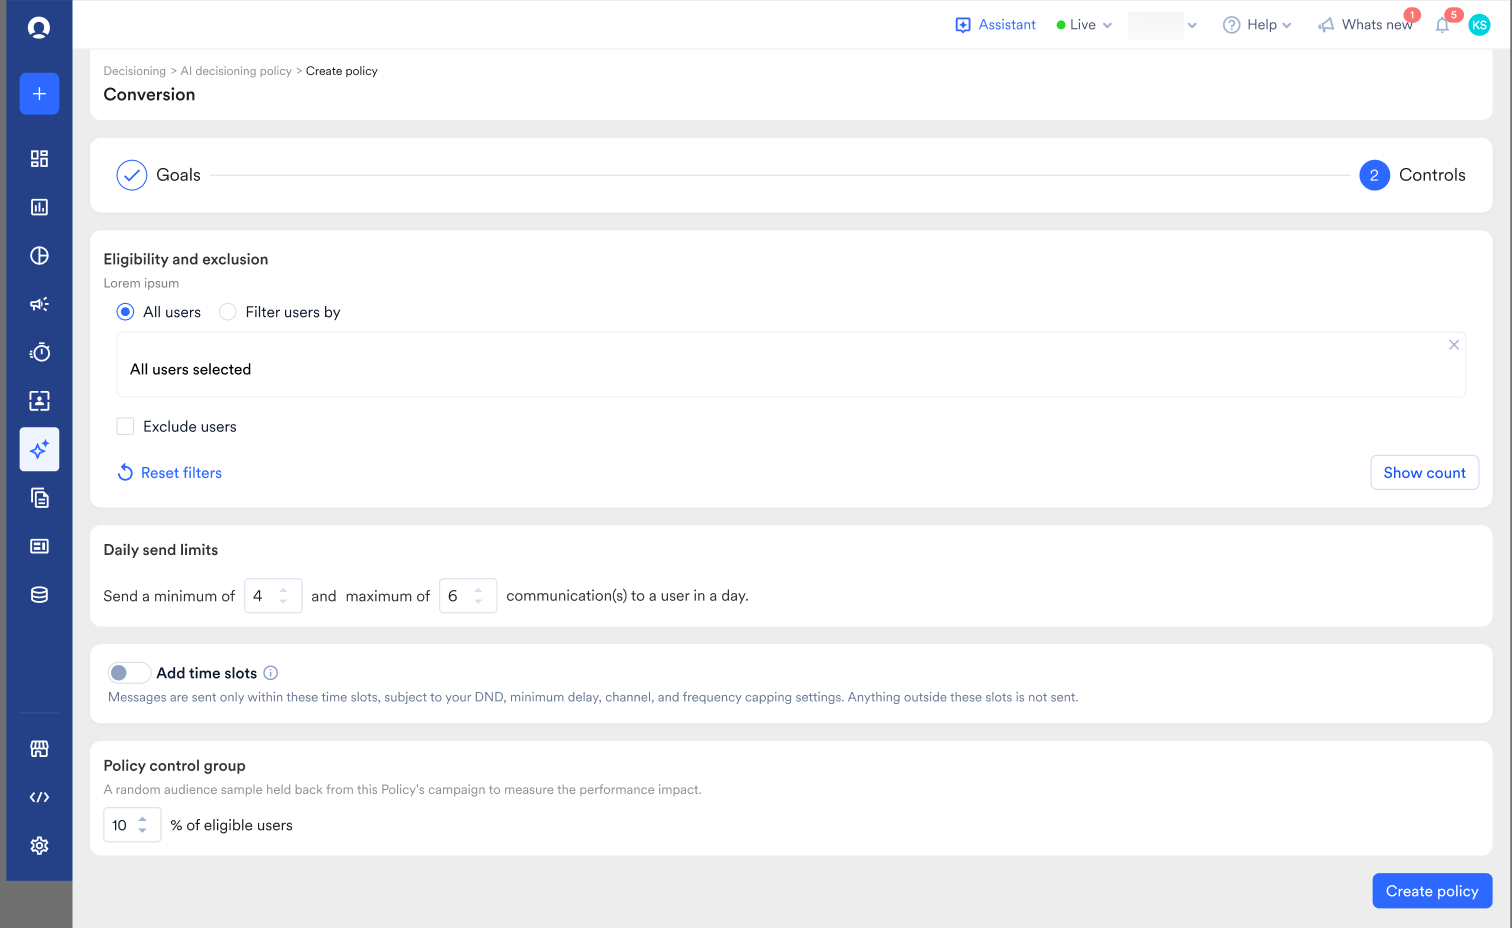
Perform the following steps to configure Controls.- Set eligibility and exclusion: Select All users or Filter users by segment criteria. You can also exclude users. Click Show count to view the eligible audience size, and click Reset filters to clear the selected criteria.
-
Set daily send limits: Define the minimum and maximum number of communications an end user can receive per day. If this limit exceeds your workspace global frequency cap, MoEngage displays a warning with a link to the frequency capping settings.
-
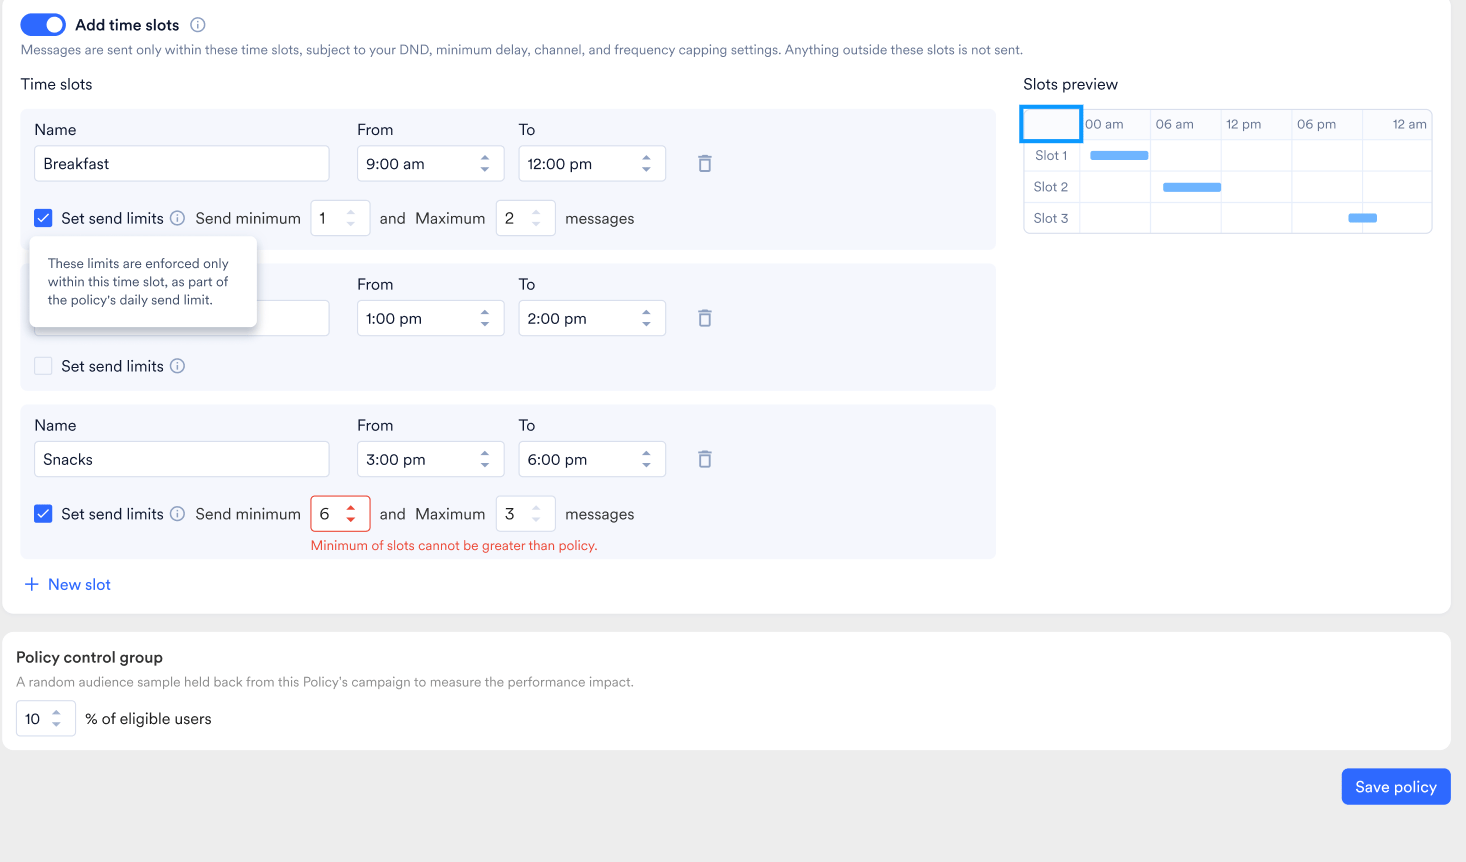
Add time slots: Turn on Add time slots to send messages only within the defined slots. No messages are sent outside the slots.
- For each slot, enter a Name, a From time, and a To time.
- Click + New slot to add a slot; use the trash icon to delete one.
- Select Set send limits to add a send minimum and maximum for that slot.
- The Slots preview shows a 24-hour timeline.
- Time slots cannot overlap.
- A slot’s minimum cannot exceed its own maximum.
- The sum of the slot minimums cannot exceed the policy minimum.
- No slot’s maximum can exceed the policy maximum.
- If a campaign’s scheduled send time falls outside every slot, the policy excludes that campaign and sends no messages for it.
- Set the Policy control group percentage. The default value is 10%.
- Click Create policy.
At send time, the policy audience is matched with the campaign audience, and the workspace global frequency cap still applies.
Create and Manage Policies
The Campaign decisioning policy page lists all the policies you create, along with their status, last update date, active campaigns, decisions made, and policy performance. You can search by policy name, filter by status, use the ellipsis icon on a policy row for the available actions, and open a policy to edit it.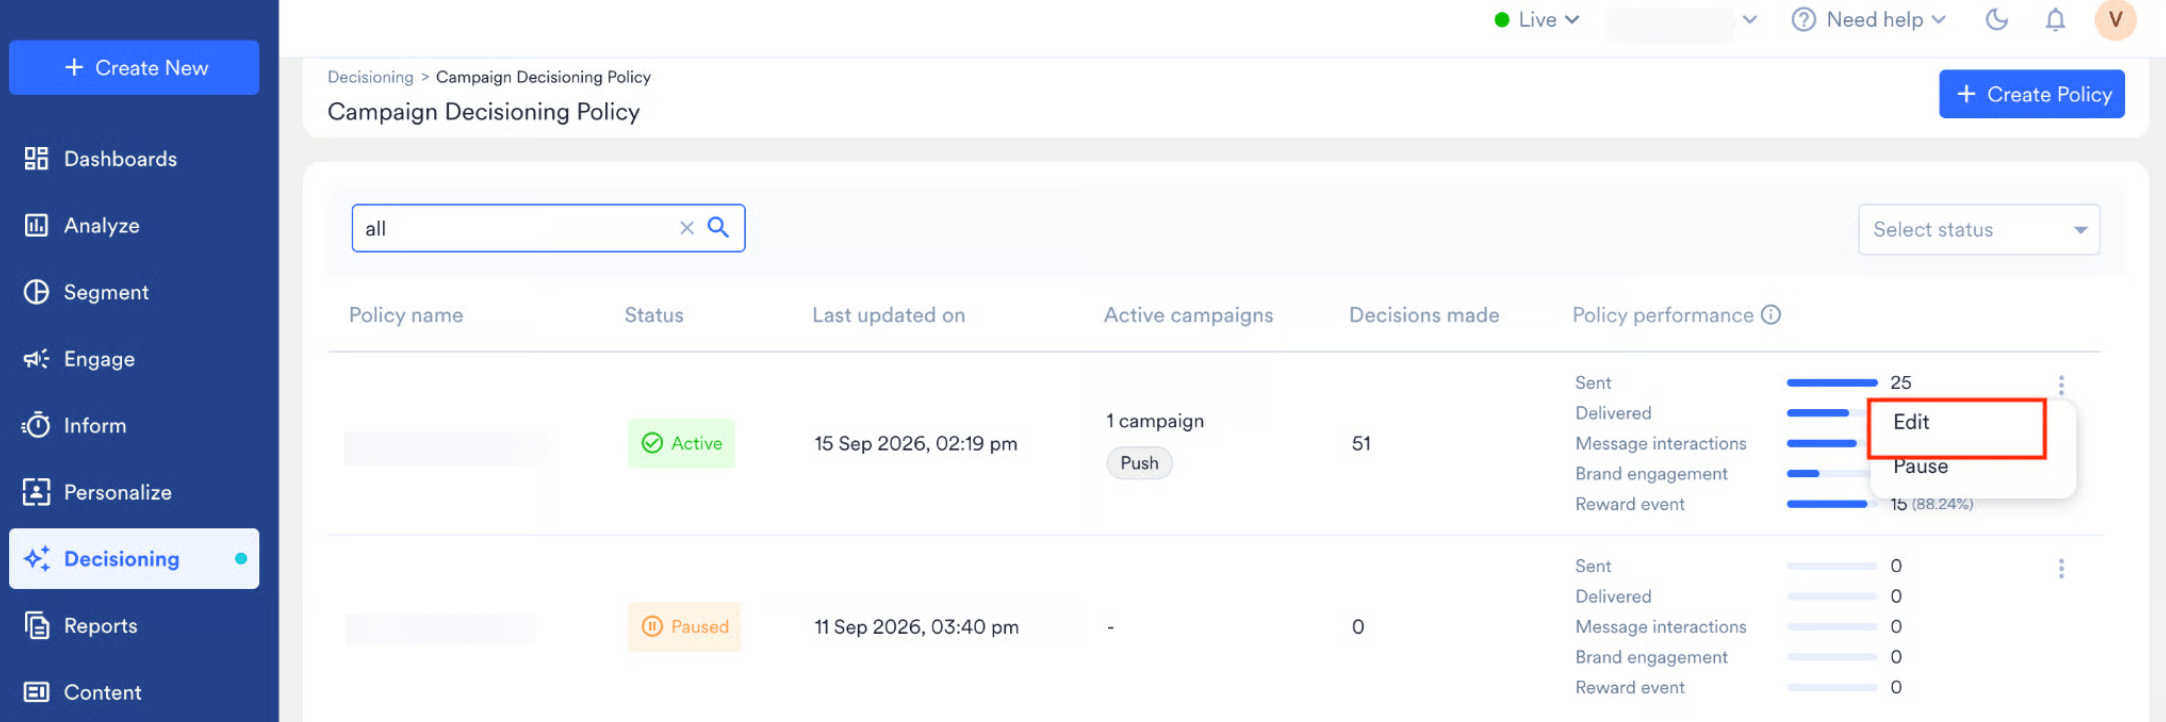
- You can have up to 25 active policies per account.
- Each policy can have up to 50 active campaigns.